rll
-
Posts
91 -
Joined
-
Last visited
Content Type
Forums
Events
Gallery
Everything posted by rll
-
Josh, Thanks. My love of walnut goes back to junior high wood shop and a chess table I made back then. The smell of walnut working on this brought back many memories. Randy
-
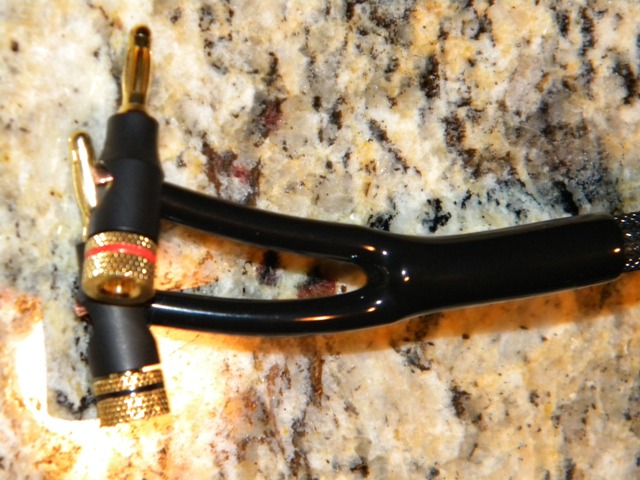
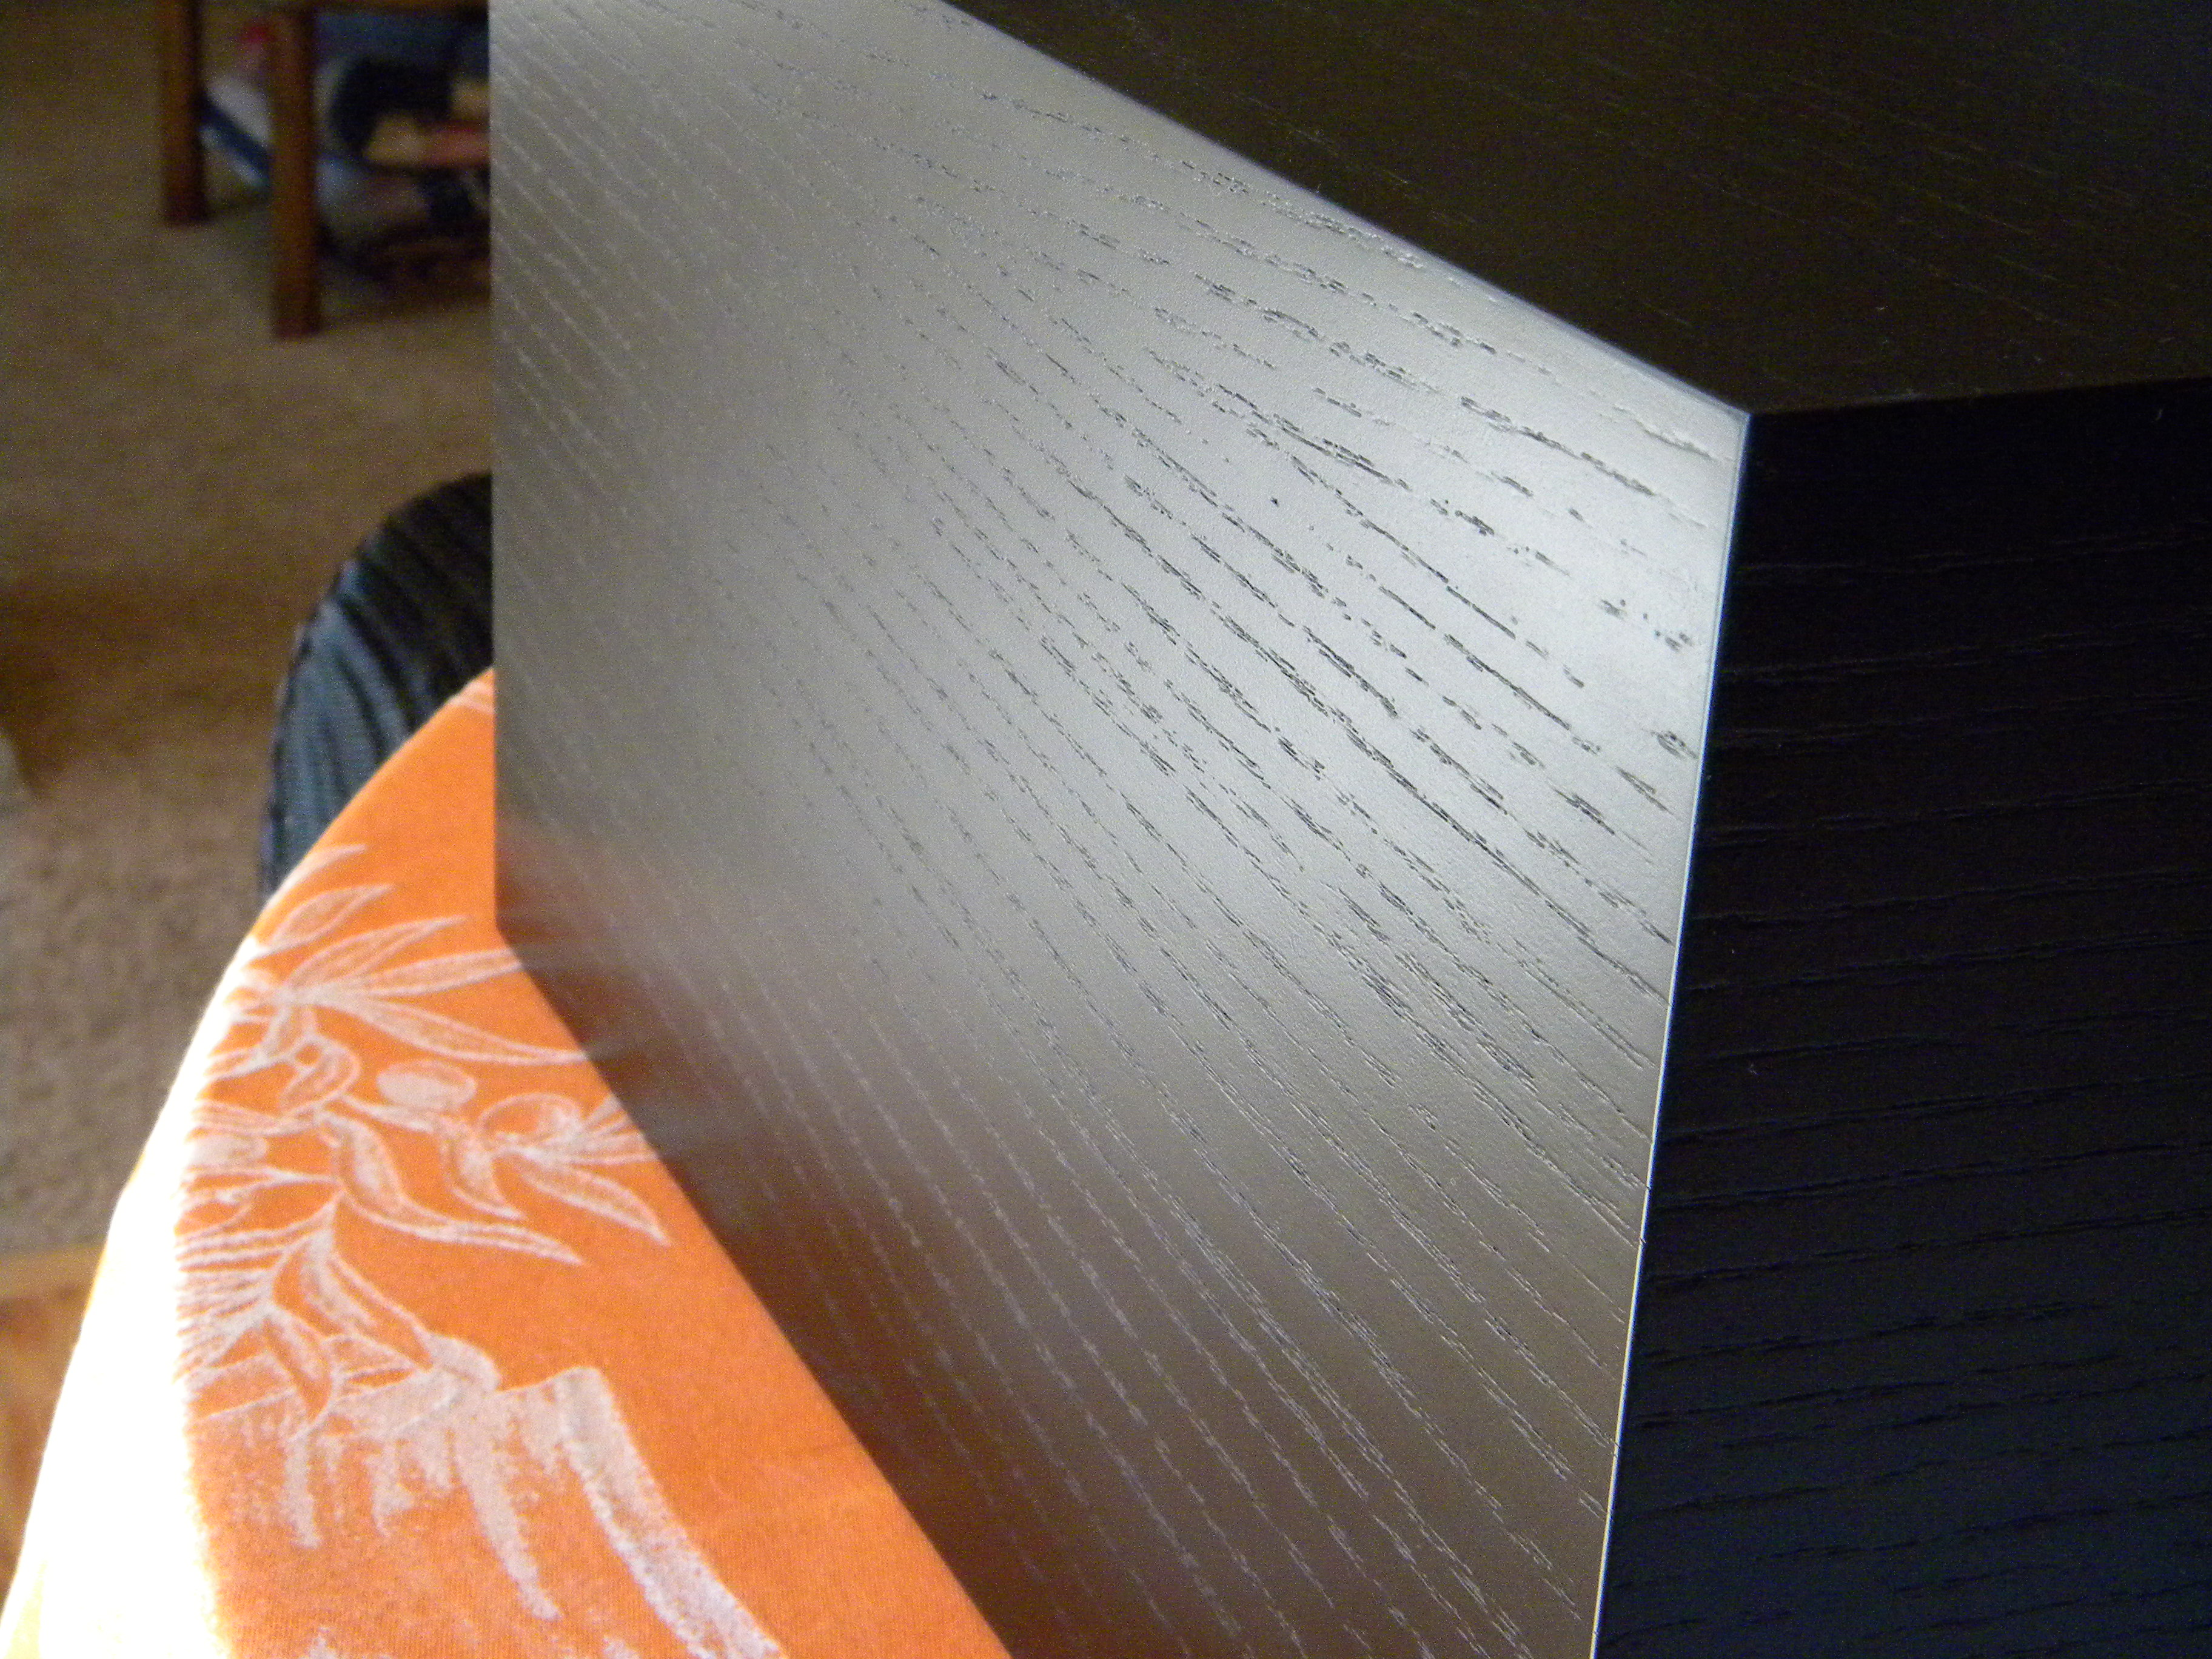
A closeup of one end. Very clean. Randy

-
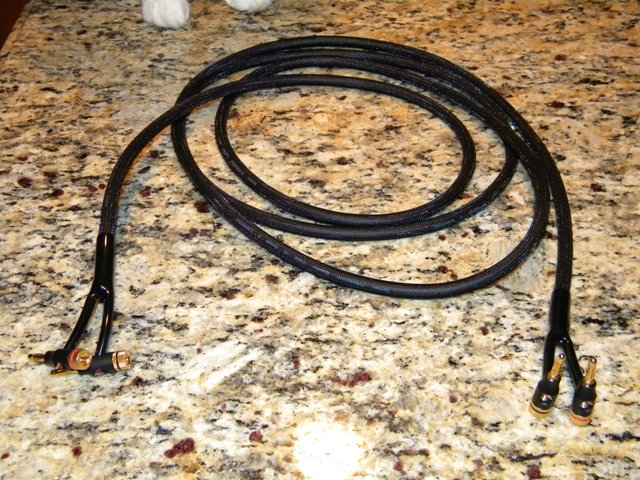
A quick word about the cables. Without intending to start a debate, I fall into the simple, inexpensive, yet effective camp. That said, I like something with a professional, finished look. I recently put these together, at a cost of less that $1 per foot, plus connectors. All components came from Parts Express. Start with the professional 13 awg speaker wire: http://www.parts-express.com/pe/showdetl.cfm?Partnumber=100-481 Covered with 1/4" expandable sleeving: http://www.parts-express.com/pe/showdetl.cfm?Partnumber=082-316 Cable finished with 9mm Cable Pants: http://www.parts-express.com/pe/pshowdetl.cfm?&Partnumber=082-778 Banana plugs: http://www.parts-express.com/pe/showdetl.cfm?Partnumber=091-1260
-
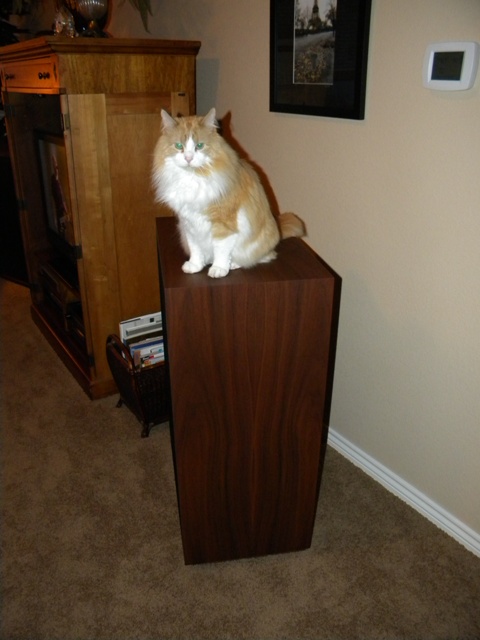
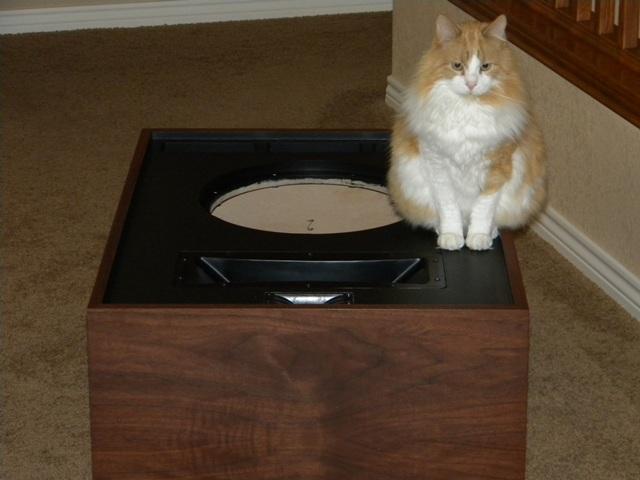
Andy approves!
-
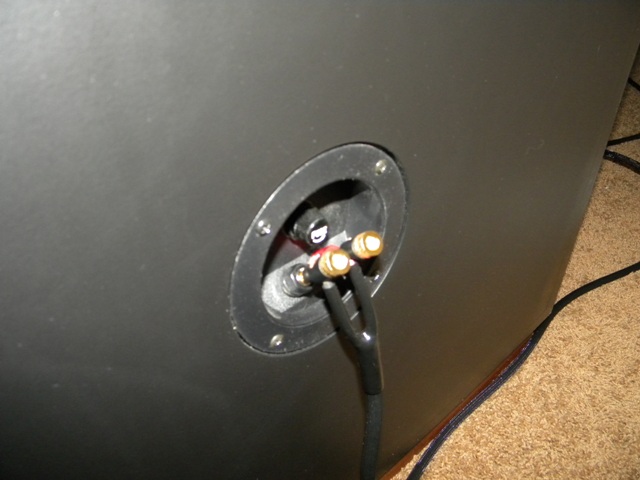
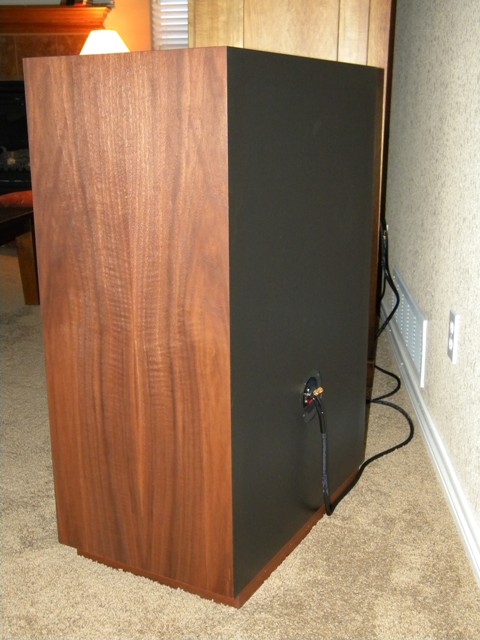
Rear showing the terminal cups.
-
A side/rear profile.
-
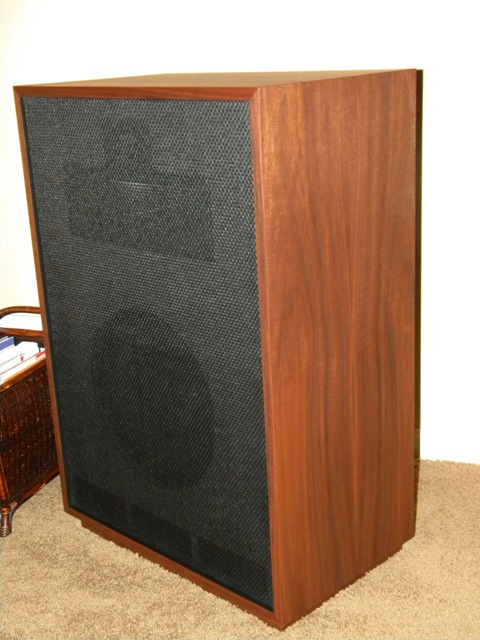
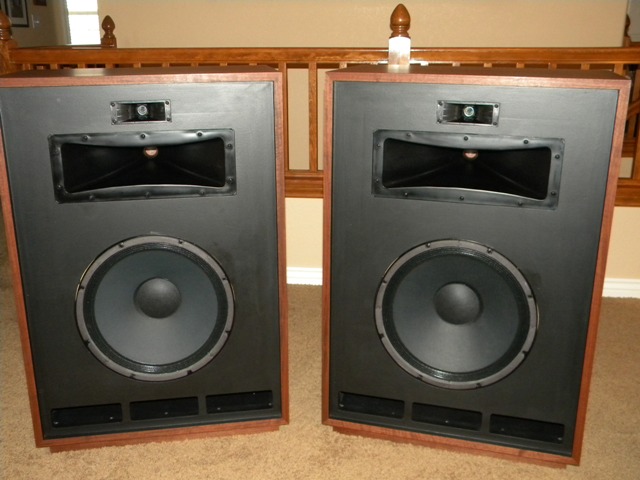
and the left. To build the grilles I followed Marshall's instructions in this thread: http://forums.klipsch.com/forums/t/110684.aspx?PageIndex=1 . We are very pleased with the way these turned out.
-
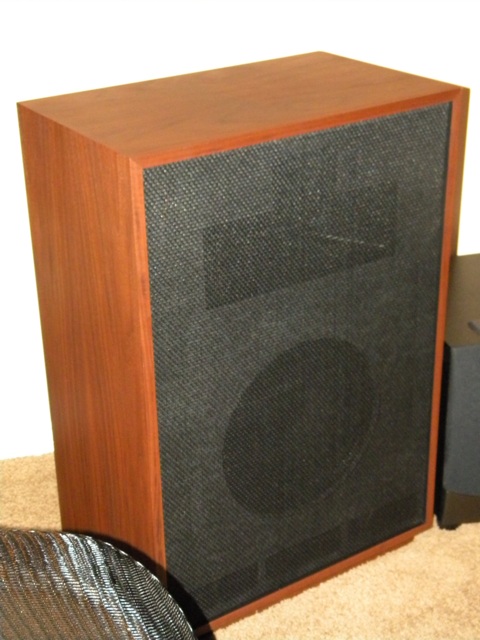
The right, with grille....
-
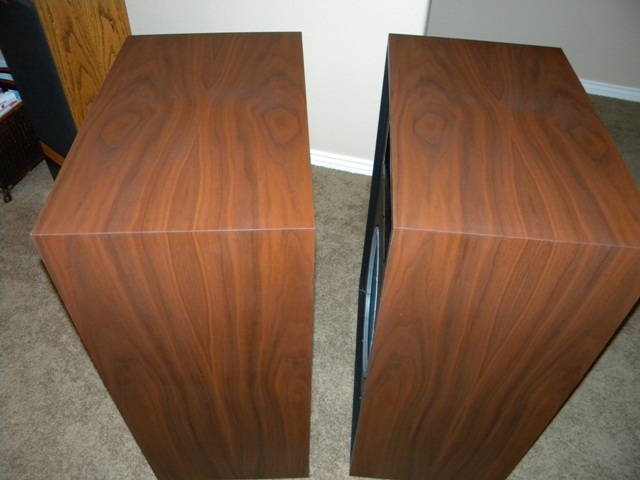
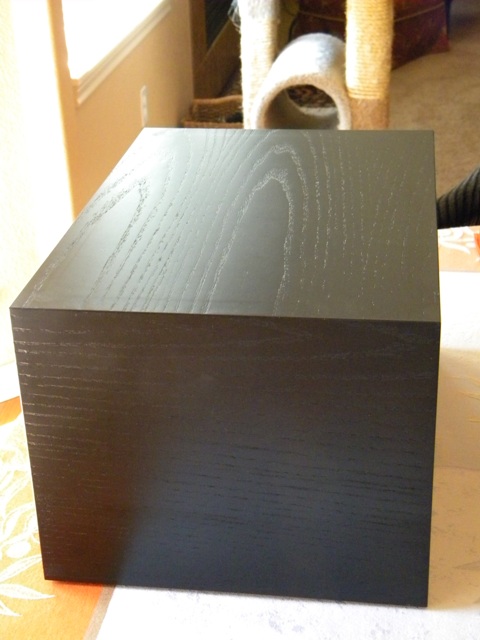
This picture does not do them justice, makes them look too red and splotchy, which they are not. What I want to show here is how the grain on the two side panels matches, and how it flows up to the top. I followed Marshall's instructions on finishing found here: http://forums.klipsch.com/forums/t/117315.aspx?PageIndex=1 . I also picked up Bob Flexner's book Understanding Wood Finishing and studied it. I sanded these with 150 grit with a random orbital sander. Thoroughly cleaned them by wiping, vacuuming, then a final wipe with mineral spirits. Gave them a liberal wipe of Gunstock, which I let sit for 15 minutes before wiping off. Then wiped them with a 2:1 mixture of Gunstock and Special Walnut, done twice. Let them rest for 24 hours before giving them a liberal wiping of 1:1 Watco Teak and Watco Medium Walnut oil, also twice.
-
Assembled.
-
Last winter I put together this pair of Cornscalas. http://community.klipsch.com/forums/t/115820.aspx?PageIndex=1 While they sounded very nice, and my wife thought they looked great, I thought they were rather amateurish. Even though I have very little practical experience and skill, I knew I could do much better, so I began to look at those as prototypes. One consideration was to strip the original cabinets and veneer them. But I also began to think about replacing/upgrading the squawker horn. The layout of the motorboard prohibited that because the woofer cutout is too high. So I knew I'd be going back to square one. With that decision made, I began to wrestle with which design to build - a Cornwall cabinet or a something like Bob's original Cornscala using a k400/401 or something else. I eventually decided on the Cornwall II cabinet, with the woofer lowered. This configuration allows me to use the ph800 for the time being, with the option of replacing it with a Fastrac later. I don't have an Eye-gor, but I have Andy. He's not good at assisting, but loves to watch. I included this photo because it gives you a better idea of the color. In most of the photos to follow, the flash makes them look more red than they are. I did not chronicle the construction of the cabinets, but let me say that I learned from my experience building the first pair. My neighbor Harry, who loaned me some tools and assisted often, said any cabinet maker would be satisfied.
-
$200 CORNWALL SAGA - RESCUING ORPHANS
rll replied to Groomlakearea51's topic in 2-Channel Home Audio
I have to thank you for all the help you've provided with your pictorials/tutorials, they have been invaluable. The one that caused me the most apprehension was the grill tutorial, but I have to say I studied it thouroughly and once I thought I understood it, took a stab at it and it worked perfctly. About a year ago I built a pair of Cornscalas around a Cornwall cabinet. That pair was nothing special cosmetically, a simple black painted finish. As they were my first attempt at anything like that, they naturally had some construction flaws. The woofer was higher, like in the III, which precluded replacing the ph800 with something like Gothover's Fastrac. I began to think about upgrading that horn, which meant building new cabinets. That coupled with wanting to build something a bit more appealing, got me going on this pair. Used the Cornwall II plans, with the woofer lower, and raised the tweeter just a hair to give me room to replace the squawker horn in the future. Cleaned up my construction techniques along the way. My neighbor assisted along the way and said any cabinet maker would be satisfied with these. They are in the basement resting from staining this morning. I'll get them oiled tomorrow afternoon and let them rest. Once I get them upstairs and assembled, I'll post some pictures. Check your email, I have a private question for you. Randy -
$200 CORNWALL SAGA - RESCUING ORPHANS
rll replied to Groomlakearea51's topic in 2-Channel Home Audio
Thanks once again. I asked the spousal unit what she thought of each (without telling her anything whatsoever, such as different stain, conditioner - no information), she "preferred" the one without. So I've begun, am in the middle before going back with the gunstock/special walnut blend, and without using conditioner. So far, very good. Randy -
$200 CORNWALL SAGA - RESCUING ORPHANS
rll replied to Groomlakearea51's topic in 2-Channel Home Audio
That's perfect, thanks. Let me ask you this, with walnut, a conditioner is not necessary before staining with an oil-based stain. Would you use a contioner anyway, any real benefit, or just a waste of time? I did it both ways on a couple samples, one with conditioner, one without, and can't say I see much of a difference. I guess that's my answer. What's your opinion? -
$200 CORNWALL SAGA - RESCUING ORPHANS
rll replied to Groomlakearea51's topic in 2-Channel Home Audio
Marshall, How long should one wait between staining and oiling? Randy -
Well, I'm in the beginning stages of building another pair of Cornscala cabinets. This pair will be veneered, and I'll lower the woofer so that I can replace the ph800 with a Fastrac at some point. I'll provide a blow-by-blow pictorial later on. Panels have been cut, but before I cut the port holes and get the biscuit joiner out, I want to double check a couple dimensions. The set of Cornwall plans running around (I don't have them with me at the moment, so I'm going from memory) calls for the port shelf to be 3 1/8" above the bottom, and the port holes to be 2 3/16" x 6 7/8". By my calculations, total area for the three port holes comes to 45.12 square inches. I've seen advice that 50 square inches is the desired/recommended/preferred/correct area for the port holes, so I'm putting out out a request for confirmation of those numbers. I don't have a pair of Corns handy, so I'd be grateful if someone could measure the actual dimensions of the port holes and the height of the port shelf from the bottom of the cabinet and report back. Or perhaps someone can say it's close enough. To me, 10% shy seems at least somewhat significant, thus the request. Thanks, Randy
-
This is a pictorial from one of the resident experts of restoration projects, I refer to it often. http://forums.klipsch.com/forums/t/117315.aspx?PageIndex=1 Also poke around Greg Roberts' site for some step-by-step descriptions. http://www.dcchomes.com/Gregsaudio.html Finally, practice first on something you don't care about in order to learn the techniques. I'll soon start another Cornscala project, this time with veneer. I've never done it before, but have practiced some different techniques (contact cement, Heatlock glue, Titebond II) to see what works best for me. Once you master the veneering technique, you'll want to experiment with staining to get that down. The first link above has some good info for walnut if you go that route, personally my favorite. Good luck! You'll find it to be very rewarding. Randy
-
Dave, Good work. I like the flush-mounted horn. I hope by the time I'm ready to get my project off the ground you've decided to produce that version for sale. I also like your solution for the woofer, keeps it from protruding so far off the motorboard. Have you fired them up yet? What are you using for crossovers? Couple questions concerning your cabinet. 1. What did you use as the dimensions of your port holes? JWC's total ~50 square inches, which is also what Bob says. For the pair I built last winter, I used the Cornwall plans floating around that call for the holes to be 6 7/8" by 2 3/16", and the port shelf to be 9 1/2" deep and 2 3/8" above the bracing (or 3 1/8" above the floor). Using those dimensions, port hole area is 45.12 square inches. Am I missing something? 2. You increased your cabinet depth by 1", which I understand you did to offset the additional volume taken up by your horn and bracing, correct? Did you calculate this or is it an educated estimate? The difference in cabinet volume is ~.25 cubic feet, not taking into account the assorted parts, etc. How significant do you believe that is? Randy
-
Black paint recommendations for Heresy II's
rll replied to Tony Reed's topic in General Klipsch Info
Stumbled across this http://forums.klipsch.com/forums/t/103886.aspx Still hunting... -
Black paint recommendations for Heresy II's
rll replied to Tony Reed's topic in General Klipsch Info
(Shoot, I tried to respond and it appears to have vanished) The #40 refers to the sheen. It's been a while, I'll poke around and refresh my memory. I'll need to find some eventually myself. Perhaps Mr. Colter has some information on where it might be found. Randy -
Black paint recommendations for Heresy II's
rll replied to Tony Reed's topic in General Klipsch Info
and 3
-
Black paint recommendations for Heresy II's
rll replied to Tony Reed's topic in General Klipsch Info
#2
-
Black paint recommendations for Heresy II's
rll replied to Tony Reed's topic in General Klipsch Info
Ok, a small handful of pictures. I tried to capture the sheen for you. How does it compare to the factory finish? I honestly don't know. I wasn't necessarily trying to match something, so I just looked around until I found what I wanted. Actually stumbled on it by accident, my wife had used it to paint a mirror frame, I saw it and said that's what I'm after. So it was here all along. By the way, the Valspar lacquer is, according to Marshall, the factory finish. Greg is right about getting one of those spray handles. Here's another tip - the standard tip that comes with a spray can produces a dot or circle pattern. Rustoleum has some replacement tips, a bag of four. Two are the standard, but the other two produce a fan pattern. That produces a much more even finish. One small thing to be aware of, though, paint from the very bottom of the fan will collect in the lip/rim at the top of the can. Normally not a big problem, but if you then go to spray a horizontal surface and tip the can while over your surface, that collected paint will run out of the lip and drip onto your work. So use care or you'll get aggravated. Like I did. #1 Randy
-
Black paint recommendations for Heresy II's
rll replied to Tony Reed's topic in General Klipsch Info
Tony, One of our formerly active posters, someone who really knows his stuff, used Opex/Valspar #40 sheen, semi-gloss, production lacquer. But that requires an investment in painting equipment. He also recommended, for those of us who don't want to make that investment, Watco brushing lacquer, tinted black. I haven't tried it yet, but looked into the tinting part. Had no success finding anyone locally who's got experience doing that. Poke through this thread for Marshall's process, see page 10. http://forums.klipsch.com/forums/t/109693.aspx?PageIndex=10 I'm going to build another pair of Cornscala cabinets, veneer them in Ash, and paint them black. A couple months ago, as practice for the project, I veneered some boxes I had previously built as stands for a pair of KG4s, then wrestled with several different paints, lacquers, etc. What I eventually settled on was Rustoleum's American Acccents Canyon Black http://www.rustoleum.com/CBGProduct.asp?pid=1 . I'll see about taking a picture later and posting it if you're interested. Cornwalls are just too big a project to spray with cans by hand, so I'm not sure what I'll do when the time comes. Perhaps get my hands on the Valspar lacquer and find someone to spray it for me. Hope this helps. Randy -
The crosswinds at the end of stage 3 really helped animate the race during the first week. The time gained with the split was not significant, but I thought the tactics were. Lance and his Astana mates spent some time at the front driving the break. To me, if Lance felt Contador were the team's captain, he, Rast and Popovych would have sat on the back of the break as passengers. I still think we'll see a split among Astana, if we haven't already. Another thing that we were reminded of the other day was how astute Lance is tactically. Contador is not, he can always be counted on to make a mistake somewhere. His talent has allowed him, up to now, to overcome those errors. The pressure of the Tour is enormous. Lance knows how to deal with it. Granted, Contador has won the Tour before, one would think he knows how to deal with the pressure. But the comments he's made over the months since Armstrong unretired and joined Astana leave me wondering if he's fragile emotionally. If so, he may crack under the pressure. Weak teams in the TTT seem to have put an end to the chances of Menchov and Evans. I love the TTT, but it really seems to have put an early end to the overall chances of a good part of the favorites. It was almost comical to watch half the bBox team ride into the weeds. But to their credit, Voeckler regrouped to win the stage yesterday. Tomorrow will tell us more, and will set the stage for the next two weeks. Today looked to be fairly benign, but halfway through and it's beginning to rain. So anything's possible. Have to agree about Versus and its "all Lance, all the time" format. Yes he came out of retirement to promote his foundation, but he smells yellow, and I think he desperately wants it. Even if Astana splits, alliances can be formed. Lance has friends at Columbia, he and Columbia have different objectives, stage wins (Columbia) vs. overall (Lance). That, in theory, could be a mutually beneficial alliance at the right time. Stay tuned. It won't be over until the Ventoux. Randy