amos
-
Posts
12 -
Joined
-
Last visited
amos's Achievements
Member (2/9)
0
Reputation
-
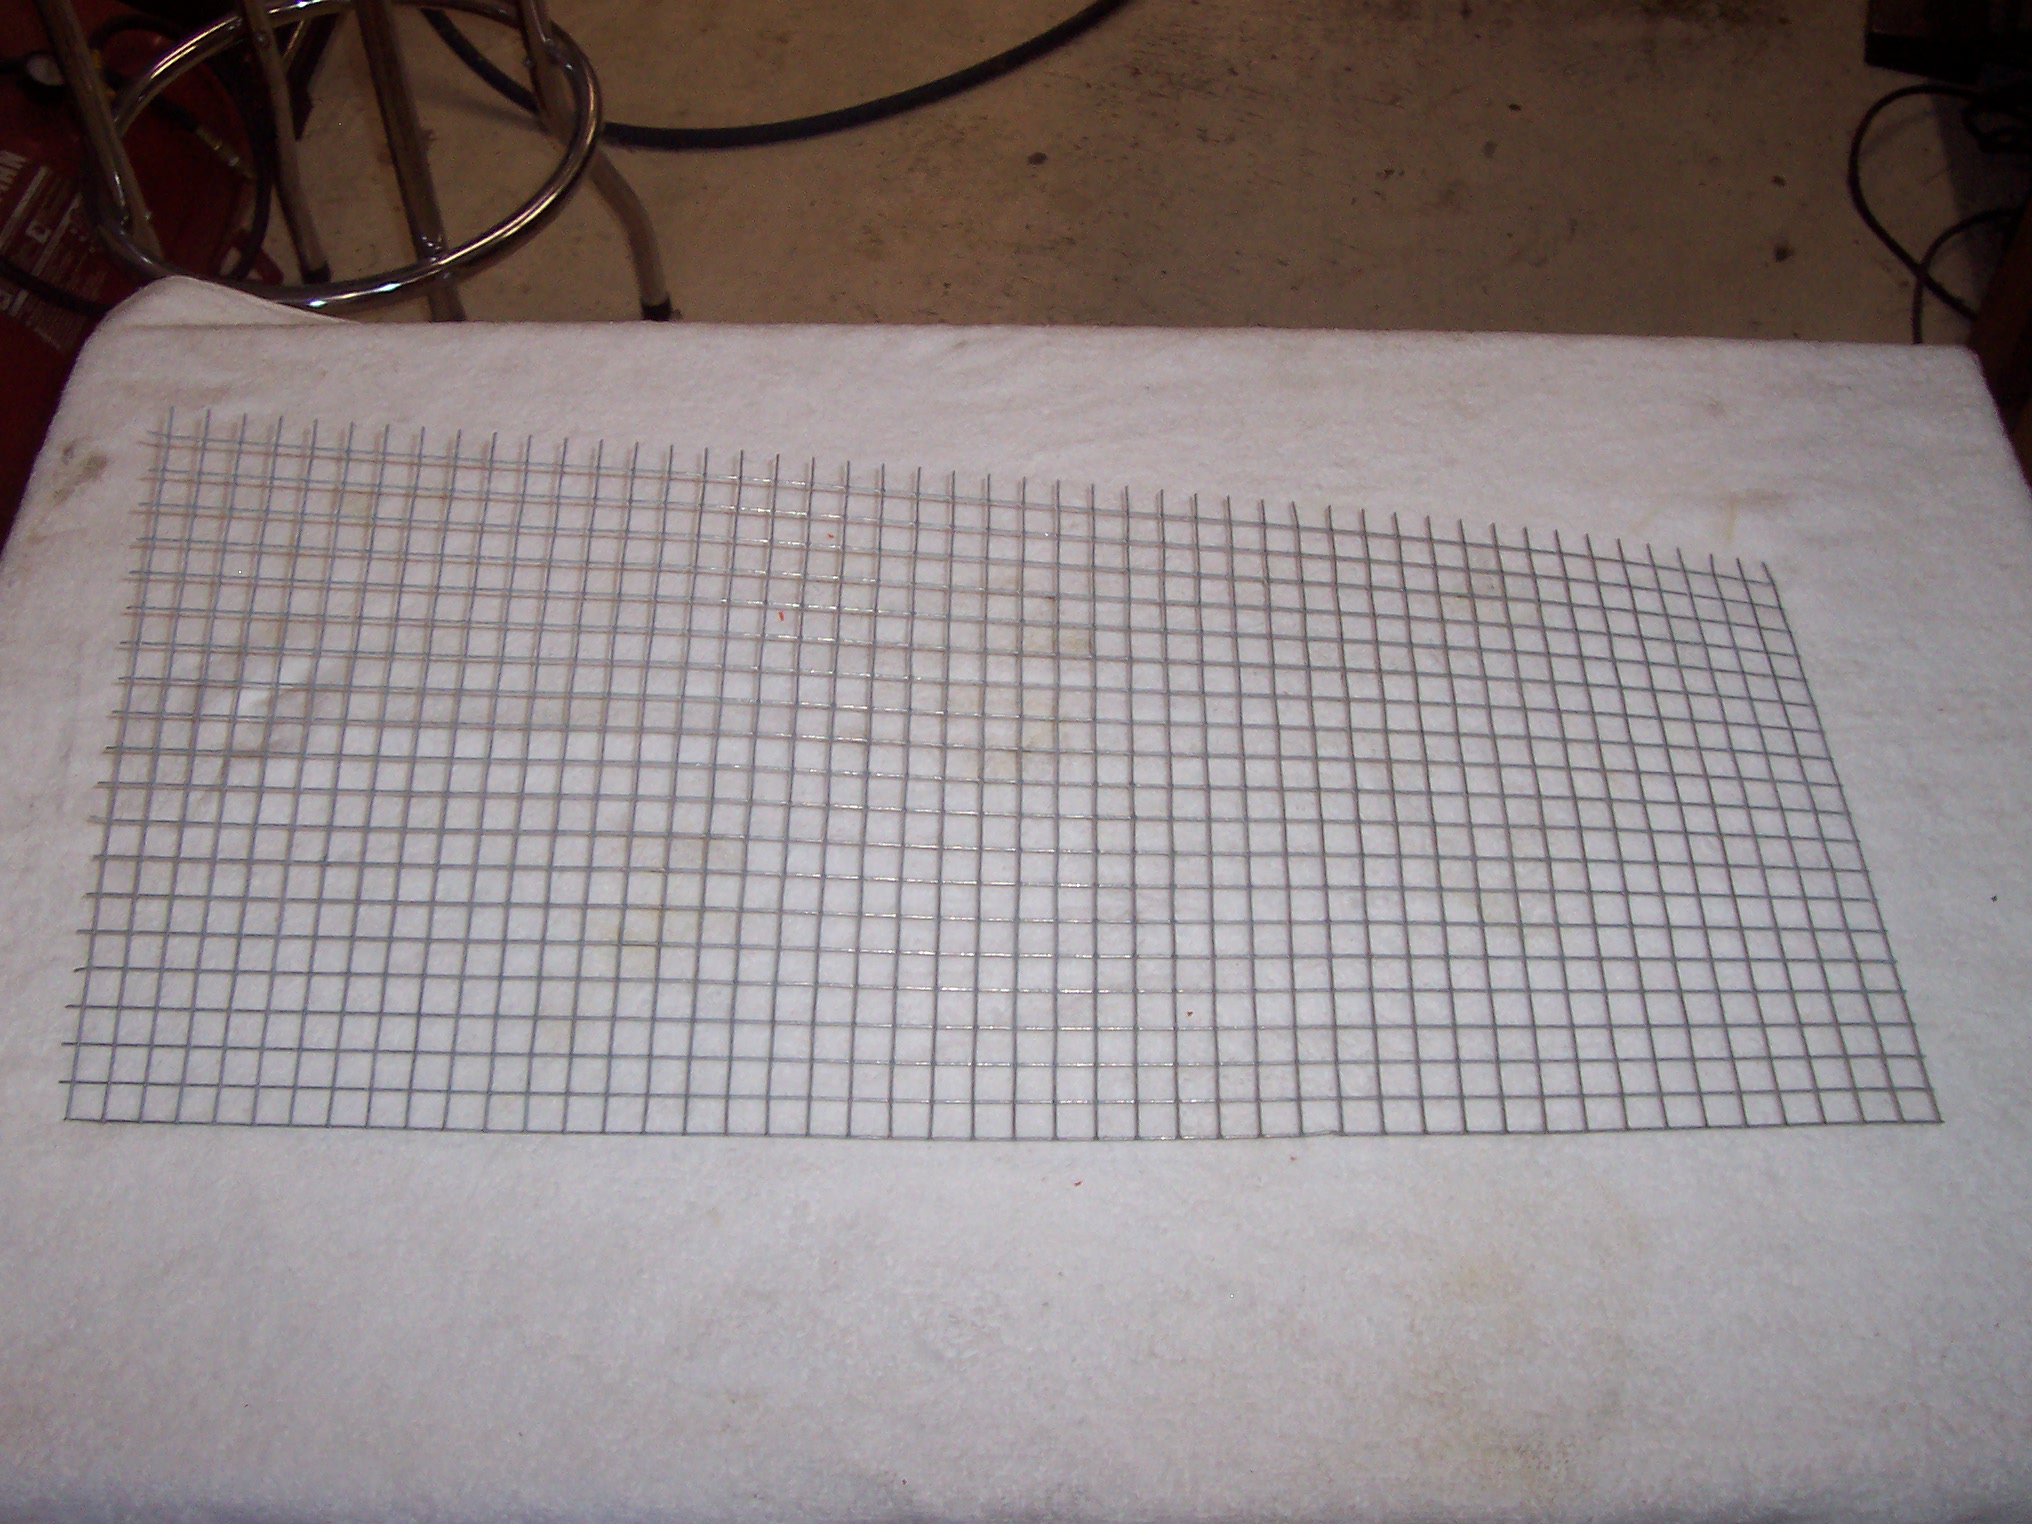
I picked up some wire mesh at the local farm store. 1/2 squares and 0.040 wire dia. Cut to size and sanded all the sharp points where I had cut. Painted it black. Layed the piece FLAT on the fabric and folded the edges over. Had a friend run it through her sewing machine. Since the fabric was attached when the wire was flat, when you bend it the fabric pulls tight. I did not put a permanent bend in the wire, it holds a nice even curve just being held at the edges. I love those Koa Khorn's. Amos

-
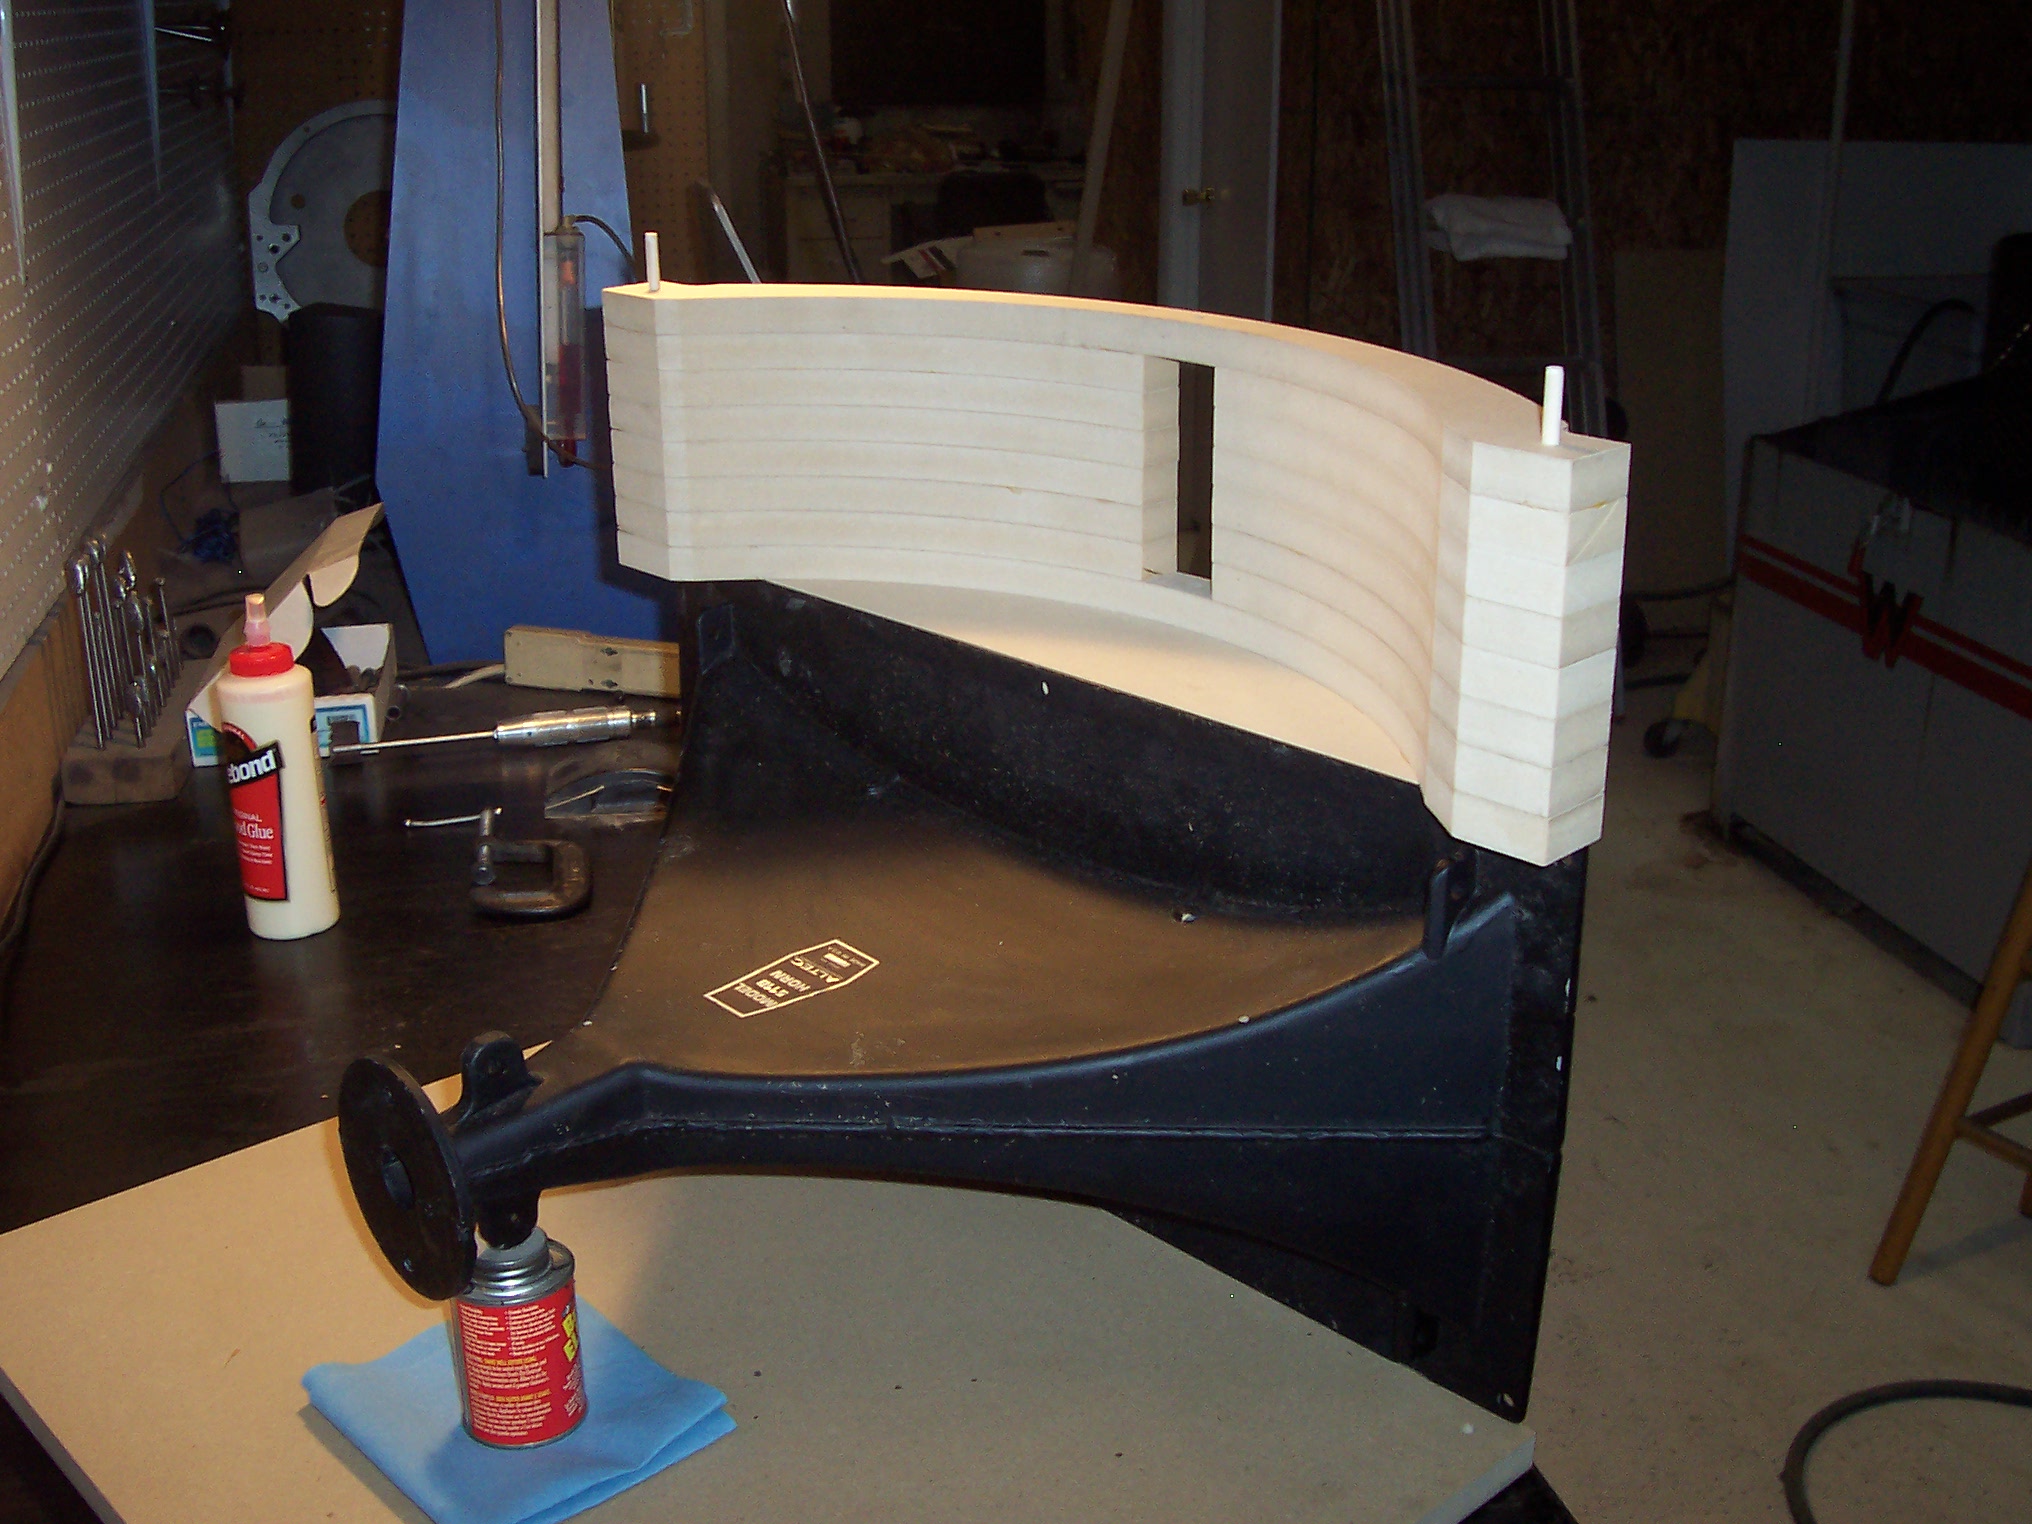
The thin wood veneer bends over the radius quite easily. The radius was made by simply stacking MDF.
-
I like it, or maybe MOMAC's. It's easier for me to spell than Cornscallla's
-
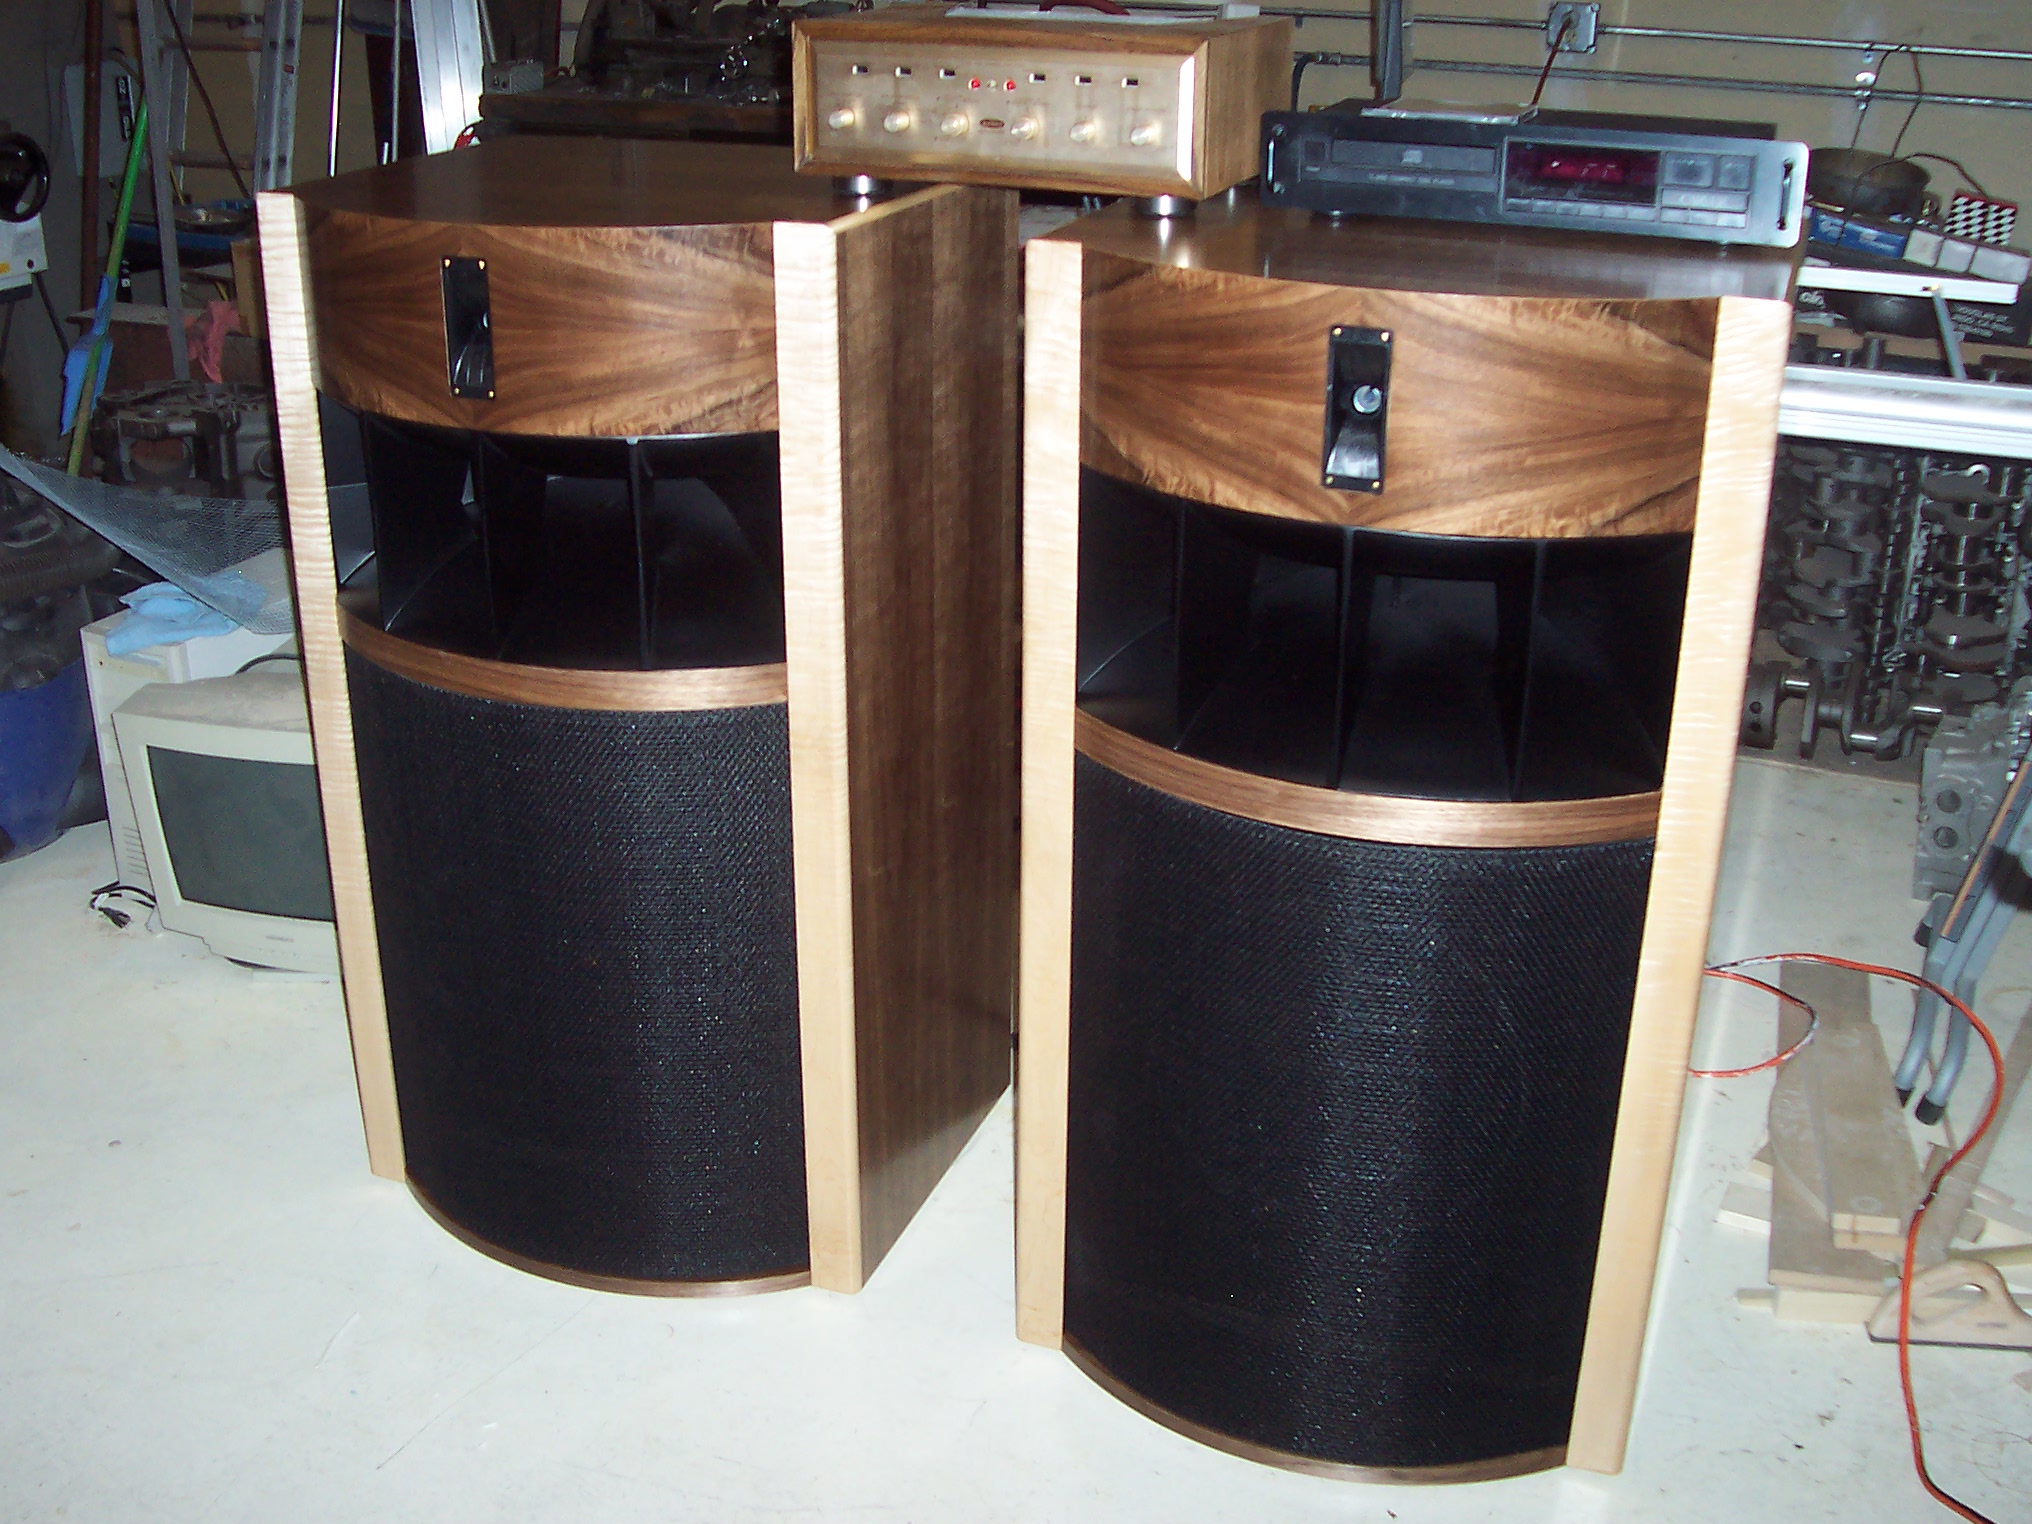
All done! Thanks for all the comments. It's nice to have this community that can appreciate what these are capable of. Good sound! All I get from people in my area that have seen them is concern over the volume. I guess big equals loud.
-
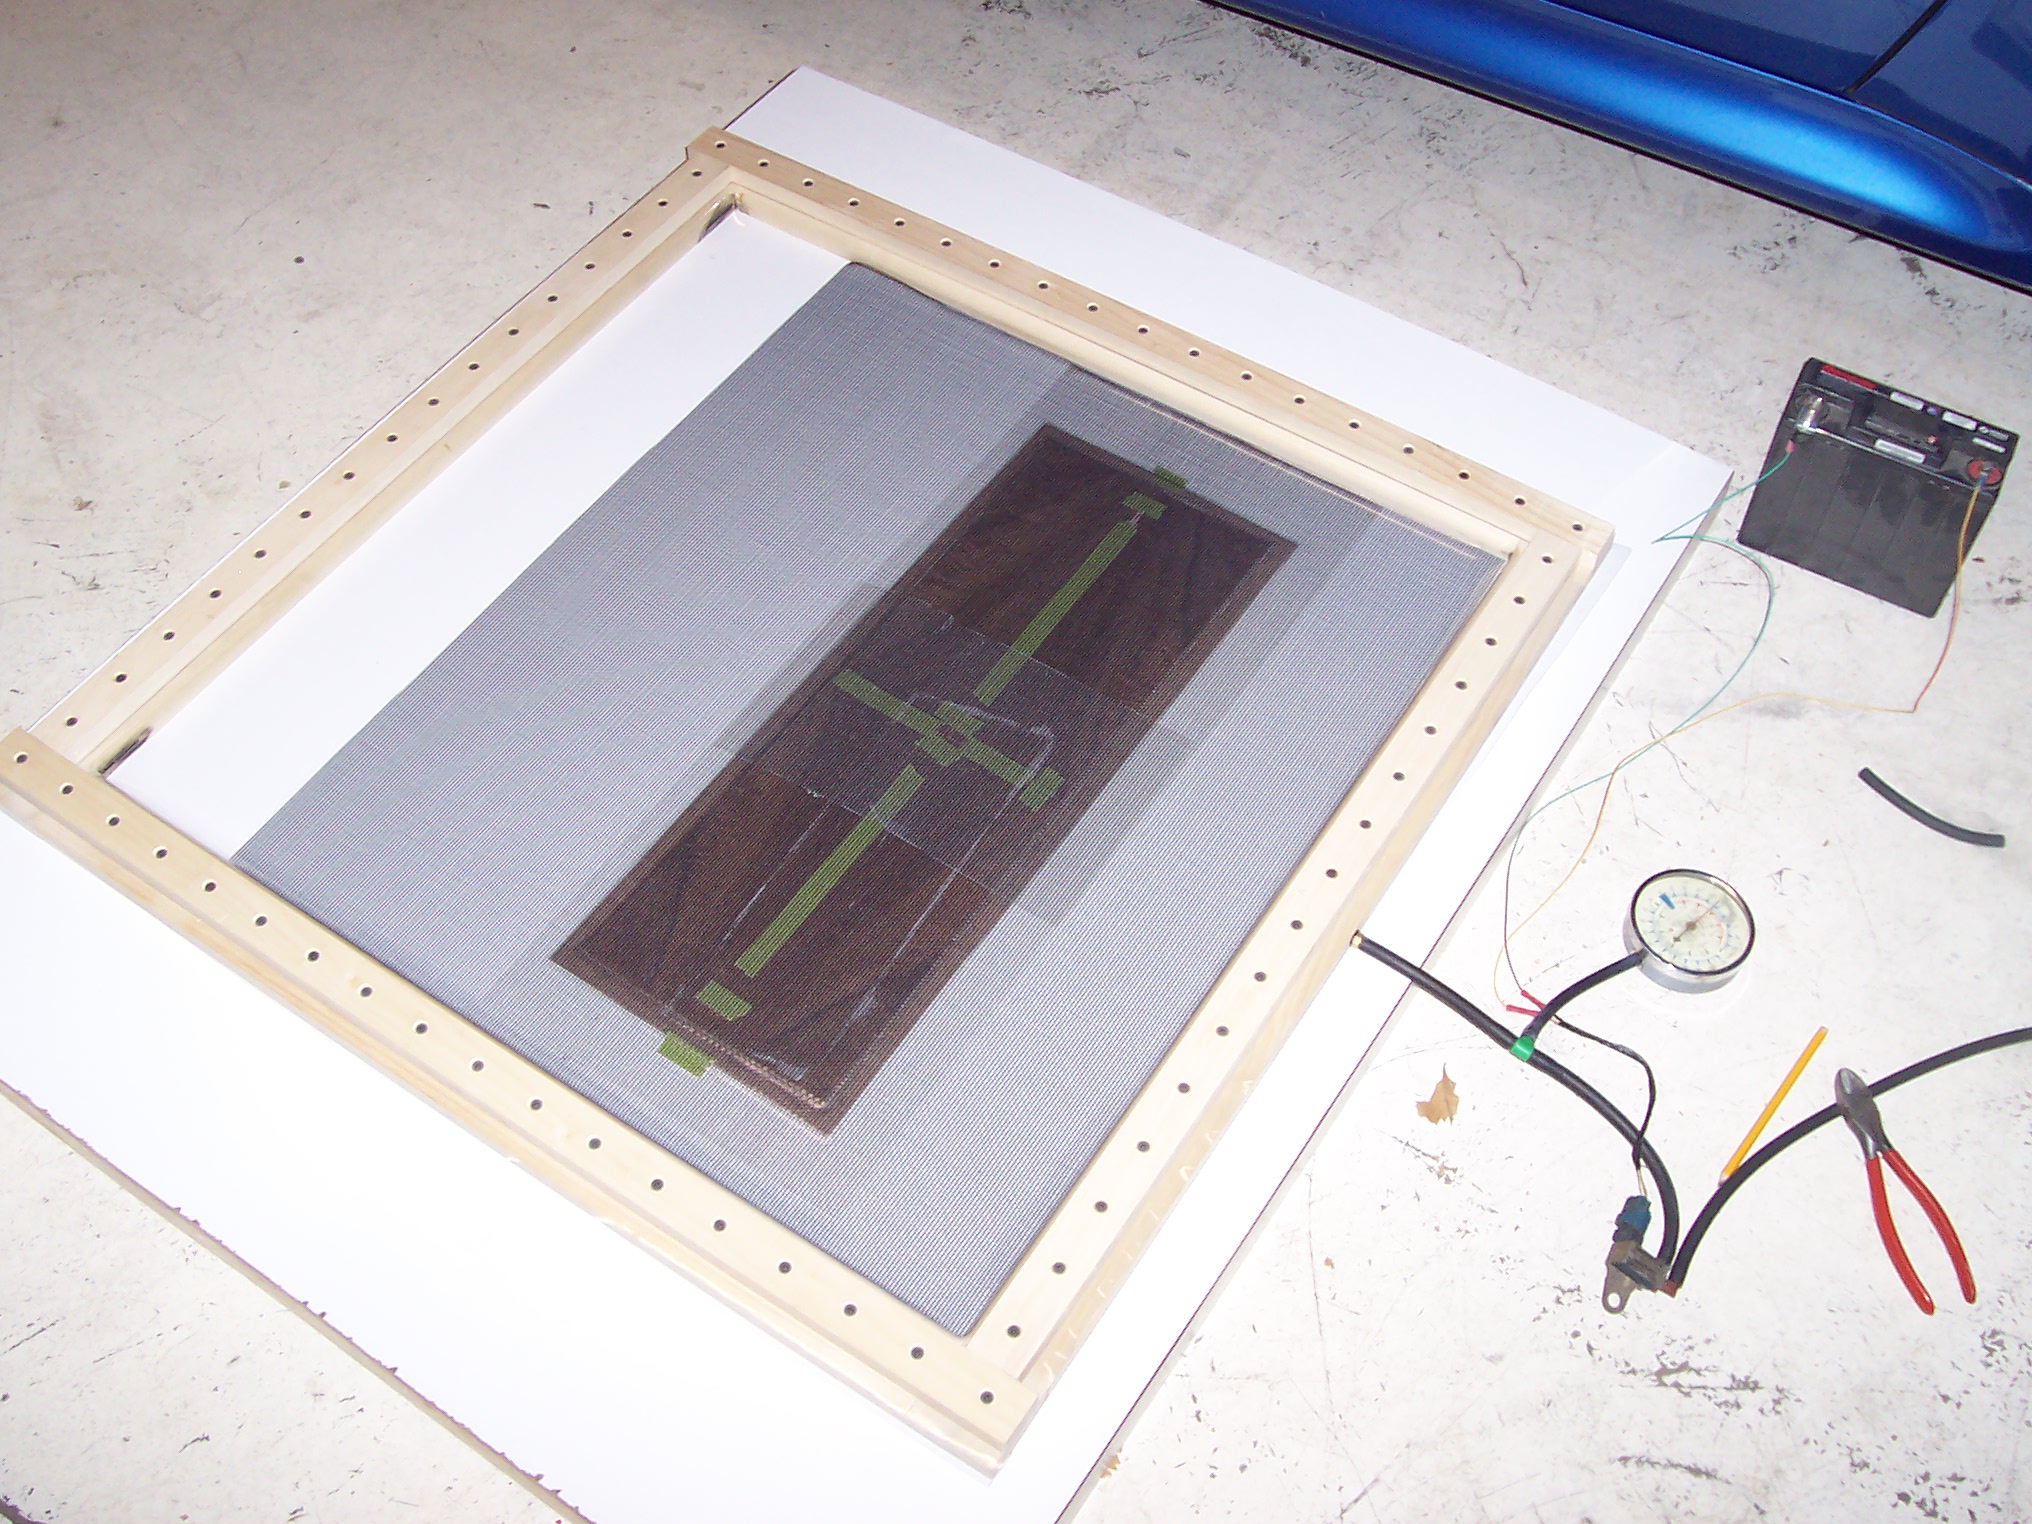
vacuum press
-
MDF for cabinet. Paper backed walnut veneer from Oakwood Veneer. Veneer applied to cabinet with Titan DX contact cement. Very good stuff, much better than what you can get at Home Depot. Curly maple. Black paint is semi-gloss latex. Finish is Varathane semi-gloss poly. Figured walnet is some raw veneer purchased on Ebay. Not recommended, I think what you buy on Ebay is stuff pro's throw away. It was very wavy. When you tried to push it flat it would crack into many pieces. I mixed 1 part wood glue with 2 parts water, applied it to both sides, placed it between pieces of wax paper and mdf scraps, and pressed it in the vise. This worked okay. It took along time for the pieces to become dimensionally stable, and I always kept them between sheets of mdf to help prevent warping again. I haven't devised a suitable method of getting straight and square edges for joining, but I managed. Contact cement for raw veneer never worked for me. Always ended up with joints pulling apart. So I built my favorite tool of this project. A vacuum press. Plans from Joewoodworker.com. I used cold press veneer glue and glued the taped together pieces to some of the leftover paper backed veneer. No joint separation, no bubbles, no glue bleed through. Now I could use contact cement to apply it to the curved surface of the cabinet. The press cost me approx $30.00. I used one of my cars as a vacuum source. 15.5 in hg, or about 7.6 lbs per sq inch. Just cool. I hope this ramble is close to what you wanted. Communication is NOT one of my skills. Thanks for all the kind comments.
-
Cornwall woofer, cab volume, and port dimensions. LaScala tweeter and mid driver.
-
Yes, lower section only.
-
Thanks to the forum members for the inspiration. Thanks to Bob at B&K Sound for the parts and advise. Thanks to Craig at NOS Valves for the work on my Scott 299. As you can see, I need to finish cleaning up and painting the 511B's and make the curved grill for the LF section. I couldn't wait to show someone.
-
I'm considering building a pair of large and low tunes sub in the future, and have a few, ...well... alot of questions. Ports: Does the port have to be entiely contained within the enclosure? I would assume not. Is the air column of the port considered part of the effective enclosure volume? Or is it subtracted. If the air column is added, then the volume of an external portion of a port would need to be added, Right? I get really confused when I read about high pass filters. If I set my speakers to small in bass managment of my receiver, Isn't high pass taken care of by the receiver? Thanks in advance for anyone's help. I've been lurking in the forum for a while and have been inspired. All Heritage HT in the works!
-
amos joined the community
-
Thanks all!
-
picture I hope