StephenJK
-
Posts
18 -
Joined
-
Last visited
Recent Profile Visitors
845 profile views


StephenJK's Achievements
Member (2/9)
4
Reputation
-
Steve, An update on the RWO monitors. Mike Gillespie, who was involved with the original design of that product line is considering manufacturing a 40 year anniversary updated design. They have a facebook page here: https://www.facebook.com/RWOFostex/
-
I rebuilt a pair of 1976 Khorns last year. If you're handy with a soldering iron Bob Crites will sell you an upgrade kit for your crossovers - if not then he can rebuild your old ones for you. Or, as you have mentioned you can simply buy new AA crossovers. With the squawkers you can rebuild them with new diaphragms from Bob Crites. With the tweeters Bob mentioned that he hasn't found a replacement diaphragm to the original specification, I ended up buying new tweeters. Mind you, the original ones might still be OK. I agree with others, unless the woofers are damaged they're likely just fine and can be used again. Best of luck with your rebuild project! Stephen
-
I've come across a very few for sale over the years. They were big and heavy, like a K-horn lying on it's side. The last time I saw a pair of LS-3's was in Hamilton through the CanuckAudioMart.com many years ago. They were beat to hell and my very unreasonable offer was refused.
-
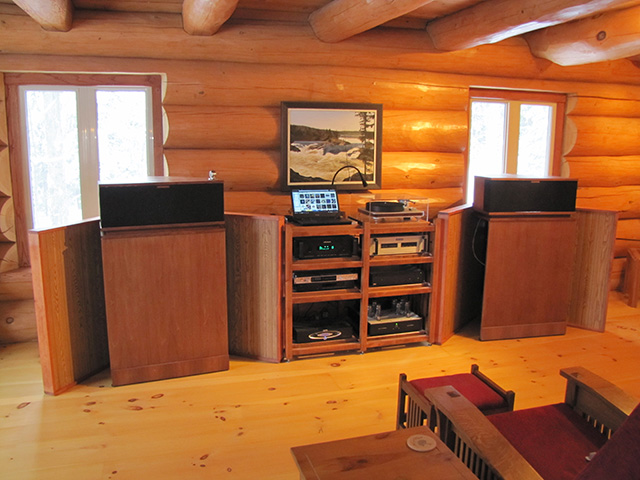
Rick, I don't have Magnepans, I have something called Fostex GZ-2000's. They're a magnetic planar with a four-way configuration. As you know the Maggies tend to be bass shy. Fostex got around this with a 12" edgeless woofer in a lower sealed bass cabinet. There were maybe 12 pairs made in a prototype run in the early 80's. I bought them from Oakwood Audio in 1982 for $4,800. At the time, through a local company called RWO they were making the LS-1, -2 and -3 monitors using the Fostex drivers. Those were with two top time aligned horns with a lower ported and vented dual driver bass cabinet. My wife and I preferred the planars over the horns. The planars have a very flat frequency response, are the most accurate speaker I have heard and have never failed to resolve the most minor changes in our system. I do plan to conduct a detailed analysis and comparison between the Fostex and the K-horns with the understanding that it's a bit of an apple and oranges thing - they were made for different purposes. Still, soundstage depth, instrument placement, detail and resolution should be common factors. I'll make some time to do some testing tomorrow and will report back soon, perhaps with a new thread topic. And yes, I will try the pipe insulation on the baffle plate. There doesn't seem to be any issue with the walls moving, we rarely play over a comfortable conversational level. So far, I do have to say that the detail, clarity and resolution of the horns is astonishing. I continue to hear things on recordings I know well that I have never heard before. Testing is needed to see if, compared to the planars, something might be changed or missing. Stephen
-
I'm sure you have other skills that more than make up for your lack of shop experience.
-
The difference with the walls is astonishing. The bass cabinet seems to have a frequency range much geater than what you would expect - it's from low bass to a midrange overlap. With the walls in place the gap to the squawker is now seamlessly closed. There seems to be a balance between all the drivers that wasn't there before. The horns provide the detail and resolution while the bass extension with the walls fills up to meet and overlap the horns. I'm glad that I rebuilt the speakers and crossovers to the original specification - I can see why they are so highly regarded.
-
Agreed, as I replied to another comment I have a lot to learn about these speakers. Those are the false walls, they're easy to move and I will try a different setup. What you don't see is that the house is completely open across the top floor. Normally, we're listening at the supper table which is another 36 feet back. And yes, they fill the house with sound in a way my planars never could - at any volume.
-
The ridgid styrofoam fits tightly between the wall panels, there's no play at all. I don't think they could buzz or vibrate at all. I've never had K-horns before, I normally run with four way magnetic planars. I rebuilt these for a friend who then left them with me. I have a lot to learn about these speakers, this was just the first serup and it's close to how thw planars were setup. I see a few comments about further apart, that I can do.
-
That is a Clearaudio Ovation with the Universal tonearm. Also installed the VTA adjuster. It's the best turntable I've ever owned.
-
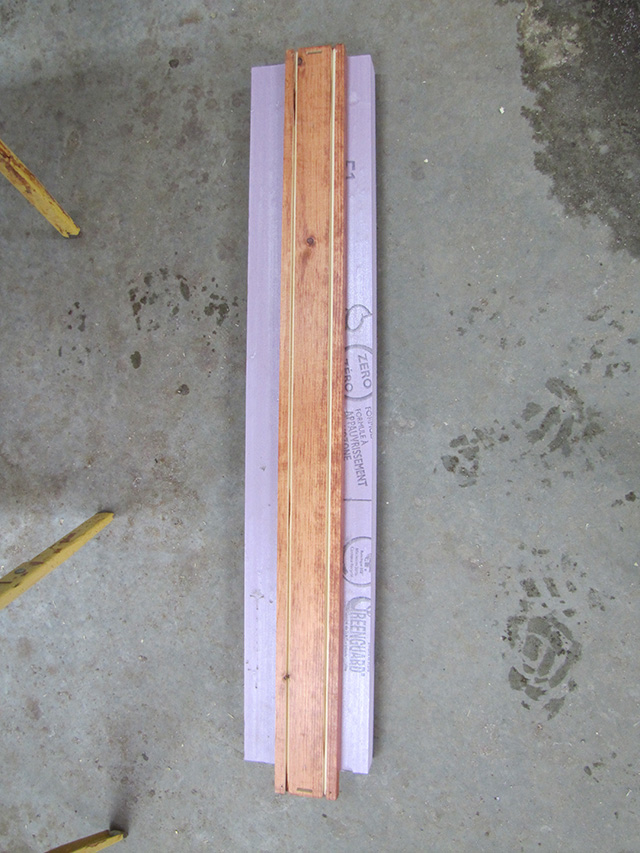
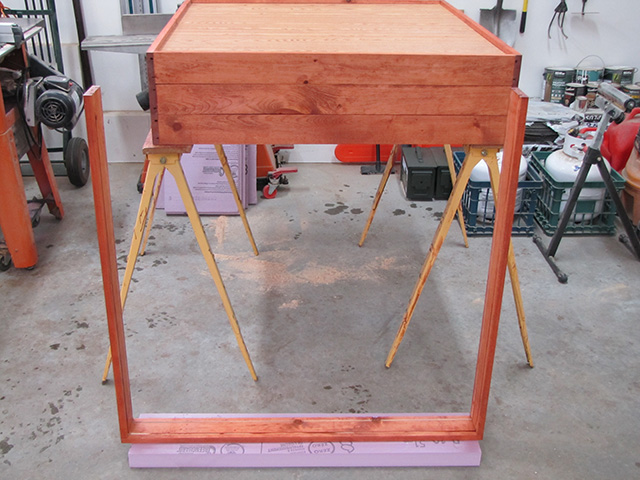
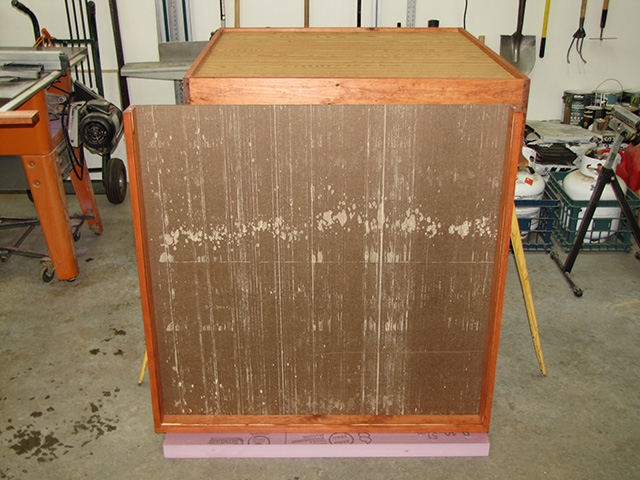
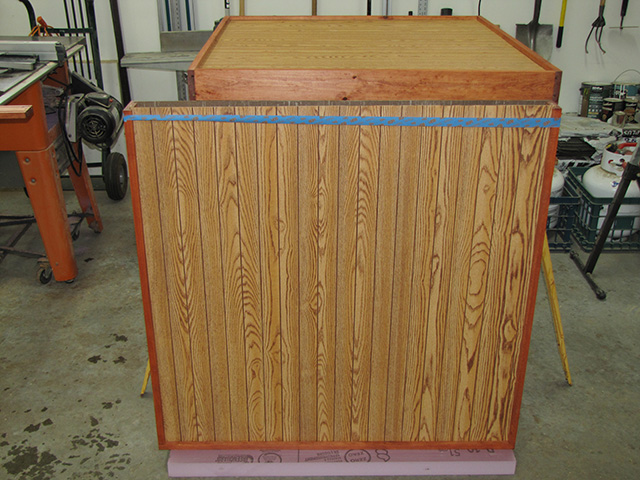
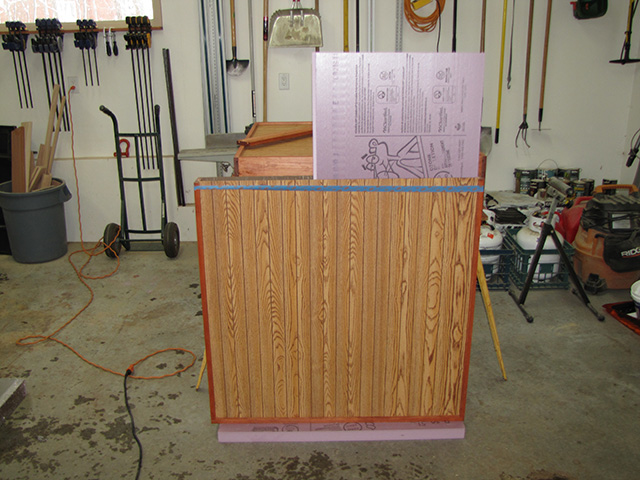
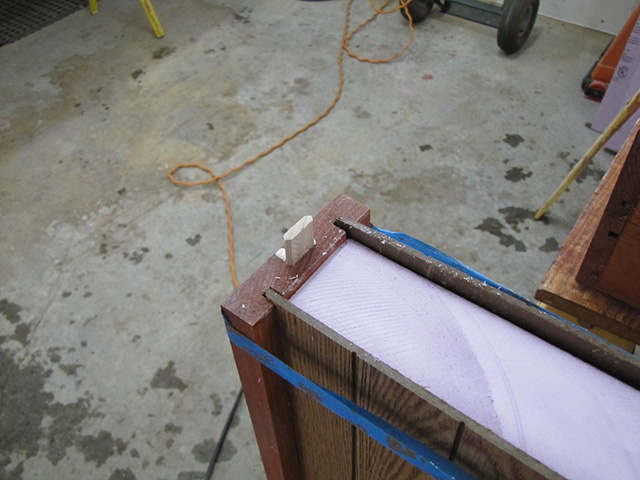
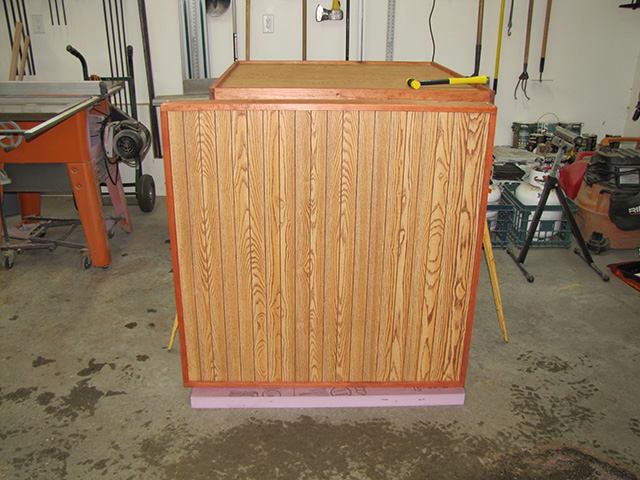
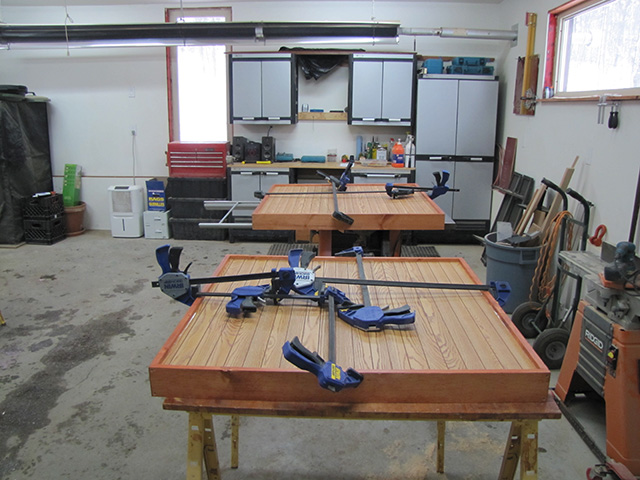
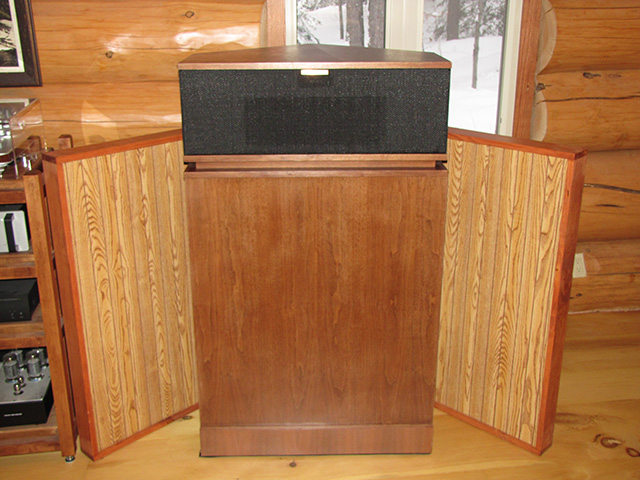
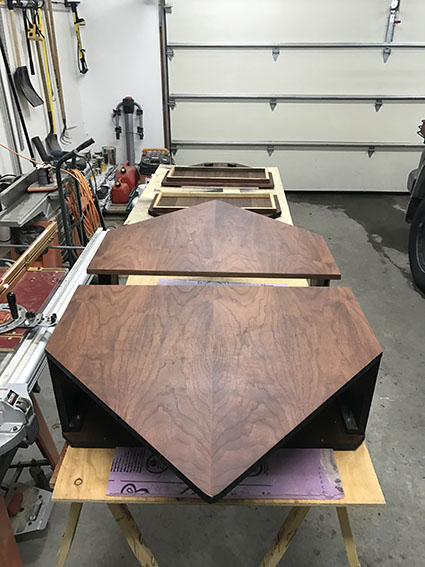
Klipschorn Portable Corner Wall Under a separate thread I explained how I’ve been working on a pair of Klipschorn’s from 1976. This is more of a rebuild than a restoration. All of the edge banding has been replaced, but I was able to sand and refinish the bass and horn cabinets with only minor repairs being needed. The crossovers were completely rebuilt with new capacitors from Bob Crites. Because of the layout of our house, it isn’t possible to place the speakers into corners. I thought of closing in the bass cabinets but was reluctant to change the original design. As a result, portable corner walls are needed. The Klipsch design with 2 x 4’s and plywood was not something I wanted to do. That’s an old design using the materials available at the time, and one I thought I could improve on. These walls are made from 1” x 4” (3/4” x 3-1/2” actual) knotty pine. I used a dado blade on the table saw to cut a groove 3/8” deep and 1/4” wide. The completed outside dimensions are 42” x 42”. Once assembled with glue, screws and one floating tenon per corner, the wood forms a slot that is used to insert a section of wall paneling 1/4” thick. I don’t think the tenon is absolutely necessary, but it will stop the ends from twisting and keep them aligned. I went with a wood grain look as that was the least ugly panel at Home Depot. I suppose you could also use a flat Masonite panel and then paint, but I’m OK with the wood grain look. Once the two panel section were installed, I inserted 2” rigid Styrofoam board to fill the center space. The foam is easy to cut with the table saw and you can get a close fit. The idea is that the foam board will provide a high density barrier to the bass signal without adding a lot of weight. Once the foam was installed, I placed the top cap and screwed it in place. After that, to better seal the wall sections and to glue them up I ran a bead of clear silicone all around both sides and clamped it while the silicone set up. Alternately, you could run a bead of silicone on the inside of the wood frame so that it would stick to the Styrofoam, but I think it’s easier to do the outside. With the silicone set, I finished by plugging the top screw holes and placing wood filler into the exposed end of the dado groove. Once that was sanded down and the stain touched up the entire wall assembly, including the panels was given a coat of satin water based Varathane. The walls were assembled with a couple of brass hinges, and the bottom protected with felt stick-on feet. Each wall panel section weighs just a bit over 26 pounds for a total assembly of 52 pounds. They’re light and easy to move around. All costs are Canadian dollars. The cost for the pine was a few bucks. The wall panelling was about $38 a sheet with four sheets needed. The 96” x 48” x 2” rigid foam was surprisingly expensive at $32 each, again four being needed. Any other material I had lying around, but that’s the bulk of it. The walls work very well. I do need to do some tweaking, especially with something to close up the gap at the back. The overlap of the frame at the top and bottom fits well up to the side of the speaker. My thought was that the bass signal exits by bouncing off the back baffle plate and then out along each side, so it shouldn’t matter if there is a gap between the wall sections. On second thought I think I’m wrong and will have to either make a 90 degree molding that can be screwed in place or cover the gap with a strip of rubber of some sort. The nice thing about them is they are light and very easy to reposition with the speakers as I continue to dial them in. Note that the side grilles are not installed. The bottoms got wet at some point, the 10,000 staples in each one rusted slightly and they’re a bear to pull out. A couple of the plywood panels are broken so it’s easier to make new panels from 1/2" sanded plywood, paint them black and install new grille cloth. I was going to install new cloth anyway, as the original stuff has seen better days. The speakers are sitting on indoor/outdoor carpet – the rubber backed stuff. I cut a triangle shape that the three metal feet can rest on, essentially the same size as the bottom of the bass cabinet. Two carpet sections of the same size are stuck together with double sided carpet tape so that the carpet side sits on the floor and the rubber side sits under the speaker. That allows me to easily move the speakers around without marking up the pine floor. That’s it! Edit: I'm unable to have the pictures sorted in order by file name and after four attempts have decided to give up. In any event, you'll get the idea.....

-
Klipschorn Source for Walnut Edge Banding
StephenJK replied to StephenJK's topic in Technical/Restorations
No worries, we're all here to help each other. What we mean is Danish Oil, available in clear or stained different colors. Danish oil is oil with a certain amount of varnish in it. You apply by flooding the wood, wait for fifteen minutes, wipe off and then repeat. You can then leave it like that or wait at least 48 hours and then cover with water or oil base Varathane in the gloss of your choice. I prefer water base satin finish. The water base is a lot easier to work with and you can do a couple of coats in a day. Let it harden for a day or two and then do a wet sand with 400 grit or better for that silky mooth finish. The original oil application gives a nice rich traditional look. My pictures above your post are the oil finish only.- 23 replies
-
- 1
-

-
- klipschorn
- k-horn
- (and 3 more)
-
Klipschorn Source for Walnut Edge Banding
StephenJK replied to StephenJK's topic in Technical/Restorations
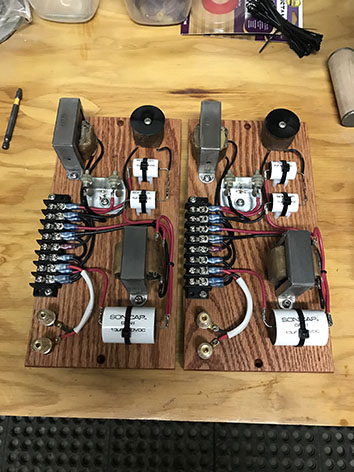
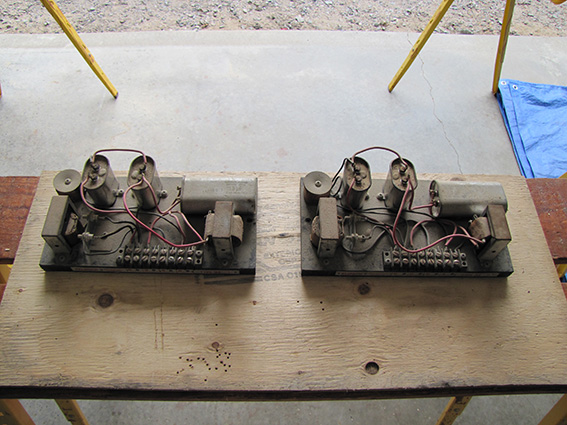
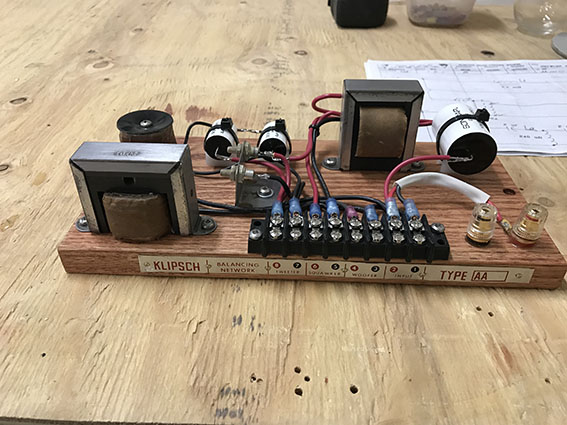
As promised, a bump to post the rebuild progress. The Minwax Gunstock stain color worked great, it matches the original veneer very well. The crossovers were rebuilt using the schematic provided by Bob Crites with the rebuild parts - this is the original Klipcsh design for the AA network. Other than the capacitors and the Cinch 8 position terminal blocks, I reused all of the original components. I was evern able to remove the front plate and recycle that to the new crossovers. I added a pair of better than decent banana jack/screw post terminals for the incoming speaker wire, as it's nice to have something other than a couple of small screws. The posts are threaded into a recessed hole in the bottom of the wood plate, and then potted with epoxy resin to keep them in place. The connection is in parallel with the original input screw terminals. That changed the layout quite a bit, I tried to put things where the connections to the terminals would be without long runs or with mixed signal wires. I thought I had a picture of the bass cabinets, but they must be on my phone. They're completed and sitting in the house. Will post that tomorrow. I see a lot of discussion on how and where the original crossover design is either the best thing ever or a clumsy effort. I decided to rebuild them the way they were designed - based on the theory that someone at Klipsch just may have known what they were doing. Stephen
-
Klipschorn Source for Walnut Edge Banding
StephenJK replied to StephenJK's topic in Technical/Restorations
OK, I'll try the Minwax stain and see how that works out. Stores are closed tomorrow (Canadian Thanksgiving) but I'll get to it next week and post the results. -
Klipschorn Source for Walnut Edge Banding
StephenJK replied to StephenJK's topic in Technical/Restorations
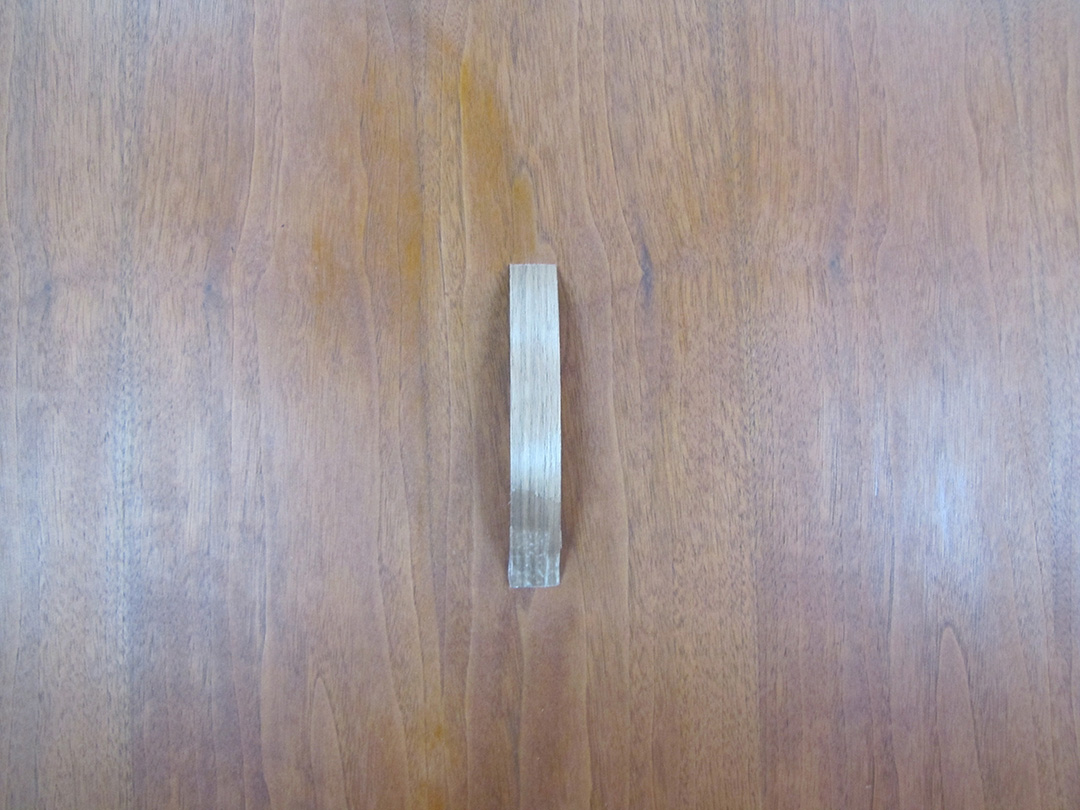
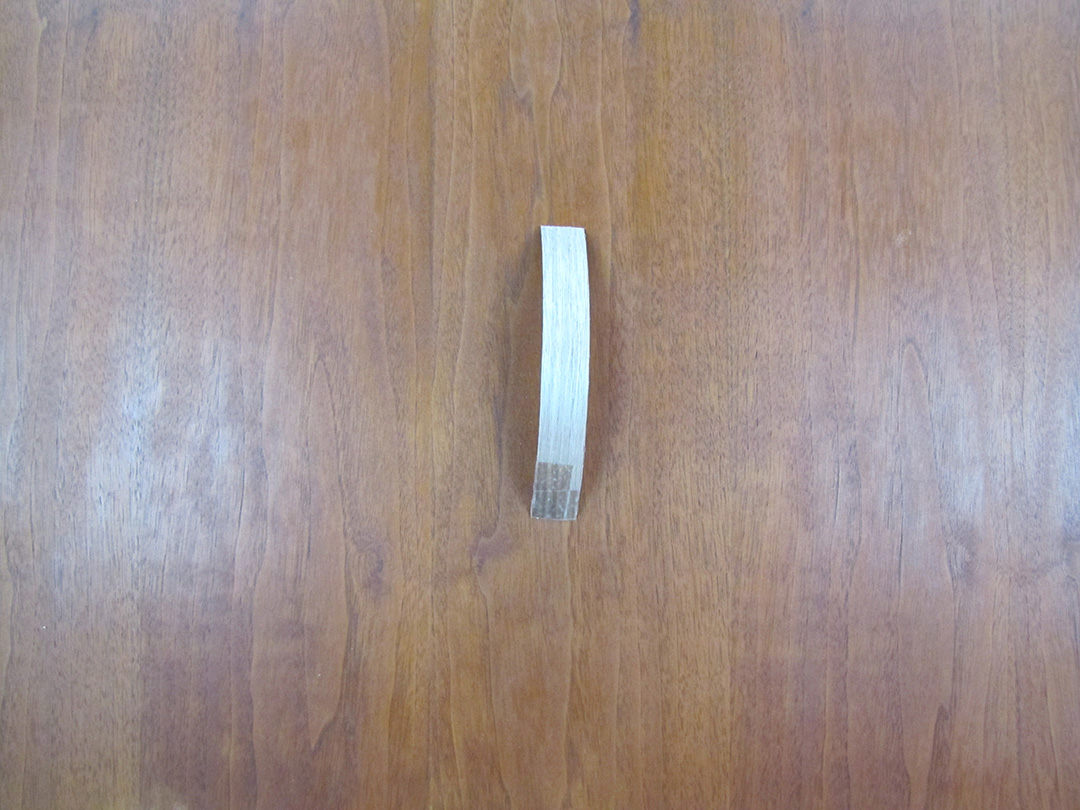
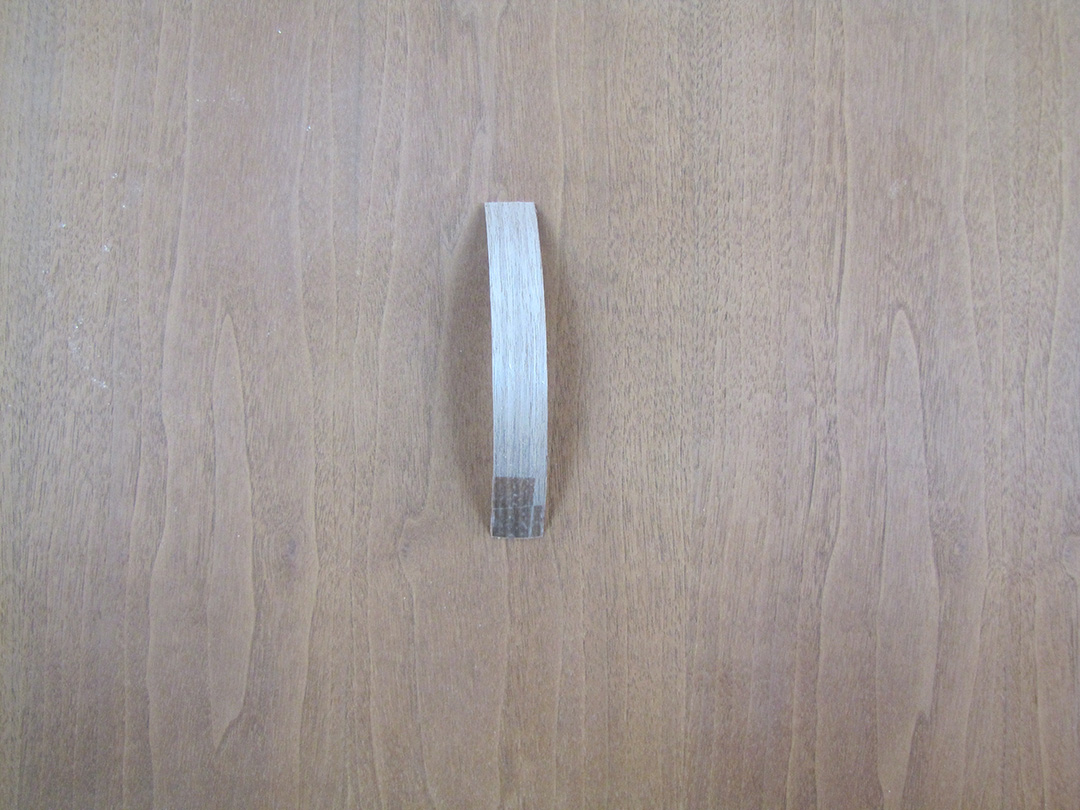
Pictures. I don't know if they will post in order, but it's like this. The one labelled Walnut Dry is the speaker with a small piece of the walnut edge banding I just bought. The second picture is Speaker Mineral Spirits, with a quick wipedown with mineral spirits to show the grain when wetted. The final picture, Both Mineral Spirits is exactly that, both wiped down. The edge banding continues to have a grayish look to it while the speaker has a nice brown coloration. I can stain the edge banding, but that will certainly make it darker. More experimentation is needed. Unless, of course, someone says "Stephen, buy this veneer over here and it will match perfectly."
-
Klipschorn Source for Walnut Edge Banding
StephenJK replied to StephenJK's topic in Technical/Restorations
You know, Weber just might have something there, I had assumed he was being jocular and now formally apologize for not having taken him seriously. Black lacquer would certainly do away with any concerns of matching wood grains. And to dirtmudd, thanks for the advice on the edge banding. I will try to oil some that I have to see how it works out. My biggest concern was that I had bought the same veneer in sheets to do the new toe rail - if that's to be finished in something such as black lacquer then matching perfectly is no longer a concern. And thanks for the link to the blog post regarding modification of the Klispchorns. I tend to agree with the author, and can relate. I had read with interest a modification done by Greg Roberts at Volti to close in the bass bins and had seriously considered that. I have since decided not to proceed based on the simple fact that while it is certainly doable, it was not part of the original design. I'll keep everyone posted on further developments.- 23 replies
-
- 1
-
-
- klipschorn
- k-horn
- (and 3 more)