ZINDA89
-
Posts
53 -
Joined
-
Last visited
ZINDA89's Achievements
Advanced Member (3/9)
13
Reputation
-
I have a set of series 1s that I had 3 speakers and 1 had a very poor cabinet while the other 2 looked better still needed to have cabinets restored. I decided to mirror finish black lacquer 2 and use the 3rd to make a center channel that would look more like a modern style center using both horns and opted for 2x 6.75” DCM dual 5.5 ohm VC woofers removed from a pair of large bookshelf's. I had to fabricate the entire cabinet and crammed everything in as tightly as possible without loosing strength on motorboard. I used typical techniques for cabinet design with dato cuts to groove sides around motorboard, all block backed seams, 45s on sides inset back piece. All 3/4” 7 layer oak veneer plywood with no voids. Cab is 100% perfectly square, solid and sounds great, crossover was used with minor tweaks, all caps were tested using ESR meter and were dead on. Since the woofers are a 5.5ohm load, I added a 15 ohm 10watt resistor to the woofer out put to impeedance match it to retain proper crossover point. I also moved the mids and tweeters down 1 setting on the autoformer to achieve a better sound output that very closely matches the 2 others. Al 3 had the drivers moved to the front of the boards. To keep motorboard strength I did not inset the drivers, I also moved them as close as possible to each other. To mount them on the front required the horns backside of the flanges to be flattened since they are cast with a thicker area in the center of the side flanges that tapers out towards the top and bottom flanges.There was a piece of textured hardboard precision cut to fit over all drivers on all 3 to give it a very different look and make the drivers appear to be flush mounted. All frond edges were rounded to reduce deflection further. This design and fabrication took about a week then 2 weeks to finish the cabinet exterior. The other 2 have not had any crossover changes and all caps tested exactly perfect. This set of 3 sounds better than my series 2 set by far. I would like to sell all 3 or even 5 including the series 2 set also redone in mirror finish black Lacquer. Since I did make the most creative design I could think of the set of 3 really needs to be sold together. I have named them the Heresy Tiki Series 1. Asking $1000 for the set of 3, $750 for the series 2 set, all 5 for $1500. There's about $750 just in paint and supplies, plus 4 months of all day every day labor that went into these, all 4 regular sized speakers are using all original parts, all caps were tested, all original wires but the series 1 set has updated binding posts.

-
Working with new wood is a breeze, I fabbed a new cabinet for a KG2.2 and had it completely done in 2 days. Making an exact, basically undetectable copy was very simple to do when reusing the motorboard. I think the cabinet took 8 hours from start to ready for paint. My cabinet ended up ⅛” smaller since I had to squeeze all pieces out of 1 piece of left over wood that had an unsquare edge that I didn't notice before I started cutting. But was able to save it. Anyone who has made their own cabinets knows how important it is to have a saw that is set up to make perfectly square cuts. I was a sheet metal worker that did tons of layout work and repetitive cuts and bends to make polished 18ga (about .05” thick) stainless steel open edge weld seams. There could not be any gap on weld seams and that type of layout tolerance makes for perfect speaker fabrication. Here's the KG2.2 done.
-
How about the ops results on his veneer fix? Very nicely done
-
I'll try to post some pics of the stand I made, I've used it with at least 20 speakers now
-
As you can see by my post on getting started there's quite a few things that need to be done before anything can get started successfully, once you have enough of those items and are ready to get to it I can help you to get started
-
Or really ok I'm sorry I had no idea I could even change any other posts
-
I tried several times to remove it and you can see how it came through all strangely reconstructed, I had no intentions of changing anything and have no idea how it even ended up there and had to leave it. I thought it my not actually end up posting it like that so I just looked to see and wanted to send a message to the site asking about it.
-
I started typing ”first” and it didn't appear where it was supposed to, I tried to correct it but there was no way to change it, I don't even know how they happened, I, sorry but I had no control over that and still can't figure out how it happened?
-
First thing I found that was needed is a proper stand that you can mount the speaker on. I made one using stuff I had laying around. This is the main tool that allows you to keep the speaker suspended while working on it. It will allow you to rotate it while you work since you cannot set the speaker down on any side while you're working. Once that's built, then plan on picking up an assortment of Sanders, a peanut grinder is needed for tough stuff, I also use a sander an old craftsman 1/2 sheet sander, 4x ⅓ sheet Sanders and 3x palm sanders (all loaded with different grades of sandpaper) I also have a a powered hand planer which I found to be very useful on water damaged wood. Sandpaper grades from 30 to 3000, stacks of each of them 30-60-80-120-180-300-500-1000-2000-3000 seem to work the best. Do not get harbor freight paper or you'll get nothing done, it simply doesn't release the paint from the grit. I also have 4 polishers, small 6” dual action, work ok but I found that a right angle variable speed drill works better than any expensive polishers. More torque, better speed consistency, youll need pads and covers, rubbing compound, polishing compounds pastes ect... Some files, scrapers, plastic spreading tools, Bondo, wood filler. Wood sealer, primer, all sand paper needs to be wet sanding, all paint needs to be lacquer and nothing but lacquer or youll be scraping it off and starting over. Sanding blocks for hand sanding, long straight edges for checking top levelness and straightness across entire surface. Grinding discs, baking soda and crazy glue or finishing nails and Bondo for rebuilding edges. When you get these things rounded up then you can get started, contact me after you have these required tools and I'll help you in another thread since it will be quite involved and you will need 3 more things before you get started, unlimited money, you cannot do this and expect it to be done for cheap, your first time, 1 speaker will probably end up costing well over $300 in paint and supplies, it will cost less as you get better. My first set of big speakers like these was over $500 and 500+ hours of my time. The 2nd thing you need is time, you can't rush it, you need to do little bit then wait and see what happens a few days later, your entire work could turn into cracks or peeling or won't dry for some reason , wood warps and changes, edges bubble up and things go wrong tht you will not be able to predict, lastly you need patience, you can't get frustrated and elect everything to go smoothly, it simply will not obey, you can't give up and expect it to finish it's self, never has, never will. You'll need to read even more than I can tell you since others have done this more than I have, what they did and how they did it will vary. No one way is the best, it comes down to what's available and the condition of the wood. Guitar refinishers have knowledge on working with smaller surfaces using different techniques that also need to work on rounded surfaces, there's a bunch of info in those forums. Many things they do doesnt transfer to larger objects due to cost and time. They may restart 10 times and use paints that coat a fortune to cover a smaller guitar body, each time you restart a speaker you just spent $100. I can point you in the direction you need to start but youll have to put in the hours of trail and error to get anything done.
-
Sorry.
-
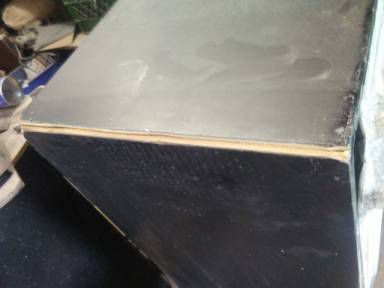
I used a peanut grinder along that entire edge on all 4 sides and down the back edge where water ran repeatedly, probably from a wife who had plants on top of the cabinets before they were put in the garage where or basement until it flooded and really took a toll on the cabinets. They didn't appear to be that bad until I decided to black Lacquer them and after pealing off the veneer using just my hands I knew I had to get the perfectly level and flat across the entire surface on each side. I placed a large framing square on the side and was checking for square to the top and saw that the wood was cupped about 3/8” from top edge to bottom. The square was touching the top seam and bottom seam but had 3/16” gap in the center of the front side edge and when I placed it corner to corner (top front to bottom back on the side piece) I had 3/8” gap in the very center of both sides. The back edge only had 1/8” gap since the back edge was swollen similar to the top and bottom. The real issue was the bottom 2 inches or so was swollen out the most. The center of course had no swelling, as I worked on flatting the sides I also built up the center a bit. On d I was done with the sides I started on the bottom and I got it pretty good all the way around and Eve had a number of layers of black sanded smooth. But I noticed when I sanded along the back bottom edge I heard a different sound. I tapped on the wood and it sounded hollow. Now I wAs nearly done sanding and was ready to start clear coating, which means I was only a few days from completing. I took a screwdriver and poked it around that area that had the hollow sound. I finally drove the screwdriver into the surface with a hammer ready to fill the void with wood putty. After I was done chasing the bad wood and gouging it out as I went along the path. I had a 3/8” deep gorge that was 2 to 2.5” wide across the back edge and halfway up one side where it tapered off and no more bad wood was coming out. I took pictures of it. That entire area had to have a piece cut perfectly to fit into that gouged out area. It took a day just to fit those pieces in and refinish that surface just to end up stripping the entire speaker and started over from square 1. That cost $100 and 2 more weeks work to get it back to where I was before. Each restart cost $100 in paint and supplies. I have it figured that a speaker this size will cost a minimum (if all goes perfect and it has never yet) of $125 to mirror finish black lawyer 1 speaker cabinet. With no less than 150 hours of labor. That set ended up with 500 hours labor because I used the original cabinets. Had I fabbed my own (which I considered a million times in my head and decided to keep them original) I could have done it in half the time and half the paint and supplies, but they would no longer be Klipsch Heresy's. Particle board or similar wood is very difficult to seal once it's been loosened up by dents or water. The fibers swell when paint hits it where the damage is. It goes in a vicious circle chasing the swelled area until you finally get rid of it, that's what you see in that shot and this is what I had to do to get everything back under control, after it already had 25 coats of black on it. It took about 15 tubes of crazy glue added drop by drop with baking soda tossed on top of the drops to freeze it in place. After a few edges you get the hang of it and a seam can be done in an hour or so with perfect results, that edge is stronger than the wood and that seam is now 1 solid piece, there is no line on the edges of these speakers. Then the bottom issue popped up. That's why I say do it right the first time and grind all bad spots all the way down to solid wood before you do anything. I learned the hard way that you can't just cover it up. Bondo will break loose with your fingers if you try hard enough, you'll never get the crazy glue to come off, it soaks into the wood and it actually smokes as it does! You can put some anchors in the area to help his the Bondo in place, a few finishing nails with the heads sticking out a bit will offer more reliable grabbing but Bondo isn't very strong and cracks easily when it's over 1/8” thick, it also doesn't always set properly, it's difficult to keep in place and droops after it's applied and gets everywhere. I found it very hard to work with no matter what I did I only have about 30 seconds of work time and found myself scraping it back off with a knife because it won't sand at all. I used a special file that looks like a cheese grater and I was still hard to work with.
-
I think the pictures will say it all, just be ready to put some time and money into them.
-
I did complete resurfacing to a pair with this same damage and I can tell you right now that the repair is much more extensive than a simple patch or it will look worse than if you just left it alone. I went for the strongest most durable repair possible and I have tried basically all wood putties, Bondo, glued wood pieces in place of chiseled and ground out notches, I found the best to be using crazy glue with backing soda built up over the damaged area that has been ground down to a stable base . Meaning any flakes or loose materials need to be removed to have a non affected base that has all the original properties of the original wood used. There is no short cut, you will need to completely veneer the entire speaker to avoid making it look like it has been repaired. Anything short of this will simply draw more attention to the repair and if you're going to spend my time doing this you might as well do it right the first time.
-
I have a set of unmarked speakers that have very similar looking cabinets but they have a Brazilian soft dome tweeter and a 5.25” woofer with a passive radiator on the back. I had the laying around for years before I finally tools closer look at them and made new grills and made a new radiator. They have a crossover that looks like it could be either a simple factory or a home made that was well done as far as how it looks, covered with glue. They are decent sounding but are not good with any real power, maybe 25w, with minimal bass expectations. They are nothing compared to a set of Infinity RS125 that I paid $10 and refoamed in 10 minutes with $1 foam pieces I had laying around. I bought a ton of foam last year from Amazon before the seller's all jacked up their prices. I also have a set of obviously home made small sized speakers with Peerless drivers and huge crossovers Iike these, 2 ways but have Peerless k 4 inch woofers and paper tweeters. I would take a look for a set of good speakers that have bad tweeters and make new cabinet based on the woofers needs and see how they sound when the woofer is allowed to run up till natural roll off, you can always limit it if needed, you could try any woofer that's 8” or larger since you have a mid driver, I would consider a decent paper 10”. I have a few that came out of organs that are surprisingly well made, even an old zenith allegro 10” driver might work out nicely. They made a good woofer but not much else, can be found for cheap. Most people who are trying to sell organs will simply give them away if you come and pick them up. I had 4 lined up to pick up for free within 5 miles of my home, took 1 day to locate and set up pick up times. Retrieving the drivers is easy, getting the rest of the organ in the dumpster usually takes some time to tear into smaller pieces. They tend to use the same speakers in a bunch of different manufacturers organs, CTS were popular (alnico magnets) you'll find (paper cones) 12” drivers or 2x12” in many organs with an 8 or 10 on the spinner, all are excellent quality drivers. Although many tend to think that those drivers are more for guitar amps, there are more that are designed closer to home speakers than not. Example is the old Omega brand speakers (I believe they were made by DLK) that used CTS 12” woofers, exact same as used in many organs in the late 60s and throughouth the 70s. You might even get lucky and find some high $ speakers that were part of some of the best organ systems that have separate speaker boxes using 4x 12 or even 15'” or 18” woofers. Plus there will always be drivers inside the organs as well. You'll find the top brands like Hammond are harder to find for free, but they're out there, just have to keep an eye on ads and after 6 months to a year without any sales is a good time to offer free disposal. Another source I have found is console stereos, some used higher quality wave guide horn tweeters and 12” or 15” woofers, finding broken units with frozen turntables and wont turn on can result in free pick up as well. Not everything needs to be bought new when there's so much all around you that's being tossed in the garbage out of convenience.
-
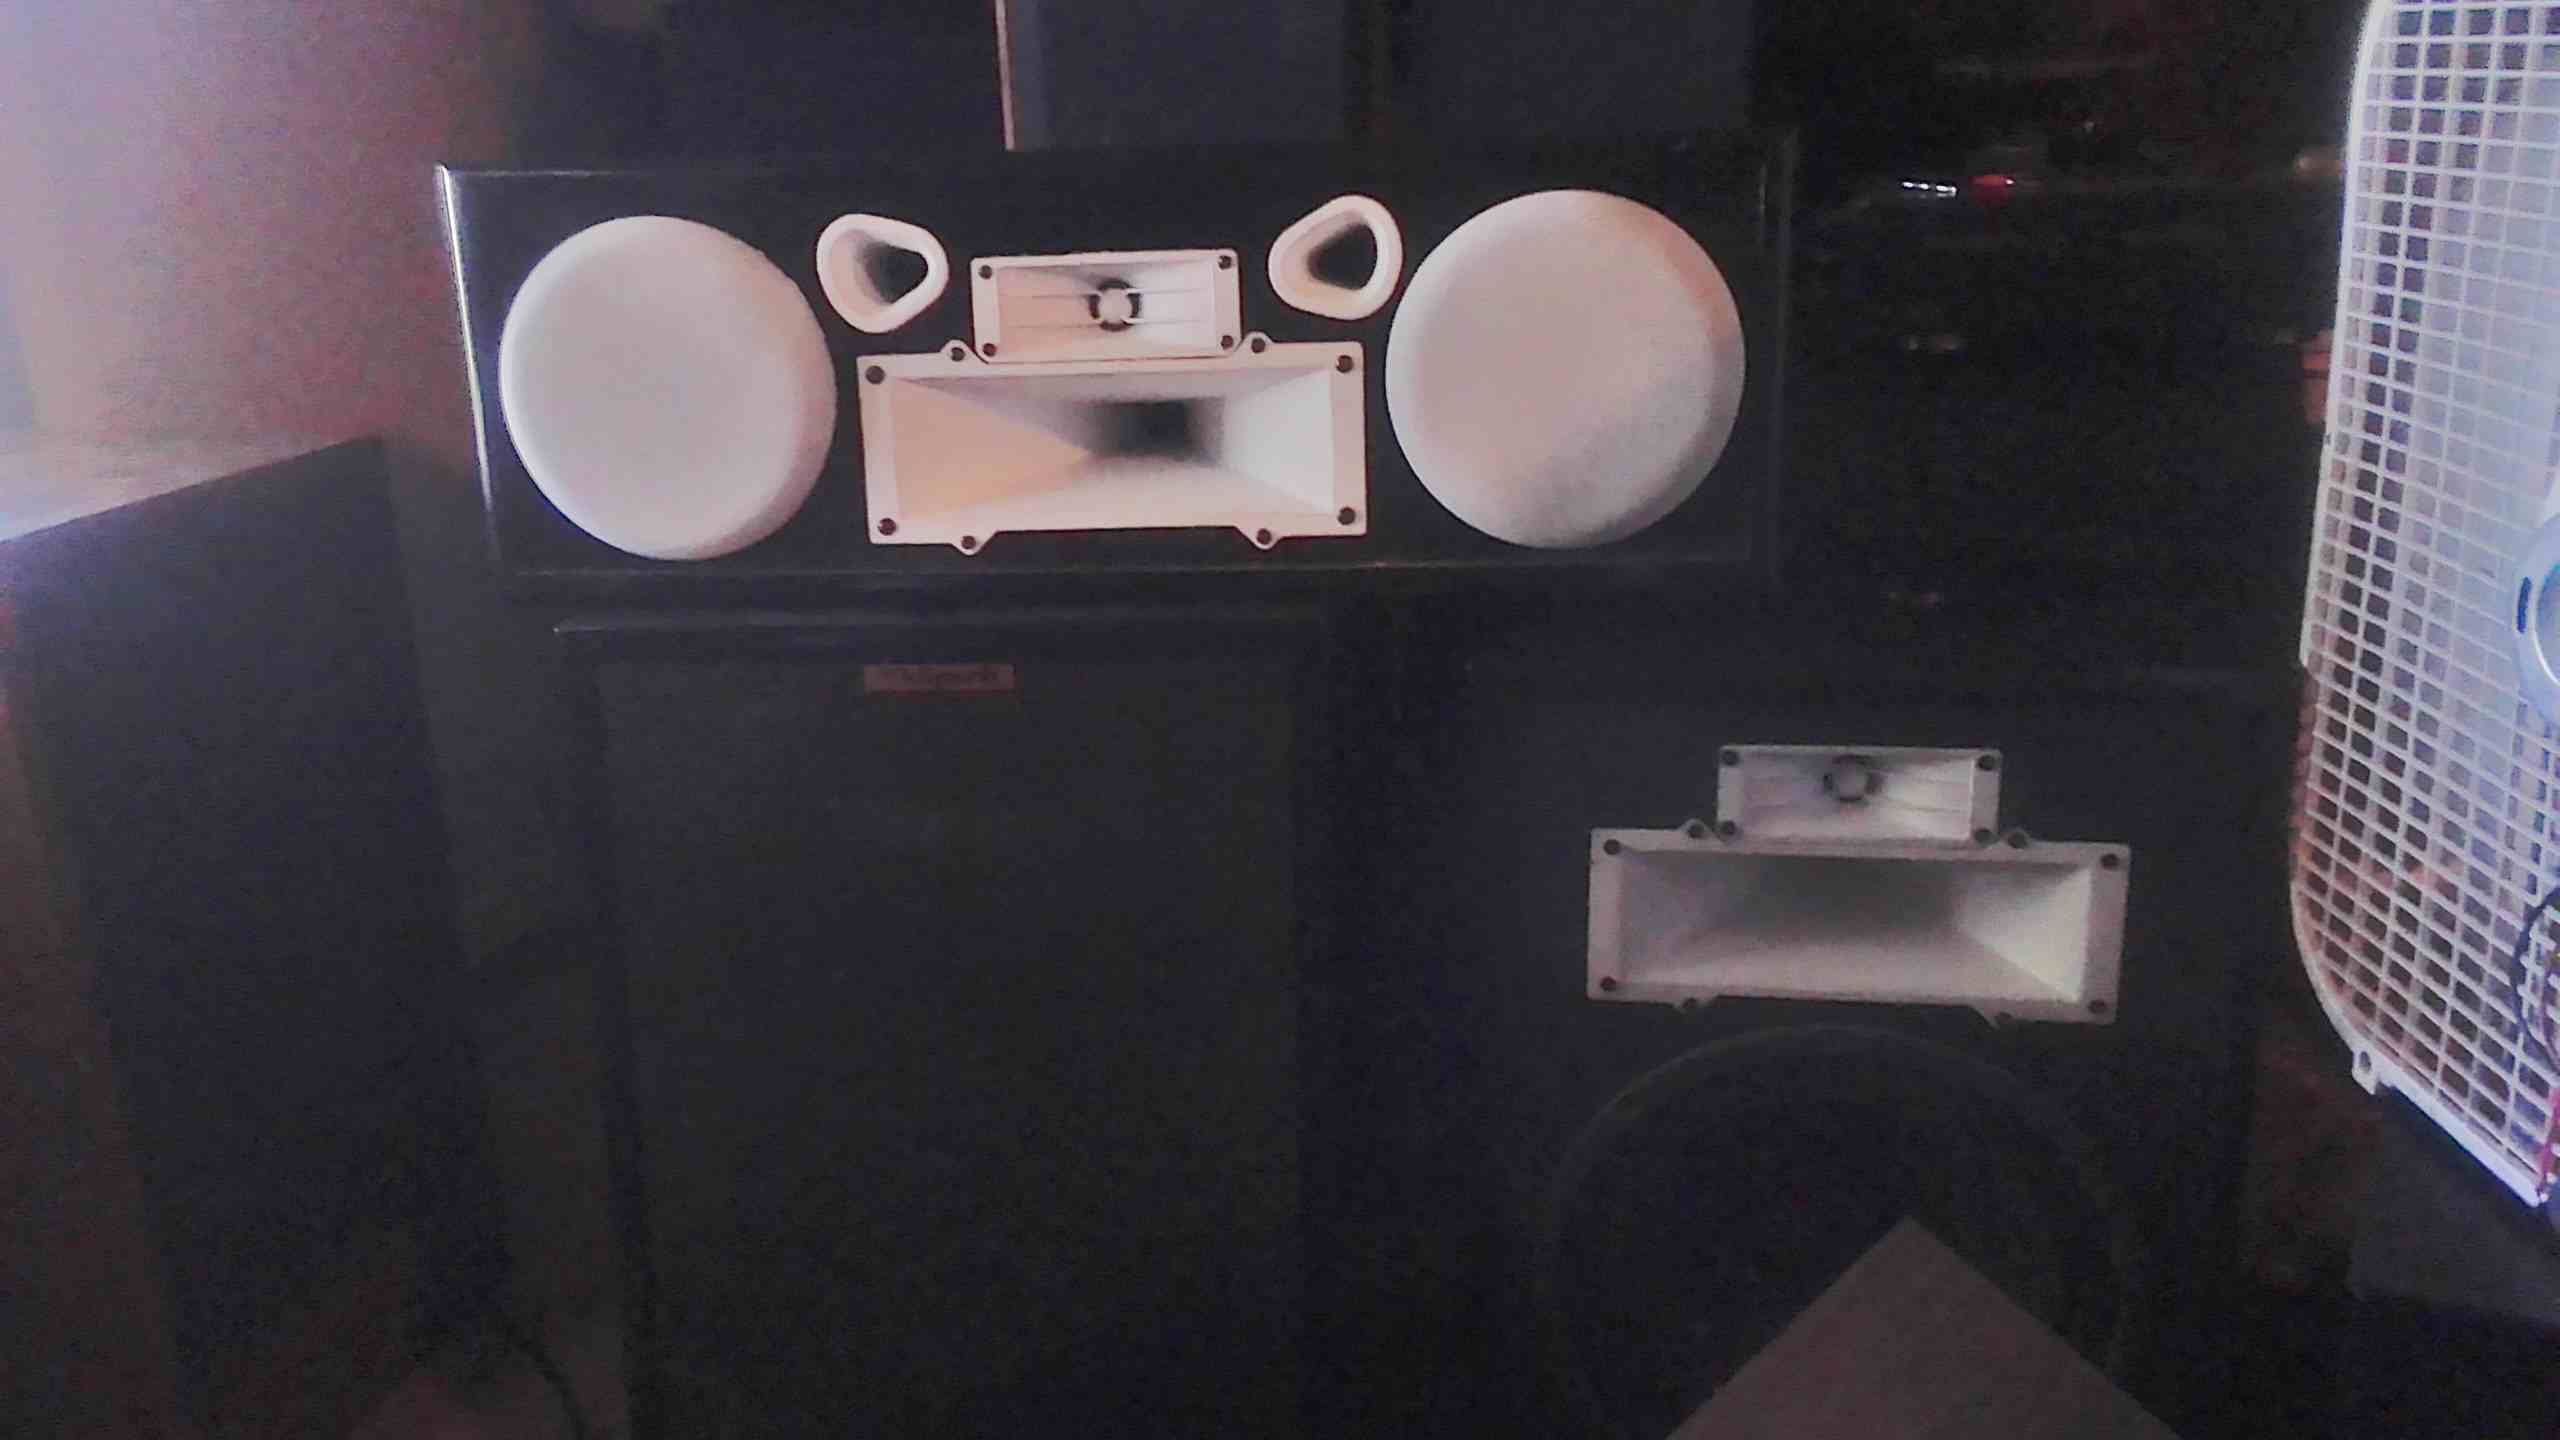
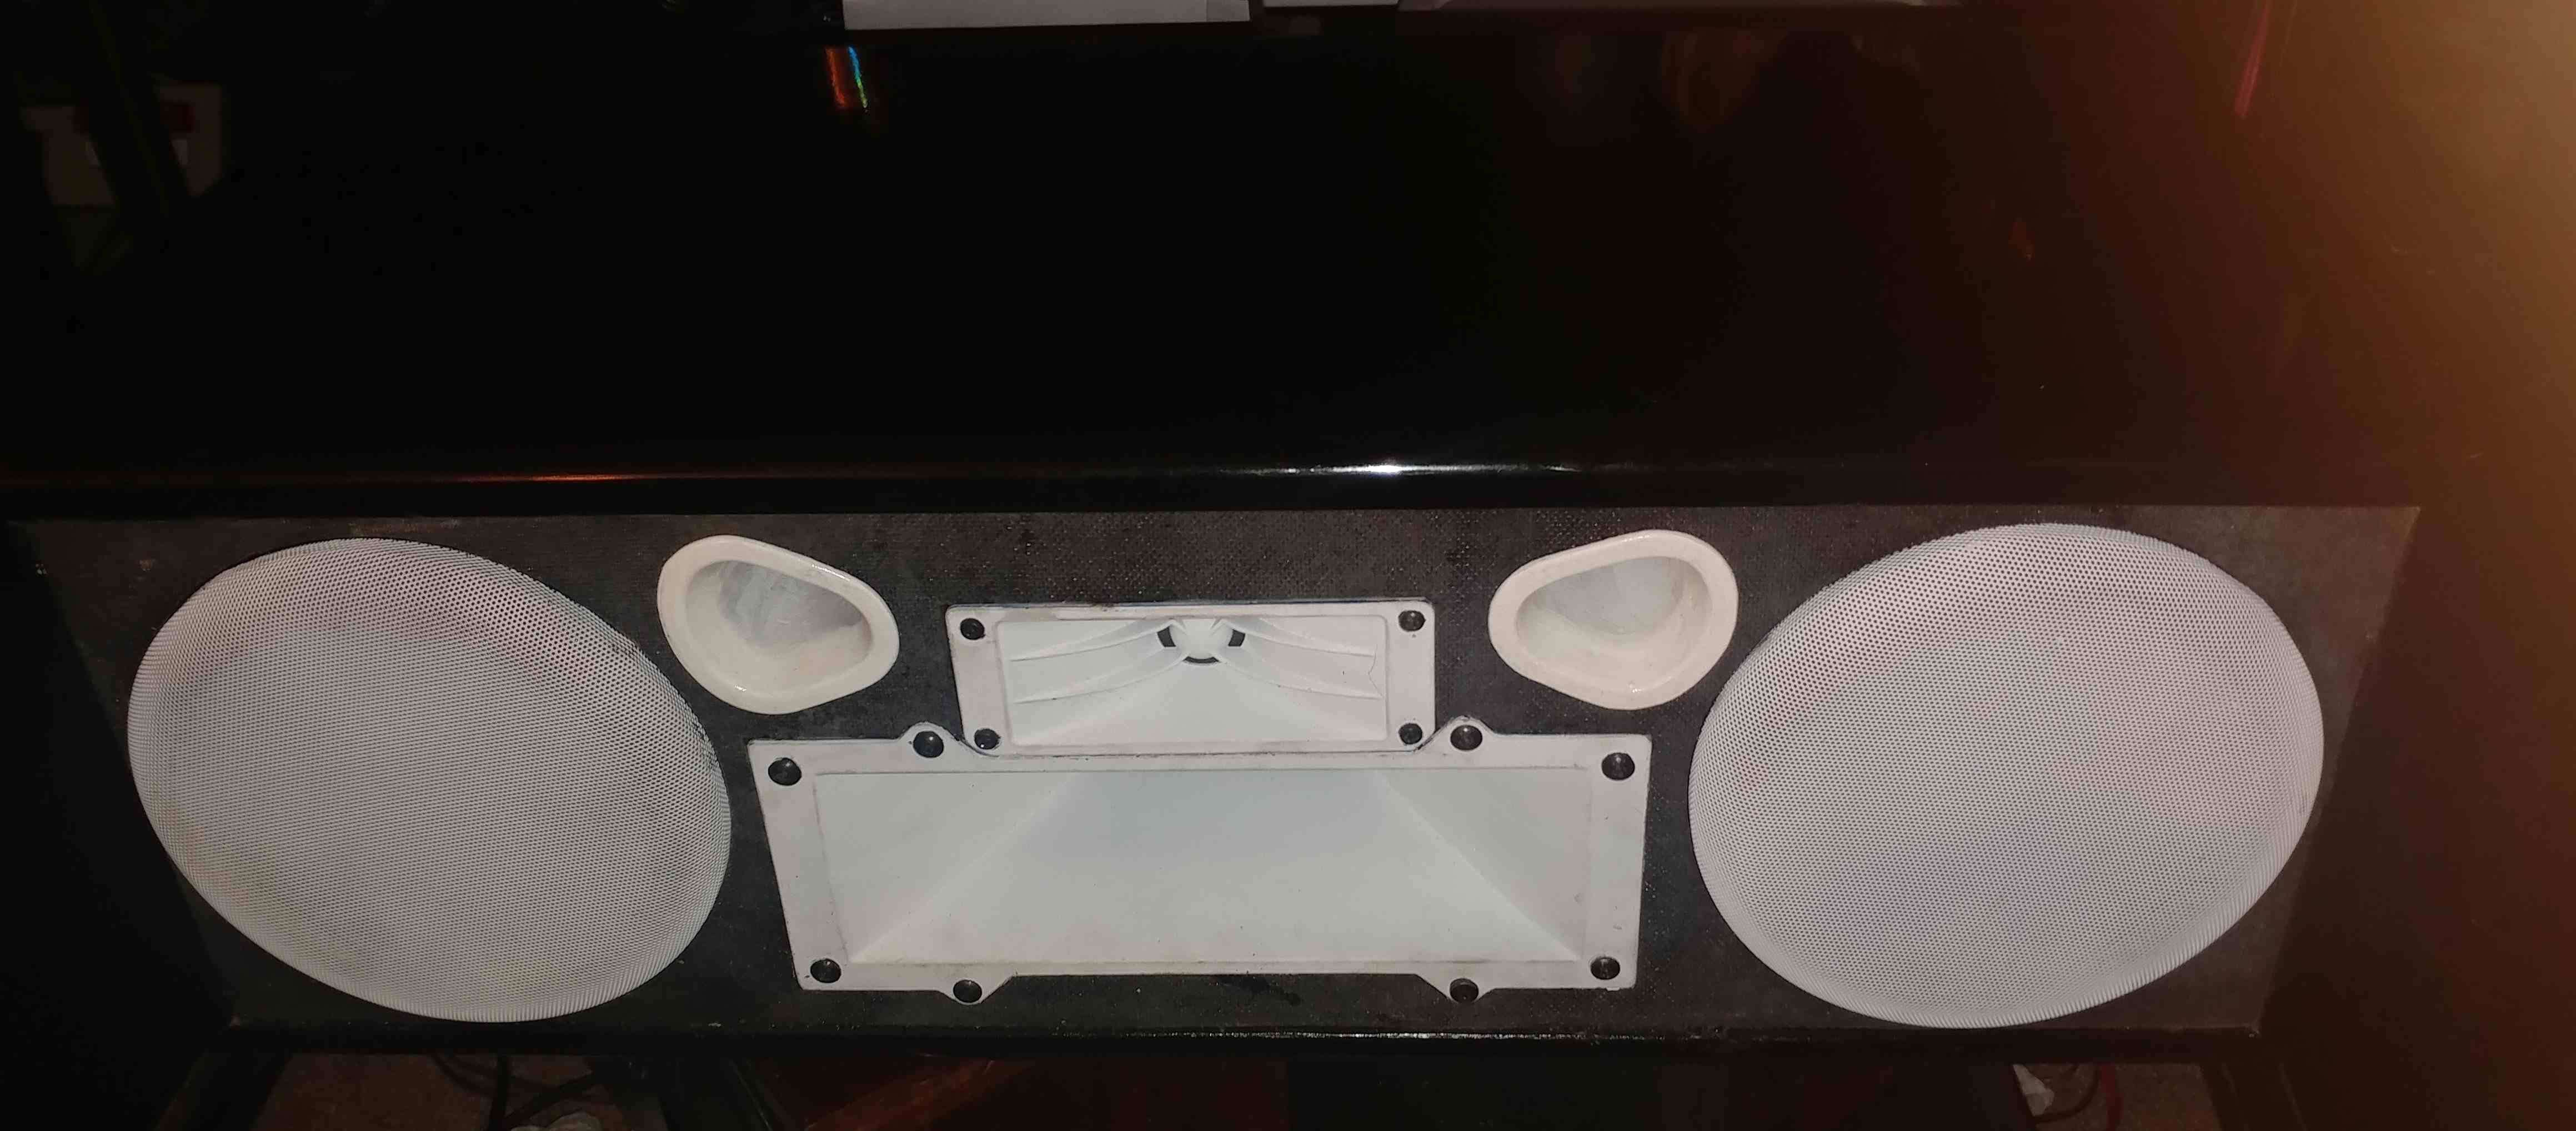
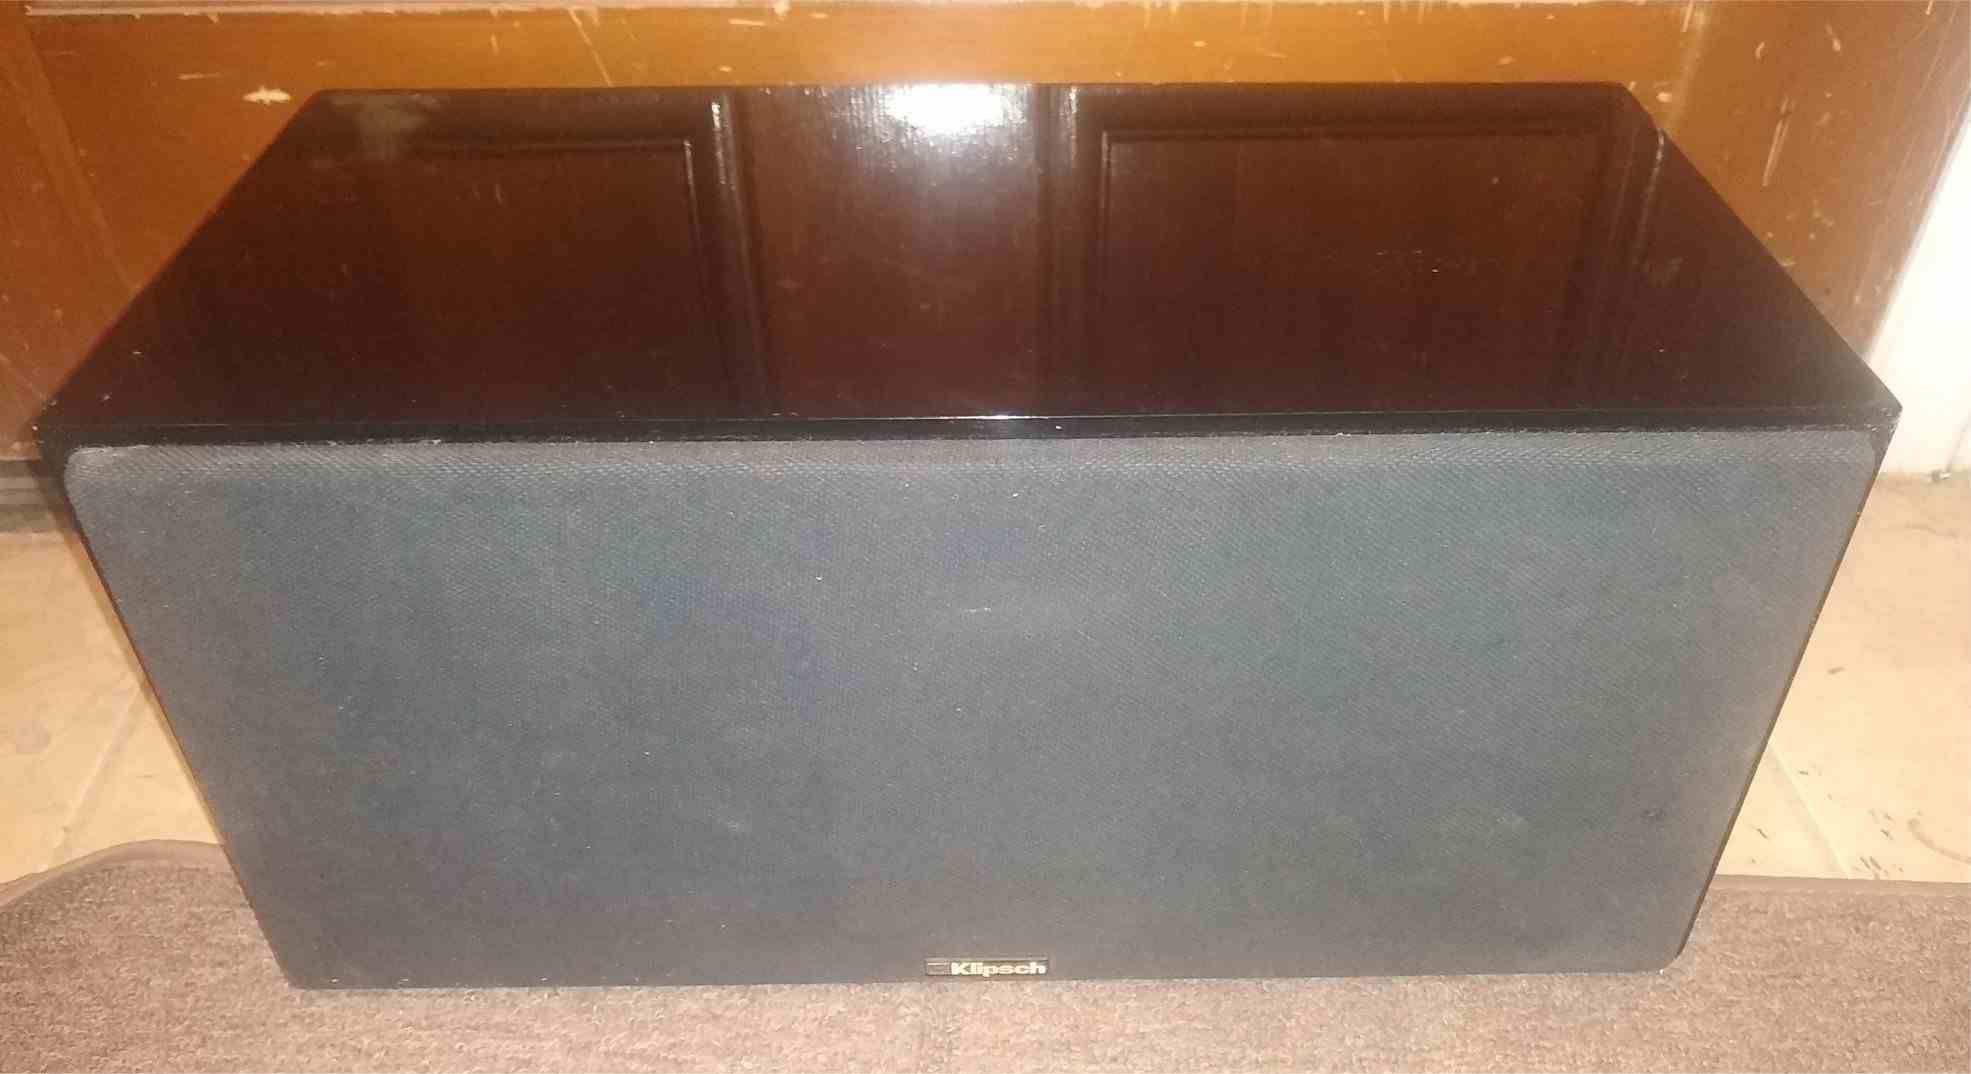
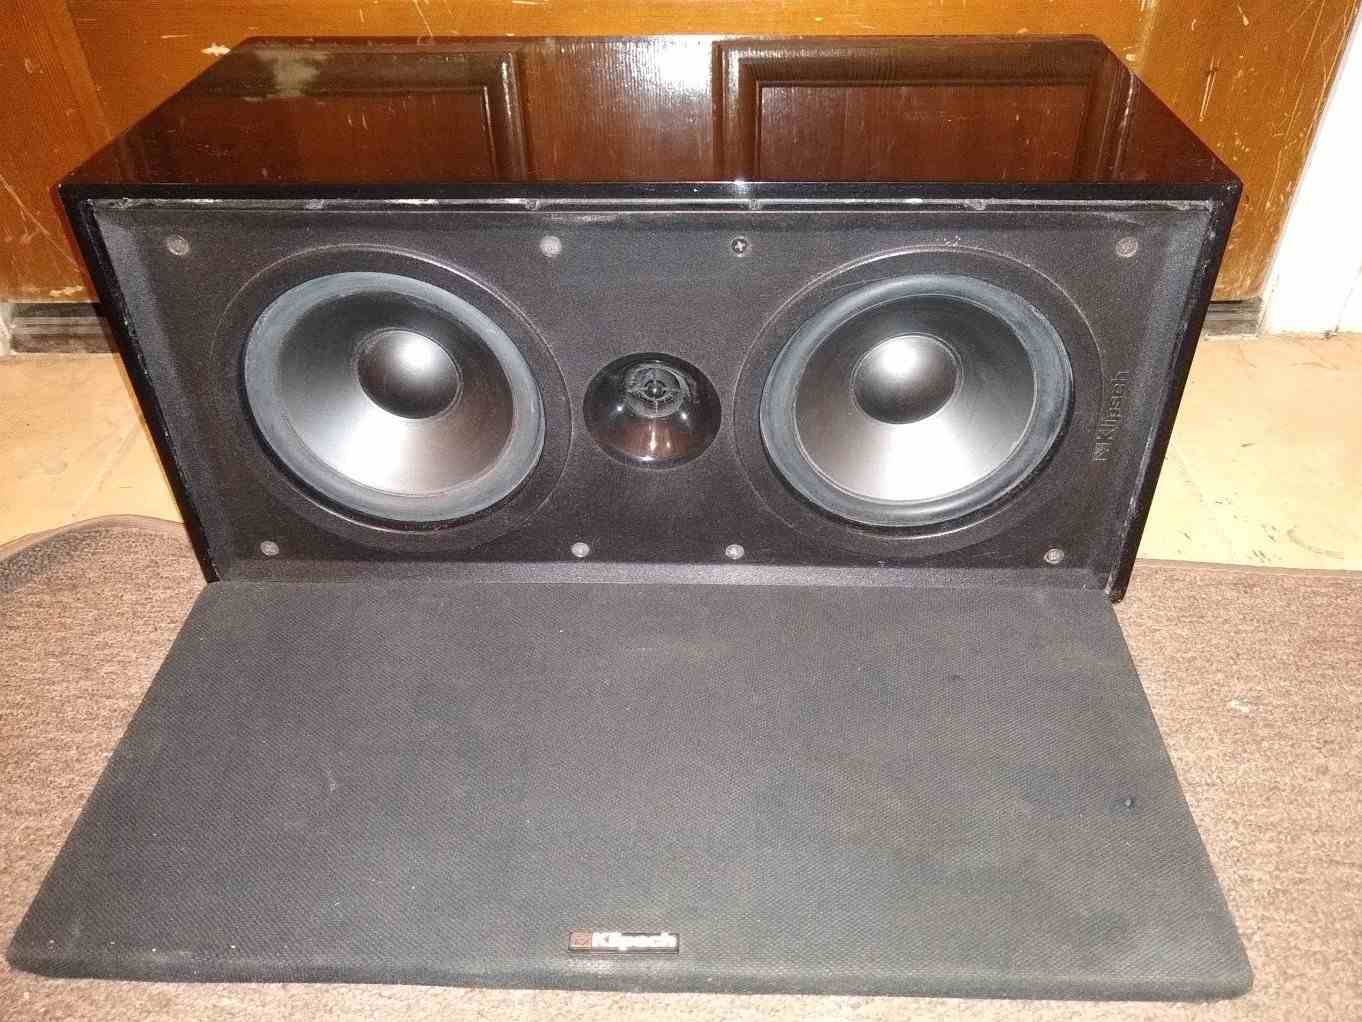
I had a set of series 1s for 10 years or so, cabinets had typical pealing veneer, water damage to top and bottoms. I originally had plans to black lacquer them and once I got started I realized that there was much more to it than expected. So I did what everyone does and just left them black with grain showing. After redoing several speakers in black lacquer over the years, I decided to do a set of series 2 that were in bad shape and did a complete money no issue type restoration that included rebuilding the corners edges and seams with a much more harder material. It took a good chunk of time and money but they turned out great. So after I picked up a 3rd series 1 for $30 which had a terrible cabinet and what I found later to be a water damaged but still working woofer, I decided the next project was to fix the bad job I started 10 years ago and turn the 3rd one into a center channel. I also came up with an unusual themed look for these 3 speakers that would set them apart from any other set in the world. I always figure that there's no sense spending time on anything if you're going through the trouble you might as well make it your own creation. A simple veneer job will never be a project I would be planning. I would have a hard time getting excited to do it knowing it will end up looking like so many other thousands of speakers that are out there already. I want mine to be recognizable as my build just from seeing a picture from 10 feet away. After much thought I had to improve on the original design by removing a few of their weaknesses or slight imperfections without losing the original sound, since they were going to be stripped and I had full control. I felt the best way to start was to move all driver's to the front of the motor board to remove the diffraction that was part of series 1s problems. Not only the diffraction at the edge of each hole but at the cabs front edges. They needed to be rounded or mitered. I chose rounded which may be the harder of the 2 since the paint was going to show any tiny defects. I opted to work with all original parts once again for the 2 mains which meant completely grinding down all sides to get a perfectly flat and true surface on all sides of the cabinets. Removing any cupping and maintaining edge thickness around the front was crucial. The way that the series 1 are built has the motor board screwed to backing strips (¾“x¾” blocks of plywood) that are stapled around the front inside edges (definitely not the best way to build the cabinet since they offer little strength and lack ability to seal air tight) and they are not cut to be precise leaving gaps at the corners and do not offer an airtight seal. So all seams and connections were sealed with glue and large gaps were filled with Bondo to make them air tight where glue alone could not fill them. The next issue was the drivers themselves were not made to be front mounted, the casting was made with the side flanges were thicker in the middle than at the edges. This raised area made a V shaped flange on the back side where the seam was and made them not able to be mounted without possibly cracking the the edges of the flanges and also making it difficult to seal and mount evenly. Both the tweeters and mids displayed this casting issue. They had to be filed flat so all 4 sides were level, this took much more time than expected to end up with perfectly flat flanges. Moving the drivers in front of the motor board gained some interior volume, I also moved the tweeter down closer to the squaker, originally I did this to get them to blend together better and for looks but later realized it was a necessary in order to be able to mount the tweeter without the magnet hitting the backing strip. I had to make the drivers appear to be inset into the board without actually cutting away any material. It also wanted it to have a very original look, a new texture that would make the entire speaker look as if it was made to not be covered up and hidden from sight. I then carefully cut pieces that fit like a glove over the drivers. Great care was used during the trimming of the new cut outs. There's a 3/16” strip of wood left behind the front trim piece between the tweeter and mid just so they seal tight. The tweeters corners were ground to fit inside the mids. Foam tape was used to make airtight seals. The painting part was no longer as difficult as I had seen on other speakers, the plywood had a better more solid foundation that was much easier to seal especially on the edges. I found it did not need to be ground away and rebuilt as the series 2 cabinets needed. They did have their own set of challenges that needed to be addressed but there was much less ”redoing” as I progressed in comparison. The center channel needed to be completely fabricated and I drew up a plan for 2 designs, 1 would use a pair of 6.75“ DCM 5.5 ohm dual voice coil woofers and the other was for a pair of 10” woofers single 16 ohm voice coil or a pair of 5.5 ohm dual voice coil. The 10” just called for a cab that was going to be quite a bit larger just to mount them. I went with the DCM and packed everything in tight as possible. I also made the cabinet to fit around the motor board. Grooving the sides and notching the front to make a tight dato fitting that could be glued airtight during assembly. I had a piece of 3/4” 10 ply veneered plywood that was big enough to make the cabinet no room for error. I did the same front mounting and covered the front with the same textured hardboard 3/16” panel, cut to fit exactly as possible. The ports were from some speakers I tore apart and tossed, I had 2 sets of them no idea what they came from. But they needed to be modded as well to flare the opening and make them smooth. JB Weld did the trick, I have plans to cover the 12” woofers with a similar metal grill but haven't found the right one. It has to fit directly on the edge of the basket as the smaller ones do. I cannot have a frame under it or anything that's larger in size since it has no room available with the front cover cut exactly to fit. I may have to make my own by hand. The sound has greatly improved even better than the series 2 by a long shot. I did have to move the autoformer settings for the center channel and added a 15 ohm 10watt resistor in parallel with the mid to smoothen the response. The overall look was exactly what I was looking for and the bonus was the much improved sound. I think I have made a near perfectly timbre matched center with the most unique look possible, all pieces are mirror finish black lacquer (that has become my finish of choice on anything I do now) just to make sure that these will stand out as another one of my creations and very less likely to ever see another in existence. This set of 3 has been named the ”Tiki Series” the mask of the warrior is a very close rendition of my final creation.
-
- 2
-

-
- black lacquer
- center channel
- (and 3 more)