ngen33r
-
Posts
166 -
Joined
-
Last visited
Content Type
Forums
Events
Gallery
Everything posted by ngen33r
-
R-110SW / R-112SW / R-115SW Repair Blog
ngen33r replied to ngen33r's topic in Technical/Restorations
R-115SW plate serial number LK162600399 On this amp the power would not stay on. There were some burned components and one of the capacitors almost achieved liftoff. I would guess it went with a bang and at a minimum scarred the hell out of the cat. All of the Ketuo (how do you even say that?) caps were removed and promptly launched into the garbage bin. The resistor achieved meltdown and was replaced with a flameproof safety resistor and spaced as far as possible from the new caps. The fet was also replaced and spaced higher off the board to help with cooling. This is a classic case of subwoofer left powered on 24/7. 5W of power at idle is 5W of heat inside a closed chamber with no air movement. Turn your equipment off when not in use or if you MUST be lazy, install a smart outlet that at least powers off when you are sleeping and working. Some silicone to secure the parts and this one is completed.
-
Hello All I have been repairing Klipsch subwoofer amps for about 15 years as a hobby. I have decided to start blogging my repairs and eventually do videos of each one. This thread is intended to be a blog and a resource for information. I will try to answer repair questions as best I can. Comments and tips are also welcome, If you do not have the experience or the tools, PLEASE do not attempt any of these repairs. You will only end up damaging the board and it will end up costing more for a tech to repair the damage. If you do not have a high quality vacuum desoldering station (Hakko or Weller) and a current limited mains supply, you should not be working on these amps. These subwoofers do not have any user serviceable parts inside. If you open up the sub or attempt any repair you see in this thread, you are doing so at your own risk!!! The main issue that I see with these is a thermal failure. The parts were placed too close together and since almost everyone is too lazy to switch them off when not using them the capacitors just cook and then things start to burn up. ALWAYS REMEMBER TO UNPLUG OR SWITCH OFF YOUR AMPS. CAPACITORS HAVE A LIFESPAN AND WHEN POWER IS APPLIED THE CLOCK IS TICKING. THE AUTO ON/OFF FUNCTION DOES NOT PREVENT THIS ON MOST MODELS!!!!!!!
-
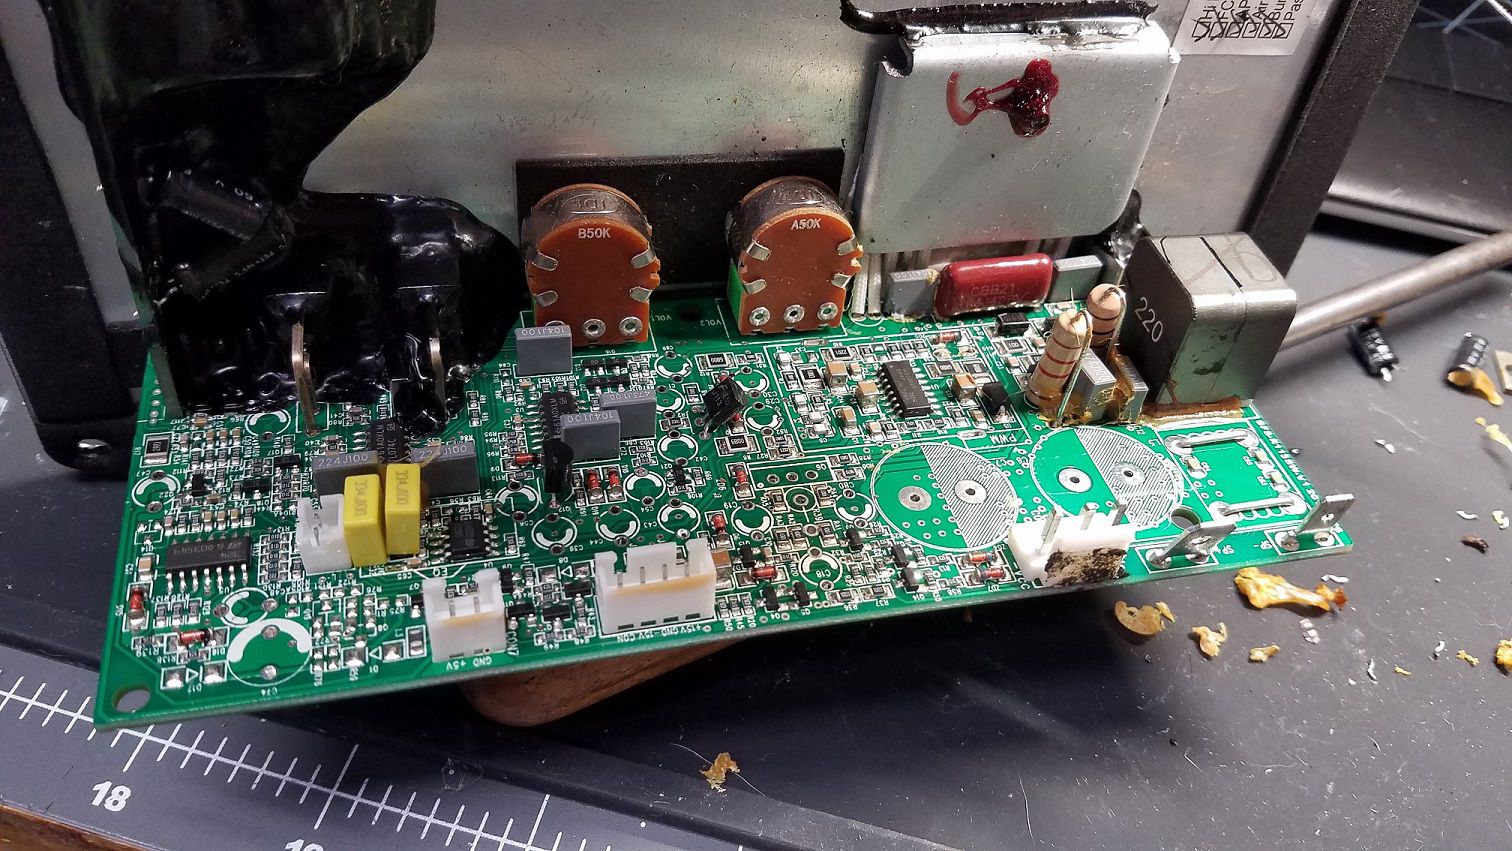
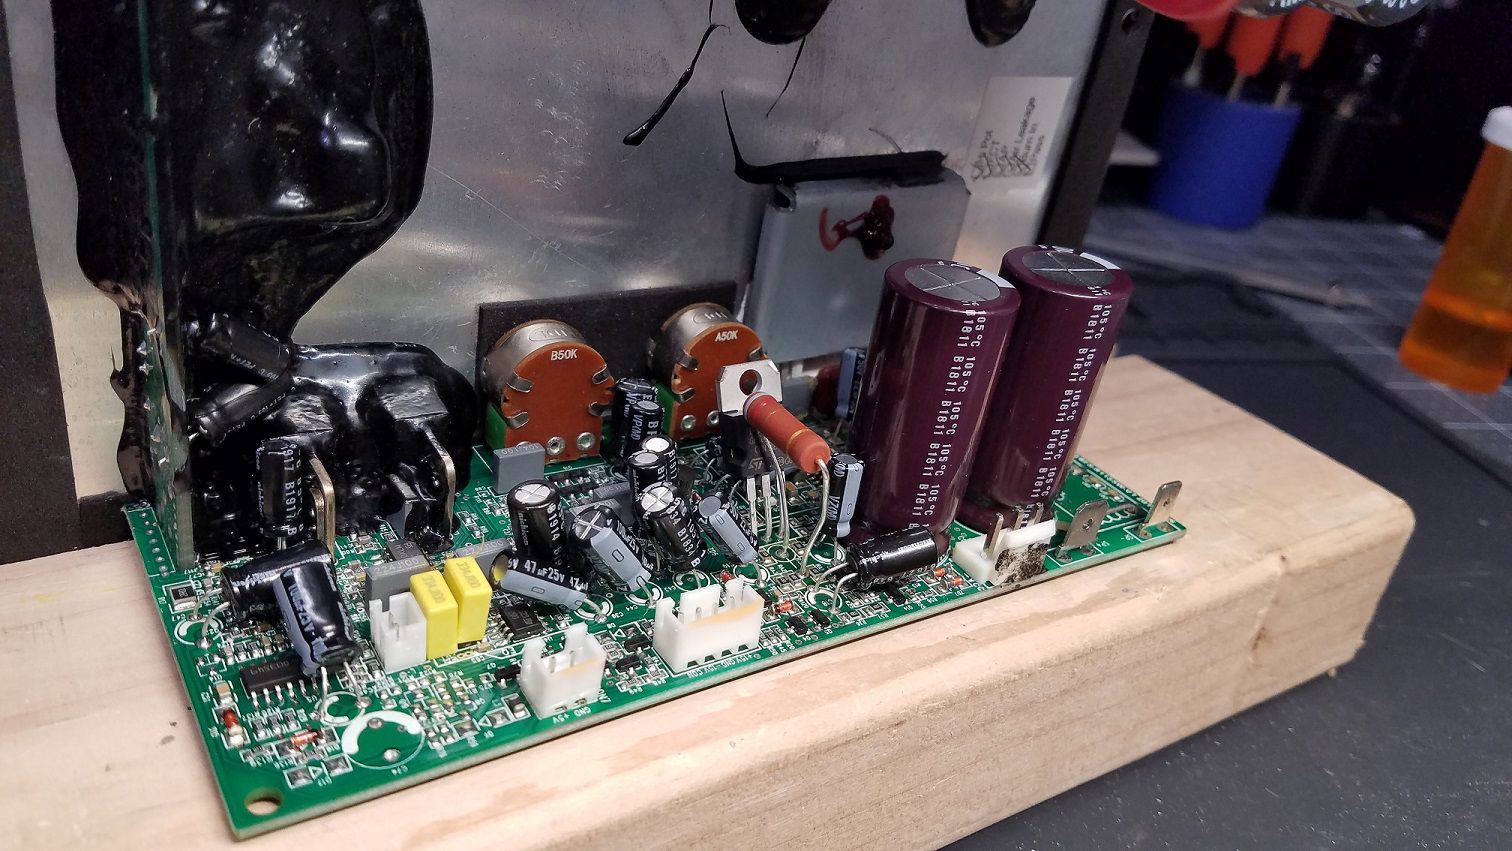
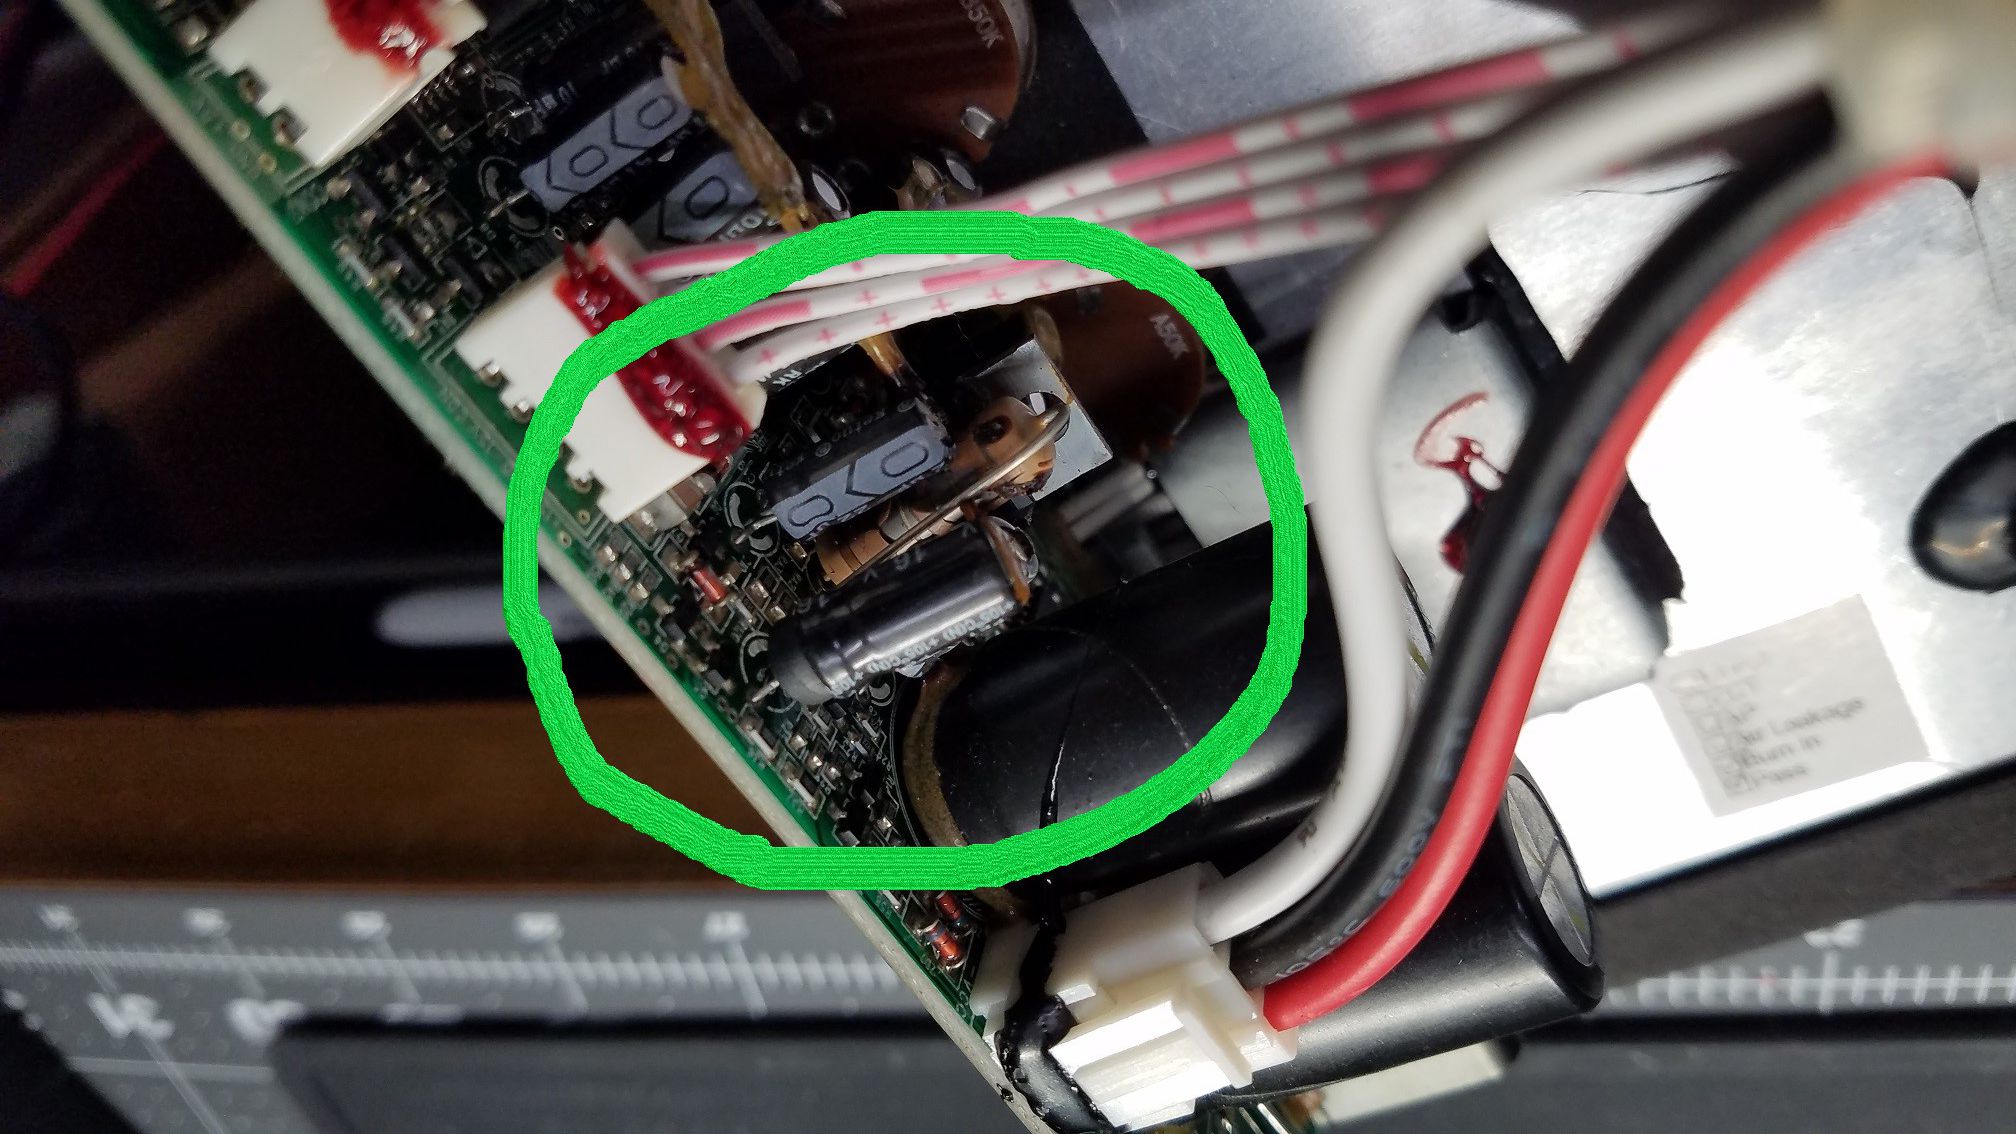
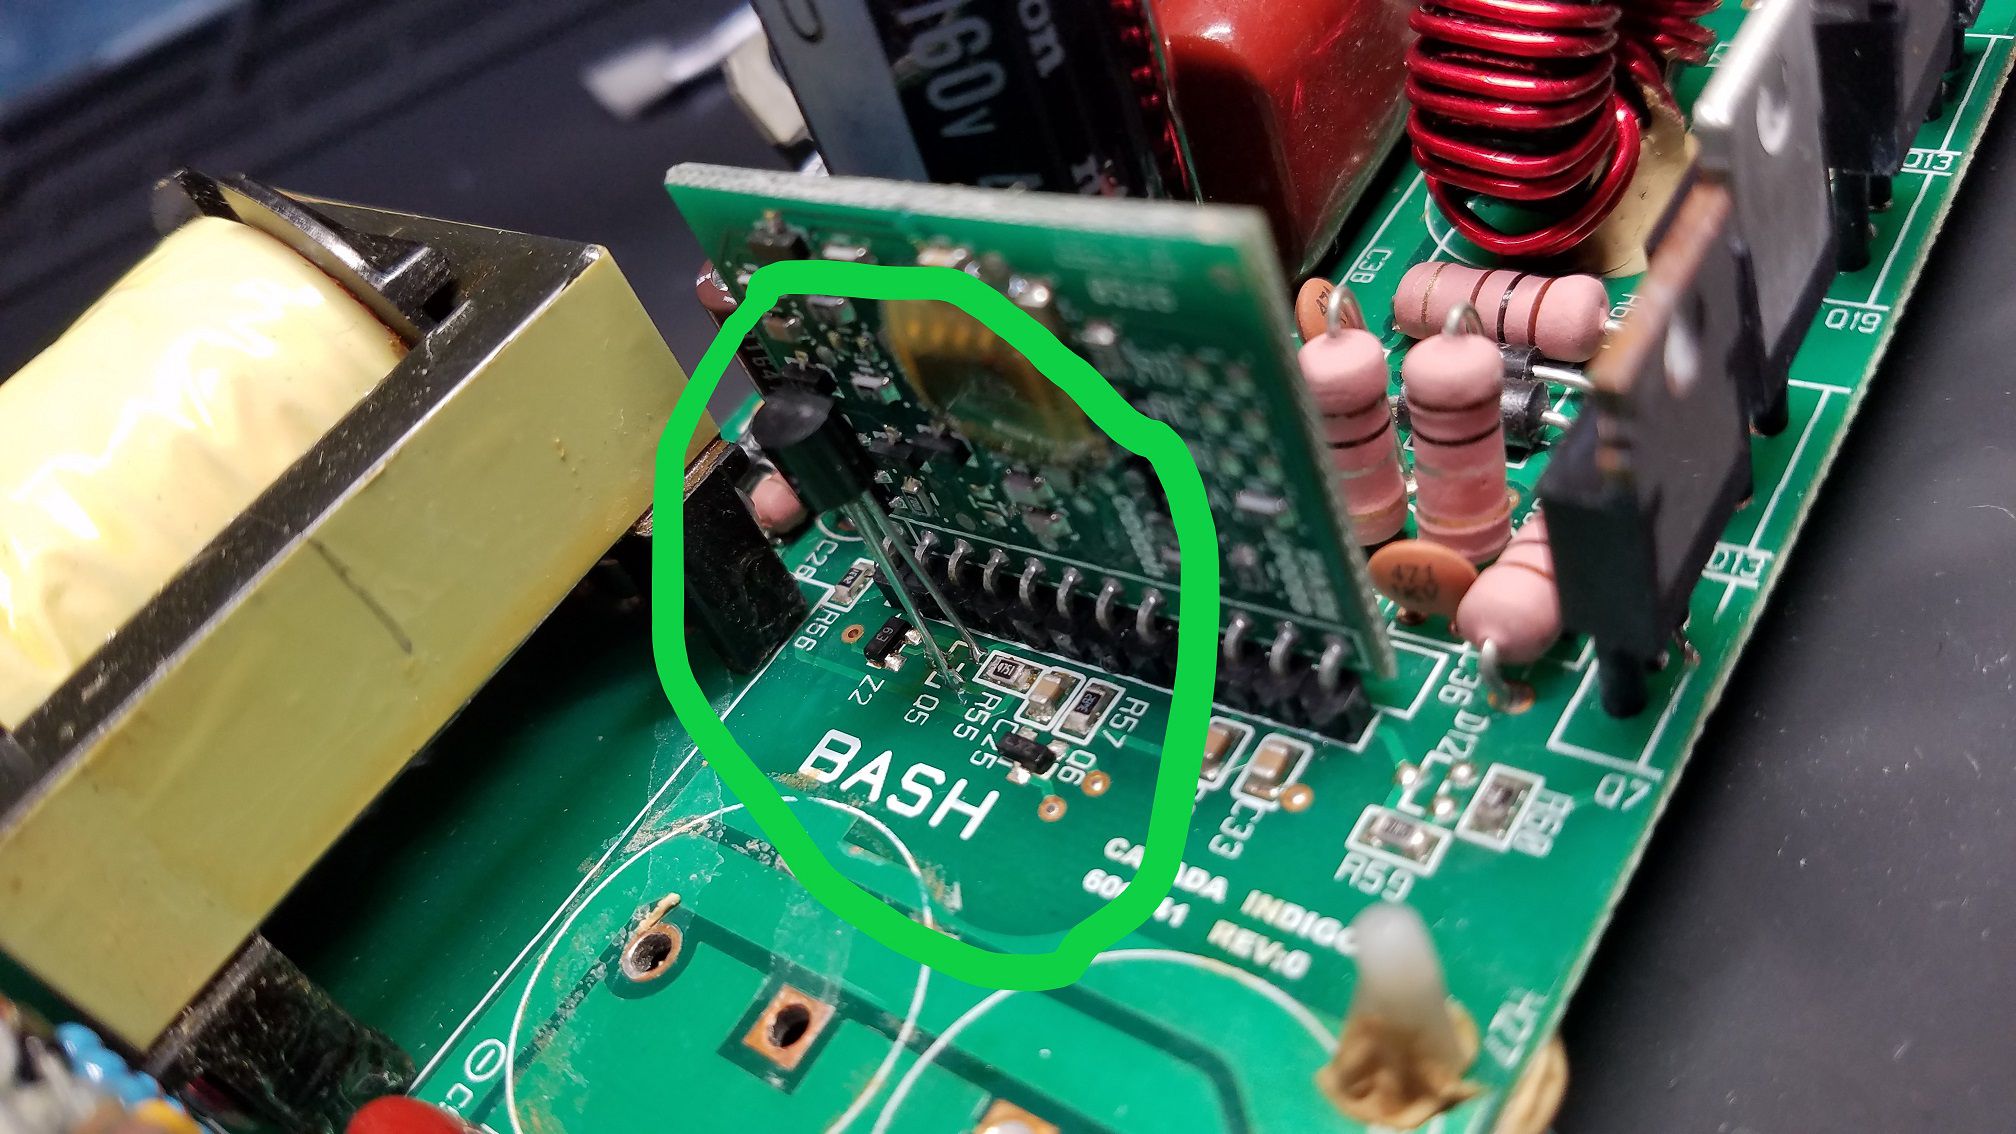
SUB-10 Plate serial number 06230172 This amp also power to the secondary side of the transformer. The +-15V supplies were stable, but the outputs did not have power. The BASH module was not working. At idle the rails should have around 5V across them with the volume at 0. Pin 5 of the bash module should have around 12V between pin 11. This module has the full ~90V rail voltage on it so don't poke around with the power on. Q5 was the issue and replaced with a TO-92 2N4401. From the heat generated the trace lifted of the board but I was able to carefully remove the part with hot air and epoxy the pad back down. This repair also got a blob of epoxy to secure the legs of the part from stressing the traces. A full recap of the power supply was done , also all the bad glue removed and it is good to go.
-
I have not worked on or seen one of those yet. If it is a BASH amp, you can be sure it is a glue or capacitor issue.
-
SUB-12 Plate serial number 06310349 This amp had no power. The PDC board was shorted, which blew the transformer drive fets and was causing the fuse to blow. The PDC was removed, cleaned and repaired. Q5 was upgraded to a 2N4401 and the amp was fully recapped with Nichicon caps. Gotta love those JUNFU capacitors. It's fun to say, but that't about the only good thing about them. The SUB-12 amp is my favorite BASH (Klipsch) amp, even with all the issues they have. They really put out a good amount of power. It is a good idea to silicone the replacement parts in place. You don't need to go crazy but it helps to have them secured.I use GE silicone 2. Q5 definitely needs to be secured at the head and also over the pads and solder joints. Epoxy over the solder joints would probably be better, but the silicone works just fine.
-
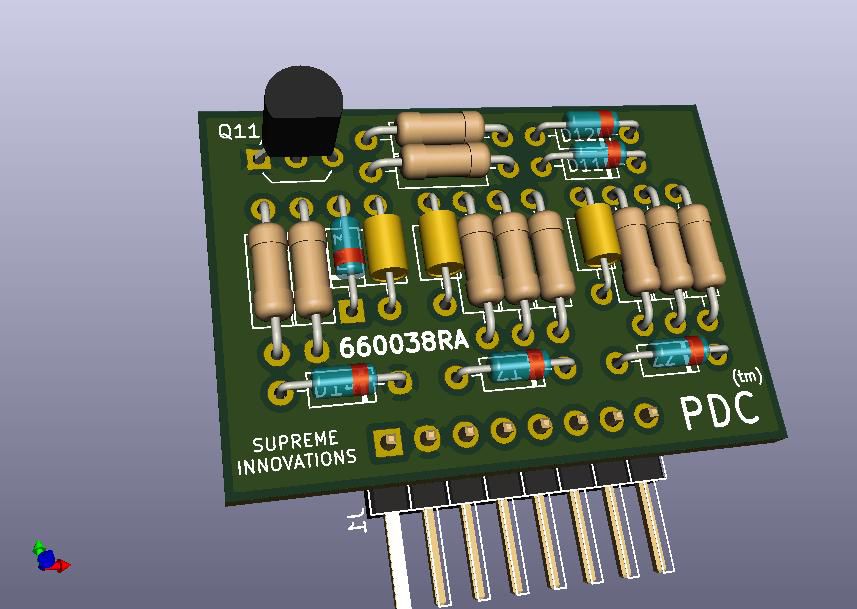
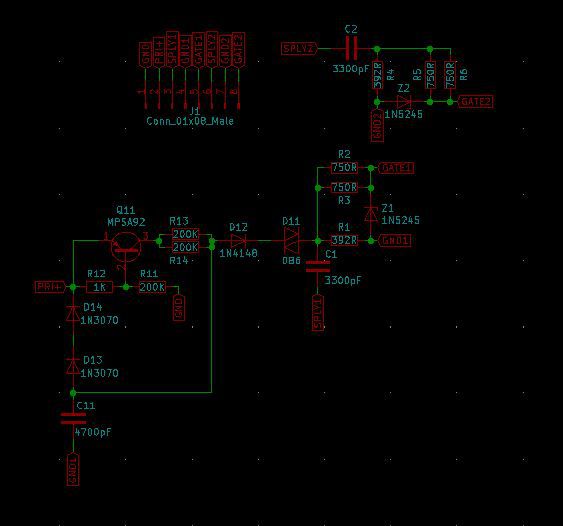
Hello All I have been repairing Klipsch subwoofer amps for about 15 years as a hobby. I have decided to start blogging my repairs and eventually do videos of each one. This thread is intended to be a blog and a resource for information. I will try to answer repair questions as best I can. Comments and tips are also welcome, If you do not have the experience or the tools, PLEASE do not attempt any of these repairs. You will only end up damaging the board and it will end up costing more for a tech to repair the damage. If you do not have a high quality vacuum desoldering station (Hakko or Weller) and a current limited mains supply, you should not be working on these amps. These subwoofers do not have any user serviceable parts inside. If you open up the sub or attempt any repair you see in this thread, you are doing so at your own risk!!! The PDC board 660038RA (main supply control) is almost always the main failure mode of these amps. The glue that was used becomes conductive and kills the board and the fets (planned obsolescence?). These boards are typically made in China and are super easy to damage. If you don't have a desoldering tool you MUST cut the board off and remove the legs from the thru holes one by one. Once the thru holes are damaged the repair becomes a difficult hack job unless you have a thru hole repair kit. The other most frequent failures are the Bash control board and Q5. If Q5 is SOT-23, it needs to be replaced with a TO-92 2N4401. This mod was done on later revisions most likely due to warranty claims. I have made a schematic of the PDC board and I also have made replacement boards (I do not sell or supply these boards). Sometimes they are so badly burnt, they have to just be replaced. ALWAYS REMEMBER TO UNPLUG OR SWITCH OFF YOUR AMPS. CAPACITORS HAVE A LIFESPAN AND WHEN POWER IS APPLIED THE CLOCK IS TICKING. THE AUTO ON/OFF FUNCTION DOES NOT PREVENT THIS ON MOST MODELS!!!!!!!
-
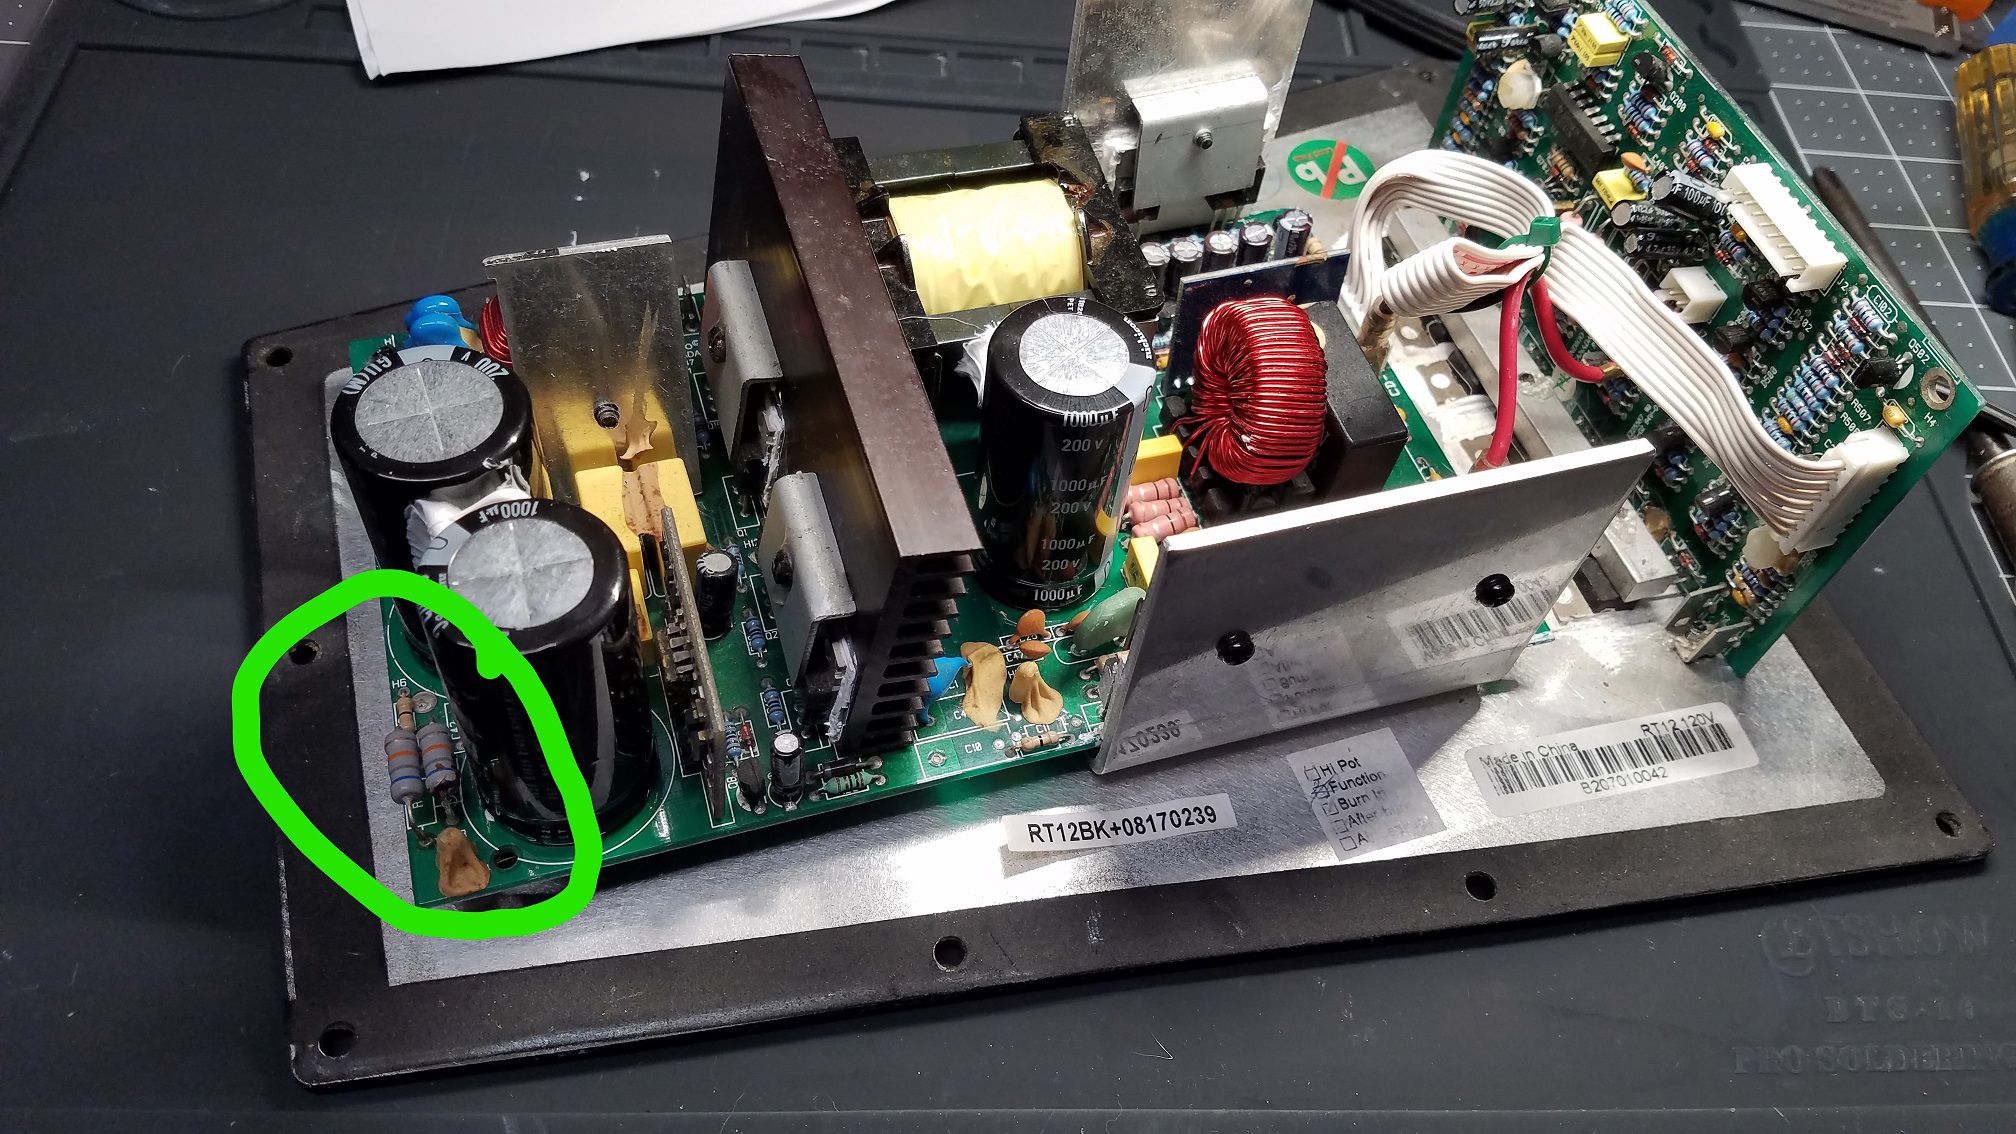
RT-12 Plate serial number B207010042 This amp was having a power supply issue. I was not getting main power out or either rail on the op amps. This moves the problem to the primary side of the transformer. The fuse was not blowing, but the supply would not come on. After inspection I found that burnt glue was causing a short between R5 and the PCB. I used my hot air station to soften the glue and remove it and once removed, I replaced all of the caps on the board. I generally only use Nichicon 2000hr+ caps. This was one of the easier repairs on this model aside from removing all the bad glue. ALWAYS REMEMBER TO UNPLUG OR SWITCH OFF YOUR AMPS. CAPACITORS HAVE A LIFESPAN AND WHEN POWER IS APPLIED THE CLOCK IS TICKING. THE AUTO ON/OFF FUNCTION DOES NOT PREVENT THIS ON MOST MODELS!!!!!!!
-
Hello All I have been repairing Klipsch subwoofer amps for about 15 years as a hobby. I have decided to start blogging my repairs and eventually do videos of each one. This thread is intended to be a blog and a resource for information. I will try to answer repair questions as best I can. Comments and tips are also welcome, If you do not have the experience or the tools, PLEASE do not attempt any of these repairs. You will only end up damaging the board and it will end up costing more for a tech to repair the damage. If you do not have a high quality vacuum desoldering station (Hakko or Weller) and a current limited mains supply, you should not be working on these amps. These subwoofers do not have any user serviceable parts inside. If you open up the sub or attempt any repair you see in this thread, you are doing so at your own risk!!! Wayne