


RobC63
-
Posts
25 -
Joined
-
Last visited
Content Type
Forums
Events
Gallery
Posts posted by RobC63
-
-
On 1/9/2021 at 1:02 PM, wuzzzer said:
What an awesome write-up!! I love the documented costs of everything.
I should have done that with the Heresys I just bought but I'm already half done with them.
I wonder what they would sound like laid on their sides, slightly tilted back?
Tried that when I first got them... for me, they didn't sound incredibly different from normal vertical placement. The highs were a bit more subdued; probably because the listeners ear (while standing, anyway) was now further above the actual driver. I didn't see any discernable difference in dispersion pattern, despite the horns being longways with the speakers on their sides...
-
 1
1
-
-
23 hours ago, Shakeydeal said:
They look nice. It's a shame they had to end up placed like that. So much potential wasted........
Shakey
Although the room they are in is quite large (28 feet long X 15 feet wide) I can't get them much further than about 6 feet apart without a major reshuffling of the rooms furniture.
What would you suggest given that limitation?
-
1
-
-
STEP 7: FINAL ASSEMBLY, TESTING, AND SUMMARY
Materials Needed:
- Velcro Strip 4-pak / $3.88 Home Depot
- 1.5" #8 Stainless Wood Screws, Box of 50 / $4.39 Home Depot
Total Cost: = $8.27 (plus tax)
Time Needed: Approx. 1 hr. to install rear panels and Velcro strips; place speakers and connect speaker cables
Finally, the big day is here...
Went home yesterday and installed the drivers and crossover, etc. in the second speaker cabinet.
Next, I installed the rear panels back on both cabinets using new stainless wood screws. I should note that ALL the screws used on the project were stainless (most of the originals were either brass / plate steel and had either rusted or corroded badly in some cases) so these fasteners should stay new looking and corrosion-free for the life of the speakers.
Once the cabinets were complete, I uprighted the speakers and placed them in the approximate location I wanted them to go.
Next, I installed the speaker wire cables from my system onto the rear panel terminals.
Then, I cut the Velcro strips in half (to make 8 of them) and adhered 4 to each speaker motorboard. I adhered the second half of each Velcro section to the appropriate location on the inside of each speaker grille.
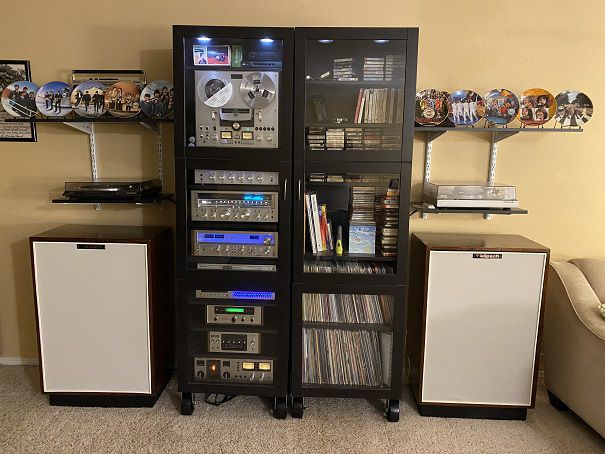
After everything was finished, it was time to turn the system on and hear the results:
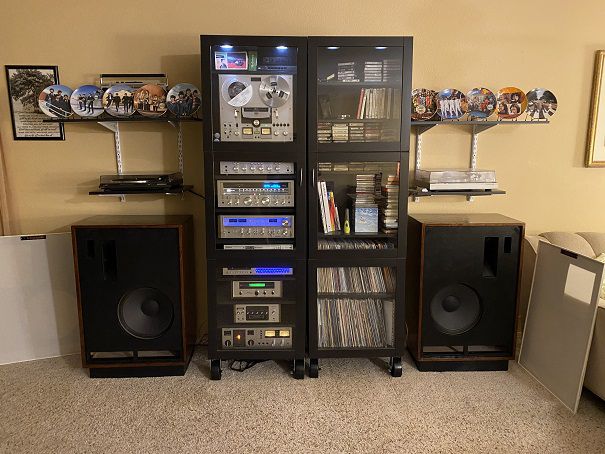
My Front Room Audio System

I've got 3 vintage receivers to choose from:
- Pioneer SX-780 / 45 wpc
- Sansui G-5700 / 75 wpc
- Marantz 2230 / 30 wpc
The system is wired through both an amplifier selector switchbox and a speaker selector switchbox so that I can choose any combination of receiver, media player, and speakers that I have. For media choices, I have (2) different Technics turntables (one belt driven and one direct drive); a Panasonic Pro Logic 5 - CD / DVD changer; an Akai GX-265D Reel to Reel deck; a Pioneer HR-101 8-track deck; and a Teac A-400 Dolby B /C Cassette deck. Regardless of the media / receiver combination, sound flows through a Rockville 21 - Band Equalizer and a Pioneer SW-202a Reverb Amp and then out to the speakers.
For speakers, I have pared myself down to these Cornwalls and a pair of 1959 University Dean Cobreflex 12s. At one time I had 14 pairs of speakers in my Front Room (boy was that a nightmare, LOL) but I chose to keep only these 2 pairs as they were the best sounding (or had the potential to be) IMO.
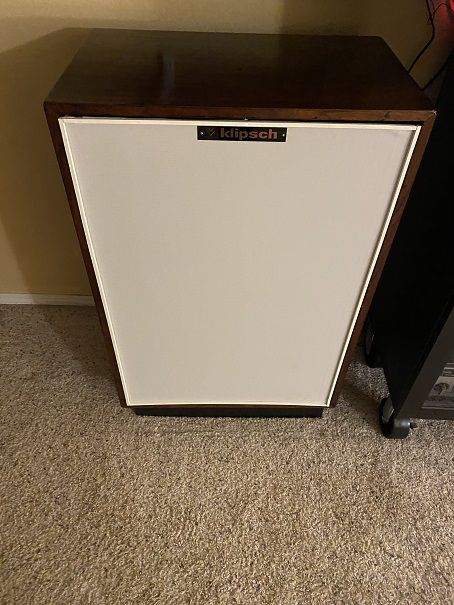
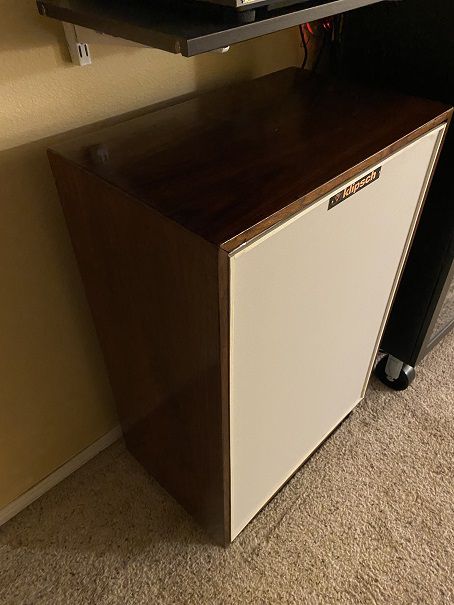
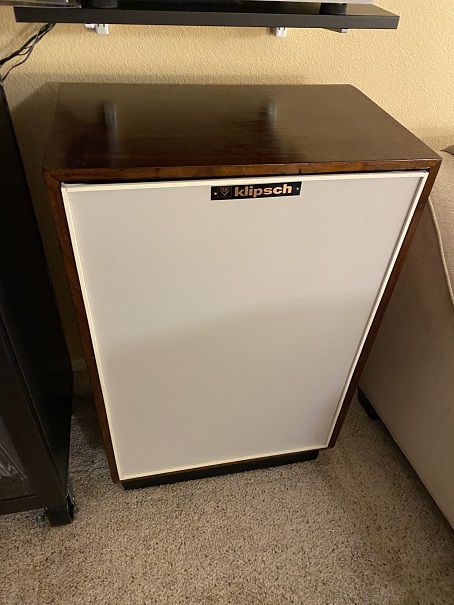
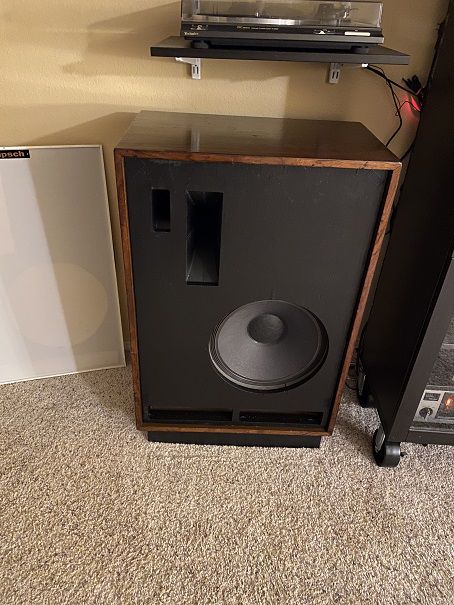
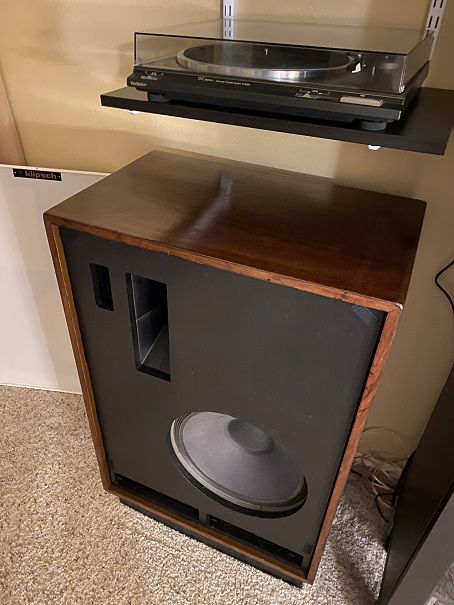
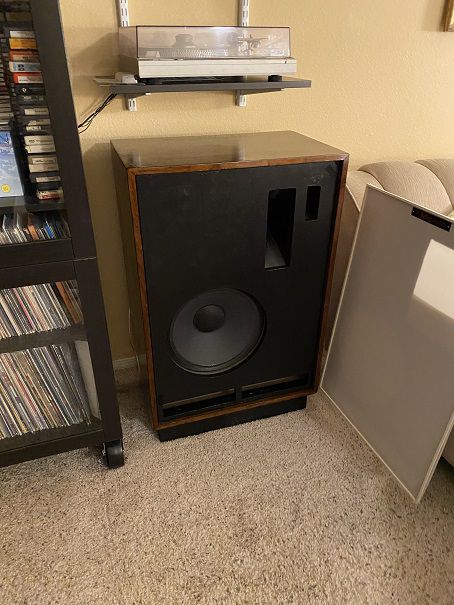
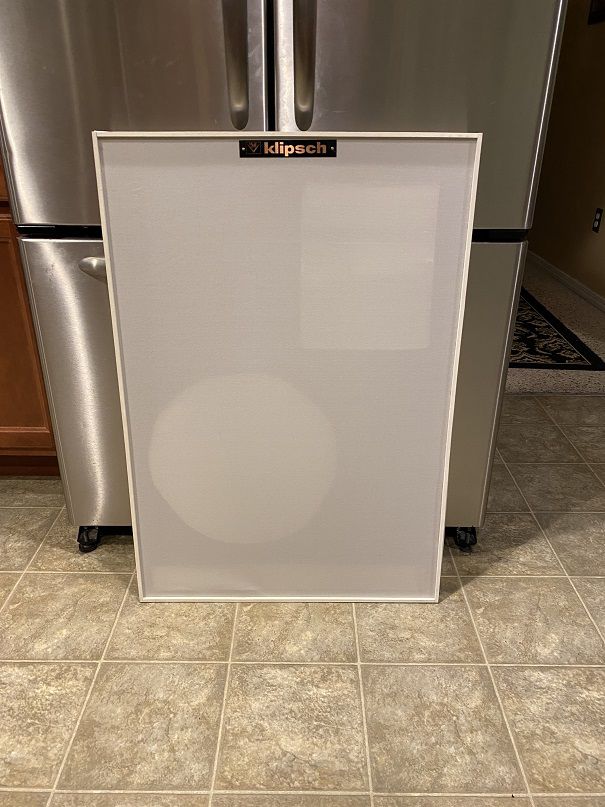
Anyway, enough background... here are some more Cornwall photos so you can see the finished project:
With the grilles removed:
Once I fired up the music, the sonic improvements vs. the original condition speakers were quite obvious.
First and foremost, the entire mid-level sound profile was entirely different. The midranges now provide not only an enhanced sound throughout their range; but they also bring a more well-defined sense of 'presence' and soundstage detail that I had not heard before. The tweeters seemed to extend higher, but at the same time were a little more subtle and delicate sounding than before. I had to go back and recalibrate my EQ as the previous settings were resulting in a sonic profile that was much too bright and flashy now.
The next thing I noticed was a change in the bass response and characteristics. Overall, the low frequency tones were now more sharp, less muddy and tighter. The amount of 'punch' was not only increased, but the frequency where you experience that punch seems to have dropped down by maybe 40 - 50Hz. Again, I had to adjust the lower frequencies on the EQ as this new combination of correct woofers / rebuilt crossovers / added 2.5" risers didn't seem to need as much manual assistance from the EQ settings as before.
Overall, the sonic tone, soundstage, clarity, and spatial layout were noticeably improved and just a richer, more well-defined sound overall. I tested these out using a couple of Steely Dan recordings; a CD of "Can't Buy A Thrill" and an LP of "Aja". I asked my son - who has no interest or great knowledge about anything audiophile - I asked him what he thought of the new sound. His response was that when the music had a horn section, it felt like the players were standing right in the room... and he could hear different instruments coming from different parts of the room as if the band was somewhere in front of him...
Cosmetically, I am quite pleased with the decisions to go with a contrasting darker walnut oil finish and the ivory grille fabric. I really like that look; also glad I painted the risers the same black as the motorboards. Grilles off, the matching risers look more 'factory' to me; grilles on, they kind of let the speaker cabinets stand out more vs. if I had finished them to match the cabinets. I think I got the level of sheen just where I wanted it to be - a nice, reflective surface that is not so glossy that it makes the wood veneer look like vinyl instead. I do think I should have went with the smaller (OEM) logo size; to me, these larger logos look a little too overstated and 'gaudy'. I may visit eBay again and buy the smaller set after all...
In Summary -
First, for those keeping tabs on the project metrics, here are the totals in cost and time:
Total Cost for All Materials: $487.06 + $50.00 initial purchase price = $537.06
Total Labor Time for All Work Performed: Approx. 24 Labor Hours
So, basically, I now have this pair of fully functional, fully restored (and pretty nice looking, IMO) 1971 Klipsch Cornwalls for a total cash outlay of a little less than $550 and 3 full workdays of sweat equity. In my case, the labor was spaced out over a period of about 4 weeks.
Now, in the interest of accuracy, if someone was attempting to complete this entire project non-stop, that actual clock time would be significantly longer when you factor in the dry times for the paint and oil finishes, etc. More like maybe 72 - 80 hours of clock time when you include non-labor items like drying times.
So how do I feel about this whole project? Well, again I want to emphasize that I am NOT a 'professional' cabinetmaker / carpenter, painter, furniture finisher, or electronics guy. I honestly feel that if I could do this successfully - most anyone else could. I would say that there is a bit of patience needed on things like the cabinet refinish; you definitely don't want to rush that. But, overall, the skill level I would say that was needed for this project was "moderate"... if you know your way around basic hand and electric tools, if you have ever painted anything like a room in your home, if you understand simple electrical concepts like polarity and if you have ever used a soldering iron... YOU can do this.
-
5
-
 3
3
-
-
STEP 6: DRIVER INSTALLATION AND WIRING
Materials Needed:
- (2) Klipsch model K-33 15" Woofers / eBay $259.27 (total for both, including shipping)
- 10 linear feet of Monster #14 gauge speaker wire @ $0.17 / ft / Best Buy $1.70
- #10/12 size spade terminal ends, Box of 20 / Home Depot $2.49
- #10/12 size slide terminal ends, Box of 12 / Home Depot $2.88
- #10 size 1.25" wood screws, Box of 50 / Home Depot $3.99
- (2) Midrange horn gaskets @ $1 ea. / Bob Crites $2.00
Total Cost: = $272.33
Time Needed:
Approx. 1 hr. per speaker (2 hrs. total) to install drivers / crossover / complete wiring installation
Now we are coming to the fun part - finishing up and testing these out...
I have to say, as I was going through the installation of the drivers, etc. last night, I stopped to think about how (overall) relatively easy and problem - free this entire project has been so far. Yes, it has taken some money - although I think less than I initially thought - and yes, taken some time... but really it has gone pretty smoothly so far. And I am pleasantly surprised by how "un - DIY" things are looking up to now. I mean, I know I could have paid a seasoned pro on things like the cabinet refinish - but the end product isn't going to scream "DIY garage project" to anyone who sees it. Feeling somewhat proud of the effort at this point. And honestly, for me, I think the biggest change in MY attitude while working on this was to allow for time and patience... I tend to be one of those guys who sometimes rushed through a project; and sometimes with sloppier than expected results. Not this time.
Anyway, I proceeded to install the drivers and crossovers back into the cabinets. A few tips:
1) Place the cabinet on the floor face down. If you have a hardwood floor put a towel or something soft between the speaker face and the flooring (I have carpeting, so no worries there). MUCH easier to install the drivers without having to hold them up (and perpendicular) against the motorboard while getting those first few screws tightened;
2) Install ALL the screws per driver loosely, then go back and tighten them all. This avoids misaligning the driver mount openings with some of the screw holes in the motorboard;
3) Install the midrange driver after you have already attached the horn to the motorboard (don't forget the gasket!);
4) Go with a screw size 1 size larger than what was previously installed. This will ensure the new screws attach firmly, even if some of the original screw holes are a little stripped out;
5) Check the length of your screws against the combined depth of the driver mount and the motorboard to avoid screwing all the way through to the face of the speaker. I originally thought 1.5" screws would work, but when I measured the screw would have protruded out the front face by about 1/8 of an inch. So I went with 1.25" screws instead;
6) Pay attention to the location of the "+" and "-" terminals on your drivers. Once installed, it may not be so easy to tell which one is which.
All drivers installed
Don't forget the midrange gasket!
Measure out the cabling from the crossover to each driver. include an extra inch or 2, so that the cables are not tight or pulling at the terminal ends. You could solder the ends to each driver if you wanted; I went with slide terminals to allow for easy removal should it ever be needed. For the crossover ends, I used spade terminals because that was what the original wiring used
One speaker all finished and ready to close back up
Last night I finished 1 speaker. Tonight (hopefully) I will finish the other... and then it's time for the Big Test (!!!)
-
4
-
-
1 hour ago, avguytx said:
I thought the same thing. Definitely not the size of K-77's or any iteration I've seen either.
What I was told from the original owner was that those tweets were a special order on the original build back in 1971. The caps were added apparently when the son replaced the original woofers with those car subs, as the owner said they were not installed originally - just the standard "B" crossover.. And, for whatever reason, the kid actually bypassed the Klipsch crossovers (and the midranges) and direct wired the subs and the tweeters straight from the speaker terminal. So these were running like a 2 - way instead of a 3 -way when I bought them.
I only found this out after I got them home and hooked them up and realized the mid horns were silent. I opened one of the cabinets and saw the 'hack job' wiring that had been put in place. I called the seller back to ask a few questions but since the seller had given them to his son sometime in the 1990s he was a little short on details as to what had actually been done to them. He guessed that maybe the crossovers went bad and that's why the son bypassed them. No explanation as to why the mids had been bypassed - especially since they worked fine when I tested them... maybe the kid was a 'basshead' or something?
Normally I would have demo'ed the speaker first before buying; but these were in a storage unit for (I was told) maybe a decade... and, for $50 I wasn't about to "demand" that I be able to test them before I bought them, LOL
-
1
-
1
-
-
STEP 5: REBUILDING THE CROSSOVERS
Materials Needed:
- Crossover Rebuild Kit, Type "B" Klipsch / $57.00 (plus $9 shipping)'
Total Cost: = $66.00
Time Needed:
- Approx. 1 hr. to remove and replace crossover capacitors.
With all the cosmetic work now completed, and a pair of OEM Klipsch K-33 woofers secured and the other drivers all cleaned up... time to get to work on restoring the sonic capabilities of these Cornwalls back to their intended specifications.
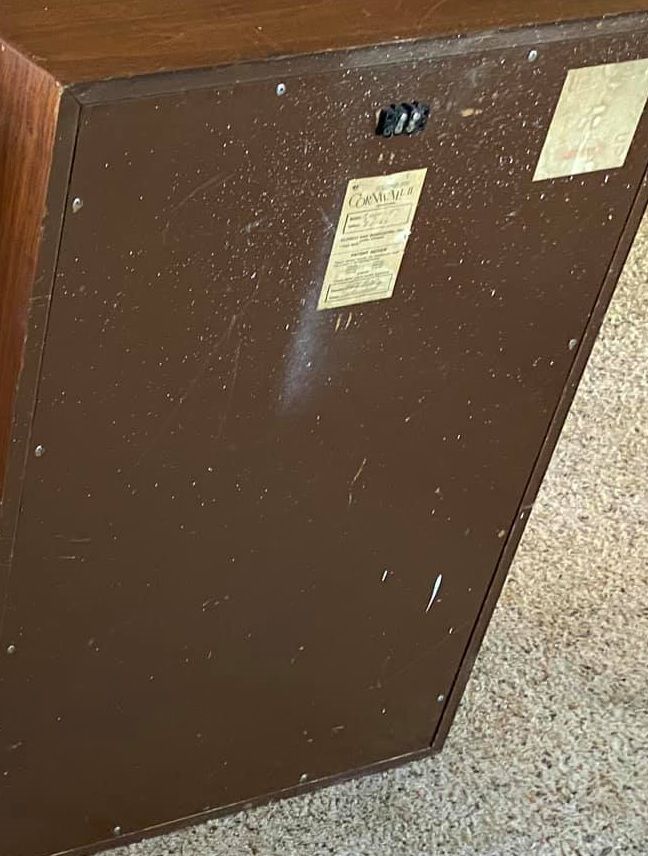
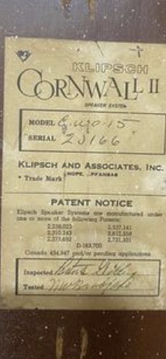
The last remaining piece would be the original Klipsch crossover networks. To that end, Bob Crites sells crossover rebuilding kits specifically designed for the Klipsch Cornwall speaker (as well as kits for pretty much every other Klipsch speaker ever made). It's very easy to figure out which kit you need; Klipsch has the crossover 'type' right on the label.
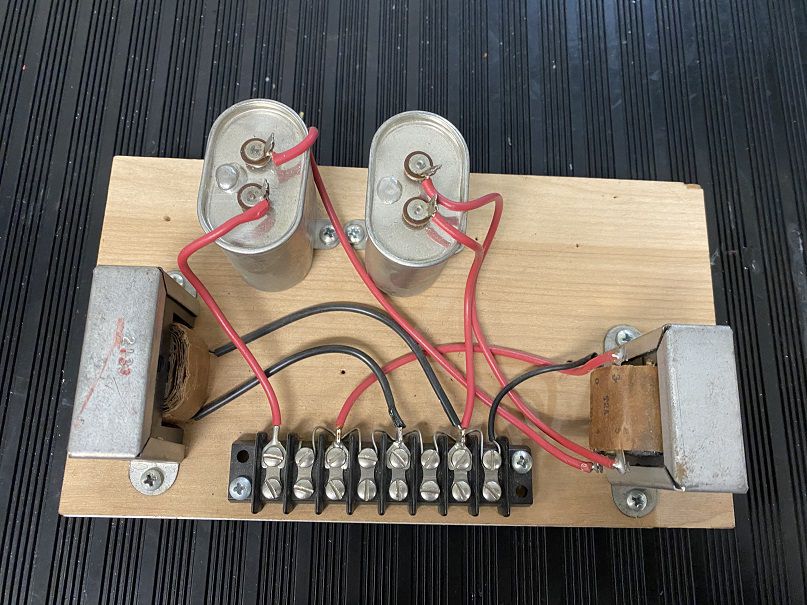
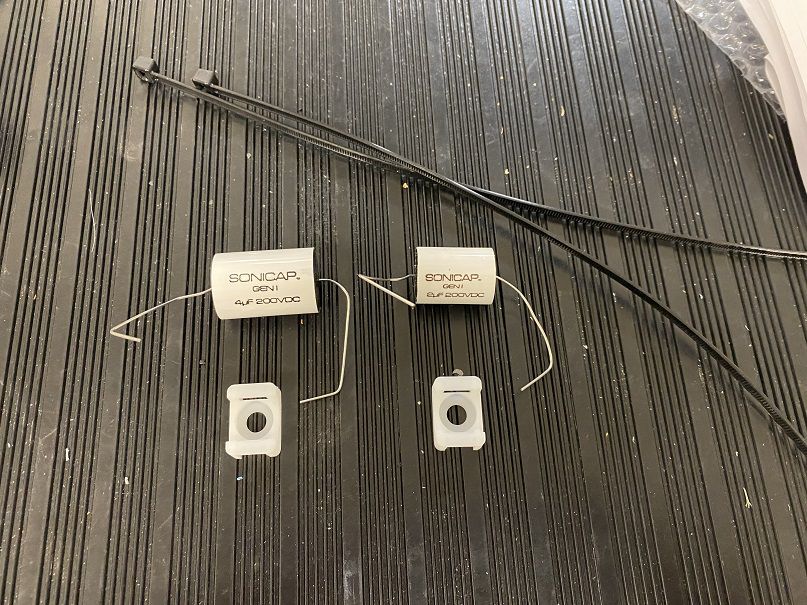
My Rebuild kit came with 4 capacitors / 4 capacitor holders / 4 cable ties; and a schematic drawing that shows the wiring of the new caps. Though it's really easy if you simply remove 1 old cap at a time, and replace with the equivalent value modern cap. Each Rebuild kit has all the parts for a pair of speakers.
Again, this is a very easy thing to do, provided you have the right tools and a soldering iron. You don't need to be an electronics expert to recap a crossover - at least not these large and simple Klipsch crossovers.
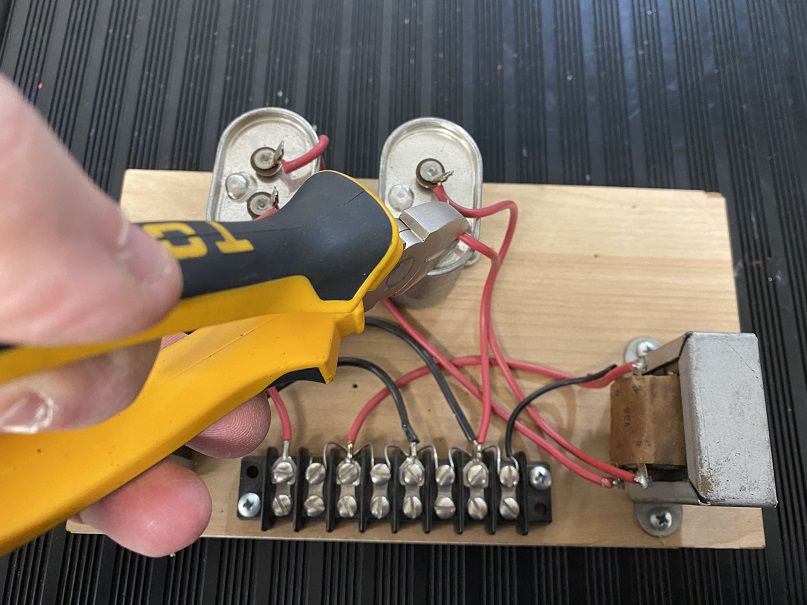
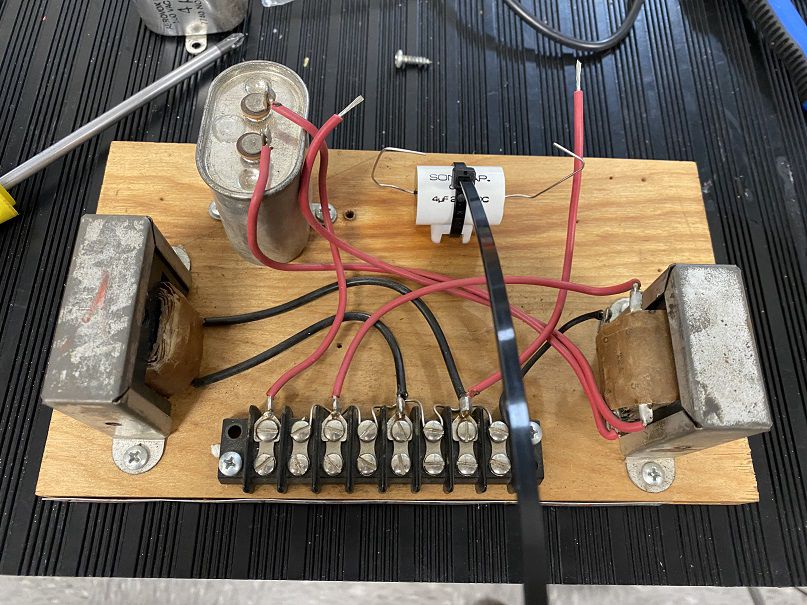
Here's what the original crossovers looked like, right out of the speaker cabinets:
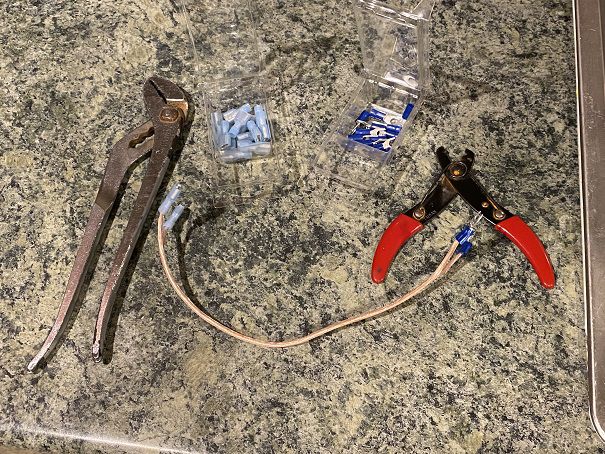
Cut the leads to the first cap. Be sure to mark which lead goes to which cap terminal.
Unscrew the cap from the base
Use a wire stripper to strip the leads
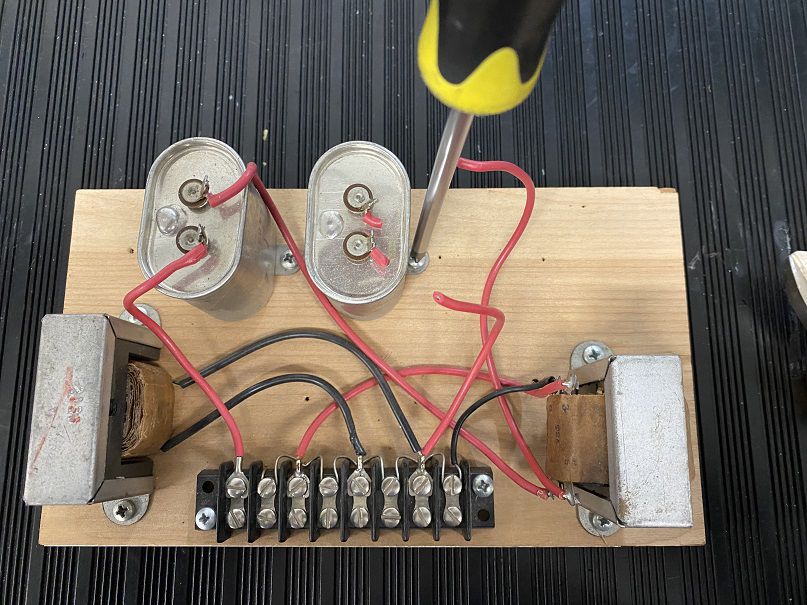
Attach the new cap holder using an existing screw and hole
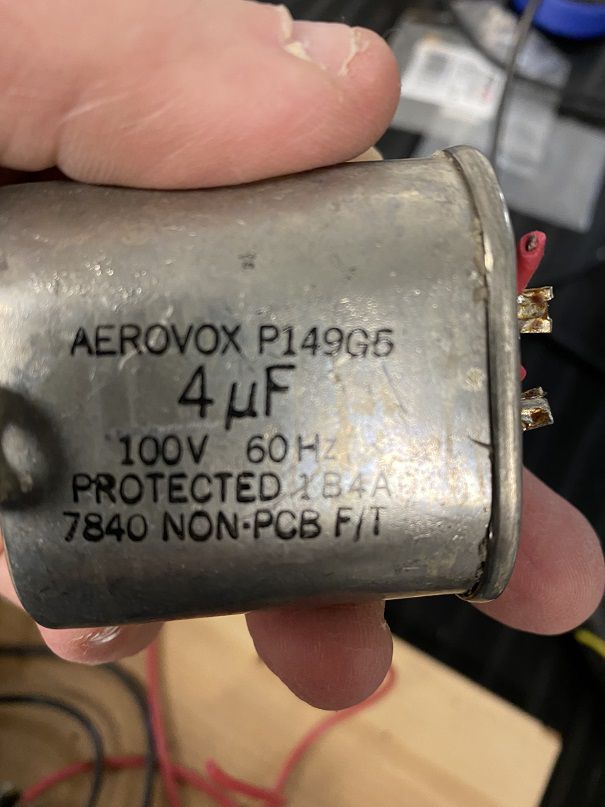
Examine the old cap to find the correct replacement
Choose the correct replacement from the rebuild kit
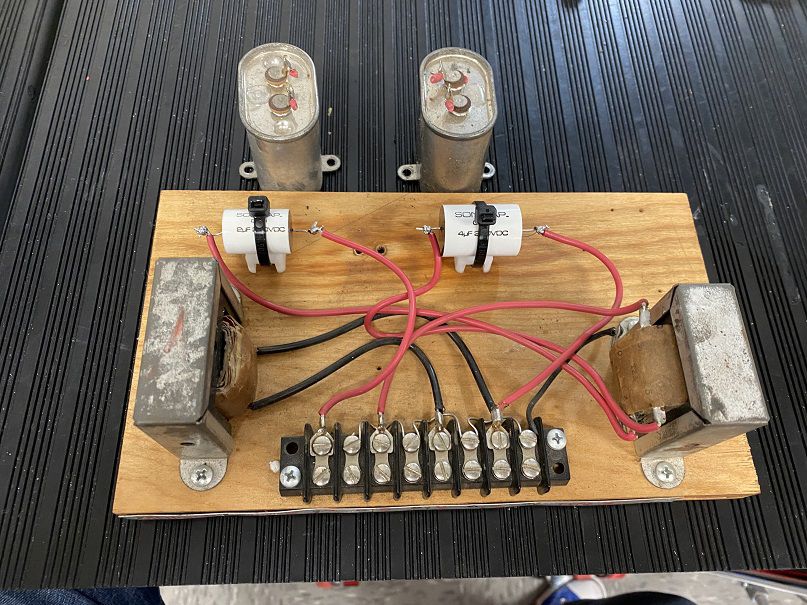
Secure the replacement cap to the board
Solder the lead wire to the capacitor lead. Clip off the excess lead on the cap. Repeat to solder the second lead to the other end of the cap.
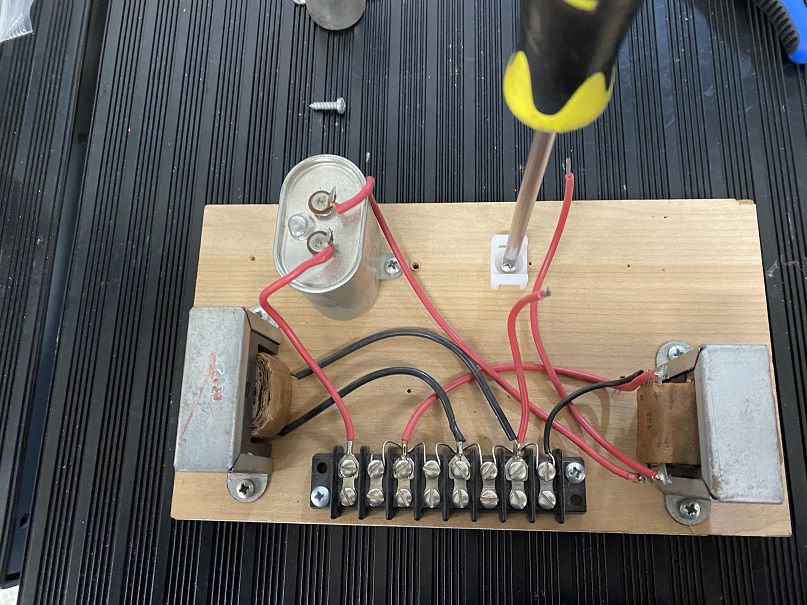
Repeat the process for the second capacitor replacement.
Then repeat the entire operation for the second crossover board.
End result below:
I'm going to keep the original caps stored away in case I ever decide to sell these speakers (in case the next owner is a fanatic about 'original parts')
-
1
-
-
Tweeters are Atlas Sound model HR-3. Alnico Magnets
-
While waiting for my crossover parts to come from Bob Crites, I figured it's a good time to clean up all the drivers.
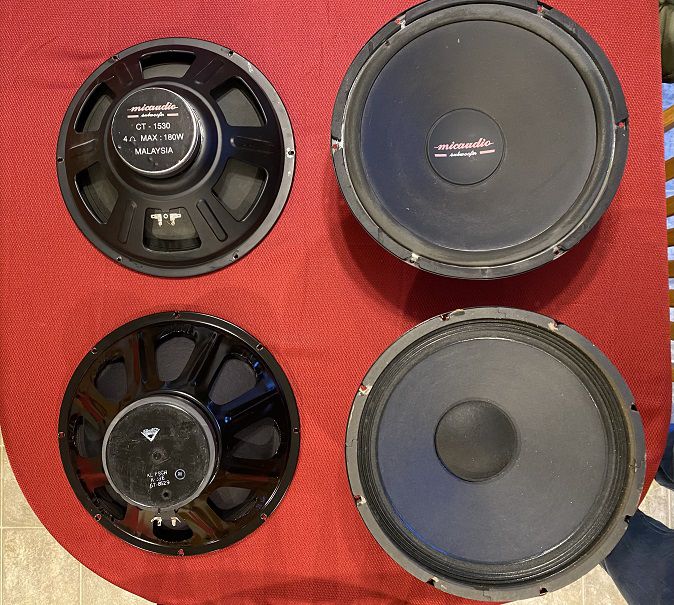
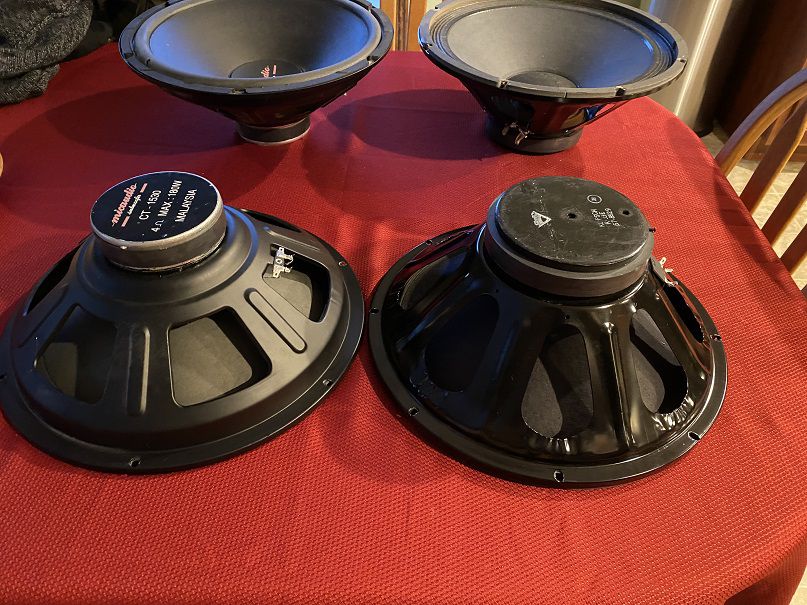
As I said earlier, I found (2) K-33 Woofers to replace the subs that had been installed sometime in the past. Interesting to see the differences between the OEM woofers and the aftermarket subs:
Pretty obvious that the originals are substantially better built; and with significantly larger magnets. Should be an interesting upgrade to the sound profile.
Got all the internals cleaned up and ready; now we just wait for those crossover parts...
-
1
-
-
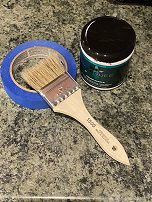
STEP 4: CLEANING THE REAR PANELS
Materials Needed:
- leftover 400 grit sandpaper / $0.00
- Howard's Restor-A-Finish 16 oz. container / $8.99
Total Cost: $8.99 (plus Tax)
Total Time Needed: Approx. 2 hours to sand and refinish
Not really a full-fledged "step" in this resto, but I thought it might be good to document it anyway.
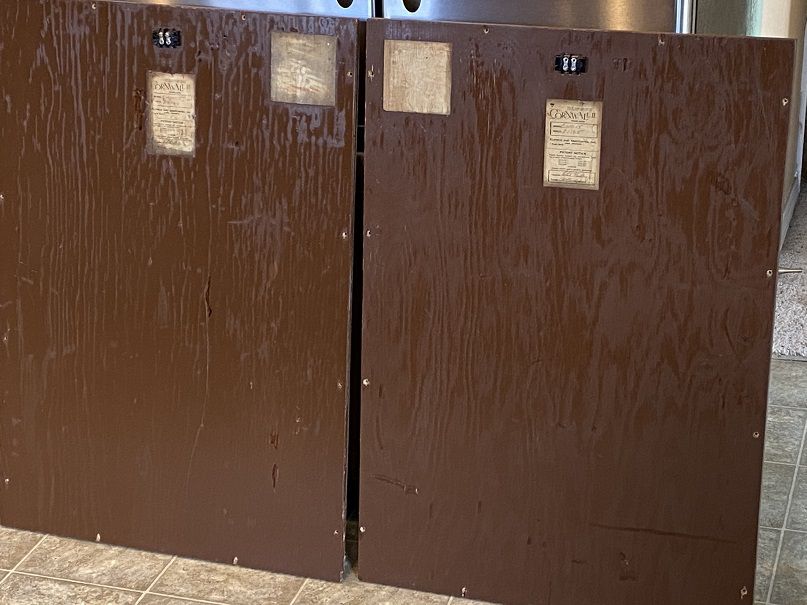
Task here was to remove the massive amount of white paint splatter that had somehow gotten on the rear panels at some point in time.
Tried "Goo Gone" and that was a bust. I'm guessing because the paint splatter had most likely been there for decades.
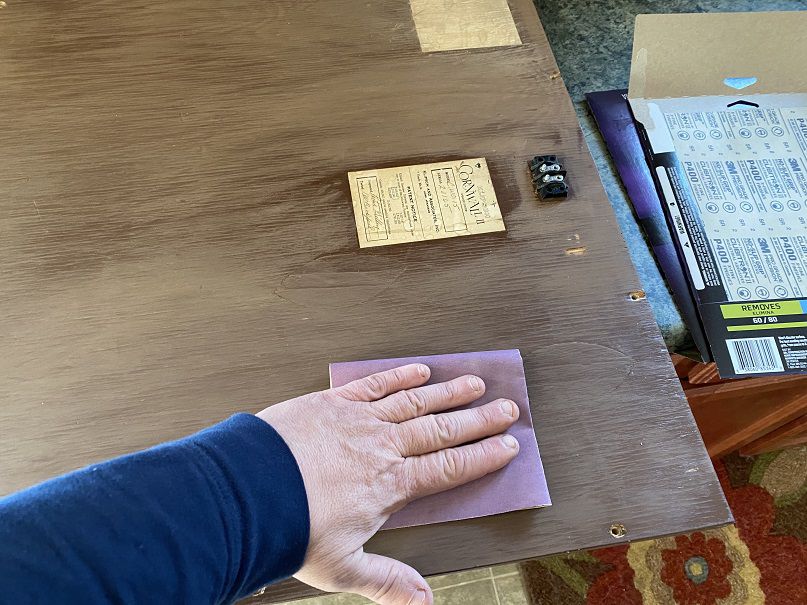
Ended up doing a light sand over the entire panels - minus the label areas. Used the 400 grit sandpaper leftover from the rest of the cabinet work:
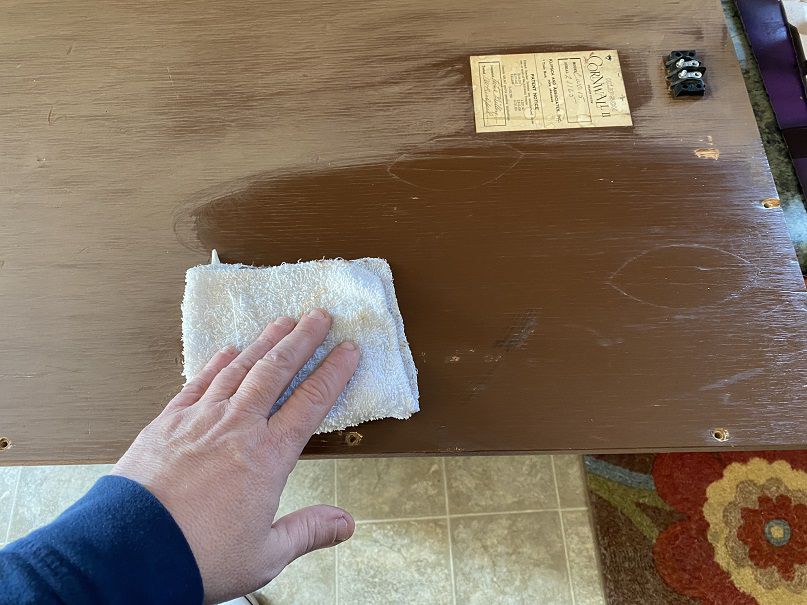
Next, a wipe down with a damp cloth to remove any residue
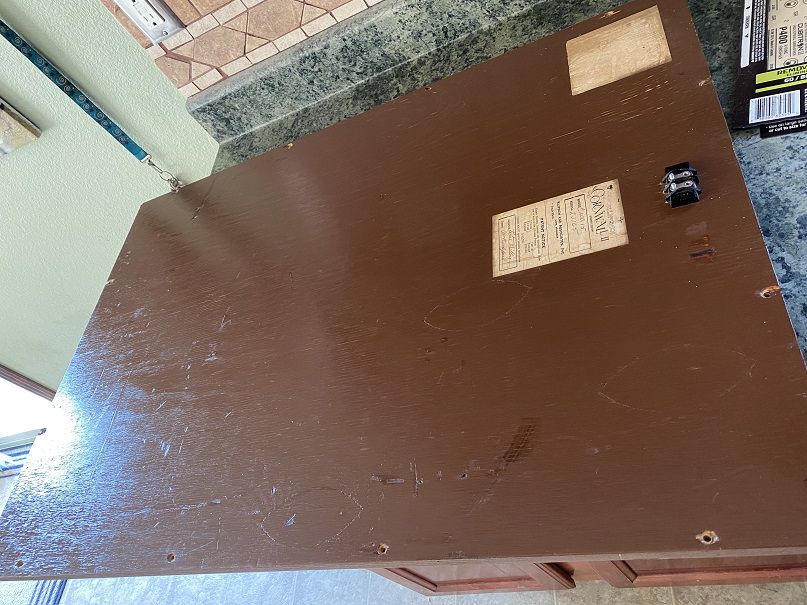
Lastly, 2 coats of Howard's Restor-A-Finish applied with a clean dry cloth. The lighter tone finish was perfect here
Had to go over a couple of light colored spots a third time. Then let dry for bout 4 hours of until dry to the touch.
Here's a couple of Before & After shots:
BEFORE
AFTER
Not perfect... but definitely a large improvement
-
For anyone keeping score -
The running tab so far comes in @ $131.47 (plus tax); so just under $140 (and 15 hours of labor time) for all the cosmetic work so far. The only thing left cosmetically is to remove the white paint splatter from the rear panels (probably with a little 'Goo Gone') and maybe touch up the original brown painted surface a bit.
I think it's safe to say that the total tally for all cosmetic restoration will come in a bit under $150... so, right now, for $200 total (including the purchase price) I've got a very nice looking set of Cornwall cabinets, complete with new removable grilles and nice 2.5" risers..
Of course, the key is getting these back to where they sound like the classic vintage Cornwall.
To that end, I have found 2 vintage K-33 woofers on eBay. One has arrived already (2 different sellers) and one is supposed to arrive today or tomorrow. I know that Bob Crites stocks OEM-spec drivers that I have heard are very good quality; in the end, however, I decided that I wanted the real (vintage) deal, if I could find decent, functional examples (and I did). Didn't really save very much money vs. buying new from Crites - but in this case it really wasn't about saving money.
I have placed an order from Bob for repair kits for the original Klipsch "B" crossovers, as well as some of those rubber gaskets for the midrange horns.
In the mean time, I will start the cleaning / inspection work on the drivers I have and hopefully no unpleasant surprises along the way...
-
1
-
-
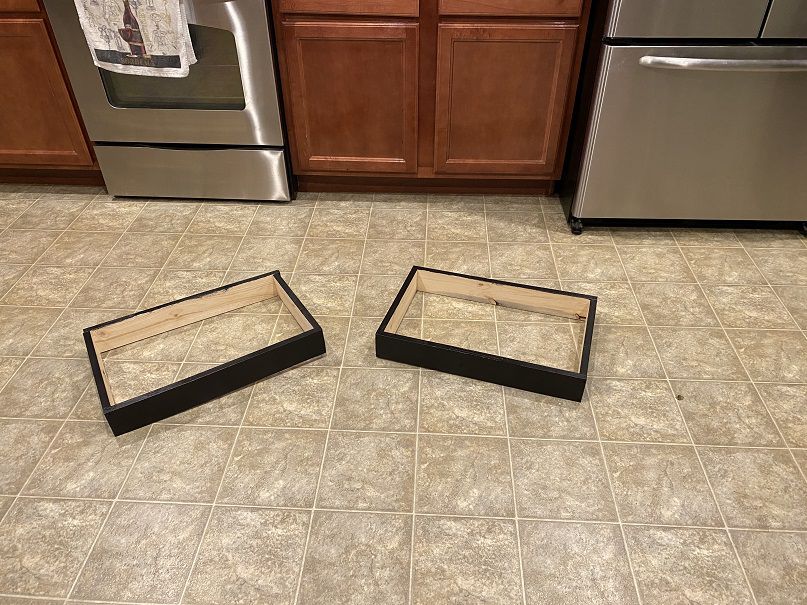
STEP 3: BUILDING A PAIR OF RISERS
Materials Needed:
- 14 linear feet of 3" X 1" oak plank (actual measurements 2.5" X 0.75") @ $0.59 per linear foot / $8.26
- (16) #8 X 1.5" stainless steel wood screws / $4.88 (for 100 screws)*
- Leftover Black semi-gloss paint (from painting the motorboards) / $0.00
Total Cost = $9.04*
Total Time Needed:
- Approx. 3 hours to measure / cut wood sections; drill / screw together and then paint the risers
* Total Cost reflects $0.78 for the (16) screws needed to assemble the risers. The remaining screws will be used to secure the back panels to the speakers (the original screws were badly tarnished and some were missing).
Putting these risers together was very easy - I kept the design super simple to keep the costs down, and also because in my particular situation I don't plan on moving my speakers around very much. If easy movement is important to you, I would suggest adding caster wheels behind the risers for mobility - or even swapping the risers out altogether for some suitable sized casters.
Anyway, this really was pretty quick and easy -
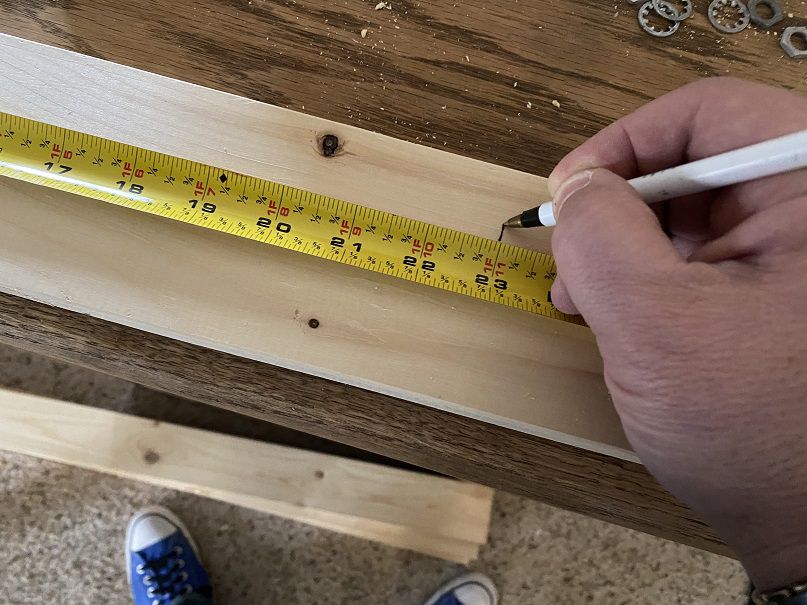
Start by measuring out the riser pieces. For Cornwalls, the speaker dimensions are 25" wide and 15 1/2" deep... you want the riser to be slightly smaller than that, so the the speaker overhangs the riser by about an inch on all sides (no functional reason for that, it just looks better - more like a short pedestal - than if the riser was flush with the edges of the speaker all the way around)... so I went 23" for width and 13" for the depth:
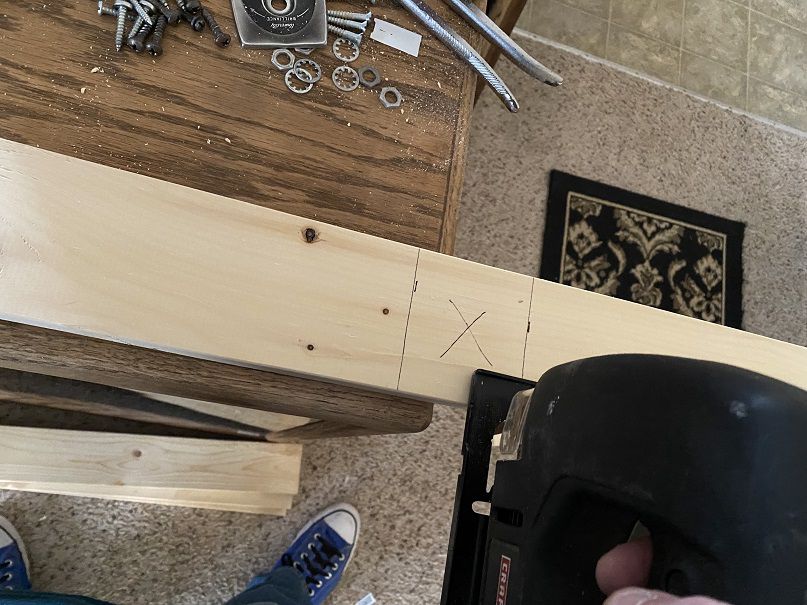
I used a jigsaw to cut the pieces (the piece with the "X" will be scrap)
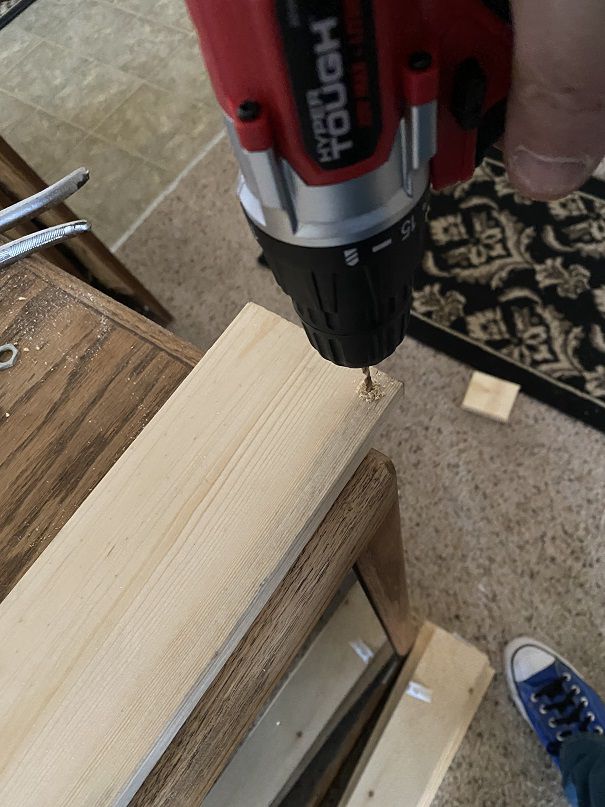
Next, drill (4) holes in each corner of the longer pieces, about 1/4" from the corner edges. Use a 1/8" diameter bit.
Once you have the long pieces drilled, mock up the shorter pieces perpendicular on the ends; then drill again into the same holes until you have drilled about 1/2" into the side pieces
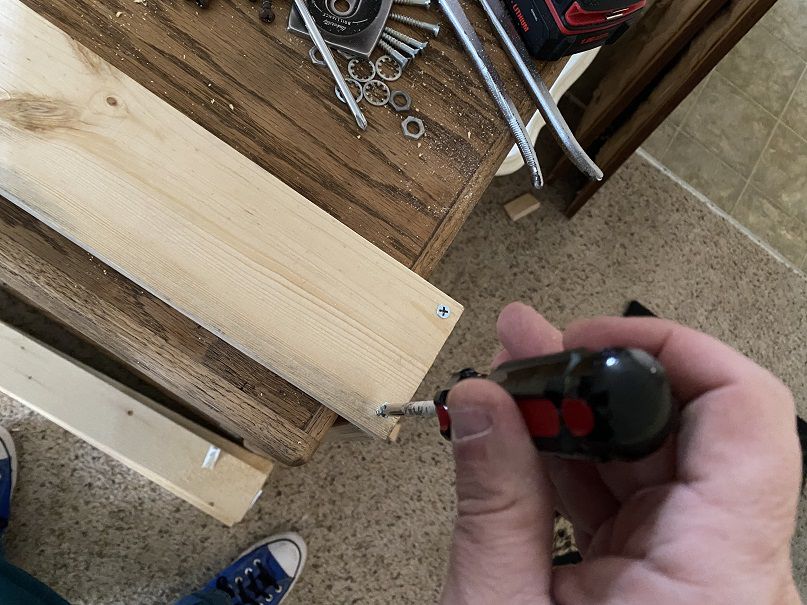
Then, insert a screw into each hole and tighten until the side pieces are firmly secured.
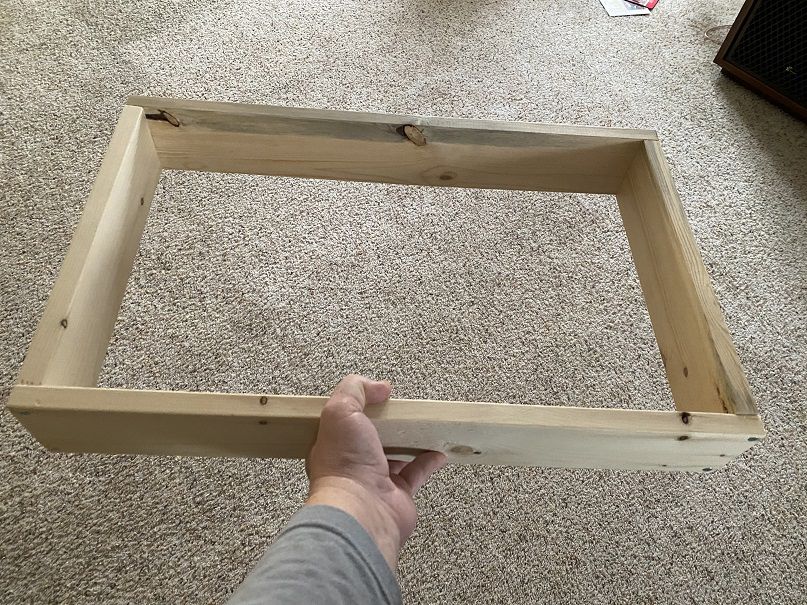
Repeat on all 4 ends until the frame is completely put together and tight
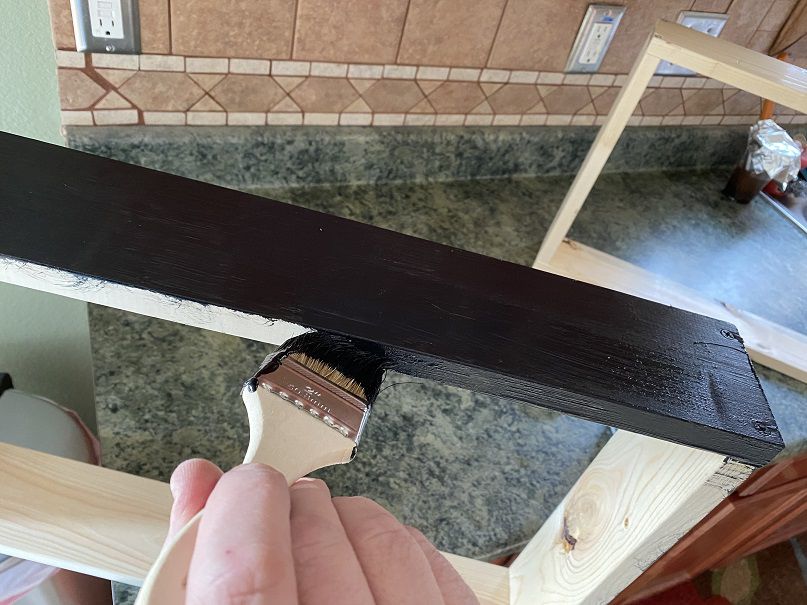
Use the leftover paint to paint the riser outer panels and top and bottom edges. Don't worry about painting the interior of the riser, you will never see it.
I used the leftover paint so it would match the motorboard, but you could stain these to match the speaker veneer if you wanted to
All done and ready to attach to the bottom of the speakers - but you are going to have to wait until the end of the Project to see how that looks...
-
3
-
-
STEP 2: FABRICATING THE (REMOVEABLE) GRILLES
Materials Needed:
- (2) 36" X 30" X 5/16" Masonite Boards (dry erase board) / $4.88 ea.
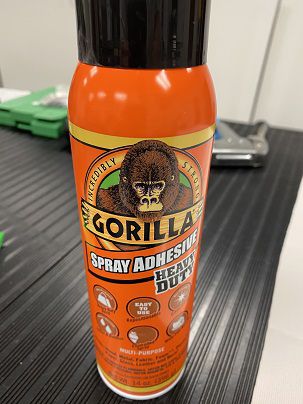
- 16 oz. can Guerilla Glue All- Purpose Spray Adhesive / $5.99
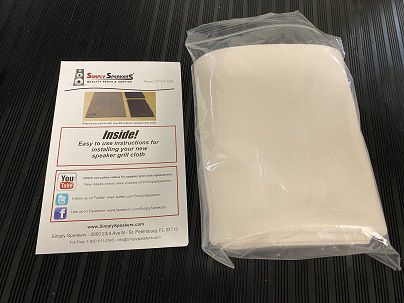
- 2 yards of Speaker Grille fabric (Ivory) / $22.99
- 20 feet X 1/4" square wood dowel @ $0.29 per foot / $5.80
- 12 oz. Guerilla Glue Clear / $2.99
- 4 oz. container White Craft Paint / $0.99
- 4 oz. container Ivory Craft Paint / $0.99
- (2) 4" Klipsch OEM style Logo badges / $15.99 for both
Total Cost for this Step: $65.50 plus tax
Labor Time Needed:
- Approx. 7 total hours to trace / cut grille pattern & fabric; glue fabric to board, secure w/ staples, cut / paint / attach 1/4" dowel trim and logos
Masonite Board, Guerilla Glue (both types) came from Home Depot
Grille Fabric was ordered from Amazon (they had about 20 colors to choose from)
Dowels and Craft Paint came from Hobby Lobby
Logos were purchased off eBay
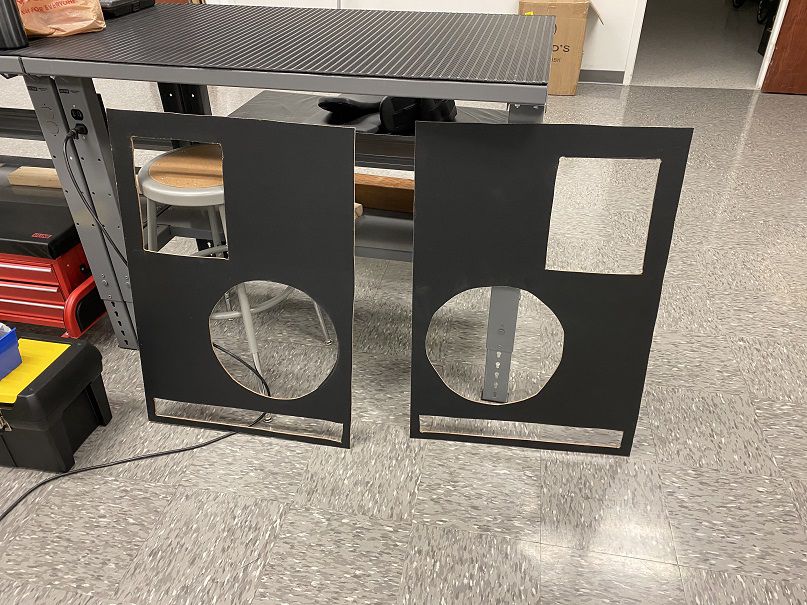
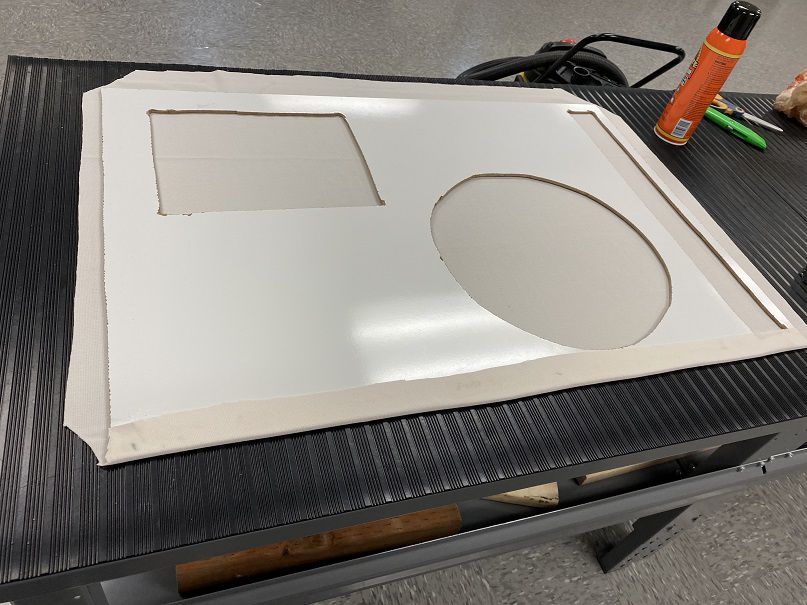
Found a grille pattern right here on the Klipsch Forum for Vertical Cornwall speaker grilles. Transferred the measurements to the masonite board using a thin line marker.
Cut the openings using a drill to start each opening, and a jig saw to complete the cuts.
Wasn't too difficult; I read that you could use a router to get more professional looking results. Didn't have a router, LOL . I am satisfied with the hand cuts, since they will be covered with grille fabric anyway.
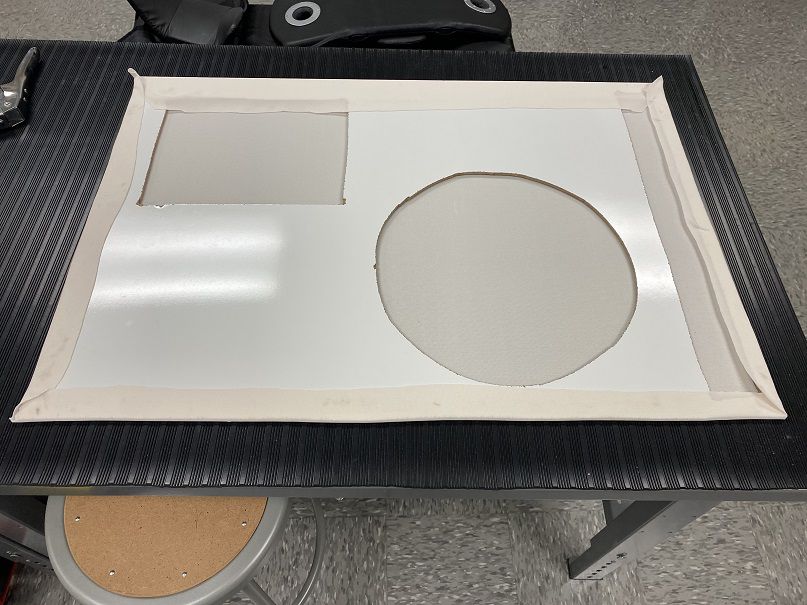
Cut the fabric so that there was a 2" - 3" overlap on every side. Cut the corners diagonally to avoid too much excess fabric in the corners. Spray a 1" wide swath of glue onto the edge of the masonite from end to end. Wait about 1 minute for glue to set tacky, then lift the fabric overlap onto the glue and press down the entire length. Glue holds pretty well after about another minute. After securing the first side, place something heavy on the freshly glued side. Go to the opposite side and lay down the glue. Be sure to gently (but firmly) pull and stretch the fabric before pressing down on the glue. The goal here is that the fabric should be taut over the entire grille front face; you don't want any sags, lines, creases or lumps. Sounds difficult, but actually was pretty easy (these are the first grilles I have ever made from scratch and I didn't have any issues getting it tight and uniform).
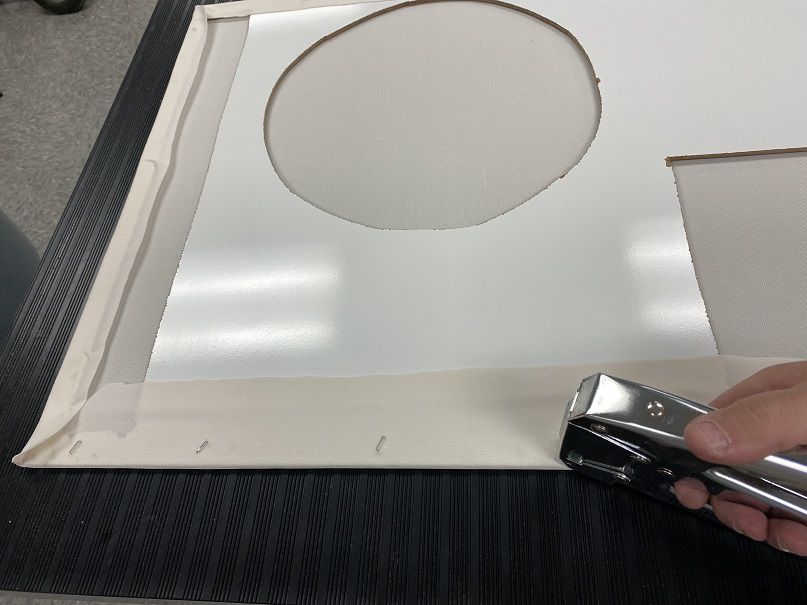
Once all sides are glued down, secure the glued areas using a staplegun and 1/4" staples.
Then, take the scissor and cut off the excess overlap (whatever parts are not glued / stapled down).
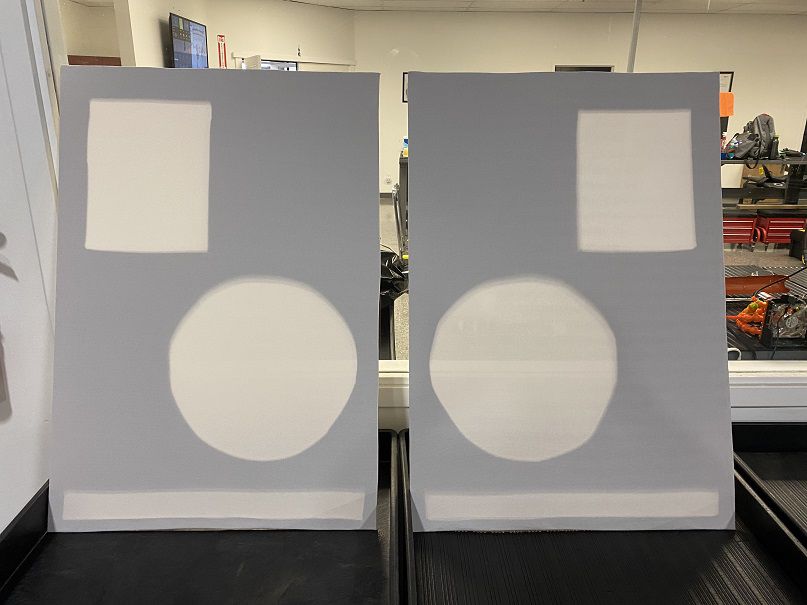
Your semi - finished grilles should now look like this from the front side:
Unfortunately, I forgot to take photos while doing the grille trim work. It wasn't difficult, and if you follow the directions below it should all make sense even w/o photos...
Next, measure and cut the 1/4" square dowel to fit as trim around all 4 edges of each grille. Mock it up (don't glue yet) to make sure there are no gaps or overly long trim pieces.
Then paint the dowel trim on 3 sides (the 4th side will be glued down to the grille) and let dry. In my case, I mixed a little of the Bright White and Ivory together to get a color that matched the fabric.
Once the dowel trim pieces are completely dry, glue in place based on the mock up you did earlier. Allow the glue to thoroughly dry.
Last, attach the grille logos. Some will have adhesive backing, some will have to be screwed on (mine were screw on).
Here's a shot of the finished product. In hindsight, I got the "large" logo badges; probably would have looked a little more 'factory' with the smaller size (2" I believe).
And you are going to have to wait until the end to see them actually on the speakers, LOL
But again, not too difficult to make these - and I think they look decent for under 70 bucks and a days labor...
-
2
-
-
Here's a couple of "Before & After" Comparison Pics. I love how much darker and richer the new finish looks compared to the unrestored original:
-
1
-
1
-
-
To do the bottoms, I sanded them at the same time as I sanded the rest of the speaker. I waited until the rest of the speaker had been oiled / polyurethaned and dry for a week before I turned the speakers upside down and laid them on an old towel (instead of cardboard and tupperware) to apply the finishes to the bottom panel...
-
STEP 1: REFINISHING THE CABINETS
I decided to do this first, as I felt like this might be the 'hardest' part of the project / thing I would be most likely to screw up or not satisfactorily complete. I figured if I was going to mess up anything to the point that I might have to send these out for professional help, then let's get that over and done with. I had repaired speaker drivers, etc. before so I was pretty confident that I could remove / reinstall hardware inside the cabinets... I was a little less confident about the cabinets themselves, LOL.
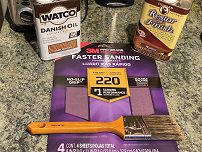
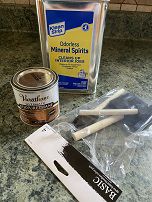
Materials Needed:
- 220 and 400 grit sandpaper, 4 sheets each / $4.97 per 4-sheet pack
- Watco Danish Oil, dark walnut, one pint container / $8.97 (There is also some Restor-A-Finish in the photo; I did NOT use that, as it was not as dark a finish as I wanted)
- 2" Fine bristled synthetic paint brush / $ 9.47
- Sample size Behr Interior semi-gloss paint, Midnight Black / $4.88
- Roll of Painter's Tape / $3.88
- Disposable 2" paint brush / $1.97
- Varathane Oil-based clear Gloss Polyurethane, 236 mL / $6.88
- Mineral Spirits, quart container / $ 8.97
- Asst. disposable sponge brush set / $1.97
Total Expense for this Step: $56.93 plus tax
Time Required:
- Approx. 8 hours total time for sanding / prep, repainting the motorboards (1 coat), oil finish application (3 coats), polyurethane application (2 coats). Does NOT include drying time between coats
Ok, so here goes...
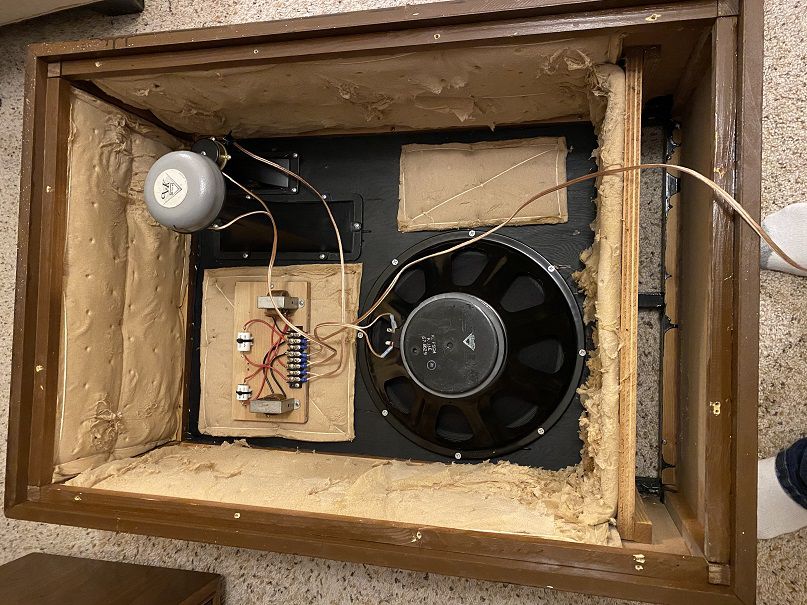
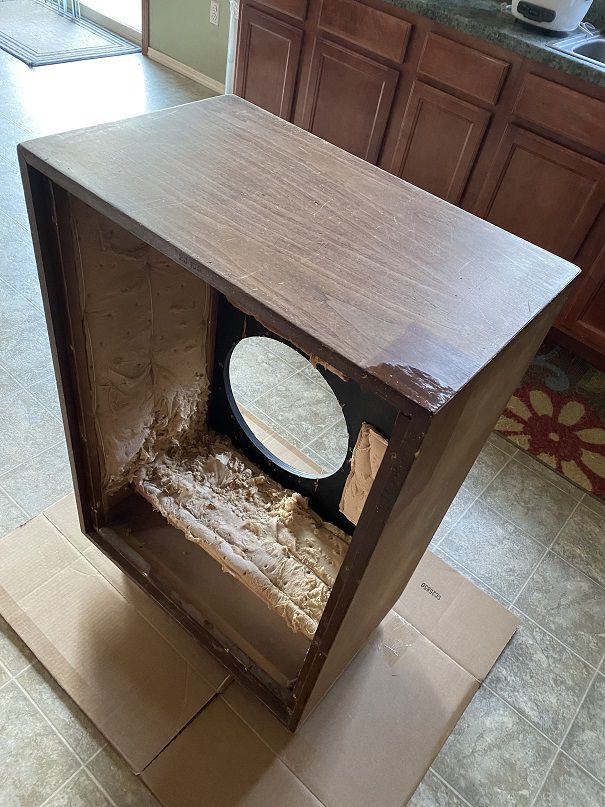
First, remove the back panel and remove all the drivers, crossovers, wiring. Why? because these are big, heavy speakers - and removing the hardware and back panels reduces the weight significantly. Plus, we've already decided that the hardware needs inspection and some work, so it will need to come out at some point - and it would really suck if you dripped paint or oil onto a driver front or inside a horn, etc. And with the back panels off you can move the speakers by lifting from the (dry) inside instead of having to wait for the exterior to fully dry before attempting to move or touch anything.
Once everything is out - I didn't bother to take photos of removal, as I think everybody know how to use a screwdriver, LOL - you will be left with a 5 - sided cabinet "shell":
Note that I put down some cardboard to hopefully prevent any drips or spills from hitting the flooring, and that I raised the speakers off the ground using (4) cheap 1" Tupperware containers per speaker. This would allow me to get at the bottom trim, etc. without hitting the cardboard barrier.
Now it's time to sand down and prep the existing finish. This actually ended up being quite a bit easier than I expected, with one caveat. A close up inspection revealed a few fairly deep scratches in the veneer; I made a decision that I was not going to try and remove every single scratch; rather, I would get rid of all the light surface scratches and work to minimize the visibility of any deeper defects. My reasoning for this was based on two things; 1, my skill level (or lack of it); and 2, I had read that the veneer on most vintage Klipsch cabinets was not particularly thick - and I was worried that if I went too nuts with the sanding that I might sand right through the veneer in spots.
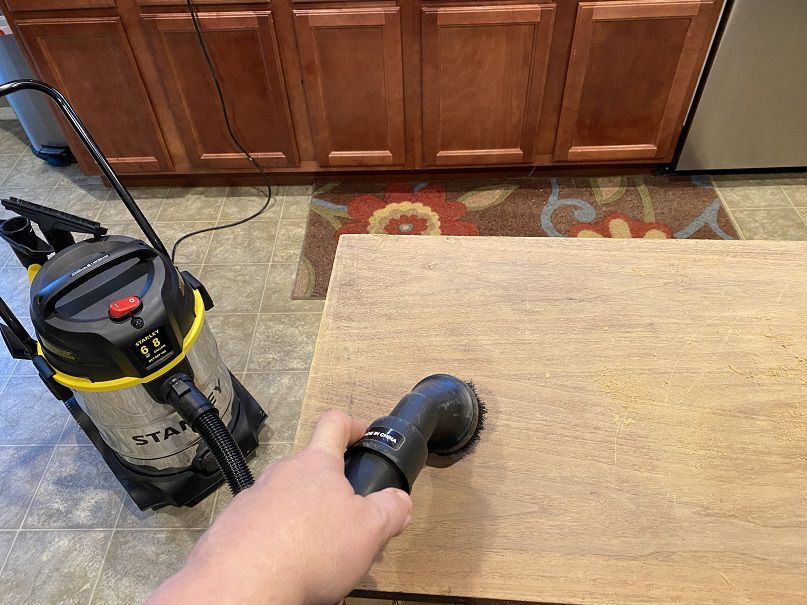
Sanding is easy, if you remember a few important rules. Always sand by hand, applying steady and even pressure as you go. Always go straight back and forth in the same direction as the woodgrain. Check the sandpaper frequently to see if the section you are working with has any rips or is worn out. Check your sanding work frequently, especially if you are working on a deeper scratch or scuff. You only want to sand as deep as you have to. Start with the coarser sandpaper (lower number) and then go over everything with the finer grit paper (higher number). When you think you are satisfied with how the surface looks and feels (it should feel smooth without any grooves or uneven surfaces), use a vacuum with a soft brush attachment to completely clean every part of the cabinet, including the motorboard and inside the cabinet. The sanded dust gets everywhere!
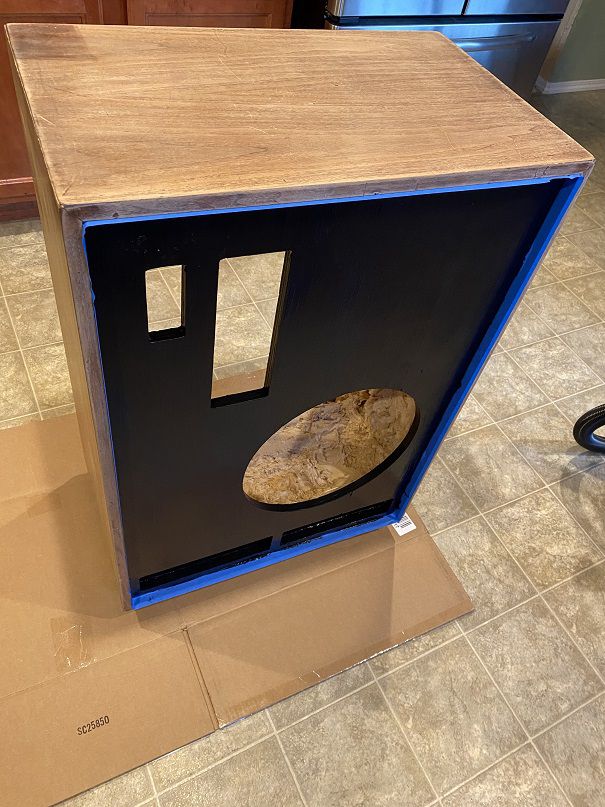
Next, I used the painter's tape to tape off the frame around the motorboard so I could paint the board. Again, really easy to do. Apply the paint evenly; be sure to go in the direction of the woodgrain, make sure any places where the original paint had peeled off are fully covered. Be sure to paint inside the driver openings, since the drivers are all installed behind the motorboard you will see the opening surfaces when you are all finished. You can use a cheap, disposable brush for this step. Allow at least 30 minutes of dry time before removing the painter's tape. Allow to dry overnight before attempting to apply the finishing oil to the rest of the cabinet. That small sample size paint can was enough to repaint both motorboards with about 1/3 of the can left over.
BEFORE AFTER
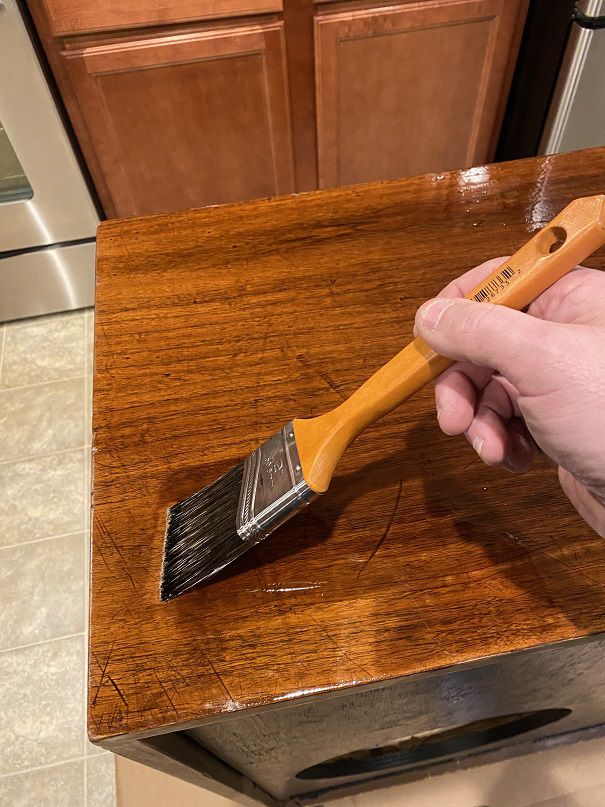
Now it's time to apply the oil. Intimidating to think about; surprisingly not too bad at all to actually do it. First thing I did was look up how to do it on the Internet, which actually was very helpful. Among the tips I learned... buy a good brush, don't use a cheapo throwaway for this. I took a disposable 12 oz. cup and filled it about 1/4 of the way with oil (shake the oil can a bit first). Apply the oil sparingly; don't load up the paintbrush or it will drip everywhere. I dipped only the last 1/2" of the bristles into the oil and then let any excess drip off back into the plastic cup. I applied oil to all the edges of a surface first - like all around the top surface - and then stroked the brush across the surface, always with the grain, back and forth. Be careful on the sides as gravity will make it drip if you apply to heavy a coat. Don't forget to do all the trim areas around the front motorboard. As long as you are careful, I didn't see any need to tape off the black painted portions of the board. After about 15 minutes go back over each surface with the paintbrush (don't add any more oil to the brush) to ensure that the oil coat is uniform and even, and that there are no heavy sections or drip lines visible anywhere. Once you are satisfied that the coat looks good, allow to dry completely before applying the next coat. This could take an entire day depending on room temperature and humidity. Patience here seems to be more important than actual skills. If you rush it you will end up with an uneven, gloppy mess.
Once you have applied at least 2 coats (I did 3) allow everything to dry for 48 hours minimum to be able to apply the polyurethane. Now, full disclosure, these speakers did not originally come with a poly finish; but I wanted to max out the shine, and also protect the finish long-term so I won't have to do this all over in 5 or 10 years.
Again I used a disposable plastic cup to hold the polyurethane. I diluted the polyurethane by adding half as much of the mineral spirits (so, 2 parts poly and 1 part mineral spirits) because I read a tip that straight polyurethane may be a little too thick and might show brush marks once dry. I used a cheap disposable sponge brush to hopefully eliminate bristle brush stroke marks in the finish. I went with a high gloss poly, but they also sell matte finish and semi gloss versions as well. I applied 2 coats, with a full 24 hours of dry time between coats. And, as always, go with the woodgrain - not against it.
Here are some photos of the (re)finished product. Not too bad for an amateur, I think -
-
1
-
-
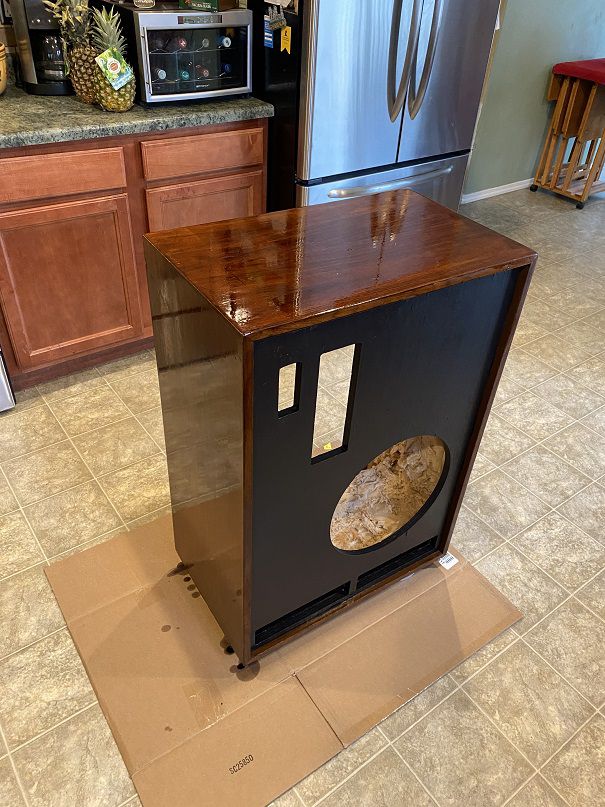
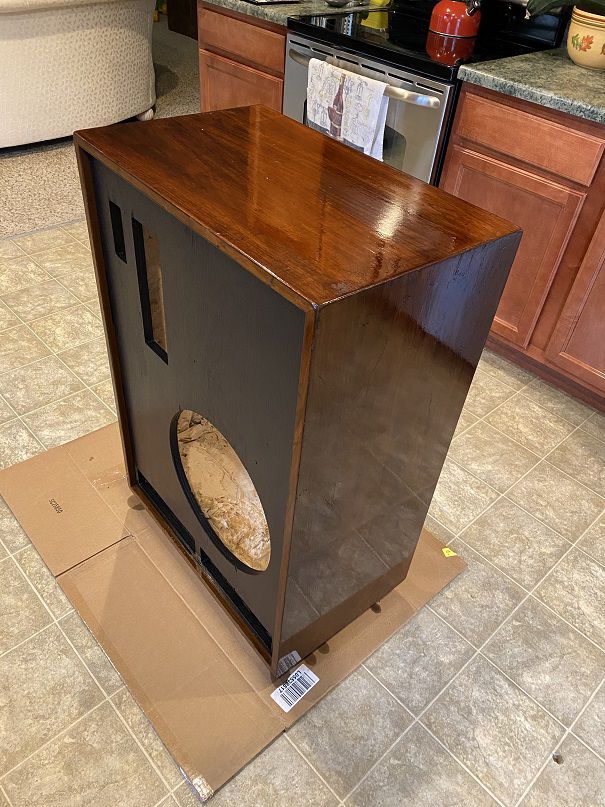
So, here is what the speakers looked like when I got them home and dusted them off (see photos).
After cleaning them off, and wiring them up, I tested them out using my Pioneer SX-780. The good news was that they sounded decent; and I went around and verified by ear that all the drivers were indeed functional. Of course, there were some issues - but what would you expect for 50 bucks?
The first and most obvious issue is that the woofers are not the originals. They had been in fact replaced with (probably) 1990's era subs. The subs did work; but if I was going to own a pair of authentic vintage Cornwalls, they are going to have actual Cornwall drivers in them. And if I was going to own a pair of authentic vintage Cornwalls, I wanted to have something that looked and performed 100% like it did back in the day. Something to be proud of.
With that in mind, I put together a list of everything that was going to need to be done to get these Cornwalls back to their former glory:
1) Sonics
- Replace the aftermarket subs with authentic, period correct Klipsch Cornwall woofers;
- Inspect the midrange and tweeter horns / drivers to ensure everything is within spec and working properly. Disassemble and clean them, install new gaskets for the midrange horns;
- Inspect the crossovers and either recap or replace completely, depending on condition;
- Replace the aged internal crossover to driver wiring 'harness' with modern, heavier gauge wire
2) Cosmetics
- Refinish the cabinets original walnut veneer (in my mind I am hoping to go a little darker than their current appearance);
- Repaint the scuffed up black matte motorboards;
- Clean up the rear panels, which were not veneered and were painted a medium brown at the factory. Unfortunately they had been exposed to white paint at sometime and there were splatter marks all over the panels. The goal was to remove the splatter without damaging the original paint job or the original labels that were still attached to the rear panels;
- Fabricate removable speaker grilles in a contrasting fabric. The original grille material (which was black - there were a few tiny bits left on the motorboard edges) was stapled to the motorboard and non-removeable. I wanted the ability to have removeable grilles which became a production option for the Cornwall a few years after mine were originally built
3) Extras
- After some online research, I saw that some people used risers to elevate their Cornwalls off the floor. I decided I would fabricate my own risers to keep costs reasonable;
- Install any missing period correct logos / badges, etc.
I felt like this was a pretty comprehensive list, but I realized that once I got started there was always the potential for other things to pop up. I also should say that I am not anywhere near a professional carpenter or cabinetmaker; I have done a little refinishing work on speakers before but these were at the worst 'starting point' finish-wise that I had ever worked on. I've got some general tools (like screwdrivers / socket wrenches / etc) but my garage is stocked more for automotive stuff than woodworking.
Lastly, I am going to try and keep a running tab on both dollar costs and labor time hours as I go through the refurb project. I figure should anyone else out there be thinking about doing a similar type project, this might serve as a good template to let you know how much time, effort and money you are going to end up spending. And if it gets difficult or goes south, I won't sugarcoat it. If it's an easy step, I will say so. Same if I any of this is a PITA or something best left to a pro - I will let you know.
-
3
-
1
-
-
Hi All -
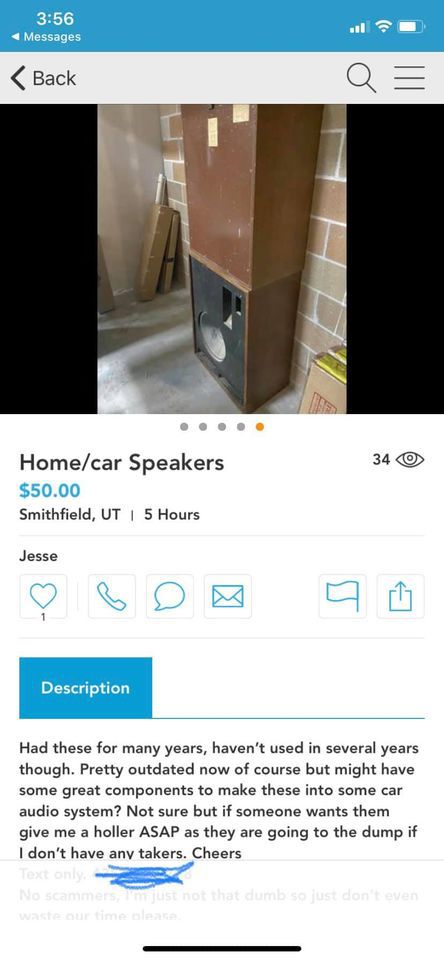
Pretty new to this Forum; even so, I have already gotten some great help and advice from the members here. I thought there might be some interest in following my journey to refurbish a pair of 1971 Klipsch Cornwalls that I happened to luck into over the summer of 2020. By sheer luck, I came across an ad for these listed for just $50. The seller was located about 2 hours drive (one way) from my job. And, that day I happened to take my convertible to work instead of my Suburban - I mean, who wouldn't want to drive a drop top on a warm, dry, sunny Utah day?
So here's the backstory: I texted the seller immediately and was surprised that I was just the third person to respond (although the ad had only been posted about 10 minutes at that time). I told him I would definitely take them, and offered to pay immediately via Venmo or Paypal. The seller said he was OK waiting for me to show up to collect payment. He explained that when he mentioned to the first 2 prospective buyers where he was located, they both backed out. I knew that if I wanted these I had to go there ASAP; no time to drive back home first and get the truck. I explained that I was 2 hours away and was DEFINITELY coming .I verified his exact address with GPS and saw it would take 1 hour and 58 minutes to get to him. Would he be OK holding them for 2 hours and 15 minutes. I would have been devastated (and a bit pissed off) had I driven that far only to find that they were gone. The seller said "no problem - but at 2 hours 16 minutes I move on to the next guy". Deal!
Imagine his surprise when I showed up on time... but in a convertible. With a good bit of luck, we managed to load them up. And, by the time I got to his location, he had gotten close to 50 other calls / texts from interested buyers. To his credit, he kept his word and didn't sell them out from under me. He did mention that he even got a few offers significantly over his $50 asking price, but declined them, telling them that they were already sold.
So, I will end this first installment with a couple of photos. I knew even while I was driving there, that if I was successful, this was going to sound like a BS story. So, I made sure to take a screenshot (a few actually) of the original ad showing the price. And a few of the Cornwalls loaded up in my 2003 BMW 330cic. I've attached one of each to this post.
P.S. - BTW, the seller was the original owner and yes, he knew what he had. He just figured that in this day and age of Bluetooth, Alexa, and Beats headphones that no one would want such large speakers anymore. If you look at the ad he even mentions taking them to the landfill if he gets no interest(!) Boy, was he wrong...
-
9
-
1
-
-
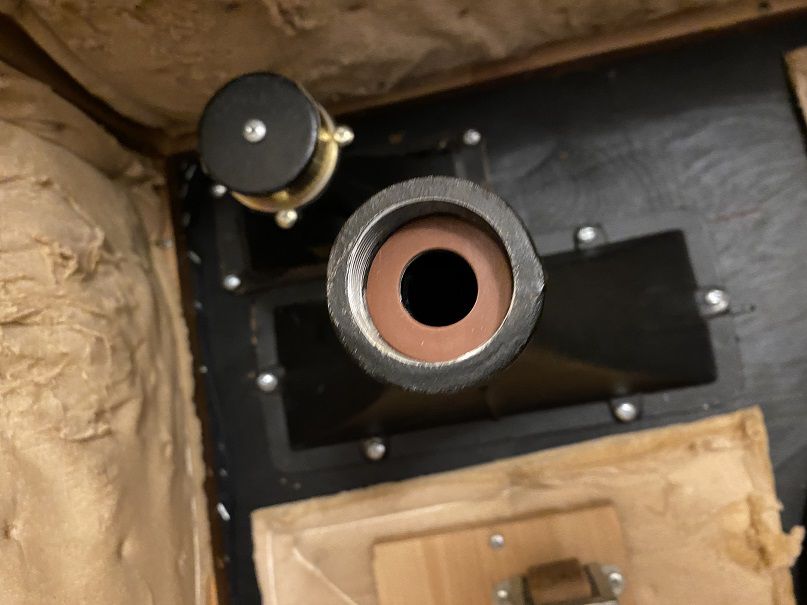
Thanks to everyone for all the suggestions. Tried the oil filter wrench; unfortunately the diameter of the mid driver was just a little too big.
In the end I just sat down, put the metal horn section between my legs, and gave a good twist on the drivers... that did the trick.
I guess I was just being too gentle out of fear of crossthreading the drivers.
-
2
-
1
-
-
Tried unscrewing the K-55 driver from the midrange horn in my Cornwalls and it won't budge. Is there a set screw or something preventing it from moving?
Also, standard counter clockwise motion to unscrew these, correct?
I know the threads are relatively small so I figured I better ask before I damage the threads or worse...
-
Bob Crites has a large selection covering most all Klipsch products including vintage models. Everything from replacement drivers, crossovers, rebuild kits, grille fabric, you name it.
-
I am starting the refurb on my 1971 Cornwalls. When I took out the midrange horns I noticed I have 2 different drivers. 1 is a K-55 and 1 is a K-52.
Which one would have been the original driver for that year? (I am guessing that 1 is an original and 1 was a replacement somewhere along the line).
I didn't notice any sonic difference between the 2 speakers prior to this teardown. Is there any good reason to NOT keep both when I put everything back together?
thanks!
-
It was odd, because the seller was the original owner (his son swapped in the subs) and he knew what he had... he just thought that, in this day of Bluetooth and earpods, etc. there would no longer be any interested in such large speakers. He even said if no one took them they were going to the landfill (!)
Of course, he was dead wrong... by the time I got to his place, he told me that had gotten over 50 calls and texts looking to buy these. Luckily I Venmo-ed the $$$ immediately; and luckily he was a decent guy in honoring our deal - despite getting significantly higher offers while I was on the way to his place.
-
Thanks to all for the help!
Yeah, I thought I was decoding the serial #'s correctly... just got a little mixed up with that whole 'reintroduction' of the II's much later on.
I lucked into my fully functional Cornwalls for just $50 (see attached photo of the original ad that I kept to prove I'm not BS-ing) and had to pick them up - 4 hour round trip - in a convertible (!) because I was afraid that if I went home to get my truck first they would be gone.
'71 Verticals, Walnut Oiled finish, supposed to have had black cloth over the motorboards (I can see a couple of tiny swatches left around the corners) and all original drivers except someone installed subwoofers in place of the K-33 drivers.
Plans for these include:
1) replacing those subs w/ period - correct K-33's (already on their way from eBay);
2) either recapping the original Xovers or getting replacements from Bob Crites;
3) fabbing removable grilles out of Masonite (going with an 'ivory' cloth to contrast the walnut veneer);
4) refinishing the cabinets;
5) fabbing 2" risers
Once I get started on the project I will start a new thread for the renovation
Even now I am absolutely LOVING the sound out of these things 👍
-
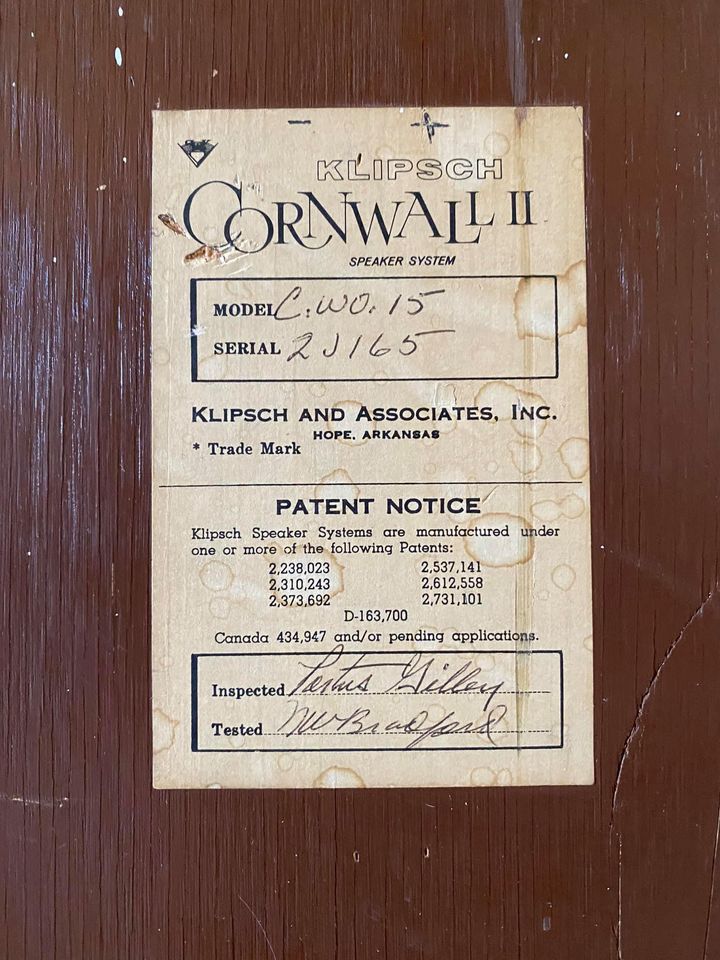
Recently acquired my first vintage Klipsch speakers, a pair of Cornwall II's that I believe are from 1971, according to the serial #s (2J165 / 2J166)...
Am I correct on the year?
Slightly confused as I thought I read somewhere that Cornwall II's didn't come out until the 1980's..?
Thanks for the help!


My $50 Cornwall Project
in Technical/Restorations
Posted · Edited by RobC63
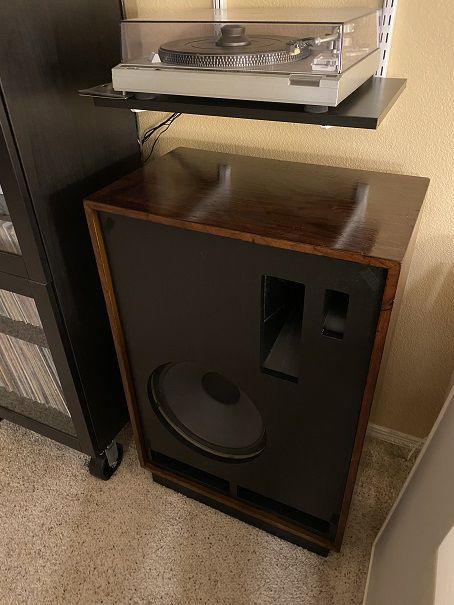
I guess it would be OK to do a short bit on the Deans, even here on a Klipsch Forum (hopefully I don't get a mod PM admonishing me, LOL)
The backstory on the Deans is very similar to the Cornwalls in some ways... local ad that had a great price and was only up a few minutes when I saw it and jumped on it. Nice, mid autumn day - so again I was driving the convertible to work. Got there fast; payed and loaded them ASAP, others were calling on the ad while I was loading and trying to buy them out from under me. These were only about a 15 minute ride from the office, so not nearly as bad getting them home. Again, priced so low because the seller thought no one would want such big speakers anymore...
Here is how I have them set up today. They are located on the opposite wall from the Cornwalls, about 18 feet away. I built a second set of cheapo risers when I was doing the ones for the Cornwalls. Haven't got around to painting them yet.
I do have the second tone control badge for the speaker on the left. It is off because I am attempting to 3D print duplicates for the speaker on the right. Same thing with the missing knob on the right speaker.
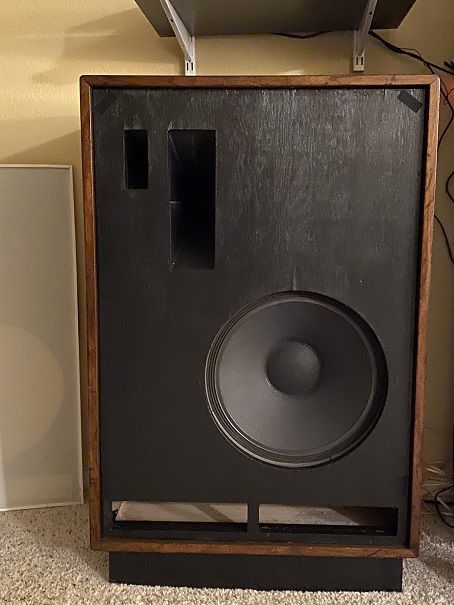
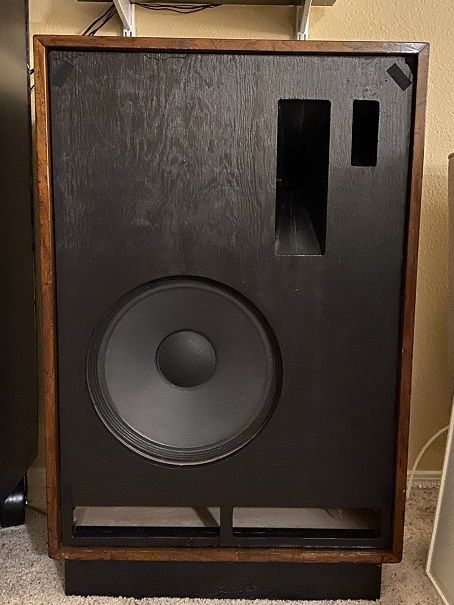
The Deans have an interesting history. I bought them from the original owner who was 86 years old. He was moving in with his son and daughter in-law, and so was selling off a lot of his older possessions. He bought these, one at a time, when he was in his mid twenties. He lived in Los Angeles at the time, and when he bought the first one he had a mono system (that's why he only bought one). The electronics store he bought it at had an order sheet that he filled out with choices for drivers, cabinet finish, grille cloth color, etc. On this first one - the speaker on the left above - he had them place the 2 tone controls on the front face of the speaker. About 9 months later he decided to change over to a stereo system, and so placed a second order. Unfortunately, he forgot to request the tone controls up front, so they were built on the rear panel as was the norm. Once delivered to his home, he decided it wasn't worth the trouble to send it back. All the other options were exactly the same on both. The other odd thing is he requested that the Cobreflex midrange horn system be placed on the bottom of the cabinets, instead of up top. So the midrange is down at the bottom and the woofer is up top, parallel with the tweeter.
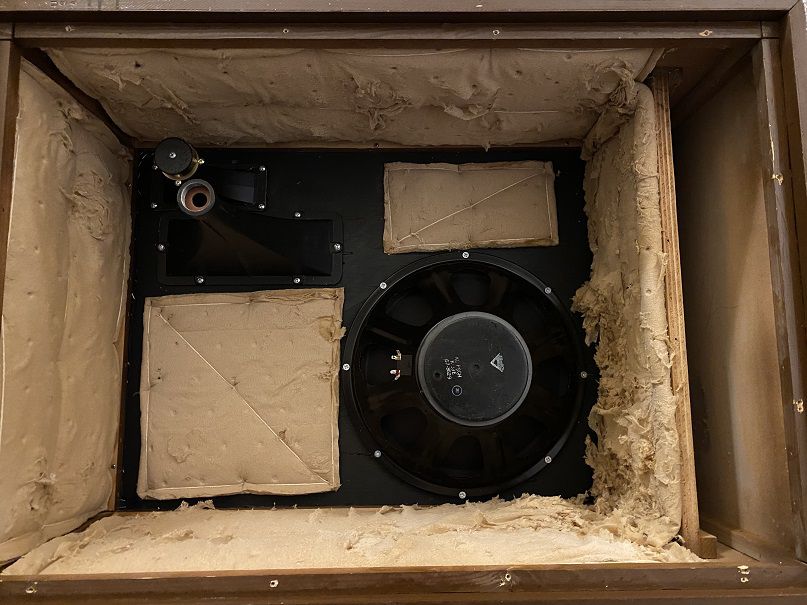
These University Deans are a 3 way system with a C12-HC dual voice coil woofer; the Cobreflex midrange horn with a T-30 driver; and a tweeter whose model number escapes me at present, LOL. The crossover is a model N-3 with the adjustable tone controls for mid and high frequencies.
The refurbishment on these has so far been limited to a recap of those N-3 crossovers, a good Deoxit cleaning of the tone control pots, and as you can see I relocated the tone control pots on the second speaker onto the front panel to match the first speaker. The original finish is in much better condition that the original finish on the Cornwalls was; however, these will get at least a scratch cover-up treatment and a good waxing in the near future. All the drivers are still the originals, and in near mint cosmetic and physical condition. The internal wiring was also still supple and was a thicker gauge than the Cornwall wiring, so I did not feel the need to replace it.
As far as how they sound compared to the Cornwalls...
A little hard to describe. There is a definite difference; in some ways subtle, and other ways more pronounced. The Cobreflex setup on the Deans (especially being at the bottom of the cabinet) has the mid profile at a more 'warm' (meaning lower midrange is a little more emphasized here) than the Cornwalls, which are a bit more 'bright' (meaning more emphasis on the higher end of the midrange)... The spatial / soundstage qualities of both brands are notably different - but neither one is 'worse' compared to the other, just different... The bass response on the Deans isn't quite as prominent (12" vs. 15" woofer plays a part, I'm sure) but is still quite strong. A non-ported cabinet gives the Deans a slightly less 'boomy' bass (not that the Cornwalls are very boomy at all). The tweeters I would give the edge to the Cornwalls. The Deans aren't bad, but I believe those Atlas horns in the Cornwalls do go a bit higher. The tone controls on the Deans of course give an adjustability factor that is not available on the Cornwalls. And although there are no dB marking on those adjustments, I am thinking the range is quite high; normally I have seen most speakers with adjustable tones usually ranging +/- 3 dB; here I think these are as high as +/- 6dB.
In the end, I have to say that overall, the Cornwalls come out on top - but only slightly. Prior to getting these Deans I had no experience with University speakers; quite frankly I had never even seen any in person, much less heard them. The Deans have been a very pleasant surprise; and I am not the only one who thinks so. A few audio enthusiast friends have been over and heard my pair... and were almost universally quite surprised at how good they sound. I mean, with the Cornwalls, yes they sound great - but you EXPECT them to sound great. After all, they are one of the flagship models of a prominent semi- high end speaker manufacturer of some renown. Almost every audio enthusiast has heard of Klipsch - even if they have never owned a pair - and they have a very solid reputation. The Universities, however, have a reputation among the less-informed as kind of a 'kit' speaker manufacturer; and the expectation is that some of them may sound "okay" but probably nothing special. I must beg to differ. At least with these Deans. Quite a unique and special sound, indeed.