justinsweber Posted June 27, 2013 Share Posted June 27, 2013 Hey Everyone… its project time. I have a set of motor boards I’ve been sitting on for 3 years for a cornscala. The ports are cut, the woofer is cut and the horn is cut for Dave’s Eliptrac… I think the pal will be to build a 2 way cornscala. The one hitch to my plan is that the motor board was cut at 25.5” and really can’t be changed without cutting into the port area, and I’m too lazy to do it. The original cornscala cabs began life as 24” cubed (24”x24”x24”) = 13,824 cu in or ~ 8cu ft. (the math as I remember it is 24” – ¾” on each side, 24” – 1.5” = 22.5” cubed = 11,390 cu in or 6.5 cu ft. 25.5” wide (my motor board) + 1.5”=27” wide externally. Here were some calculations/ options I ran through before coming to my cab size and I think the cut sheet for the panels. 27” wide x 24” tall x 24” deep = 15,552 = 9 cu/ft ext / 25.5x22.5x22.5= 12,909cu in. = 7.4 cu ft internally… too big… aiming for 6.2cu ft to 6.6 cu ft. So, 27”x22”x24” = 14256ci in or ~8.2 cu ft ext…. too big, 27”x22”x23” = 13662cu in or ~7.9cu ft. externally. Close… 27”x23”x23”=14283 cu in or ~8.2cu ft. 27”x22.5”x22.5”=13668 cu in or ~7.9cu ft. which becomes 25.5”x21”x21”= 11245cu in or ~ 6.5cu ft. So External dimensions are 27”x22.5”x22.5” Motor board/ back panel will be 25.5”x21” Sides will be 22.5”x21” Bottom and top panels will be 27”x 22.5” So, does this all makes sense… Id love someone to help me double check before I get to cutting. Quote Link to comment Share on other sites More sharing options...
Guest " " Posted June 28, 2013 Share Posted June 28, 2013 with out recomputing all your numbers......assume in split design only woofer would be in the cab....issues are internal volume and vent / shelf size and area. area of vent is different for the diffrent port versions becuase the seperating walls reduces the vent area. the good news...most as I have done bigger conscalla internal volumes and just tweaked the volumes depending on the FS of the woofer. deeper but muddy vs faster rolloff but not as deep, etc. Most as I have done different shelf lenths and different vent areas and all have their trade offs. Basic guidance is if you build bigger, you can always tweak the cabs with fill or foam...but if you under size...more restrictive in the tweak process. Bracing in the centers from front to back is a must. As it being air tight. Quote Link to comment Share on other sites More sharing options...
justinsweber Posted July 11, 2013 Author Share Posted July 11, 2013 some progress pics... I friend I made in the last year is a great wood worker and had the tools I didn't to cut new cabs for me. He made quick work of some splits... Used biscuits and pocket screws... super beefy... much like my beloved splits Dave made. Quote Link to comment Share on other sites More sharing options...
justinsweber Posted July 11, 2013 Author Share Posted July 11, 2013 1 Quote Link to comment Share on other sites More sharing options...
justinsweber Posted July 11, 2013 Author Share Posted July 11, 2013 2 Quote Link to comment Share on other sites More sharing options...
justinsweber Posted July 11, 2013 Author Share Posted July 11, 2013 3 Quote Link to comment Share on other sites More sharing options...
justinsweber Posted July 11, 2013 Author Share Posted July 11, 2013 4 Quote Link to comment Share on other sites More sharing options...
justinsweber Posted July 11, 2013 Author Share Posted July 11, 2013 5 Quote Link to comment Share on other sites More sharing options...
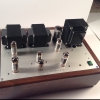
justinsweber Posted July 11, 2013 Author Share Posted July 11, 2013 It built out of 3/4" baltic. The woofer will be front mounted... I love the idea of 1.5" motor board, but having tried and failed to remove a woofer from the recessed cab... face mounting is just fine with me. The motor board, shelf and back board are removable, by removing the screws from the inside. I cut the motor board at home depot... seems no 2 cuts were the same... we will use the irregular motor boards as jigs now... and recut them on his table saw. Im till in the air weather to go 2 way or 3. Prob start out 2 way and go from there... but who knows. Quote Link to comment Share on other sites More sharing options...
justinsweber Posted July 11, 2013 Author Share Posted July 11, 2013 Did a bit of late night planning... The original plan was to use M2380 horn/B&C DE85TN and the Baby cheek tweeter/horn combo. As usual my 1st response was short sighted... I now am planning to go with Fastlane audio Eliptrac and HF horn. The top-hat will now need to be 22" tall to acomidate. The depth will be 18" as I wont need any deeper. I may try some lazy Susan idea under it allowing me to turn the tophat. Wood work has not been my handy work but Ryan Moses (romoses3@yahoo.com) (425) 246-8136. Ryan came to hear the econo-waves Dave built and fell in love with the 2way cornscala's I got from Dave last year. Long story short...Ryan does bad *** wood work, esp veneering. I had planned to buy a cheap table saw for my birthday in June, but bought some records instead.... and was advised that a cheap saw is a very bad idea. Ryan stepped up and offered to cut the cabs and help... with years exp he added to my basic layout and turned the ply into a new speaker :-). Quote Link to comment Share on other sites More sharing options...
boojum Posted July 11, 2013 Share Posted July 11, 2013 Justin and I have worked on several projects together, this being the latest. I've been designing and building high-end cabinetry for a quarter-century now, and the speakers are a new and exciting direction. Because my shop is fully equipped to produce the components, the challenge has been to create a package that could be built in-shop, or economically shipped flat-packed to Justin. With access to basic tools (pencil, ruler, screwdriver, glue, square) he can assemble and load with drivers and crossover. As I'm new to the forum, I'll include pictures once I learn the attacment procedure, or perhaps Justin will be good enough to post them in his dialogue after I forward them to him. Quote Link to comment Share on other sites More sharing options...
Mongo171 Posted July 11, 2013 Share Posted July 11, 2013 I may try some lazy Susan idea under it allowing me to turn the tophat. Don't know if it would work better, but my gf uses a cake turner. Don't know the correct verbage. It's circular and allows the turning of the cake while decorating it. Quote Link to comment Share on other sites More sharing options...
Daddy Dee Posted July 11, 2013 Share Posted July 11, 2013 boojum, welcome to the forum. Justin, cool project. looking forward to seeing more pics as you go. Quote Link to comment Share on other sites More sharing options...
justinsweber Posted July 11, 2013 Author Share Posted July 11, 2013 The orig idea was to make use of motor boards I made 2 years ago... but seemed wiser to do splits. Ive sugested to rayne that many of us would do more if the cabs were avalible/ shown easy enough to work. I secretly have a dream of runing my current set and and putting the new set in my garage :-). (Cornscalas/ any klipsch heritage is wonderful as you can really run it with 3/4 watt SE amps.). Once cabs are made, Ill have to build and sell some amps to fund the parts to stuff them and make them sing :-). Quote Link to comment Share on other sites More sharing options...
justinsweber Posted July 11, 2013 Author Share Posted July 11, 2013 ~ Quote Link to comment Share on other sites More sharing options...
justinsweber Posted July 12, 2013 Author Share Posted July 12, 2013 few more Quote Link to comment Share on other sites More sharing options...
justinsweber Posted July 12, 2013 Author Share Posted July 12, 2013 ! Quote Link to comment Share on other sites More sharing options...
Daddy Dee Posted July 12, 2013 Share Posted July 12, 2013 very cool to have the pilot holes drilled at angle for joining sides. does that technique have a name? Quote Link to comment Share on other sites More sharing options...
Guest David H Posted July 12, 2013 Share Posted July 12, 2013 Justin and I have worked on several projects together, this being the latest. I've been designing and building high-end cabinetry for a quarter-century now, and the speakers are a new and exciting direction. Because my shop is fully equipped to produce the components, the challenge has been to create a package that could be built in-shop, or economically shipped flat-packed to Justin. With access to basic tools (pencil, ruler, screwdriver, glue, square) he can assemble and load with drivers and crossover. As I'm new to the forum, I'll include pictures once I learn the attacment procedure, or perhaps Justin will be good enough to post them in his dialogue after I forward them to him. boojum Welcome to the Forum, your work is certainly to be commended. Justin, your project looks great. Dave Quote Link to comment Share on other sites More sharing options...
tigerwoodKhorns Posted July 12, 2013 Share Posted July 12, 2013 very cool to have the pilot holes drilled at angle for joining sides. does that technique have a name? Pocket screw made with a Kreg jig. Works really well. Quote Link to comment Share on other sites More sharing options...

Recommended Posts
Join the conversation
You can post now and register later. If you have an account, sign in now to post with your account.
Note: Your post will require moderator approval before it will be visible.