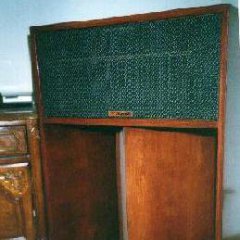
JohnA Posted November 8, 2002 Share Posted November 8, 2002 I just bought a pair of HBR Heresies, SN# 87T877 & 8. That makes them 1979 models. They were painted black by a previous owner, apparently by brush! That will change shortly. The rear stampings are "USA", "OD" and "AS". The signatures are Janet Latham and N.W. Bradford. the crossevers are Type E. They have K-77 tweeters. I could be persuaded to swap them for K-77-Ms if someone wants the AlNiCo. One has a K-22-R woofer and the other one has a K-22-EF woofer. Which is correct for '79. Does one perform better than the other? To properly paint them black, how do I hide the edge plys of the plywood? Quote Link to comment Share on other sites More sharing options...
djk Posted November 8, 2002 Share Posted November 8, 2002 The 'R' means it is a replacement driver. Somebody fried the original. The Klipsch warranty policy was: Its not our fault you fried it, but, out of the goodness of our heart, we will replace it for free this one time, on the off chance that it was defective. If we ever see that driver with an 'R' on it again though, you bought it. Its the same driver. Quote Link to comment Share on other sites More sharing options...
JohnA Posted November 8, 2002 Author Share Posted November 8, 2002 Thanks, D. The -R woofer has a round magnet rather than square, so I had wondered what the difference was. One of the K-77s is dead; the same speaker with the replacement woofer. I don't yet know if it's an open coil or something else. I have a modern diaphragm upstairs with tinsel leads. I can do the soldering, but are there any tricks needed to OH the AlNiCo versions? I guess I'm concerned about cleaning out the voice coil gap and disturbing the top plate, killing the magnet. BTW, I've had Bruce Brown over to hear my La Scalas. He says he remembers you from a past life and a set of La Scalas you built for sound reinforcement. You get his recommendation as a good guy (we won't tell) Quote Link to comment Share on other sites More sharing options...
HDBRbuilder Posted November 8, 2002 Share Posted November 8, 2002 John, It was me and a young guy named Steve who built your Heresys. Steve and I also built quite a few Cornwalls and a bunch of the MCM 1900 systems together. He was still there when I left. Ola Mae Davis(OD) sanded your speakers. Janet Latham!!! Gawd, did I have a serious crush on her!!! She was a real beauty!!! Long dark brown hair and...well...you get the picture!! She had a pair of clear-laquered LaScalas in her living room. MMM...MMM....MMM!!!!!!!!!!! When Gwin Cox got moved to assistant to the plant manager, Janet took over her spot in final assembly for a time. If you intend to paint those heresys black, the plywood edges should have been puttied up and sanded well at the plant, so just shoot em black...no big deal! Quote Link to comment Share on other sites More sharing options...
JohnA Posted November 9, 2002 Author Share Posted November 9, 2002 Andy, They are already black, but weren't well done. I have a guy that does great work finishing and refinishing and I may take them to him. However, I was thinking of doing these myself. They'll have to be stripped, puttied and sprayed. I'll have to do all of it by hand. I'm just trying to assess to amount of work. If the black paint comes off well enough, I could stain them to match the fronts. Quote Link to comment Share on other sites More sharing options...
HDBRbuilder Posted November 9, 2002 Share Posted November 9, 2002 John, If you intend to repaint them black, then just sand down the finish til you begin to see wood...ensuring that the surface is smooth as in level, but rough enough for another finish to grip it well. I would recommend using 80 grit garnet sandpaper to do this. After you get ehm to that point, take some 120 grit garnet sandpaper and give them a light sanding. Then just spray on a coat of sanding sealer, sand the sealer, then spray them black. Quote Link to comment Share on other sites More sharing options...
Dale W Posted November 14, 2002 Share Posted November 14, 2002 HDBRbuilder & John Albright: As a automotive refinisher and past sandpaper rep , I many have some reservations about sanding the existing surface with garnet paper unless your objective is to strip the entire finish. Garnet is a wood abrasive, unlike silicon carbide or aluminium oxide wich are meant for sanding paint. Care must be taken in the size and depth of scratch put into the existing paint as to help eliminate swelling and god forbid wrinkling.If the finish looks very bad and like it was applied with a brush then you might not know what base this material is and depending on what you apply over top the two may not be compatable.( one may disolve the other) The cabinets i've done in black have all been stripped then sealed with a vignal sealer,then sanded to perfection before top coating with 35% sheen black laquer. This sheen level looks very nice on speakers and is used on most kitchens doors and face frames. Just a little added imput. It's always a little tricky following what someone else has done before you, unless you have knowledge of the products they used.I realize HDBRbuilder has lots of expertise in this field just letting you know what has worked for me in the past. Hope they turn out to your expectations. Quote Link to comment Share on other sites More sharing options...
HDBRbuilder Posted November 14, 2002 Share Posted November 14, 2002 If a finish has alot of build-up and you want to get it off rapidly, then by all means use an open coat aluminum oxide in 60 or 80 grit...but JUST UNTIL you begin to see the wood appear under that finish...then change over to a 120 grit garnet...here is why: Garnet is non-friable...which menas that as it wears, it gets duller...and that is good for two reasons. First, as you continue to sand with it, it becomes less abrasive and gives a more burnished appearance to the wood...IOW...it is akin to changing over to an even finer grit without having to do so. Second, because of this, it is less likely you will sand through the veneer. Aluminum oxide is friable, which means that as you use it, the grit fractures and makes itself new sharp edges...this is good if you want to remove ALOT of stuff quickly, but it also tends to make it easier to sand too much!!...thereby sanding through the veneer. At the time your speakers were built, the outer veneers of the 7-ply core plywood used for them was much thicker than you find on plywood today...and that allows you some leeway. Your Heresys left the factory with the edge plies puttied and sanded smooth...the final sanding on those speakers was made with 220 grit garnet paper before they were shipped. It is very likely that whoever painted them used no sealer whatsoever. By working them down to where the wood begins to show through the finish, you can easily find out by feel whether any sealer was used on them prior to being painted. If no sealer was used, then once you begin to see wood, changeover to 120 grit garnet for a few passes, then 220 grit garnet for the final sanding...if you intend to have a finish where the wood grain shows. Freeman markets a great tough sanding sealer that is often used for pattern production...it is tough and fast drying and is very easy to sand...it is good for use as a laquer base and is compatible with most other oil-based finishes too! BTW, silicon carbide is friable, but not easily so...and it is best used for sanding finishes, metals, or plastics...aluminum oxide and garnet are best for wood. It makes no difference what you use if you are REMOVING finish....as long as it works and the paper doesn't load up on you alot. The important part of sanding is preparing a surface for a new finish or sanding between coats when applying a finish. Hell, if you want to remove a finish, you don't give a damn HOW SMOOTH it is...as long as it goes away!! LOL! It is the surface you want to APPLY THE FINISH TO that is important!! LOL! Quote Link to comment Share on other sites More sharing options...
Dale W Posted November 14, 2002 Share Posted November 14, 2002 Yes that was my point also, I never got the time to finish what i was saying as i got call away from my desk. When dealing with a " existing finish " on wood , aluminum oxide works very well to sand and finish over top of. ei :finishs like laquer or urethane, but gums up quickly when dealing with finishs such as tung oil. I use olny garnet on the bare wood for surface prep but i still use aluminim oxide to sand the primer sealer. Results have been exellent so far. I repaired a wilson audio speaker for our local dealer, very high gloss black finish. believe me this touch quite some time useing automotive acrylic urathane then wet sanding and polishing to perfection. NEVER AGAIN !! with a little time and guidence most do it yourselfers can get decent results.Poeple who work in this industry take there knowledge for granted some times and need to spend a little more time explaining the procudures.Sorry if i was misunderstood. sand away john !! let us know how you made out. Quote Link to comment Share on other sites More sharing options...
Invidiosulus Posted November 14, 2002 Share Posted November 14, 2002 John, Are these heresies going to be implemented into your existing system? Rear channels maybe? btw, I'm Bruce's son Josh, I came with him to hear your system a while back. I remember you mentioned getting some heresies at the time. The heresy is great speaker(for something thats not the size of a small fridge) I hope you get those working. Peace, Josh Quote Link to comment Share on other sites More sharing options...
JohnA Posted November 15, 2002 Author Share Posted November 15, 2002 Hi Josh, The New/Old Heresies are for the rear channels. I'm going to make a pair of shelves to put them on so they can be heard. My brother got my rear La Scalas, minus the ALK crossovers. John Quote Link to comment Share on other sites More sharing options...
brother Posted November 16, 2002 Share Posted November 16, 2002 Forget the black paint, get rid of the old finish, use some putty on the ply edges, and grain filler on the rest. Sand it down graduating to 1000 grit wet sanding and stain to match those gorgeous LaScalas. A little (maybe more)time and some poly and they'll look like they came from Davis Cabinet. By the way, didn't the ALK's go with the rears...... Quote Link to comment Share on other sites More sharing options...
HDBRbuilder Posted November 16, 2002 Share Posted November 16, 2002 1000 grit for final sanding??? On birch plywood??? One thing to remember is that any finish other than a hand-rubbed oil finish will not want to adhere to wood that has been TOO SMOOTHLY SANDED!! Just go with 220-240 grit hand-sanding for the final sanding...by using garnet on the final sanding, its non-friability will allow it to appear smoother than the grit would seem to indicate, and yet, it will allow for a surface to which a sprayed-on or hand applied finish will easily adhere. Nobody wants to go through the effort of doing all this just to find that their finish is flaking away from the wood surface at a later date!! LOL! Keep in mind that the birch veneer is thicker than it is today on those speakers...but it can still be sanded through!! Don't go overboard with the sanding...that is the most common mistake when preparing a veneered surface for a finish! Good luck! BTW...the ONLY time I have ever used anything even as fine as 500 grit on bare wood was when I was preparing some tiger-stripe maple cabinet door frames and facings for a hand-applied polyurethane. I did a very light sanding with 500 grit, following a hand-sanding with 320 grit. I applied the finish with a brush, because the brush would work the finish into the porosity of the wood...but if I had intended to use a spray technique, I would not have gone with anything finer than 320 grit...so that the finish would be able to adhere well to the wood. Sprayed-on finishes need fiber to grip, since they are not being "worked into the wood". Even on these oak LaScalas, using brushed-on urethane, I am doing the final sanding with 240 grit garnet. Generally speaking, the wood type, density of its grain and fiber, and the method and type of finishing decides what the final hand-sanding should be...grit-wise, anyway. BTW, that project came out beautifully!! The maple was left natural and the finish was satin polyurethane...in three coats, with 500 grit sanding between each coat...smooth as silk(smoother, actually)!! The recessed panels in the doors and drawer fronts were bookmatches ripped from 1/4" birch plywood...and were identical around the room!! With all that tiger-striped maple for face frames and door frames...with every inch you walked, the room seemed to move with you!! I love the effect of tiger striped maple in that aspect!! Because the maple was COMPLETELY SEALED by the urethane, it will not oxidize over time and will remain blonde!!...another plus...because the room will need less lighting due to the light color of the cabinetry!! Now...if I was preparing some rock-hard burl veneer for a hand-rubbed finish...I would give a very light final hand-sanding with 500 or smaller grit beforehand...but, then again...it is rock hard wood veneer we are talking about, too...NOT birch plywood! LOL! The harder the material, the more likely it can use a finer grit on its final sanding before finishing...especially if the finish is one that will be "worked into the wood"! Quote Link to comment Share on other sites More sharing options...
Dale W Posted November 16, 2002 Share Posted November 16, 2002 As if 1000 grit isnt bad enough, 1000 grit "wet" is even worse. Water and wood make a very poor match !!!!! John: I'm thinking you created a monster here. follow the advise of those who have done this before and you trust.ie:HDBRbuilder Quote Link to comment Share on other sites More sharing options...
brother Posted November 16, 2002 Share Posted November 16, 2002 Keep doing your research....you'll eventually get there. Quote Link to comment Share on other sites More sharing options...
HDBRbuilder Posted November 16, 2002 Share Posted November 16, 2002 If one uses a wet sanding with the oil used for an oil finish(ie., boiled linseed oil)...and with an extremely fine grit such as 500 or finer on a nice piece of wood or fine veneer...that is fine....since the dust from that sanding will create a slurry with the oil and fill the pores of the wood prior to the hand-rubbed finishing...allowing for a higher gloss to the finish and an extremely smooth surface...the finish ending up with lots of "depth" to it. But...for something like those HBR cabinets, there is no need, since...if you decide to go with the natural wood with a varnish or laquer finish...they will do just fine with a final hand sanding of 220 grit garnet...even better if that sandpaper is already somewhat "used" when you go to it. But...when it comes time to sand between coats of finish, you can go to a 500 grit in lieu of 0000 steel wool...the sandpaper will work fine and you won't have the hassle of washing the oil that keeps that steel wool from rusting out of the steel wool with mineral spirits or acetone prior to using it(necessary to do so that no oil film is left on the surface prior to your next coat of finish)...neither will you have the hassle involved with eliminating any of the steel wool "dust" afterwards so that it doesn't get into the next coat of finish... or even worse, into your drivers after you are done applying the finish and mount up the drivers again!! The biggest problem with using steel wool in loudspeaker finishing is ensuring there is none of it remaining on the INSIDE of the cabinets or in nooks and crannies where it can come out and get into the driver throats later on...that is no big deal when the drivers are conventional cones,because they have voice coil dust covers... but your Heresy tweeter and midrange drivers can be ruined by that steel wool dust if it gets into them...and it definitely CAN!! Quote Link to comment Share on other sites More sharing options...
Dale W Posted November 16, 2002 Share Posted November 16, 2002 HDBRbuilder: Intresting !! I've never done a oil finish but may try in the future. In lue of oooo steelwool could I use say a 3m scotchbrite pad with a lubricant. seems to me the olny reason for sanding at this point is for mechanical adheasion purposes or removing mico dust particles that have settled on the surface.Unless your trying to breakdown the texture of the prior coats.When refinishing kitchen cabinets i just scuff the sealer with a grey scotchbrite pad before applying the laquer and this works fine.But then again this is all done in a downdraft paint booth and hvlp guns. And olny one coat of laquer is applied as to preserve the wood grains appearance, this may differ from speakers. Quote Link to comment Share on other sites More sharing options...
brother Posted November 16, 2002 Share Posted November 16, 2002 Thanks HDBR, I've been reading your comments for quite some time and have always found them to be excellent. With regard to the finish, basically it's all in what you want in the end product. The high level finish I was alluding to is admittedly uncommon in speakers, but most tight grained wood can be worked into an astonishingly beautiful depth and finish as you have previously described. Fine furniture and musical instruments are more common applications of the method of which I wrote. My comment was given in fun, but it has sparked some very interesting comments and feedback. Thanks, again. Quote Link to comment Share on other sites More sharing options...
HDBRbuilder Posted November 16, 2002 Share Posted November 16, 2002 Dale, You could use a scotchbrite pad kind of thing, but it will tend to give more of a burnishing to the wood than to really remove any of the upward pointing fiber tips of the wood....and you want some of that removal to get into the slurry when doing an oil finish, but you DON'T want to use stearated sandpaper or anything that will tend to mix something into that slurry that isn't wanted. Keep in mind that this slurry is gonna be utilized as a filler for the pores of the wood prior to the final hand rubbing treatment! Anything that comes off what you use in this "sanding" process needs to be compatible with becoming a part of the "pore filler". Zinc stearate and/or minute bits of colored plastic...or bits of steel that will absorb oxygen and darken the finish over time toward a "rust" color are not what you really want to use here. Remember...this slurry is gonna remain there...under those coats of rubbed oil finish!! Microspically minute bits of garnet will not affect the finish either way. In remarking about the sanding between coats...I was referring to using multiple coats of finish(such as urethane or varnish or whatever)...and the sanding was just enough to rough up the finish for the next coat's adhesion. I doubt that most people have the equipment available to them to shoot on a sealer and then jump to a final finish. That is why polyurethanes have become so very popular over the last few decades...one kind of finish acting as both the sealer AND the final finish has its advantages...as does its self-leveling tendency! I like to use one coat as a sealer, and top it off with two more final coats, when using polyurethane...just what I like best! But I lay it on in extremely thin coats...and I am using a brush most of the time...rinsing it every so often in mineral spirits so that it goes on nice and thin... Most cabinet finishers use catalyzed varnishes now-a-days...and they have much better adhesion characteristics than older types of finishes...with the addition of being relatively immune to the humidity around them since they don't really "dry", but instead, "set-up" through a chemical reaction. They are also much tougher than most other finishes around now-a-days...and thereby require less build-up in order to provide the same level of protection to the wood. SO, in using them, fewer coats are needed. But one thing I really like about using urethane...especially oil-based urethane in the satin finish: if the finish gets scuffed enough to be noticeable, it only takes a swipe or two with some extremely fine sandpaper, then a shot or two of spray-can satin urethane of the same type, from the same maker, to hide the damage...it just levels out and it is never noticed!! The other reason to use the satin finish to start with is that it tends NOT to show the scuffs so readily in the first place. Besides, to me, anyway, high gloss and semigloss urethanes tend to make a project look like it is covered with plastic instead of being a finish over real wood...just MHO! Quote Link to comment Share on other sites More sharing options...
Tom Mobley Posted November 16, 2002 Share Posted November 16, 2002 Builder, What is your current favorite urethane? I finished my HDBR's back in 81 or so, used Varathane brand which still looks great, but there's been a lot of water under the bridge in the wood finishing industry since then, what is a well thought of brand now? I'm sanding all the old finish off my DIY LaScalas, it's no more work than stripper altogether. I used stripper on one of the backs just to see, it was a lot of work scraping and I can still smell the stuff on the wood, means there's still some there, right? Don't want any of that under the finish. I won't say what I'm using to sand, you'd probably throw up or something. Tom Quote Link to comment Share on other sites More sharing options...

Recommended Posts
Join the conversation
You can post now and register later. If you have an account, sign in now to post with your account.
Note: Your post will require moderator approval before it will be visible.