Mr Tech
-
Posts
147 -
Joined
-
Last visited
Content Type
Forums
Events
Gallery
Everything posted by Mr Tech
-
False Corners Don't Have To Be Ugly. (PICS !!!)
Mr Tech replied to Mr Tech's topic in Technical/Restorations
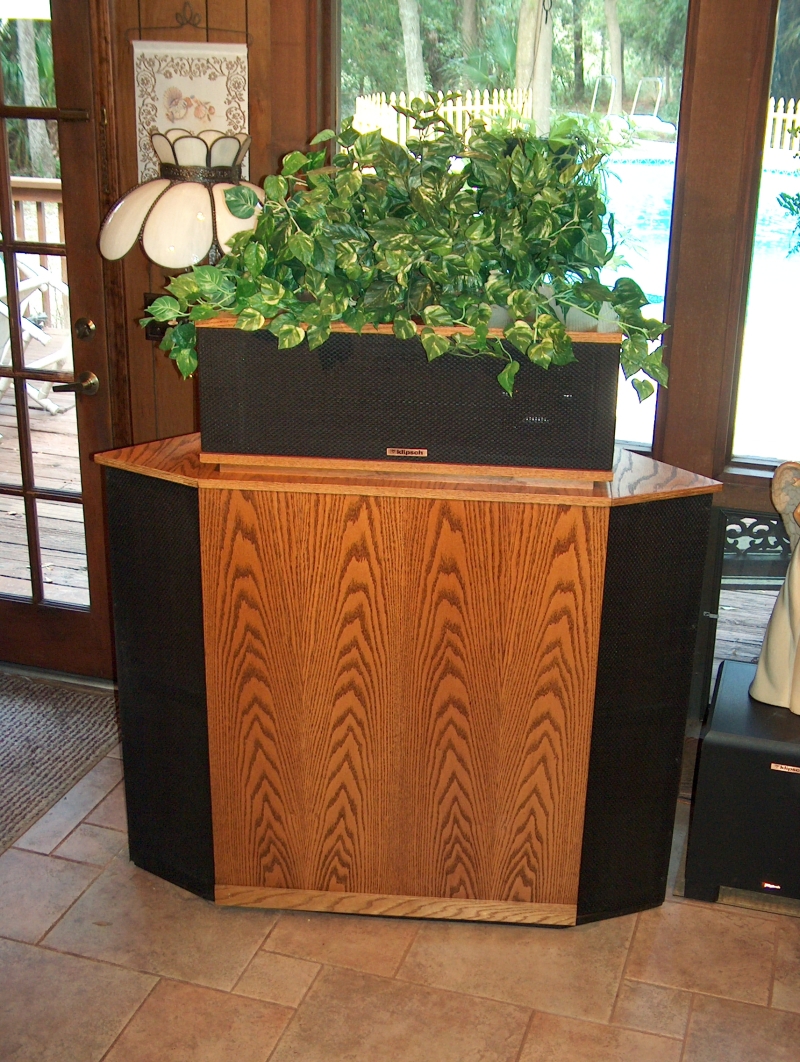
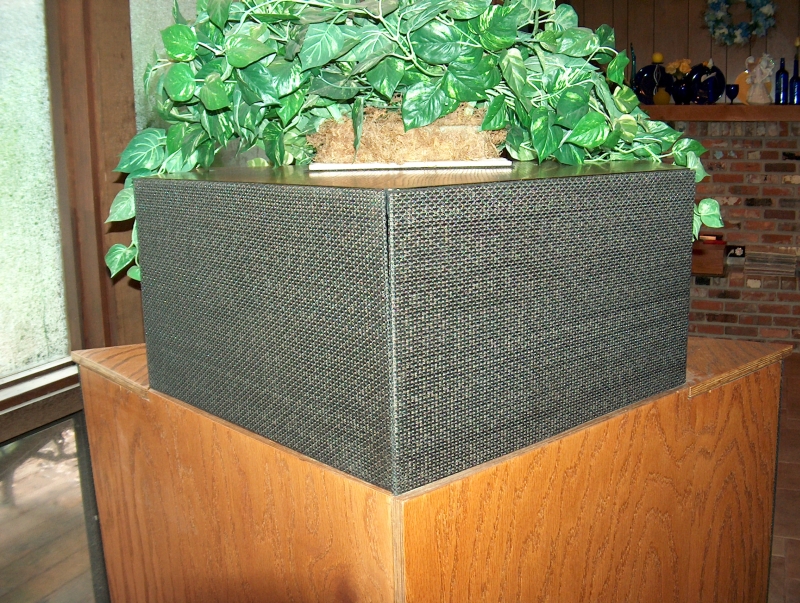
Decorated WAF shot. The plant is artificial (no water) and is sitting on a rubber pad to avoid rattles and scuffs.
-
False Corners Don't Have To Be Ugly. (PICS !!!)
Mr Tech replied to Mr Tech's topic in Technical/Restorations
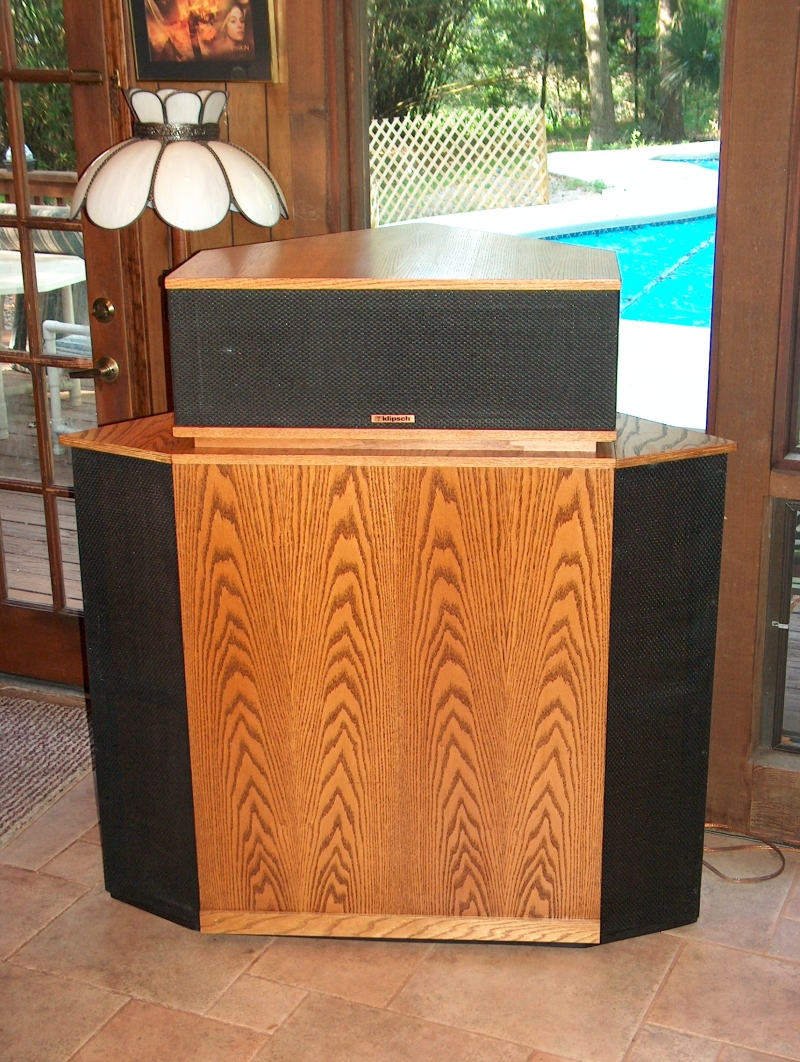
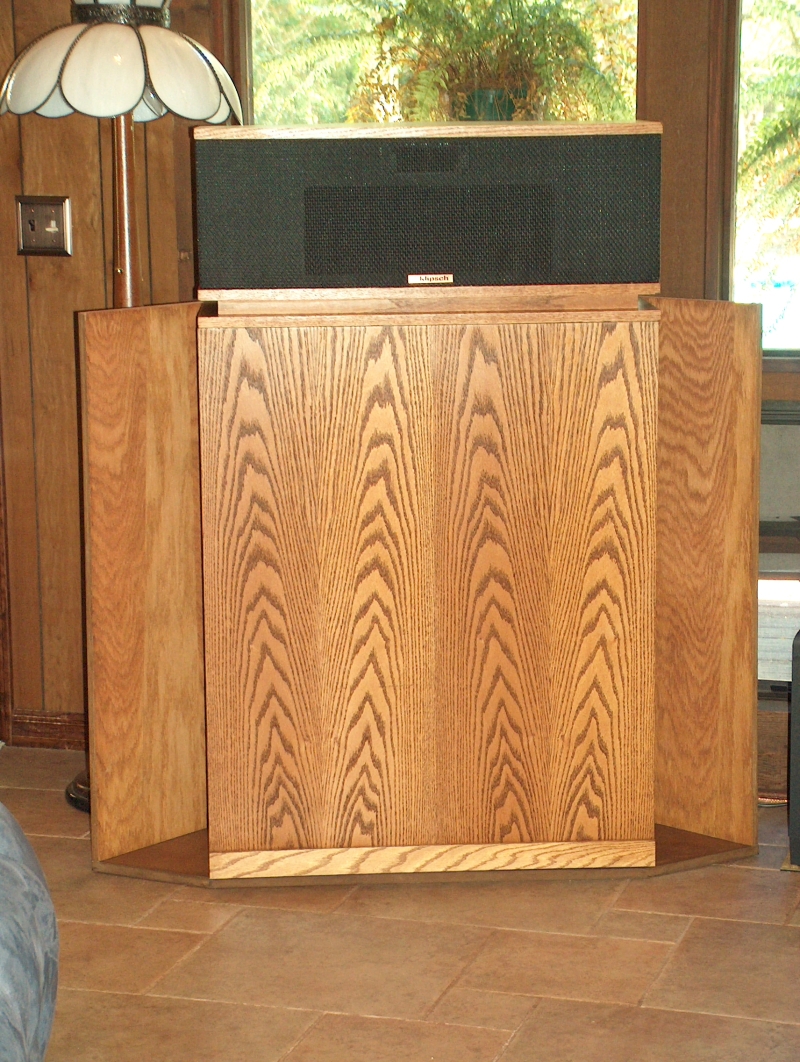
Daytime shot.
-
False Corners Don't Have To Be Ugly. (PICS !!!)
Mr Tech replied to Mr Tech's topic in Technical/Restorations
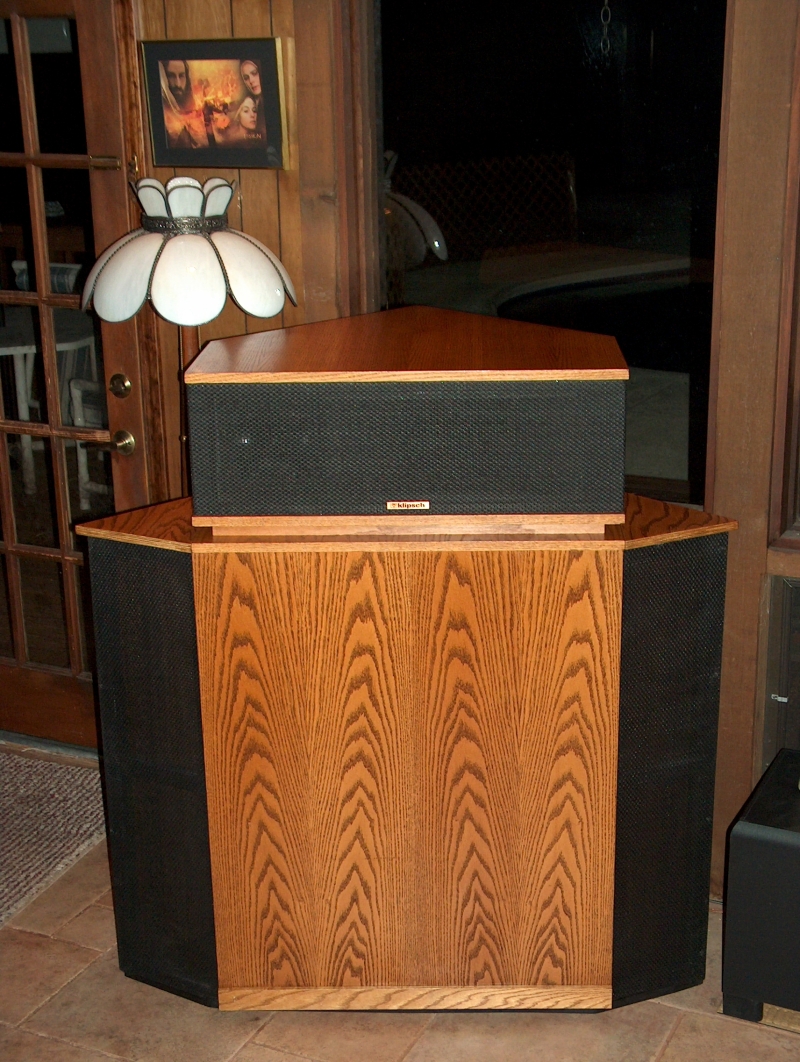
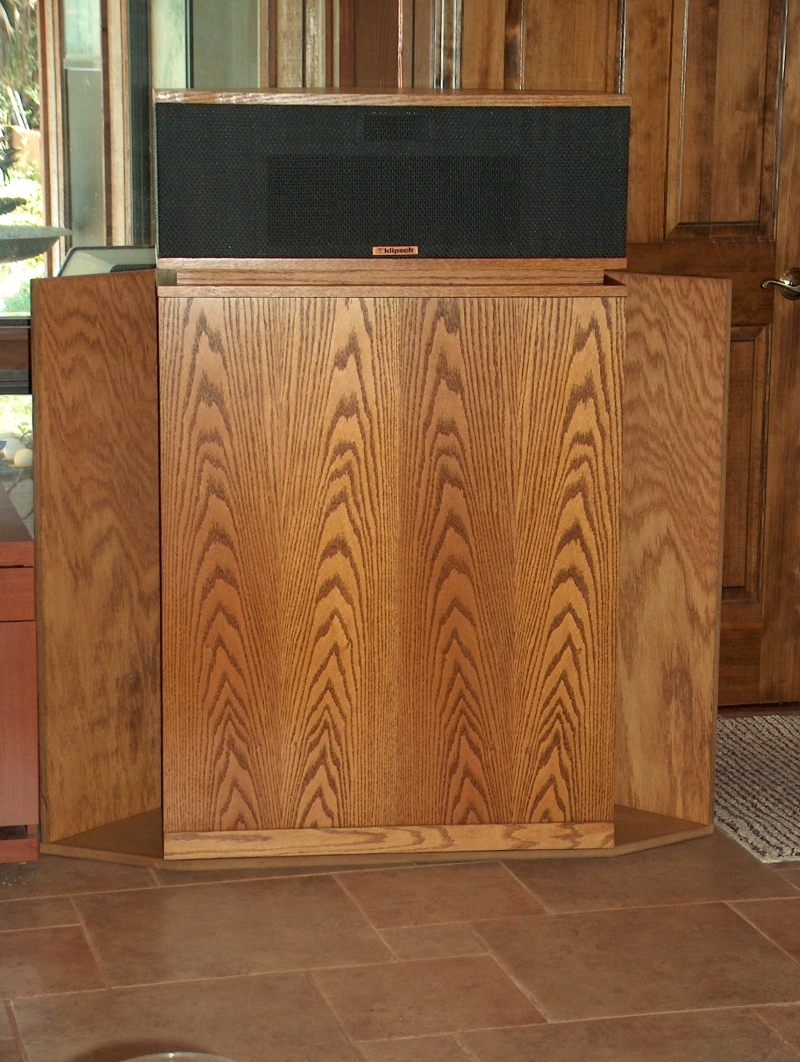
The finished left Khorn. Nighttime shot .
-
False Corners Don't Have To Be Ugly. (PICS !!!)
Mr Tech replied to Mr Tech's topic in Technical/Restorations
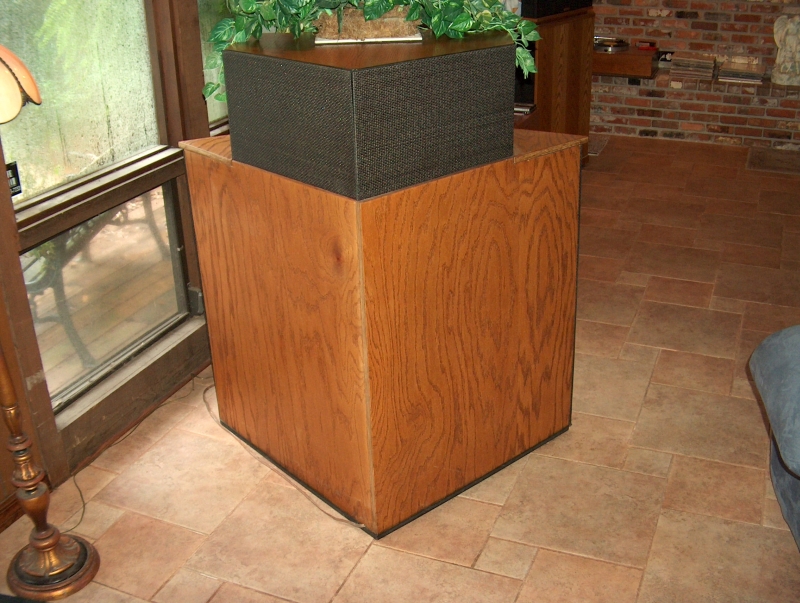
The complete unit from the rear.
-
False Corners Don't Have To Be Ugly. (PICS !!!)
Mr Tech replied to Mr Tech's topic in Technical/Restorations
Phase 4? The making of the top backboard covers. Nothing to special here, just thin fiber board covered with grill cloth. They are attached with felcro for easy removal & re-installation.
-
False Corners Don't Have To Be Ugly. (PICS !!!)
Mr Tech replied to Mr Tech's topic in Technical/Restorations
-
False Corners Don't Have To Be Ugly. (PICS !!!)
Mr Tech replied to Mr Tech's topic in Technical/Restorations
And here it is installed.
-
False Corners Don't Have To Be Ugly. (PICS !!!)
Mr Tech replied to Mr Tech's topic in Technical/Restorations
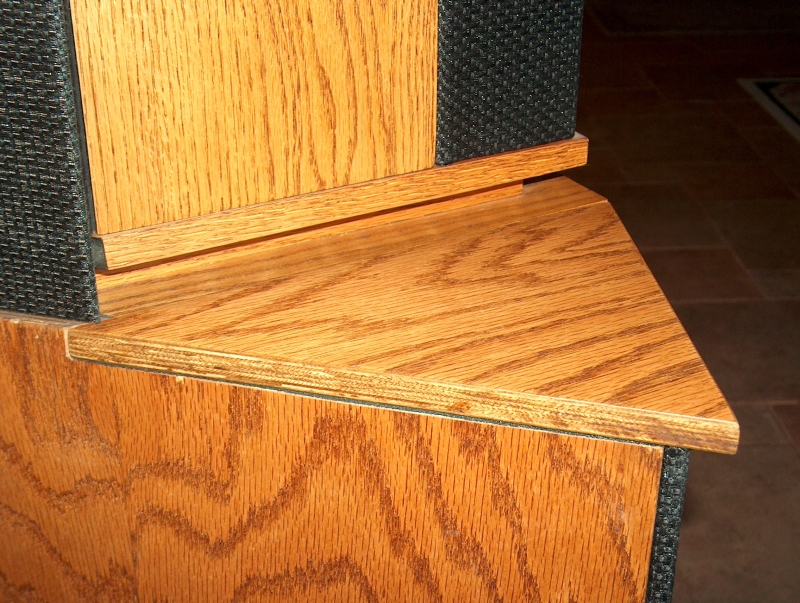
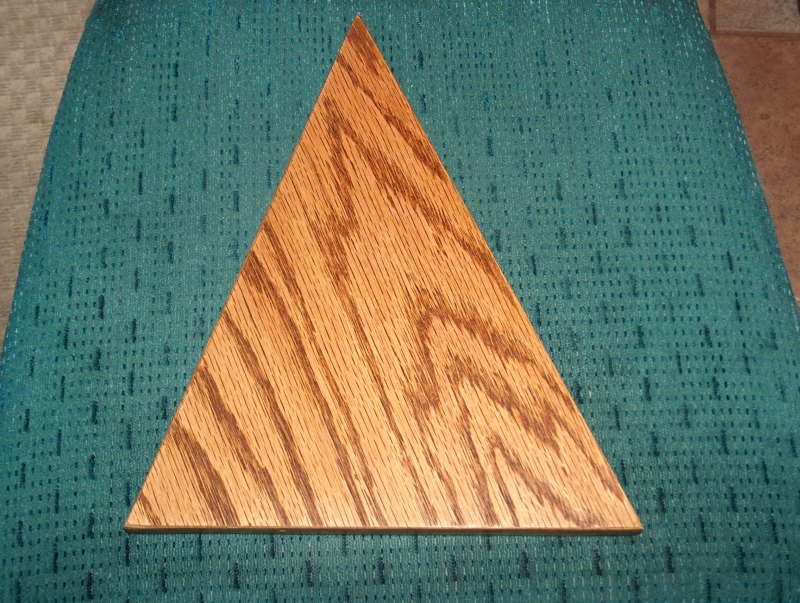
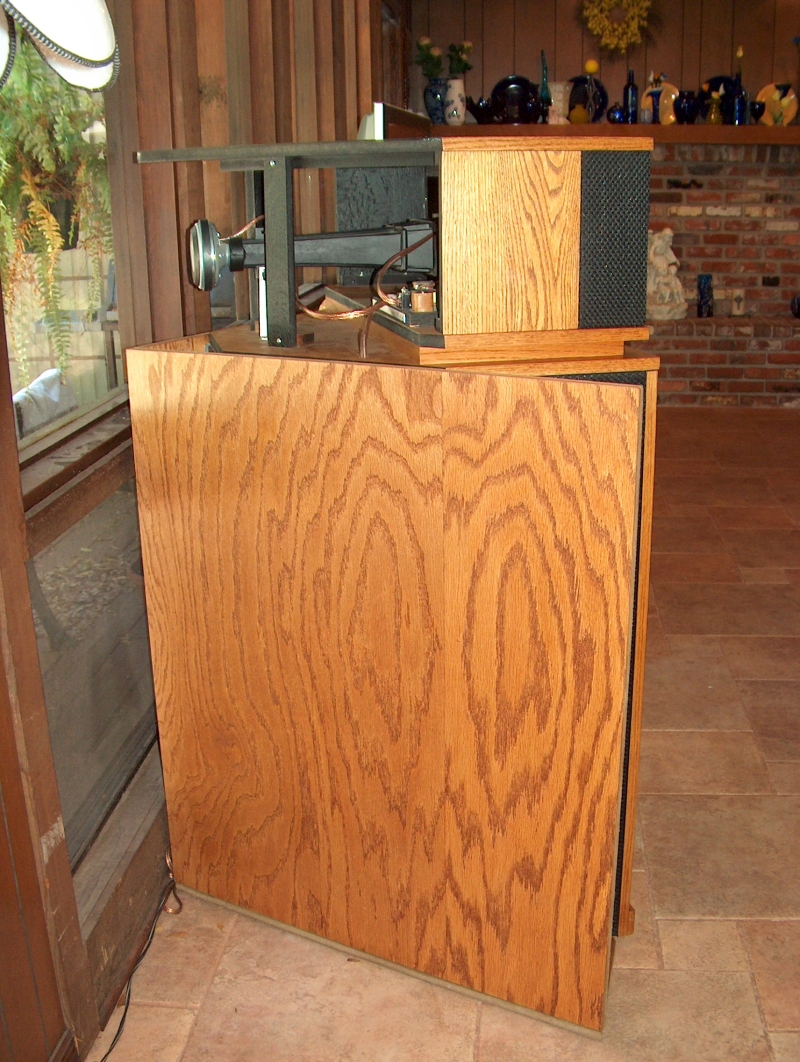
Here is one wood top. Again, each one had to be custom made for its unique location.
-
False Corners Don't Have To Be Ugly. (PICS !!!)
Mr Tech replied to Mr Tech's topic in Technical/Restorations
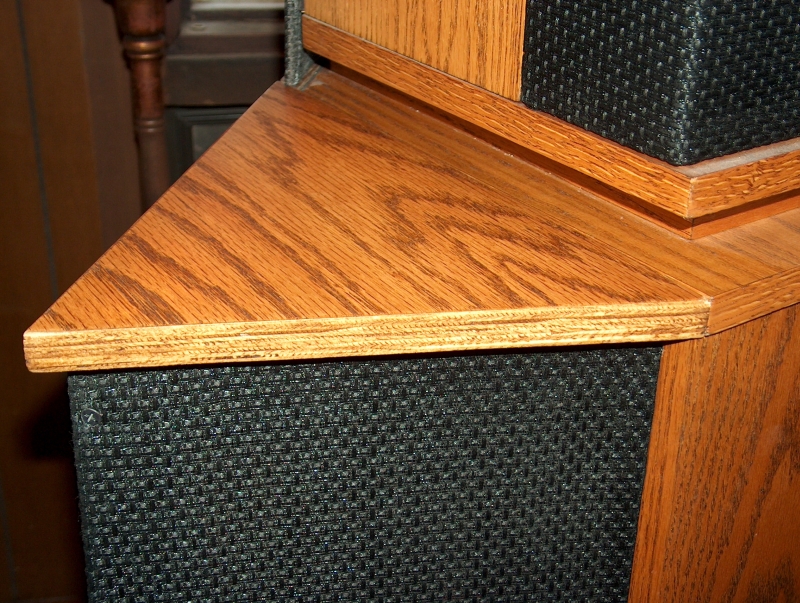
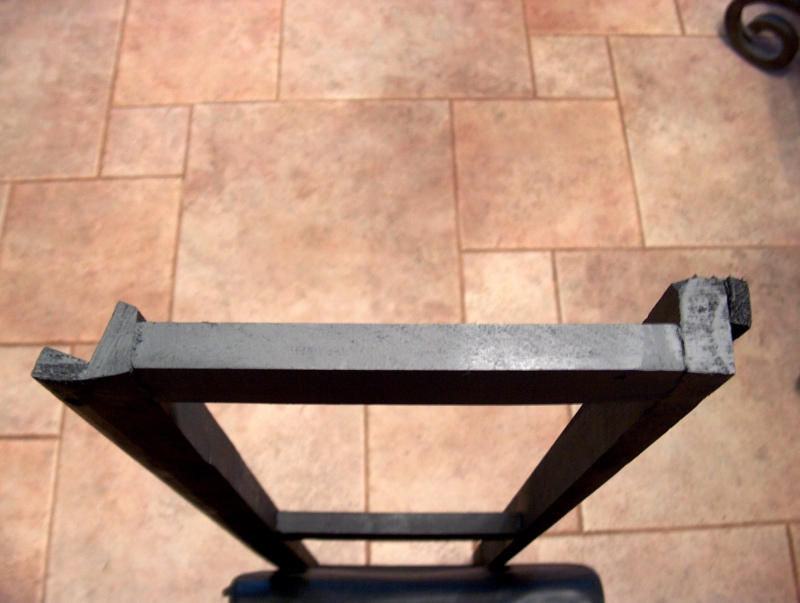
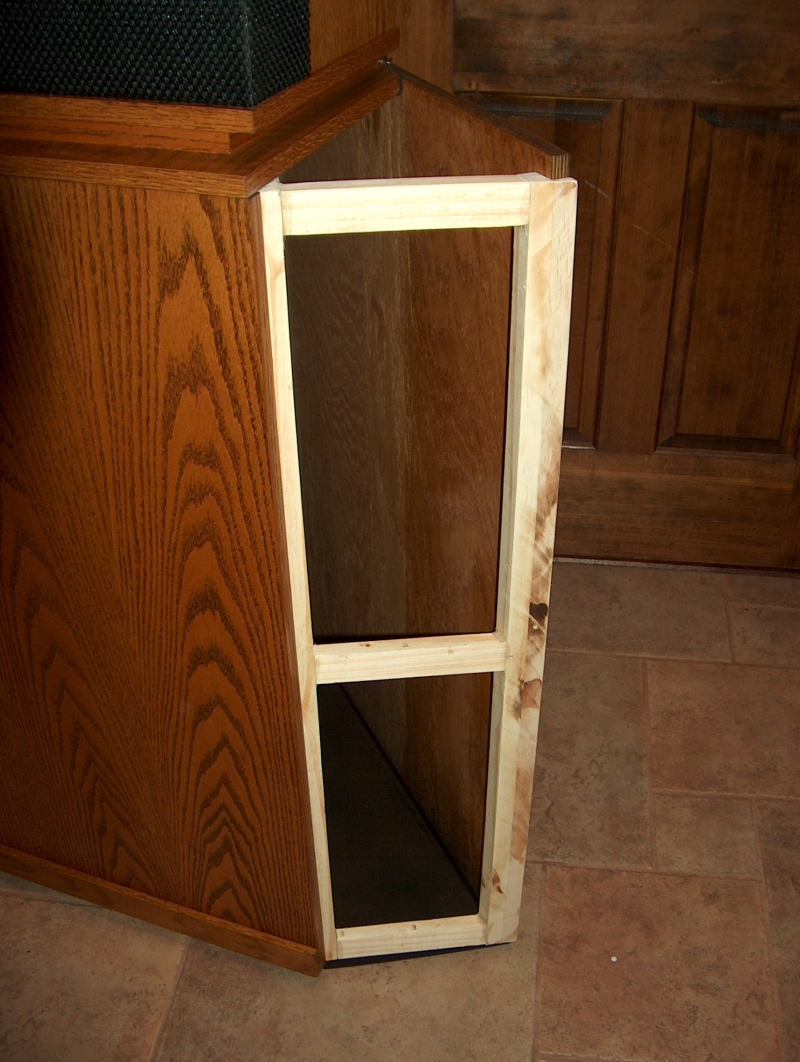
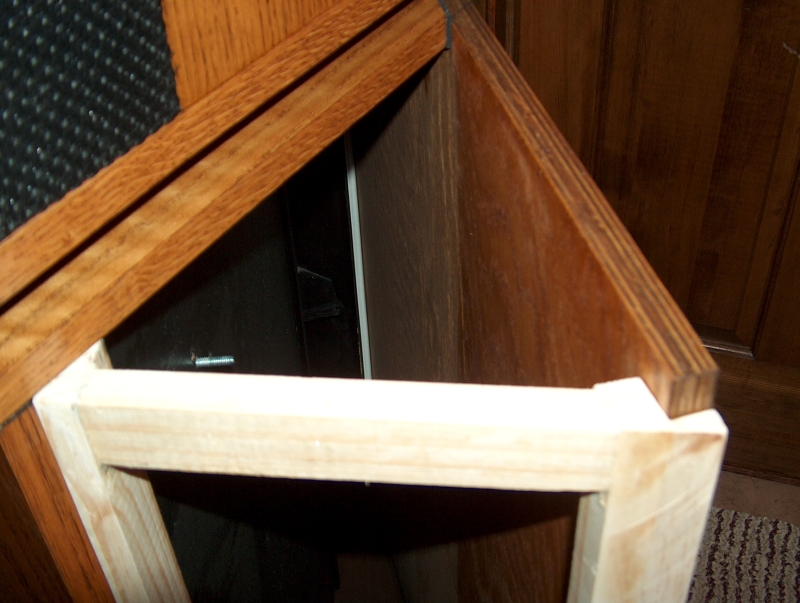
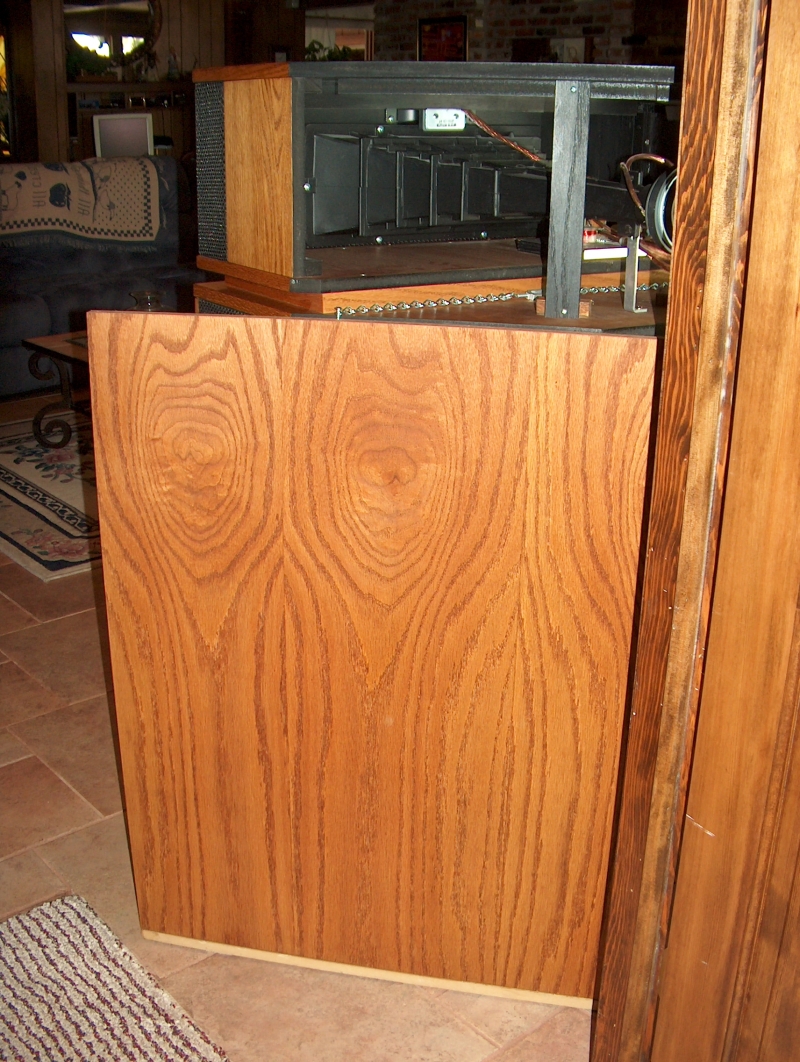
On to phase 3. The making of the triangular shaped wood tops. I chose to cut down the trailing edge of the corners to permit the wood tops to sit on top of them and be equal with the top of the bass bin. I put a very thin piece of rubber weatherstrip on top on the corner to insulate it from the wood top.
-
False Corners Don't Have To Be Ugly. (PICS !!!)
Mr Tech replied to Mr Tech's topic in Technical/Restorations
The grill frames are attached to the false corner with 3 black wood screws, virtually invisible.
-
False Corners Don't Have To Be Ugly. (PICS !!!)
Mr Tech replied to Mr Tech's topic in Technical/Restorations
A finished grill frame.
-
False Corners Don't Have To Be Ugly. (PICS !!!)
Mr Tech replied to Mr Tech's topic in Technical/Restorations
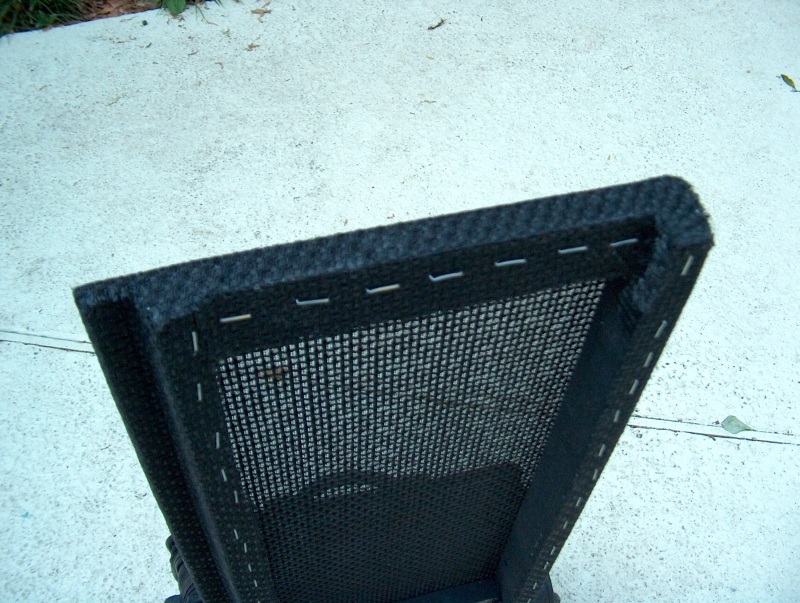
Next, I installed the grill cloth.
-
False Corners Don't Have To Be Ugly. (PICS !!!)
Mr Tech replied to Mr Tech's topic in Technical/Restorations
In this pic you can see that I added a foam rubber strip to the side that butts up against the Khorn so as to help make a tight and rattle free fit.
-
False Corners Don't Have To Be Ugly. (PICS !!!)
Mr Tech replied to Mr Tech's topic in Technical/Restorations
Next I painted them black.
-
False Corners Don't Have To Be Ugly. (PICS !!!)
Mr Tech replied to Mr Tech's topic in Technical/Restorations
Here is how it fits onto the Khorn and false corner. Also, worth mentioning is that I had to custom make each grill frame individually since there are minor differences in each corner and left & right side of each Khorn.
-
False Corners Don't Have To Be Ugly. (PICS !!!)
Mr Tech replied to Mr Tech's topic in Technical/Restorations
The inner edge (Khorn side) of the grill frame conveniently fit perfect into the recessed area where the original grill frame was.
-
False Corners Don't Have To Be Ugly. (PICS !!!)
Mr Tech replied to Mr Tech's topic in Technical/Restorations
In this pic you will notice that the right side is at a slight angle and cut with a corner notch. I accomplished this by gluing 2 pieces of wood together and then later making an angular cut on them to offset the angle of the inner cut board. All this was necessary so that the outer edge of the grill frame would hug or fit onto the outer edge or the false corner.
-
False Corners Don't Have To Be Ugly. (PICS !!!)
Mr Tech replied to Mr Tech's topic in Technical/Restorations
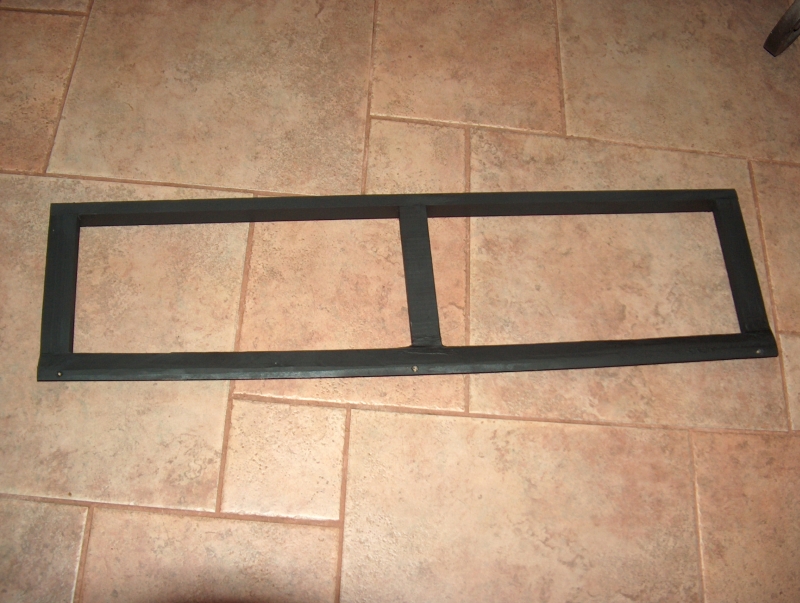
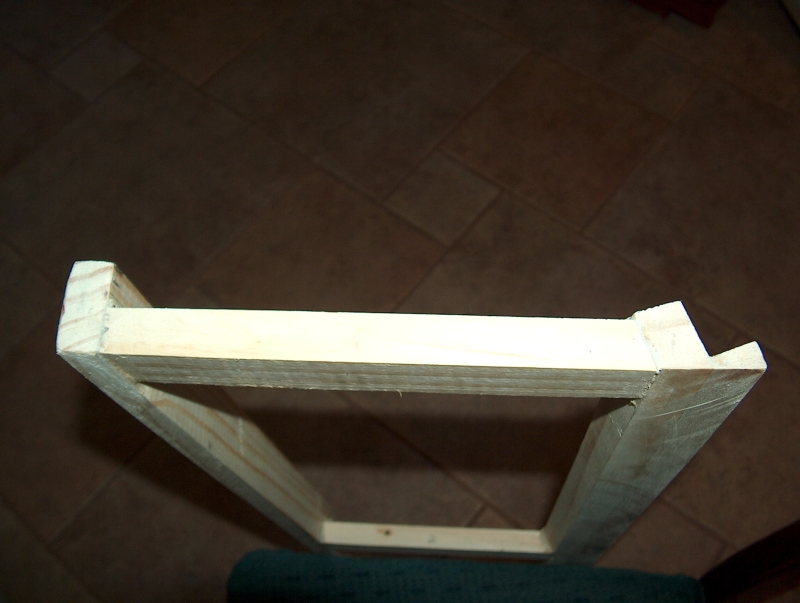
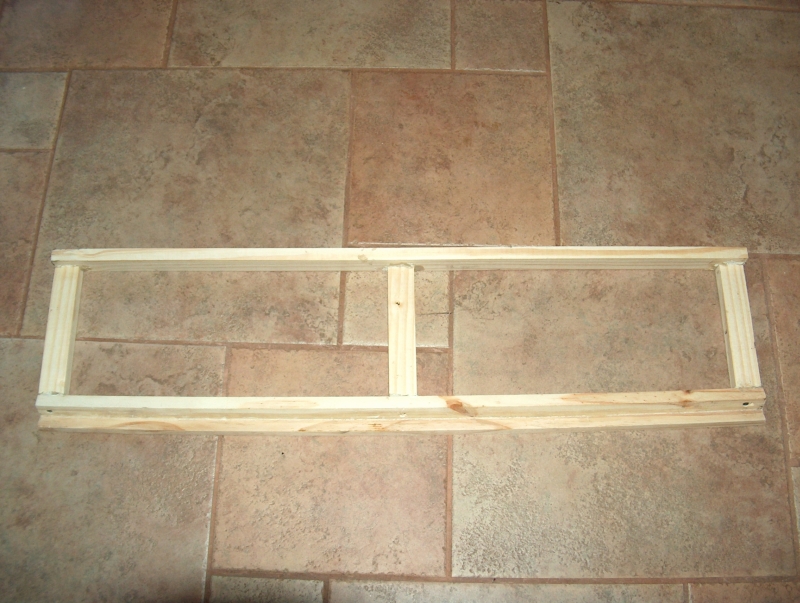
Phase 2 of the project was making the new grill cloth frames. This was probably the most difficult and challenging part of the project. I was basically engineering this design on the fly. Lots of wasted wood. Here is the frame design I came up with using standard 1x2 wood.
-
False Corners Don't Have To Be Ugly. (PICS !!!)
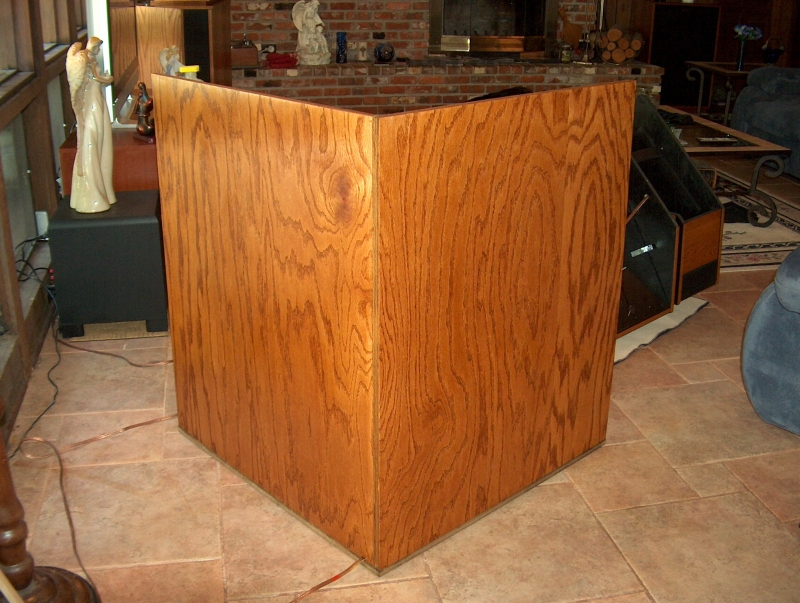
Mr Tech replied to Mr Tech's topic in Technical/Restorations
The back and side of the right Khorn.
-
False Corners Don't Have To Be Ugly. (PICS !!!)
Mr Tech replied to Mr Tech's topic in Technical/Restorations
The back and side of the left Khorn.
-
False Corners Don't Have To Be Ugly. (PICS !!!)
Mr Tech replied to Mr Tech's topic in Technical/Restorations
The right Khorn.
-
False Corners Don't Have To Be Ugly. (PICS !!!)
Mr Tech replied to Mr Tech's topic in Technical/Restorations
This is what they looked like after phase one of the project. I might mention here that I spent an enormous amount of time experimenting with wood stains to get the best possible match. Make no doubt about it, it is very difficult. I think I bought every stain color known to man and test stained bunches of scrap wood until I found a good match. The left Khorn.
-
False Corners Don't Have To Be Ugly. (PICS !!!)
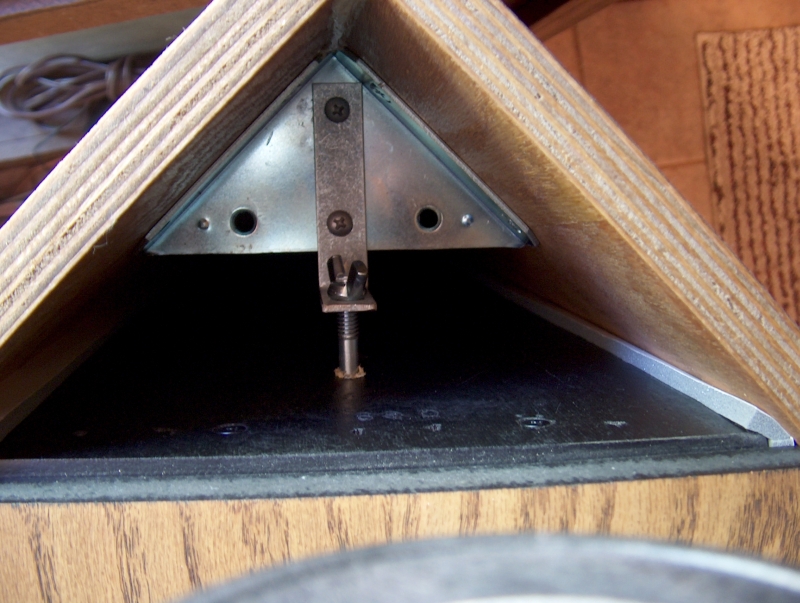
Mr Tech replied to Mr Tech's topic in Technical/Restorations
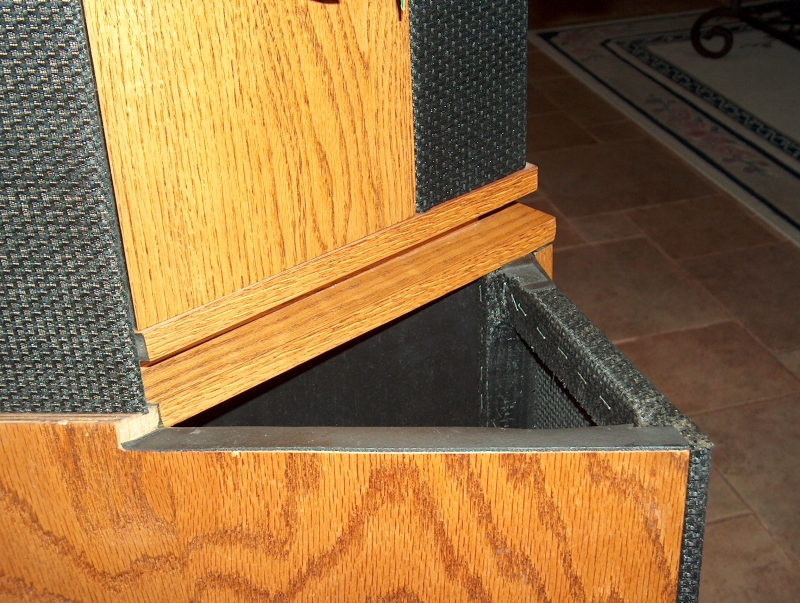
I screwed a ¼ threaded stud onto the backboard of the Khorns. This is the only hole or screw that went directly into the Khorn and could easily be reversed if necessary. As you can see, after careful alignment, the threaded stud would go through the hole in the L bracket where I attached a wing nut. This way, I could draw tight, via the wing nut, the Khorn into the false corner to make a tight seal against the new rubber seals I installed down the edges of the backboard.
-
False Corners Don't Have To Be Ugly. (PICS !!!)
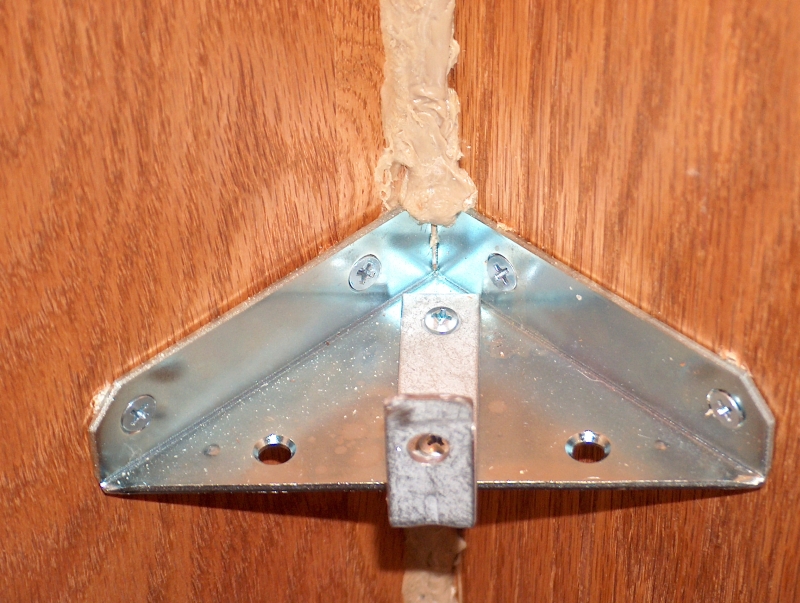
Mr Tech replied to Mr Tech's topic in Technical/Restorations
On the top corner bracket I attached an L bracket.
-
False Corners Don't Have To Be Ugly. (PICS !!!)
Mr Tech replied to Mr Tech's topic in Technical/Restorations