Pete H
-
Posts
3758 -
Joined
-
Last visited
-
Days Won
5
Content Type
Forums
Events
Gallery
Everything posted by Pete H
-
That makes 2 of us. Tough Monday so besides thinking about lugging the beast in and running wires, that's all that's going to happen tonight. It's all about Bama/LSU and a couple of beers tonight.
-
It's together and making noise but that was just to make sure the drivers work. I'll post more after work today as I have to get the monster inside so I can try and get set up for testing.
-
Cup connections made

-
Time to get wired up
-
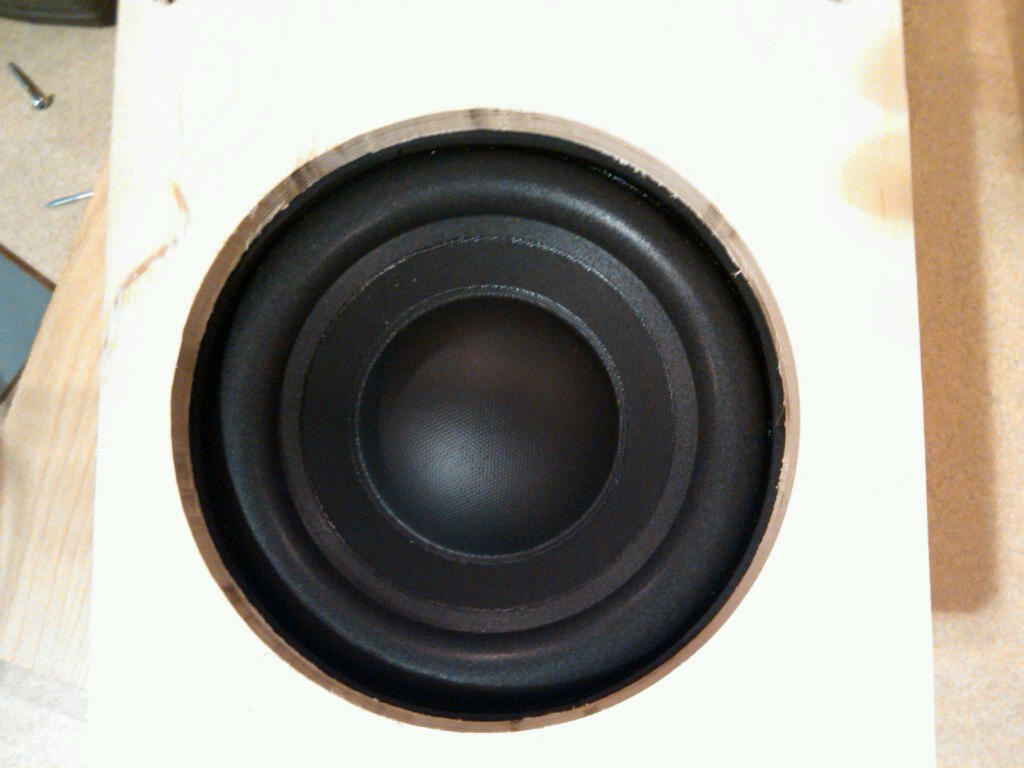
Driver installed, gasket compressed and Quad Seal applied.
-
I compresss the T nuts in with a vice grip
-
Removed one of the gaskets to use on the other side of the basket.
-
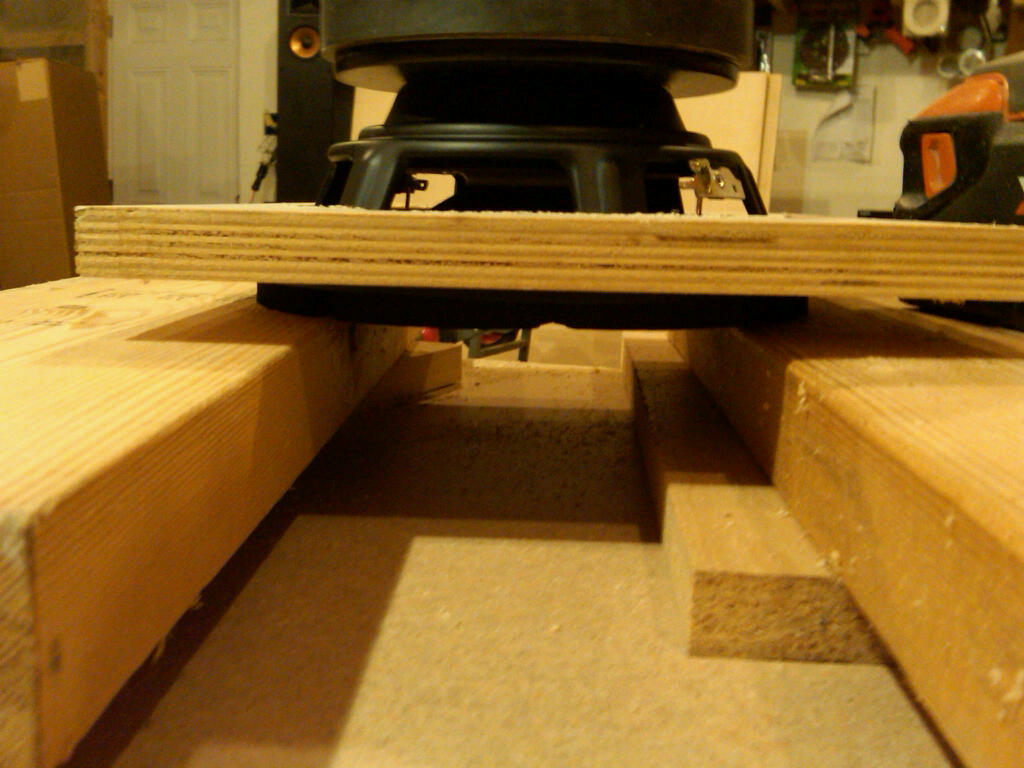
Rounter set up and ready
-
Cutting holes for drivers
-
Not only is the Rudy/Dtel access door actually useable, it's in a lower pressure area of the horn, as opposed to in the throat (in the original drawing), so the seal doesn't have to be as strong.................I discovered the better access location after cutting the side panel and access door but I have a solution that should work fine.
-
That's a lot of amp and features for $220
-
I have a DCX2496 as well, and I guess it's time to blow the dust off the user manual and figure it out, but I'm going to look for an amp today that will have controls built in as that is going to work better for me and my long term plans for the DCX.
-
Correct me if I'm wrong but you don't want to send the sub a signal lower than the tuning point of the enclosure or you risk damaging the drivers. The pre-pro will limit the upper frequency sent to the sub but not the lower frequency. Many movies have content down to 10Hz or even below. Sending that to the sub at "spirited" volumes could send the drivers into overexcursion. These are the things that I worry about because I don't want kill the drivers out of the gate. I'm assuming that just running music through them isn't going to hurt as the content won't go that low. I guess it's time to read the darn manual on the DCX2496 when I bring it in and at lease learn how to use the thing and what could be more simple than a single sub, but I'm going to take a look at the amp suggestions now and see what I think.
-
Ok you now have me having one of those moments, my pic looks different, not counting the ugly access door opening i made. What did i do Tater ? OK, so were you not going to tell me that the access door is in the wrong location until I put it there? Follow Rudy's build in regards to the access door because I just figured out today that the prints show an access door that is useless. The more I think about this, the more I think about mounting the top panel with screws and gasket material, but who knows; there's no clue what I'll decide tomorrow. At least you moved the access door to begging with so you're headed in the right direction.
-
If I would have read your build thread a few times prior to starting this I would have saved a lot of time. You got most of the issues worked out during your build, but I just had to beat my head against the wall a couple of times as many will do in the future. So Rudy, what's your opinion on the amp situation?
-
That would make a great tag line. I wish you could actually hear how hard I'm laughing; and that is the second time I'm laughing about the same thing. Glad I'm not the only one to get it and my builds will always be informative and entertaining because that's just the way I roll. I believe if you, me, Carl, Rudy and a few others got together, they would lock us up and melt down the key.
-
That picture makes me feel a lot better about what I did. [*-)], You know I'm just kidding,, but it sucks when you go; that's not the way it looks in the picture. []
-
That's exactly what I did, that way if I blow up a driver I can replace it through the access hole. I also mad sure the hole where the driver faces the wood that the hole I had was big enough so the rubber on the surround could not hit any wood if it were to have a really long excursion. Whoever thought about the access door being moved had a great idea, it's much easier to build and to get to the drivers like that. +100000000000, once I actually figured out why the drawings were done to give the illusion of being able to replace a bad driver and realizing it would never happen unless you were a Smurf or Mini Me, I decided that a different access panel was in order and I'm obviously not the first one. Where's yours?
-
Just remember; I told you when I'm going to build the Jubs, I'm showing up at your shop with a truck load of Bud and I will need a room too because I'm not sleeping in the maverick or comet or whatever that Ford lumber rack is that is outside your shop.[st] BTW, the plans that you sent me were unbelievable and I hope someday I can provide the same level of information to others. [Y]
-
Revelations is a nice way of saying what a dumb As&, so I will correct my post to read that I had a couple revelations. I'm really LMFAO. BTW, I guess I need to post one thought at a time since you're the only one that actually read the part about the amp and gave me a suggestion. Thanks for reading[Y]I too have read your entire response and I will answer your question; yes I was, but the bit I burned out wasn't for 3/4 material and with the proper bit, you can take out 3/4 with one pass, but slowly.
-
I use T- Nuts all the time for mounting drivers, because let's face it, if you got no nuts, you're not mounting anything.[]I Might be the only one doing a build that has complete " I"M A DUMB AS&" moments, but I'm going to share them with you so just in case, you've ever had one, you know you're not alone, and I didn't just have one. 1. Picture shown is of a $20+ router bit that I wasted because it was the wrong one, brand new mind you, but not meant for 3/4" material, so after smoking myself out of the shop because I would just push the router harder, the result is that I wasted this bit on a test hole. That there's a Dumb As& moment. 2. Not pictured, but non the less, another Dumb As& moment would be realizing that the reason you got hung up the night before on weather to mount if doggie or bag off [] had to do with looking at the drawing this morning and even posting that the drawing showed one mounted one way and the other one the other way because it's part of the design in order to get the drivers out if you need to through the access hole and having 2 different friends post that information in different ways and still not getting it until you're mounting the driver and going, Ah Haaaaaaa, that's why it was drawn that way. Un Freeking believable.
-
It appears in your picture that you mounted both of them by droping them in through the front of the cut out which would provide better clearance for the angled driver but when I looked back at the drawing (knowing that these were not the final drawings) it appears that the angled driver is mounted from the rear and the other driver is mounted from the front. I'm just going to mount the both from the front and let the driver gasket just hang out there which will require additional gasket material as you installed on your build. I did the test cut at 7 1/4", which is the listed cut out and that worked well for the basket to drop in and still provide pleanty of material to secure the drivers with T-Bolts. AMPLIFICATION Opinions! Provided I'm understanding the wiring properly the drivers will be wired in series which will make it a 8 ohm load and make the power handling of the drivers 300 RMS and 600 max. I will be coming out of the Sub Output from the Onkyo 805 so I can control the frequency feed to the sub from the receiver and have a few options on amplification that I would like opinions on. 1. Run one of the Carver M200's bridged which will give me around 350W into the 8 ohm load. 2. Run the QSC (currently driving the RF 7's and I don't really want to change that) bridged giving me around 1000W 3. Purchase a new amp for the Spud and if so, lets hear some recommendations. If I go new, I would lean towards a dedicated sub amp (plate or rack mount) that would have phase control and other adjustments since I'm not sure how the long signal path of the Spud is going to translate with the mains since it will be located behind them on the main wall. I'm assuming that for testing in the shop one of the Carvers bridged will be sufficient for testing but if not someone please chime in. Thanks to everyone who's helped with information.
-
Thanks Rudy, I got so wrapped up in which way was right that I didn't even consider having to get to the drivers in the future; but I'm not going to say a word about you uploading your mount. []
-
Here's the bag off the head method.
-
they are very cool, but going so fast, I came up with a mental stumbling block that could be a really stupid question, but I'm going to ask it because I don't know the answer. Which side of the motor board does the factory gasket mount to????? I was just rolling along and cutting the holes to mount them and went; Dahhh, Logic told me that the gasket needs to compress and seal when I mount the driver, but the gasket is about 5/8" thick and even torquing down on T bolts won't compress all of that or do I just mount it from the rear ( would that just be called doggie style [6]) in which case the gasket really does nothing? Here's the picture that would show the doggie mount which would compress the gasket, but I would prefer to mount it from the front, (we will refer to that as the bag can be off of her head method) because it gives me more tolerance on the small internal angled piece. This is a serious question that I didn't even consider when I built the split cornscala's (Non bag mounting method), but now I'm wanting to know why there's only a gasket on one side.