


ZINDA89
-
Posts
53 -
Joined
-
Last visited
Content Type
Forums
Events
Gallery
Image Comments posted by ZINDA89
-
-
heres what should have been pictured if the uploader worked properly


-
this is how the edges corners and seams will look if you fill the ground away areas properly. notice how much higher its been built up over the surface? thats so when its ground back down theres a completely filled non-porous edge left thats level with the sides and will not show any of the glue edges where it stops and the paint starts will be seamless and look like 1 molded piece of black glass once painted and polished.
-
heres what was supposed to be pictured
this shows the reconstruction and sealing of seams and corners to be able to get that beautiful uniform look and shine on all corner seams and edges. this process is time consuming and has a high price but its the only way I know to get the results needed to be able to to end up with a top notch Piano Black Lacquer finish. grinding awy the edges witha peanut grinder about 1/2 inch straight in so the seam is revealed allows the glue to get deep into the seam and it will soak into the wood another 1/8 inch as well making it a part of the wood it will not chip, or peal off the wood without taking 1/8 inch of wood along with it! it will resist cracks or any changes in the surface even when struck with a sharp heay object such as another speaker falling directly onto that edge with its edge. I had this happen to me and found that the outer surface of the paint had chipped very slightly but since I was in the process of polishing I went ahead and sanded it down and built up paint in that area agin and polished it smooth. It sounds easy but still took 4 hours or more to fix a tiny spot. Its better than reconstructing an entire edge and filling a seam which would probably end up in stripping 2 sides to get it done properly. maybe 2 days work minimum if all goes well.


-
On 7/11/2019 at 9:09 PM, Snowstorm1980 said:
Beautiful work, how long did this project take?
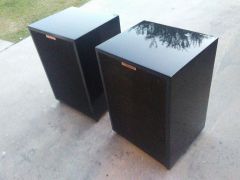
because the wood is so old and has been subjected to water or damp conditions on top and bottom of cabinets the leveling off of the sides took about 24 hours each speaker, once the sides were flat then I had to seal the wood to be able to even get started. I tried various materials to do this and locally there wasnt anything available specifically for that purpose due to the layers going over it were going to be lacquer based paints. I found some old (10 years) grout compound and coated the sides with a thin layer till I had a surface that thich enough to sand to a mirror finish. What I thought was a flat surface was still very far from mirror finish as I found out. see the attached picture showing the grouted surfaces. I only had enough grout for 1 and half speakers and when I went to get more I found out that once again progress has shifted the quality of the products available to us. As we all have been hearing for some time that everything being made now is way better than before. Processes being used to manufacture stuff has ushered in a new wave of better than ever products, thats BS everytime I go to buy anything its subpar. once again Grout now is nothing more than what spackel used to be, unusable garbage that cannot get wet or it dissolves and washes off. I tried everything, outdoor patching compounds (not water proof?) to bondo (20 second work time) and struggled with all of them. Nothing seemed to be the answer. I had differences in the overall surface that were still near 1/8" from high to low plus the need to seal the wood and went with bondo to seal the surface. Bondo is not water tight, meaning its not a 100% water blocking substance it will absorb some moisture. and I found that out on the areas that it was thin or actually ended and the edges became apparent. It was simply a long expensive trial and error process that I still cannot guarantee any perfect way to do it. I found crazy glue was my best friend. filling holes, sealing seams and rebuilding all corners and edges became a standard that could not be avoided. If I didnt grind away the edge and rebuild it it was sure to become a problem a week or 2 later in the form of a crack or a blemish on the surface wether it was done and polished or still in the process of painting. Many times I had to strip them back down to bare wood and start over . Each time you do this after its done costs about $100 per speaker. You wont know if theres a problem until 2 to 4 weeks after they are complete. I called this set done 3 times and found myself striping it back to wood trying to figure out what went wrong. this set took me 400 hours to get them to look like this, this picture is actually taken (200 hours of work) after I called them done the first time before I had to strip one and redo it 2 more times. about 3 months of long days, mostly 10 hours per day. Theres very little down time with lacquer (dries enough to wet sand in 10 to 20 minutes) and the summer was coming quickly in Phoenix, it was already in the 90s when I was finishing up. Lacquer will dry before it hits the surface and cannot be sprayed outside, the surface temps will be over 200F easily, the paint will not dry but rather turn into a tar like substance that cannot be sanded. Wet sanding with seams not sealed will allow water to enter the wood and it will swell, edges as well, back edges water gets under the veneer and it will spread out everywhere and it comes up under the paint and cracks it weeks later. I just did a 20 year old bookshelf speaker (12"x8"x8") that had high quality veneer on 5 sides with some huge dents but was not water damaged, I was done completely in 3 hours. Ill explain more of what I found that made this such a difficult task with the series 2 and their construction in another post.


Sealing and Strengthening edges and seams
in Members Albums Category
Posted
there were some spots where water got under the glue and needed to have an area ground away again and more glue was applied to seal the wood better this is where I decided that all seams would need to be ground away at least 1/2 inch to reduce the chances of having to redo any prior sealing, this is simply not deep enough nor wide enough to ensure proper sealing.