prong281
-
Posts
1 -
Joined
-
Last visited
prong281's Achievements
Newbie (1/9)
2
Reputation
-
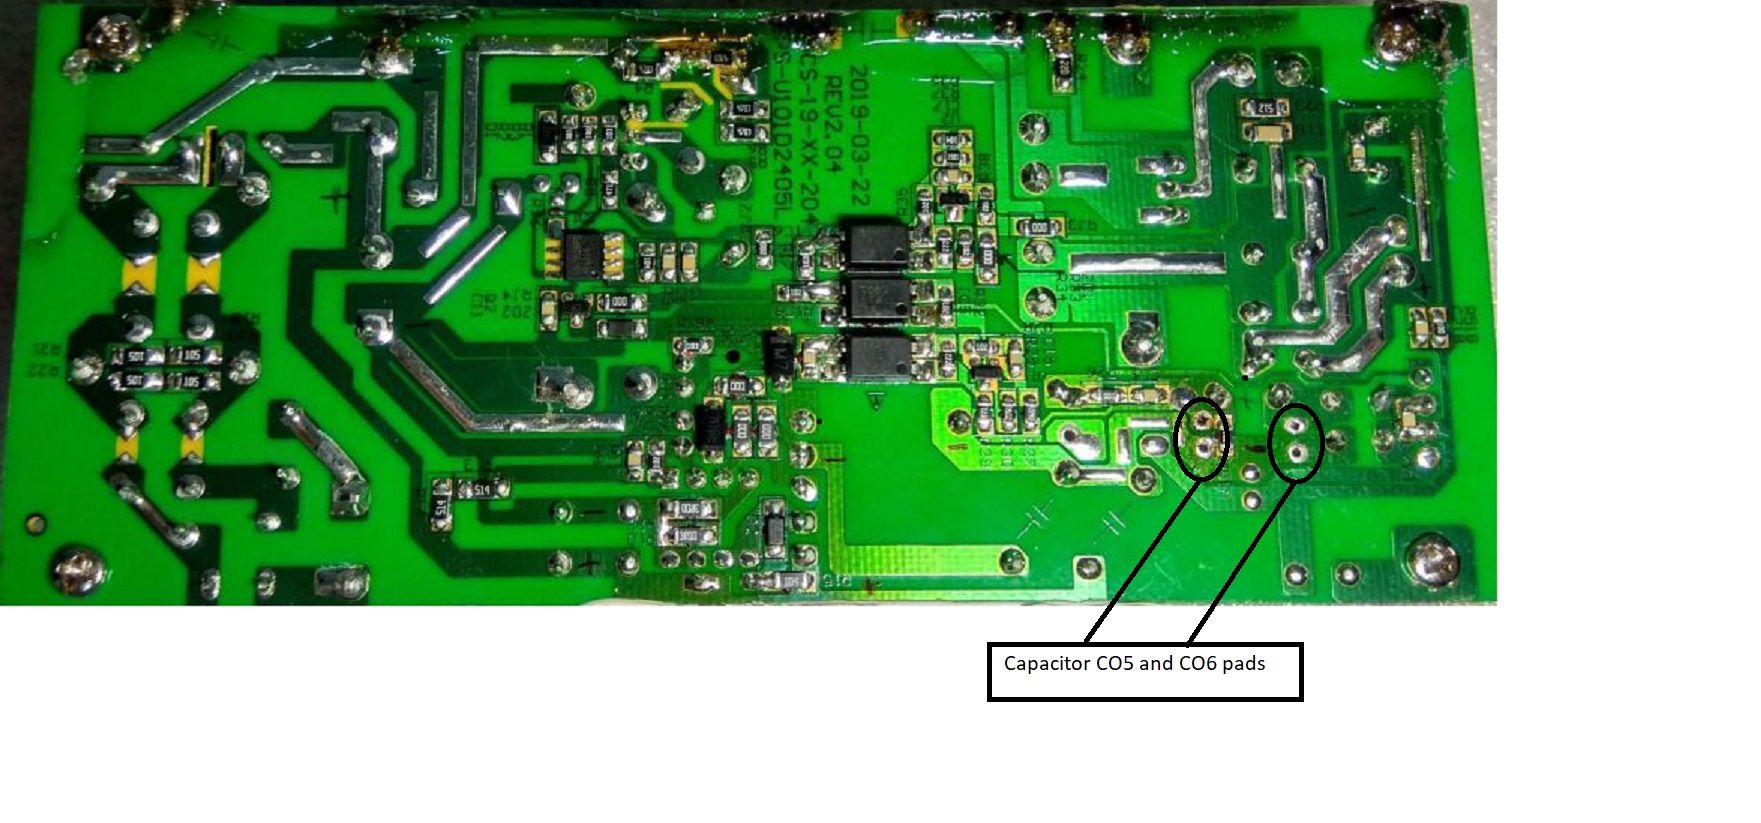
I found this thread after my Bar 48 stopped working and I was able to fix it following advice in this thread. Thanks so much to SixerFixer for starting it and everyone who has contributed. My Symptoms The first indication that my Bar 48 was having issues was when it wouldn't turn on with my TV. I was able to get it started again by disconnecting then reconnecting the power cord. This only lasted a few days and then the sound bar wouldn't turn on again. Actually, that's not entirely true. I couldn't get any of the LEDs on the top or the front to light up, but I did get some distorted sound out of one bar speaker and the subwoofer. Then it died completely. I live in Australia and called the local Klipsch service agent. After hearing my symptoms, they said it sounded like the main board had failed and, if they could get one, it would be about A$300 to repair. Thats's when I found this forum thread. My Repair Process To test if the problem was with the power supply board and not the main board, I used a USB phone charger and an old stripped back USB cable to supply 5 volts to the power supply board. On USB cables, black wires are GRND and red wires are +5V. When I did this my Bar 48 could turn on again. Being impatient I ordered one of the replacement dual power supplies from AliExpress. It will arrive in 2 weeks. While waiting for delivery I read the rest of the thread. Should have done that first because I then read ongtw75's post (10 March 2022) where he identifies the fault with the power supply is with the two capacitors CO5 and CO6. I bought 2 replacement capacitors (220uF 16V Low ESR) from my local electronics store and replaced both CO5 and CO6. Soundbar is now back up and running. I'll keep the replacement power supply (when I get it) in case I need it in the future. Repair Issues I'm not an electronics buff so playing around with the circuit board was a bit scary but I figured I didn't have anything to lose as it was stuffed anyway. I didn't detach the board from the soundbar so had to turn the whole soundbar over to access the reverse side of the board. Soldering the new capacitors to the board is fine work and you need a fine tip on your soldering iron. Make sure you don't bridge the pads with solder. I tested this with a multi-meter after soldering them in. I've included a pic below showing the location of the solder pads for capacitors CO5 and CO6.