sootshe
-
Posts
571 -
Joined
-
Last visited
Content Type
Forums
Events
Gallery
Everything posted by sootshe
-
I haven't seen this before, but was aware of needing to place the inductors correctly. Are you just posting this for reference or are you suggesting there's something wrong with the inductor placement?
-
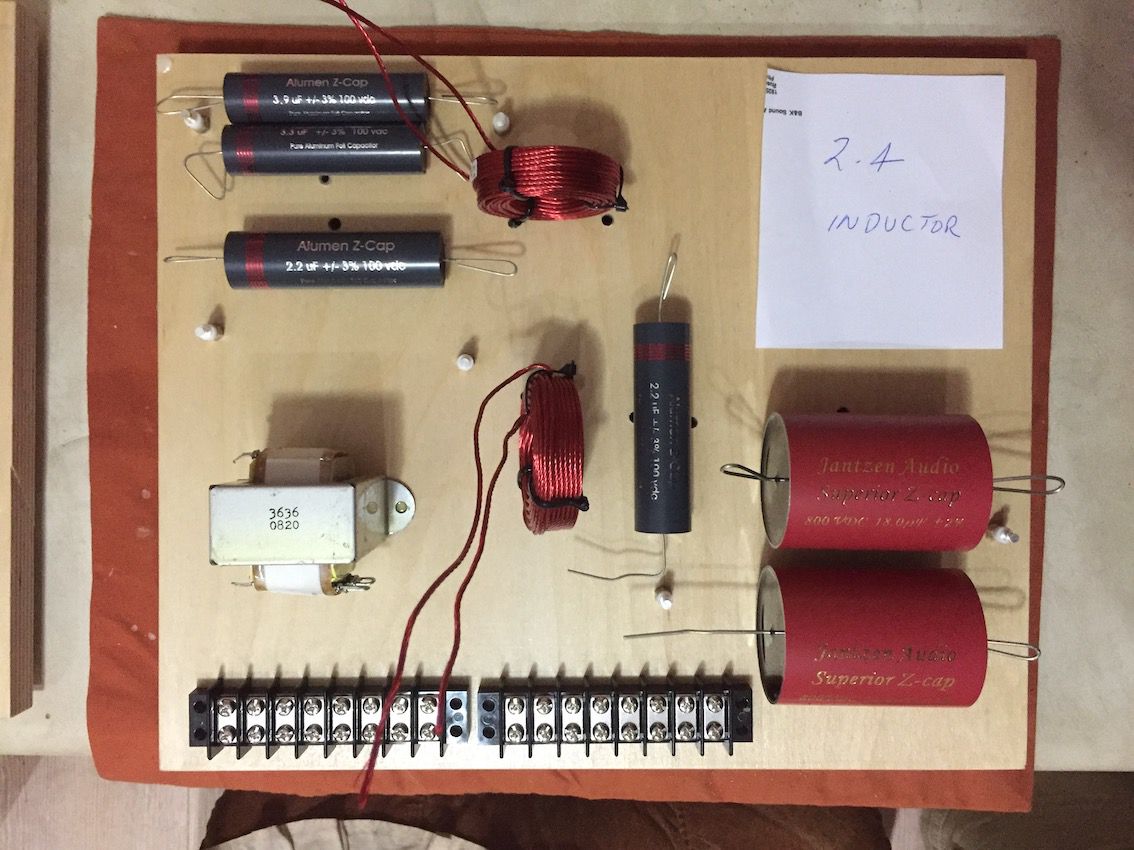
Having a break from the bass cabs for a while, as we are coming into a heat wave. Tomorrow will be 37 deg C & then a couple more days in the mid 30's. On the last leg of those at the moment....just need a bit of sanding & then the final coats of clear lacquer. It's a good time to work inside, so have started on the crossovers. Made some boards from some scrap 18mm birch, clear lacquered. This is the layout & will begin assembling tomorrow. Have all the components apart from the 2.4 inductors, which will be Mundorf vacuum impregnated. I ordered these about 3 months ago & am still waiting for them to arrive, but the distributor says they shouldn't be too far away. Also coming with these are the Mundorf Supreme resistors. My electrical skills aren't as good as my carpentry skills so will be taking my time with these.

-
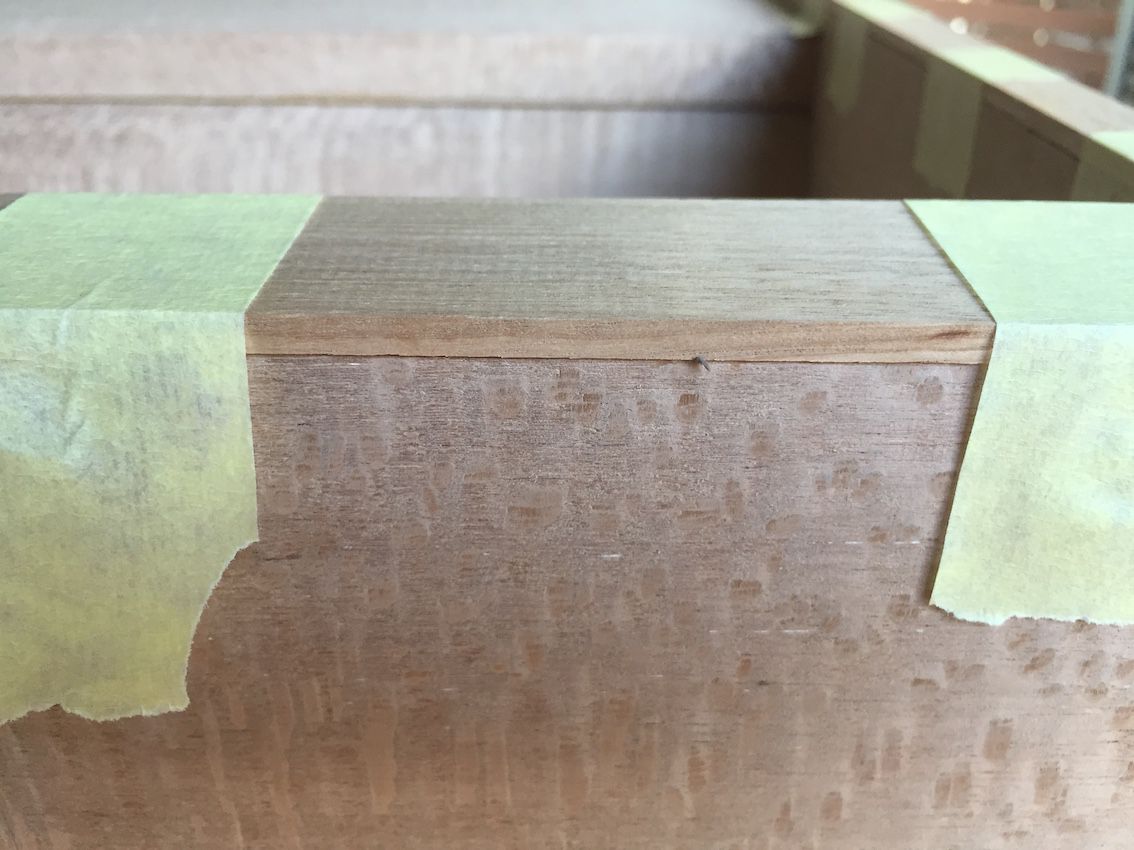
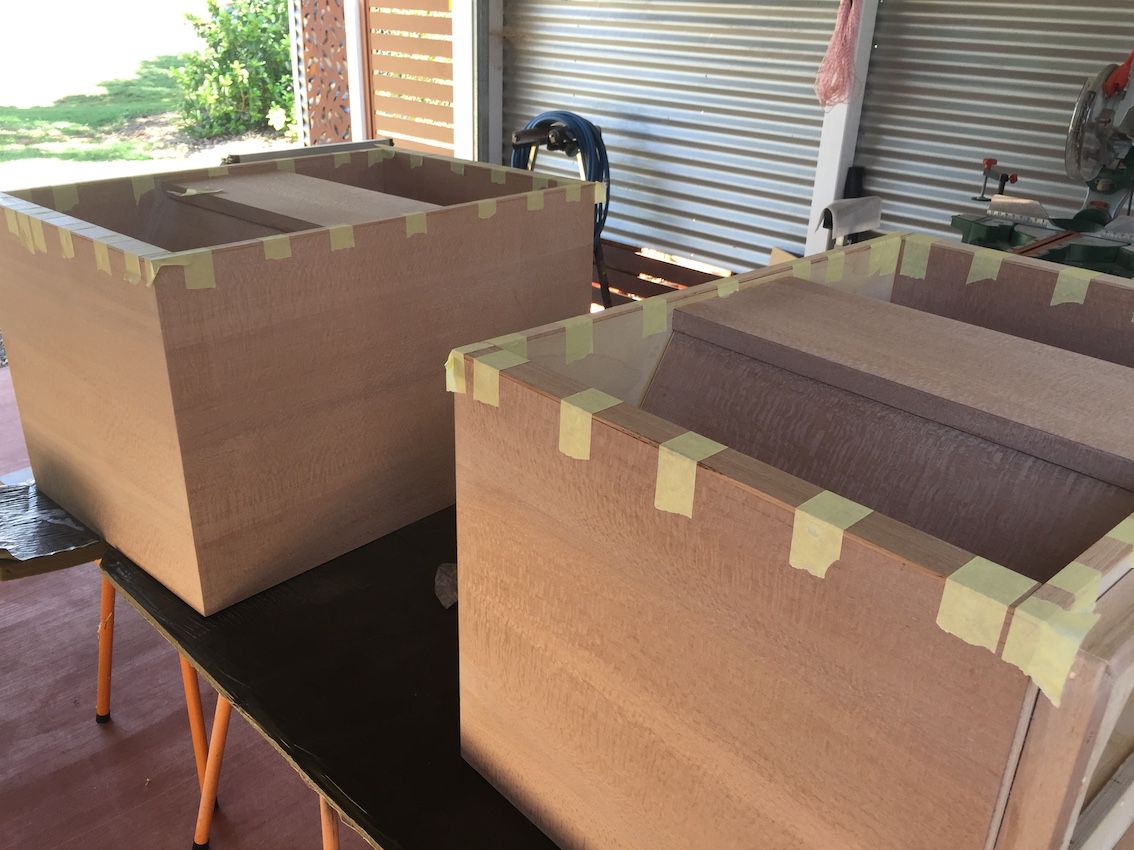
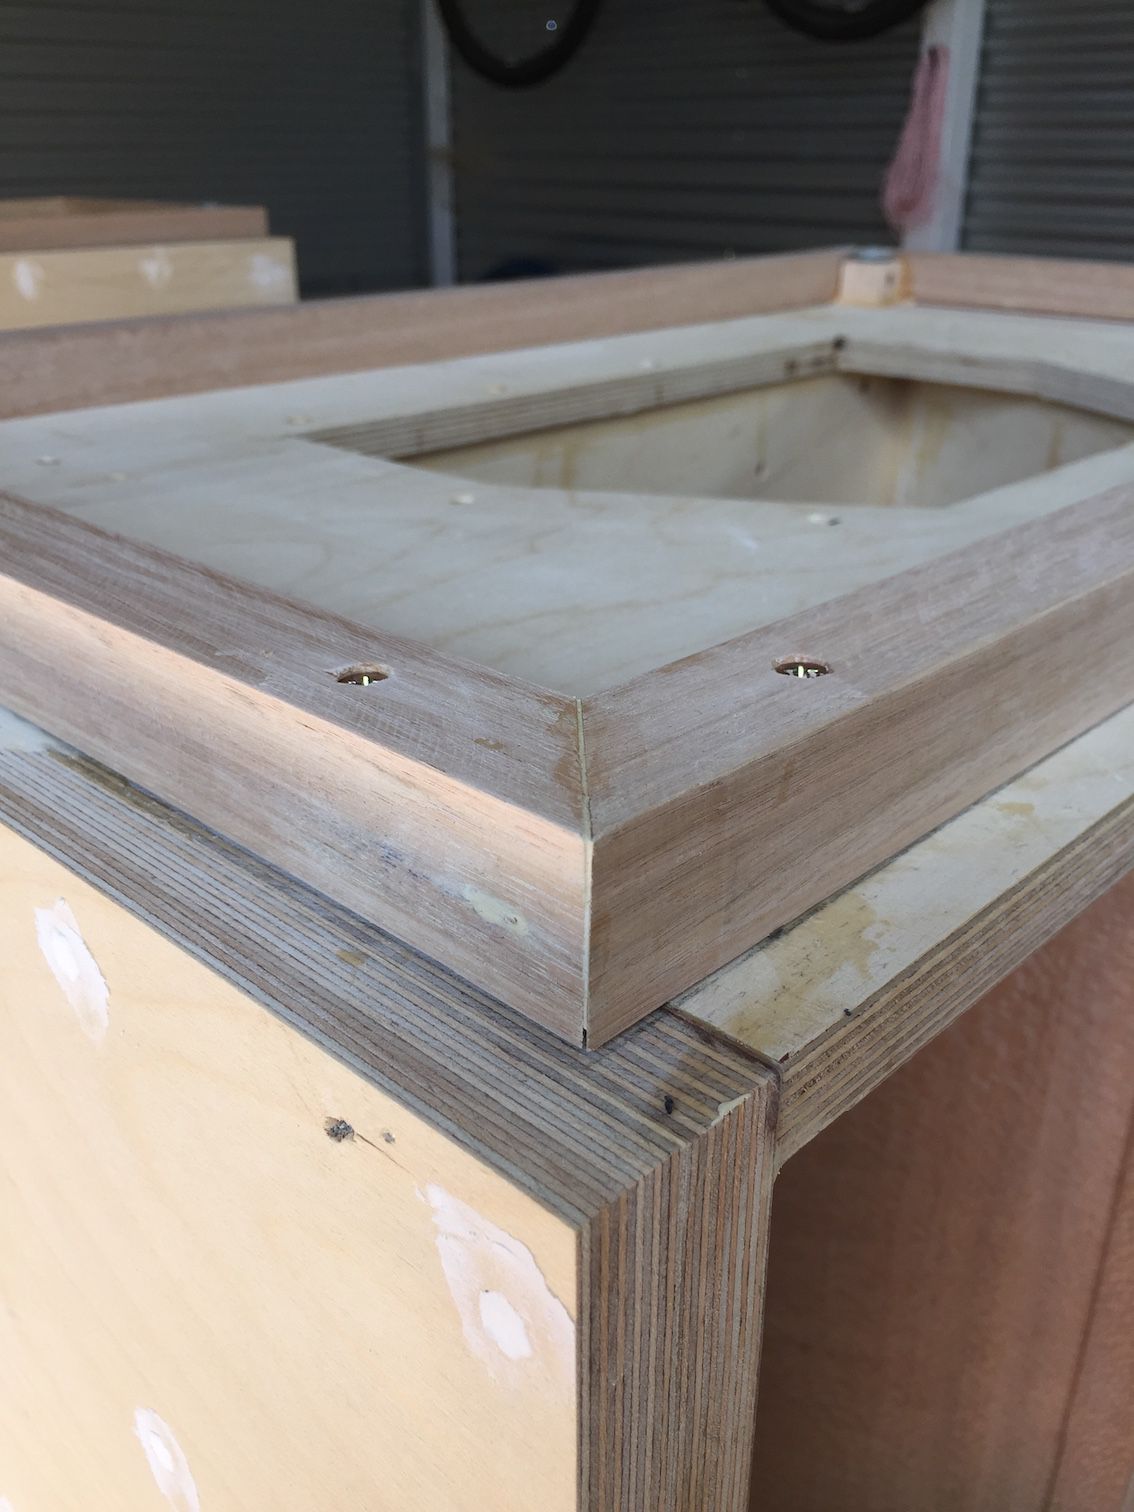
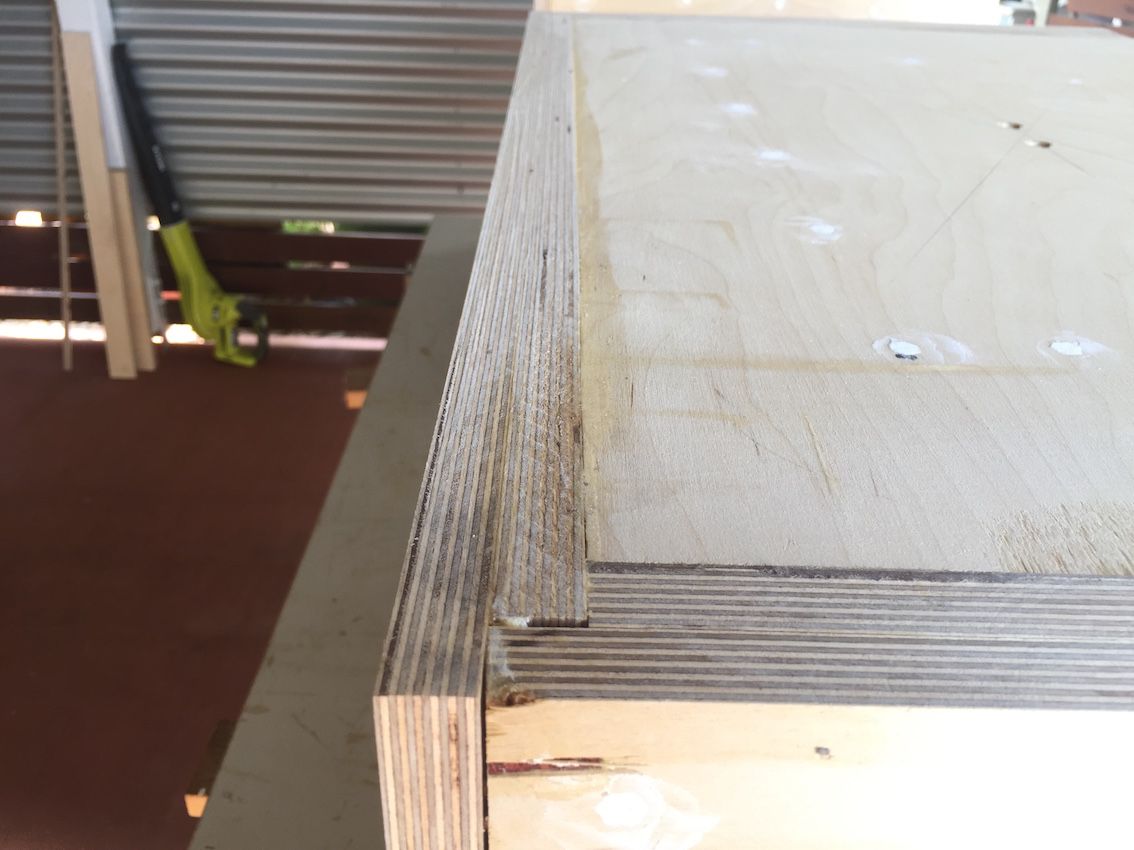
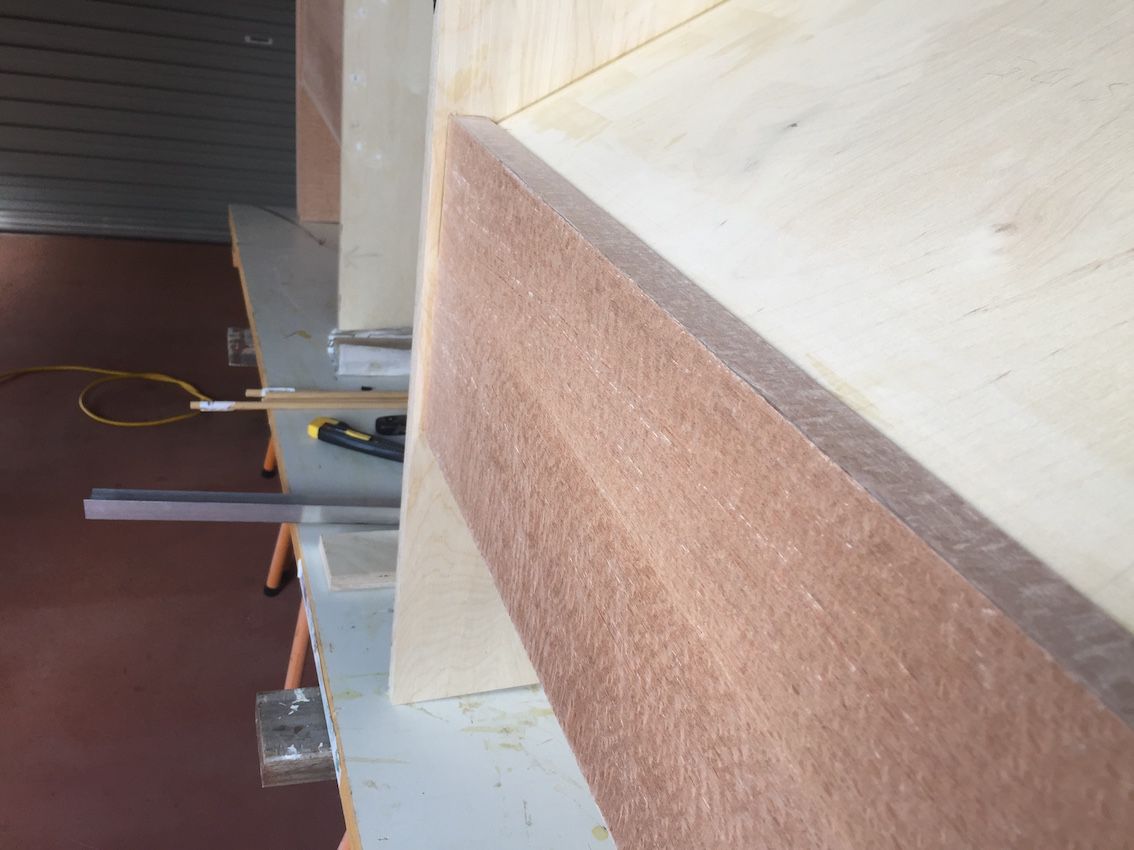
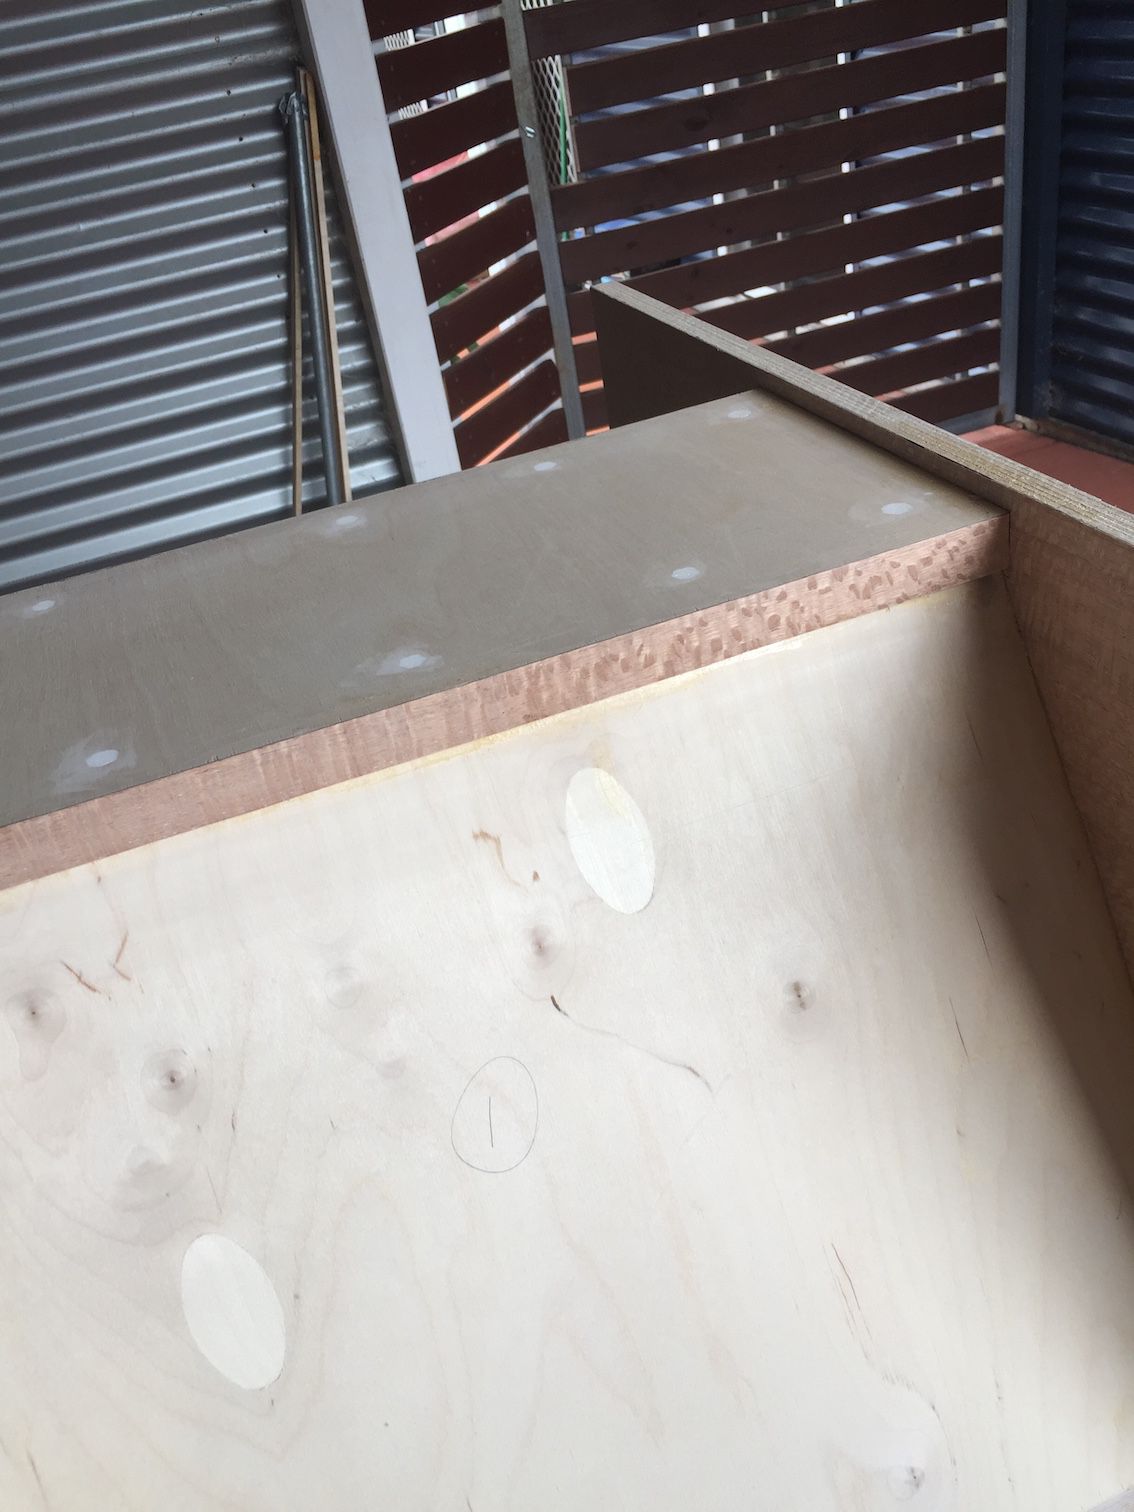
Got the other bass bin veneered today & then cut some 4mm edge strips from Tassie Oak for the front edging. This is glued on with wood glue & held with tape for 24 hours until dry. Once the glue is dry this will be as strong as if nailed.
-
Hi Jorjen, Yes, I already have all the drivers so can't take you up on your offer. Hope they find a good home.
-
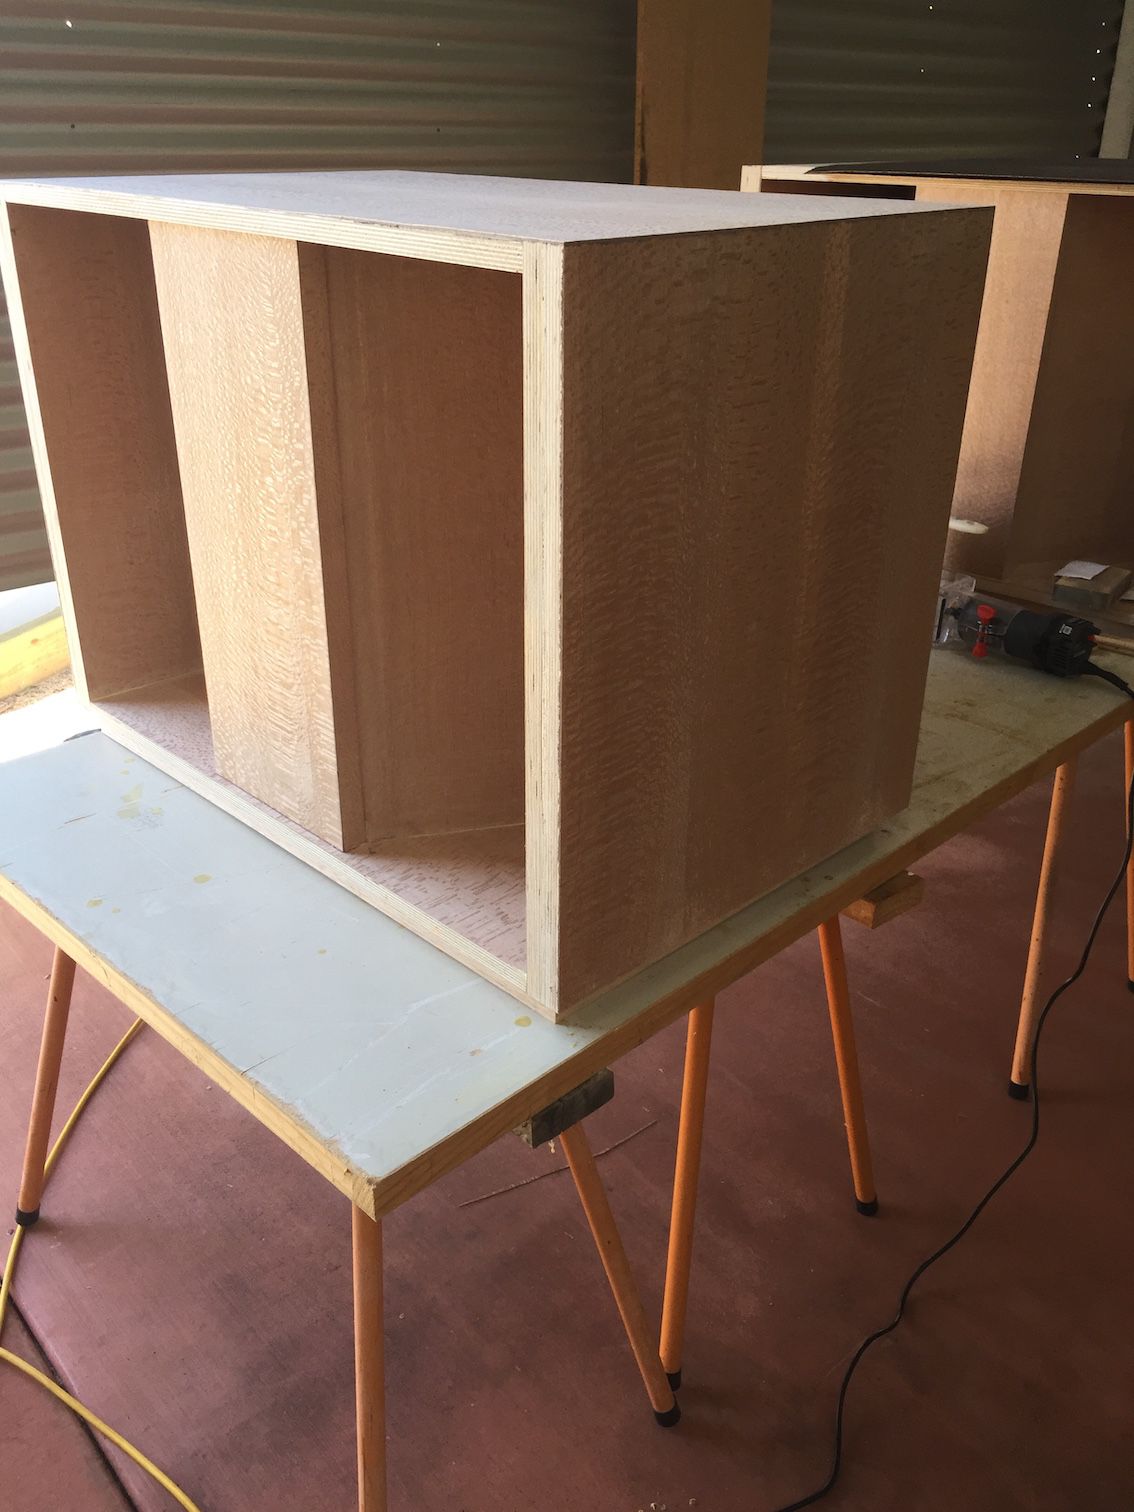
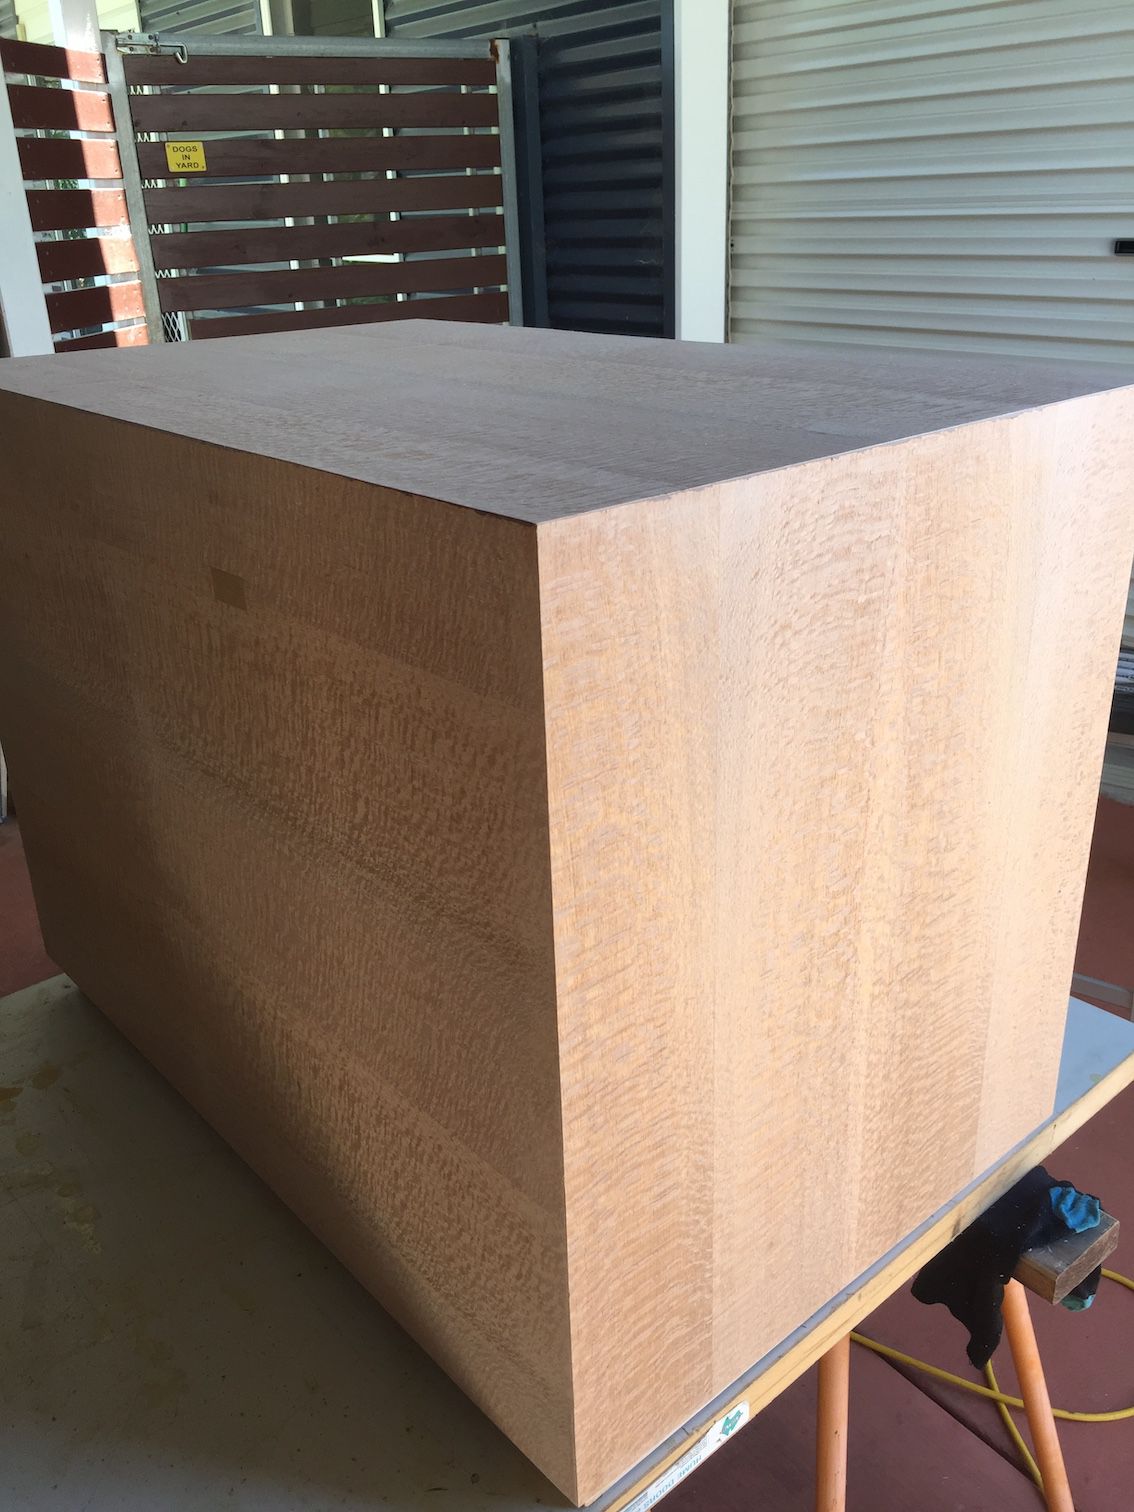
So today I got one of the bass bins veneered on the outside, just need to do the front edges. Will tackle the other bin tomorrow. I love the look of this particular oak veneer.
-
Fitted the bases for the bass bins today.....external veneer tomorrow.
-
Started on the rebate for the Elliptracs...still a little bit of finishing off to do.
-
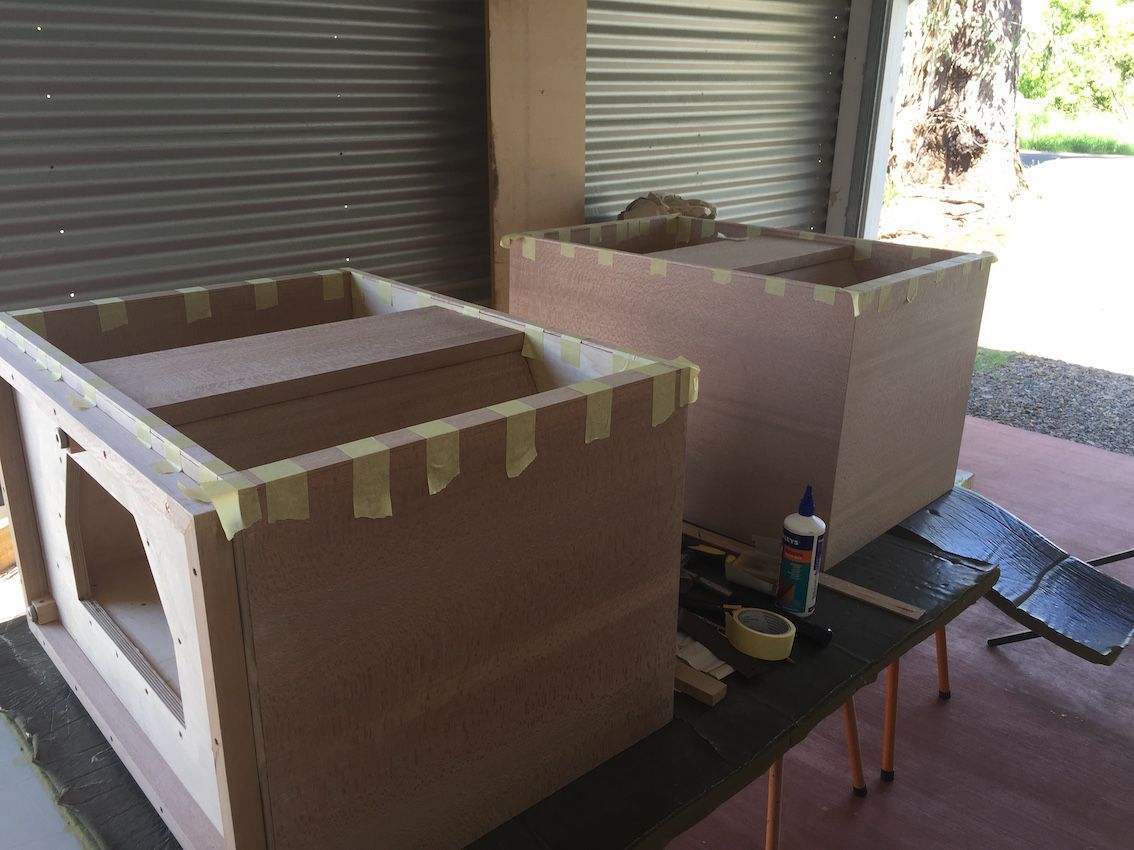
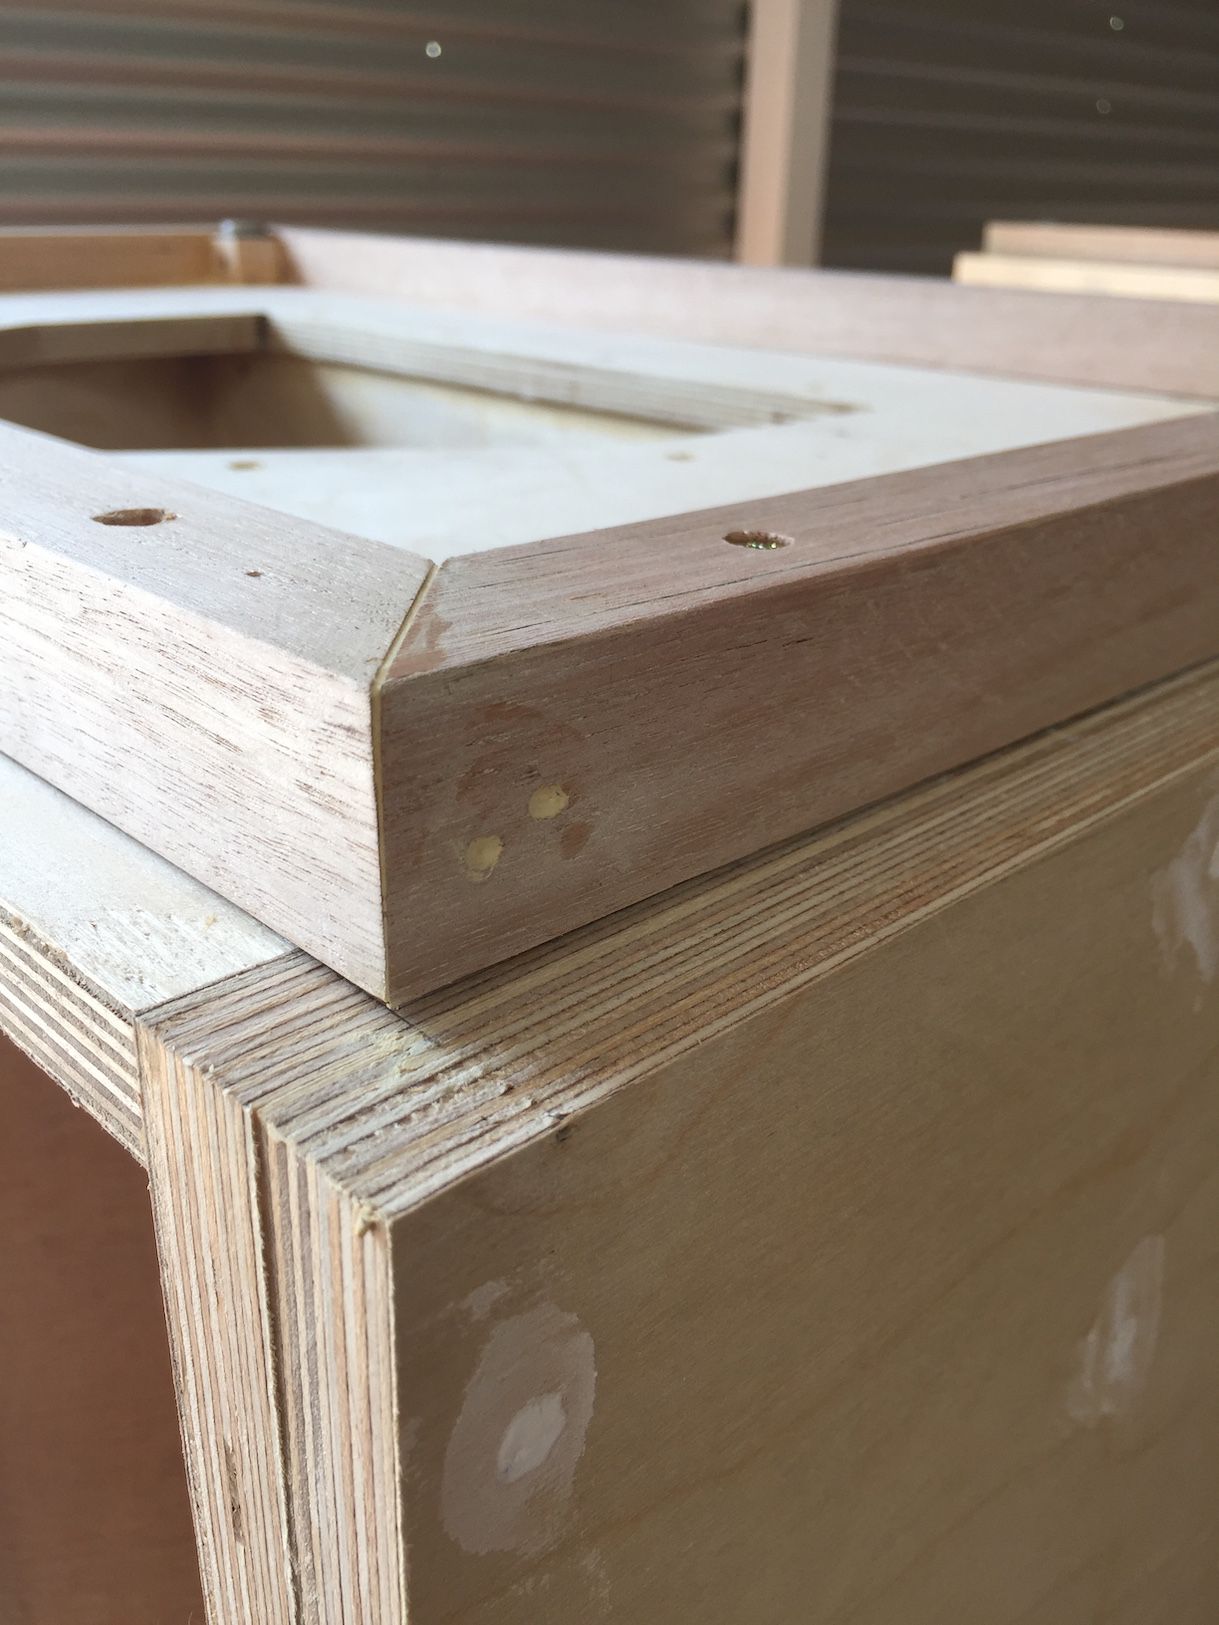
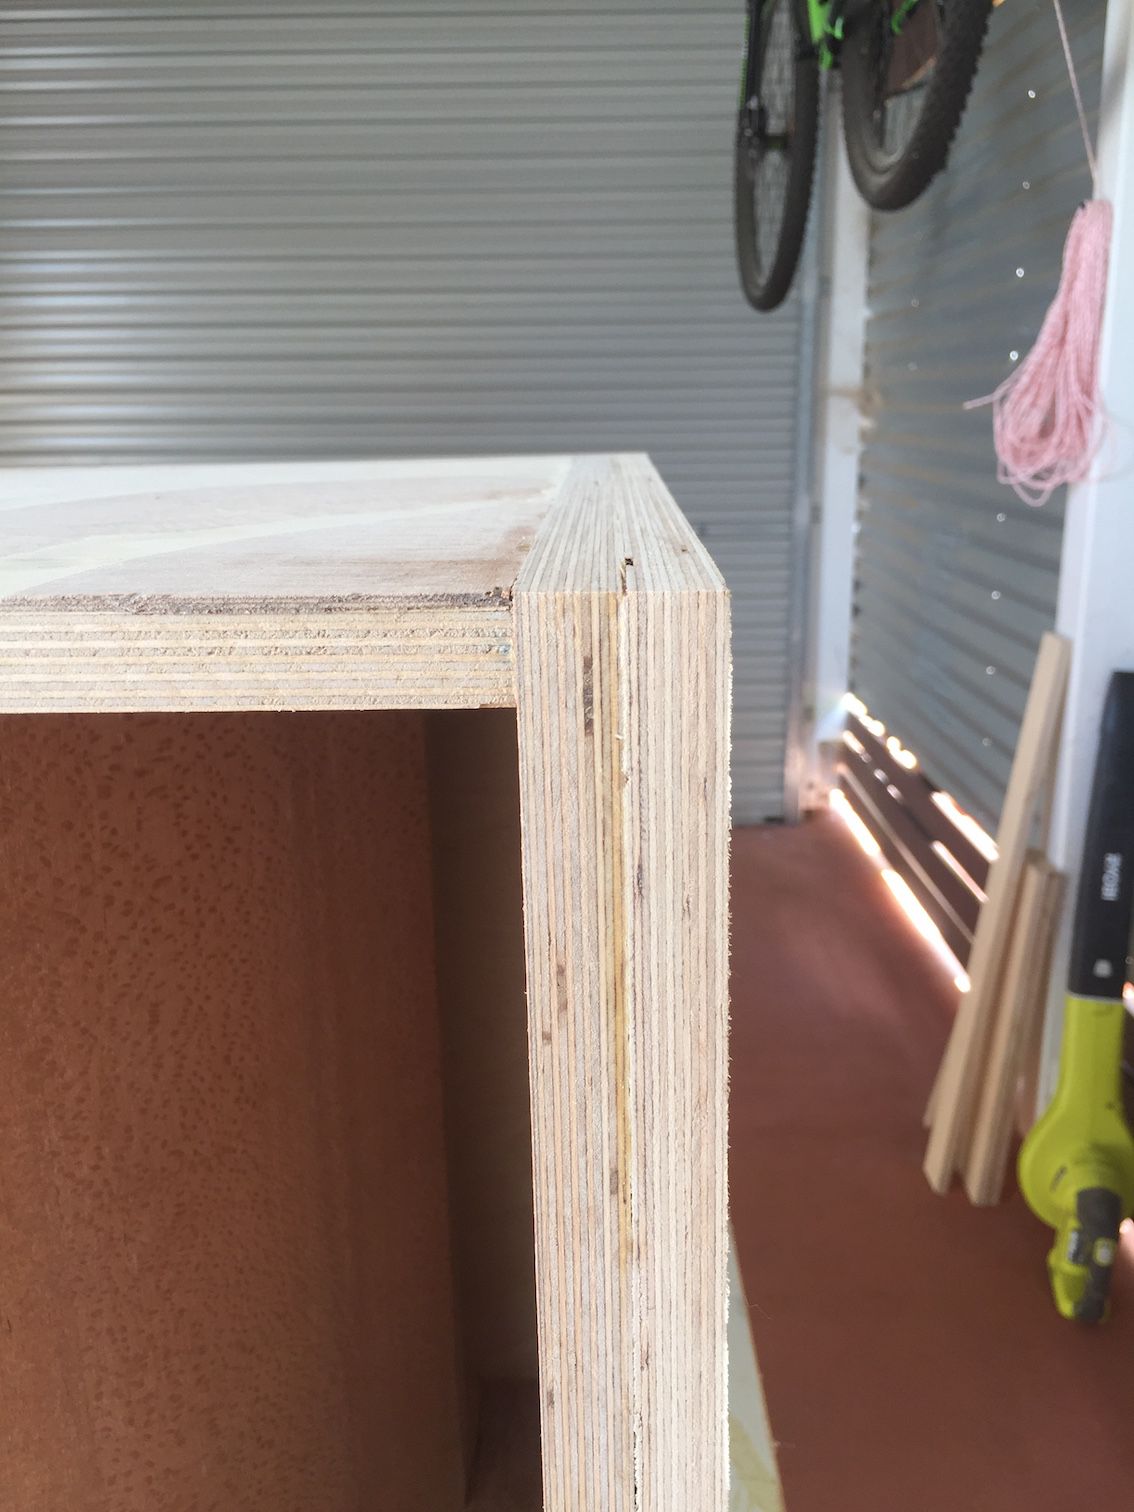
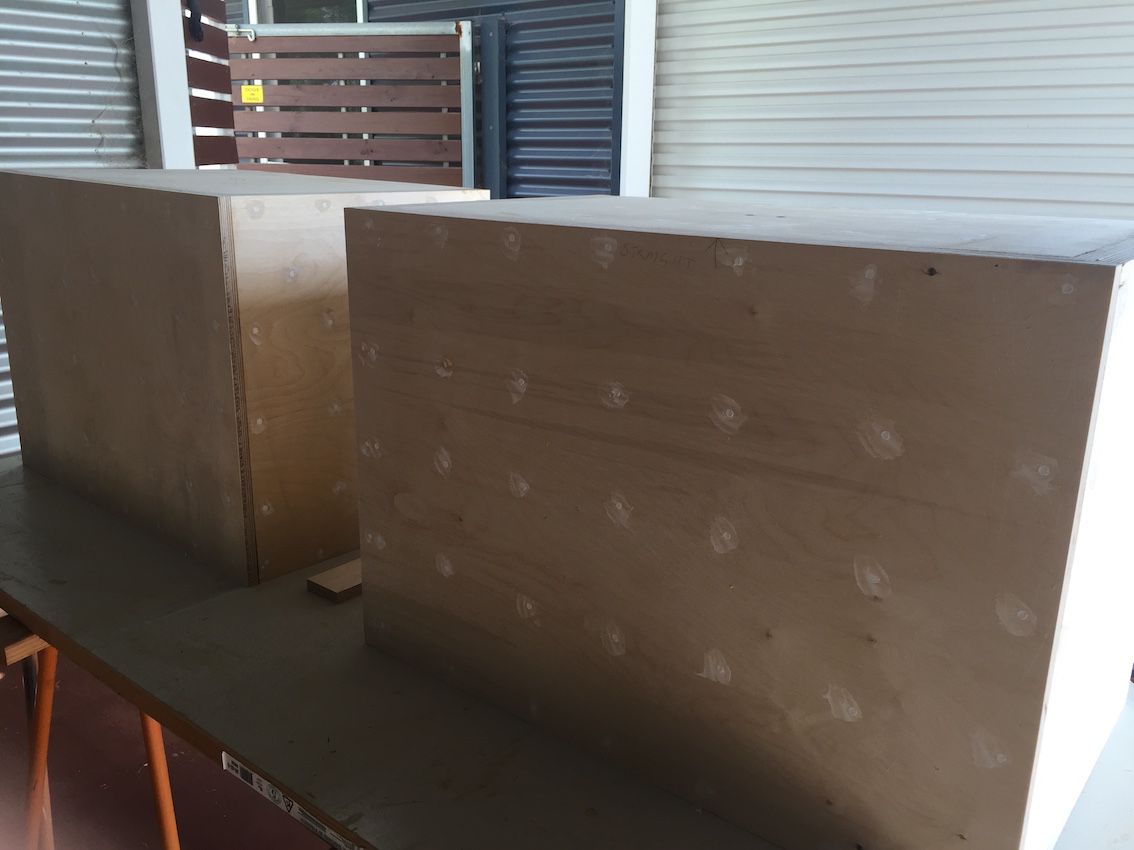
Completed the double layer of 18mm ply to the sides & the rear. Squared everything up ready for the external veneer.
-
....& a few more.
-
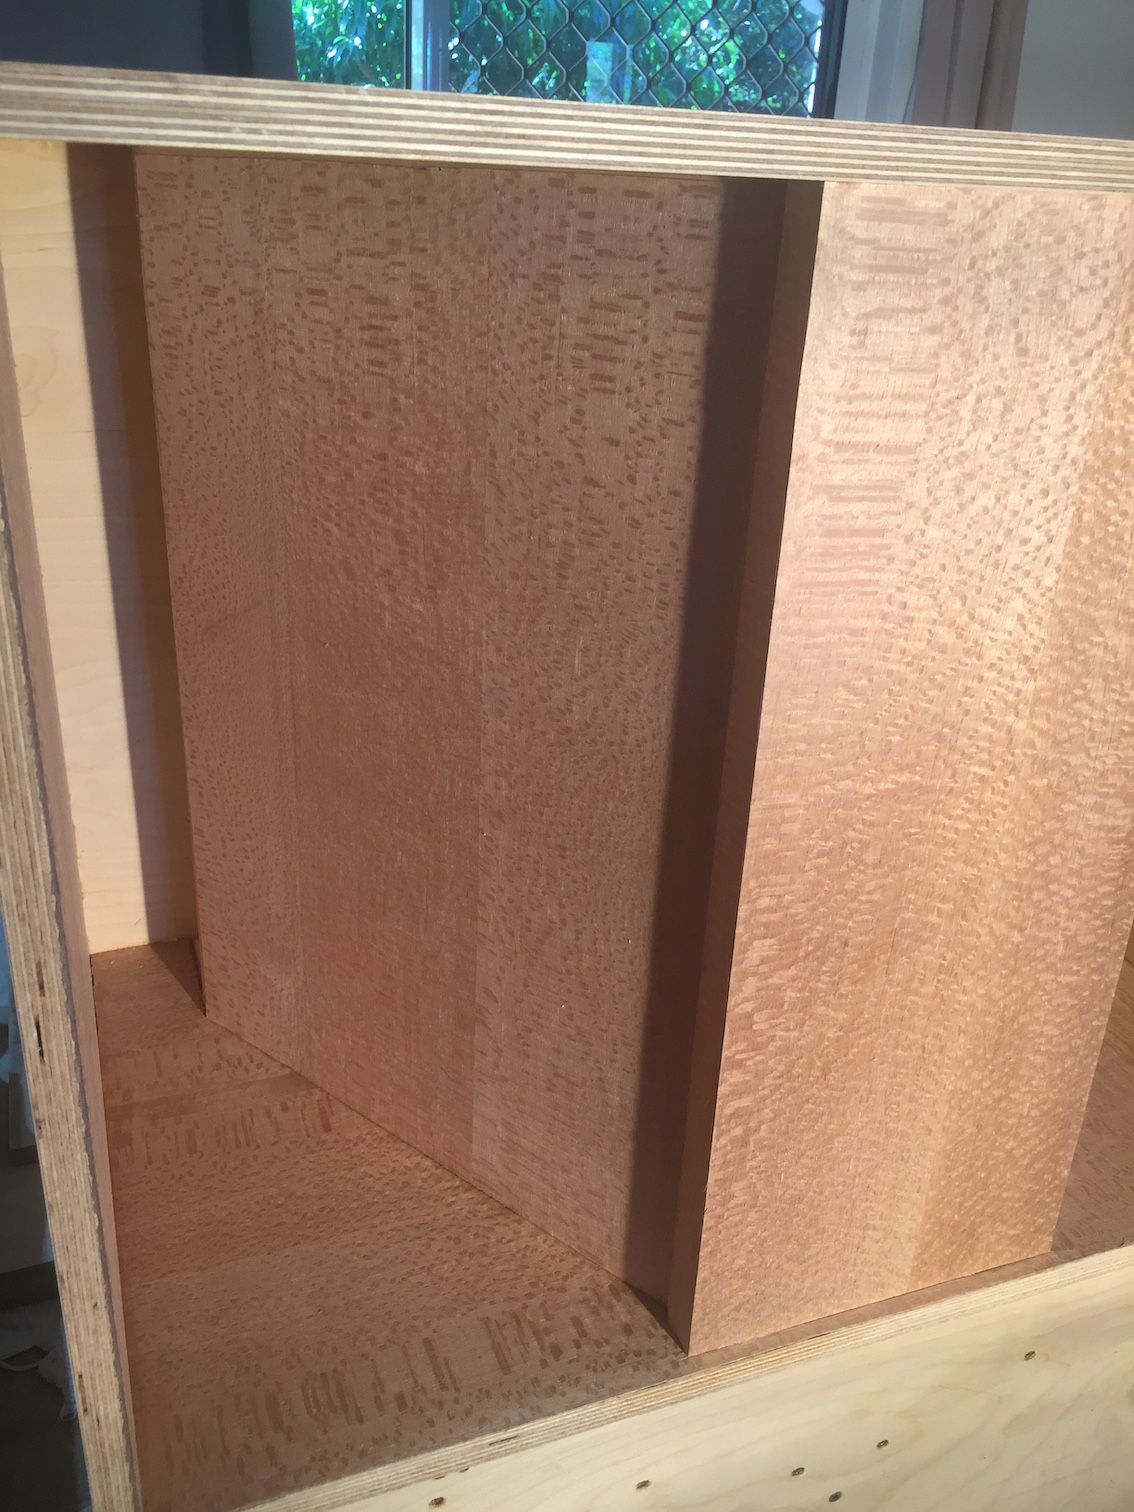
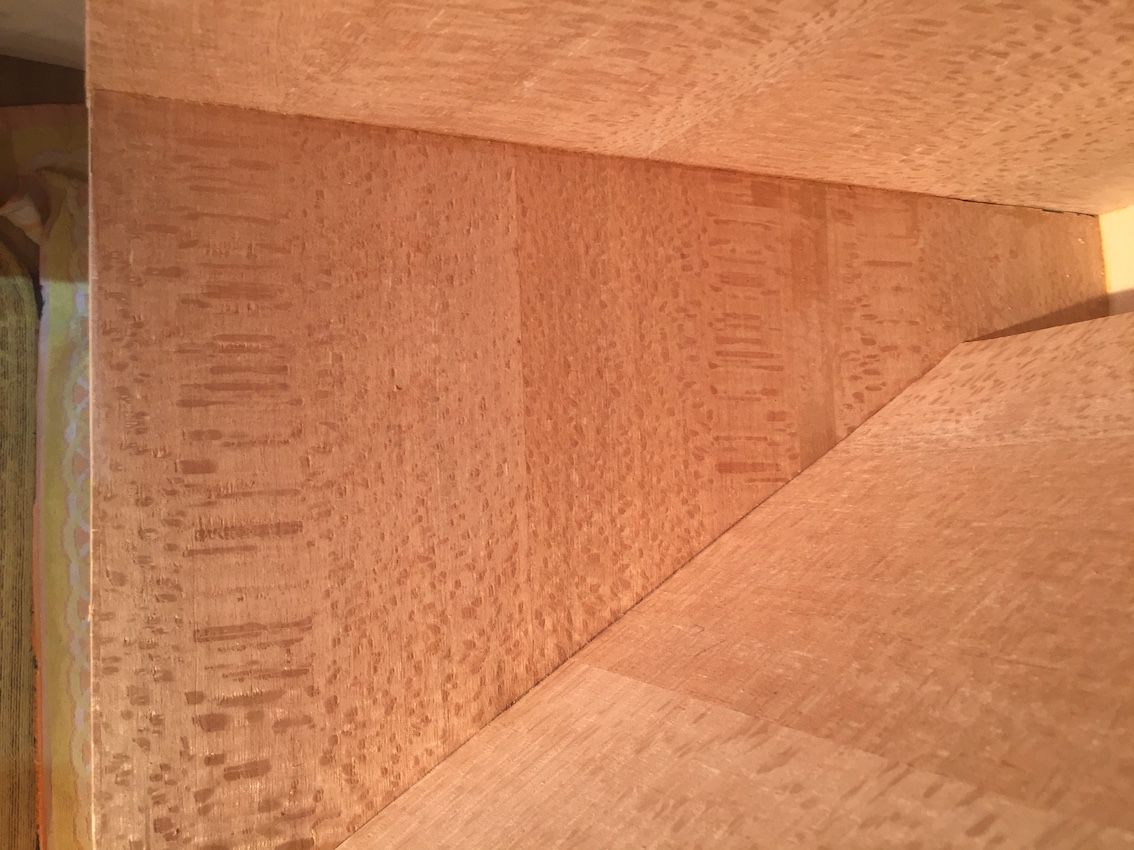
So....finished for today. Got all the internal panels veneered, next job will be to clean up all the external edges & put the next layer of ply on the sides & rear. Pretty happy with the veneer on the inside panels....a few gaps here & there, but nothing to worry about. Will fill those with wood putty & then sand ready for clear lacquer.
-
Thanks for the praise, but it certainly isn't perfect. I almost wish I had done it the way you did & veneered the doghouse before assembling the sides & top/bottom. I thought long & hard about doing it that way, but thought that the excess glue would be a problem when assembling the dog house to the rest of the cabinet. I would probably do it that way if I was going to do another build & find some wood glue that dried clear. The glue I used (TiteBond) dries a yellow colour. Anyway it came out pretty good. The only tip I can give is to make sure your templates are spot on & then you shouldn't have too much trouble getting them in place. Dowels underneath the glued veneer help to keep the veneer off the cabinet as you proceed with the stick down process & certainly another pair of hands is helpful when you are veneering the bottom piece around the perimeter of the doghouse. I wanted that to be all in one piece, so I had someone hold one side up off the glue while I adhered the other side. You won't get a 100% perfect fit around all the edges, but even from a couple of feet away you can never pick it. When all is done, I go around all the edges with some wood putty & clean up any small imperfections. Will post some photos of the completed veneer for the inside of the cabs later today.
-
.....and the front panel. Will finish off the rest of the interior veneer tomorrow.
-
.....and the edge of the front panel.
-
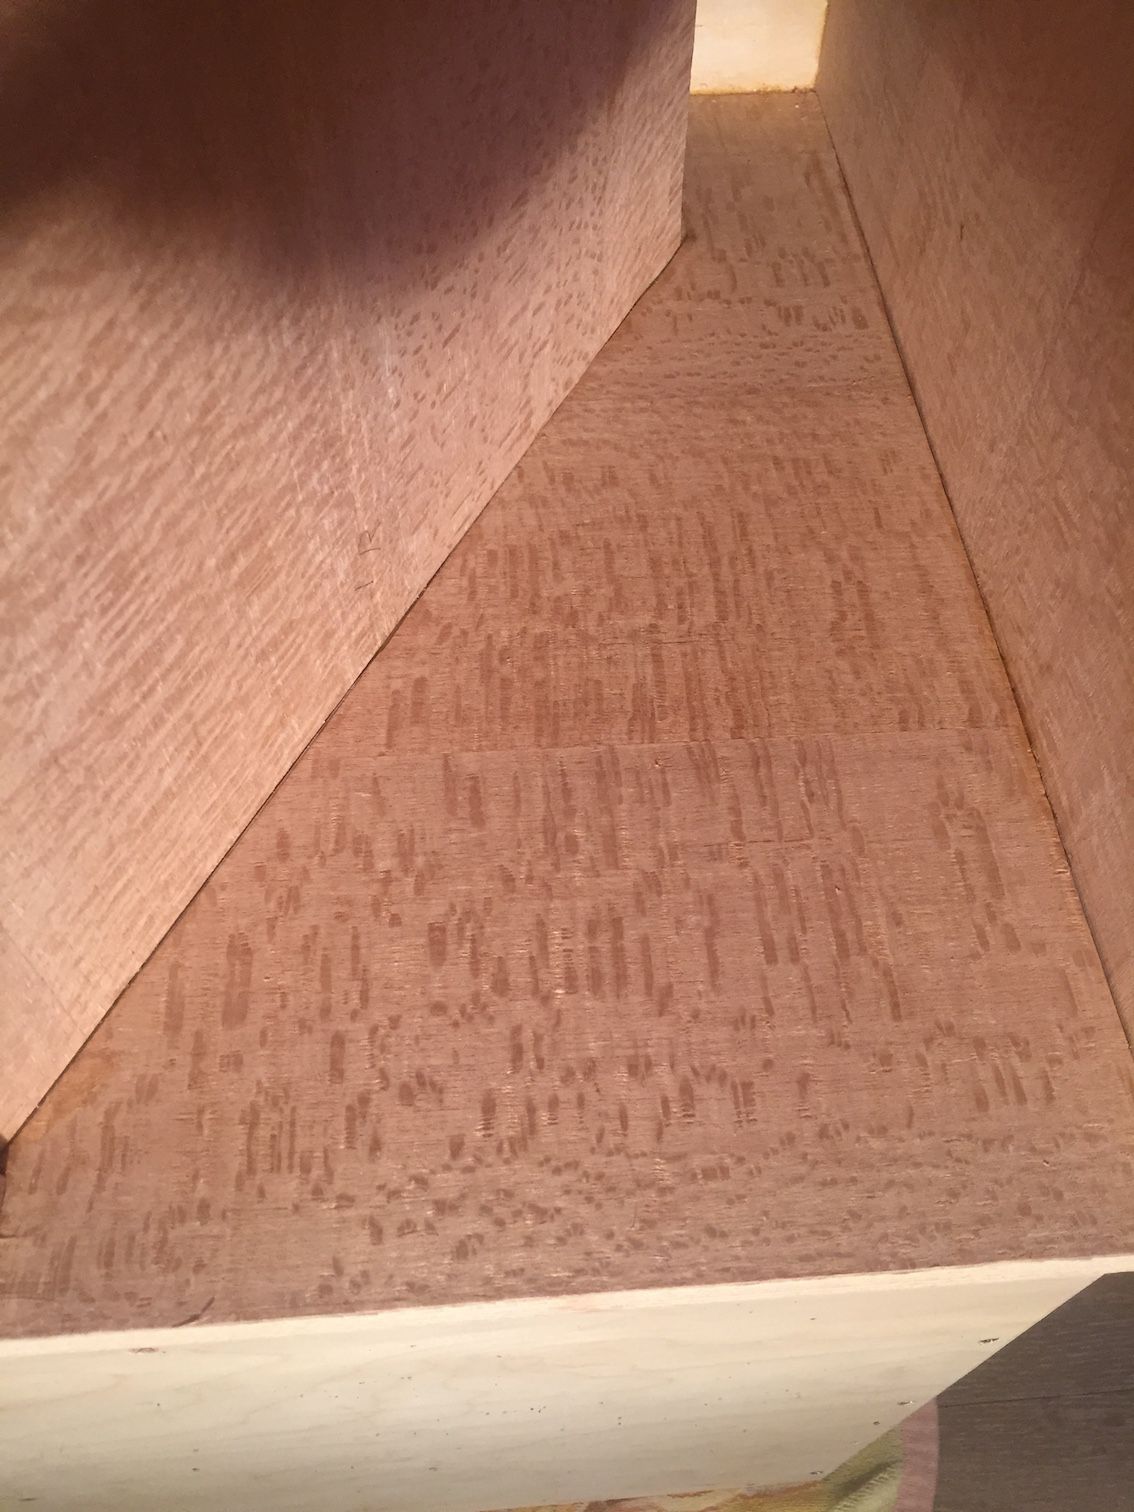
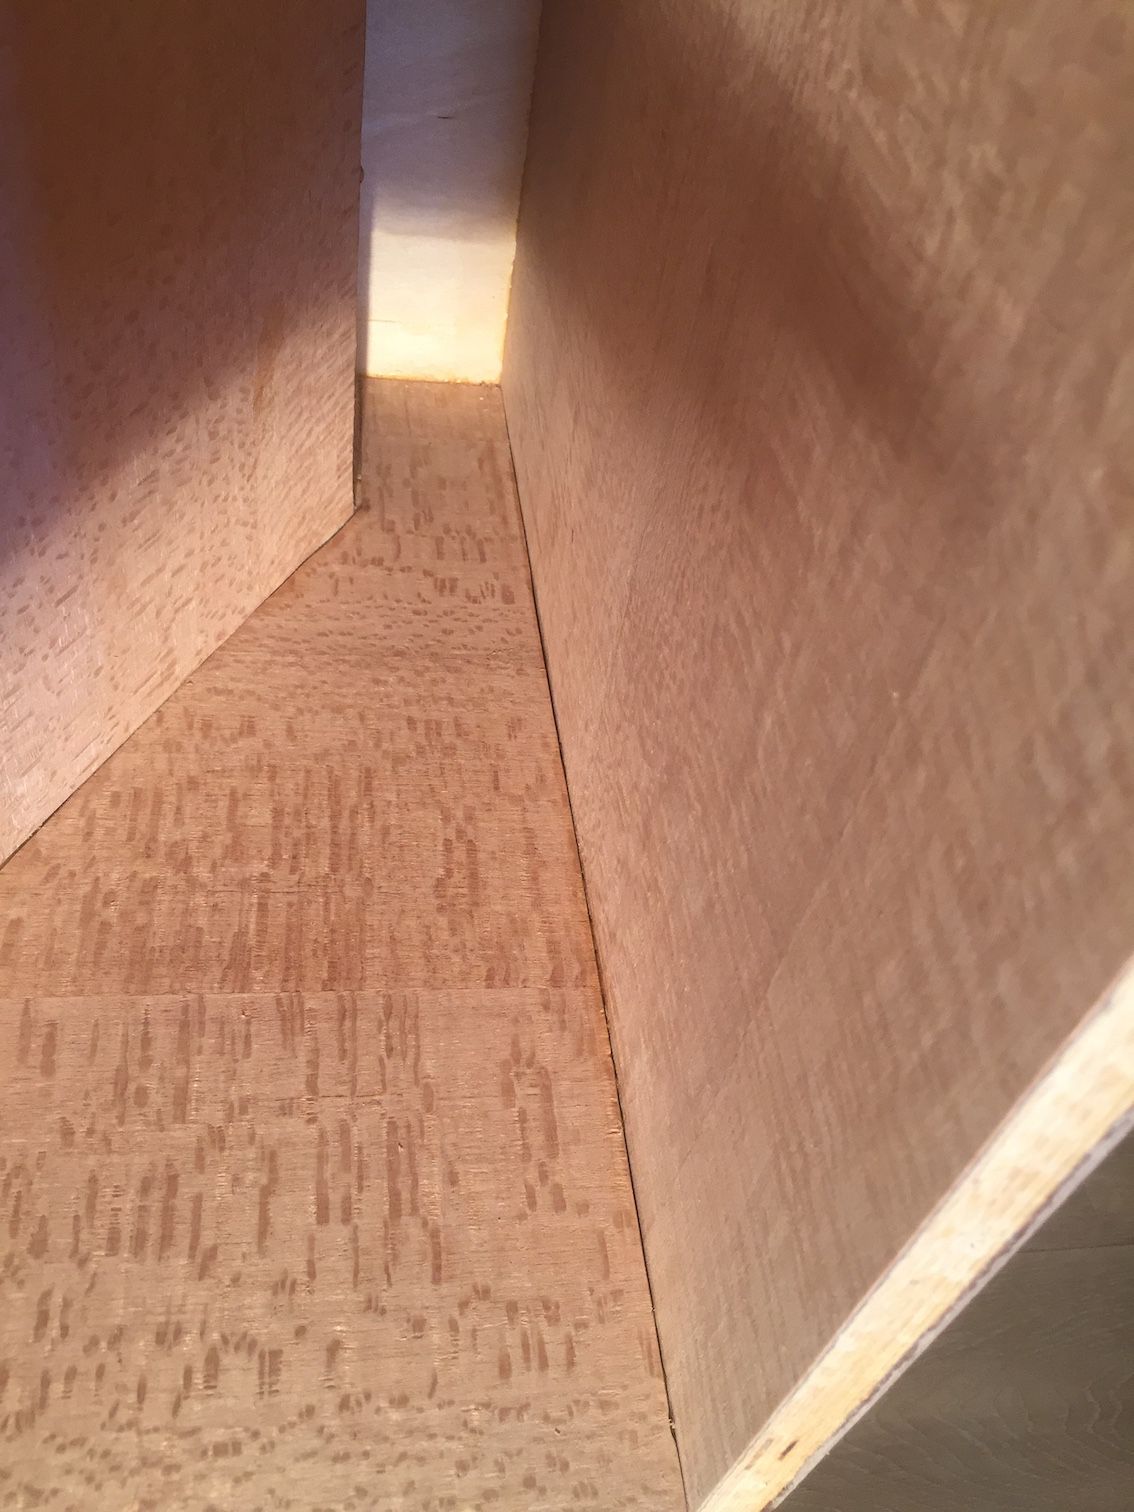
So, started on veneering the bass bins today. Have done the inside of the sides, which I will attach tomorrow. Here is the bottom of the cabs. Veneer is Silky Oak.
-
This angle wouldn't affect the performance in any way & I would suggest that the factory leaves them on because it's an unnecessary process that contributes nothing to the performance, but adds to the cost. Remember that the LS was originally designed as a PA speaker & so functionality was the main criteria....not aesthetics. Over the years the design has stayed the same & I would suggest that people who build clones want their LS to look exactly like the factory models, rather than it being a time saving exercise. If you're not happy with the look, by all means bevel those edges. This won't alter the sound at all. Keep up the good work....looks like a fantastic build.
-
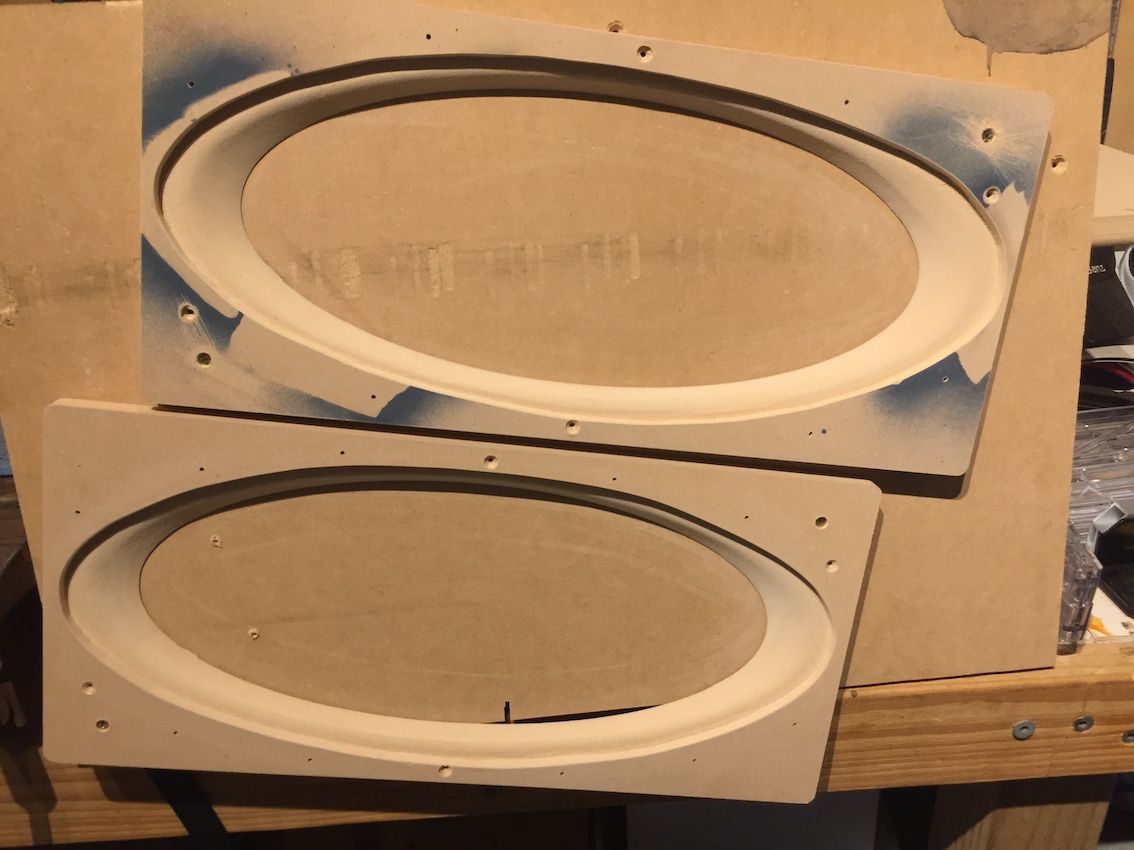
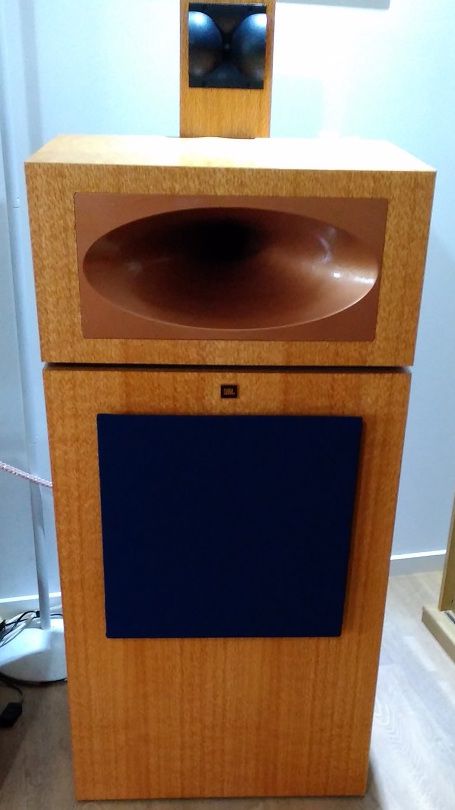
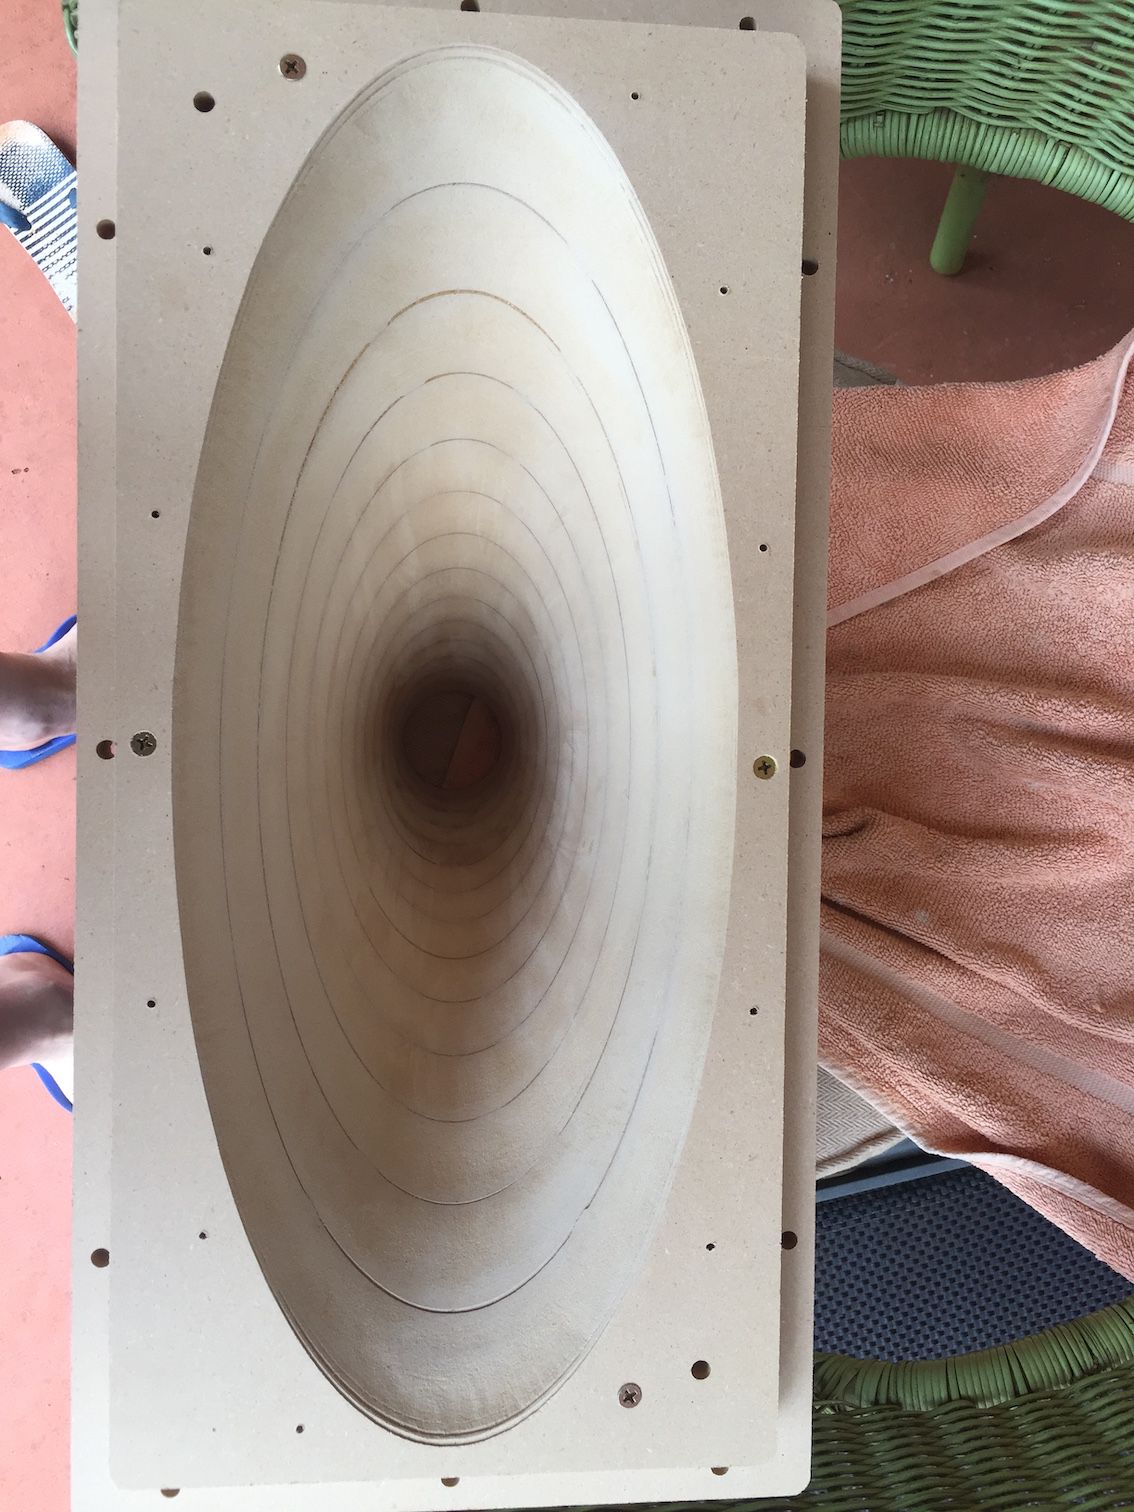
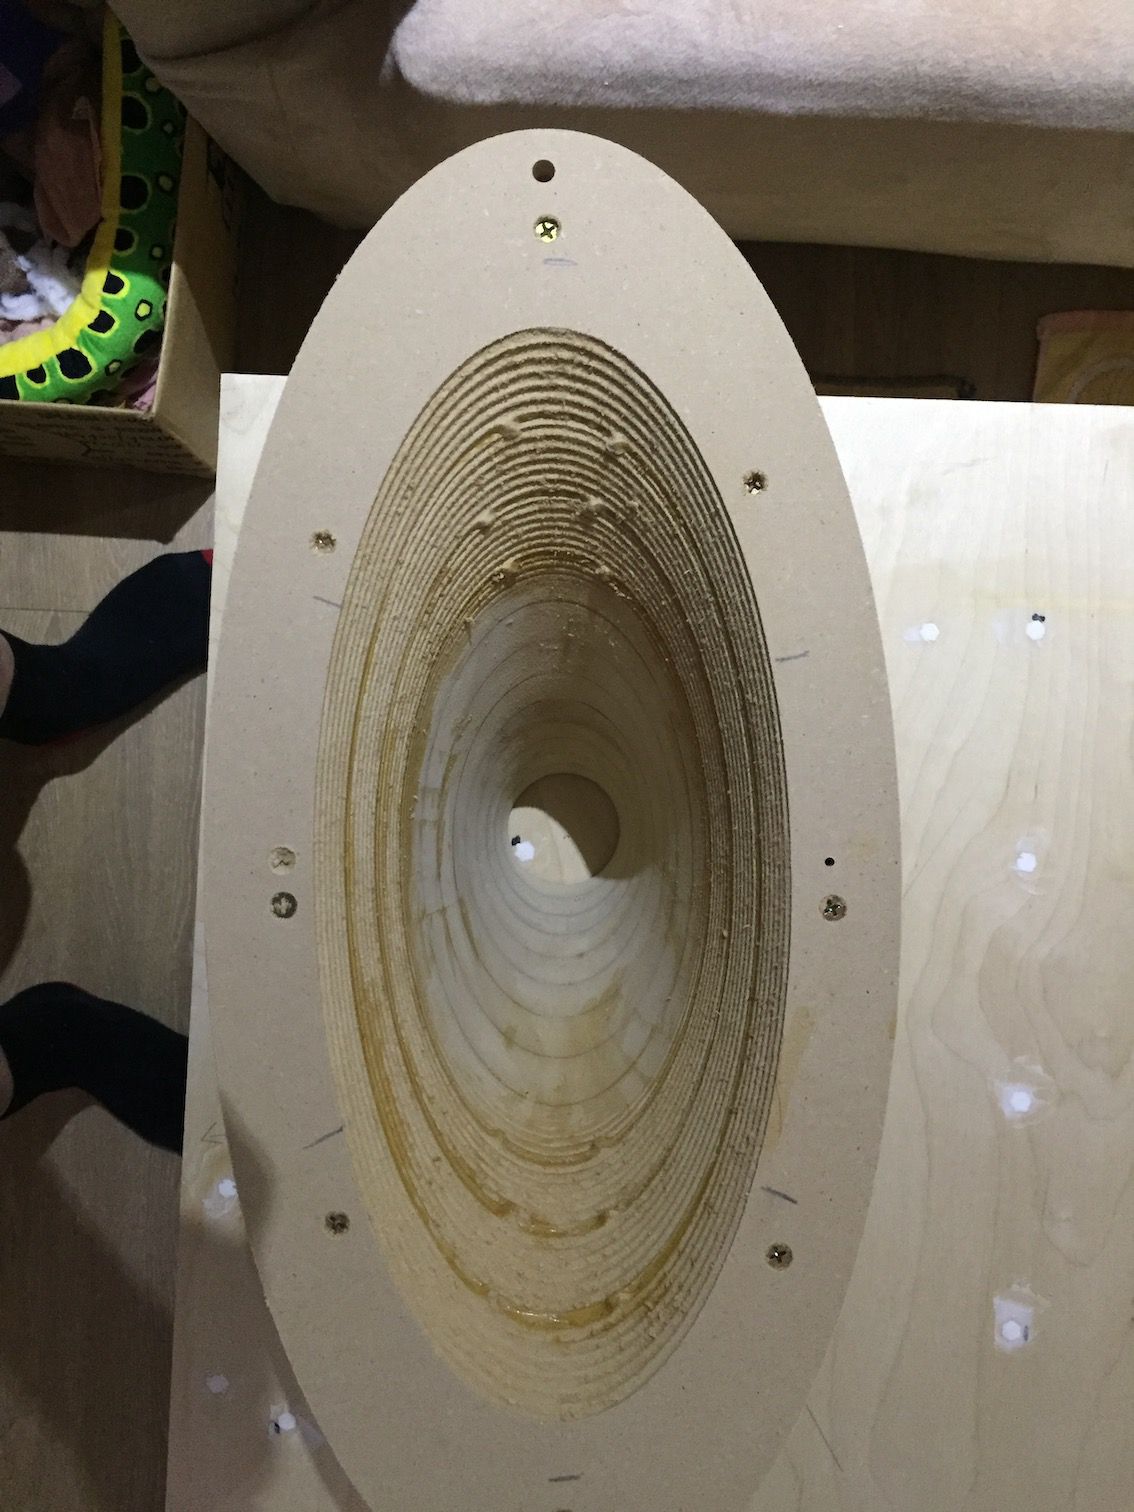
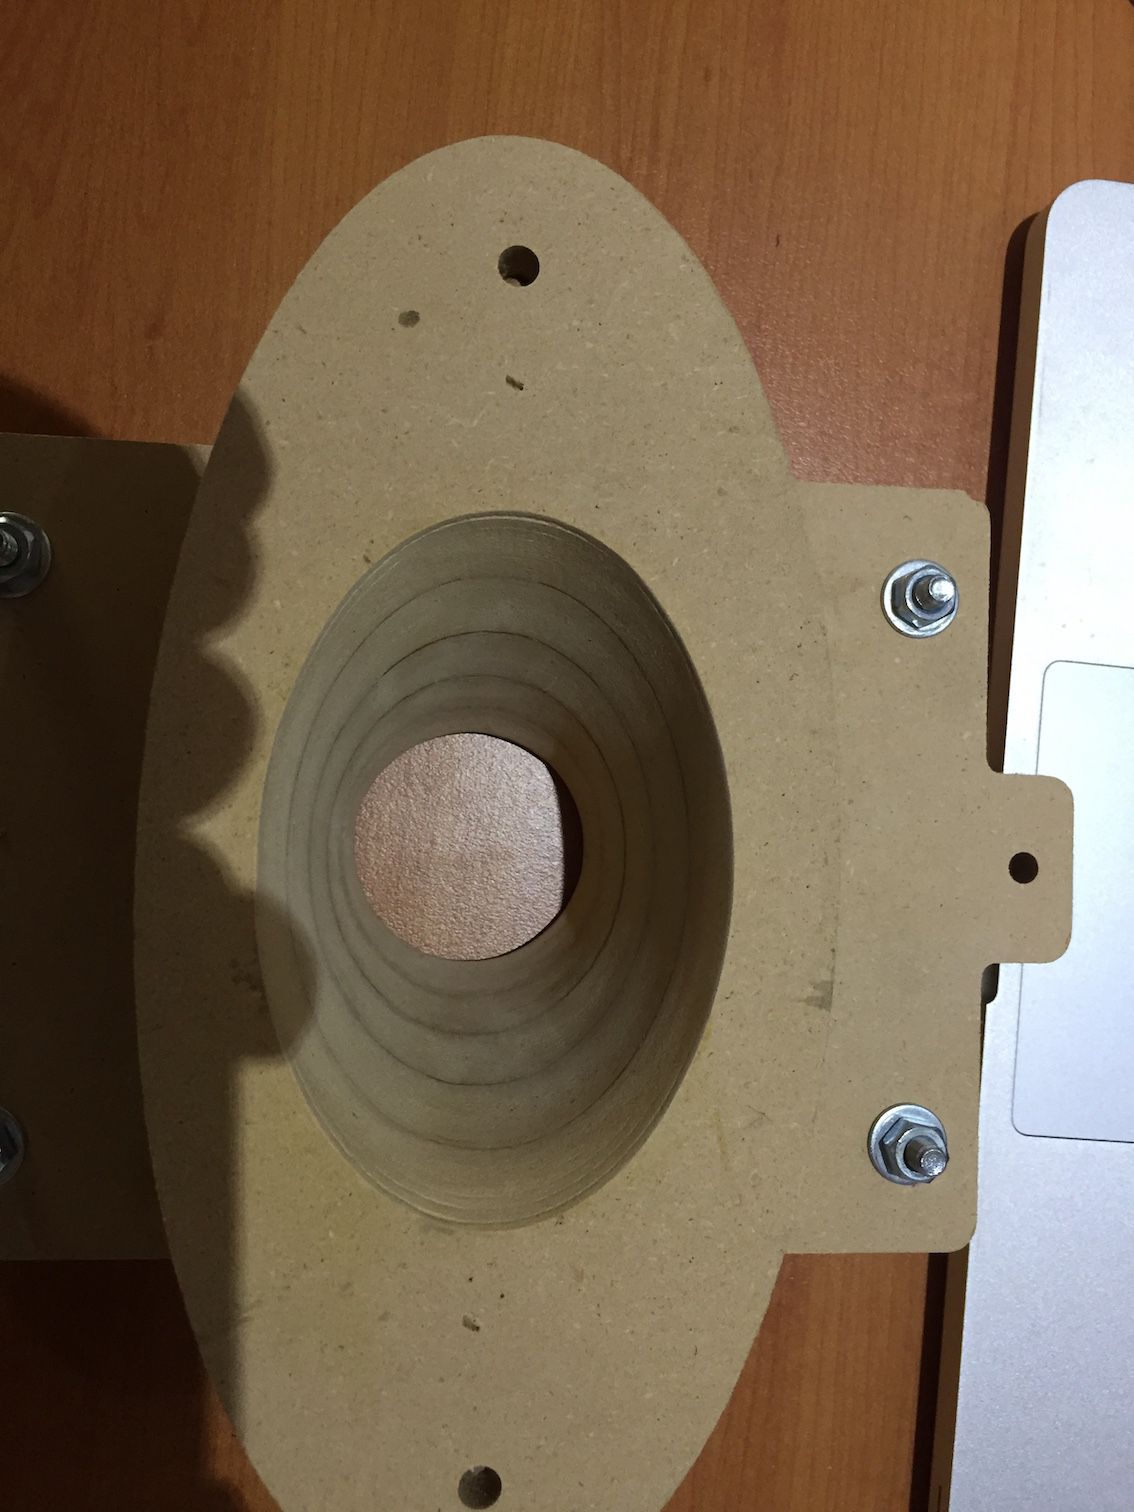
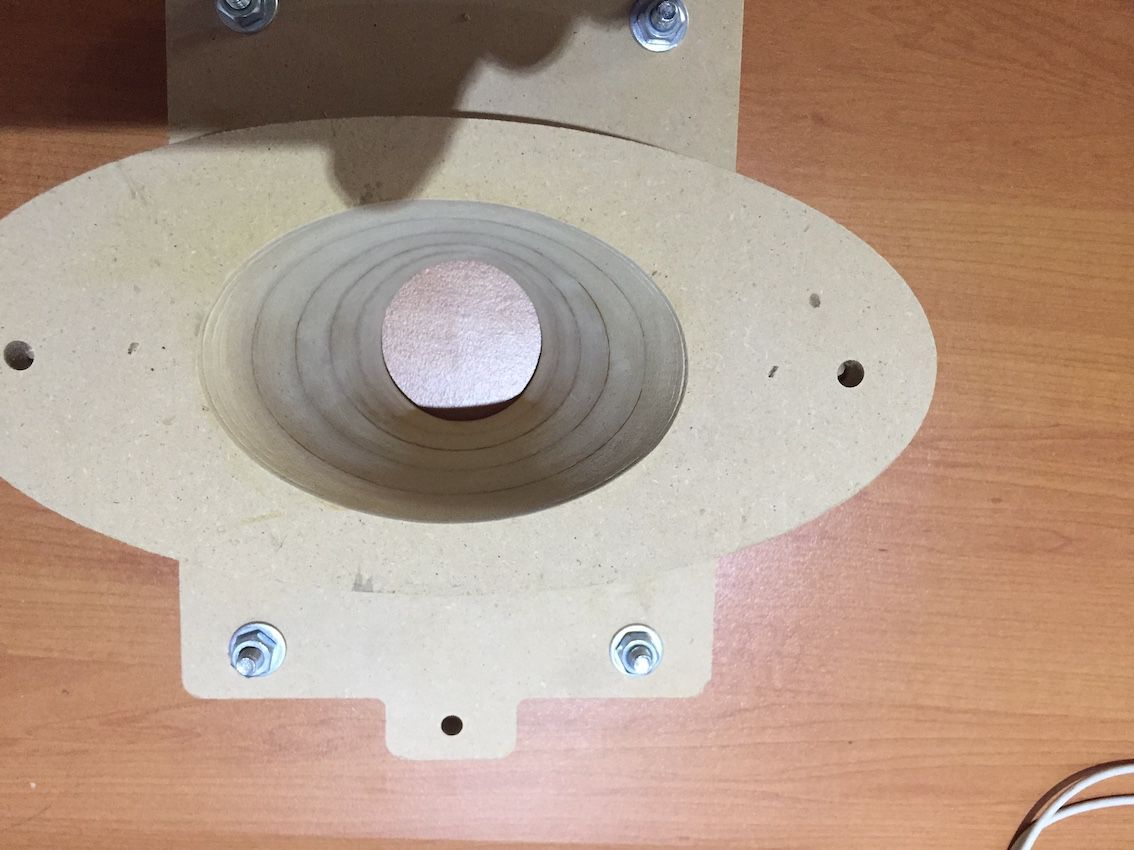
Today I spent on the last of the segments for the mid horns. Yes, I know the outer edges are not very good, but I have something in mind for that. This horn usually mounts from the rear into the baffle board & you usually veneer the rectangular shape of the baffle & so you see the rectangular shape of the horn & you also see the cut out where the horn fits through the baffle, just like my last build of JBL's with the copper coloured horn. What I'd like to do this time is fit the horn in to the baffle & veneer right up to the lip of the horn, so that the horn looks like it is a part of the baffle. Doing it this way, you won't be able to remove the horn once it is fitted, but I don't intend on changing the horn, so it's not a problem. To achieve a clean line where the veneer meets the outer curve of the horn, I need a 90 deg angle around the horn perimeter, so I am going to set the router up & route a 6mm 90 deg cut, approx. 6mm deep around the outer edge of the horn flare. I'll have to do this freehand, so have been practising on some scrap & I think I can pull it off. Will post some pics when complete.....wish me luck, as once I adhere the veneer there's no going back.
-
Very nice work. Is that cut from a solid piece or made up of individual segments? If it's segments, there sure are a lot of them.
-
These will be 3 way. Crites cast frame woofers......B & C DCM50 mids......B & C DE10 tweeters. The top hats will replicate the original Belle design in terms of the cabinets, but with a bit of a twist in terms of how the mid horn mounts into the cabinet.....stay tuned. I've had A55's before & if I still had them I wouldn't be changing them out, they are a fine sounding driver. The reason I didn't use them this time around was trying to find a horn to mate with the 1 inch throat. Daves horns just sound fabulous, I doubt whether you'd find a better solution without paying thousands of dollars. So, if you can find a horn that you like that works with the A55's, I'd stick with that. Maybe a FastTrac or Edgar style horn? I've used them before & they are very good, plus, they suit the 1 inch drivers. I've never been a fan of the CT120's.
-
Well....I didn't make the cabinets. A friend of mine who is a cabinetmaker made them for me. I then made the mid horns & didi the extra walls for the sides & backs & veneered the cabinets. Also made the original crossovers which, as you know, FullRange has since greatly improved upon. I've always wanted a set of Belles, hence this new project & decided to have a go at the full build myself. It's very challenging, but as with most things if you have the right tools it gives you half a chance to succeed. I wouldn't say that these are going to be perfect, but they will be pretty close.
-
Finished this batch of sanding.....only two more segments to go....aargh!
-
No No ....no offence taken....was meant to be humorous. I'm not very familiar with computer speak.
-
I can make enough mistakes on my own without dulling my brain any further than it already is! Appreciate the thought though.
-
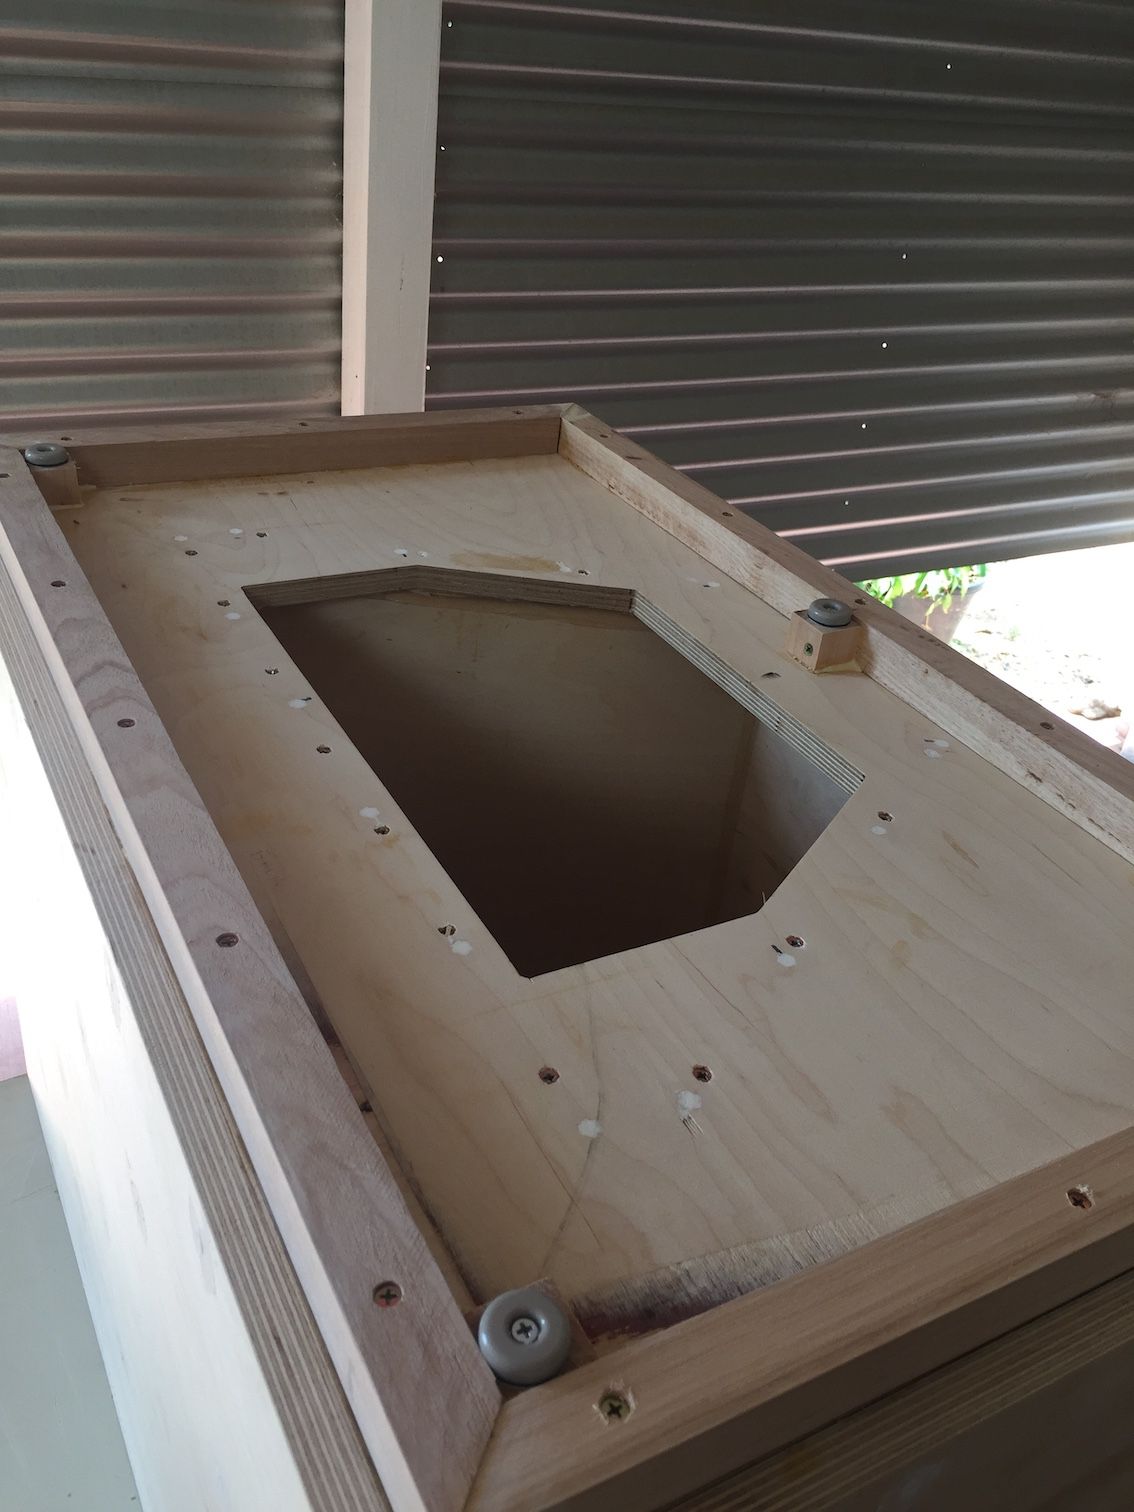
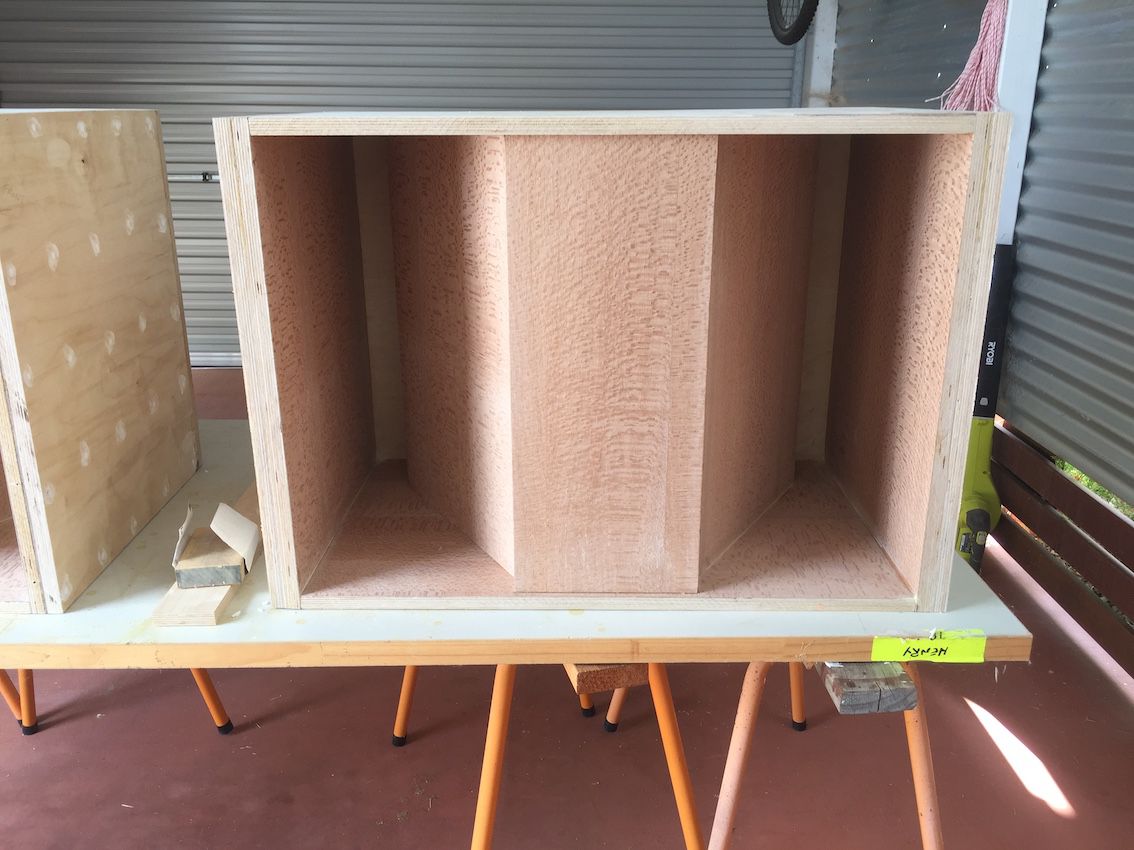
So now I have dismantled the bass bins ready for glueing & screwing permanently. I left the sides off, so that I could get to the ramps, as there are some tiny gaps & I want to fill them & put a bead of silicone around the edges. Also silicone beaded the internal corners of the doghouse. Added another three segments to the mid horns & will sand them up today. Glad that this of interest to everyone..... hope it will be of benefit to others that may try this project. Lots more to come......finishing the mid horns & the crossover build.
-
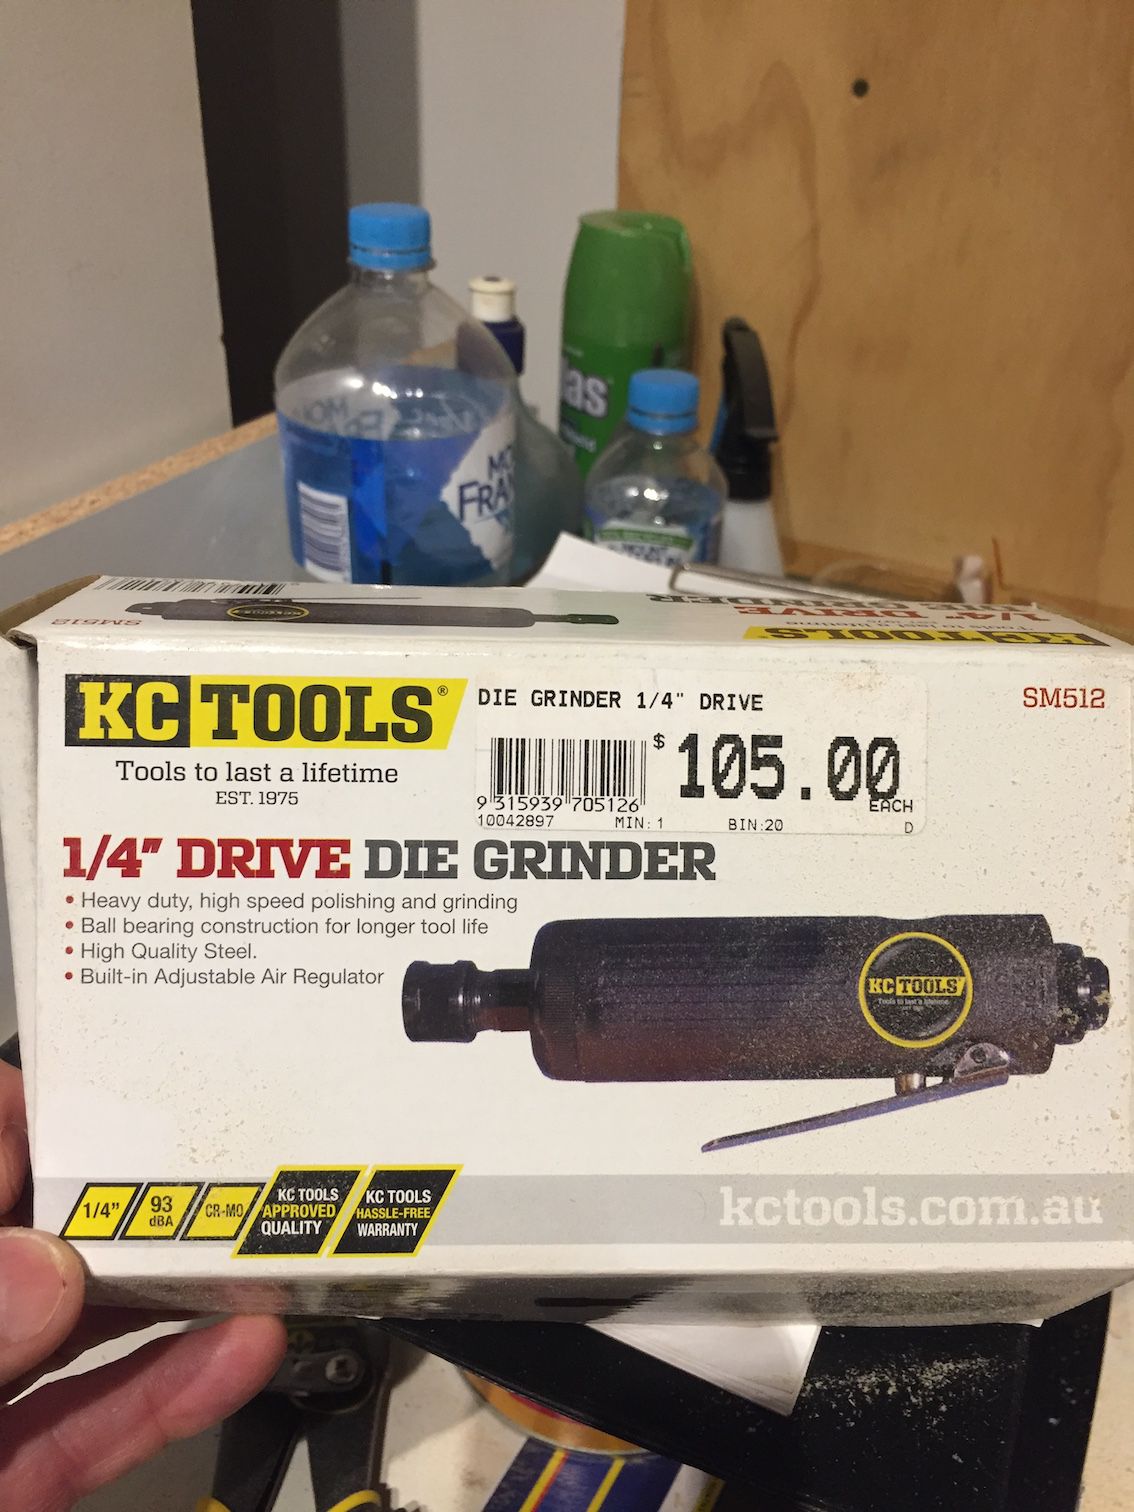
Waiting on some screws to arrive before I can continue with the bass bin, so started on the mid horns. Will do these a few segments at a time.....here's the first five segments. These are glued & screwed together. Dave provides dowel pins to key them together in the correct position, so you can't really go wrong. Bought a Die Grinder to get the rough sections off first & then hand sand with varying levels of sandpaper. The die grinder makes light work of this job & you can easily position it to remove even small amounts of material. I wish I had this when I built my last two sets! Screws arrived today, so will get back to the bass bins on Wednesday.
-
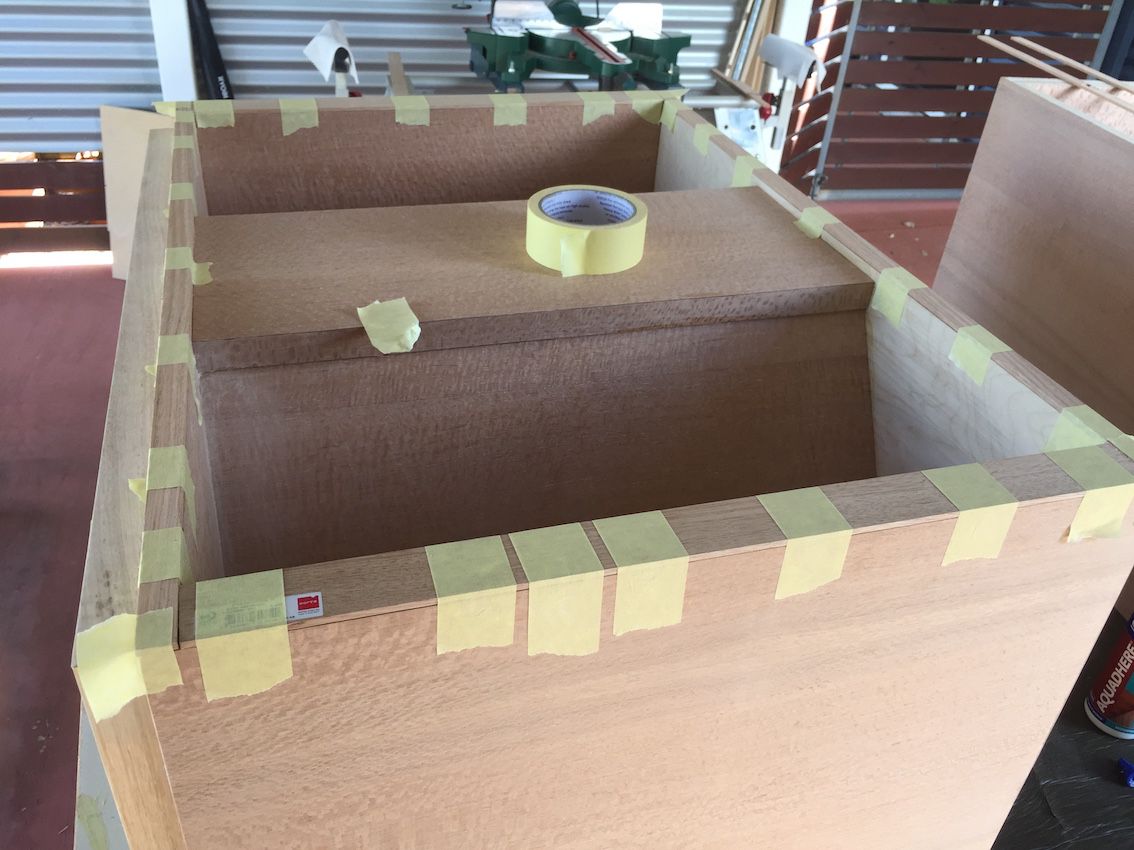
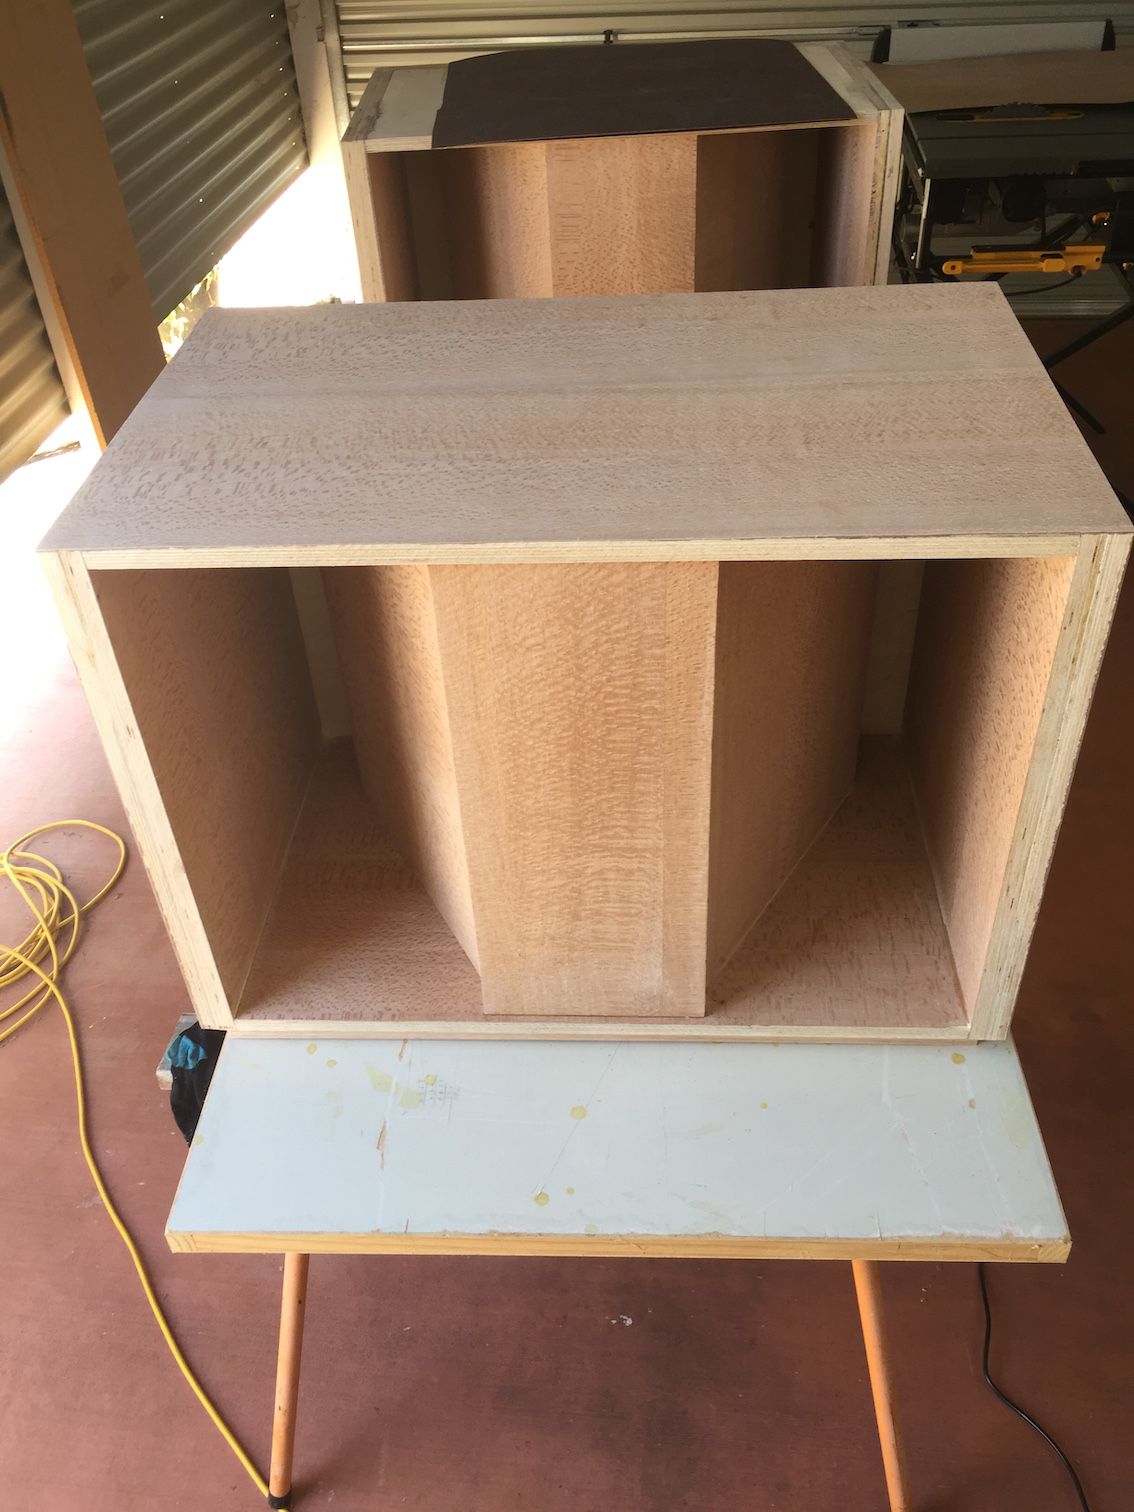
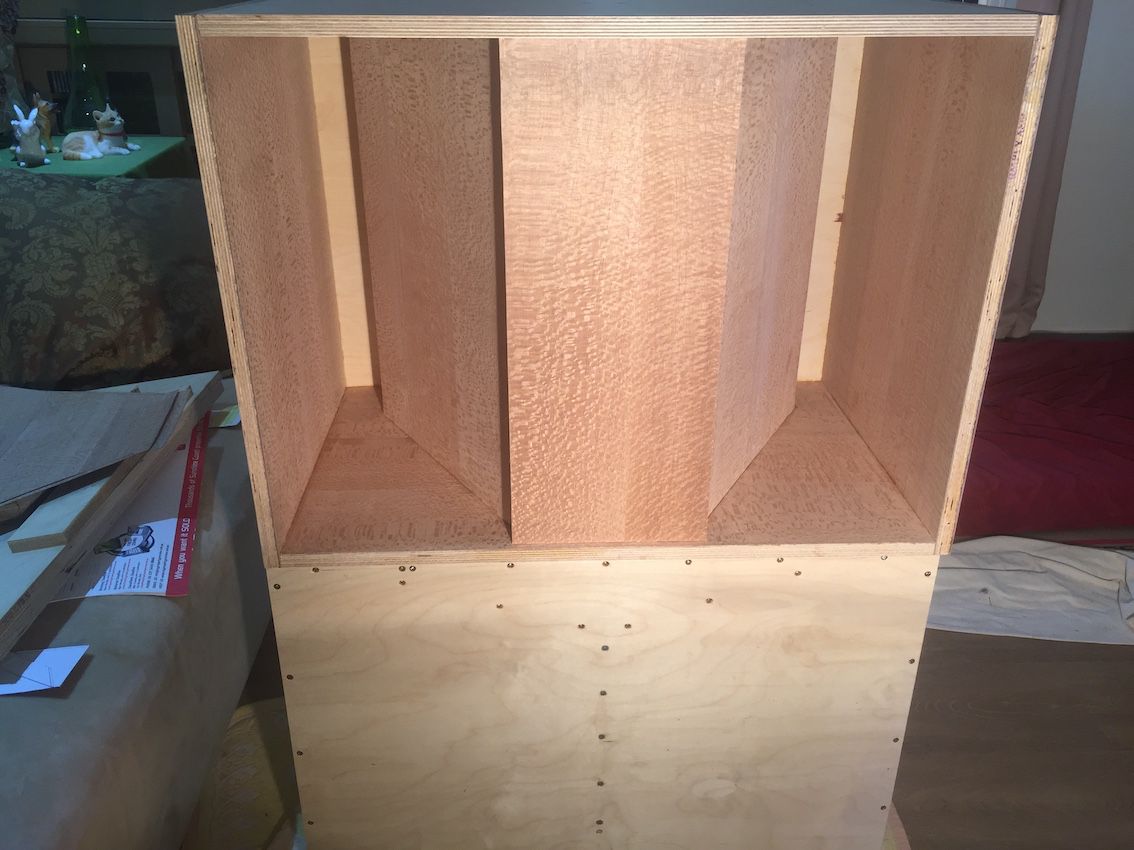
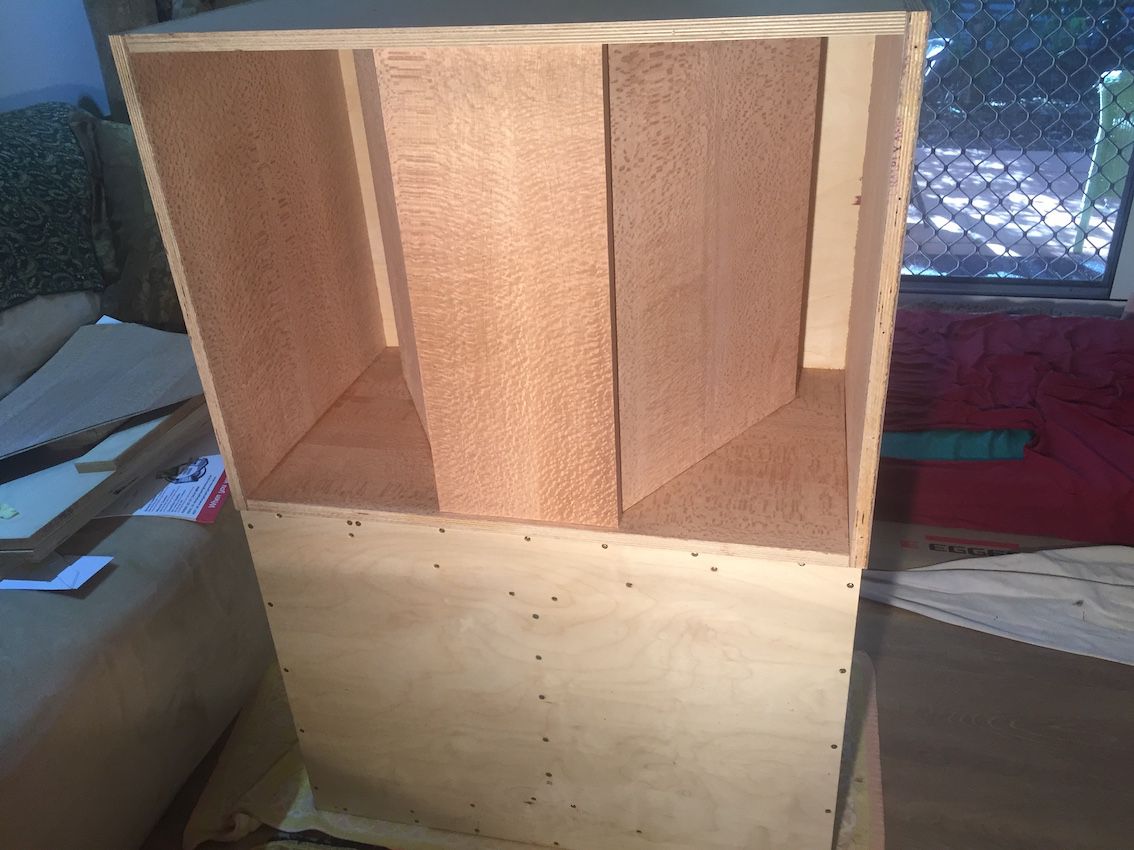
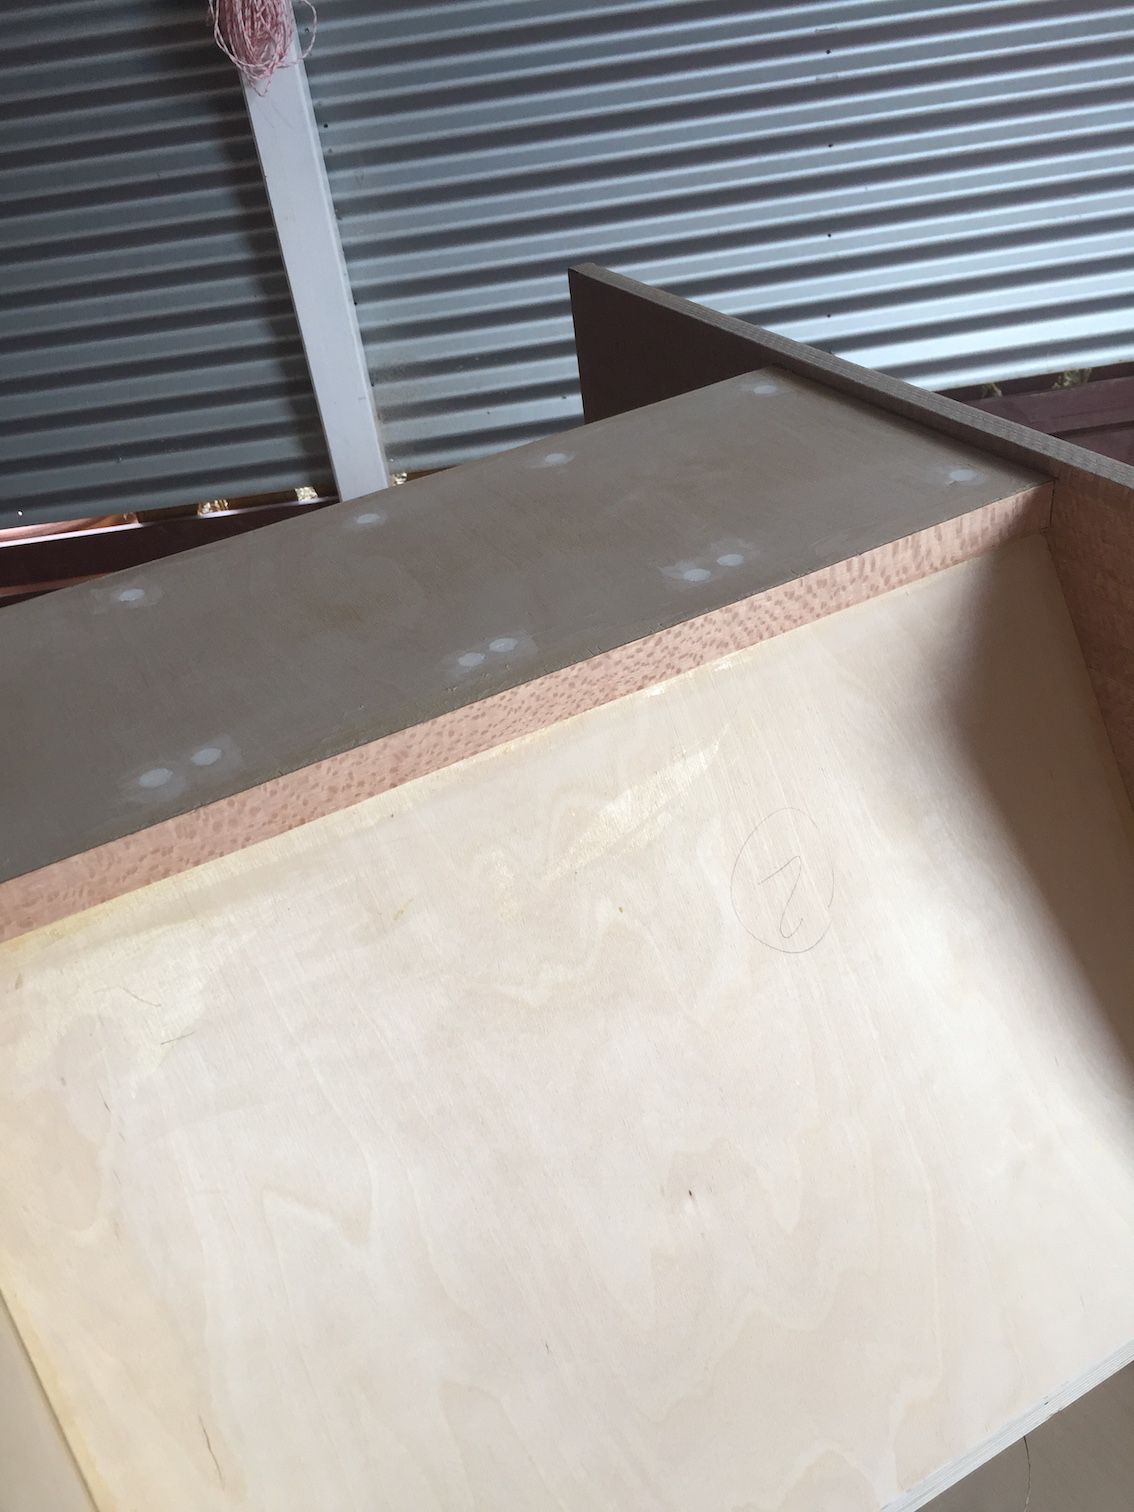
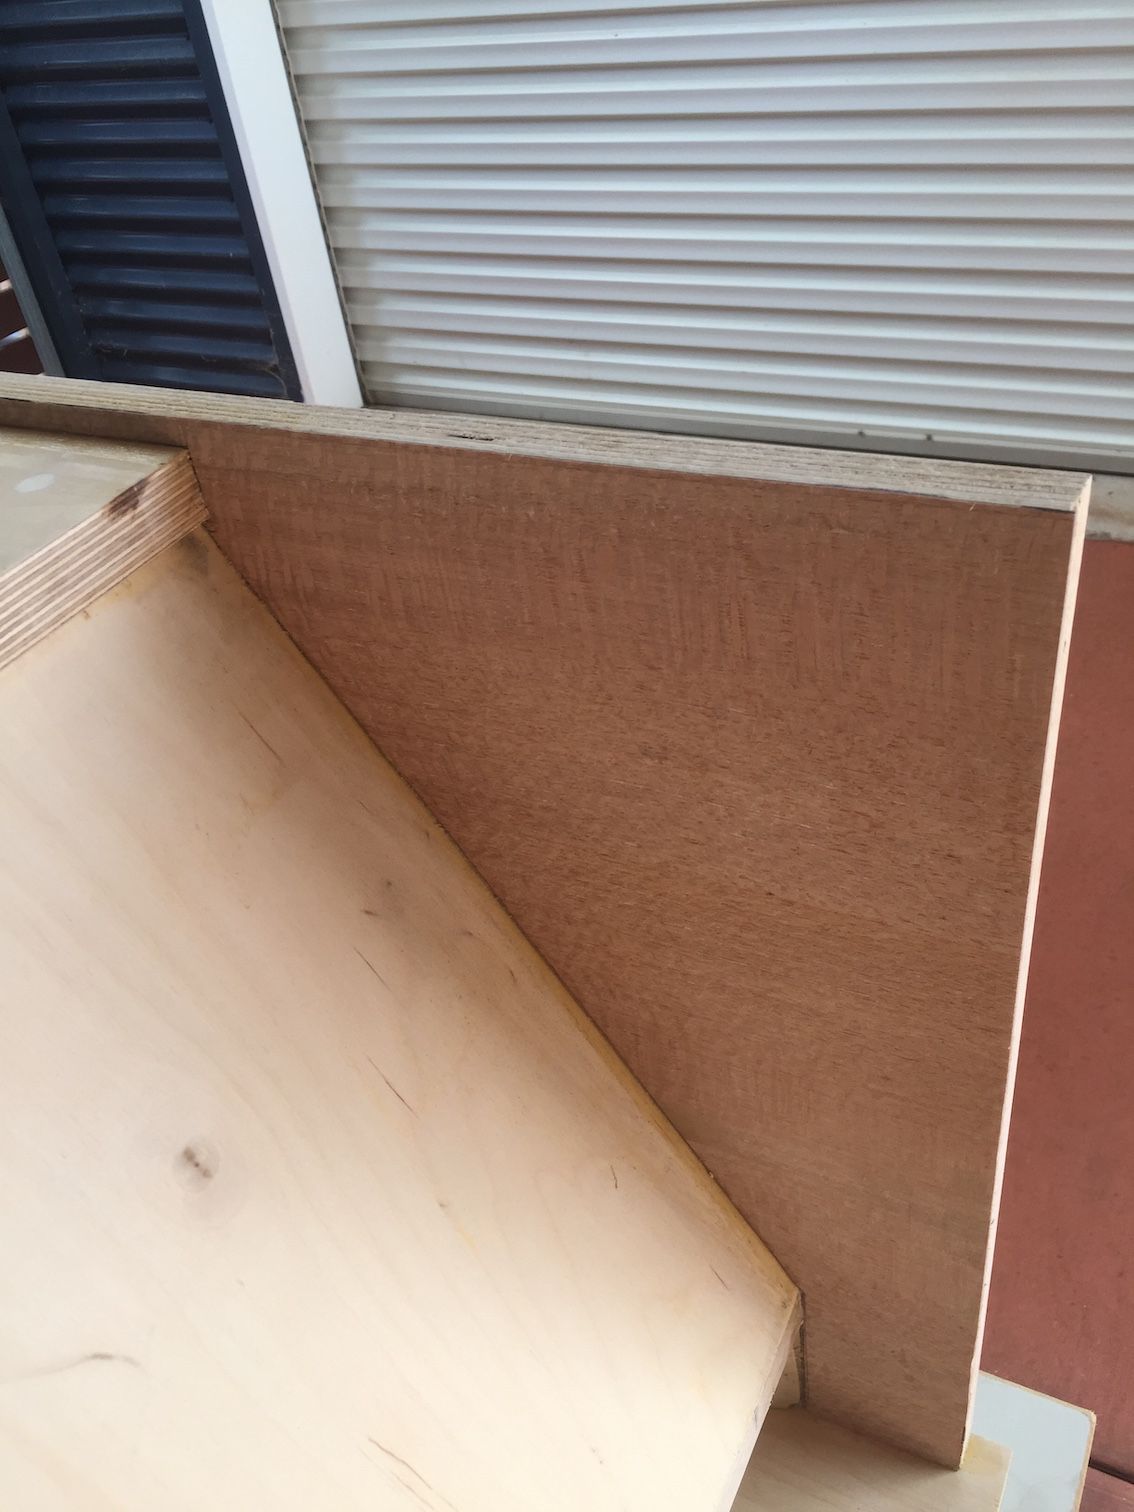
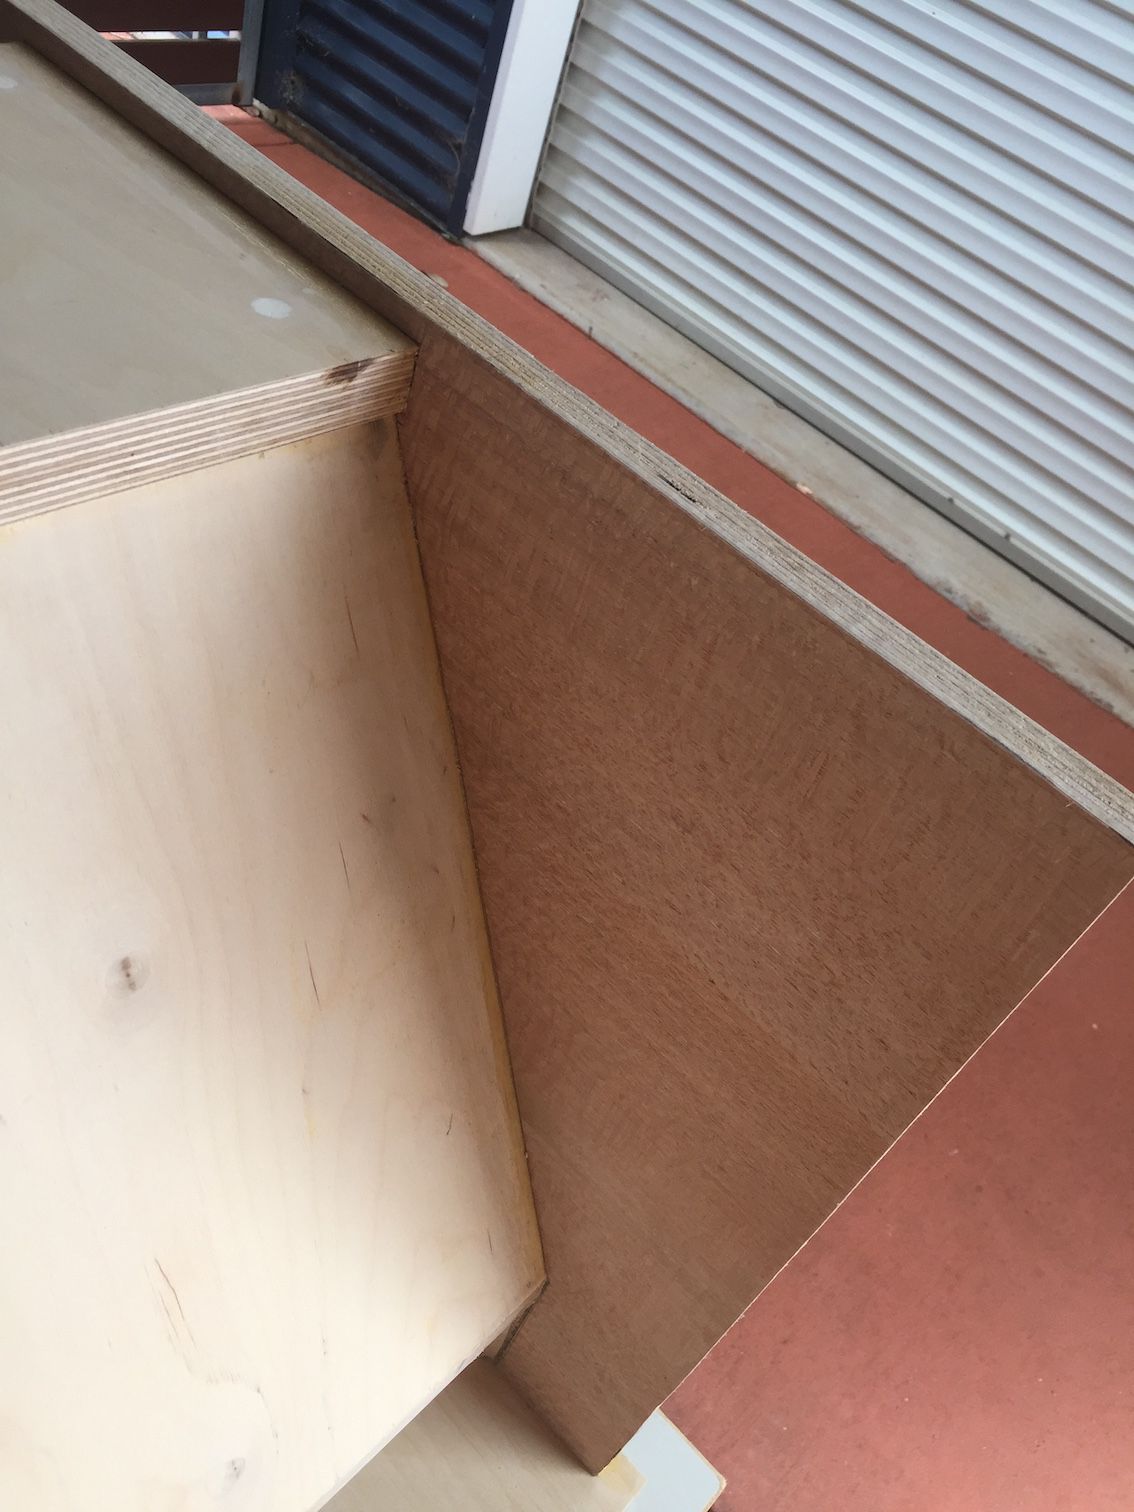
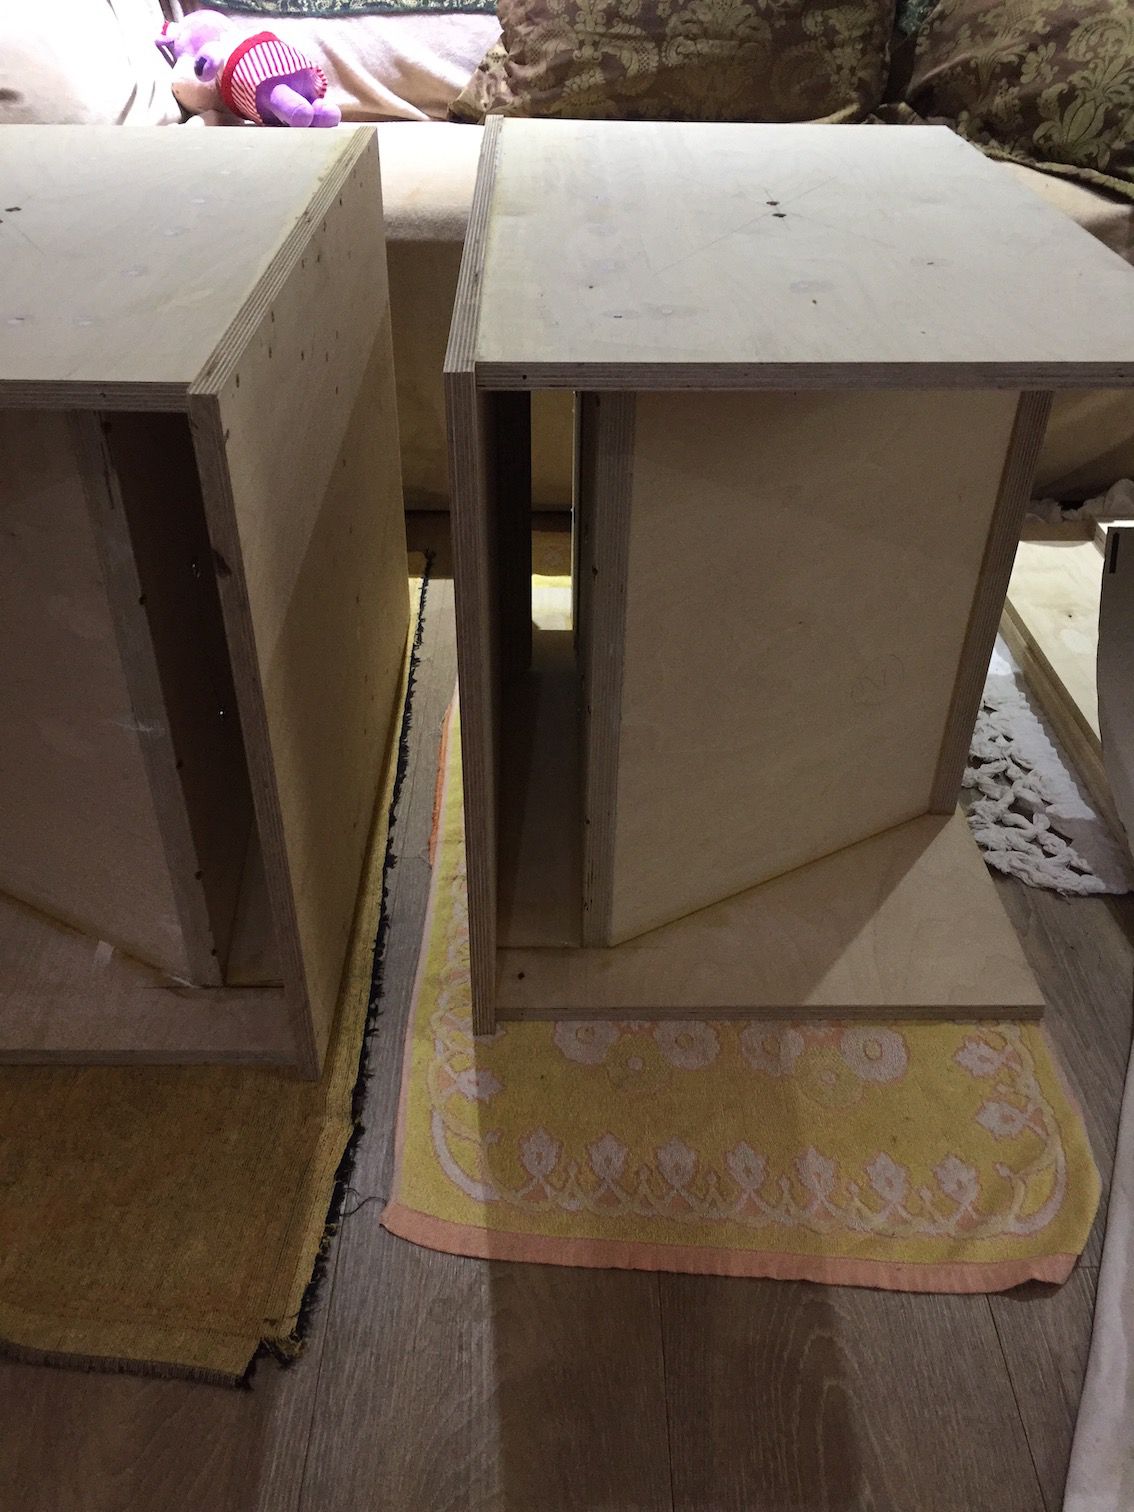
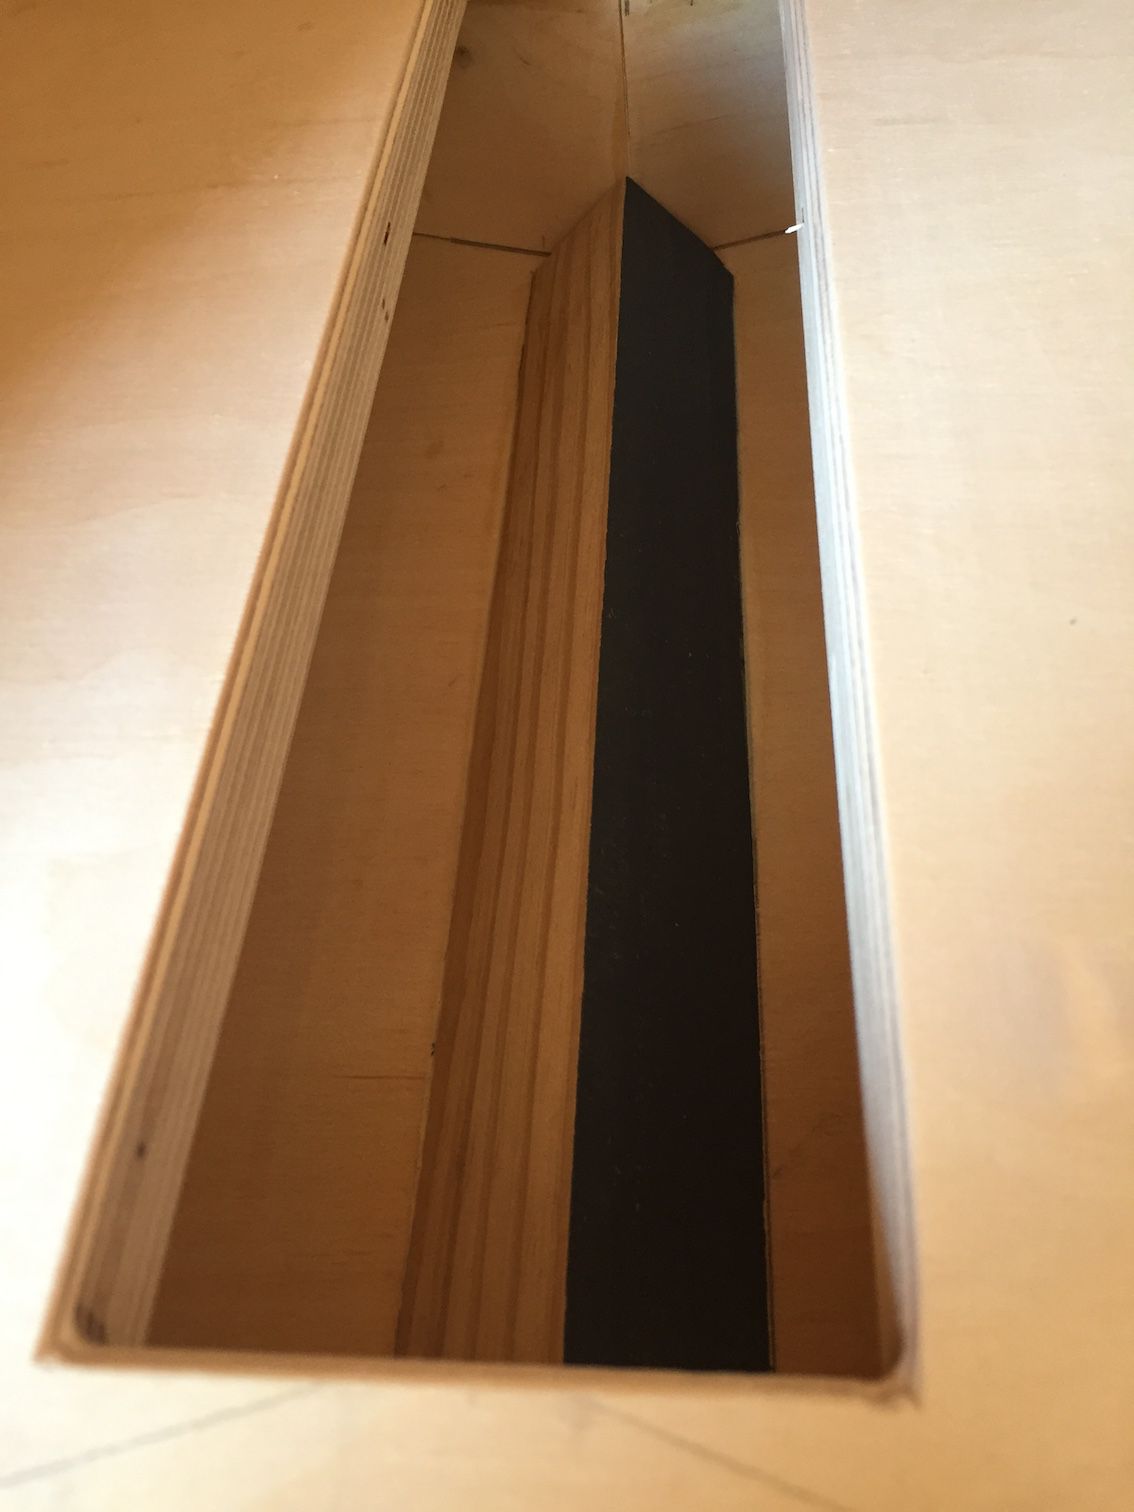
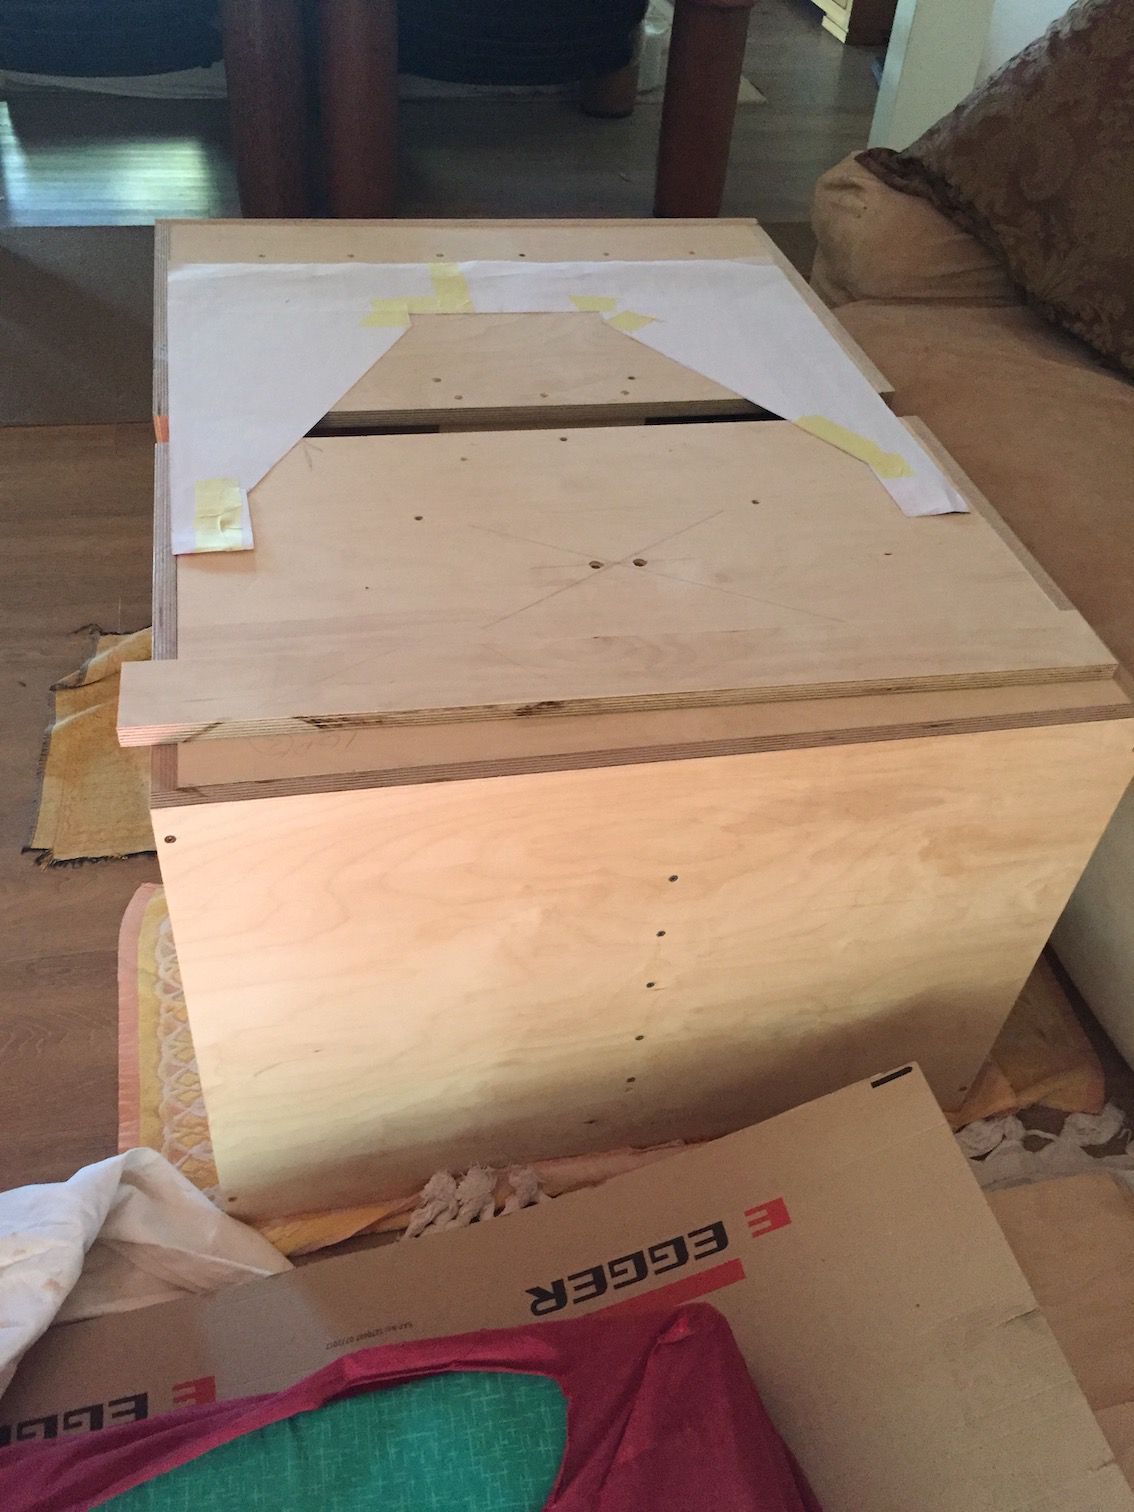
Completed the rear panels today, complete with splitters. Just used some scrap material for the splitters & cut to size on the table saw. Also made a template for the veneer to go on the inside of the cabinets......at the bottom of the cabinet between the sides & the dog house. The template is sitting on the top of the cabs.... it fits really well. I removed the bottom of the cabinets ......placed the cardboard underneath & traced out the shape. It's going to be tricky to adhere this, as the contact cement only gives you one go.