garyeanderson
-
Posts
627 -
Joined
-
Last visited
Content Type
Forums
Events
Gallery
Everything posted by garyeanderson
-
My 150 grit is very well used.' More of a real world 180-220 and I don't let the DA rest, I probably move the sander quite fast with the grain at a speed of a foot or more per second. The sander is only sanding for 5 to 10 seconds for a Heresy top before stopping to inspect Much of this sanding is to give the surface a uniform, free from old finish surface. Lite scratches I try to lessen the visual impact (some even come out), deeper digs I leave. Every defect needs to be looked at to decide if its to be fixed or hidden. As far as the boiled linseed oil goes, be very very careful with rags soaked in it, I heard today that a house 3 towns north of me had a "spontaneous combustion" fire that caused $75k in damages. I got the last quart at HD, before that I was using what my father had gotten at the transfer station "take it or leave it" area.
- 67 replies
-
- 1
-

-
- heresy 1
- restoration
- (and 1 more)
-
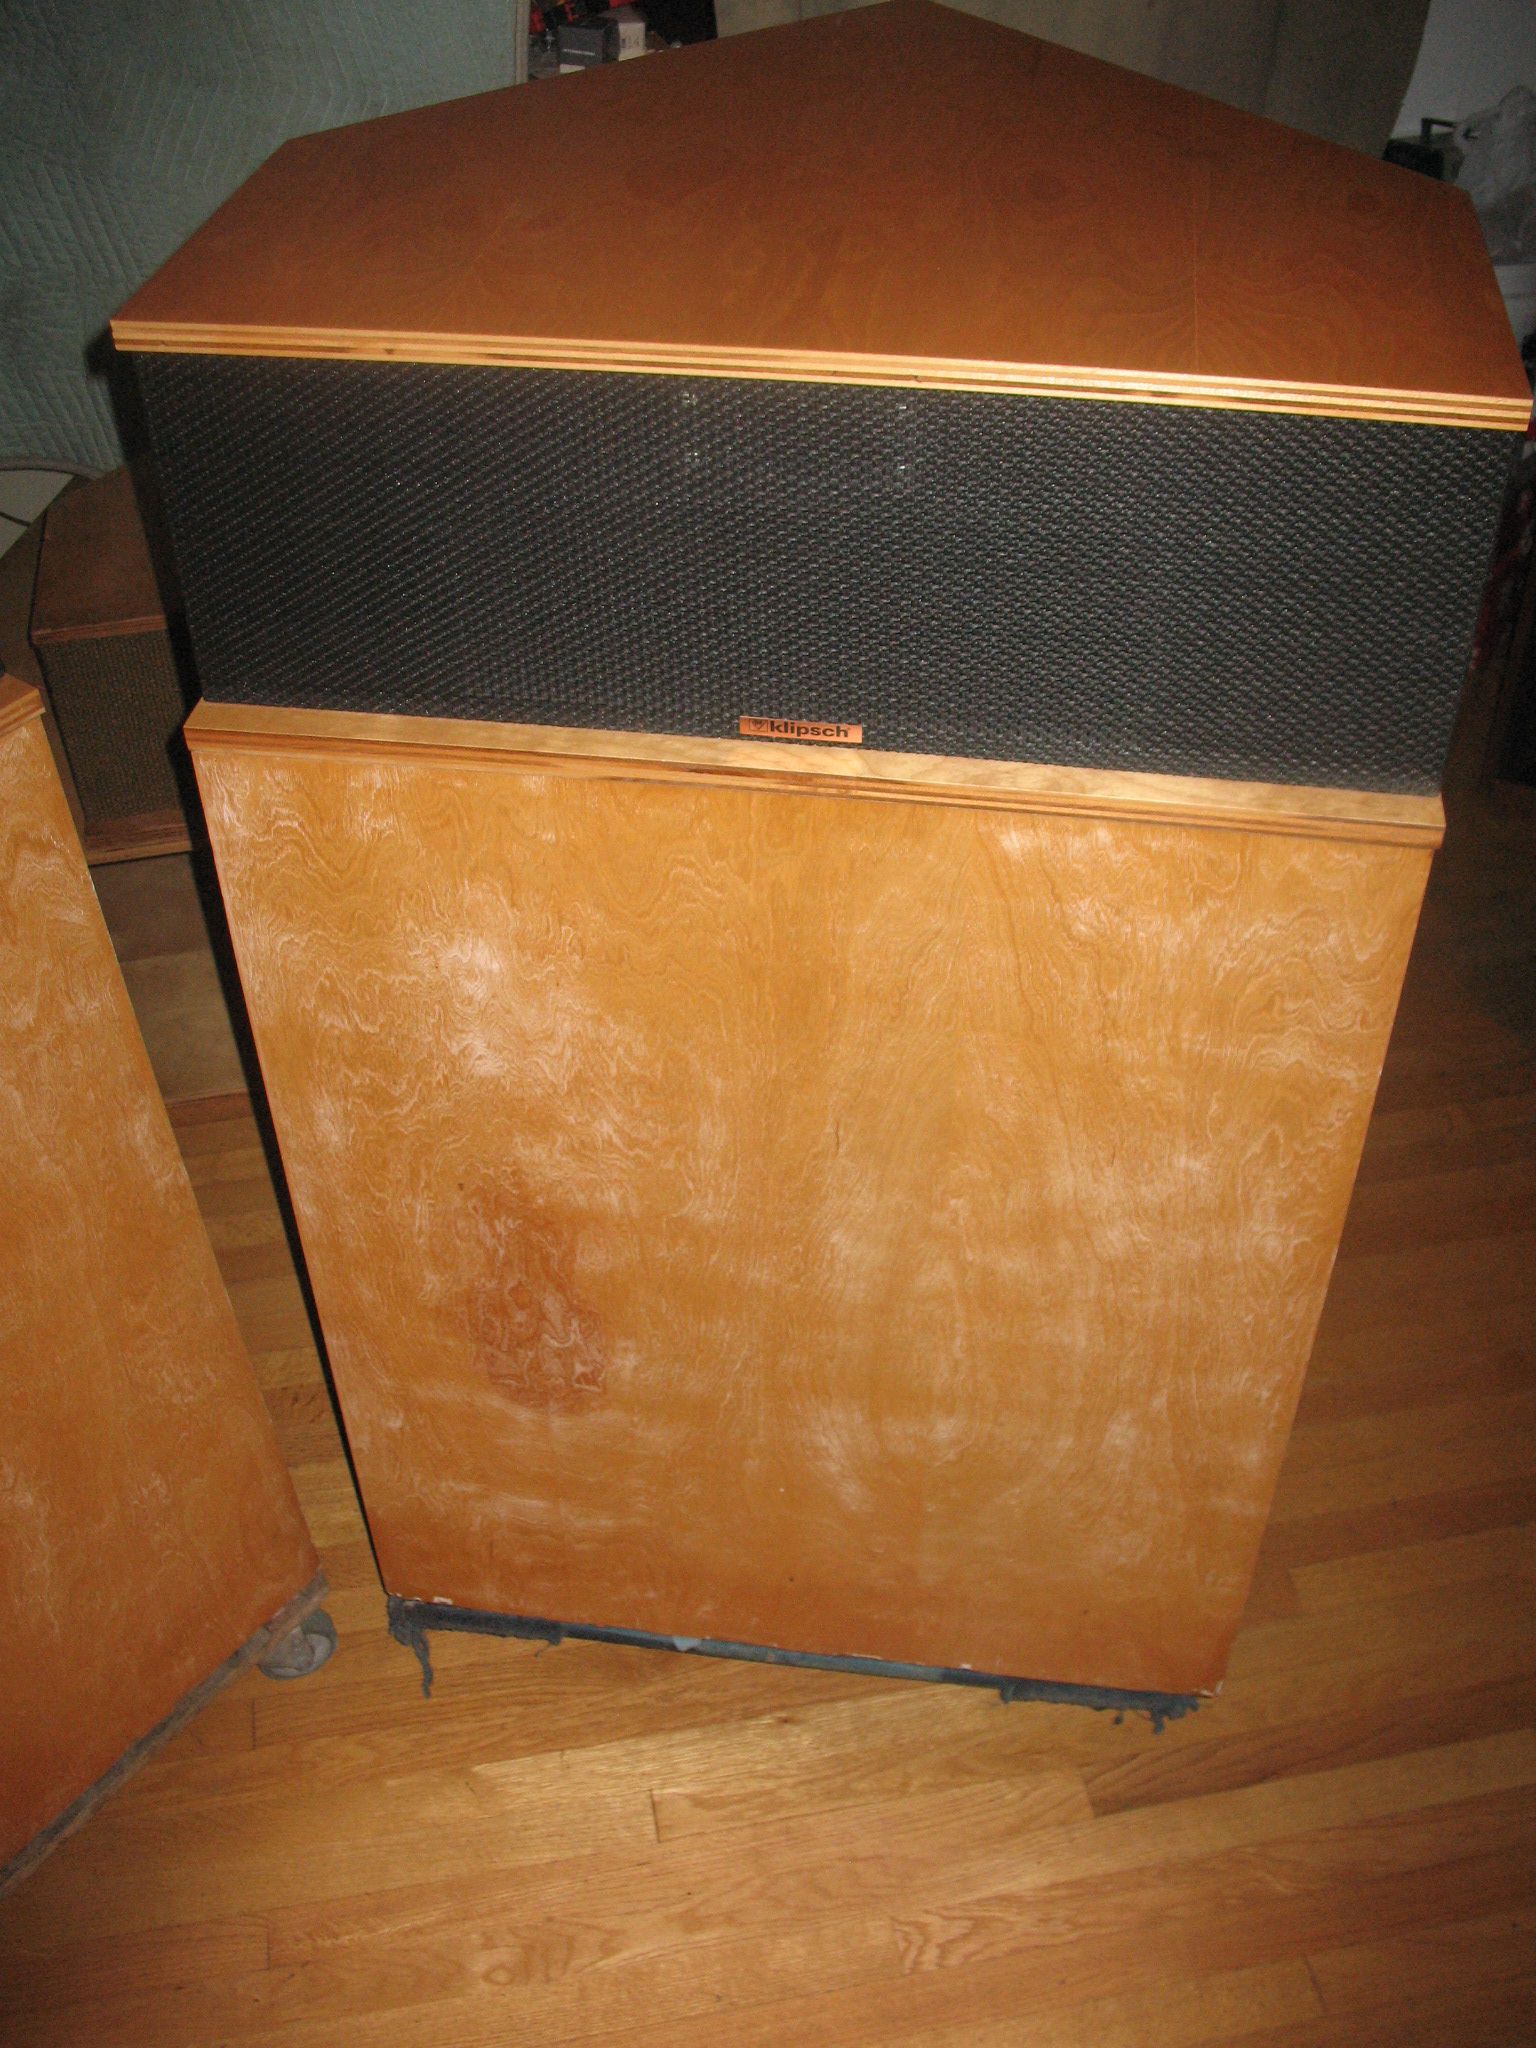
This is what I did late last year and earlier this year when I picked up two different pair of Heresy speakers, not that every thing I did is correct. Just some pictures to see before and after of age and condition challenged speakers.

- 67 replies
-
- 1
-

-
- heresy 1
- restoration
- (and 1 more)
-
Klipschorn top gets painted - covid project
garyeanderson replied to garyeanderson's topic in Technical/Restorations
I think the back enclosures are going to be put away for a while. They were never finished and to go back and fix some of the issues (aka mistakes) is not what I want to do at this time so I'll just remove all of the screws and stack them away neatly in a pile. The Khorns in there current location don't ":need" them. They do help with the aiming of the High frequency tops but I think I just need the change scenery and the "new look" that the klipschorns have received will be that nice change. I put the third coat on yesterday afternoon and they look about the same as the last pair of pictures I posted. It will be another week or so before I can put the backs {tailboards) and tops on. till then they will look much the same. -
Klipschorn top gets painted - covid project
garyeanderson replied to garyeanderson's topic in Technical/Restorations
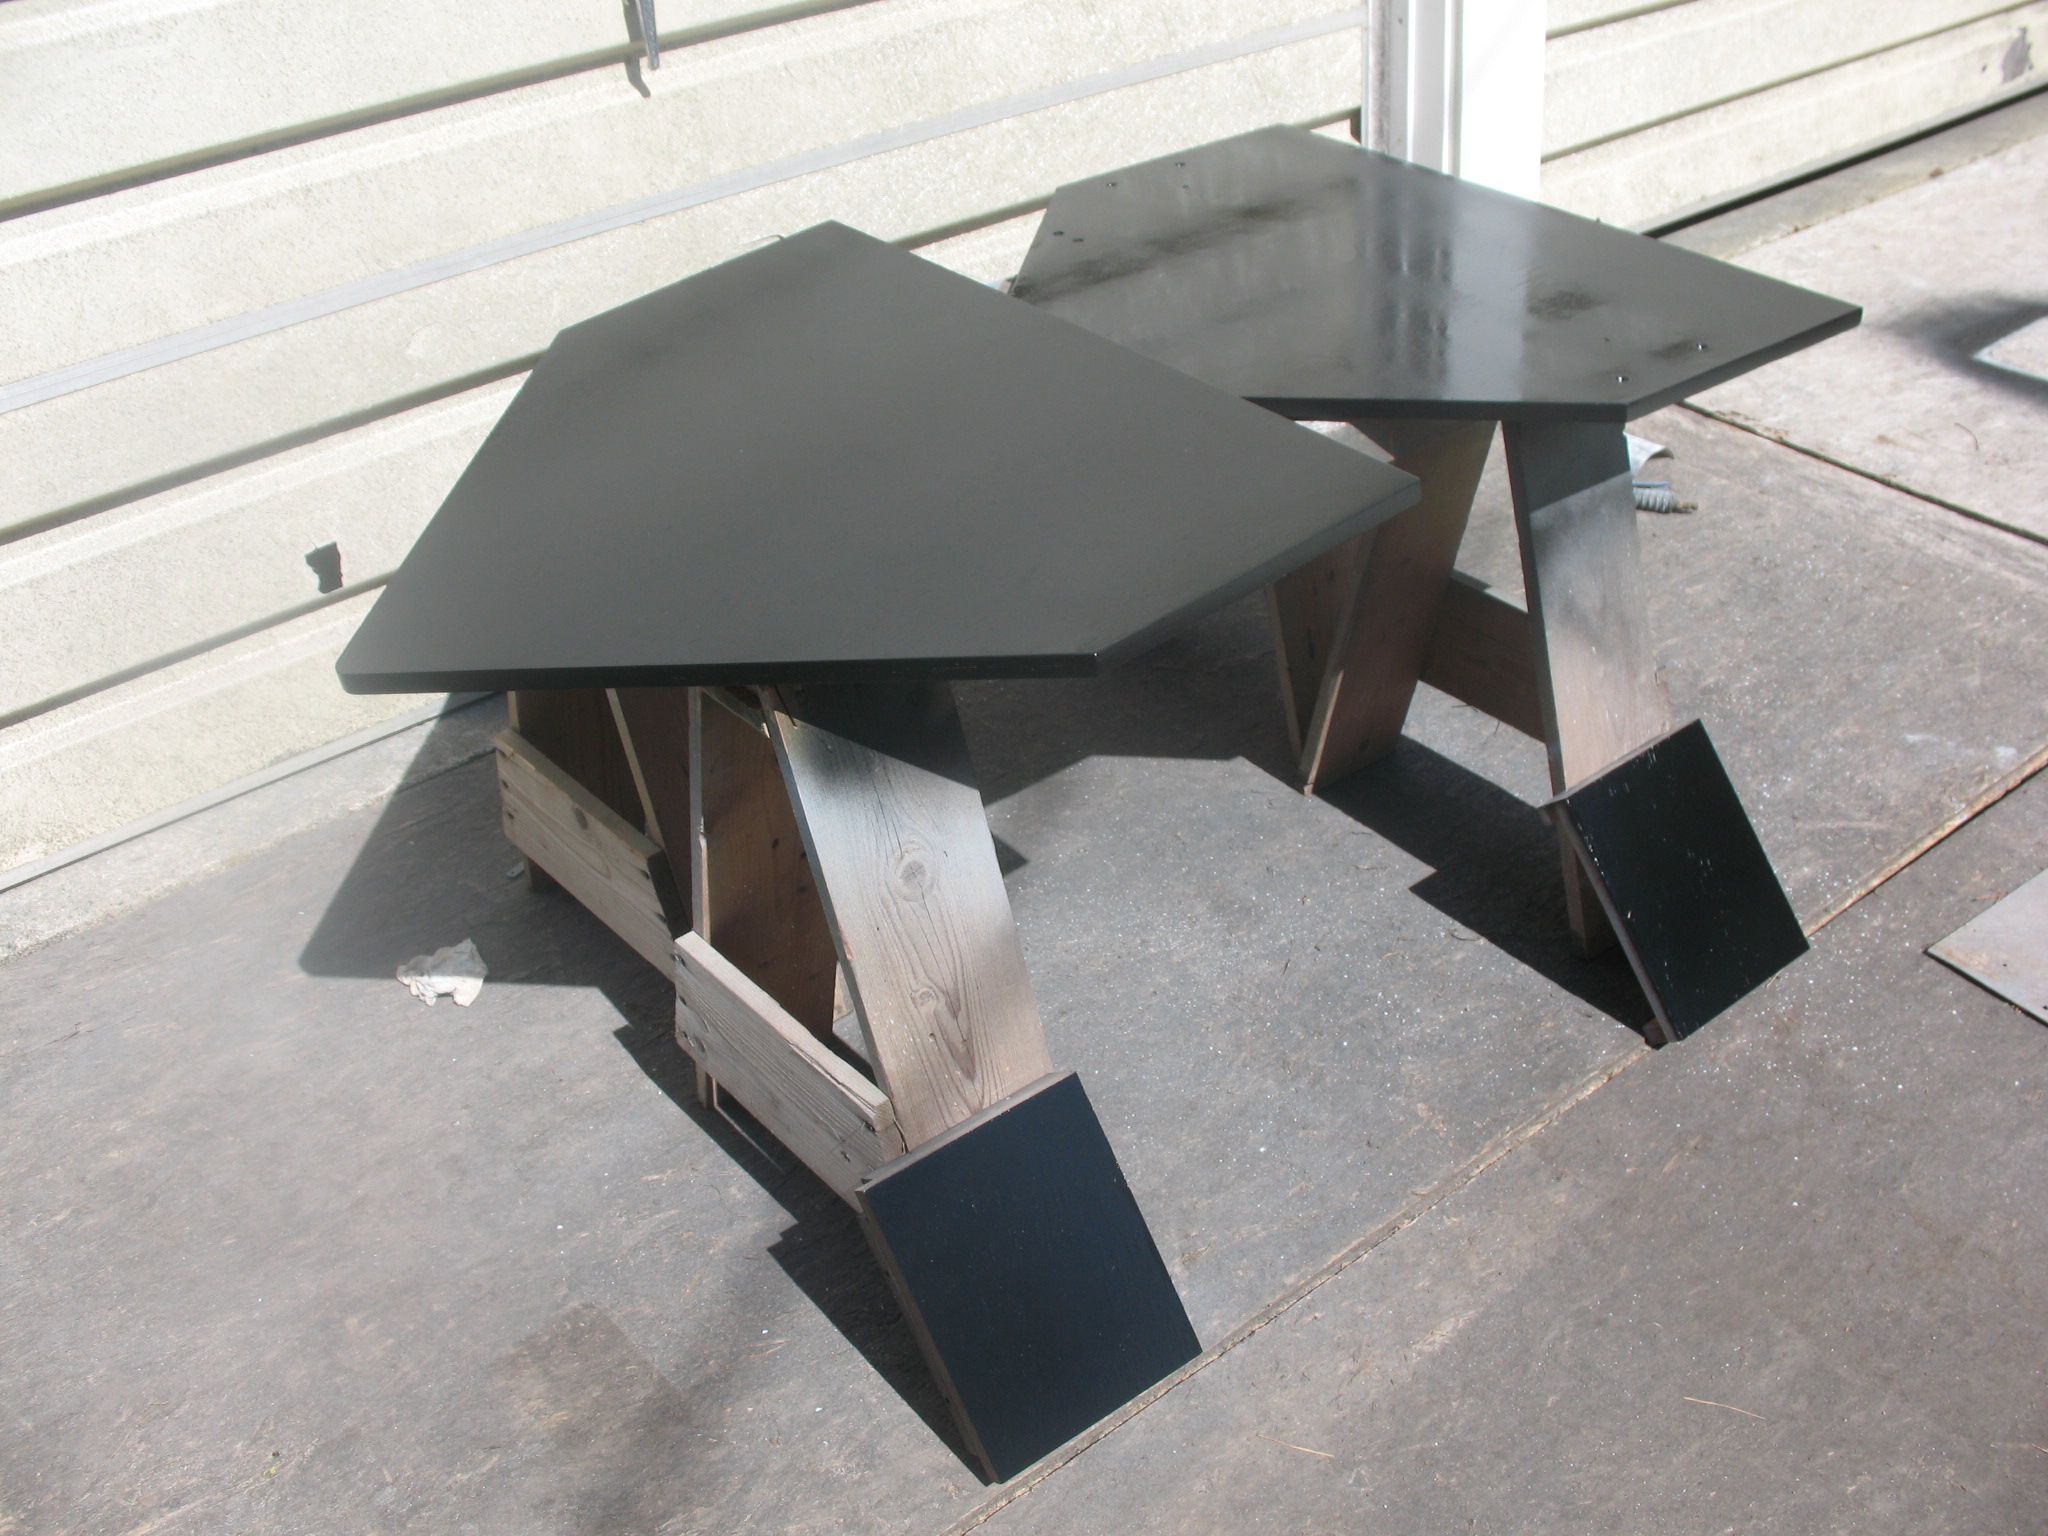
Nice color with flash Not bad without either.
-
Klipschorn top gets painted - covid project
garyeanderson replied to garyeanderson's topic in Technical/Restorations
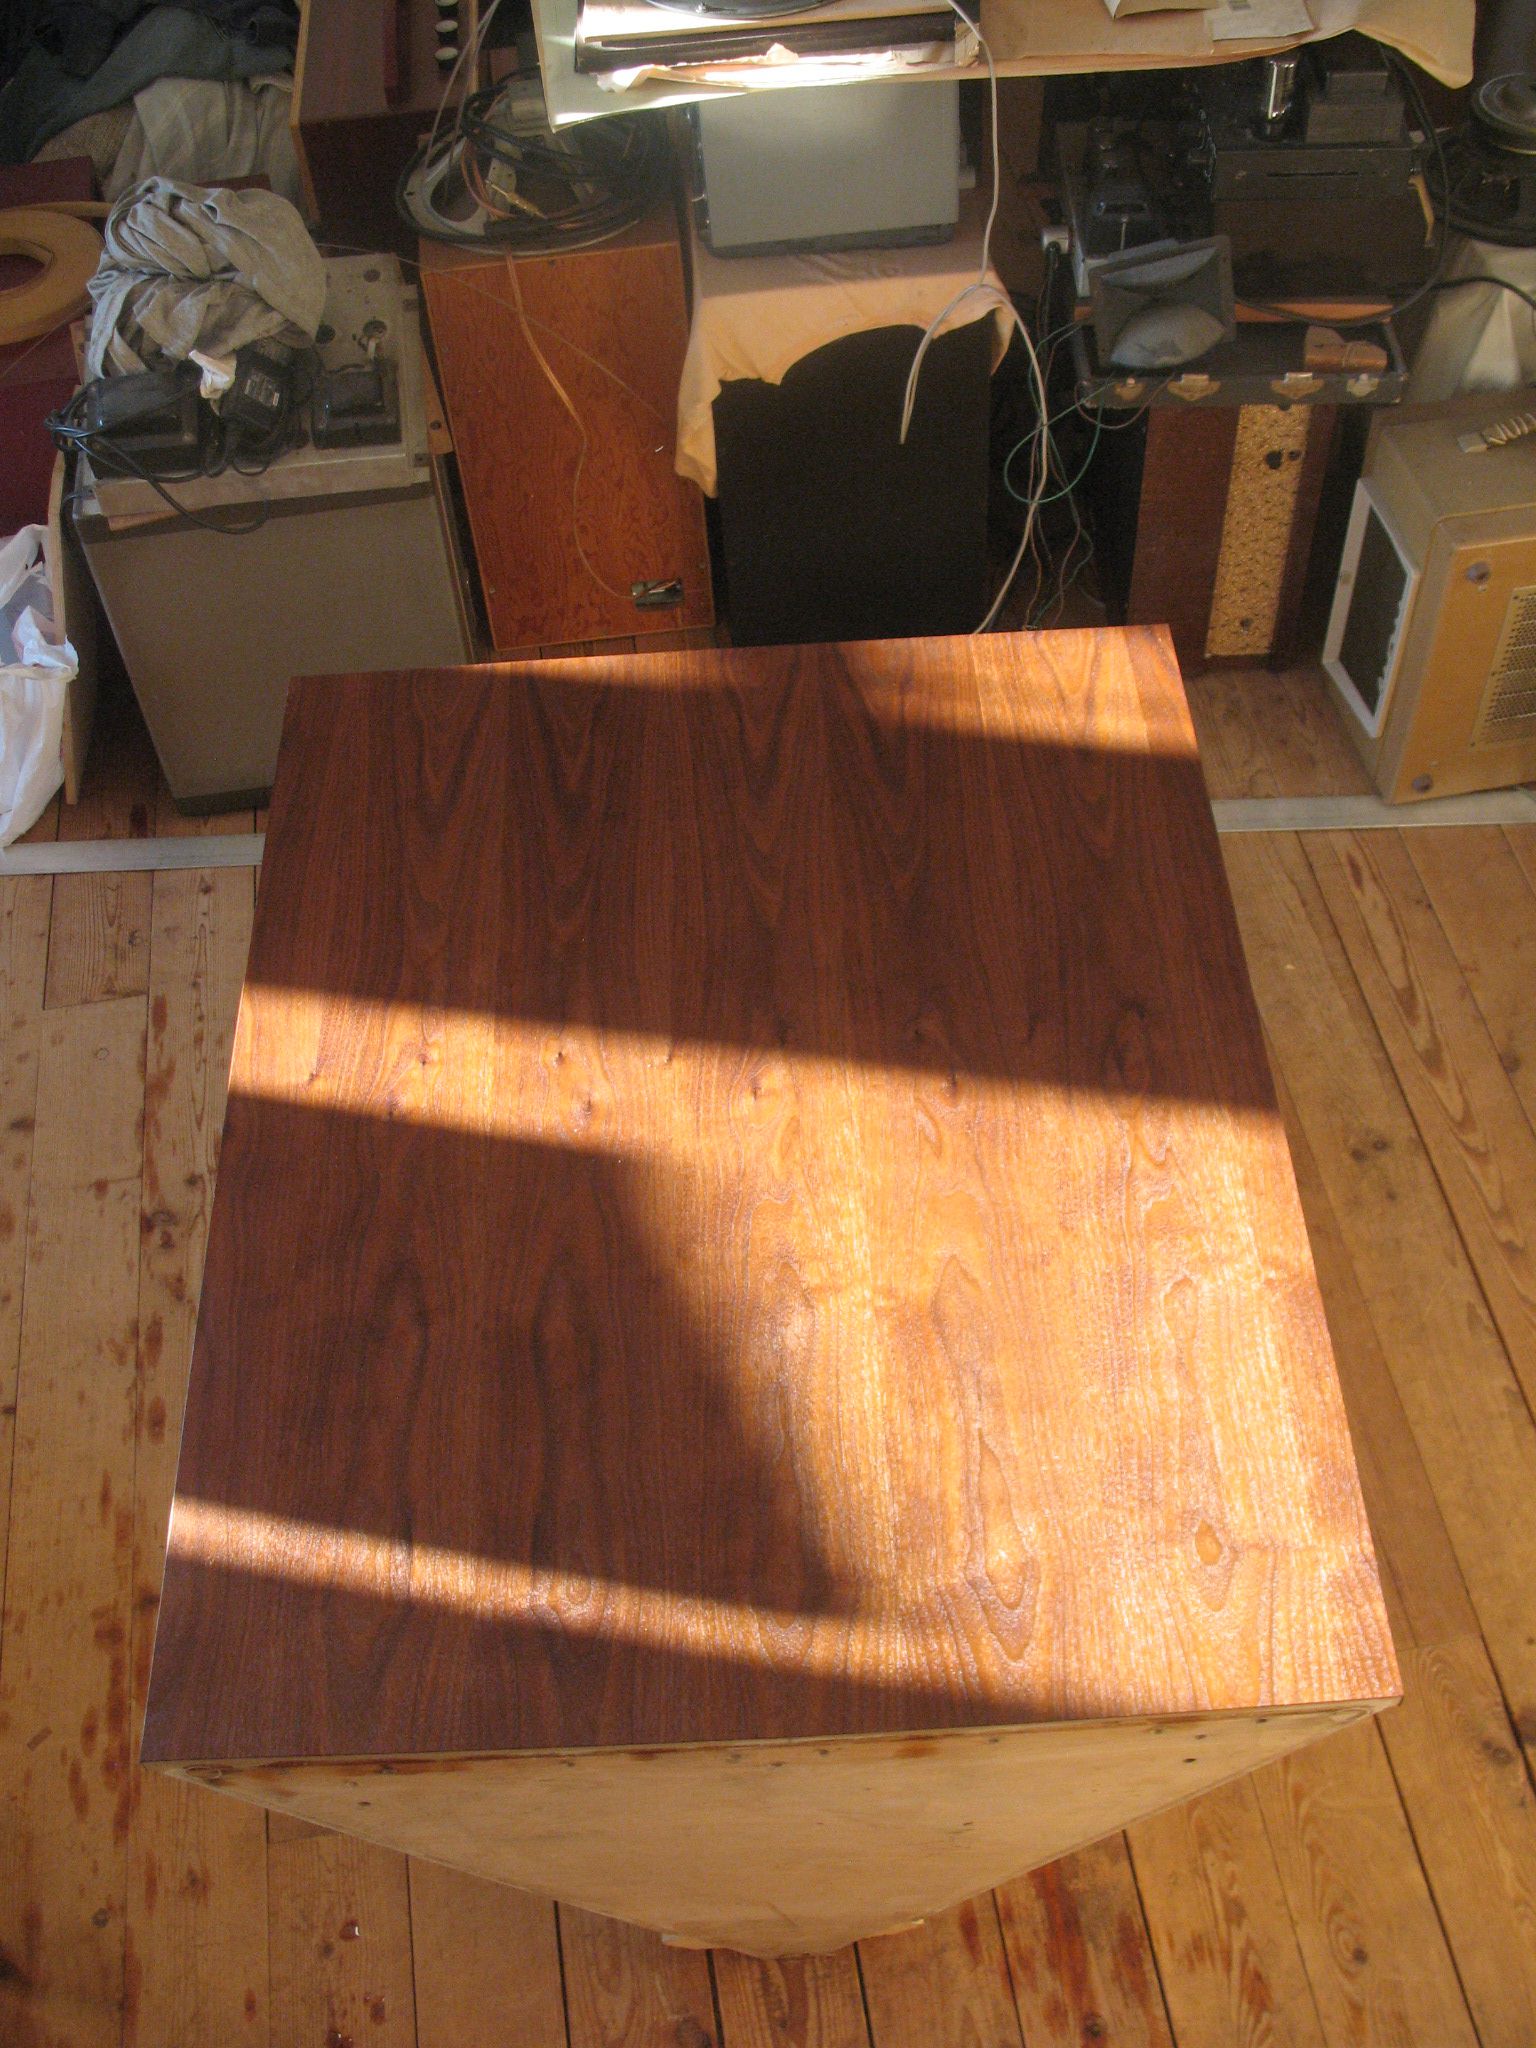
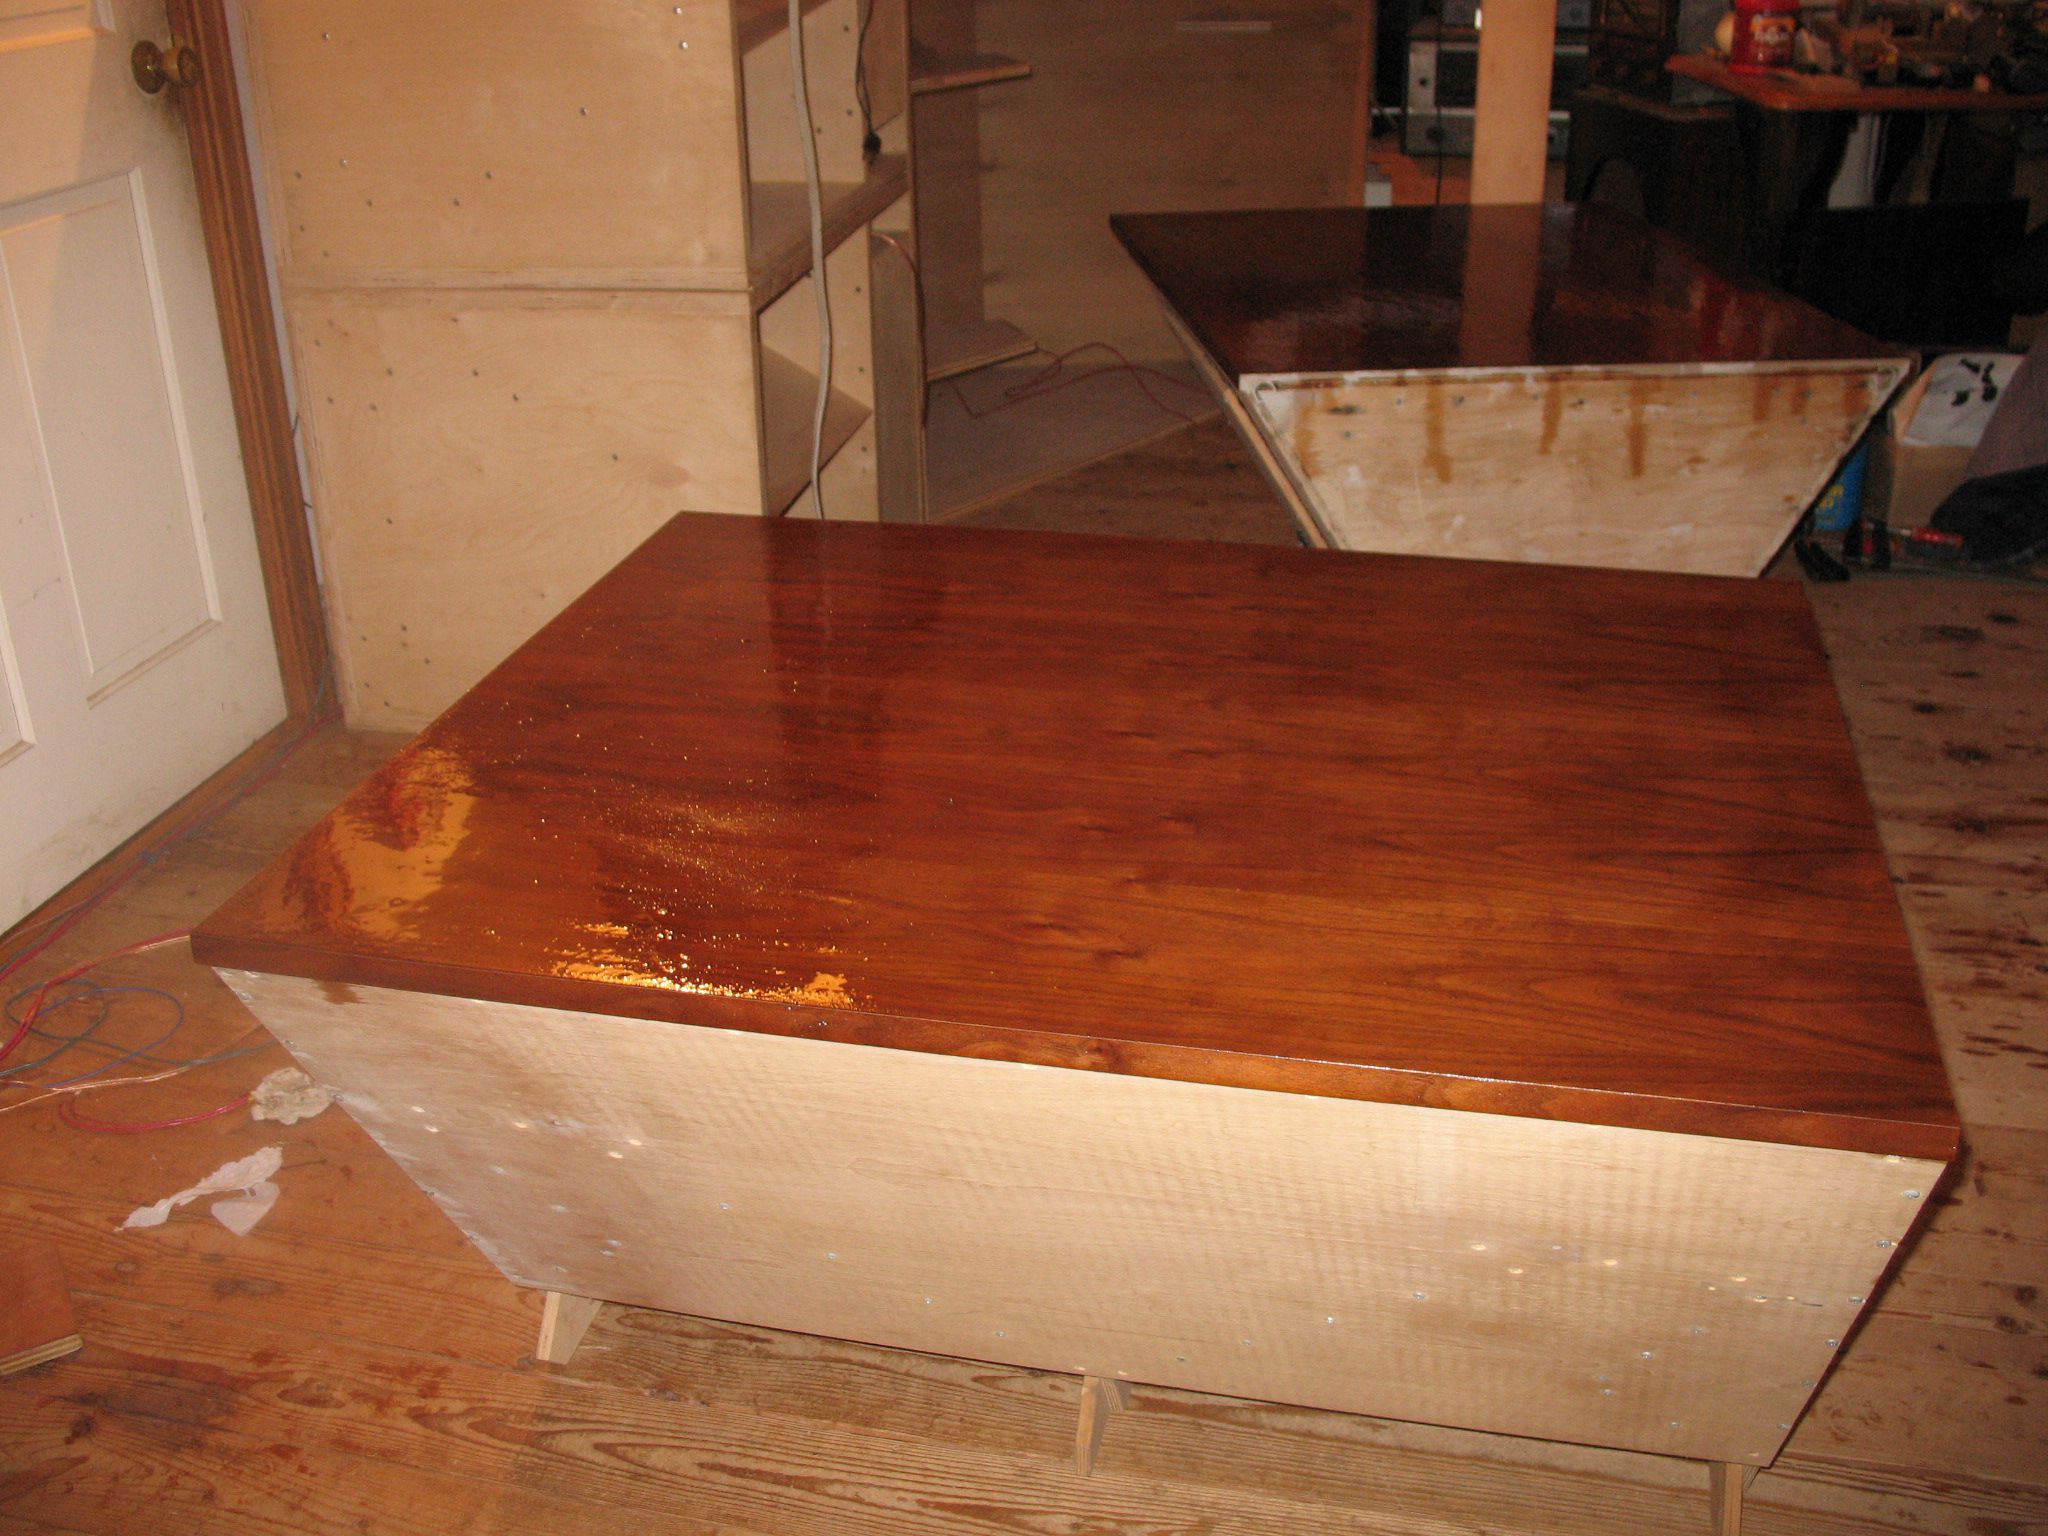
Oil had 2 plus hours to soak and I mopped off the excess - not too shabby!
-
Klipschorn top gets painted - covid project
garyeanderson replied to garyeanderson's topic in Technical/Restorations
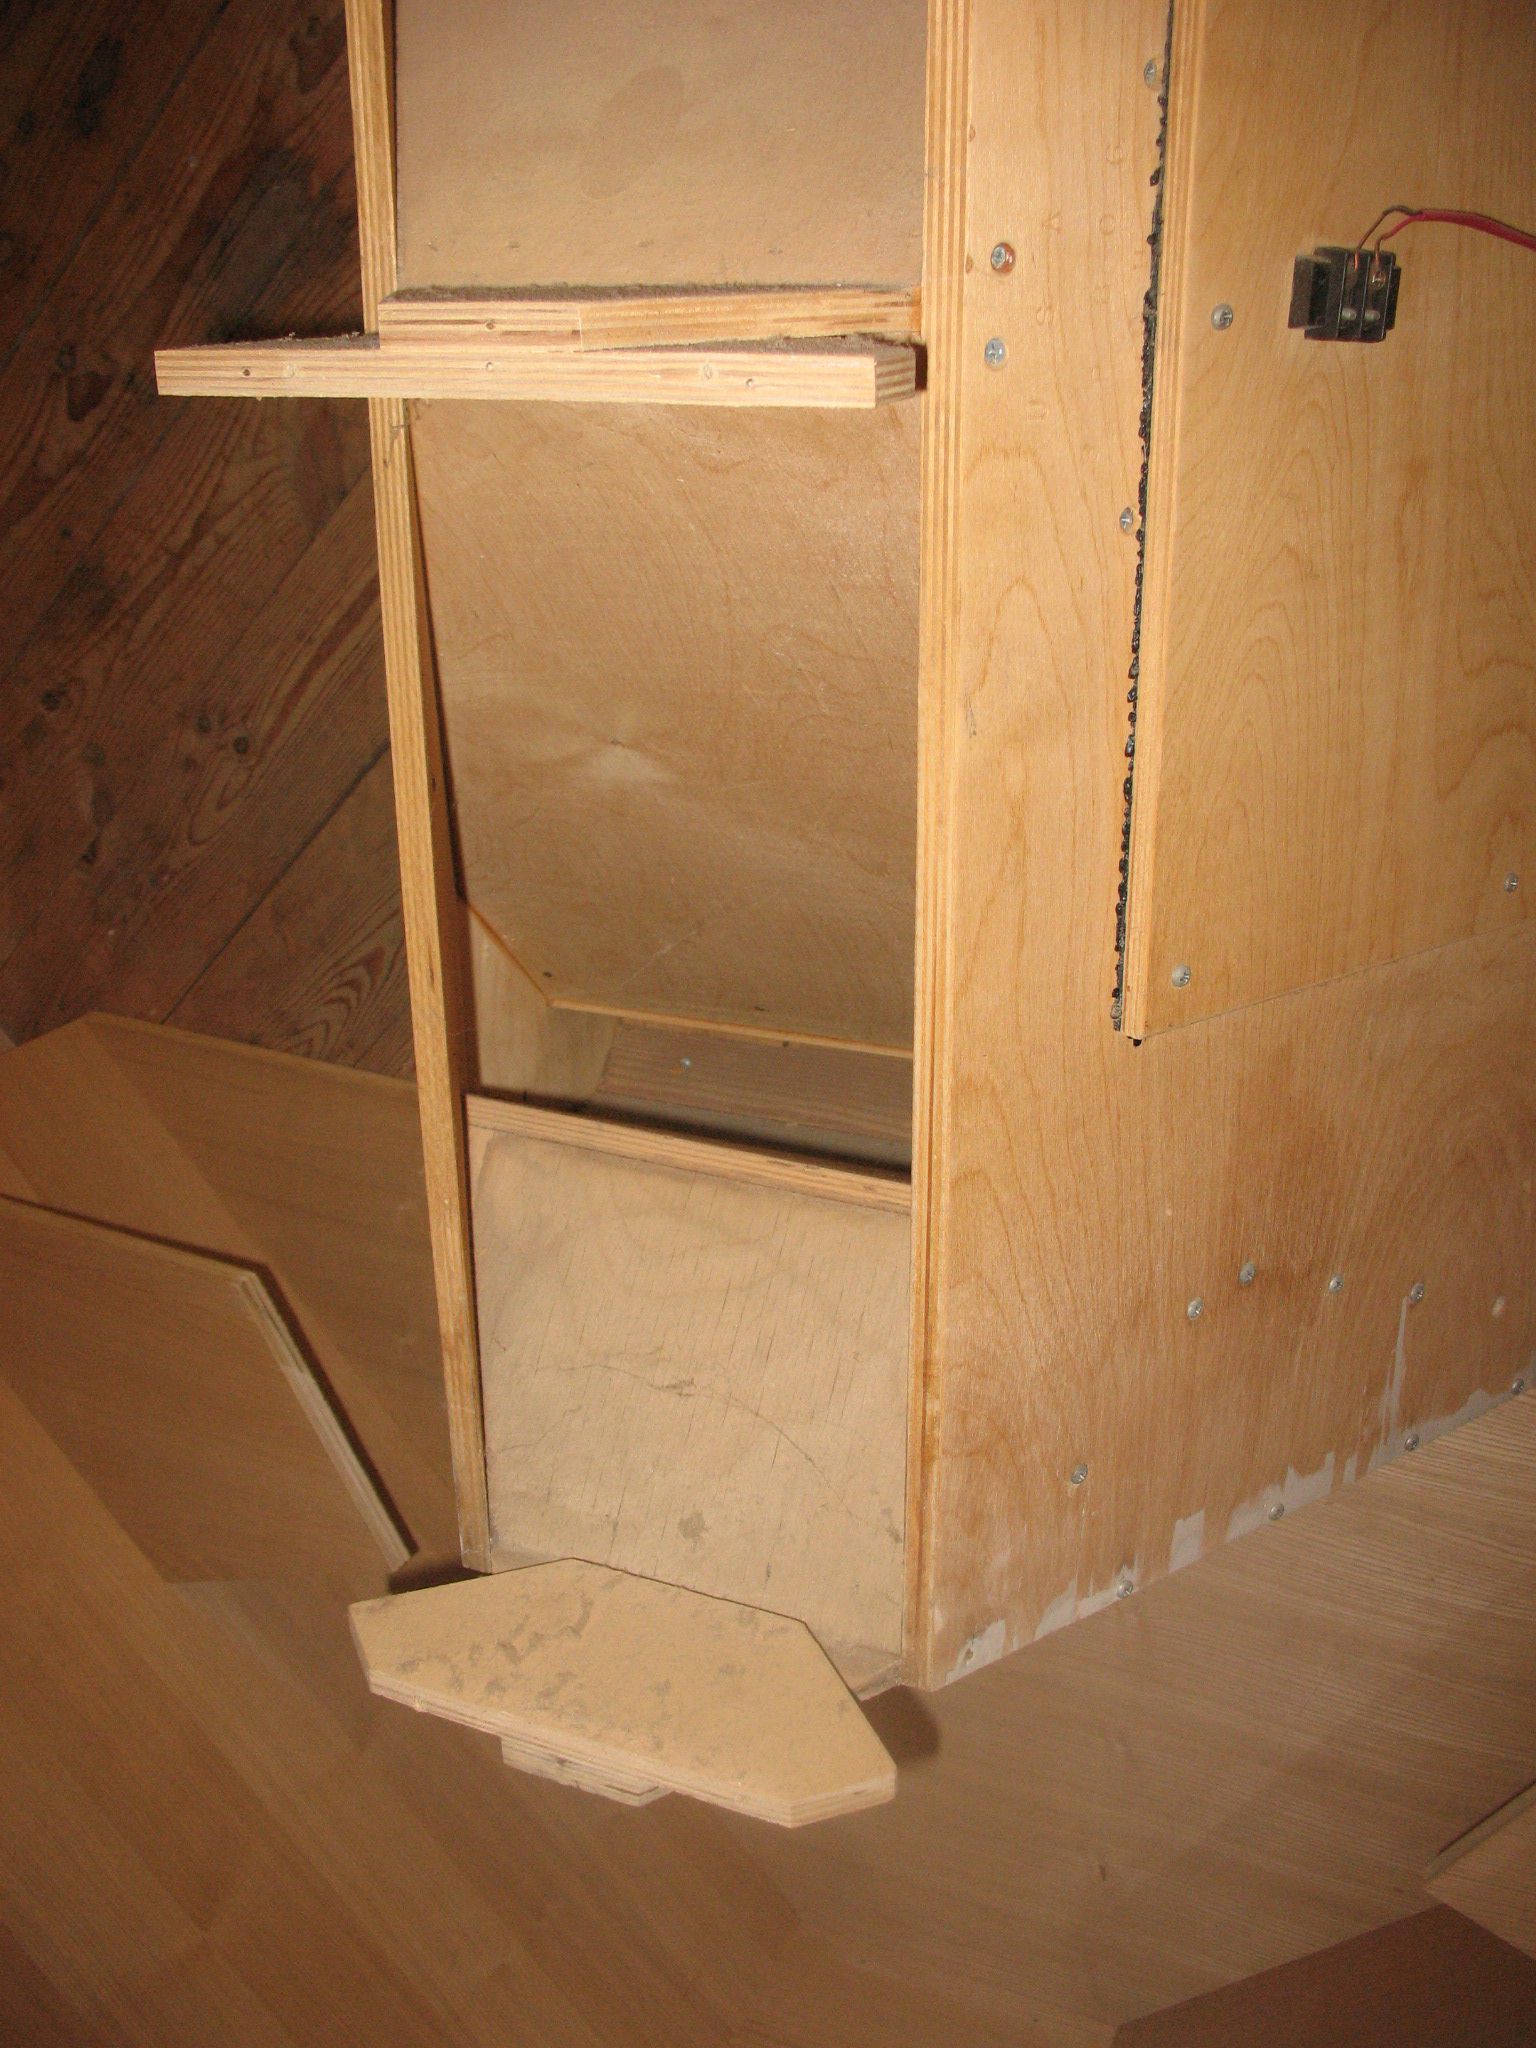
Took most of yesterday to fix the back reflector. It's not pretty but it shouldn't rattle. I had some time to think about the finish and when I woke up and had finished coffee this morning it was boiled linseed oil.
-
Klipschorn top gets painted - covid project
garyeanderson replied to garyeanderson's topic in Technical/Restorations
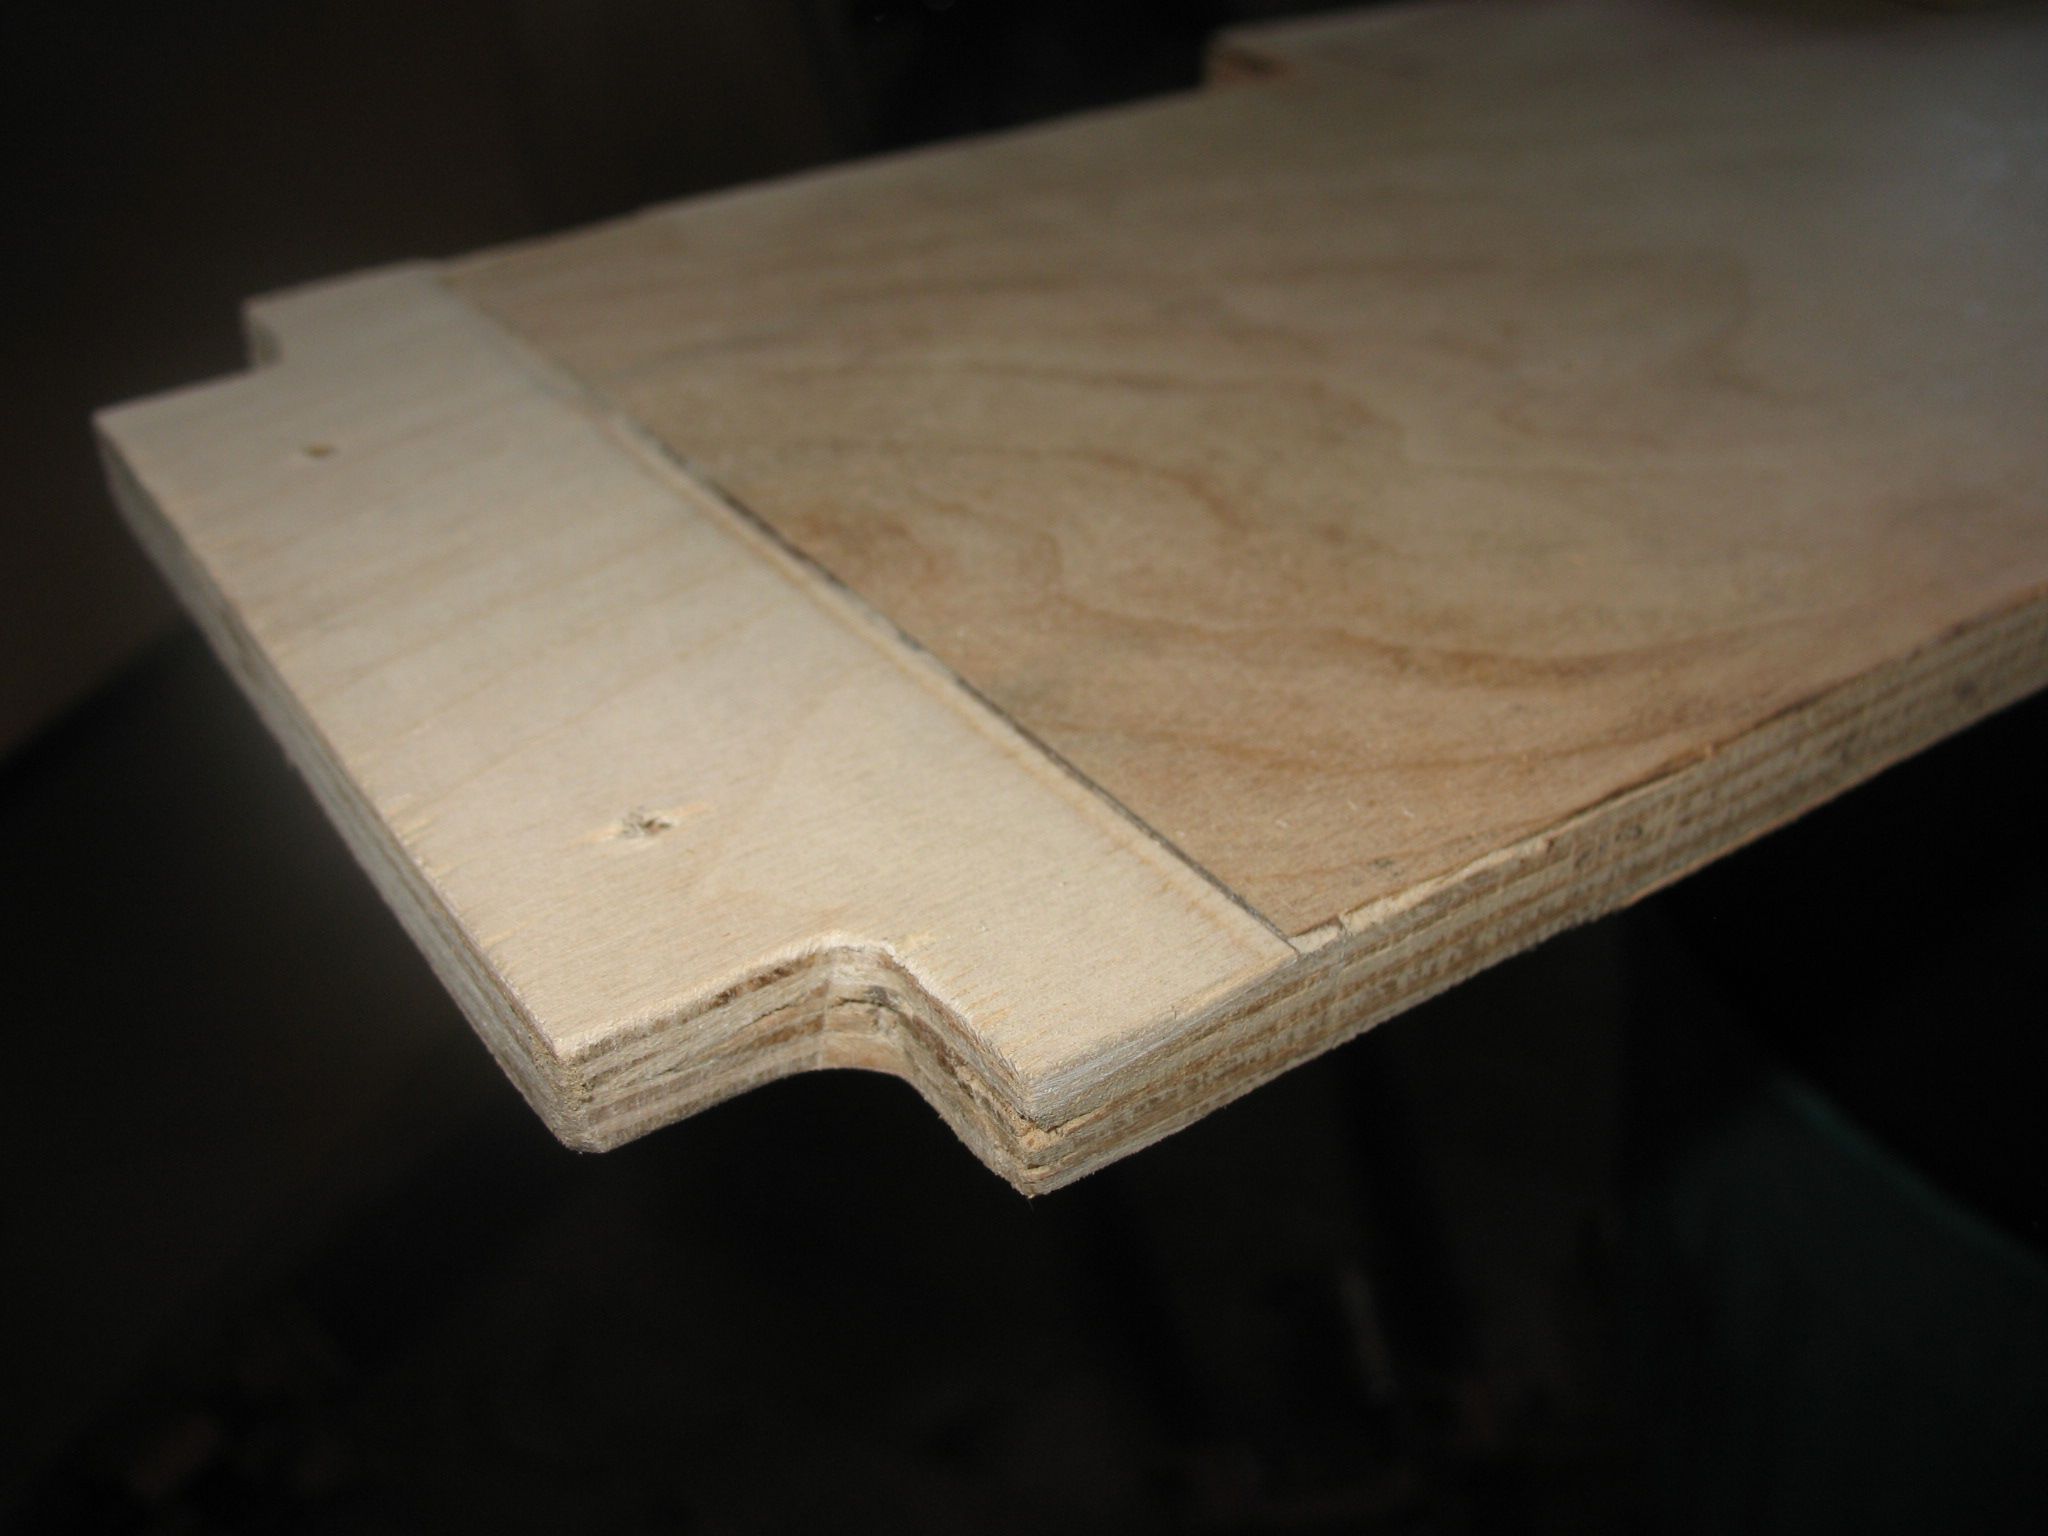
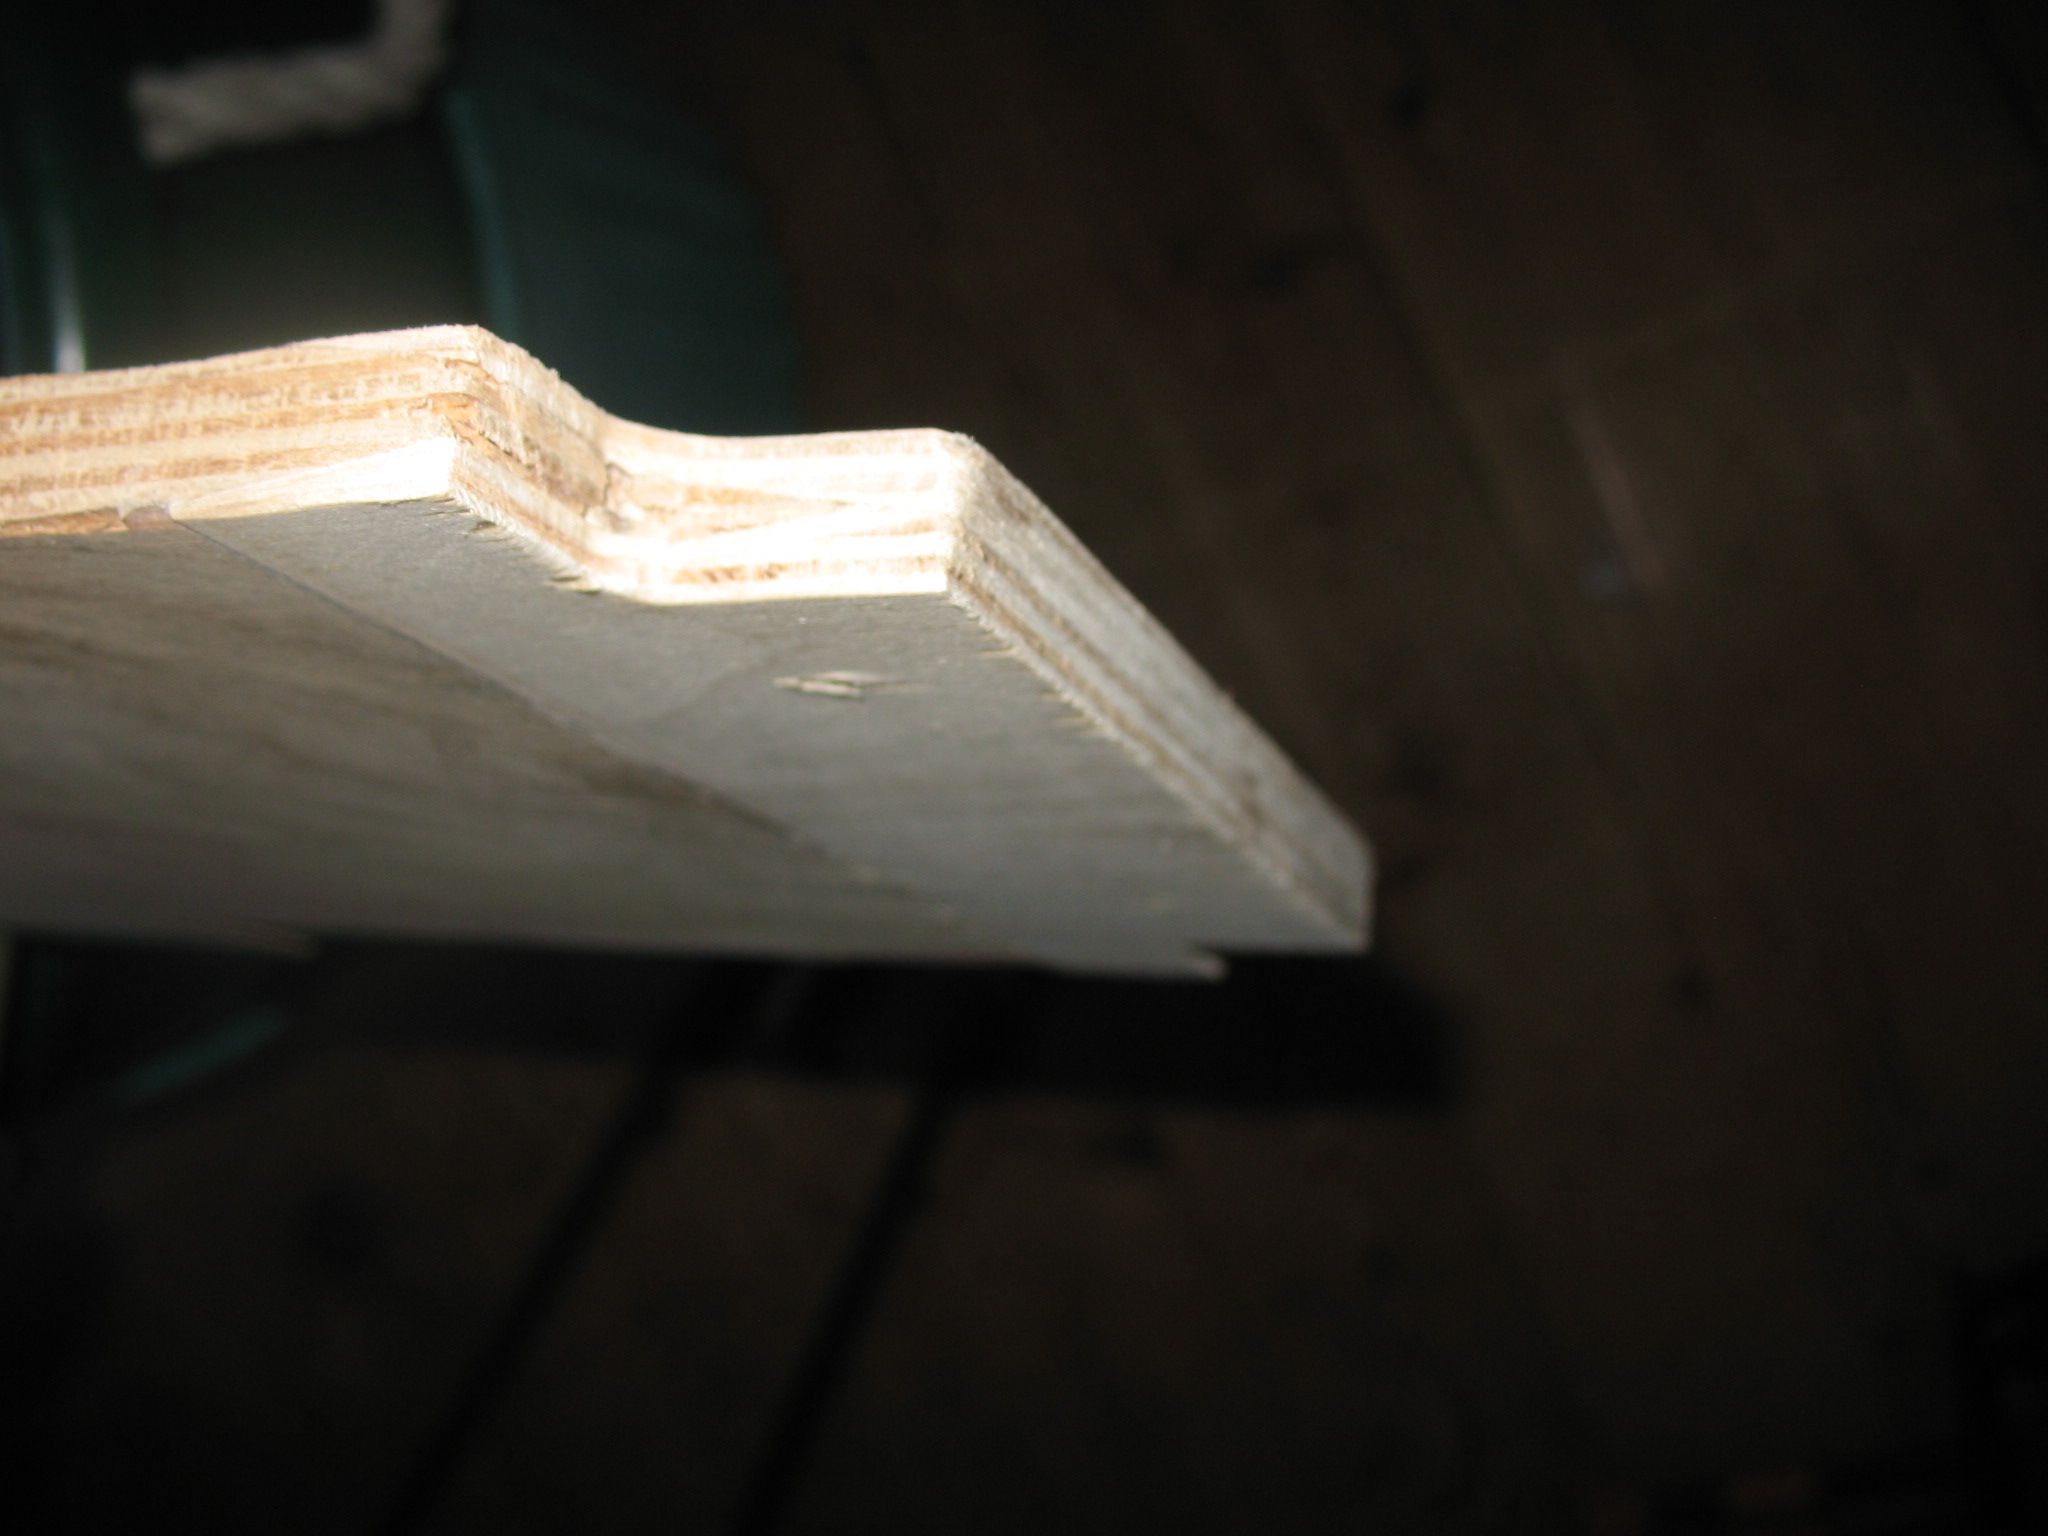
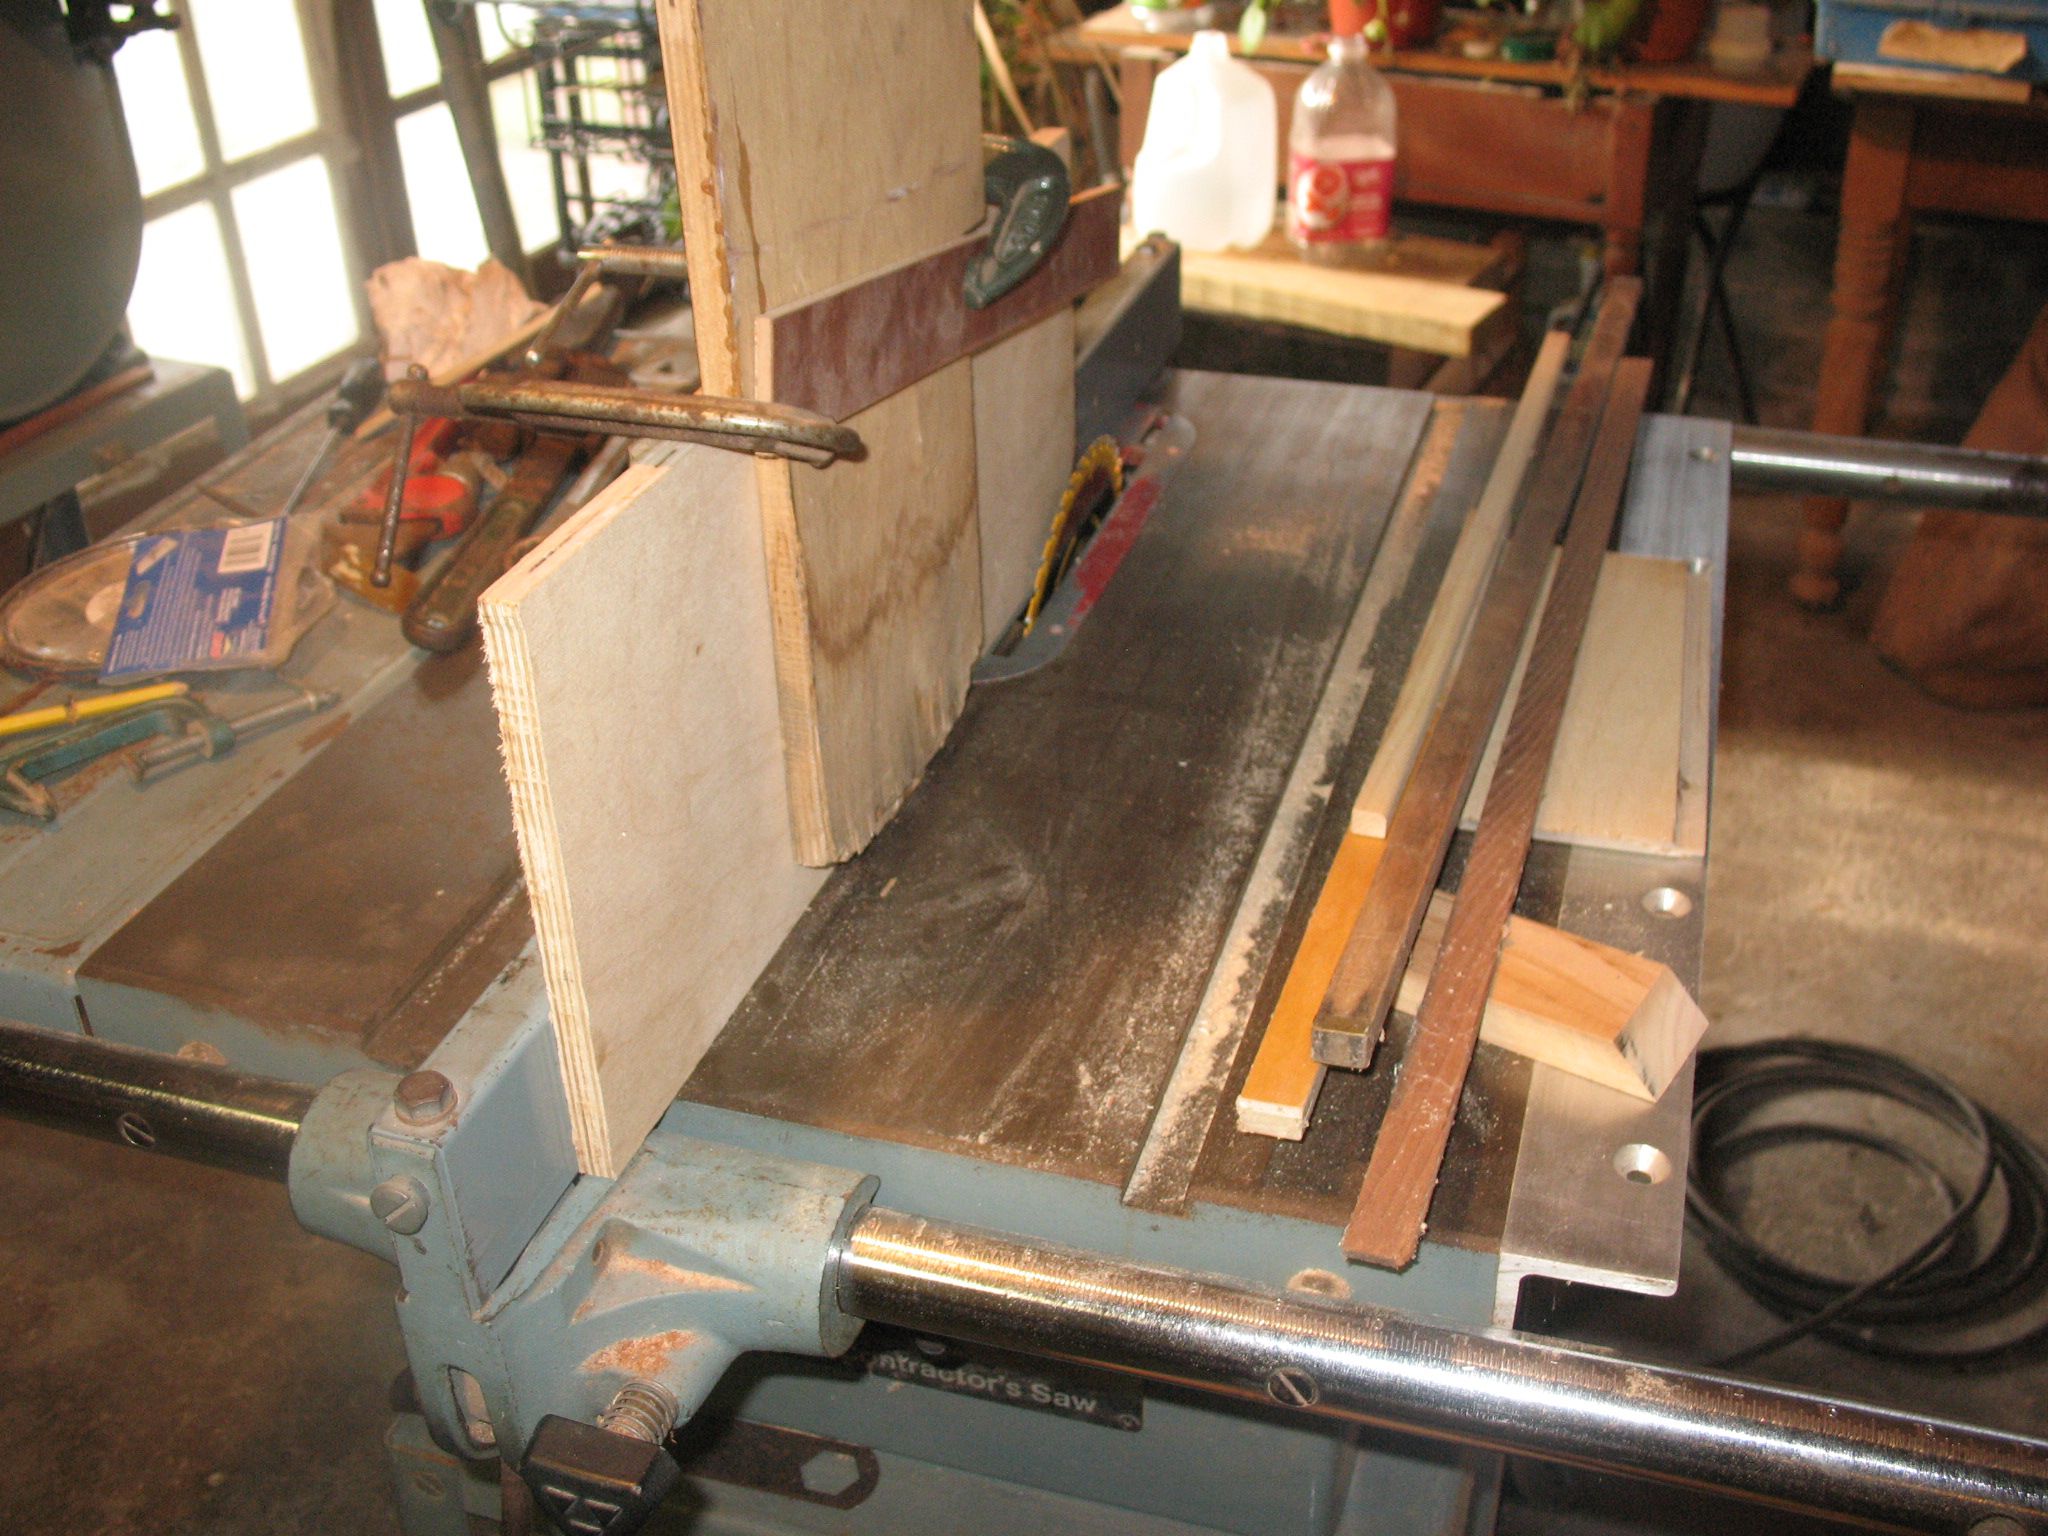
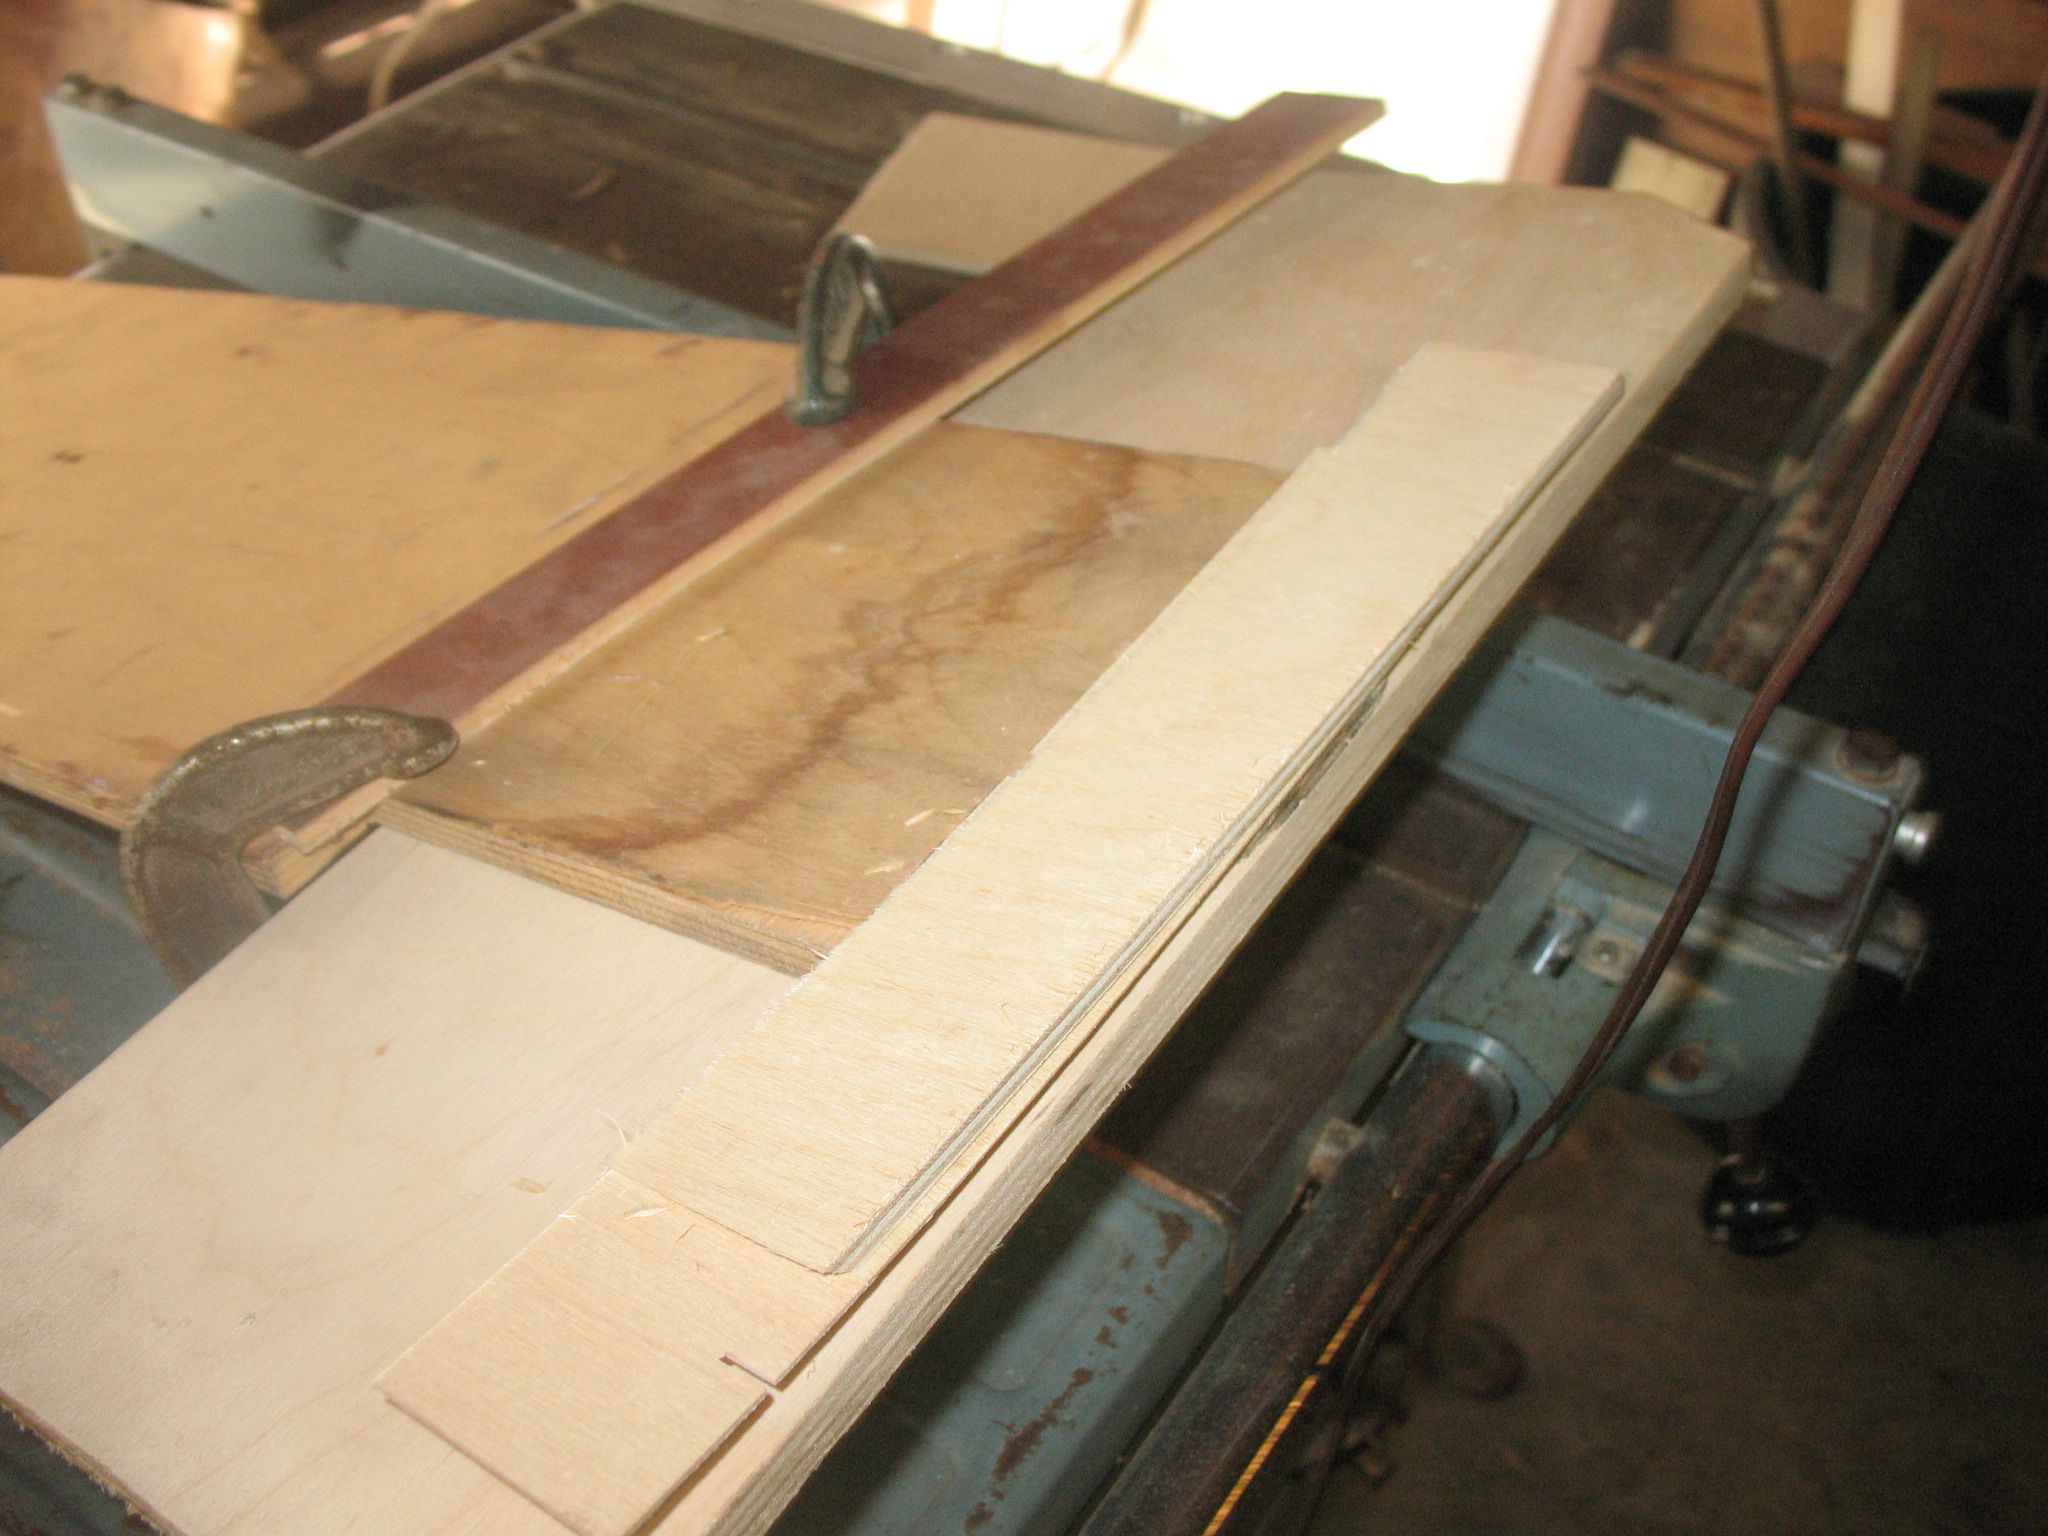
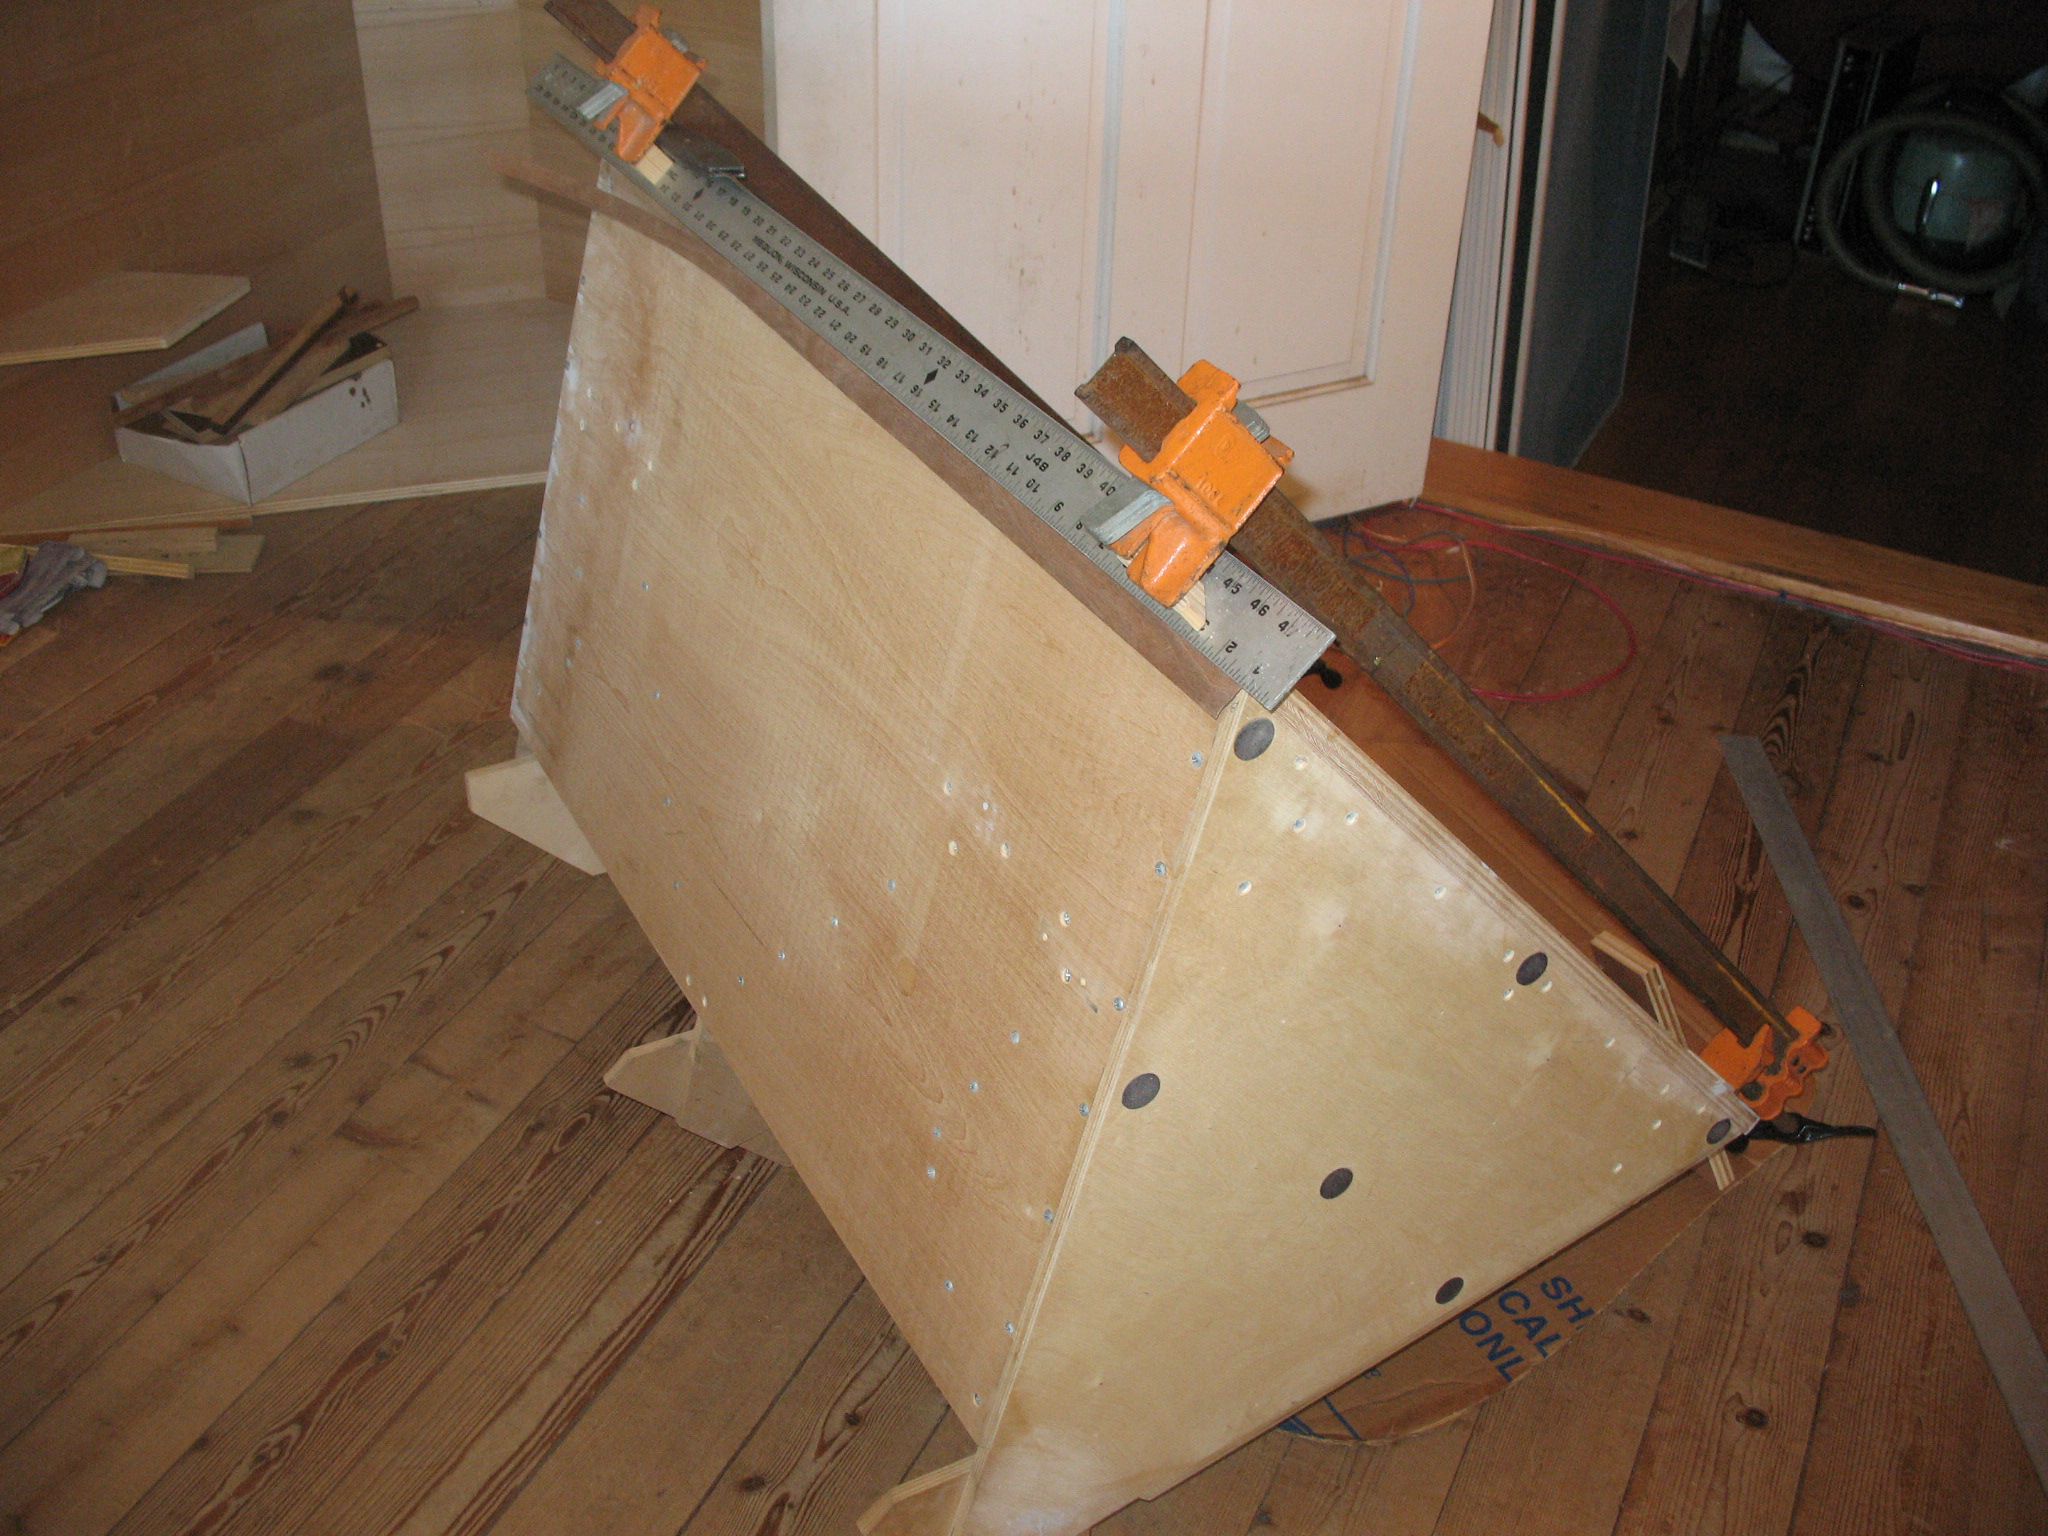
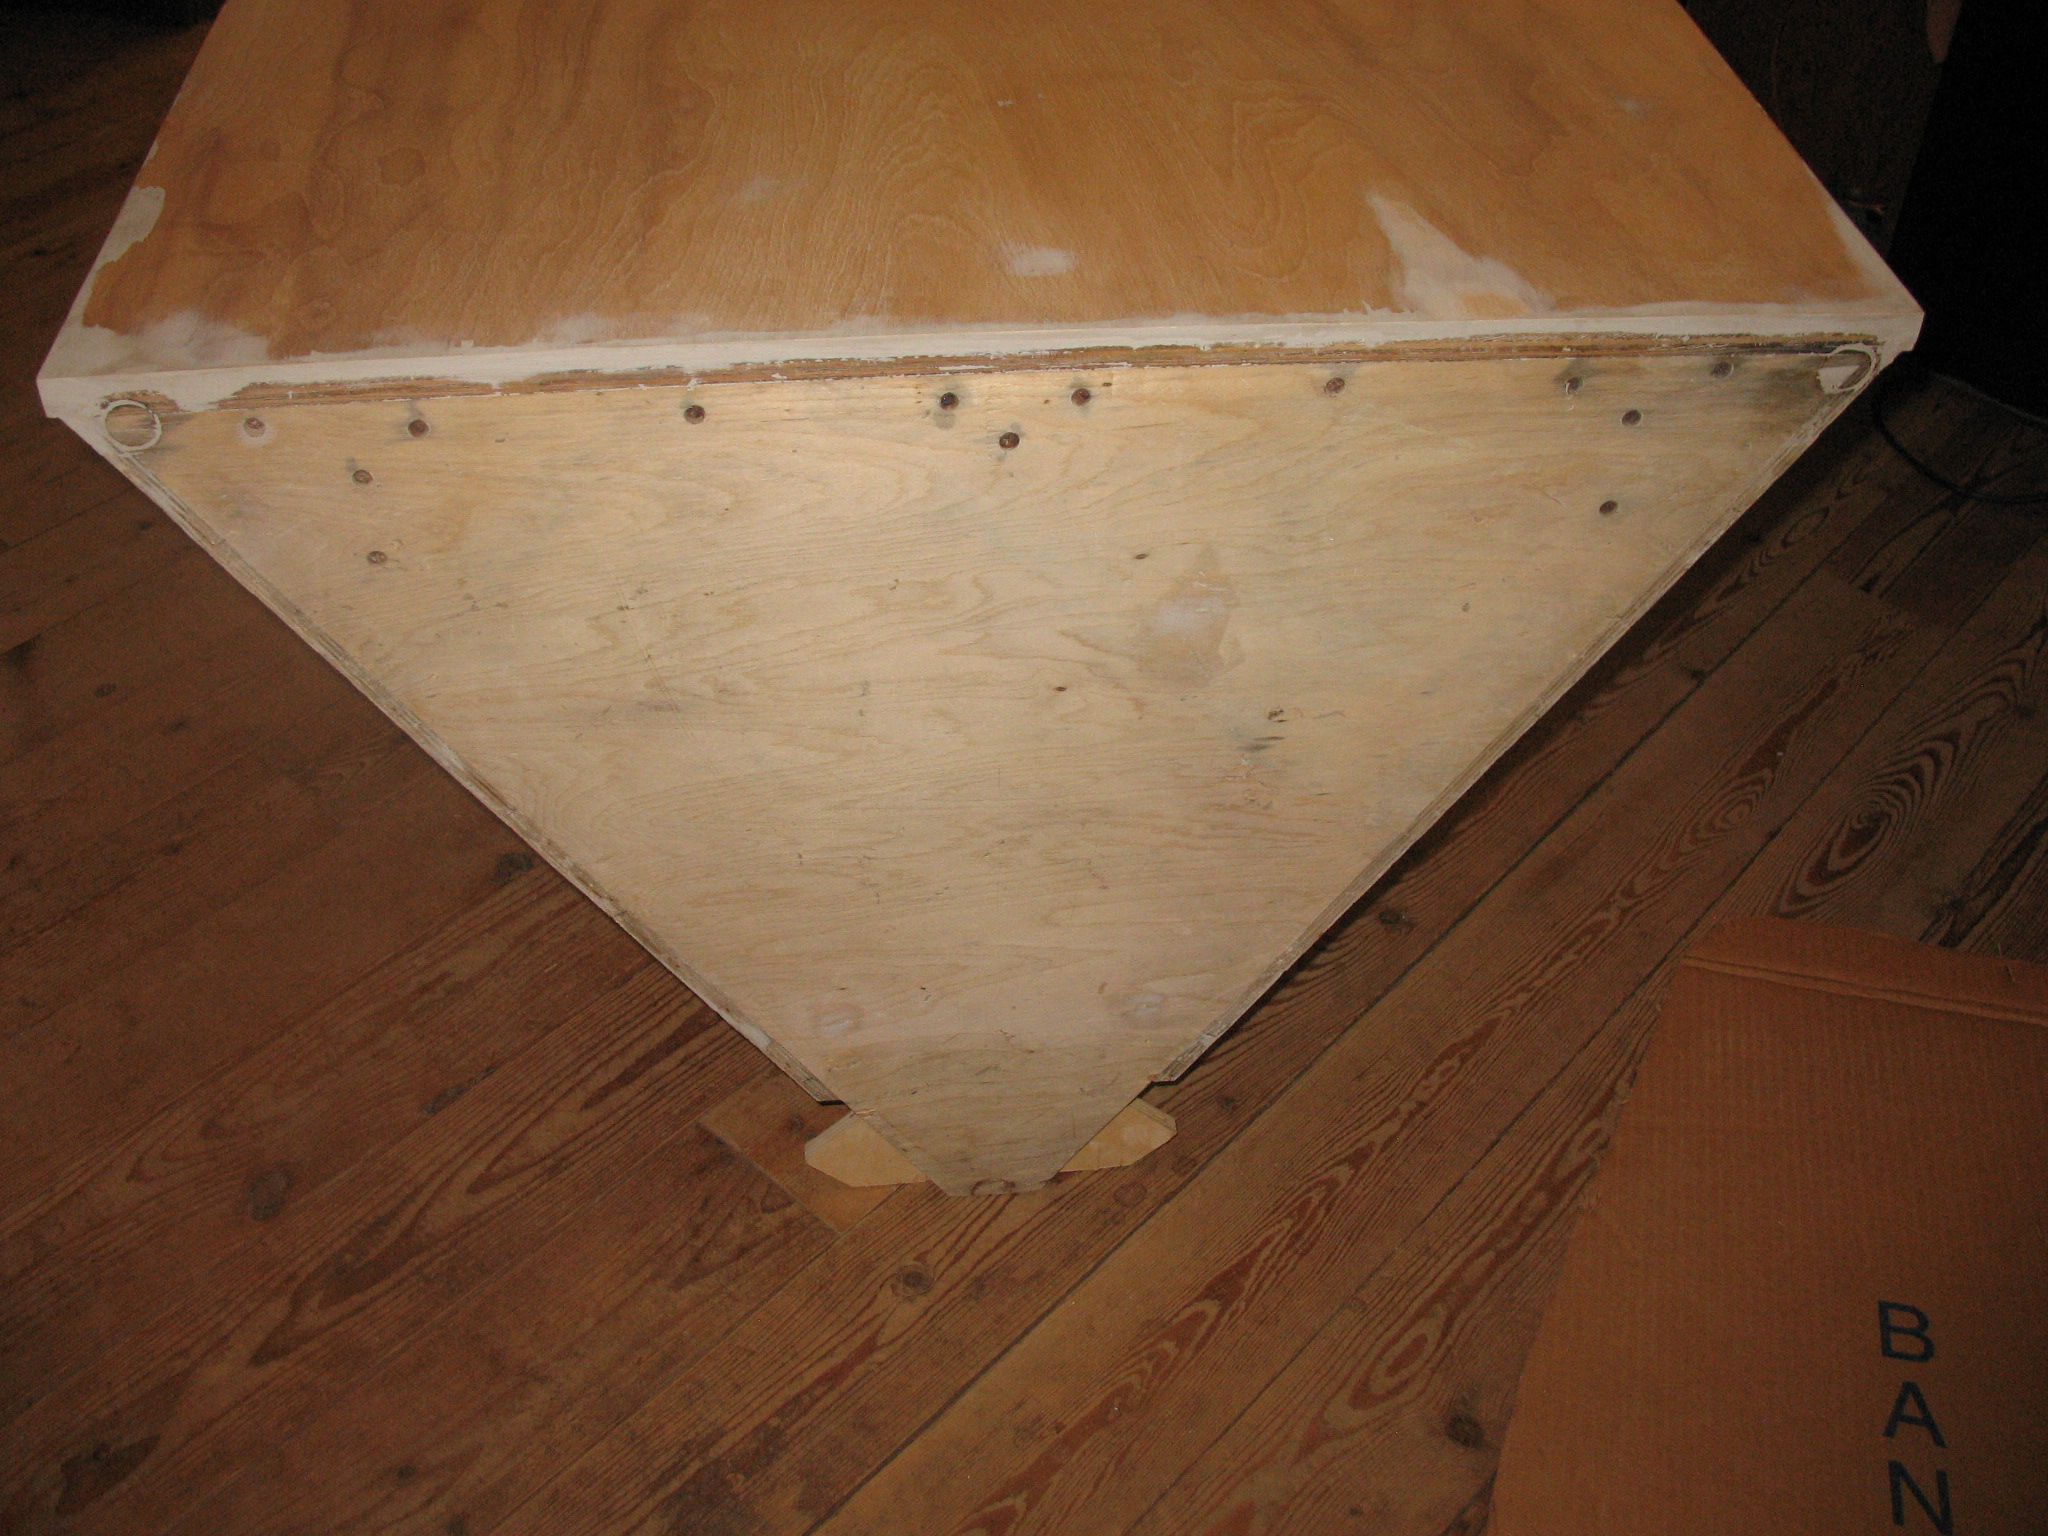
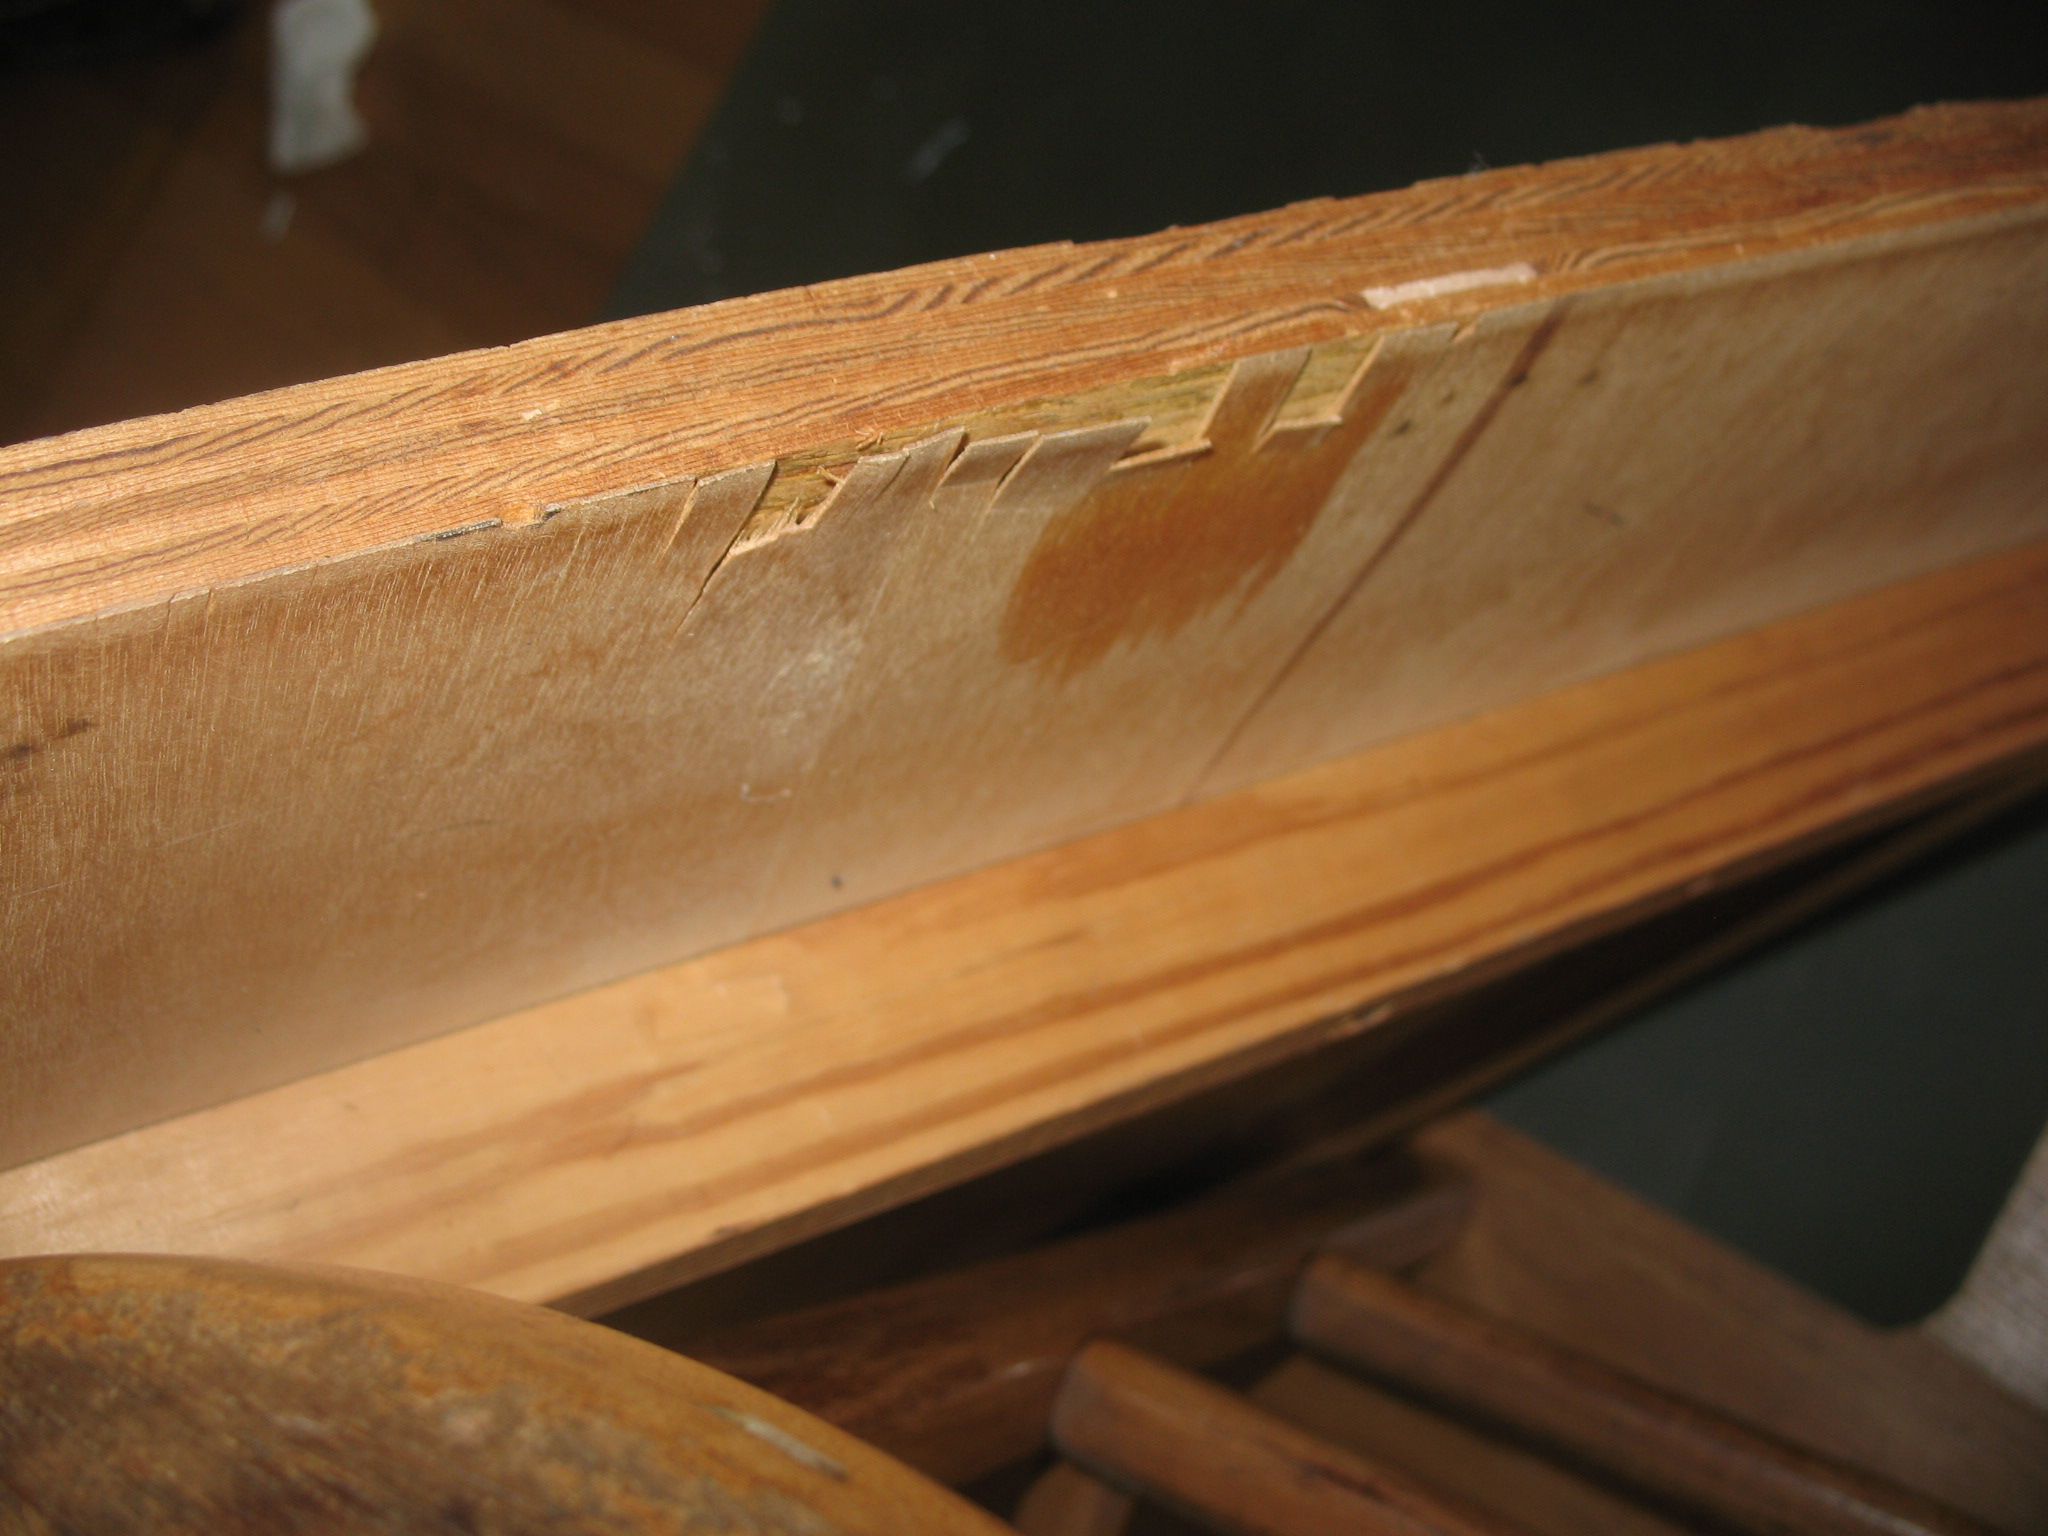
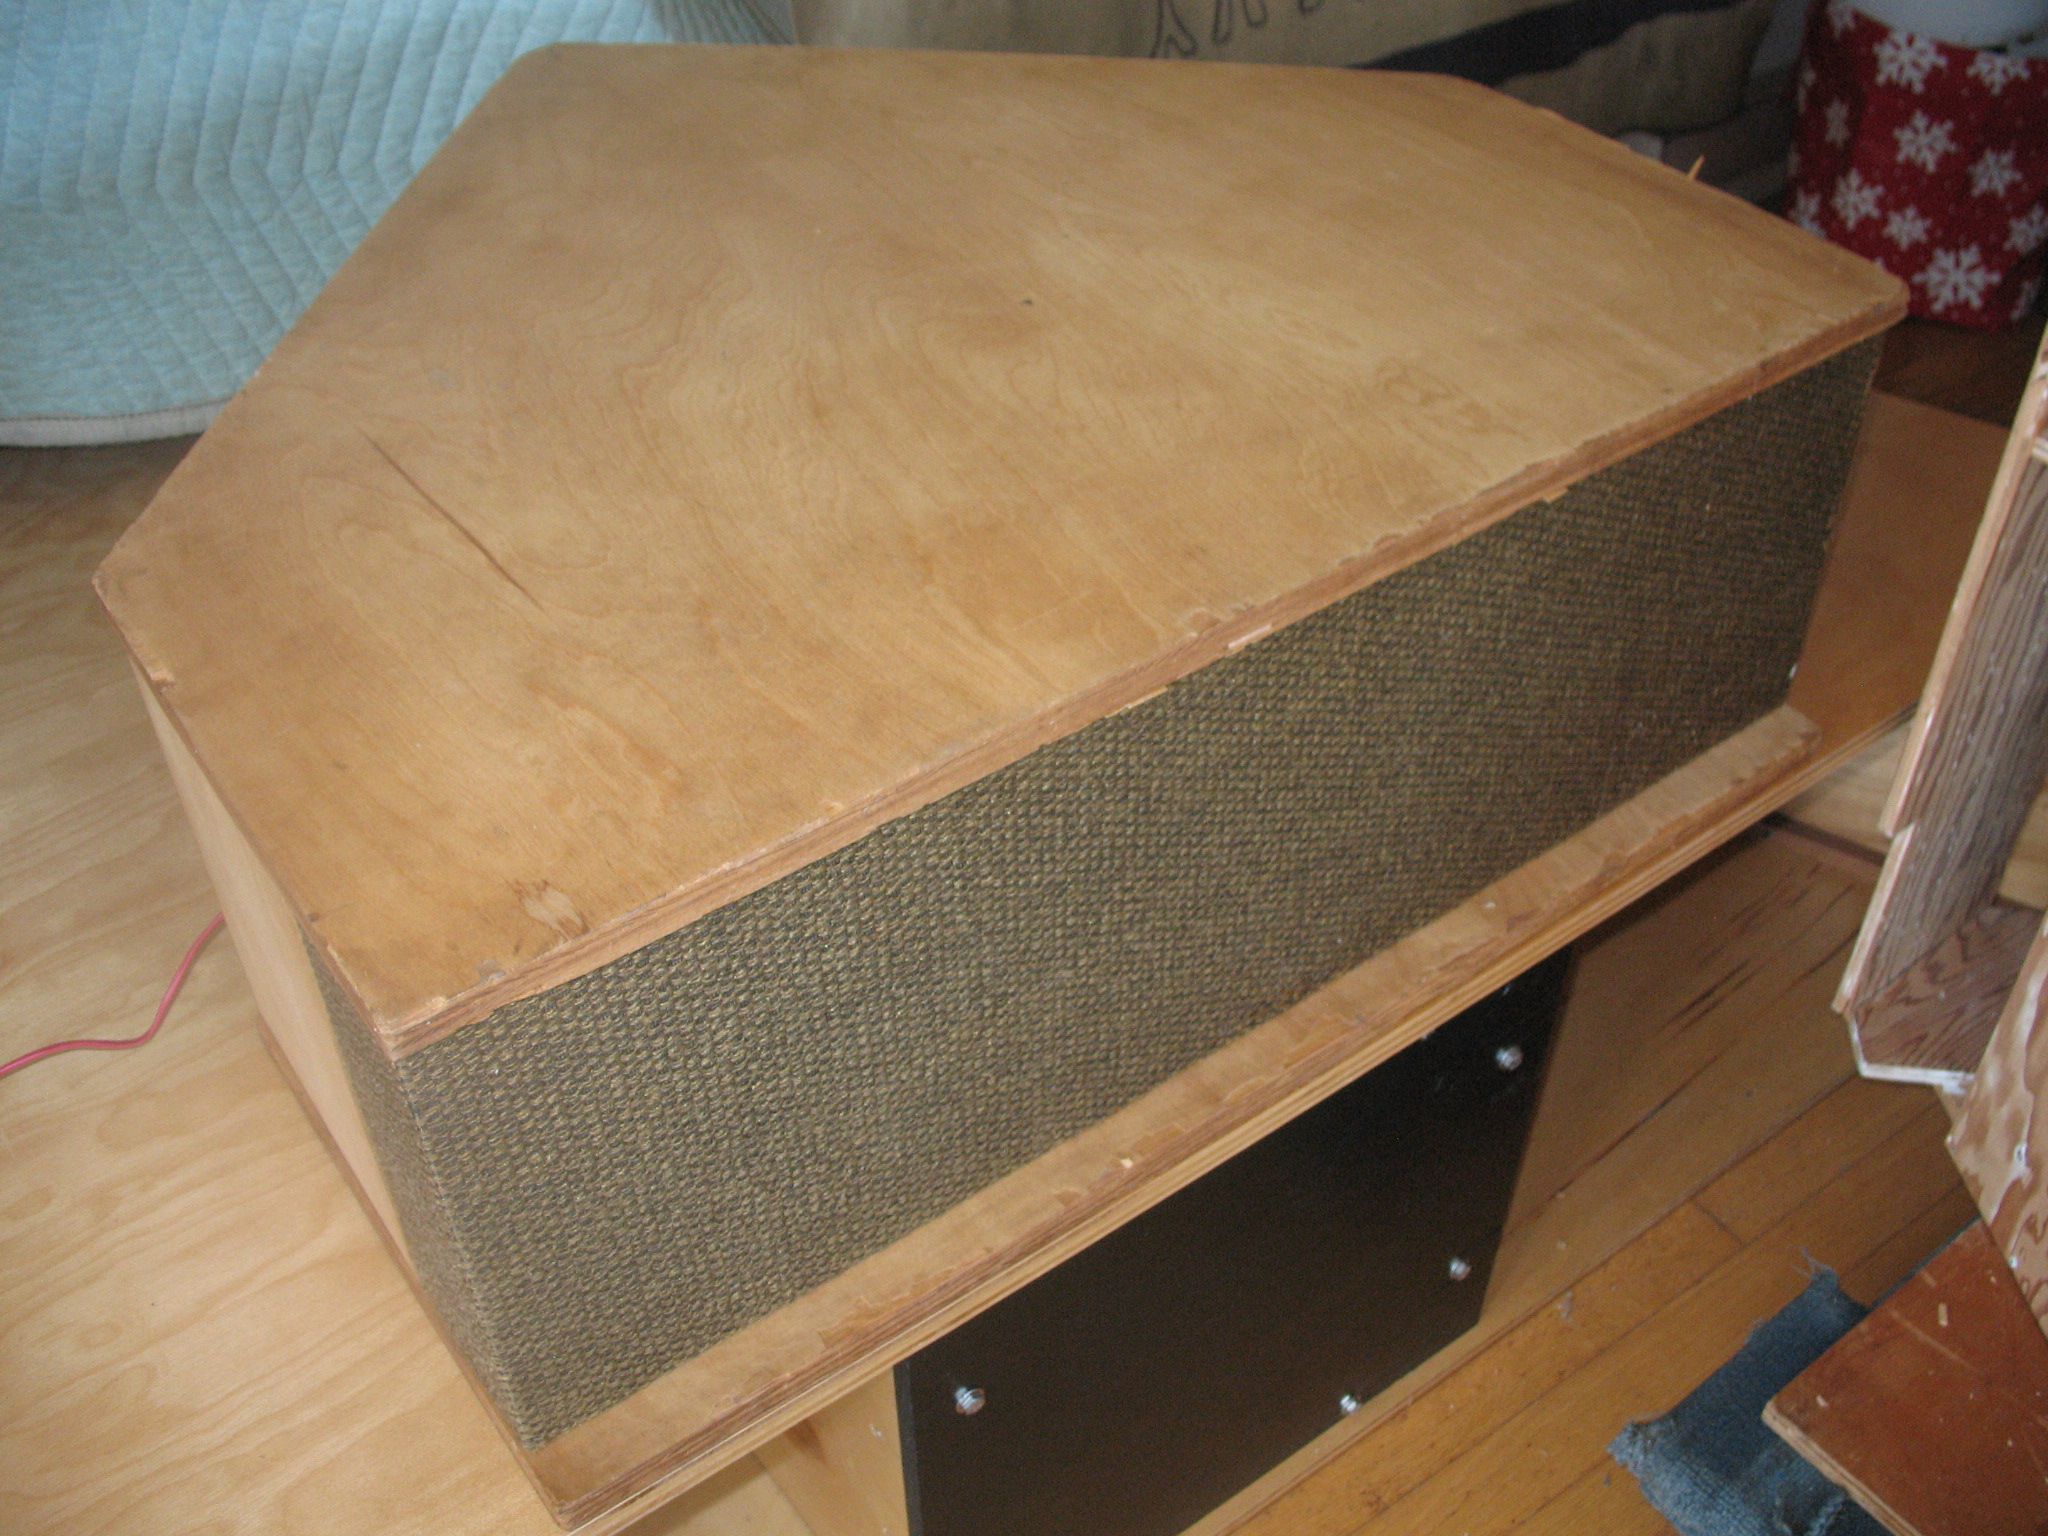
I had mentioned that these were dragged across some surface or other previously and you can see that in the first picture of this topic shows the backs. one was ugly but solid but this one the flat on the bottom that screws into the cab was delaminated and some missing where it was dragged alternating sides at the bottom. I angle cut as much as I could and made an replacement piece. My first cut was not deep enough to give me a good surface to glue too. I made a second pass and it cleaned up better but had to cut a single ply for a spacer. I need to glue this sandwich together and see if I have to do it again on the opposite face tomorrow.
-
Klipschorn top gets painted - covid project
garyeanderson replied to garyeanderson's topic in Technical/Restorations
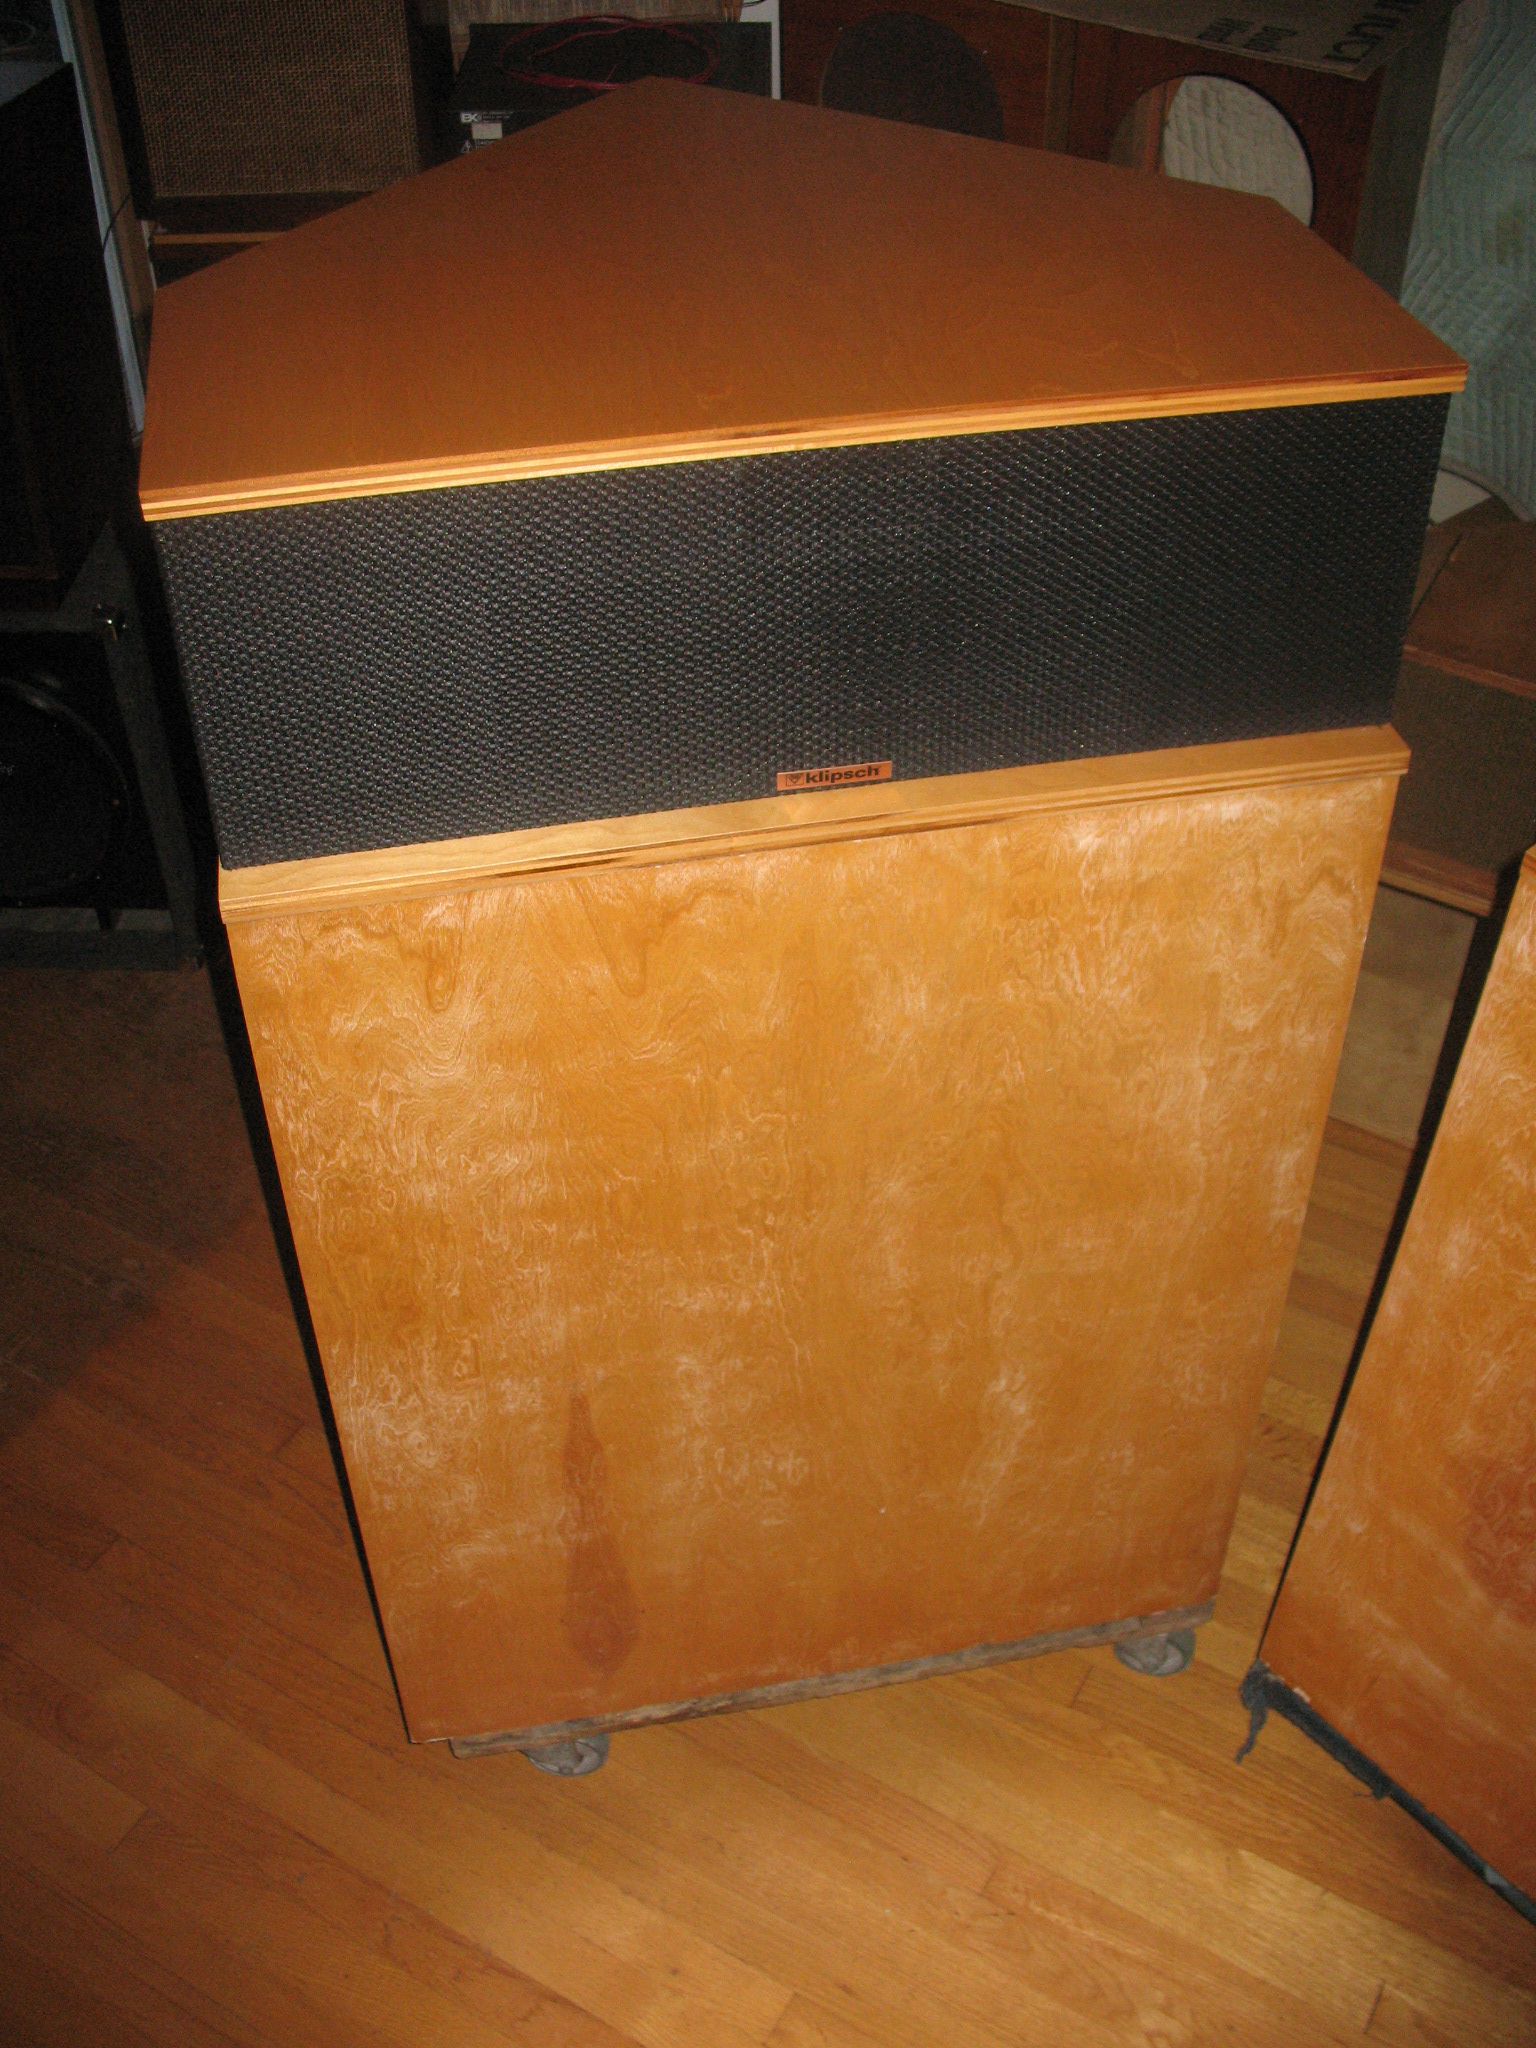
Another good day ! I had the second bass bin veneered by 2:30 and thought about the BLO finish but held off as I just wanted to think it over for a bit before I committed myself.
-
Klipschorn top gets painted - covid project
garyeanderson replied to garyeanderson's topic in Technical/Restorations
It will look better when oiled with 5 or 6 coats of BLO, I am thinking of a satin lacquer for the ash. Sure hope the satin black tops don't clash -
Klipschorn top gets painted - covid project
garyeanderson replied to garyeanderson's topic in Technical/Restorations
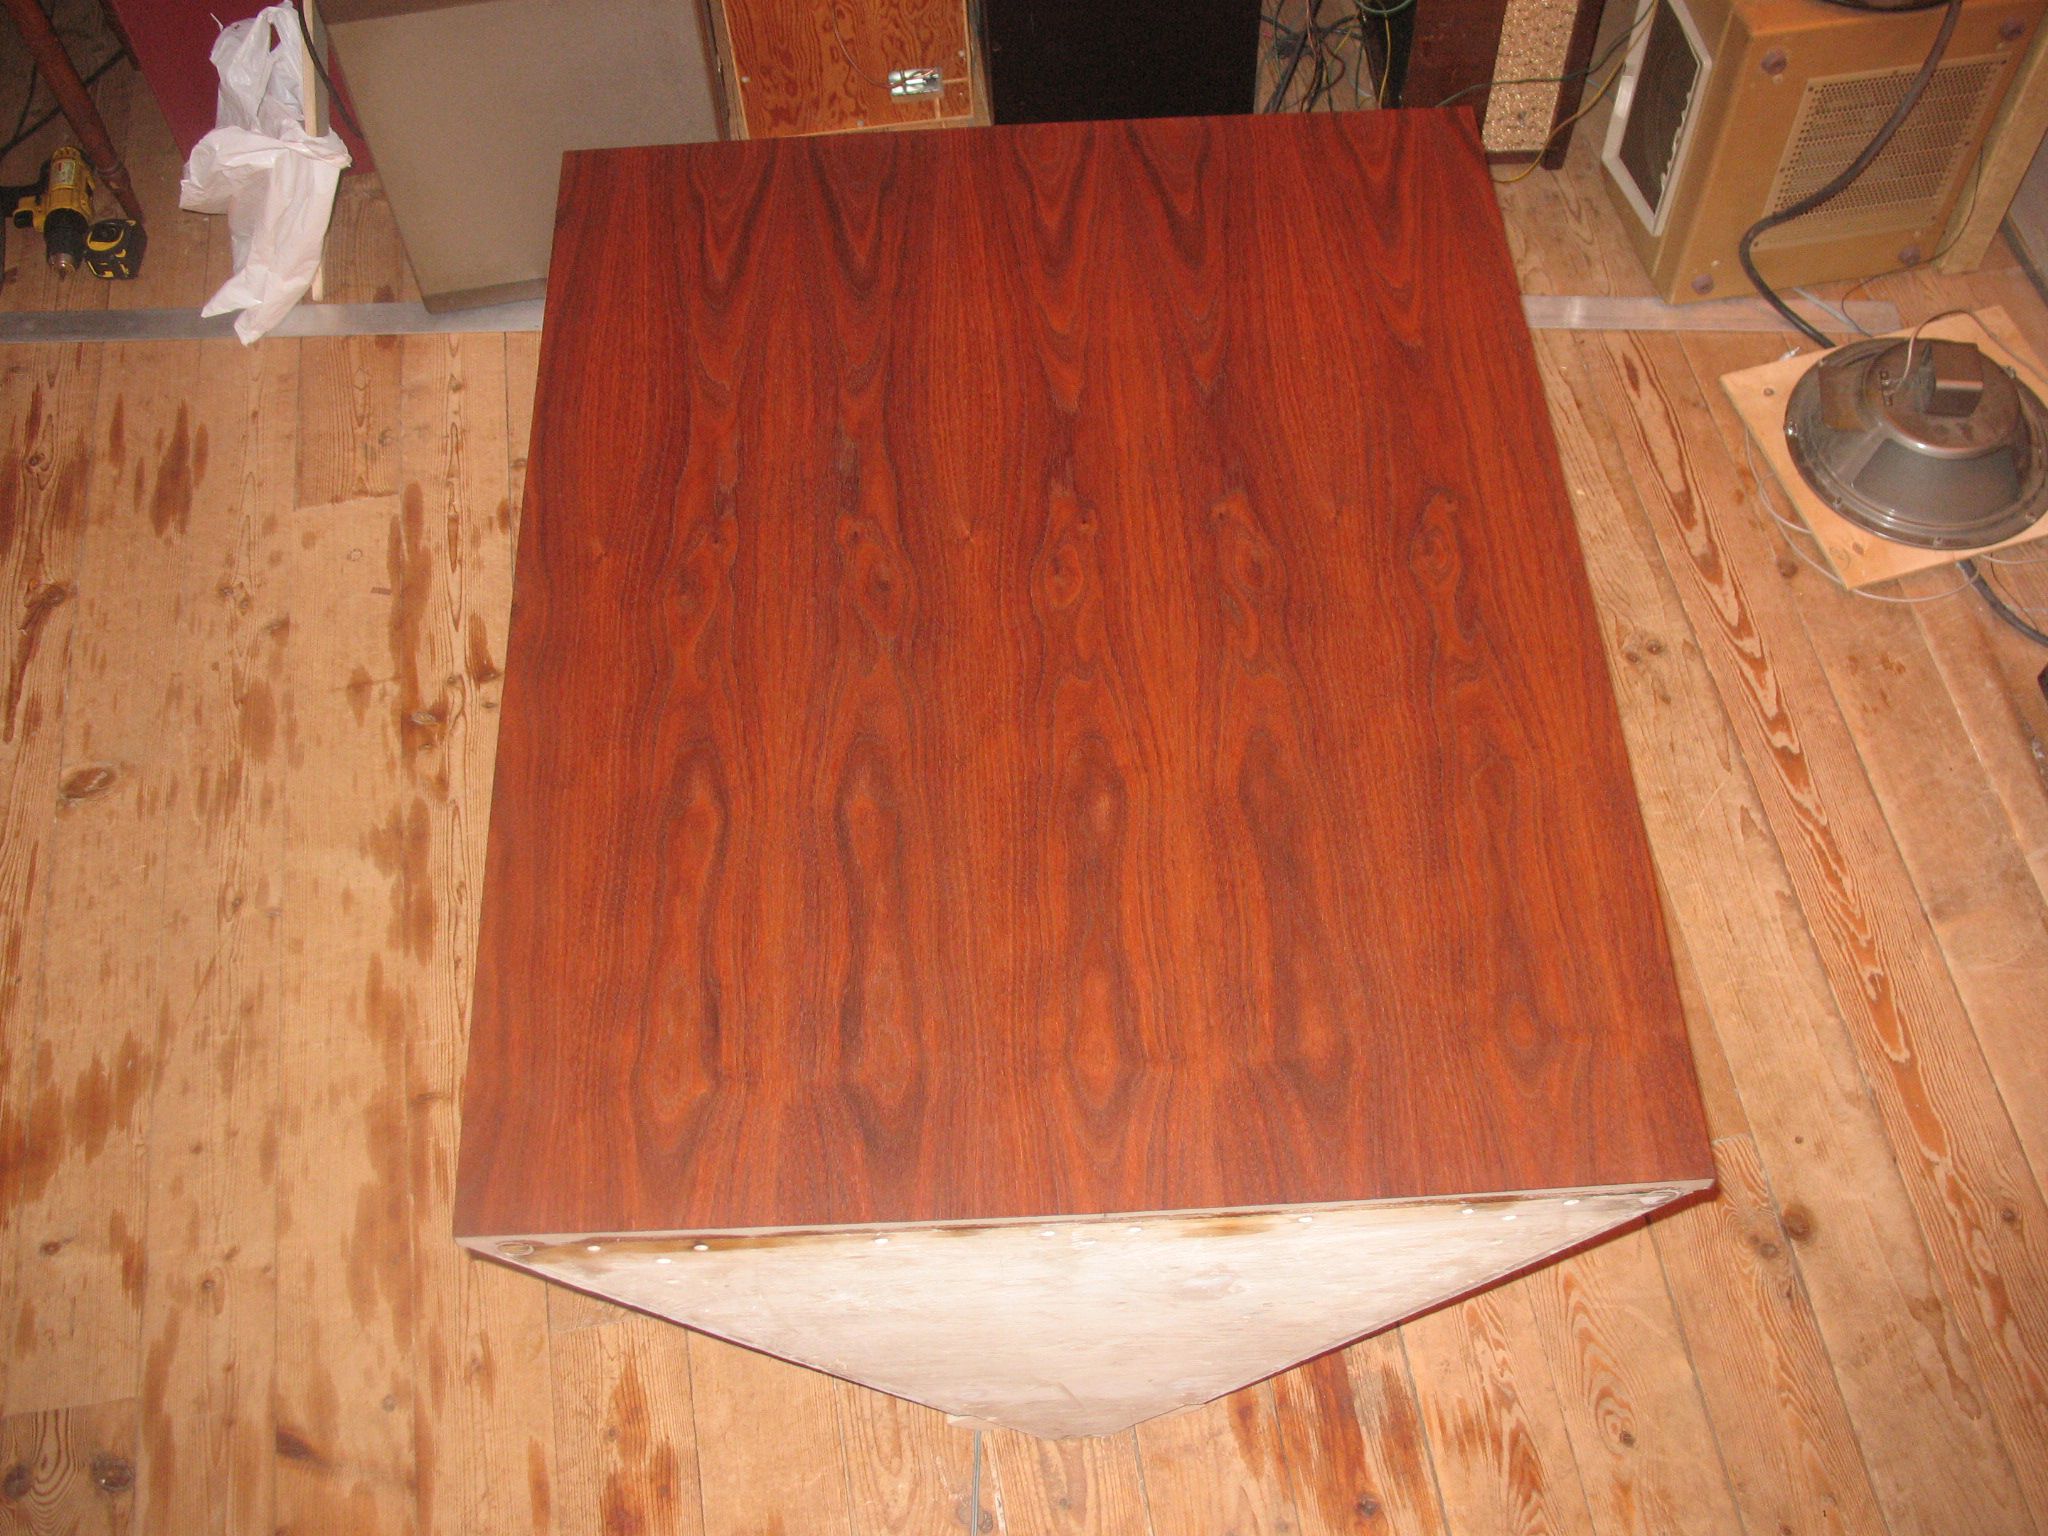
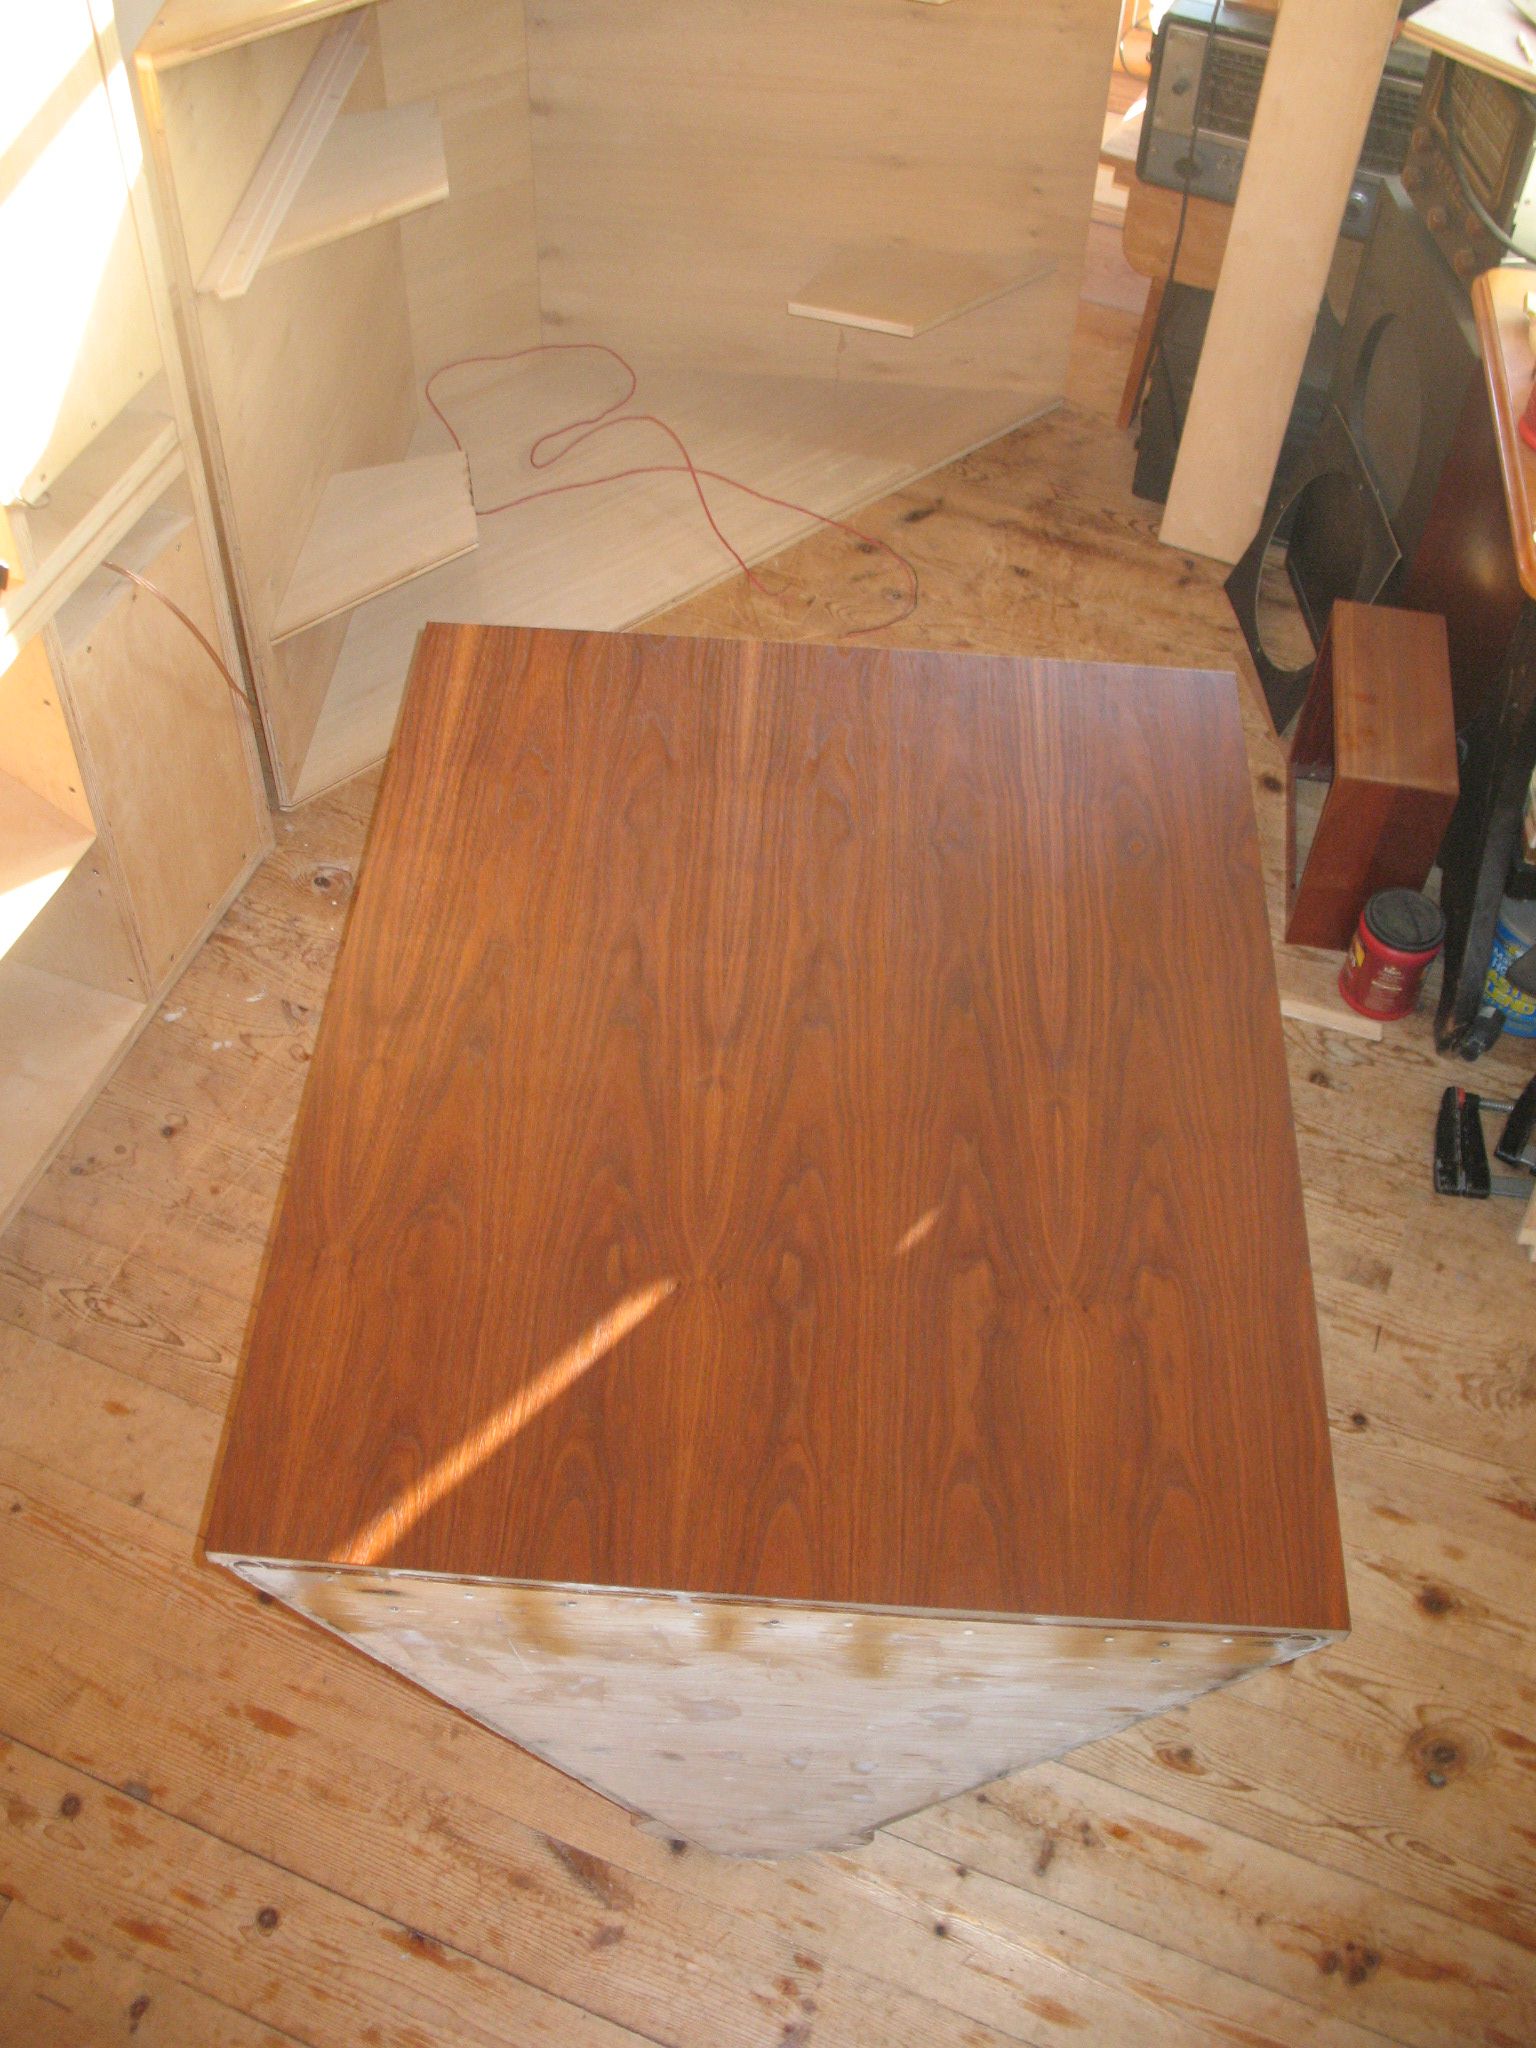
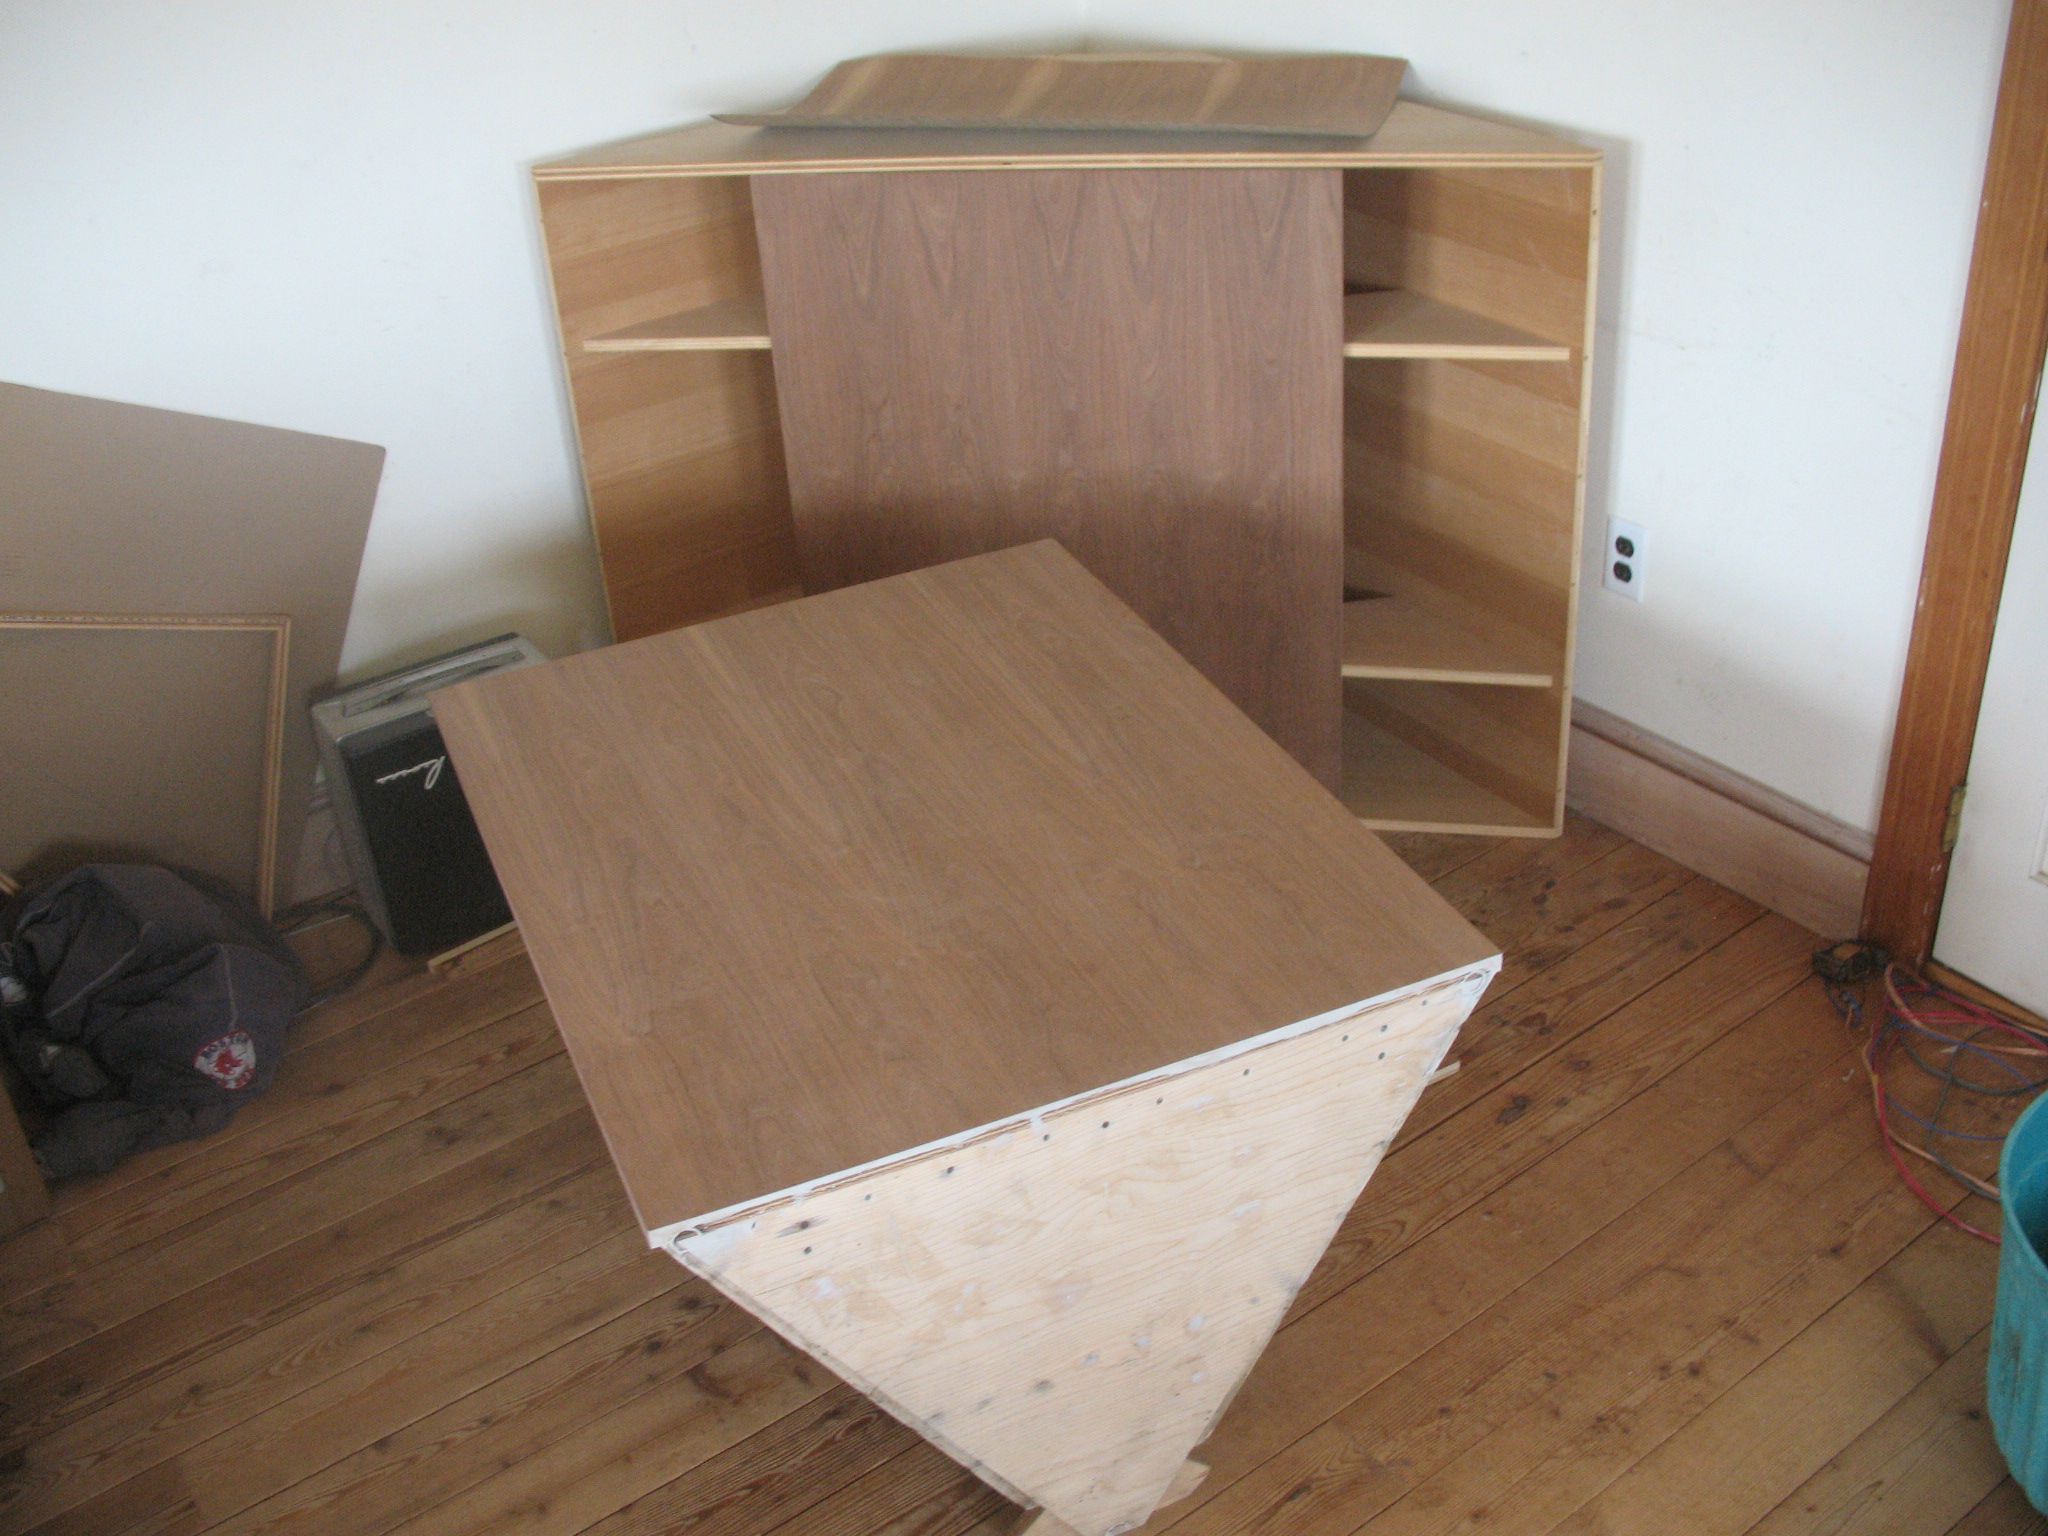
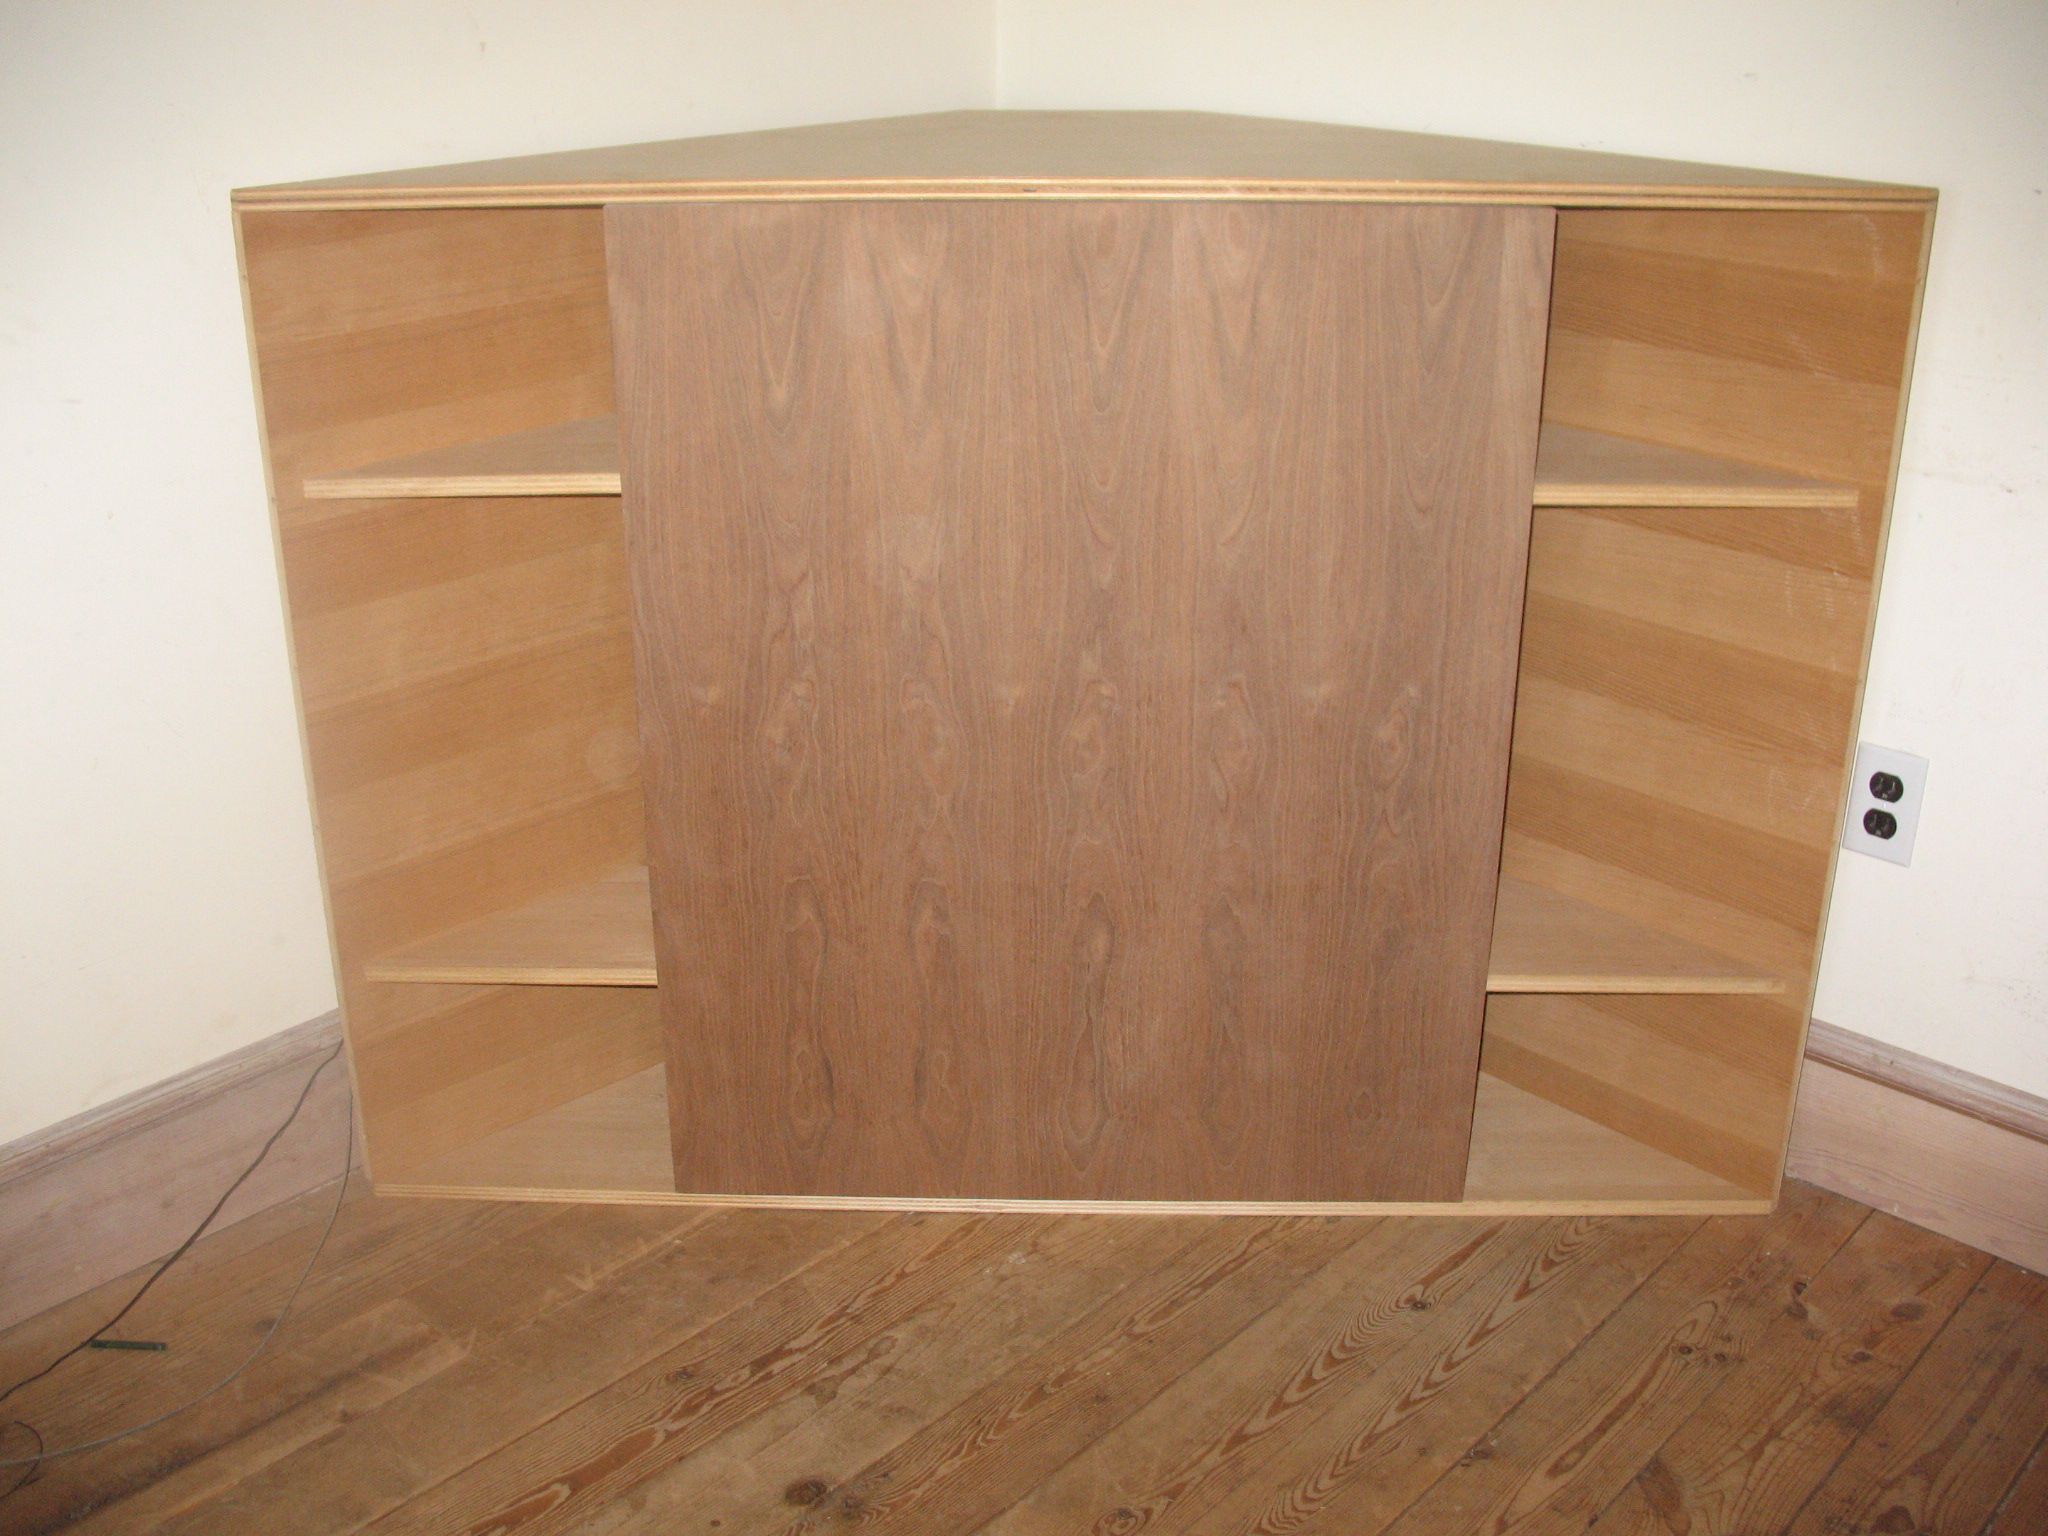
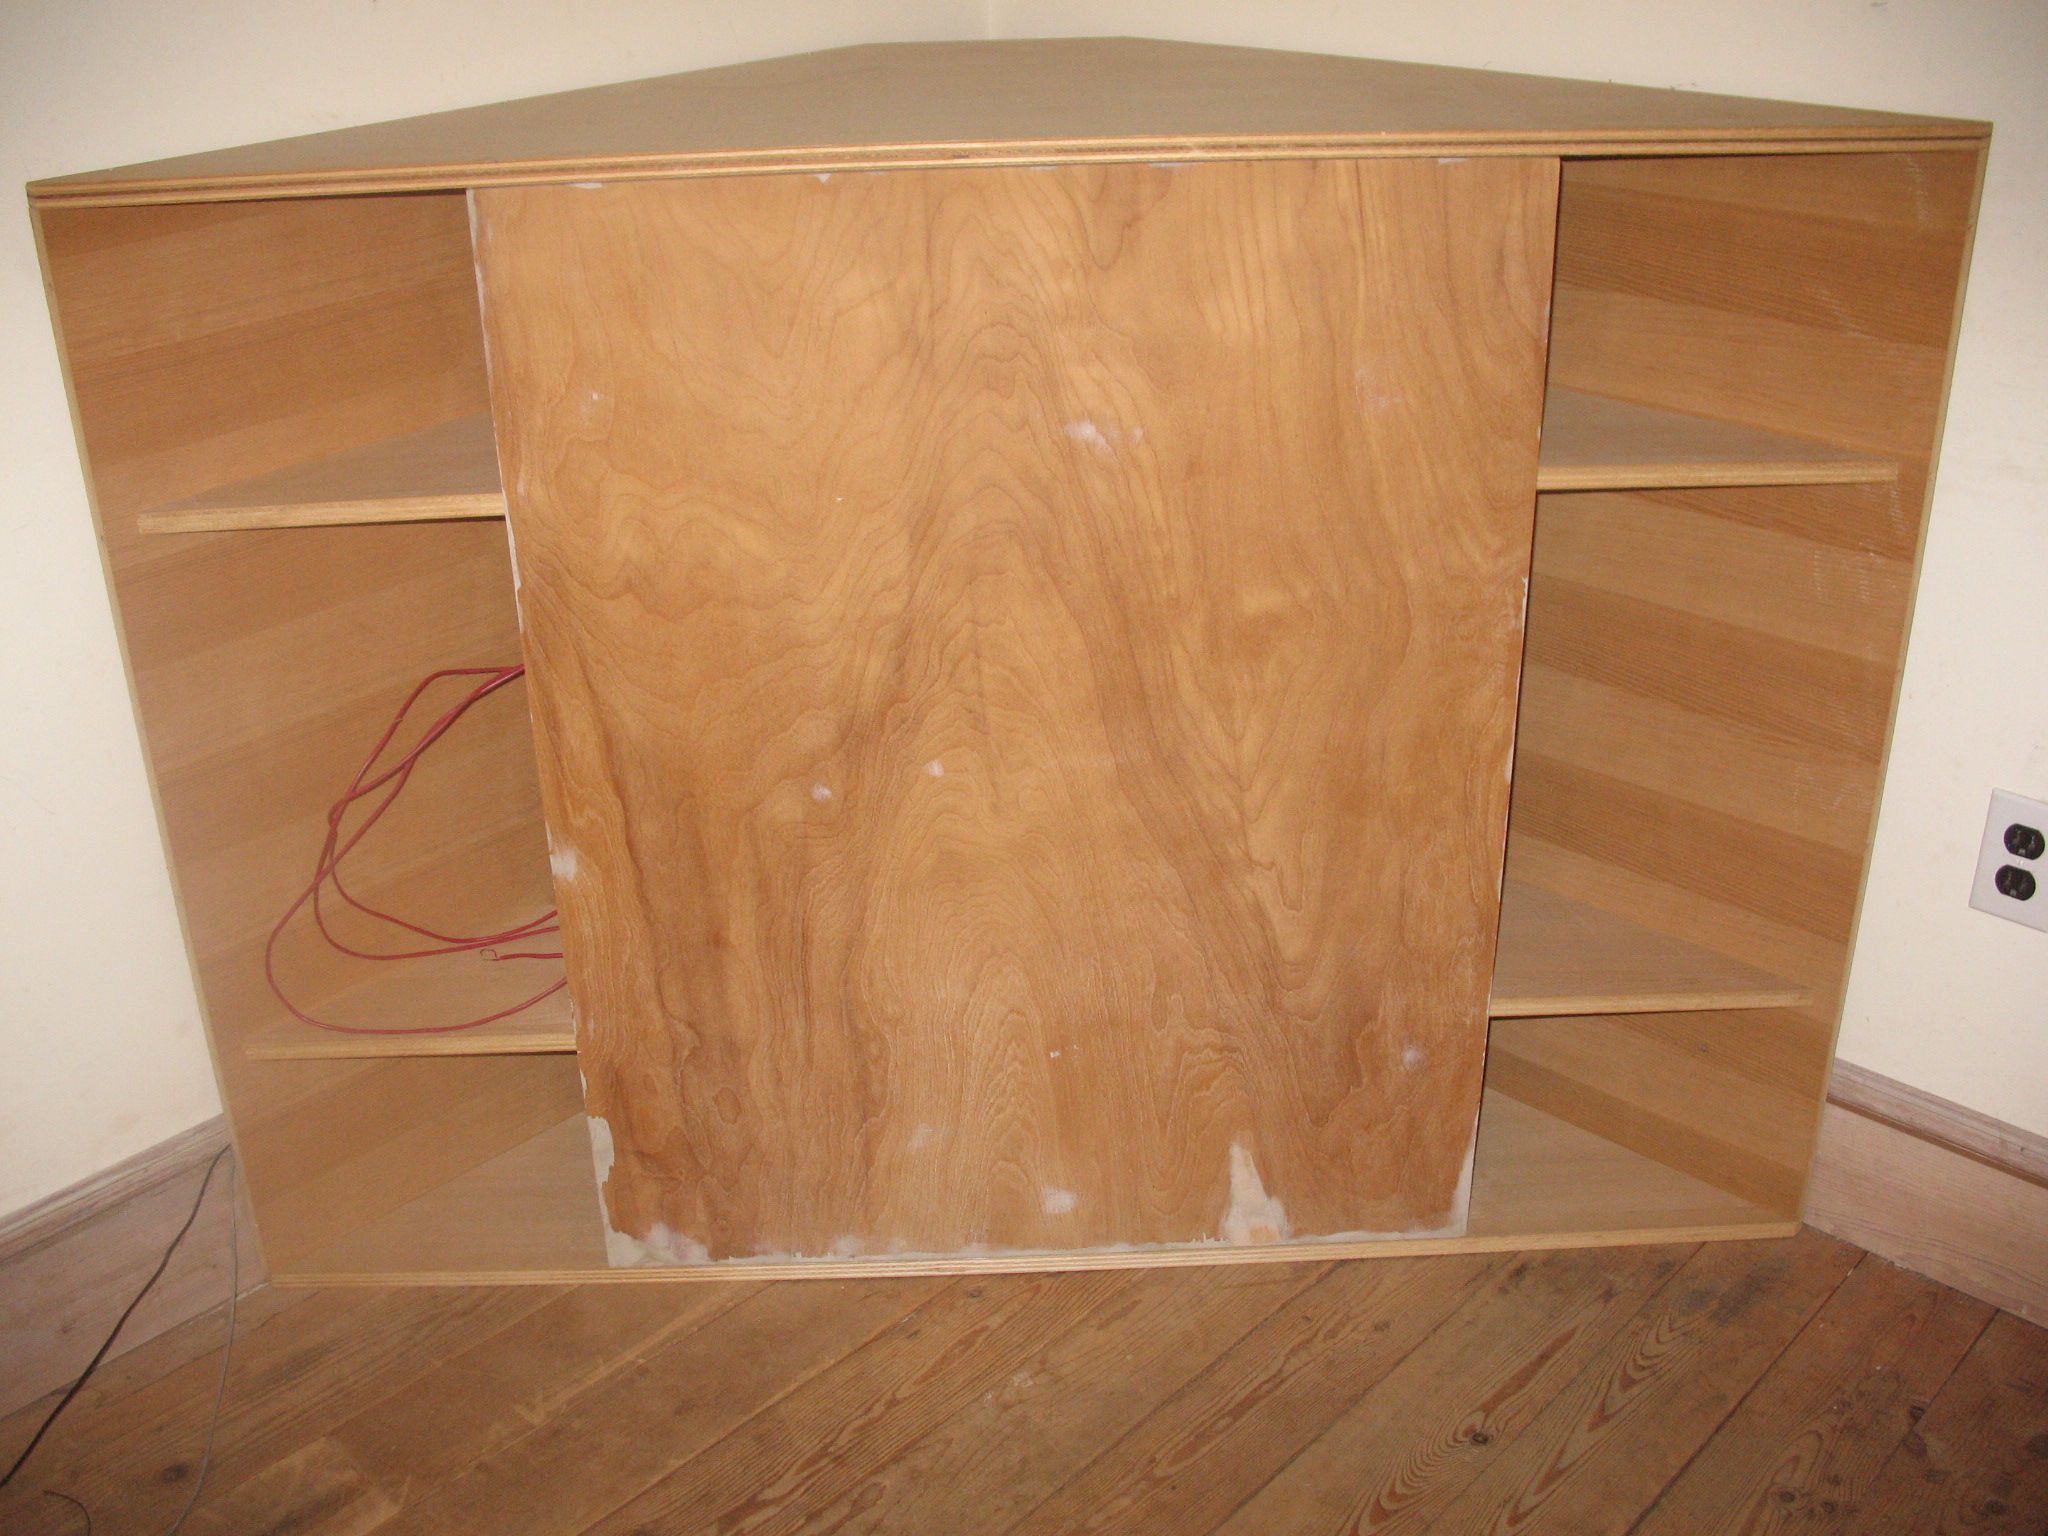
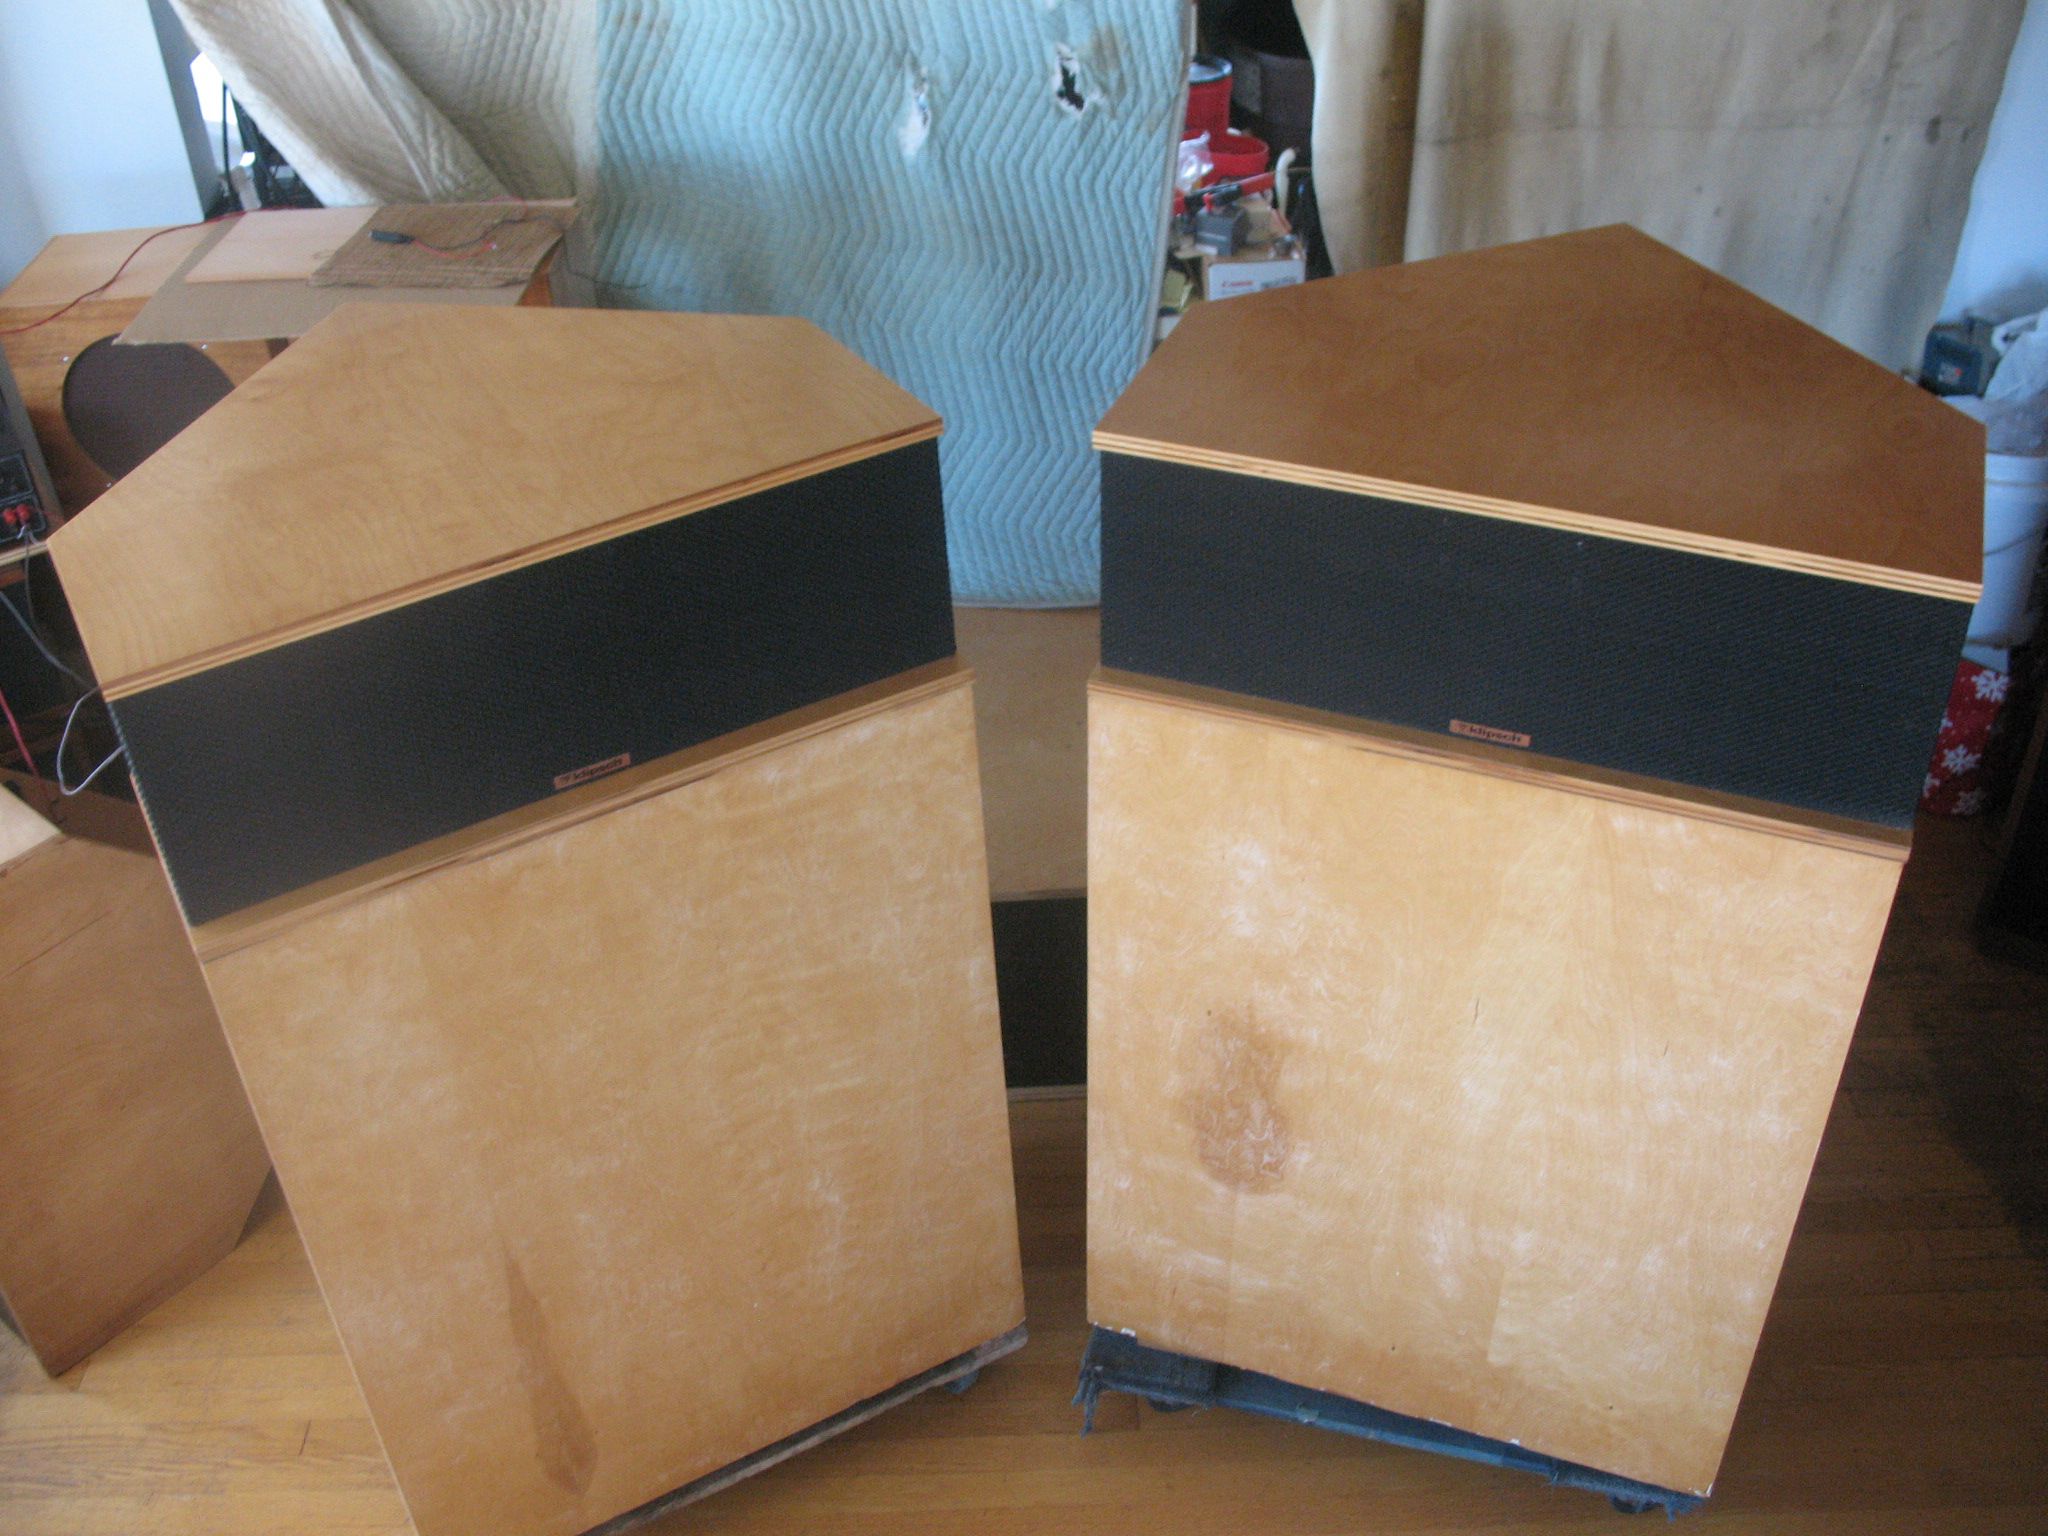
I think I got is close to being centered Back in it's shelter for the night. I need the space to do the other one anyhow. Besides I wanted to see the contrast between the walnut and ash,
-
Klipschorn top gets painted - covid project
garyeanderson replied to garyeanderson's topic in Technical/Restorations
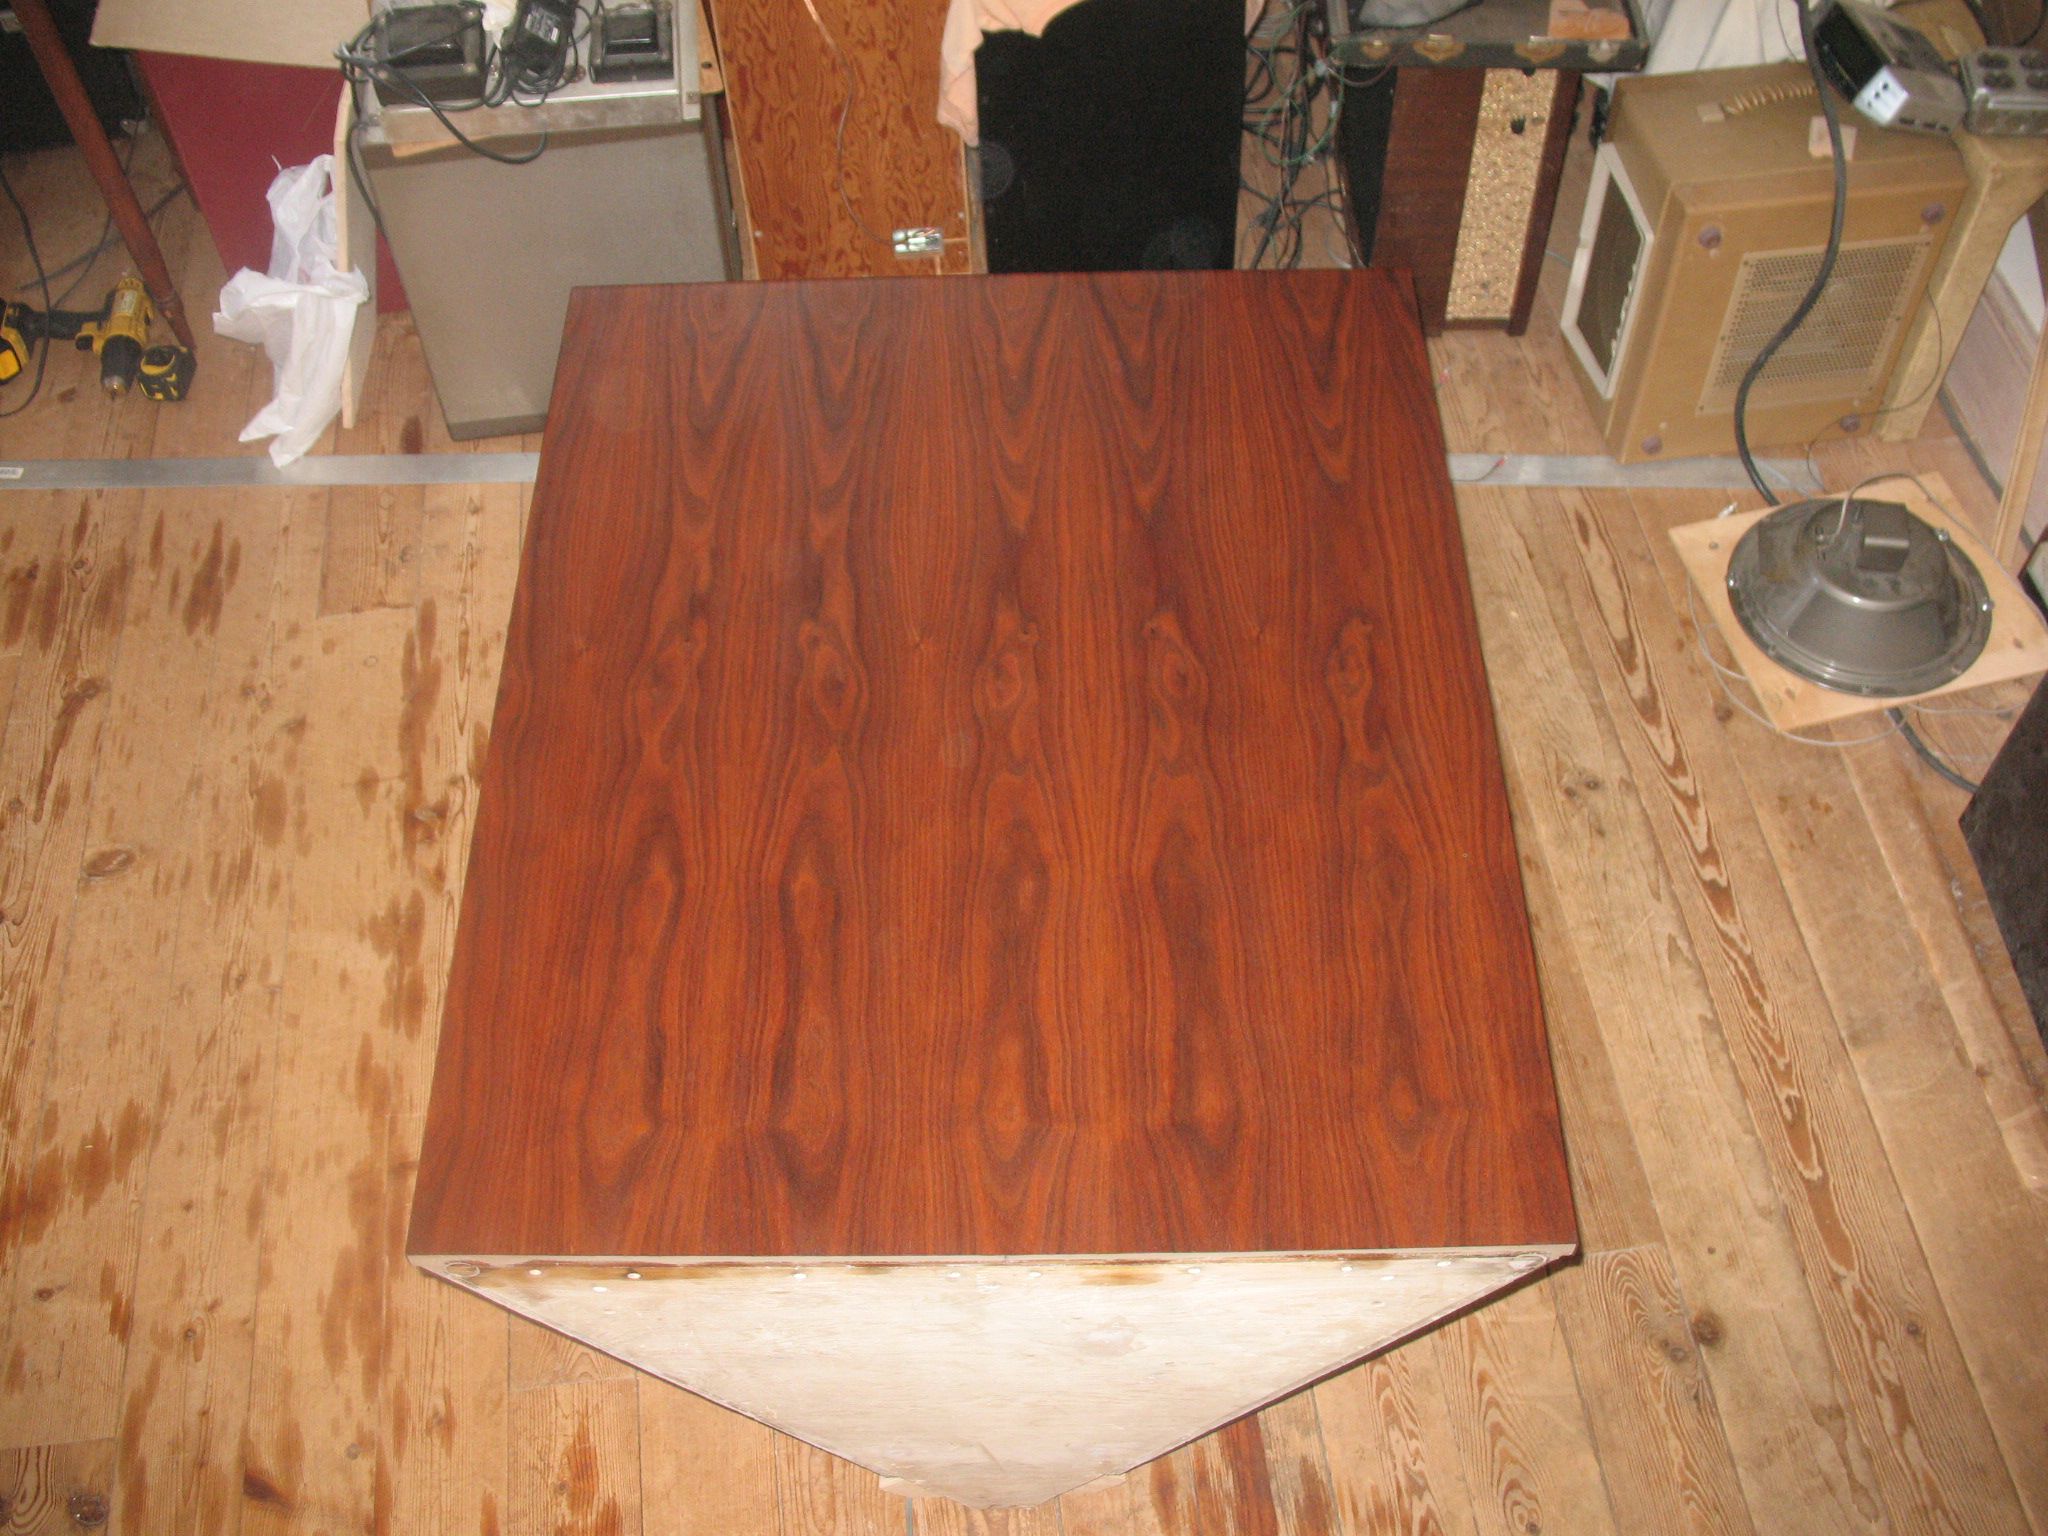
After I made the two dashboards from the 4x8 sheet of walnut veneer I had 34.5 inches by 8 feet and enough for 1 more dashboard. This is self stick that I picked up at Boulter plywood. Anyway, I cut that 34.5 down to about 33 to center the pattern as best as I could and to wrap the edge. So this is the first piece applied, After adhering it to the bin I clamped a straight edge just below the front 3/4 birch plywood front and used new blade in the razor knife and lightly dragged it along the veneer, I stopped after 3 or 4 very light passes and snapped this picture, you can see bottom is already free. After laying flat for about 4 hours. the piece is sized 31.5 by 39, it gave me an 1/8 on each side and 1/4 top and bottom to play with. I peeled back the paper on the corner on the far right of the picture (I had a small razor oops about 3/16 up and I wanted to make sure it would be cut off. The opposite corner I taped in place where I wanted it with an eighth inch overhang the whole way down the side and then stuck the first corner. I could hardly believe it but after that it all went well and I pulled back the paper as a chased it with a 3x3 flat block of mahogany 3/4.
-
Klipschorn top gets painted - covid project
garyeanderson replied to garyeanderson's topic in Technical/Restorations
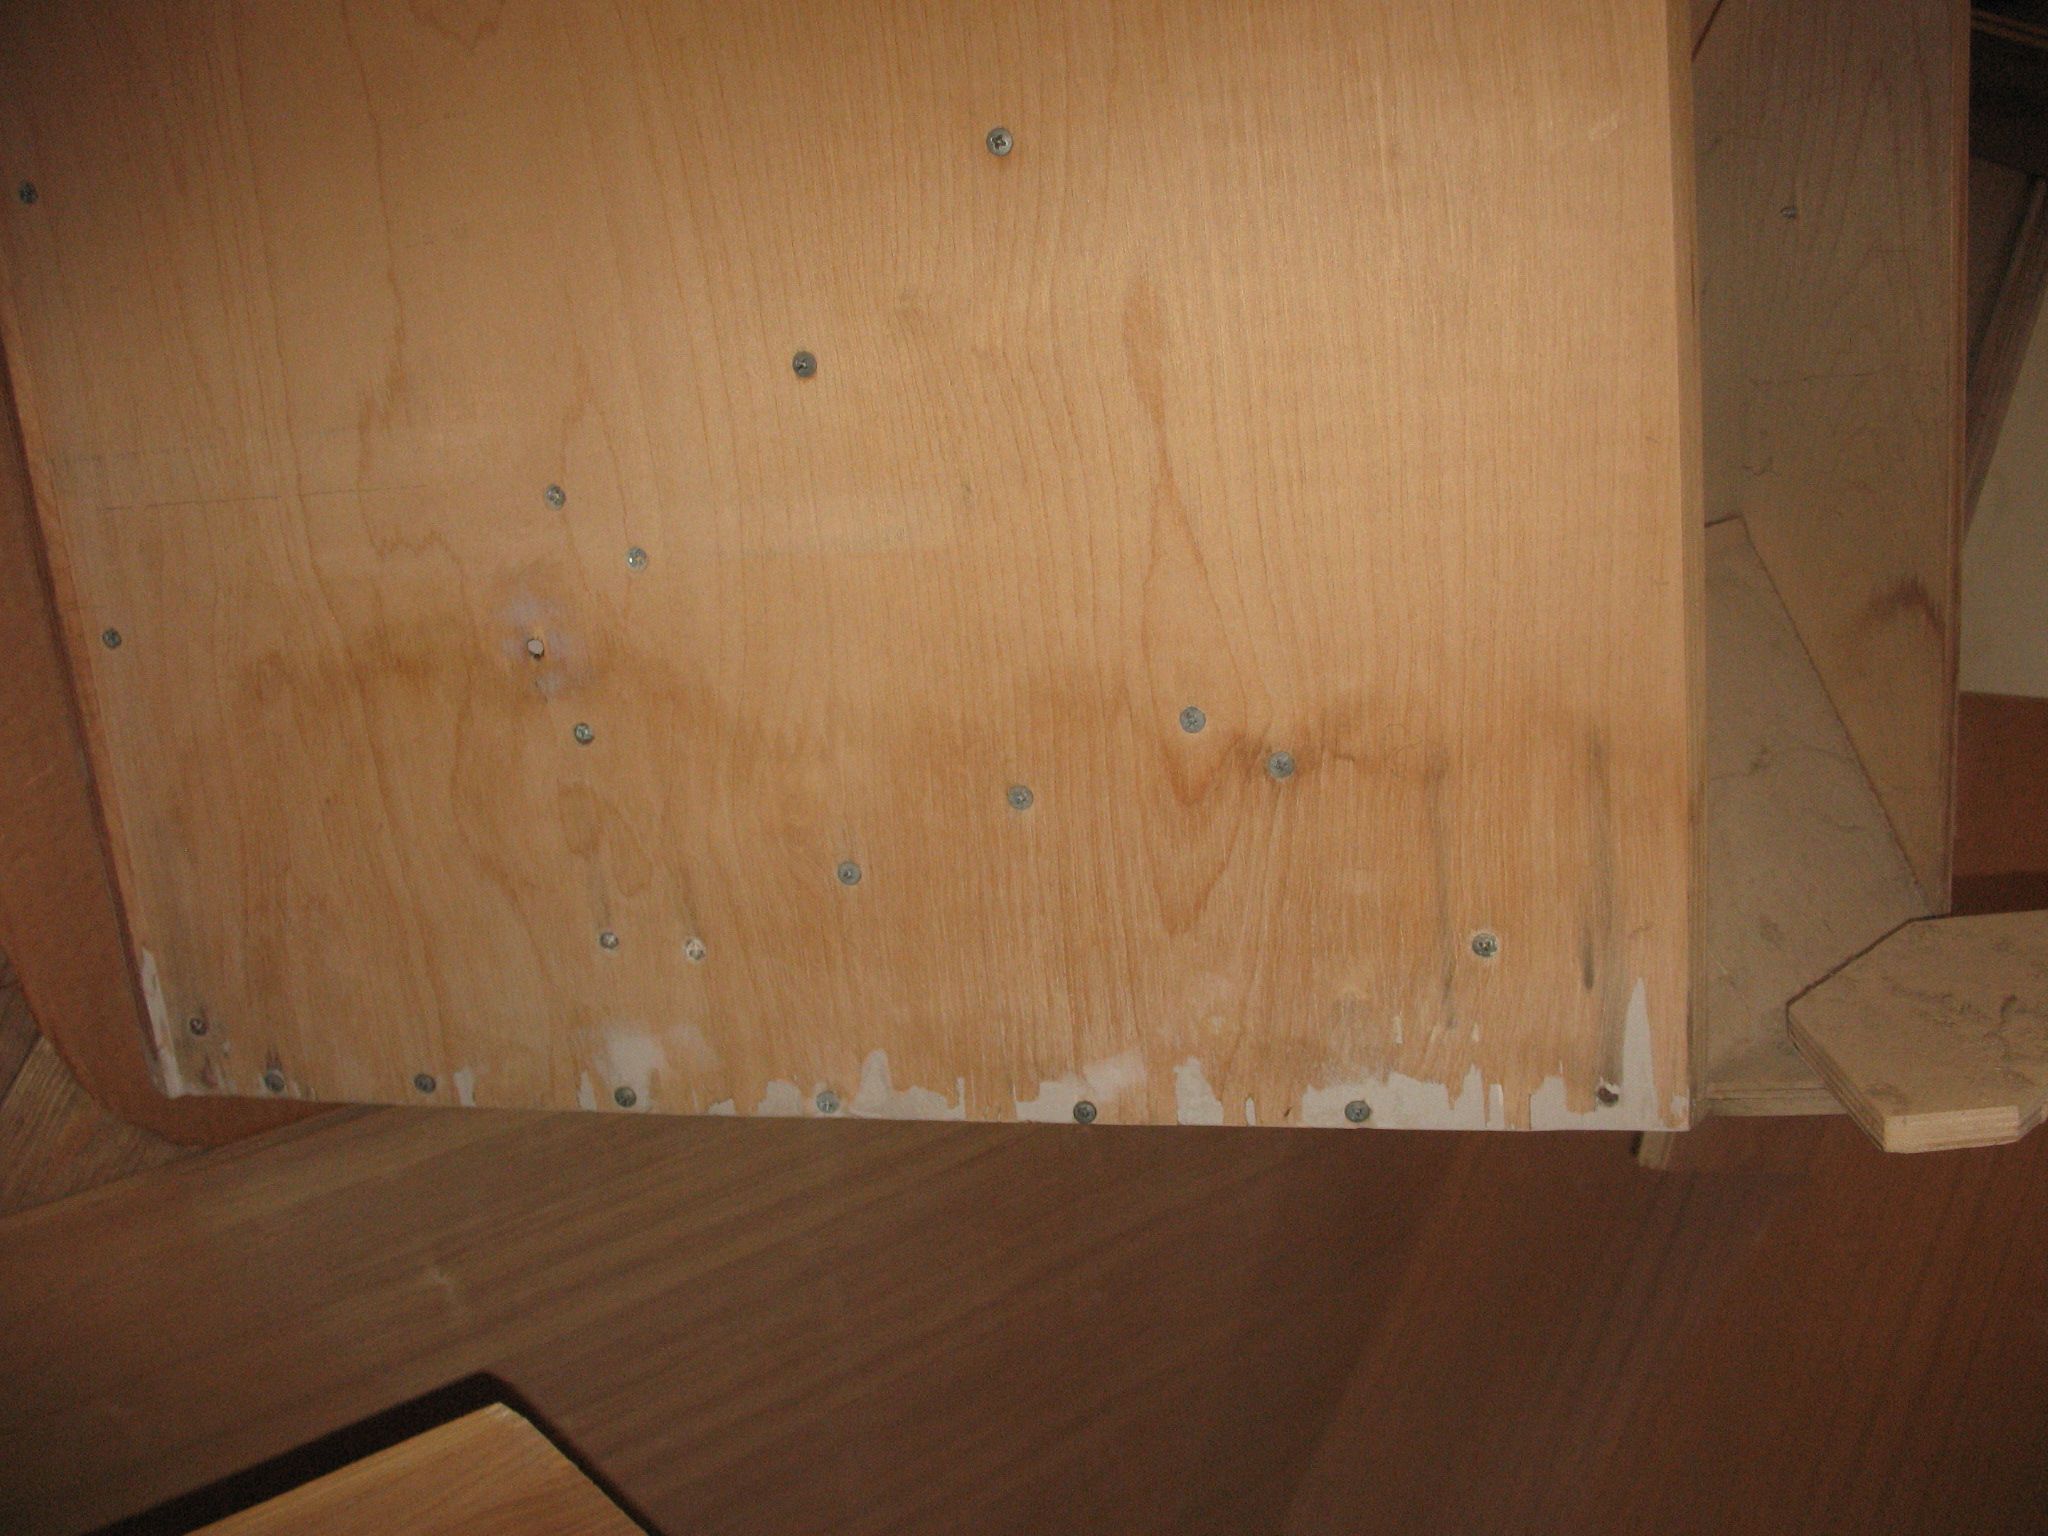
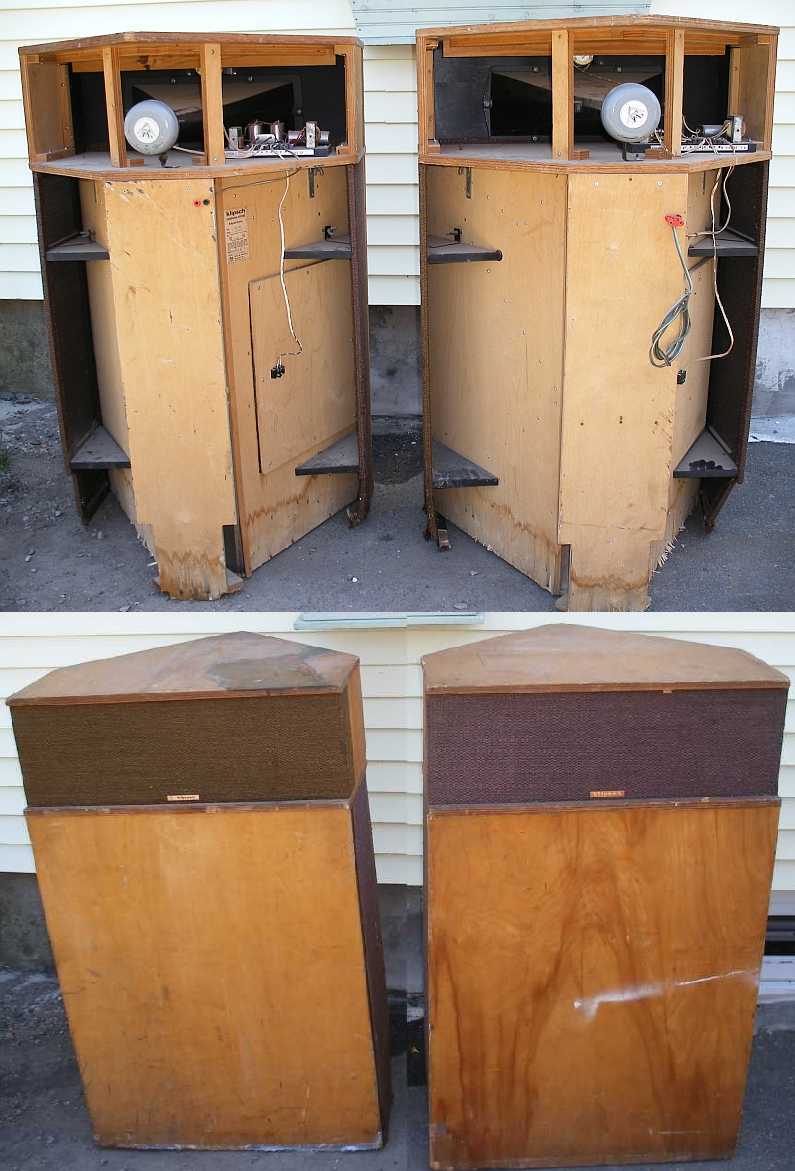
The other side doesn't look bad if you don't look to close, 50 footer I guess. the bottom didn't do badly except the bottom front and I think that that was from dragging the bin around, the tail board is worse.
-
Klipschorn top gets painted - covid project
garyeanderson replied to garyeanderson's topic in Technical/Restorations
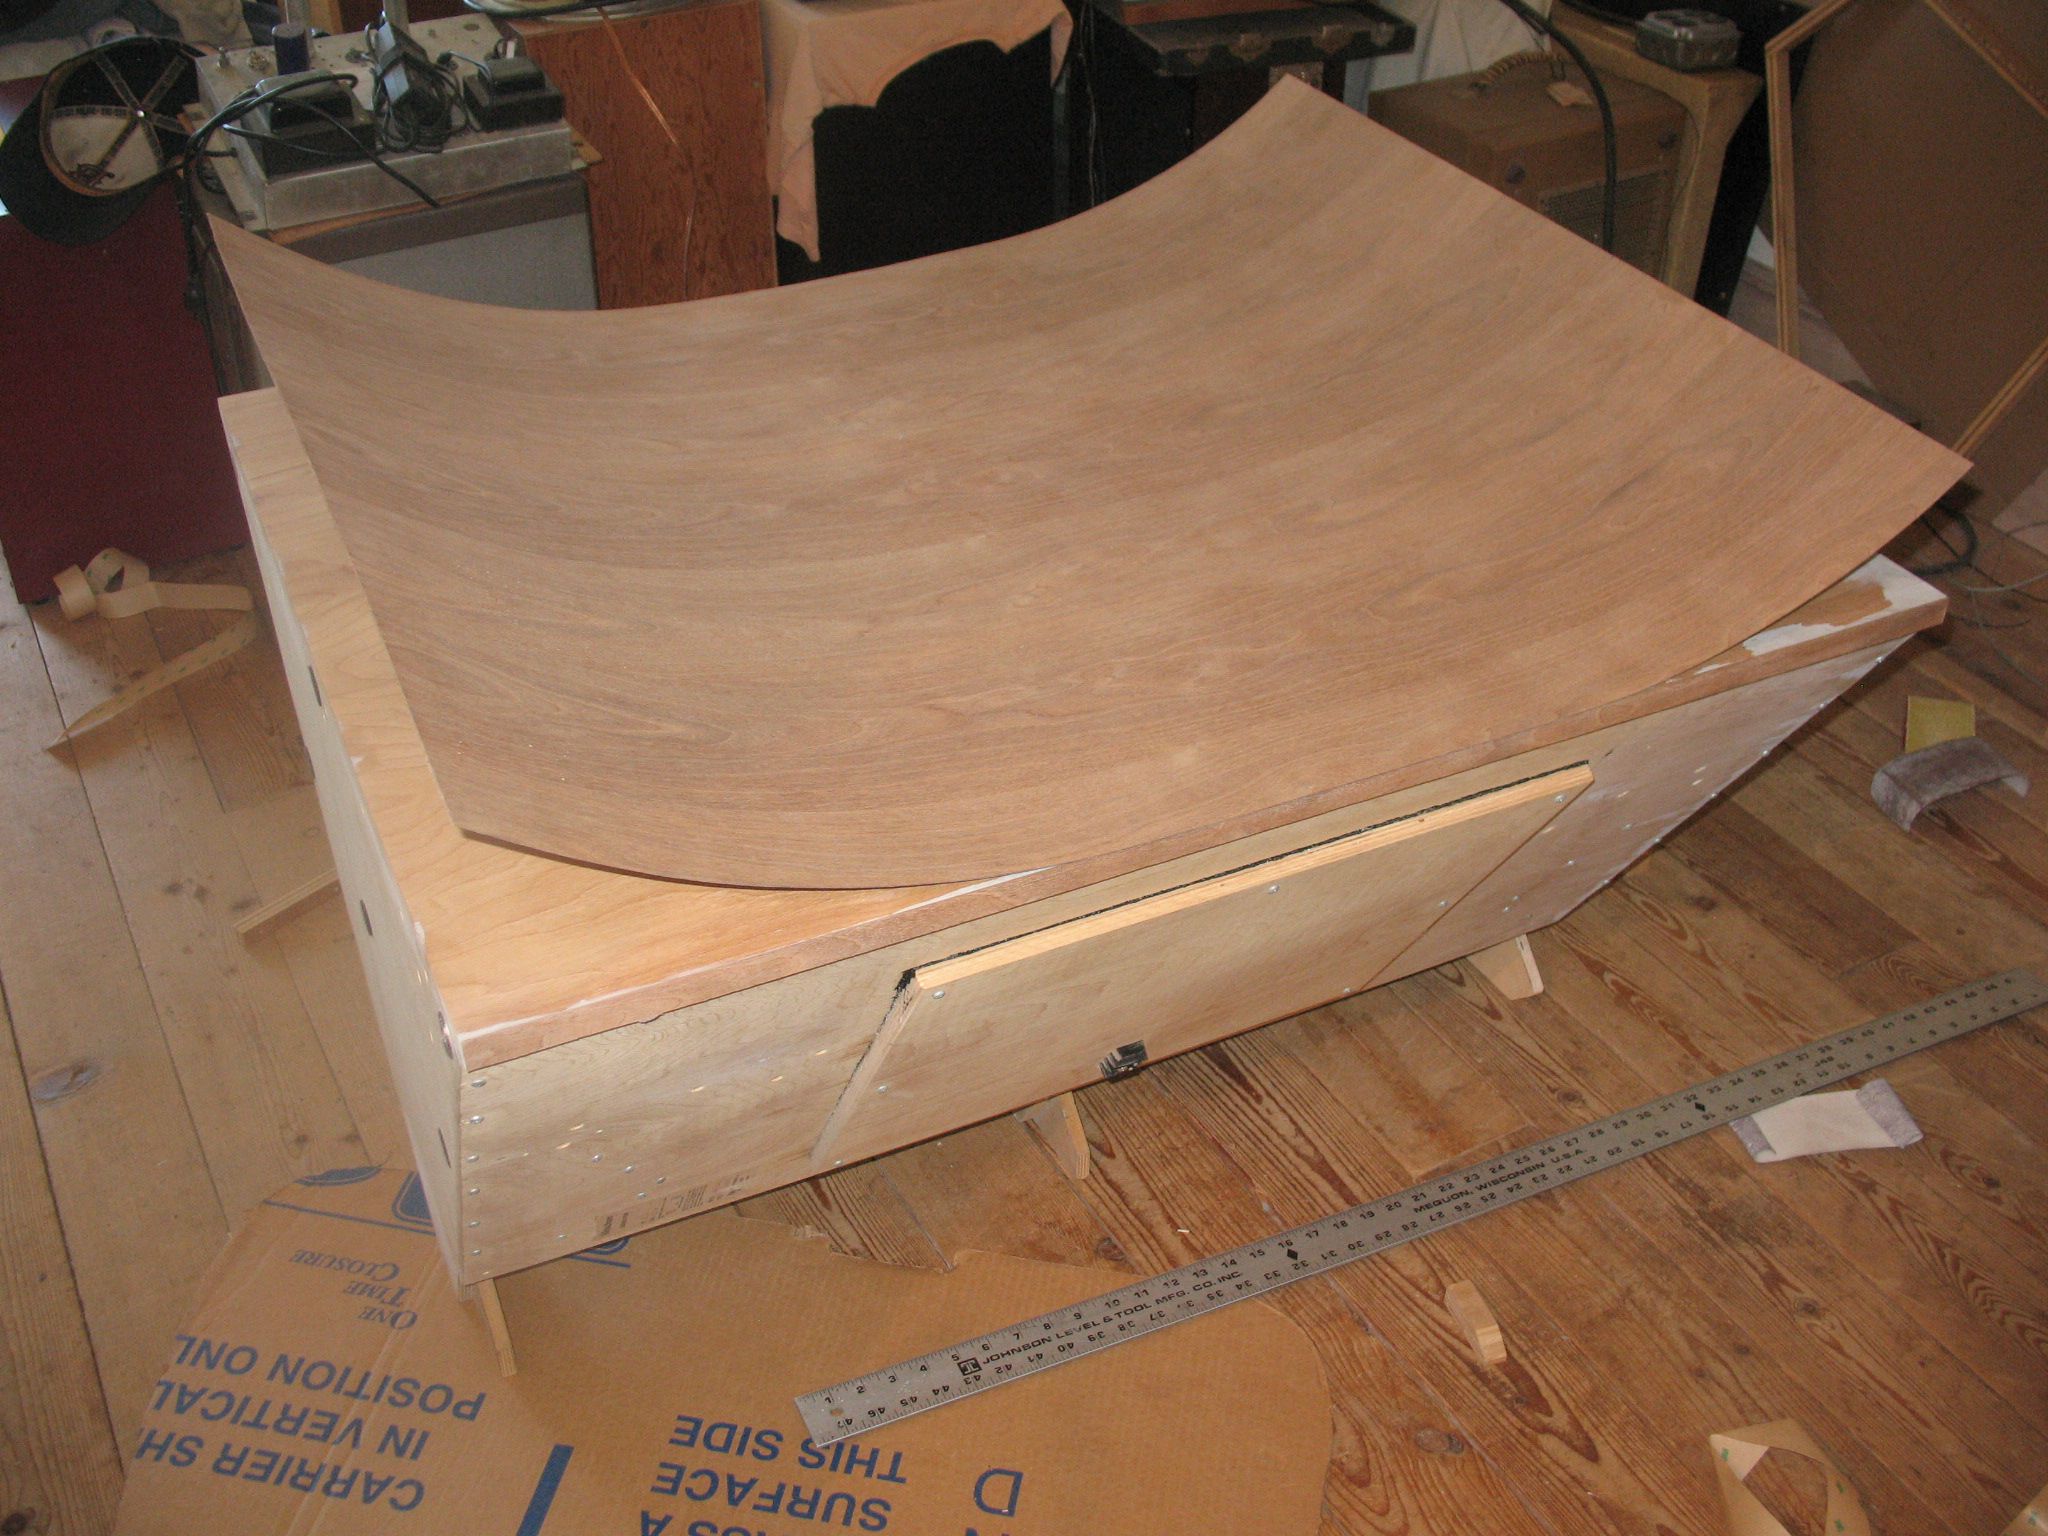
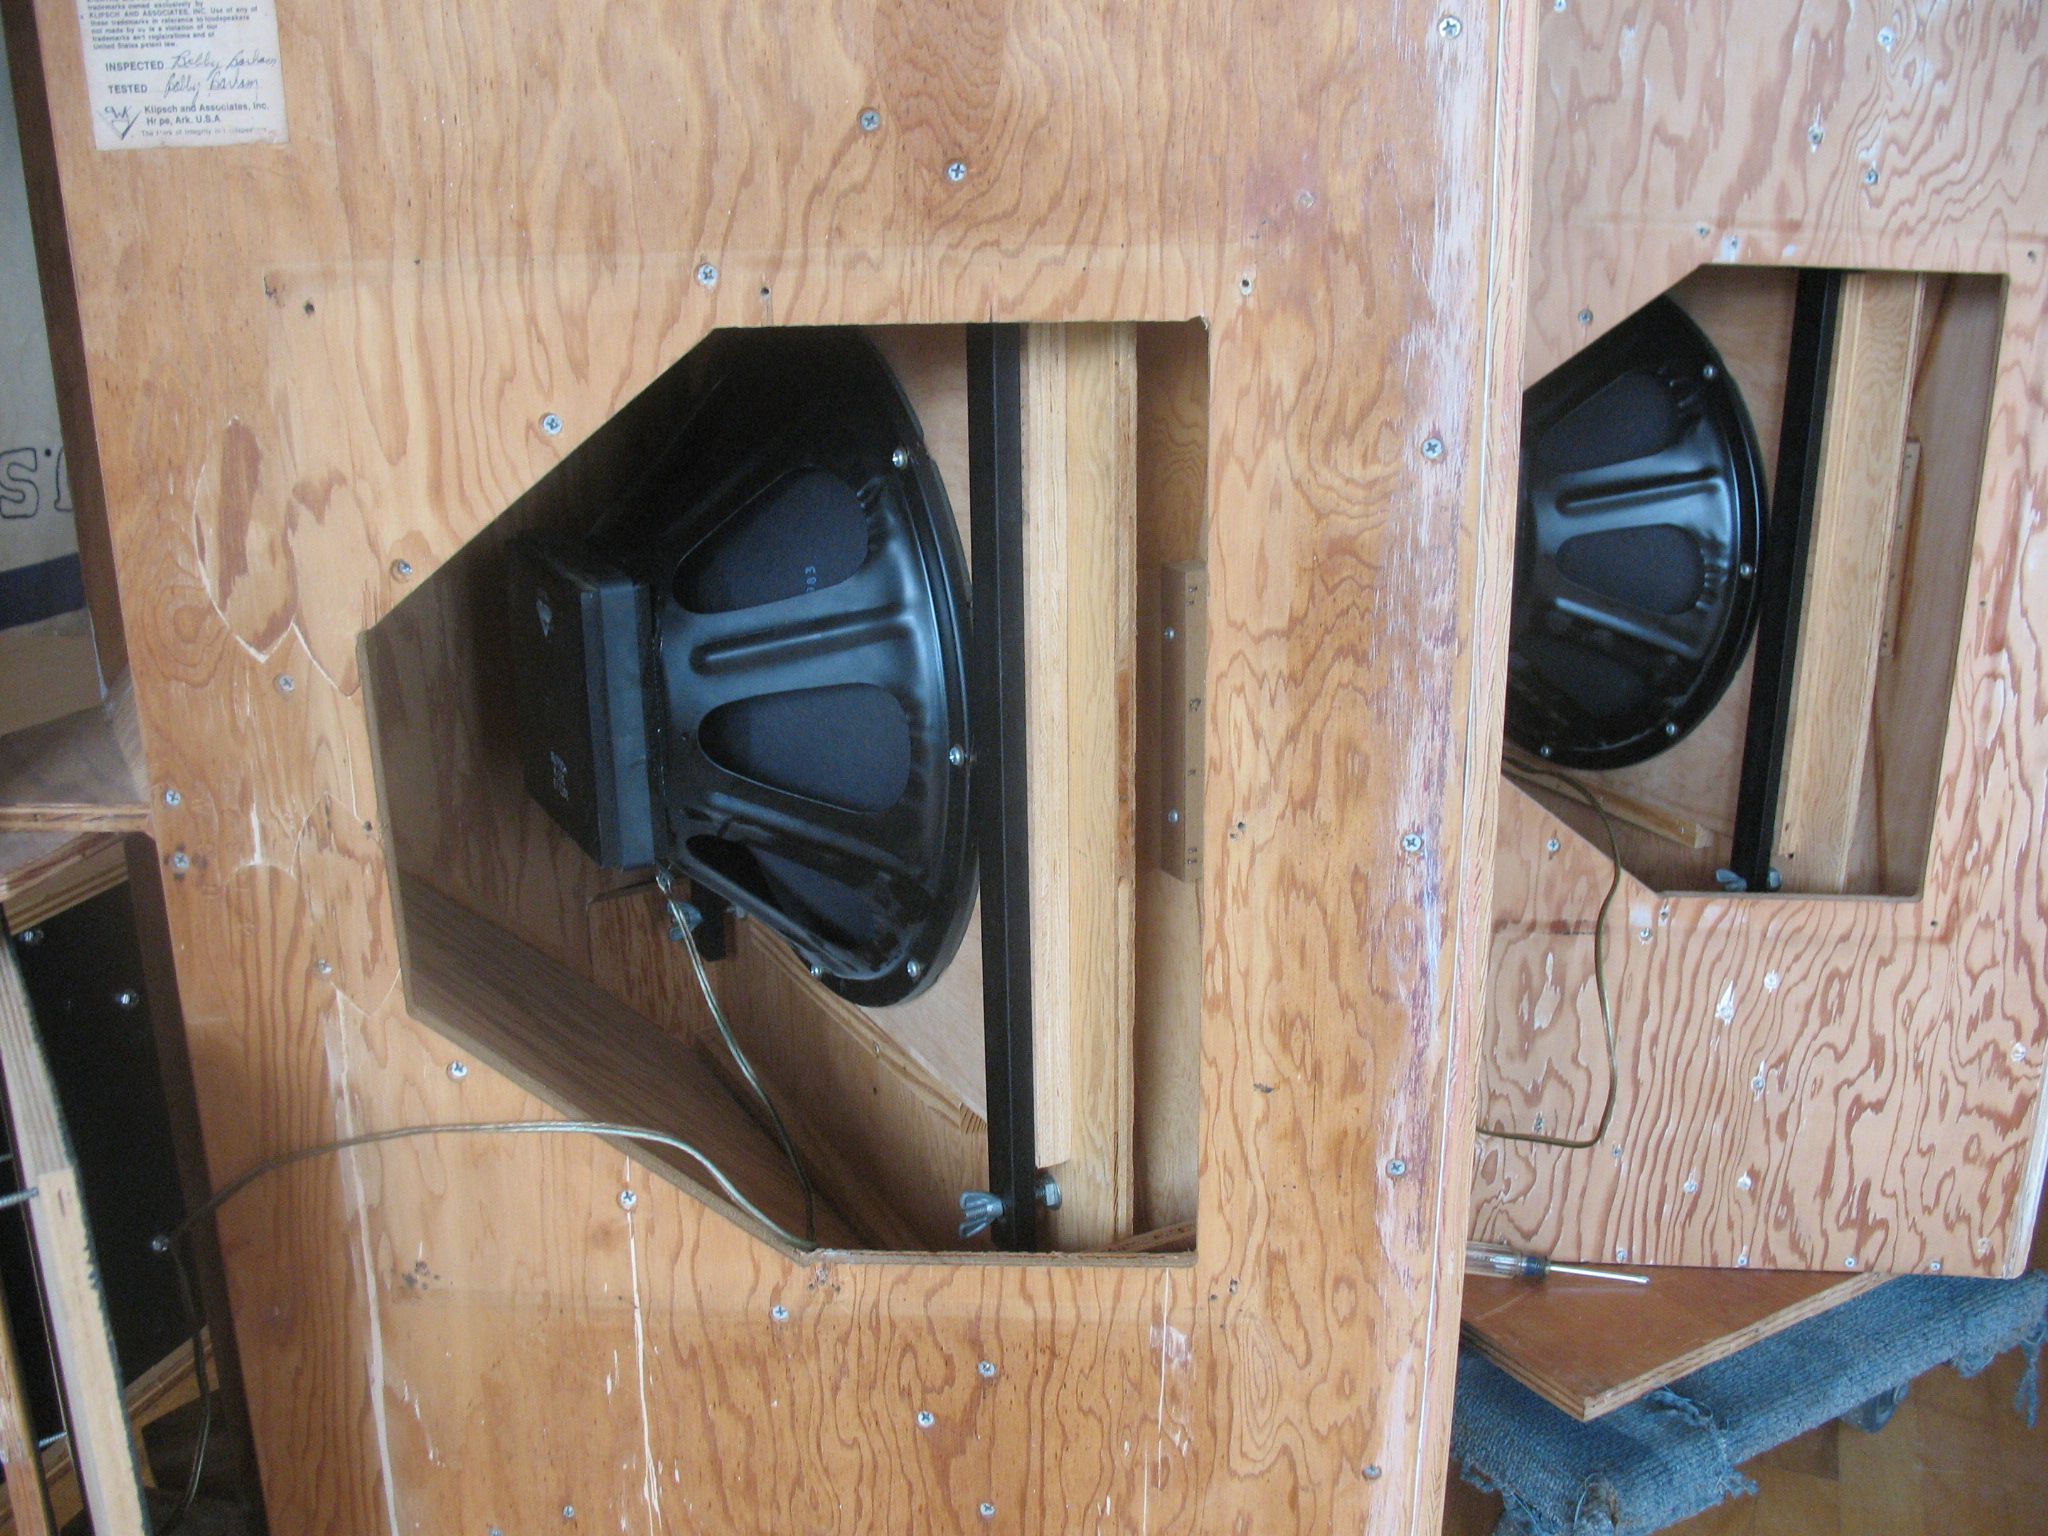
As bad as these pictures make it look, the bins are solid. If you look at the picture, the water never even went over the dam. There are check marks on the ramp but that is all. Like the 18 gauge thermostat wire looks like I left some dust bunnies If I remember this was the worst side.
-
Klipschorn top gets painted - covid project
garyeanderson replied to garyeanderson's topic in Technical/Restorations
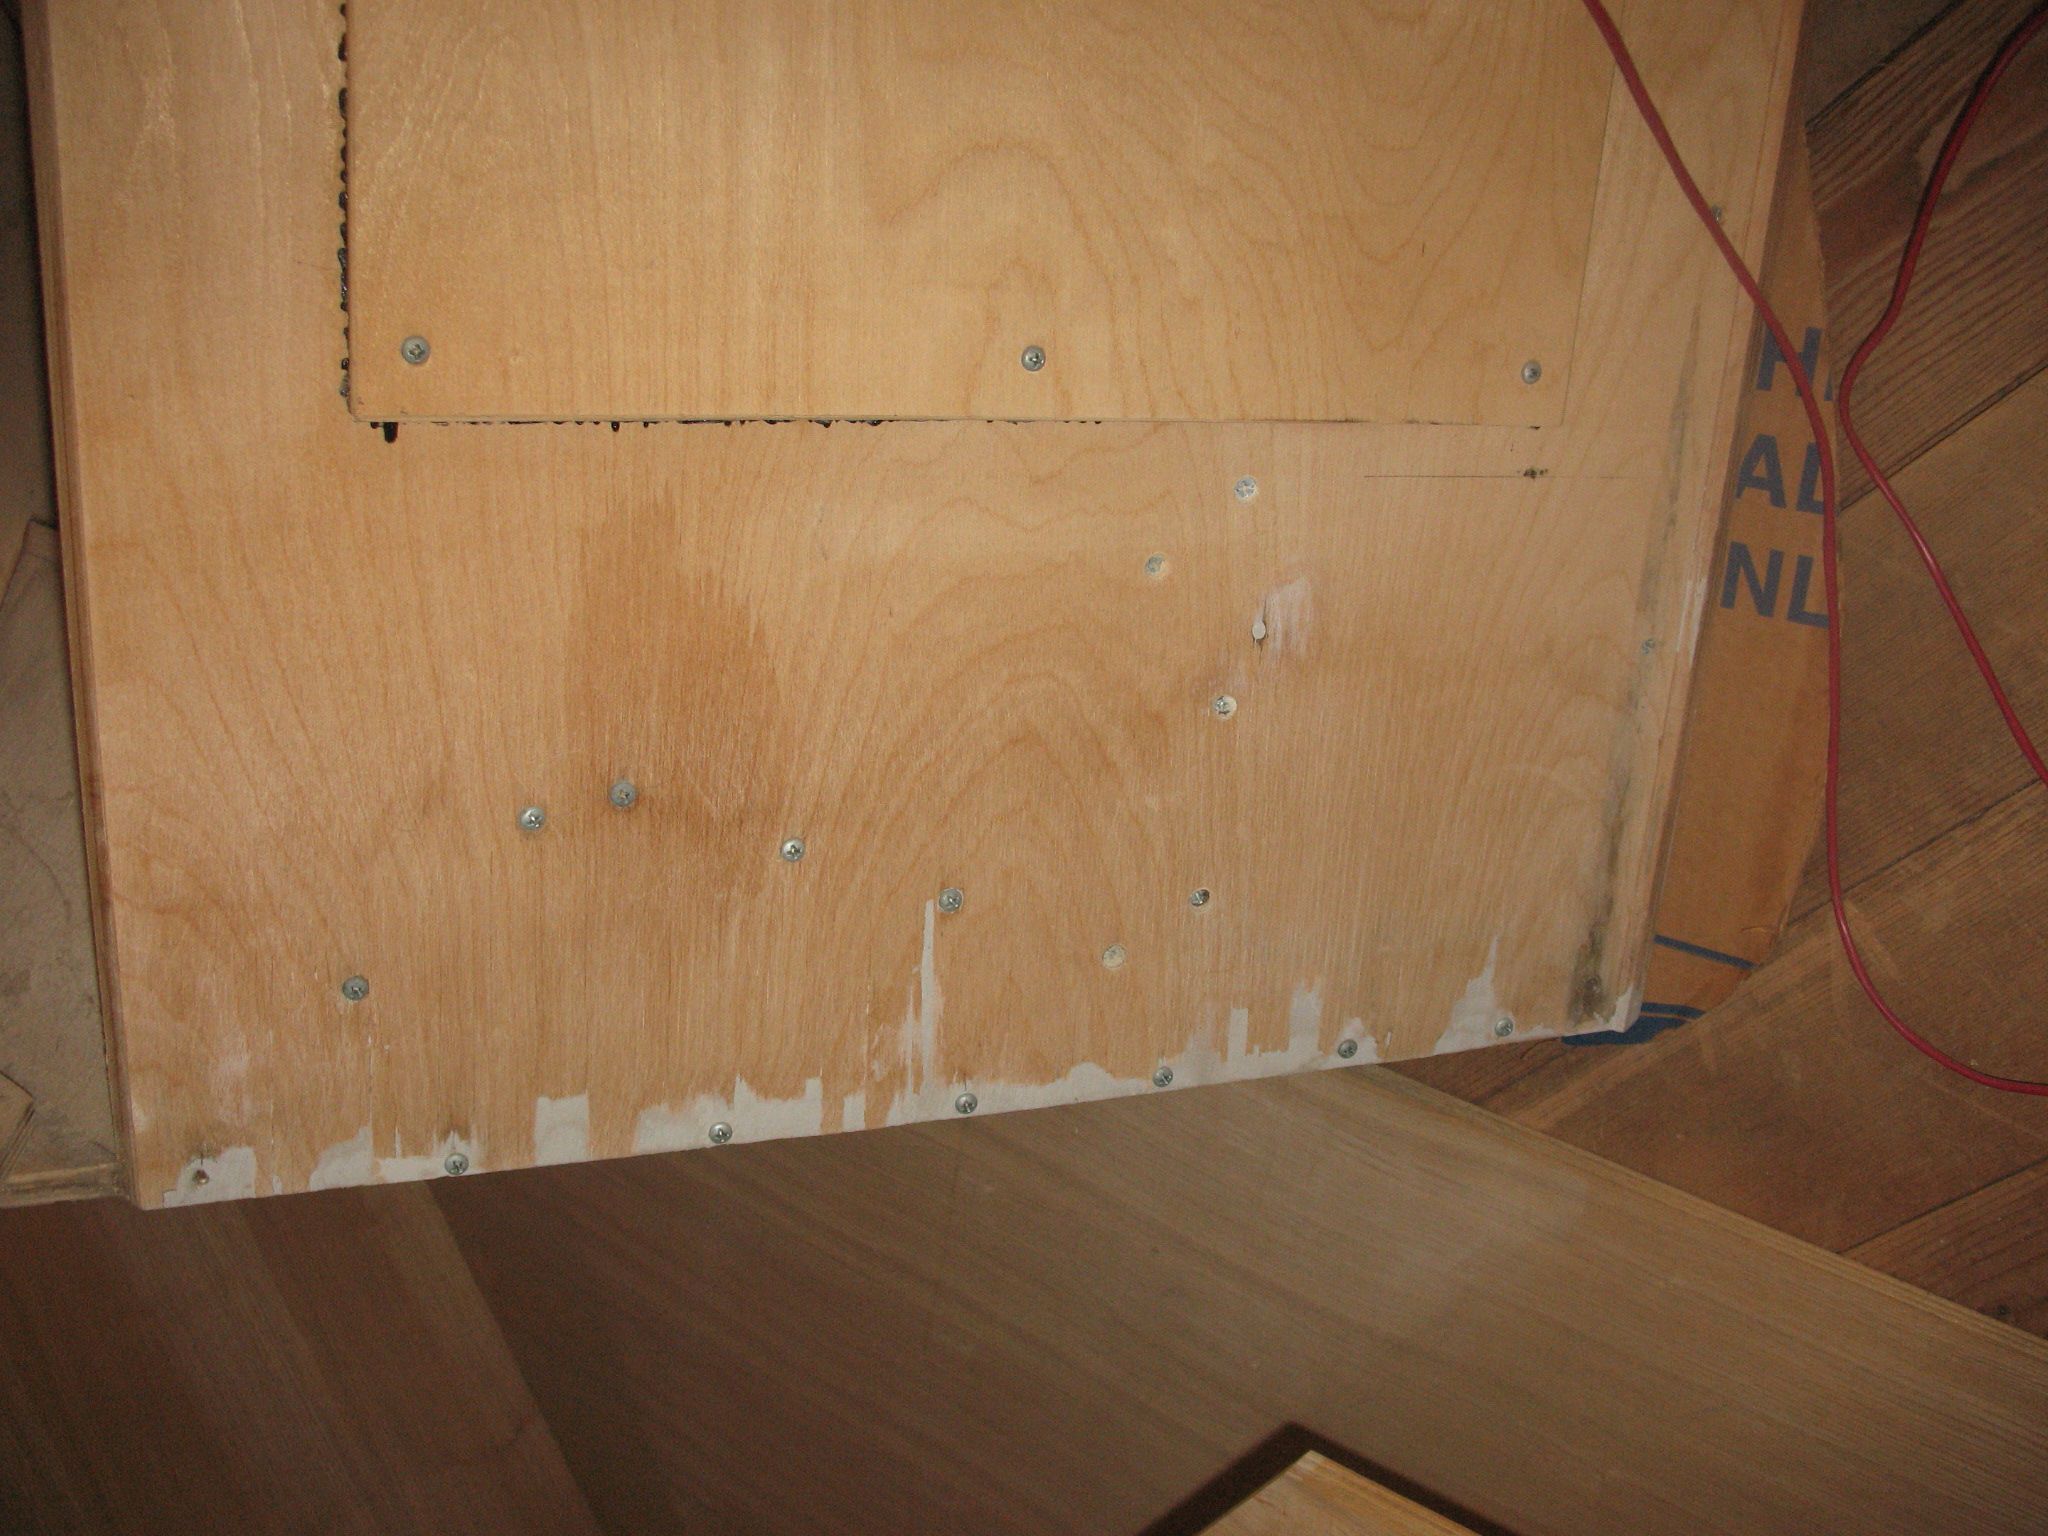
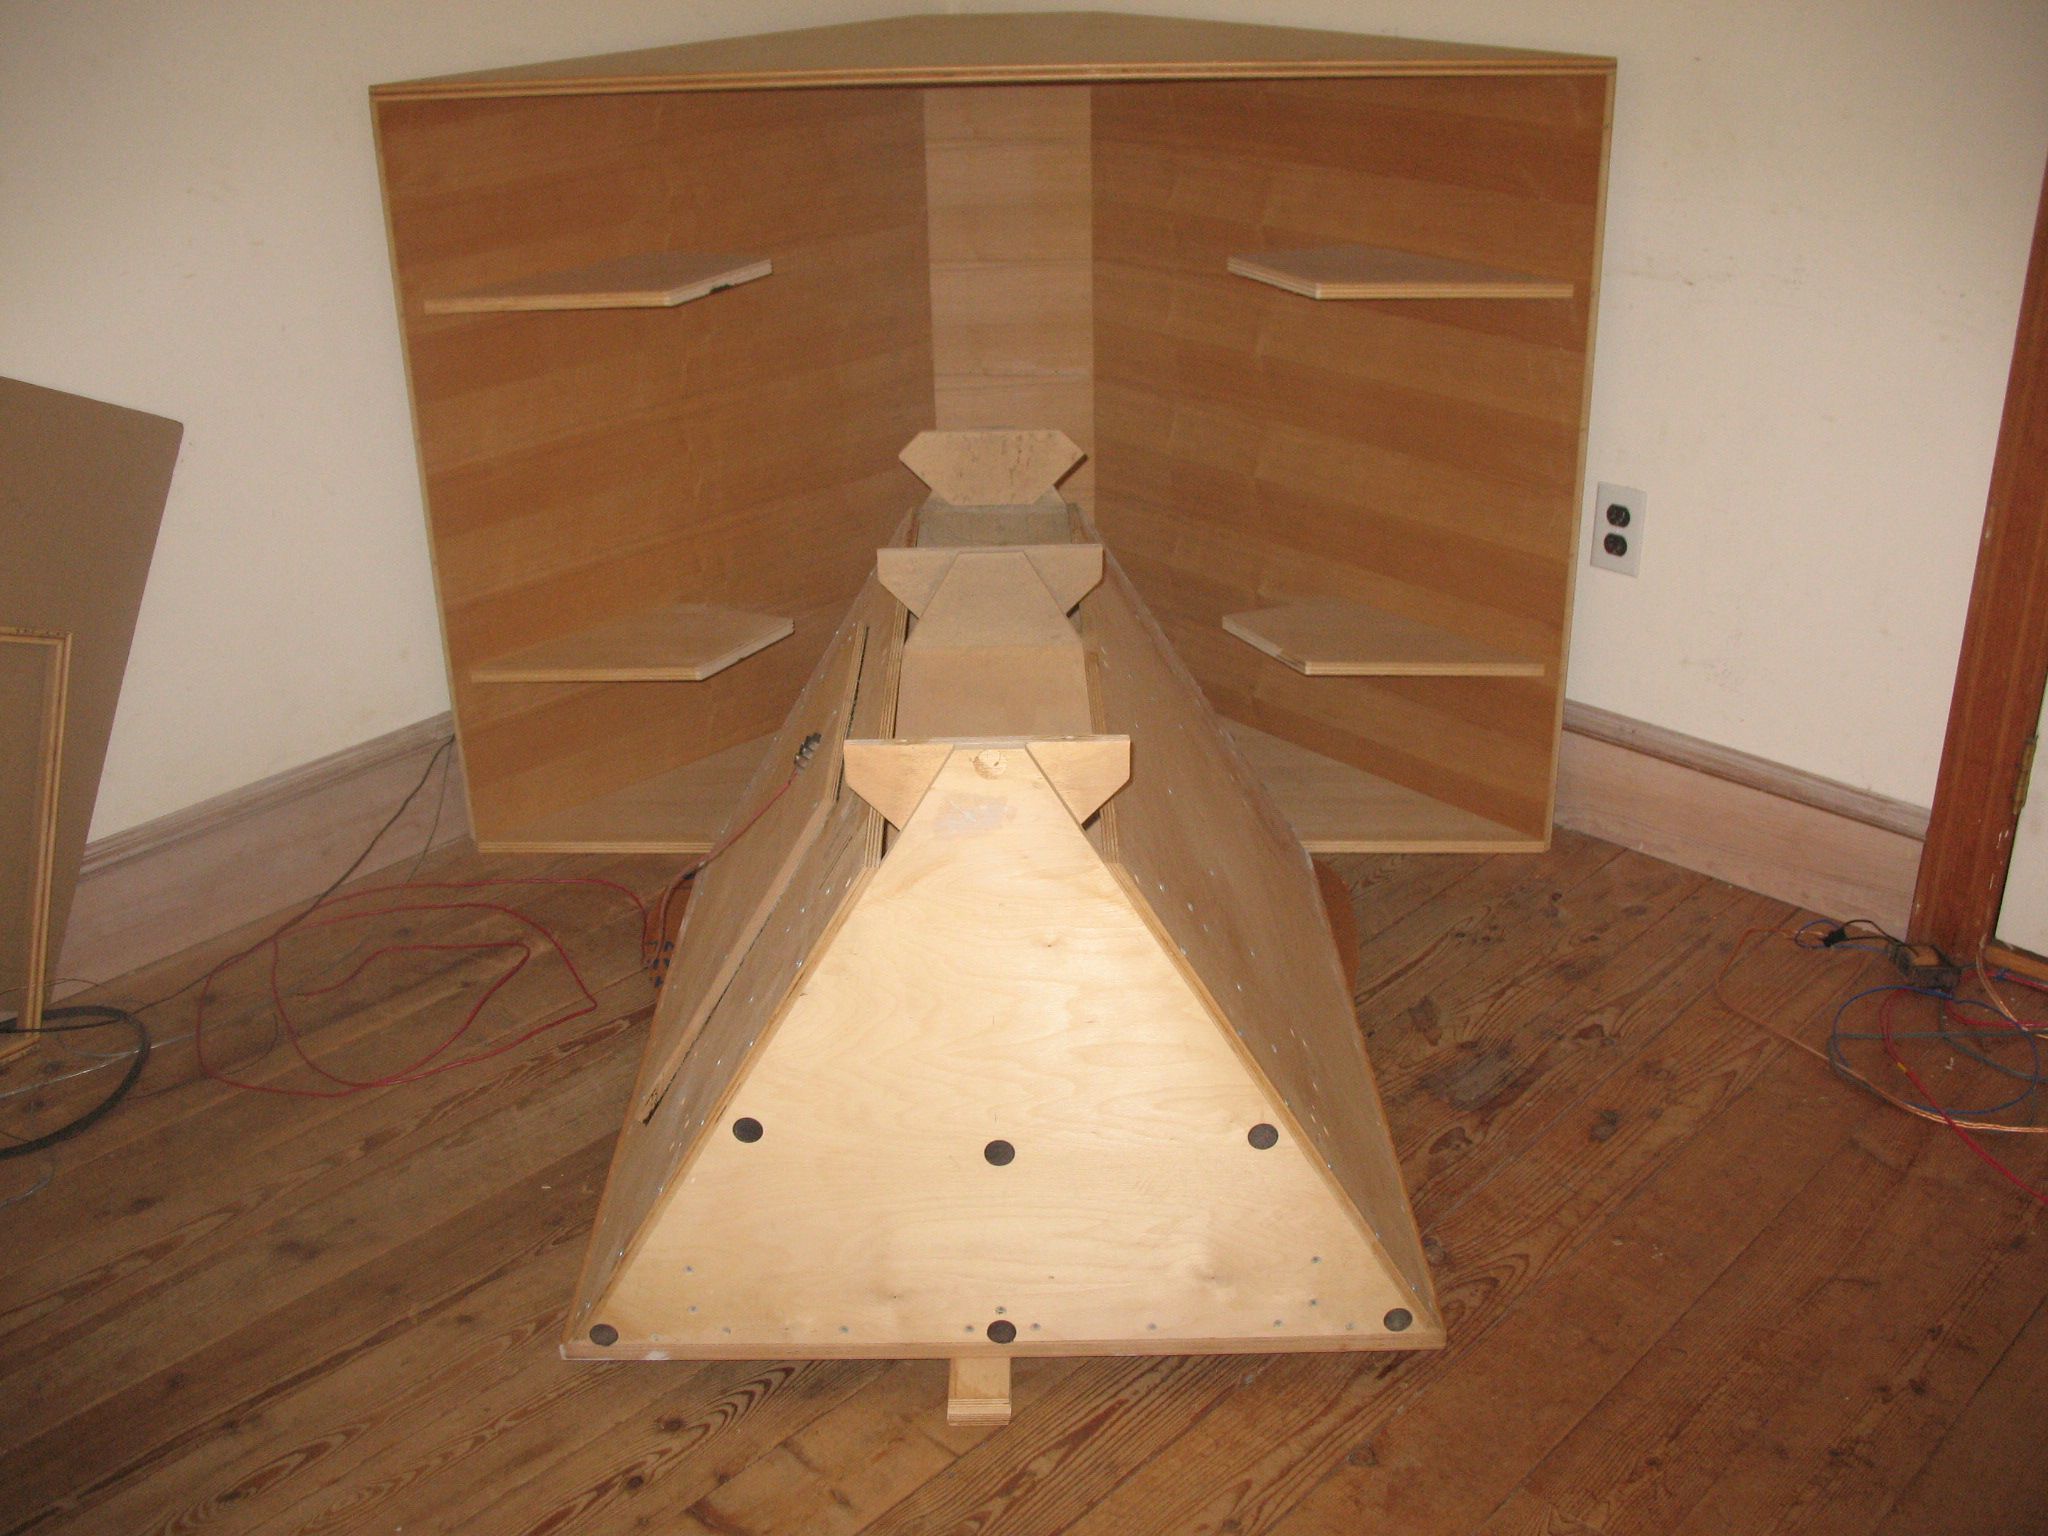
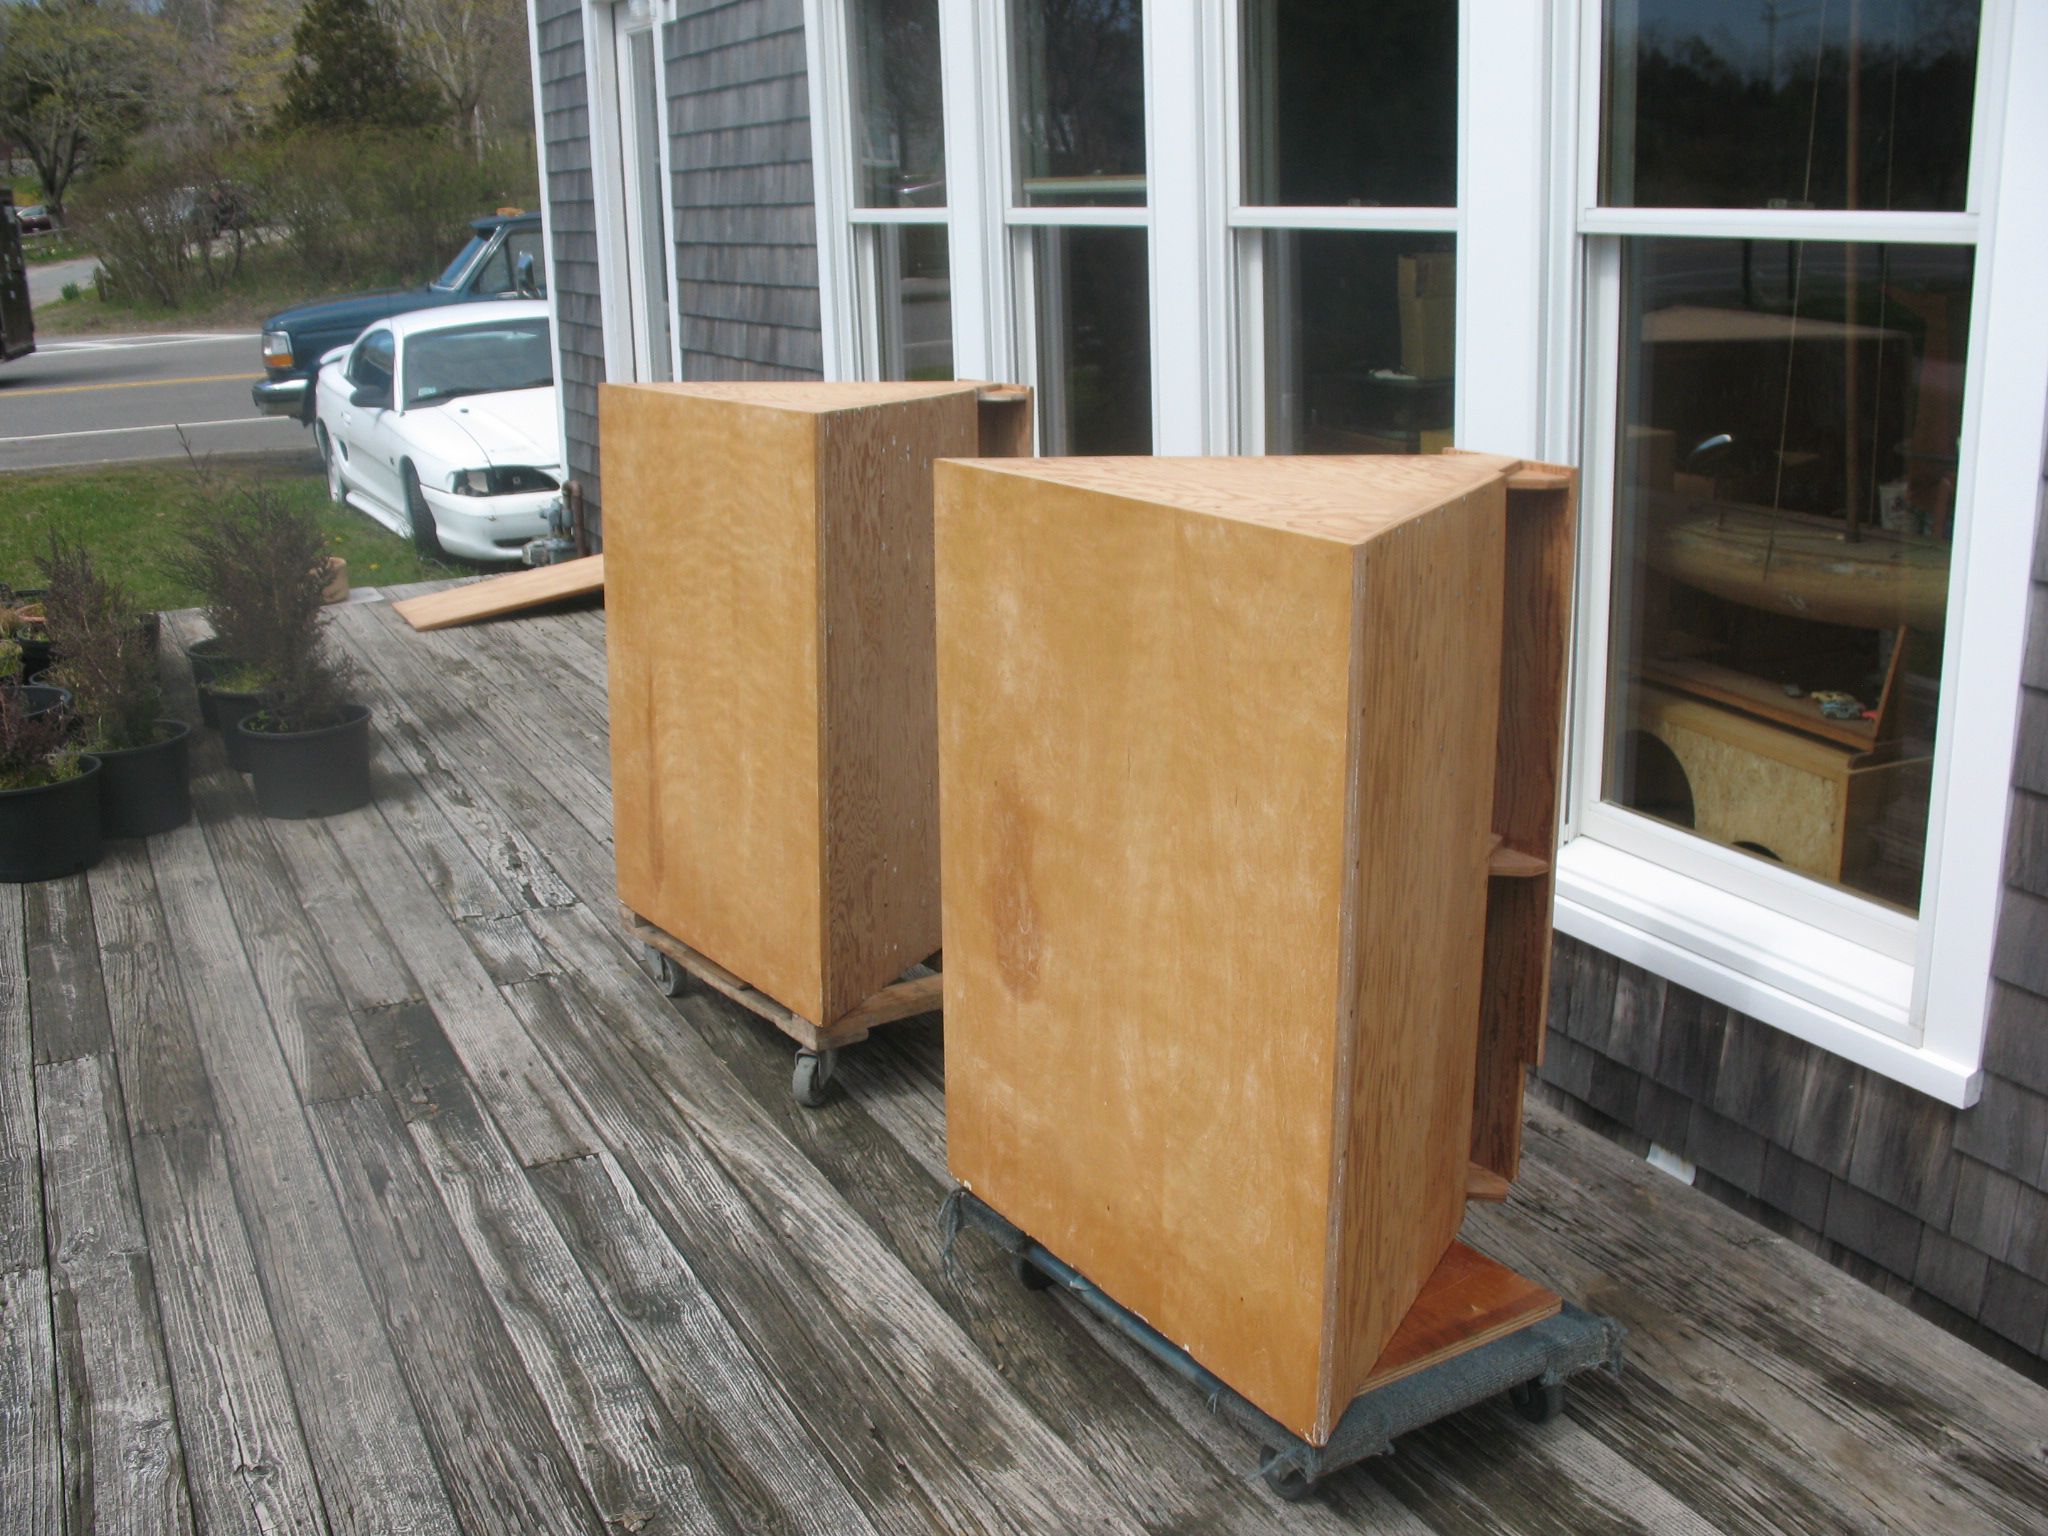
The day went well yesterday, and had the walnut veneer unrolled and flattened for a couple hours before I started. As usual I had to clear some space. The khorn bin has lived in this spot for 10 years so it collected its share of junk on top' 4 screws in the bottom and 6 in the back. I never got around to a more permanent as " I was going to get back to it..." I have the ash trim for the false corner so that may happen too.
-
Klipschorn top gets painted - covid project
garyeanderson replied to garyeanderson's topic in Technical/Restorations
Hi Tom Sorry to confuse, that first photo is from ebay and came from a topic from 2010 called The bottoms were re-glued and have been used as a second system since 2010, but the tops were not fixed at that time. In 2010 when I got these Khorns, I was buying them as parts but after a close look at the damaged Baltic birch I decided to save them. For the most part all but one or two areas were only face ply of the plywood was separated. The two area that were worse were the face ply and one other lose ply in between were delaminated. Depending on how today goes, the fronts of these Klipschorn bass bins may get a new layer of walnut veneer (leftovers from another Elan dashboard project) , I'll probably use the boiled linseed oil as I still have a bit left
-
Klipschorn top gets painted - covid project
garyeanderson replied to garyeanderson's topic in Technical/Restorations
I think this is what I was thinking of when I started. Warren Haynes is playing "company man"
-
Klipschorn top gets painted - covid project
garyeanderson replied to garyeanderson's topic in Technical/Restorations
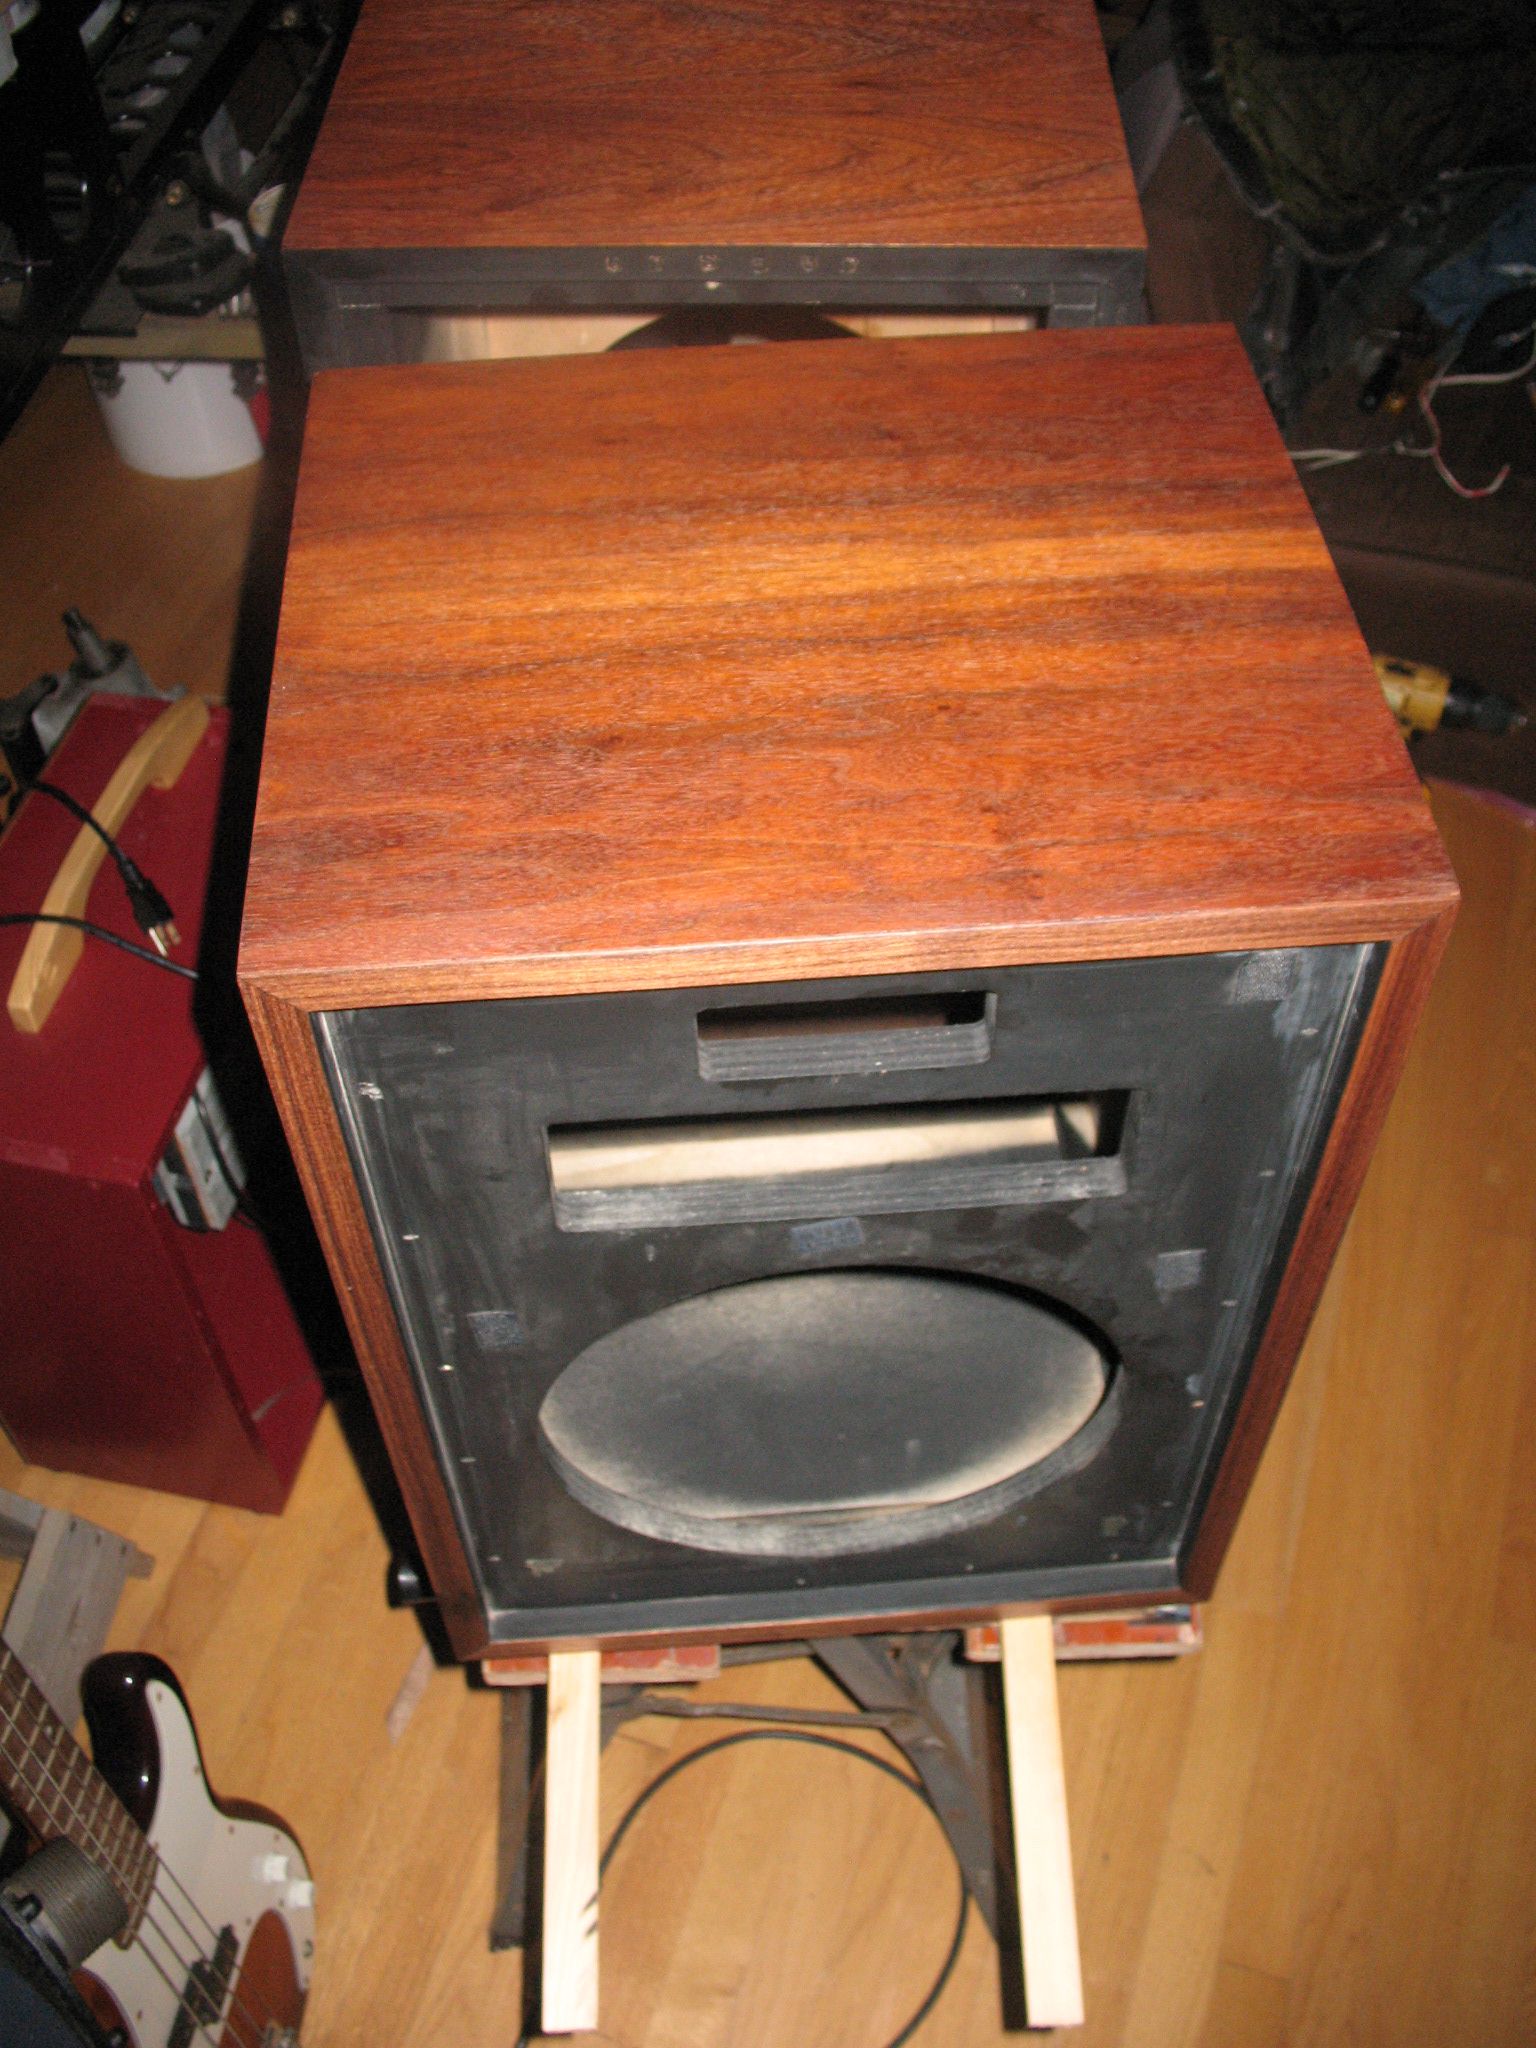
I had thought about the round over bit on the edge and decided it didn't solve the problem with the edge so that had to be fixed anyway. To route the edge is just one more step in the process that you can have one of those " that's not what I wanted to do" moments sometime followed by words that can't be printed here. I do like the idea of the veneer fronts instead of grill cloth. I got the other top disassembled and started on the edge gluing of the delaminated veneer yesterday afternoon, this on does not have the nice grill cloth but I hope the get by with it. '
-
Klipschorn top gets painted - covid project
garyeanderson replied to garyeanderson's topic in Technical/Restorations
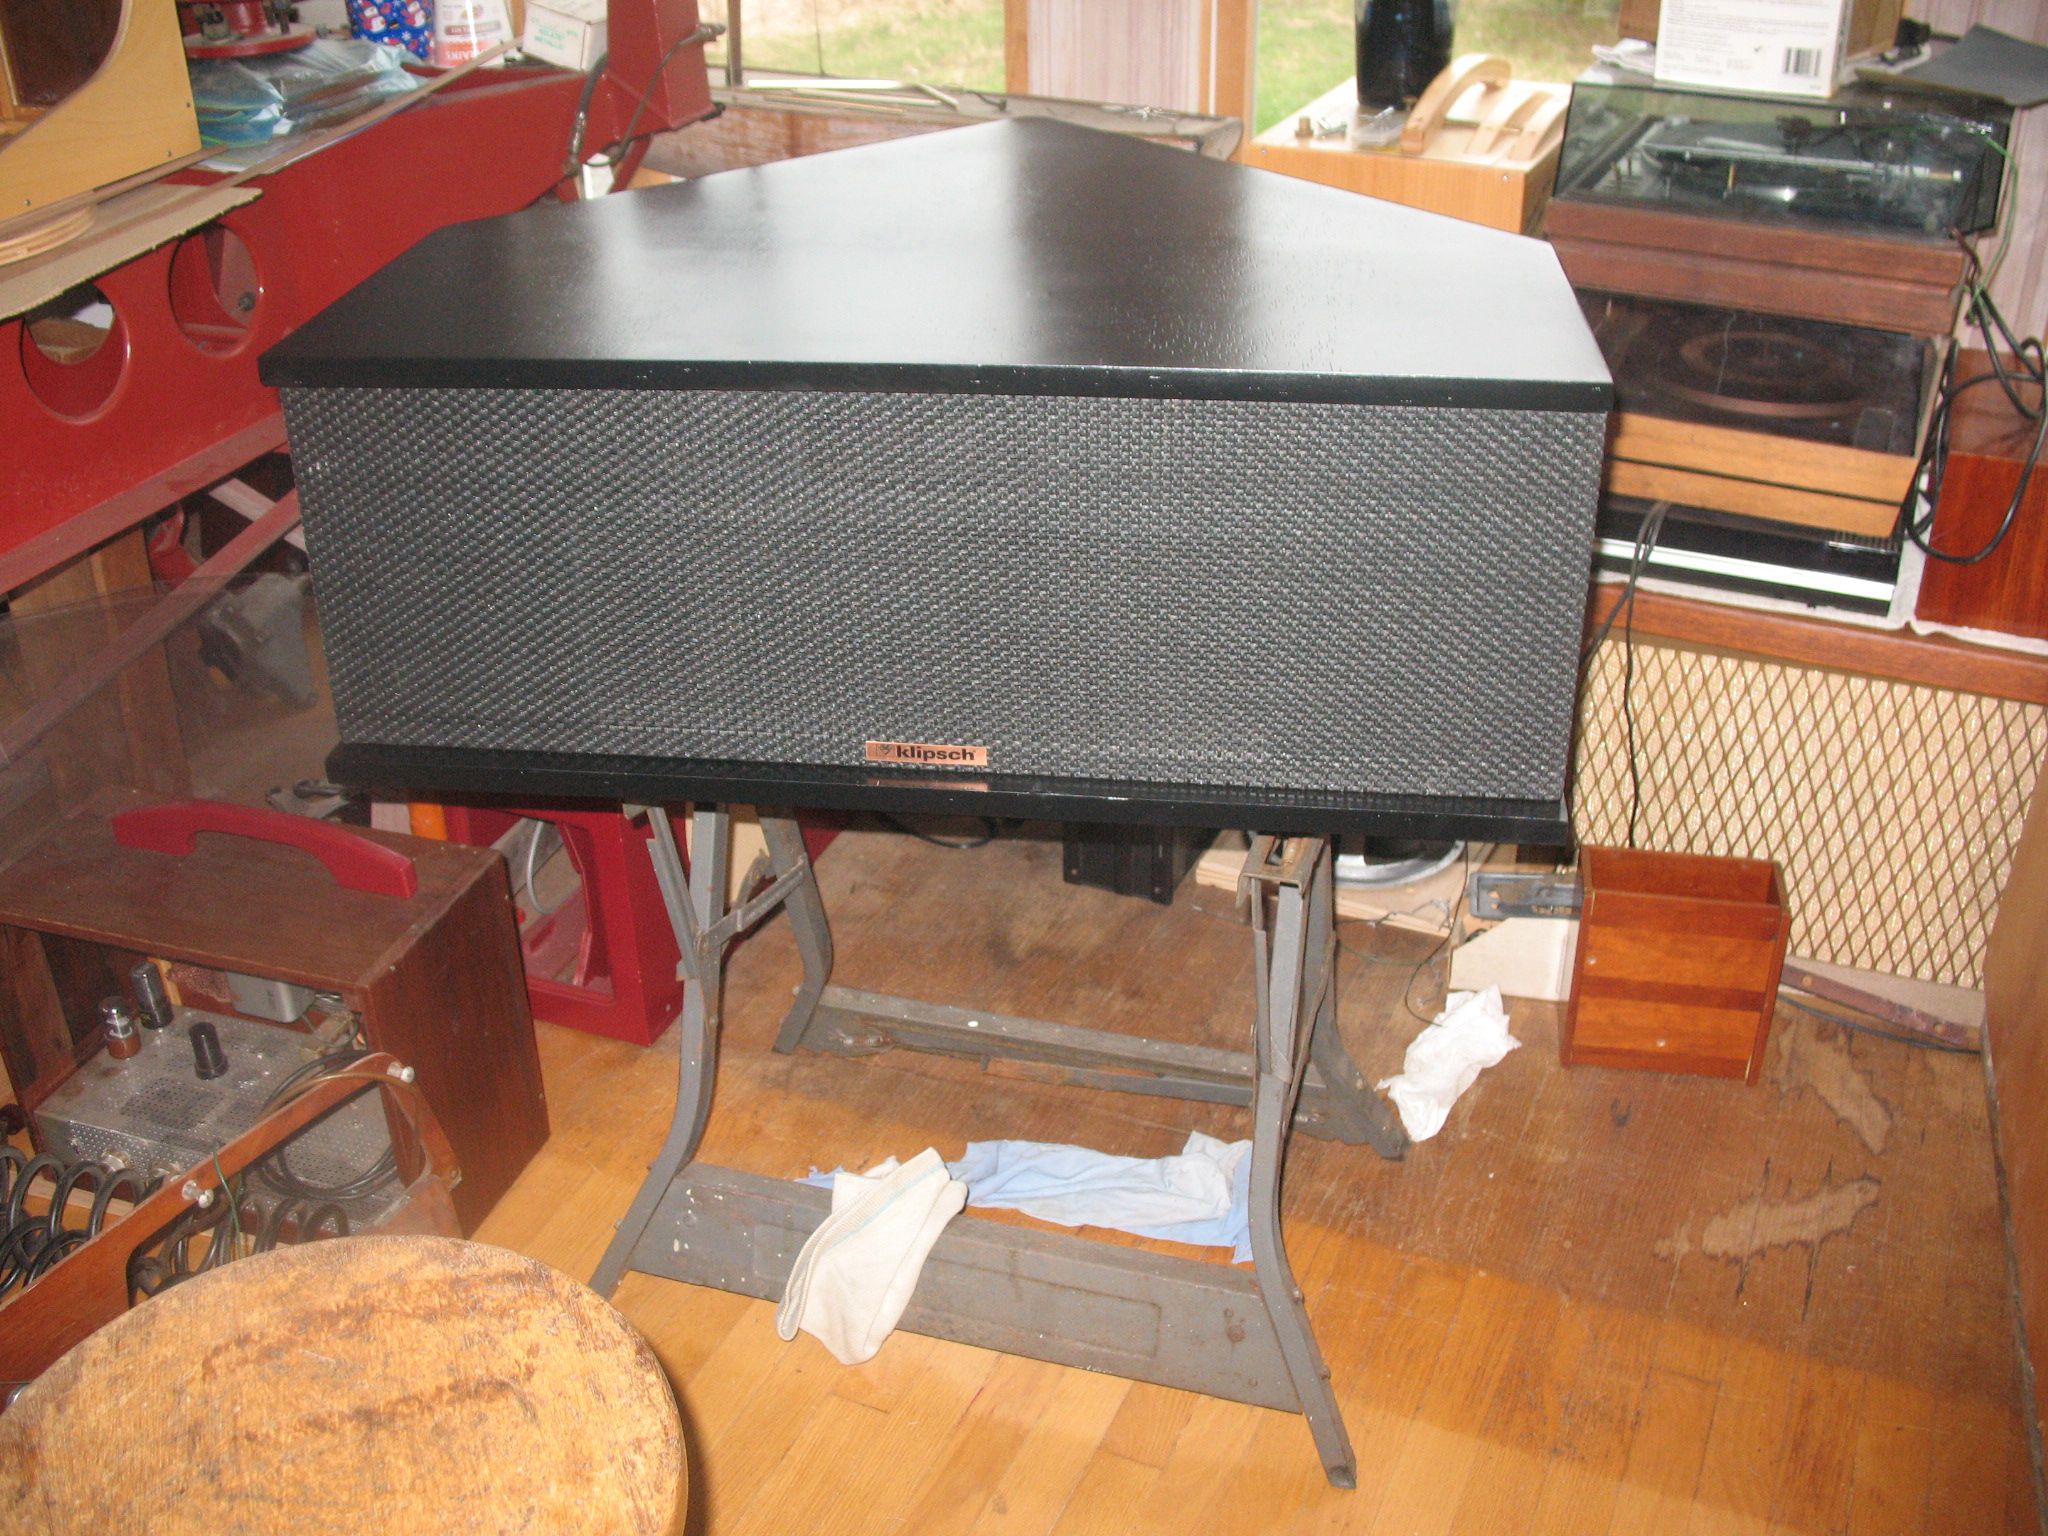
Still needs some work (and a K77) but it a site that I can look at and I guess do the other top that is currently sitting on top of the MWMs clone.
-
Klipschorn top gets painted - covid project
garyeanderson replied to garyeanderson's topic in Technical/Restorations
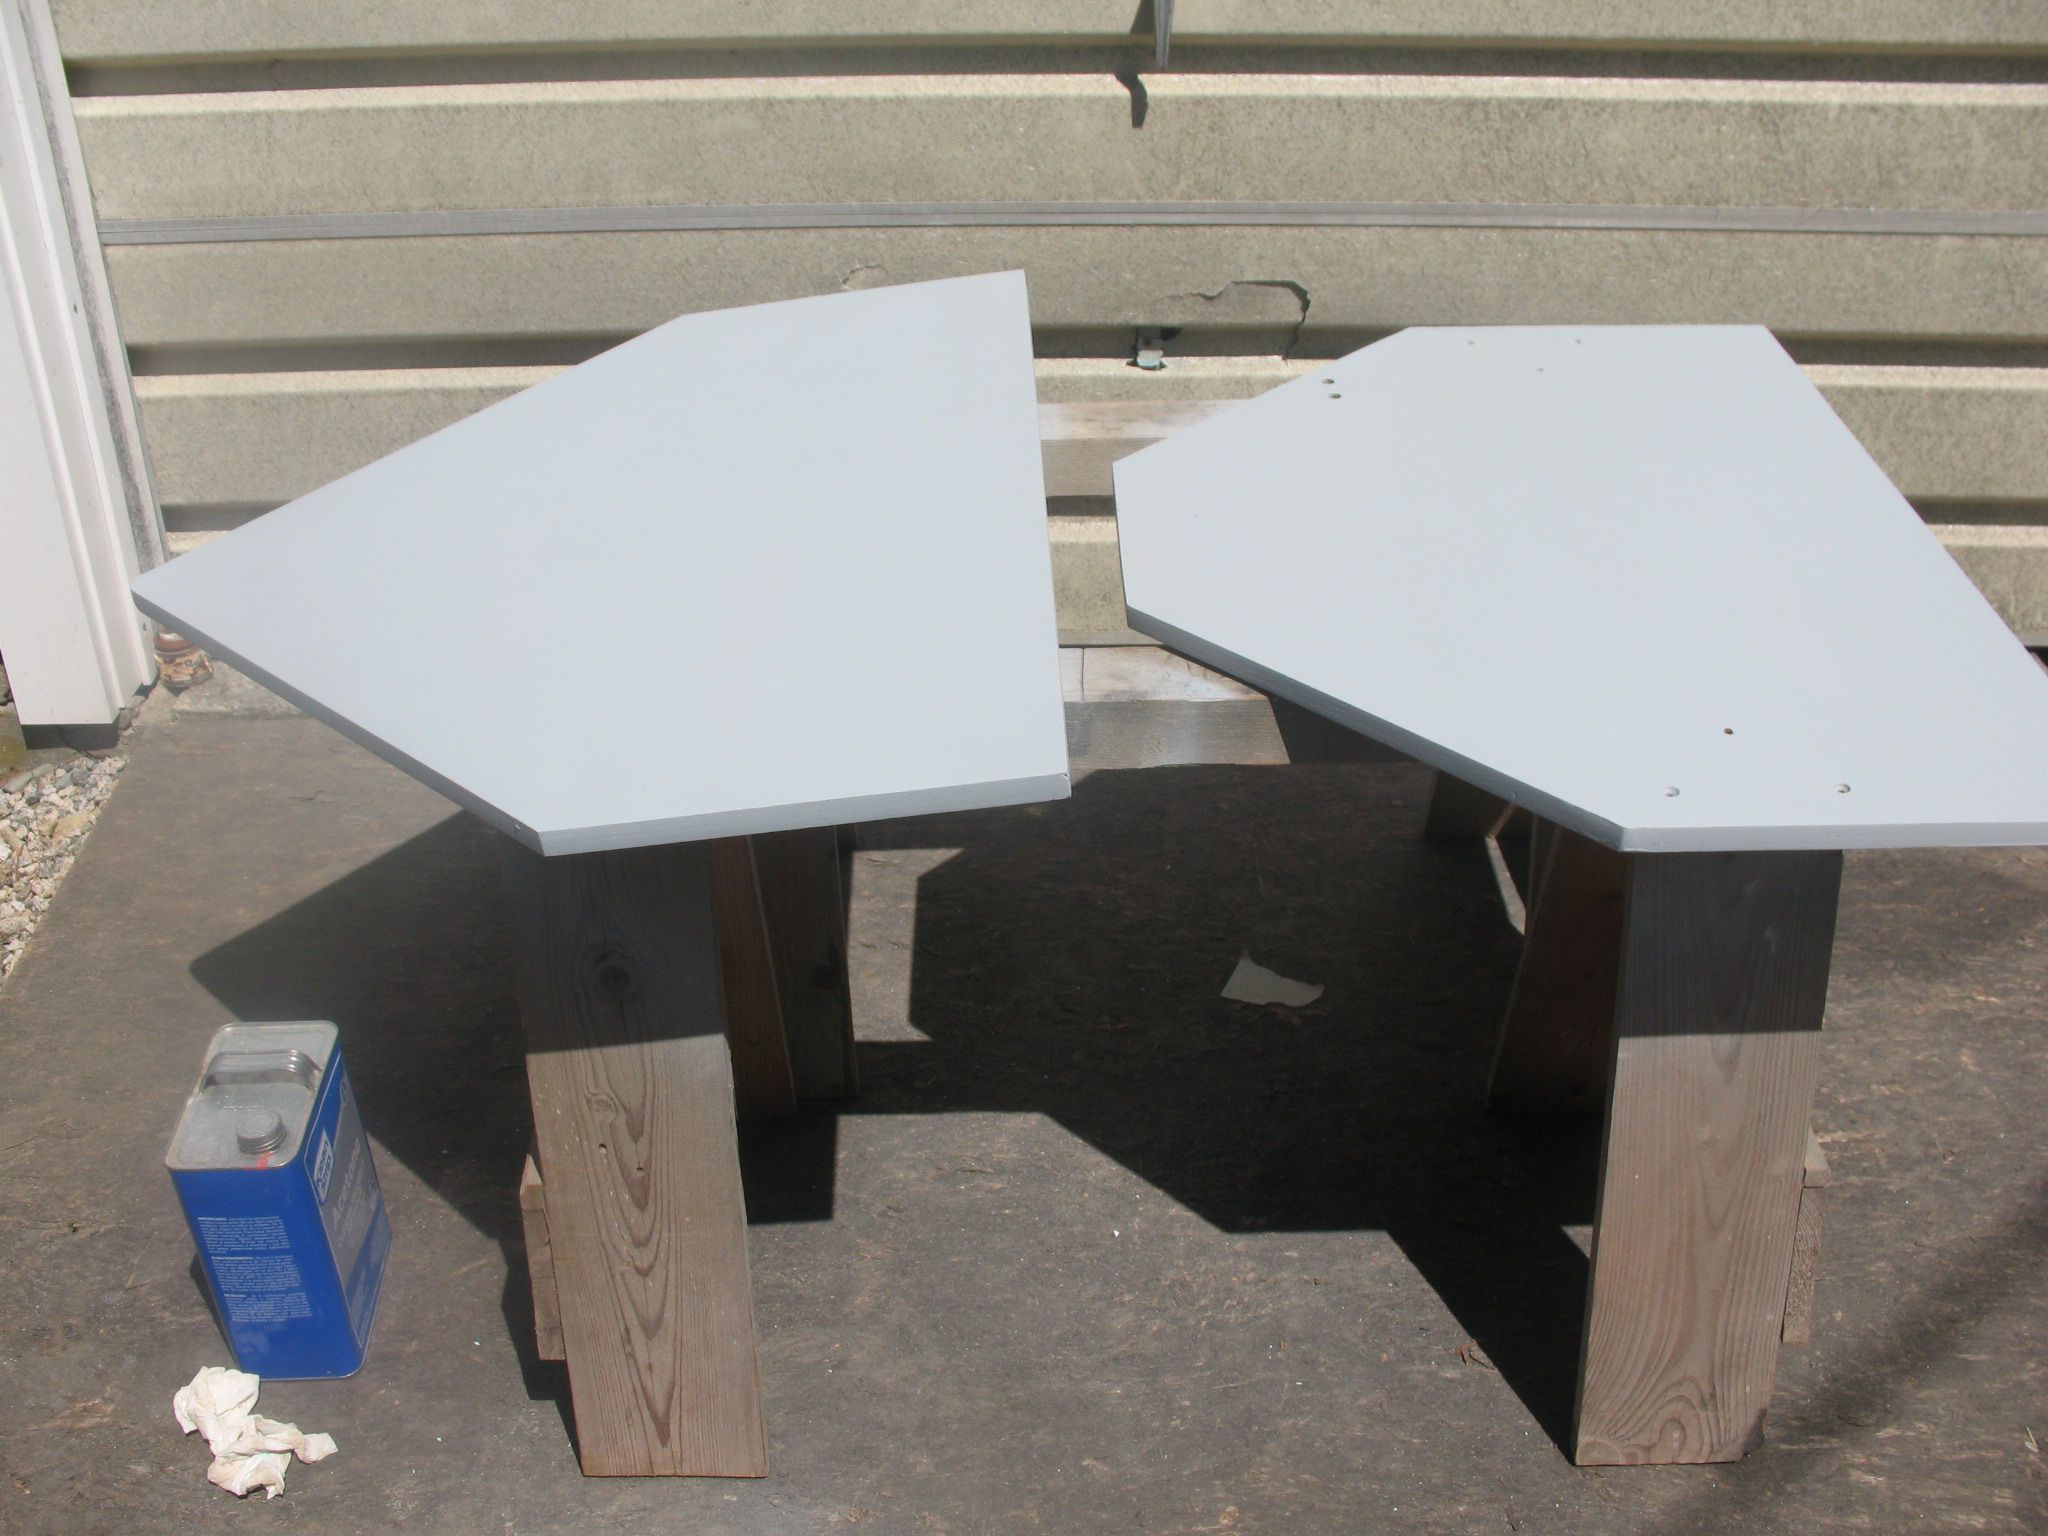
After a couple coats of 2 part primer they got a quick sanding with 220 wet sandpaper used dry One good coat of 7777 satin black and wait till morning.
-
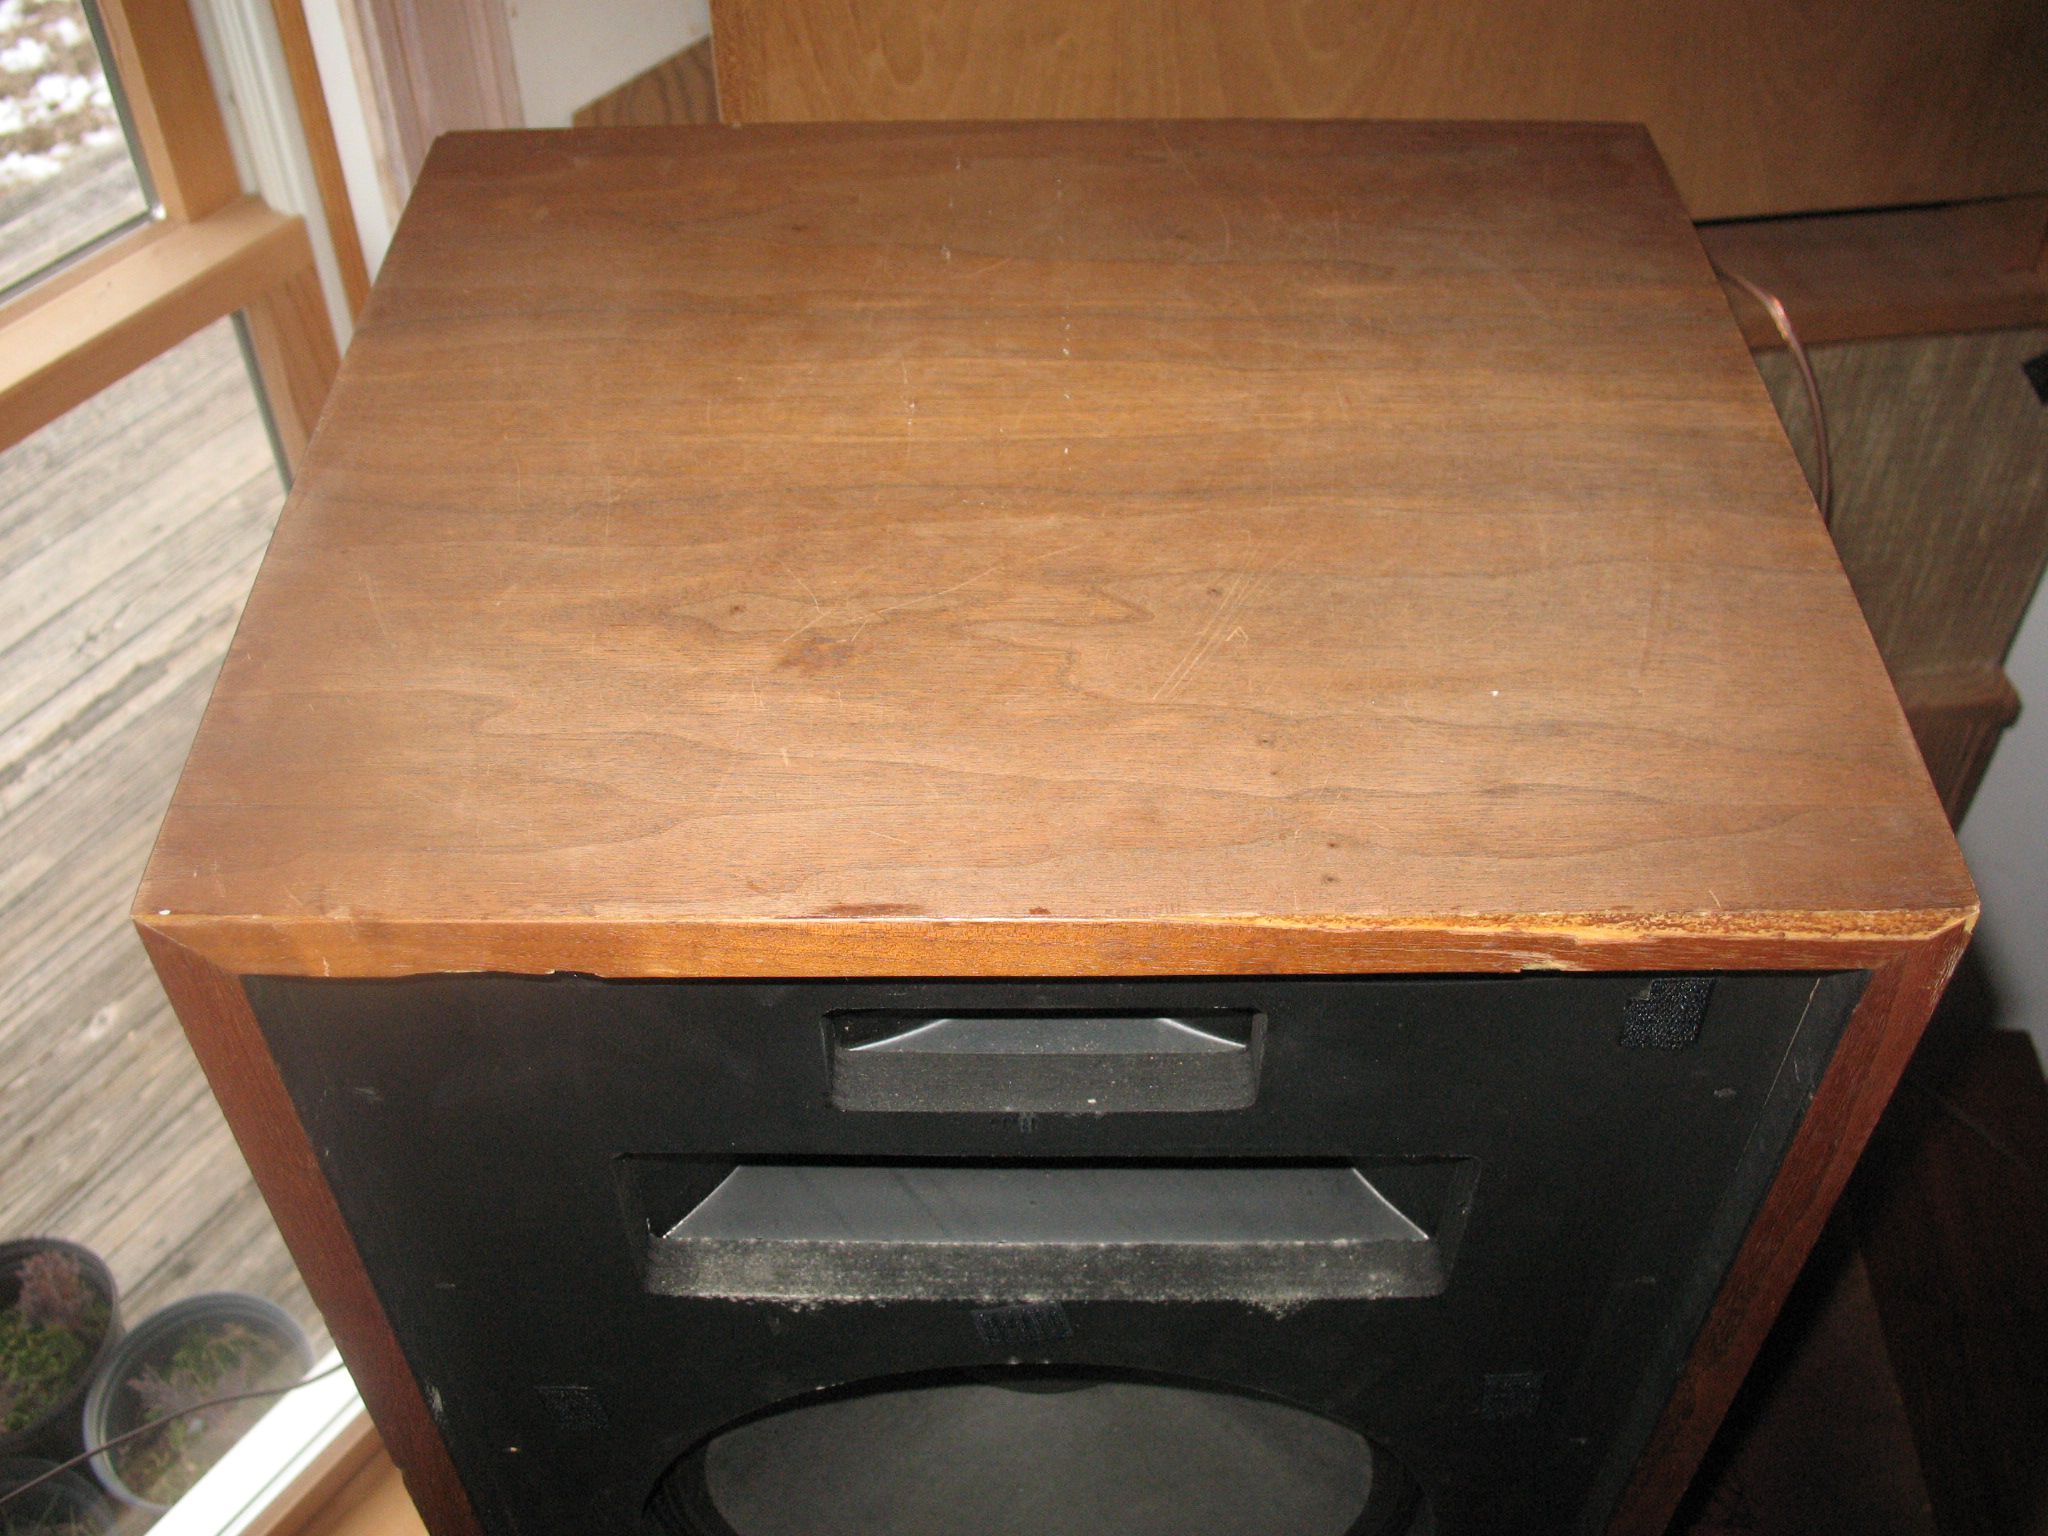
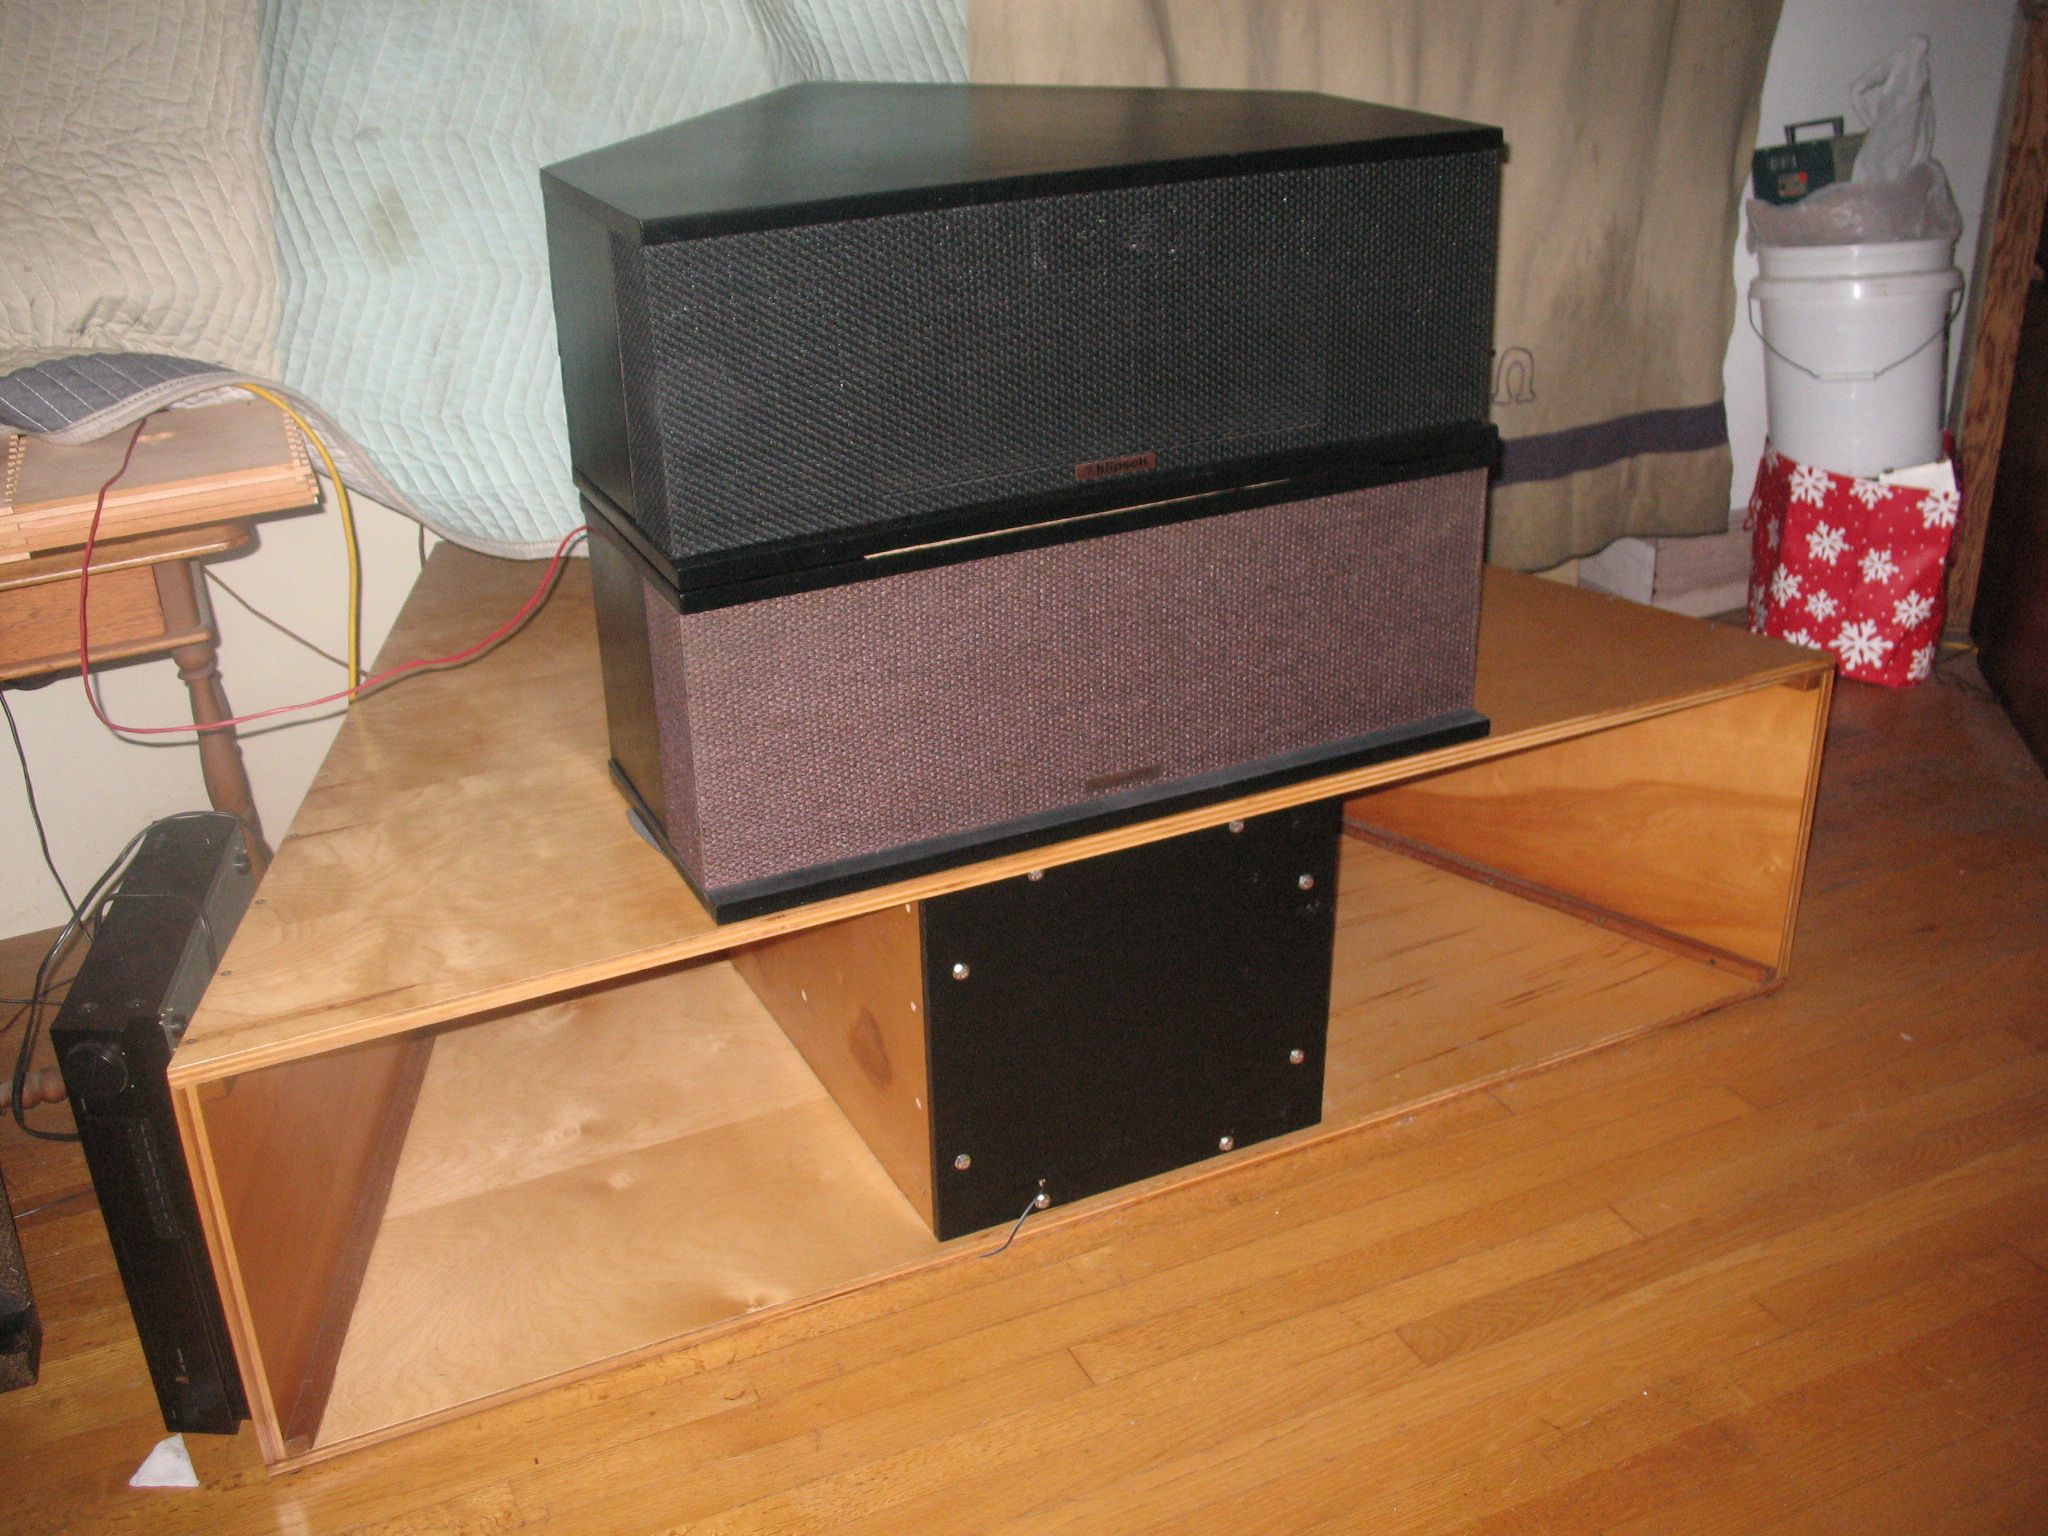
There are a couple of things that I thought I would ever see, the first is that everyone was required to wear a mask to go into the liquor store in the next town and that I would ever do anything with this K horn top. the top on the bottom left with the brown grill cloth. I am not sure what was left on the top but it really did a number on it. So this is the top after be filled and sanded, Oh I forgot about gluing the loose pieces along the edges. This is the top that started me looking into the top above. You see I wanted the top sitting on the clone MWMs bin to be higher and I needed a spacer so I figured I would just stick that ugly old K horn top under and I'd be good. well the more I looked the more I felt that I could improve the looks a bit with a couple hours of FREE time and some paint or veneer and the paint won due to cost and I had it in stock and it would get done.
-
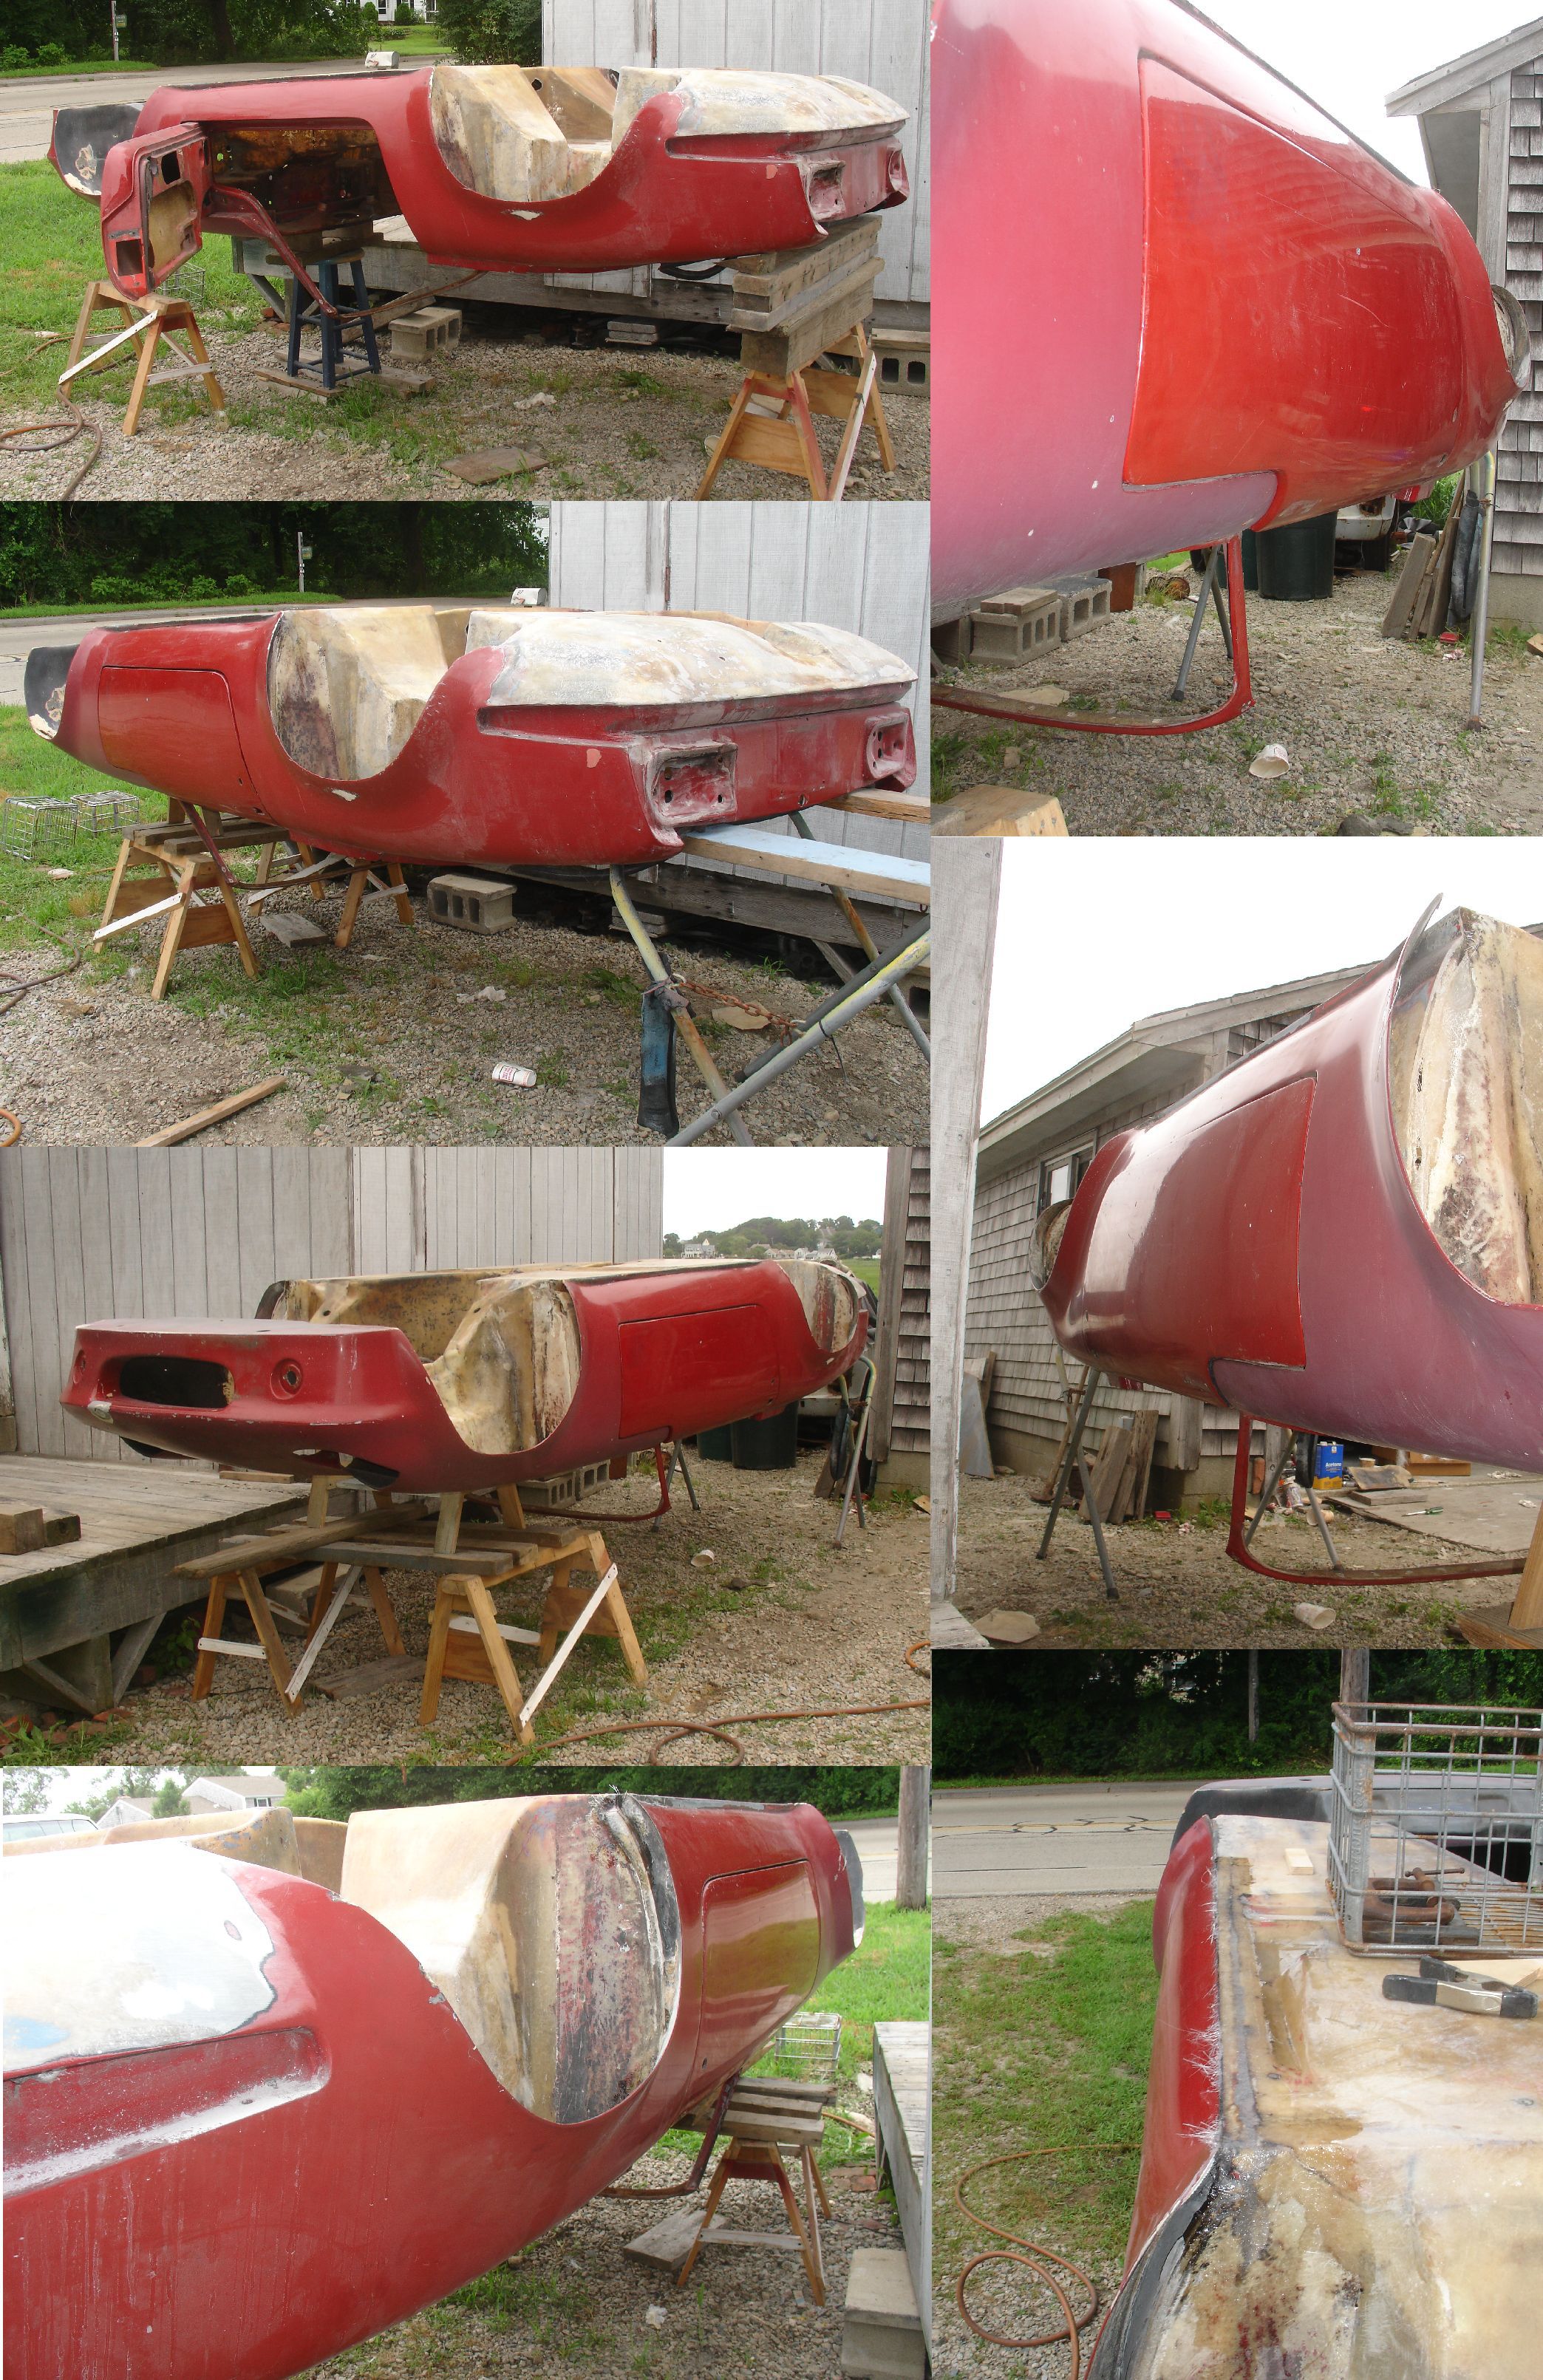
project renewal - a covid timeout Lotus Elan
garyeanderson replied to garyeanderson's topic in Lounge
There is a stock Twin cam shortblock on the bench (I should preface that in that it has been there for at least 17 years) that I am thinking of moving toward the engine bay. It will hopefully be close to stock and not cost too much -
project renewal - a covid timeout Lotus Elan
garyeanderson replied to garyeanderson's topic in Lounge
From now on, other than the engine going in, most of what needs to be done from here till it runs won't show up much in photos. This picture is an early one (like with in first 20 days) of picking up the body. Doors are attached to check the shut lines as I was doing some structural work on the metal lattice that surrounds the door.
-
Khorn KC top cab replacements for Klipschorn KD
garyeanderson replied to garyeanderson's topic in Technical/Restorations
They always look better with the flash,
-
Khorn KC top cab replacements for Klipschorn KD
garyeanderson replied to garyeanderson's topic in Technical/Restorations
Tops set on the K horns woofers reinstalled
-
Khorn KC top cab replacements for Klipschorn KD
garyeanderson replied to garyeanderson's topic in Technical/Restorations
I had about 3 cups of Lacquer left over from the last project and figured it would be enough to get a good coat or two on the bins. Almost dry