BR928
-
Posts
73 -
Joined
-
Last visited
Content Type
Forums
Events
Gallery
Everything posted by BR928
-
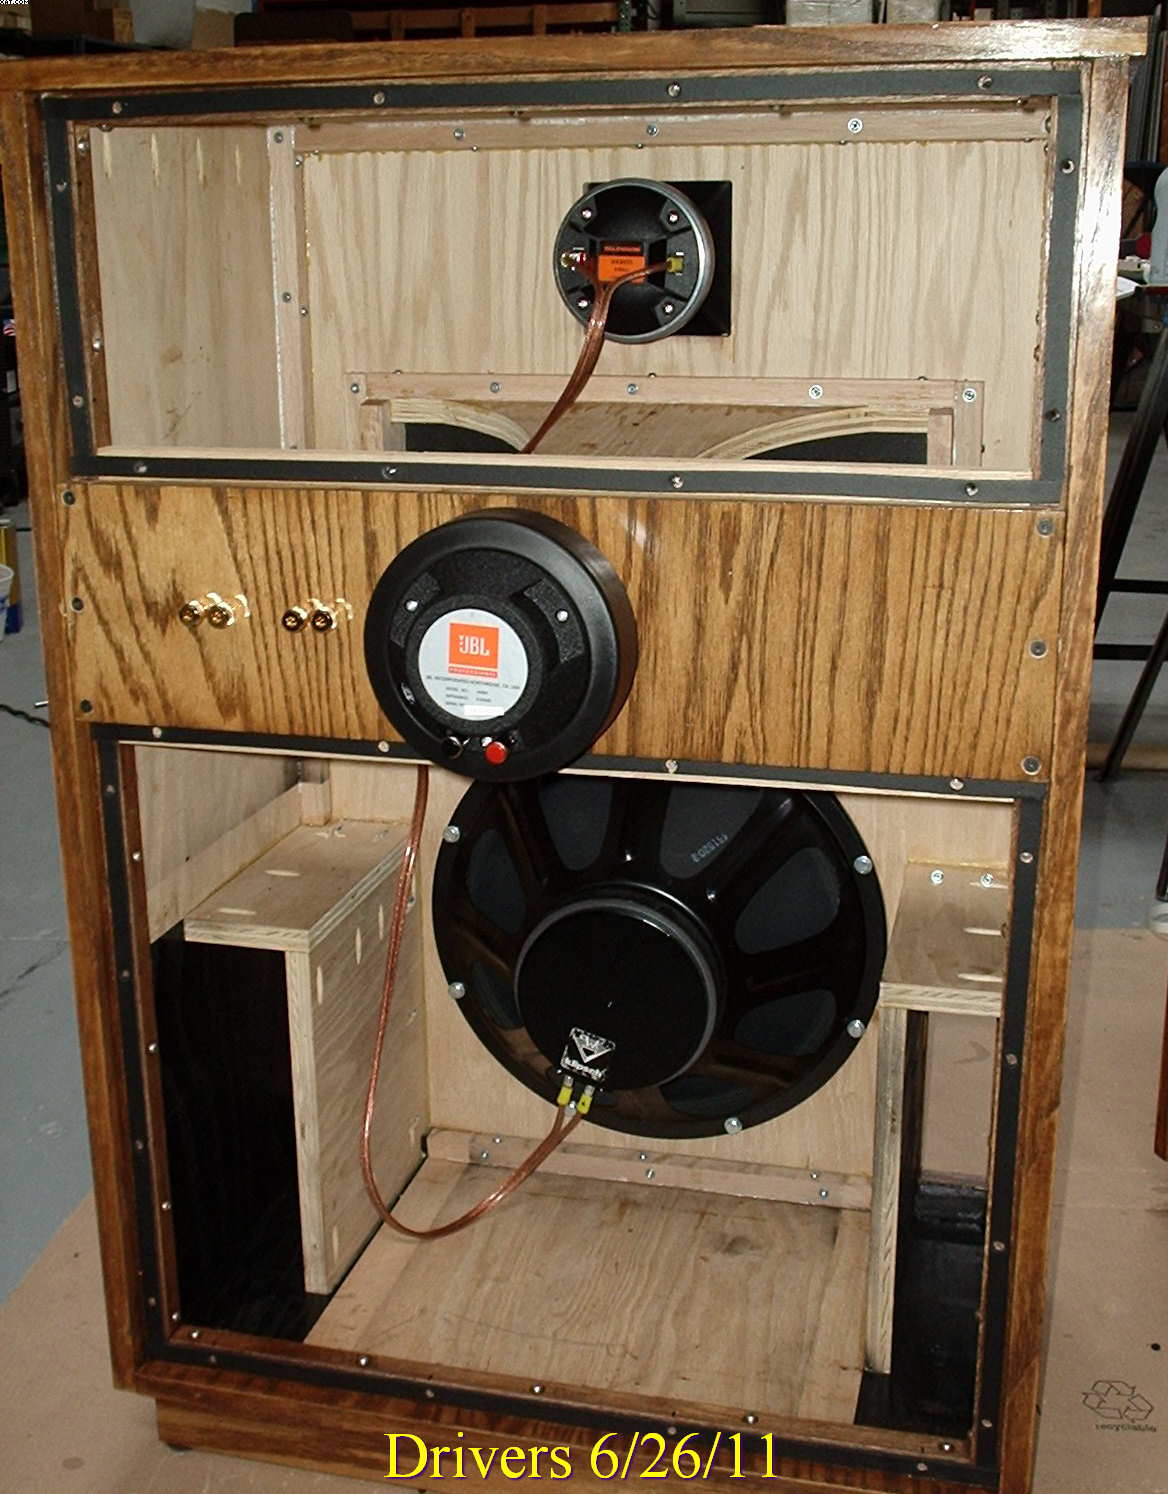
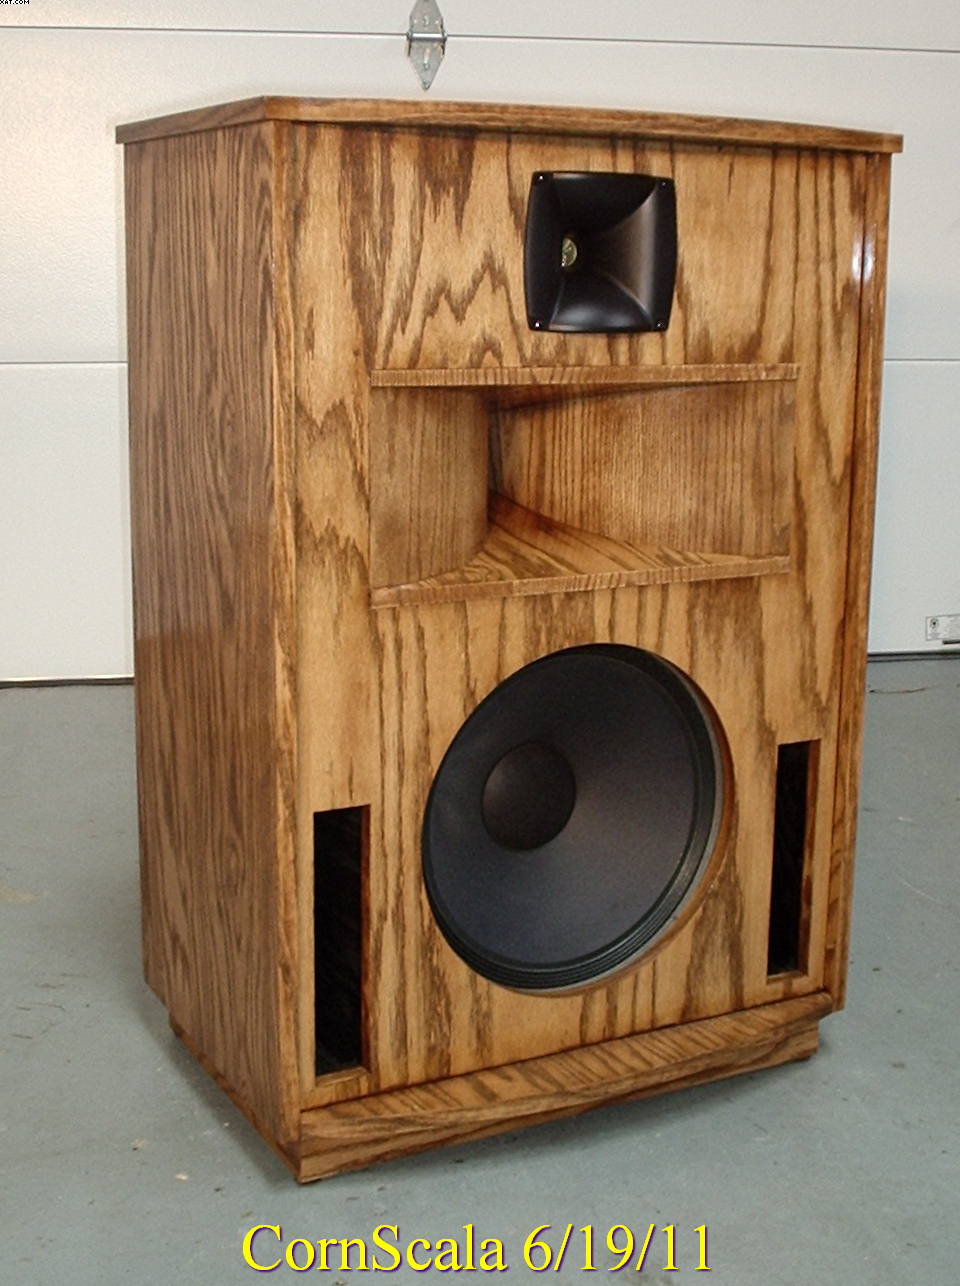
I am mounting the drivers today. In honor of their heritage I am using K33's for the woofers. After all, they should have a Klipsch heart. Squawkers are JBL-2426's. Tweeters are Selenium D220TI. I will install the ALK crossovers after testing and the levels are set.

-
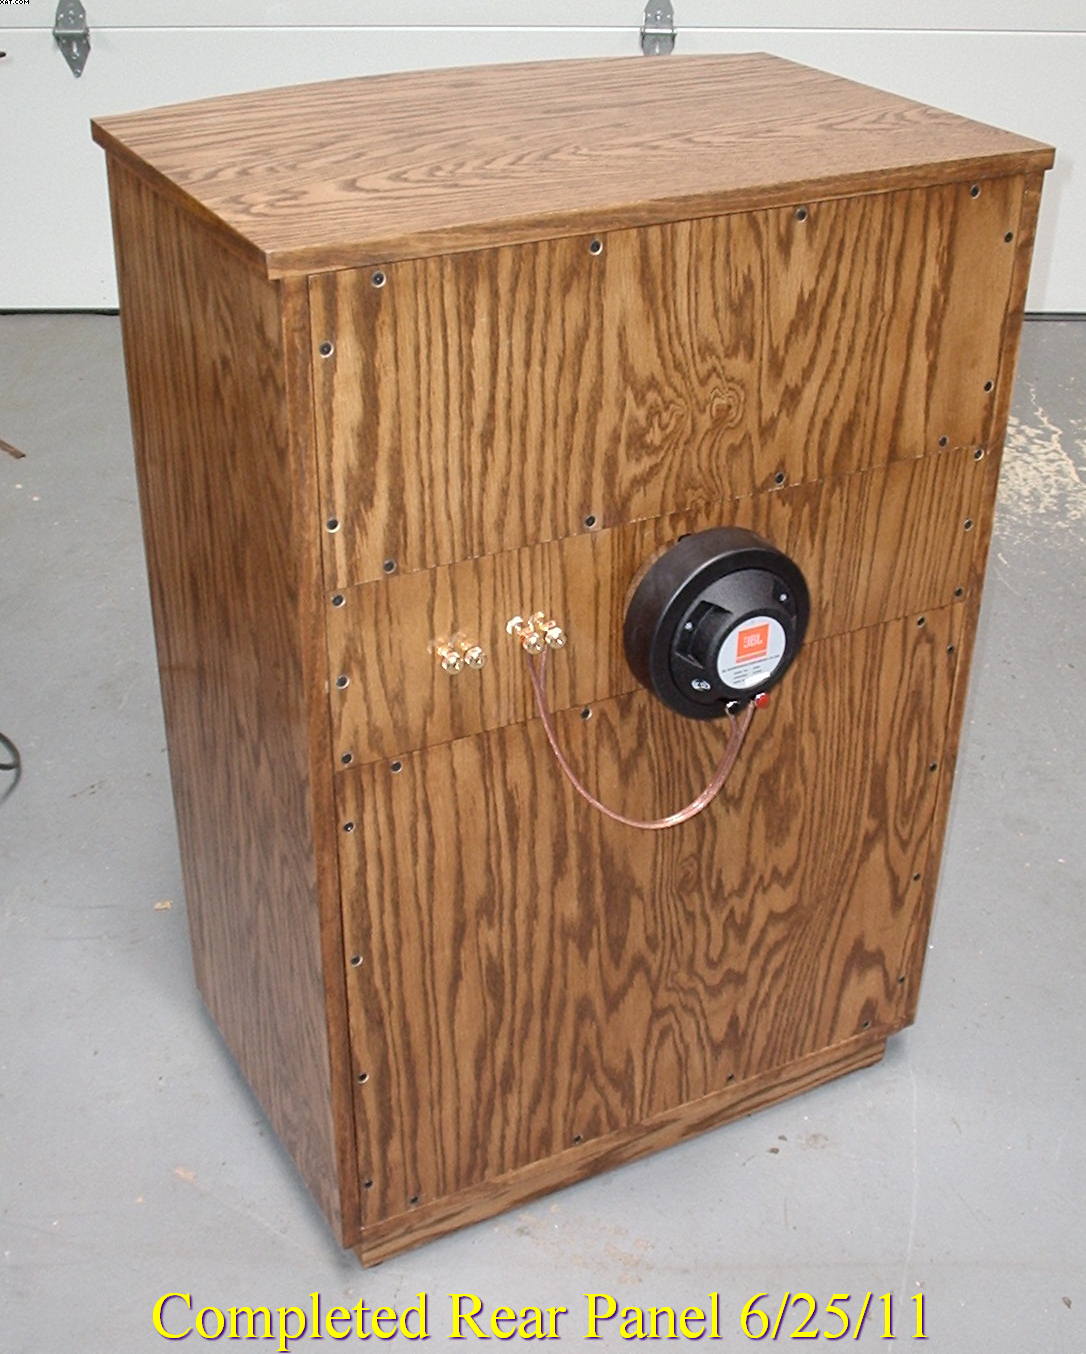
Thanks Evan. Your check is in the mail. The rear panels are finished. Time to load some drivers and get ready to rock-and-roll! It's gonna be a good 4th.
-
Man, He must have got a good one!
-
I don't know. These magnet structures are huge. I would think a rare earth magnet would be much smaller.
-
I bought a pair of JBL 2426 for a build in January for $268.00 ea. I had a hard time justifying that much at the time but it was the only true 1" driver I could find with a track record. Yesterday I noticed the cost is now $440.00 ea.! Thats a 58% increase in five months. Is this a sign of things to come in the industry or is this just limited to JBL? Yikes....I could never justify them in a build now!
-
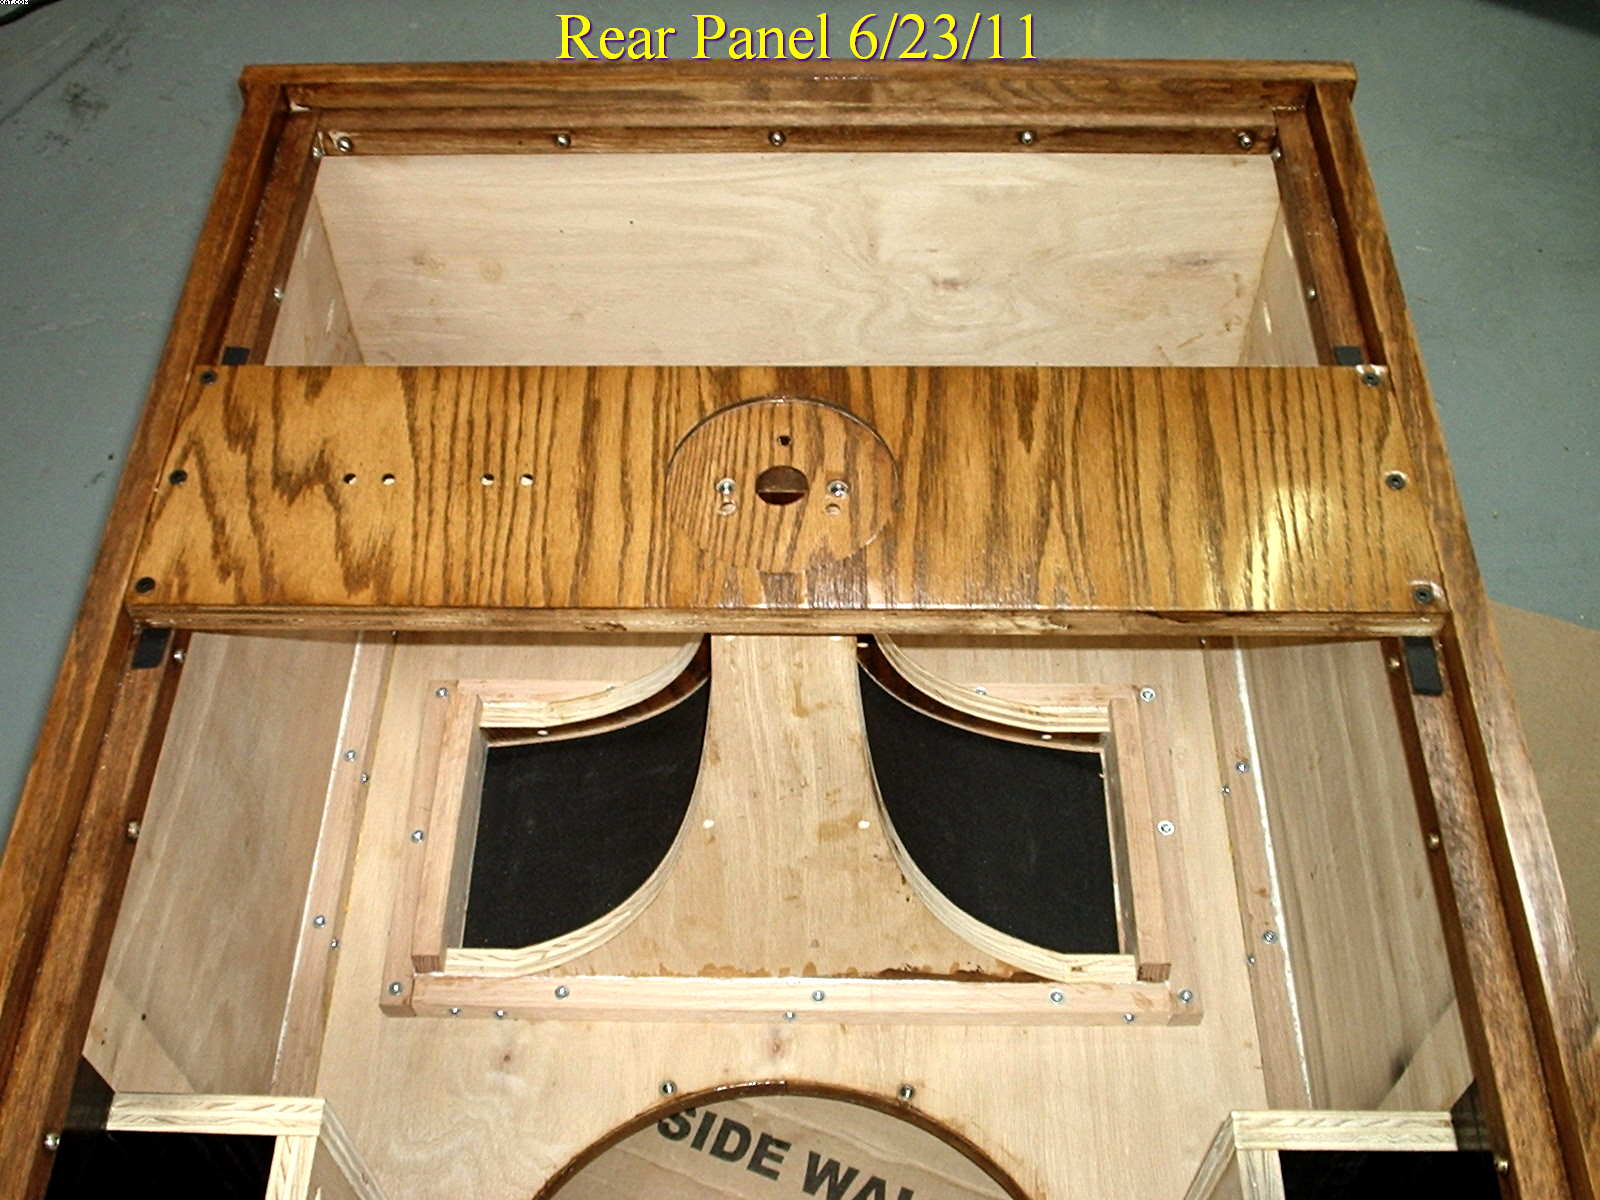
The original design concept was to keep the original Cornwall cabinet proportions. Here is the key to this design. The midrange horn extends through the enclosure with the driver mounted externally. This is one of a three part back. This design inherently acts as a front to rear brace. I also added some sound damping material to the sides of the horn. I figured it could not hurt!
-
Tony, I grew up in LR! Al had it posted somewhere on this forum. If you can't find it send me a PM.
-
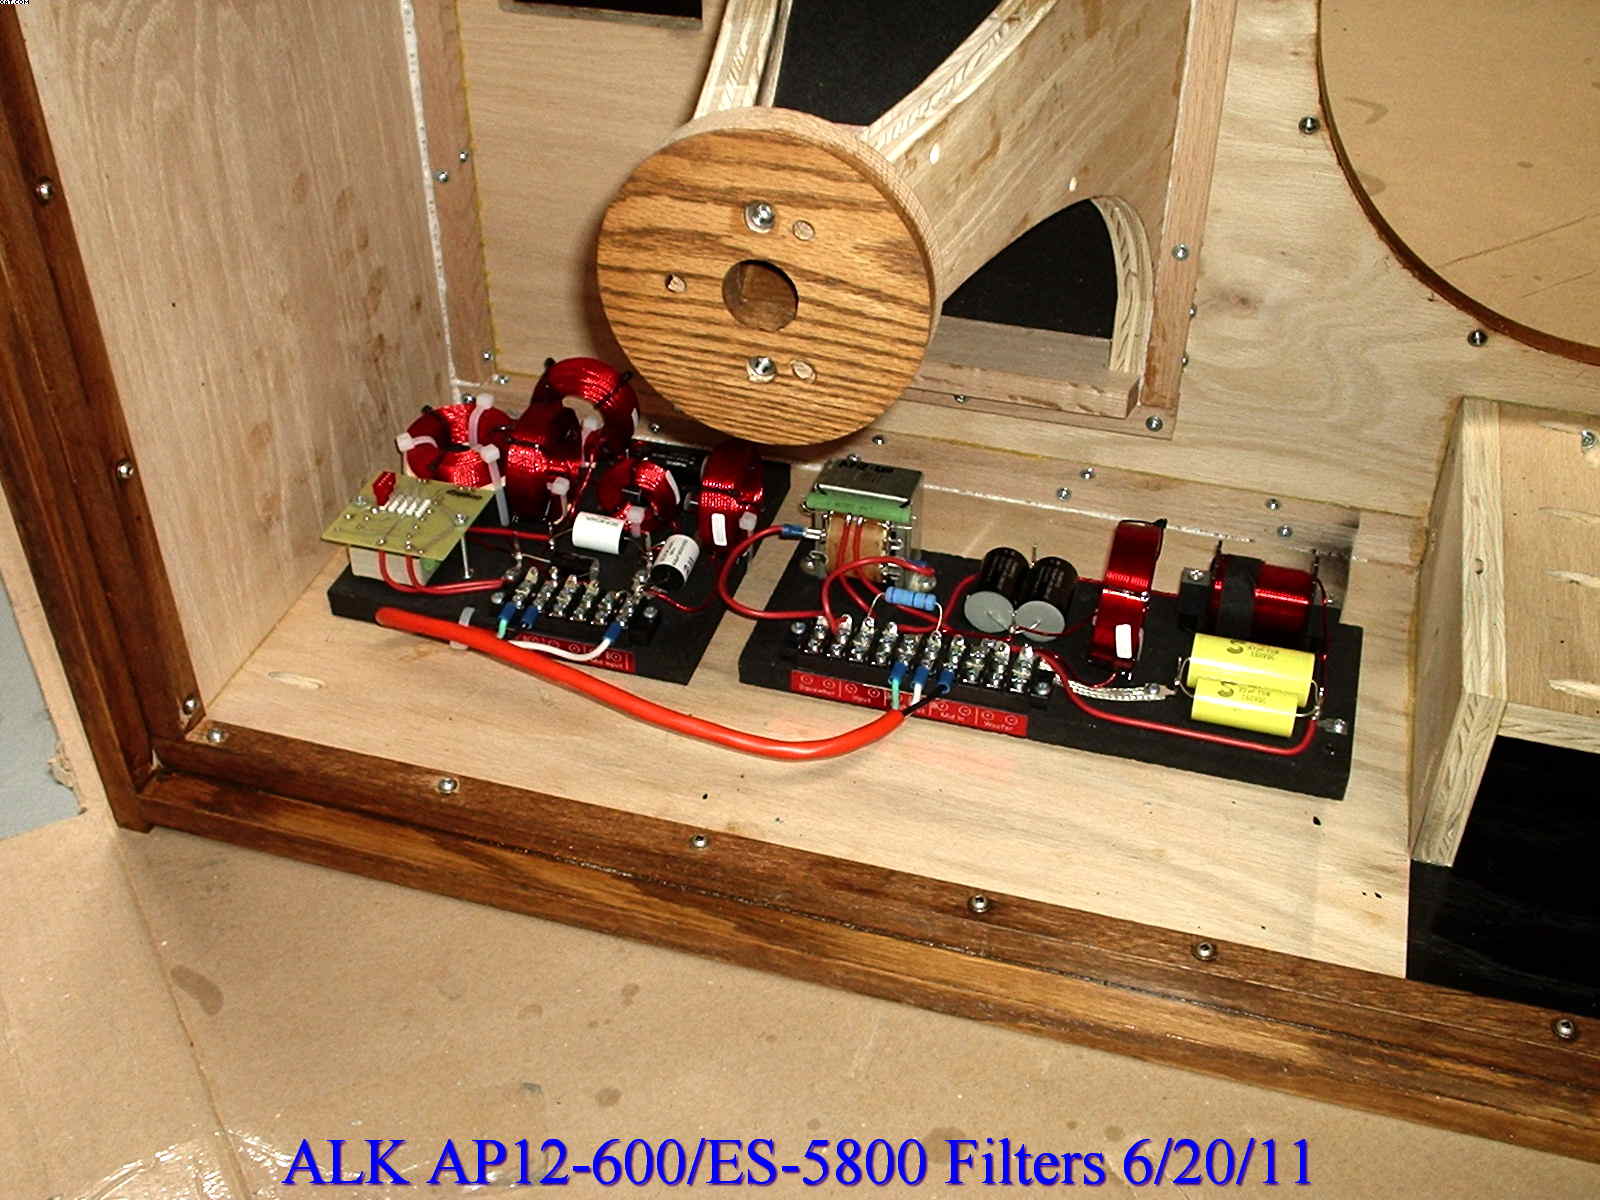
Finding a home for the ALK's.
-
Nice job. You have kept me motivated to keep working on mine. Do you still have some damping (packing) material left? I just bought two yards of grillcloth from Bob. Should be more than I need. Send a PM maybe we can work something out.
-
After getting the tractrix horns mounted into the cabinets, I had to get an idea for what the finished product was going to look like. The design goal was to preserve the classic cornwall enclosure proportions while stuffing a 7 x 20 tractrix horn into it. Works for me! Going to be ashamed to cover the front with grill cloth!
-
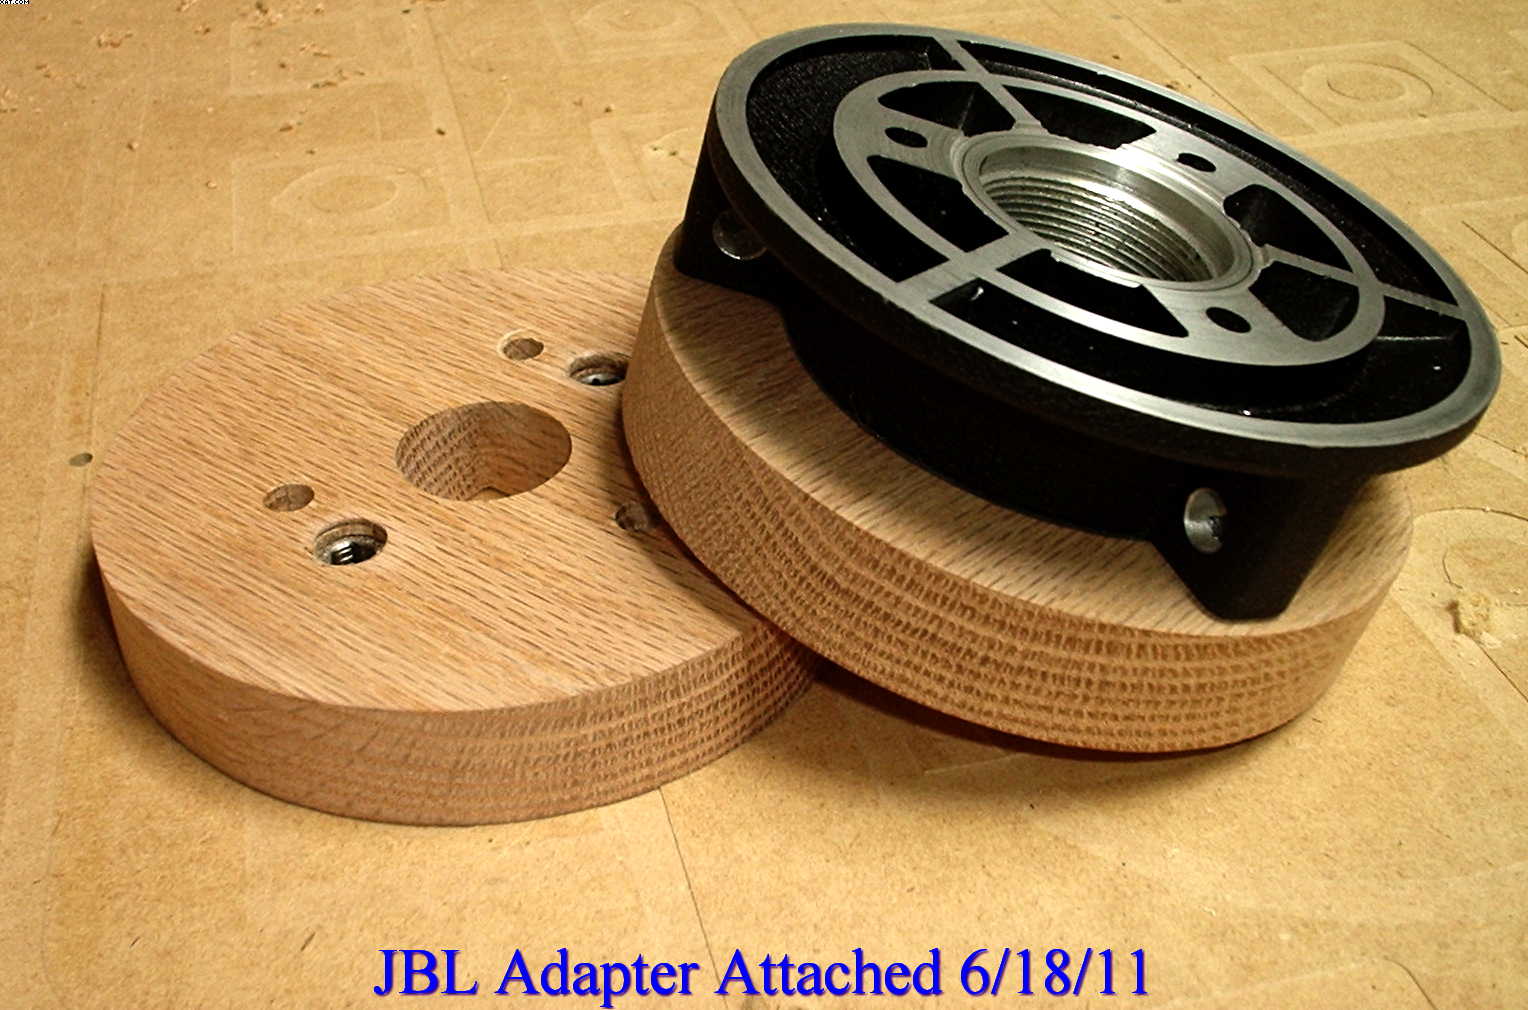
After the JBL adapter is attached.
-
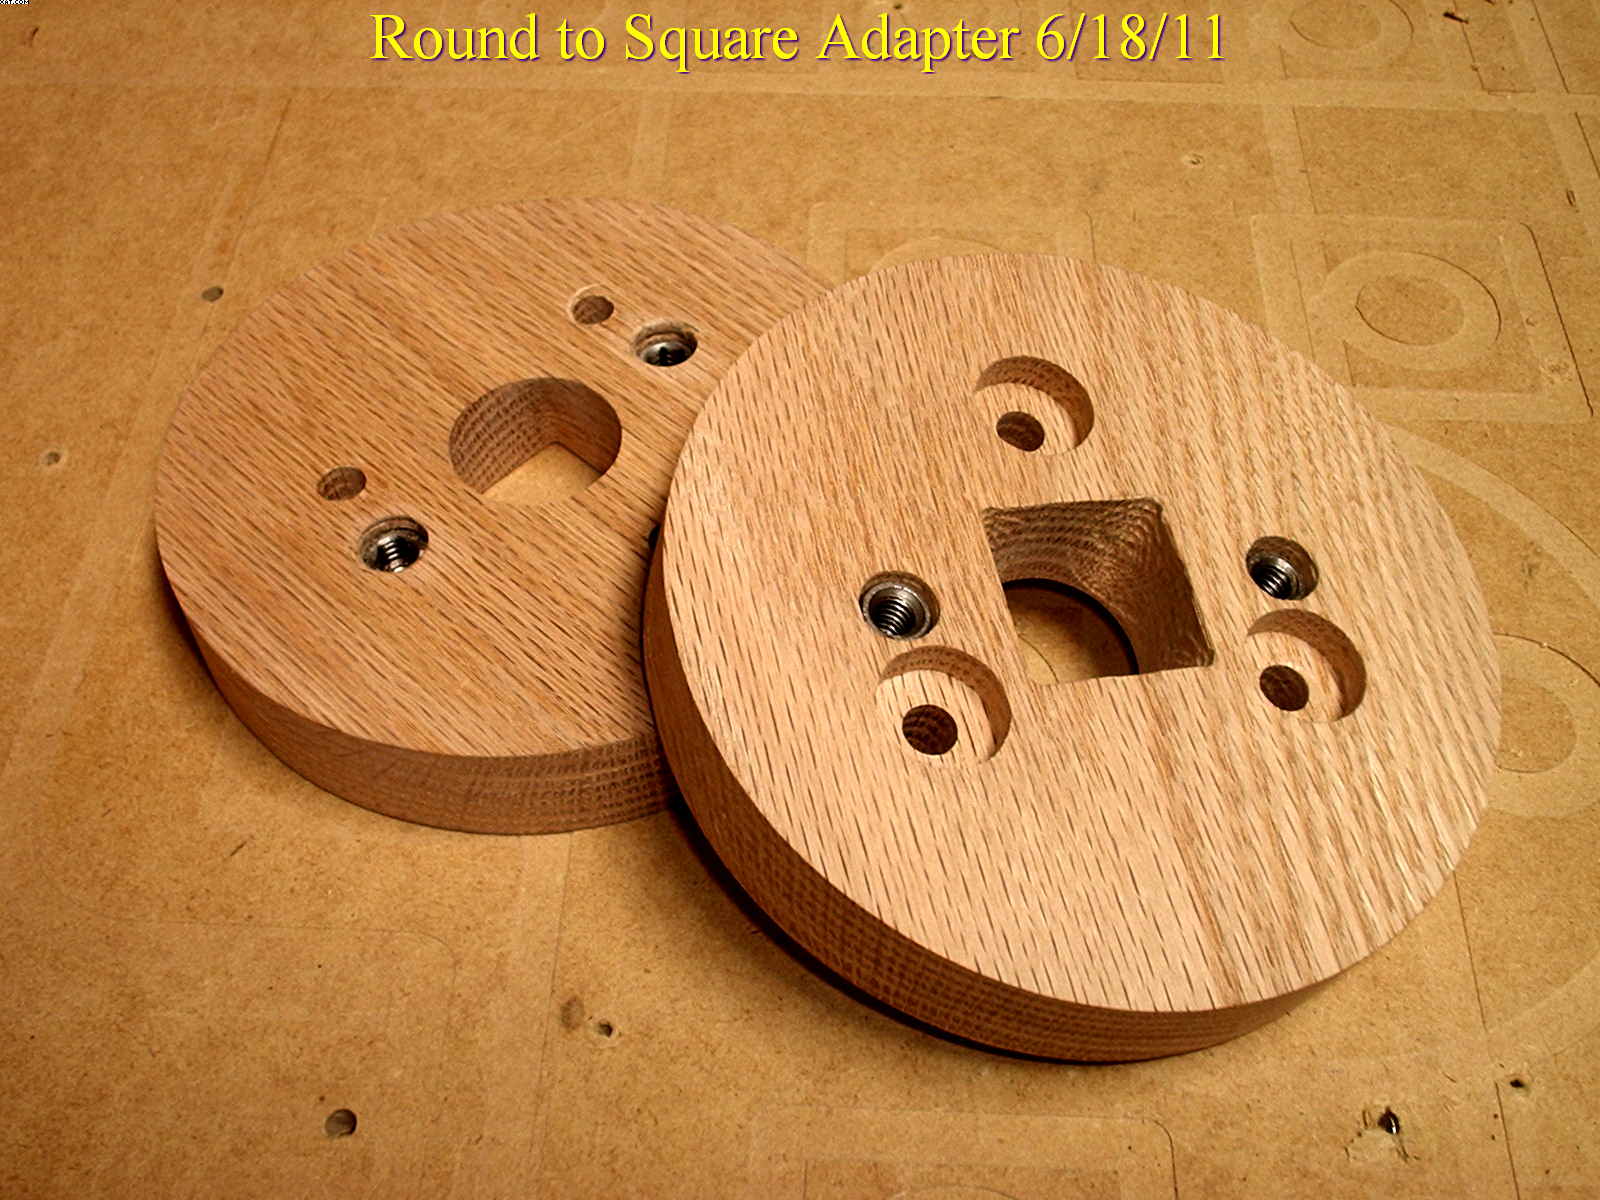
This is the 'round to square' transition piece. The threaded inserts are used to bolt the transition piece to the horn lens. The other three are to attach the threaded JBL driver adapter to the transition piece. A little sanding and this is ready to bolt on. Now who said you can't put a square peg in a round hole?
-
Do I need to update, referb, or modify these La Scalas?
BR928 replied to Onyx77's topic in Technical/Restorations
That is a cast aluminum horn made by Speakerlab in the early 70's (H350). I have two just like them. They were clones of PWK's. I don't remember a La Scala kit but they offered a Corner horn kit. This was the horn supplied with that kit. -
Front edges veneered and finished. Front mounting flange attached. After a little cleanup it's ready to go into the cabinet. It's about time!
-
E'nuf said. Picture worth 1000 words. Very nice.
-
Nice job arash. Did you add the center piece in the bottom? I thought all LS came to a point.
-
It's not that bad. Just take your time and cut paper templets and transfer. I have seen some put grill cloth half way back. Belle like. They also added a stiffener. That would keep you from doing the really hard part and would look awesome.
-
Out of the clamps and cleaned up. Ready to veneer the front edge and attach the front mounting flange.
-
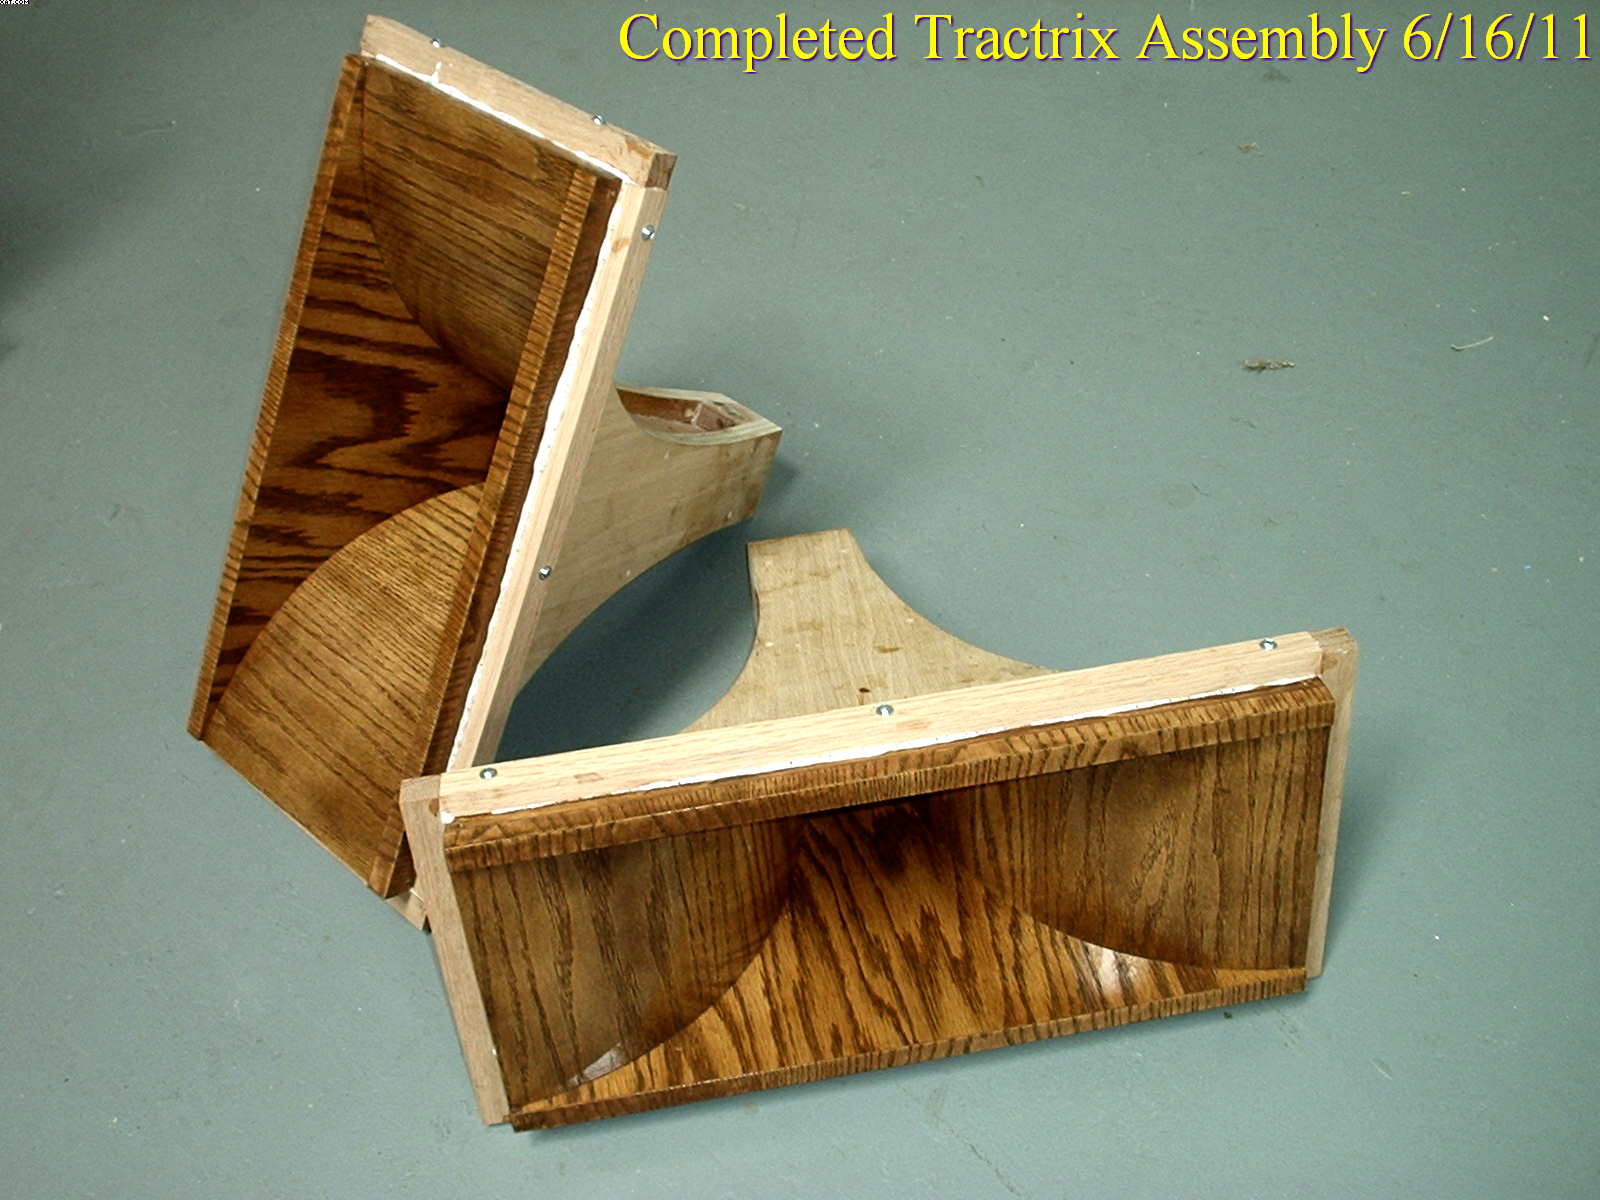
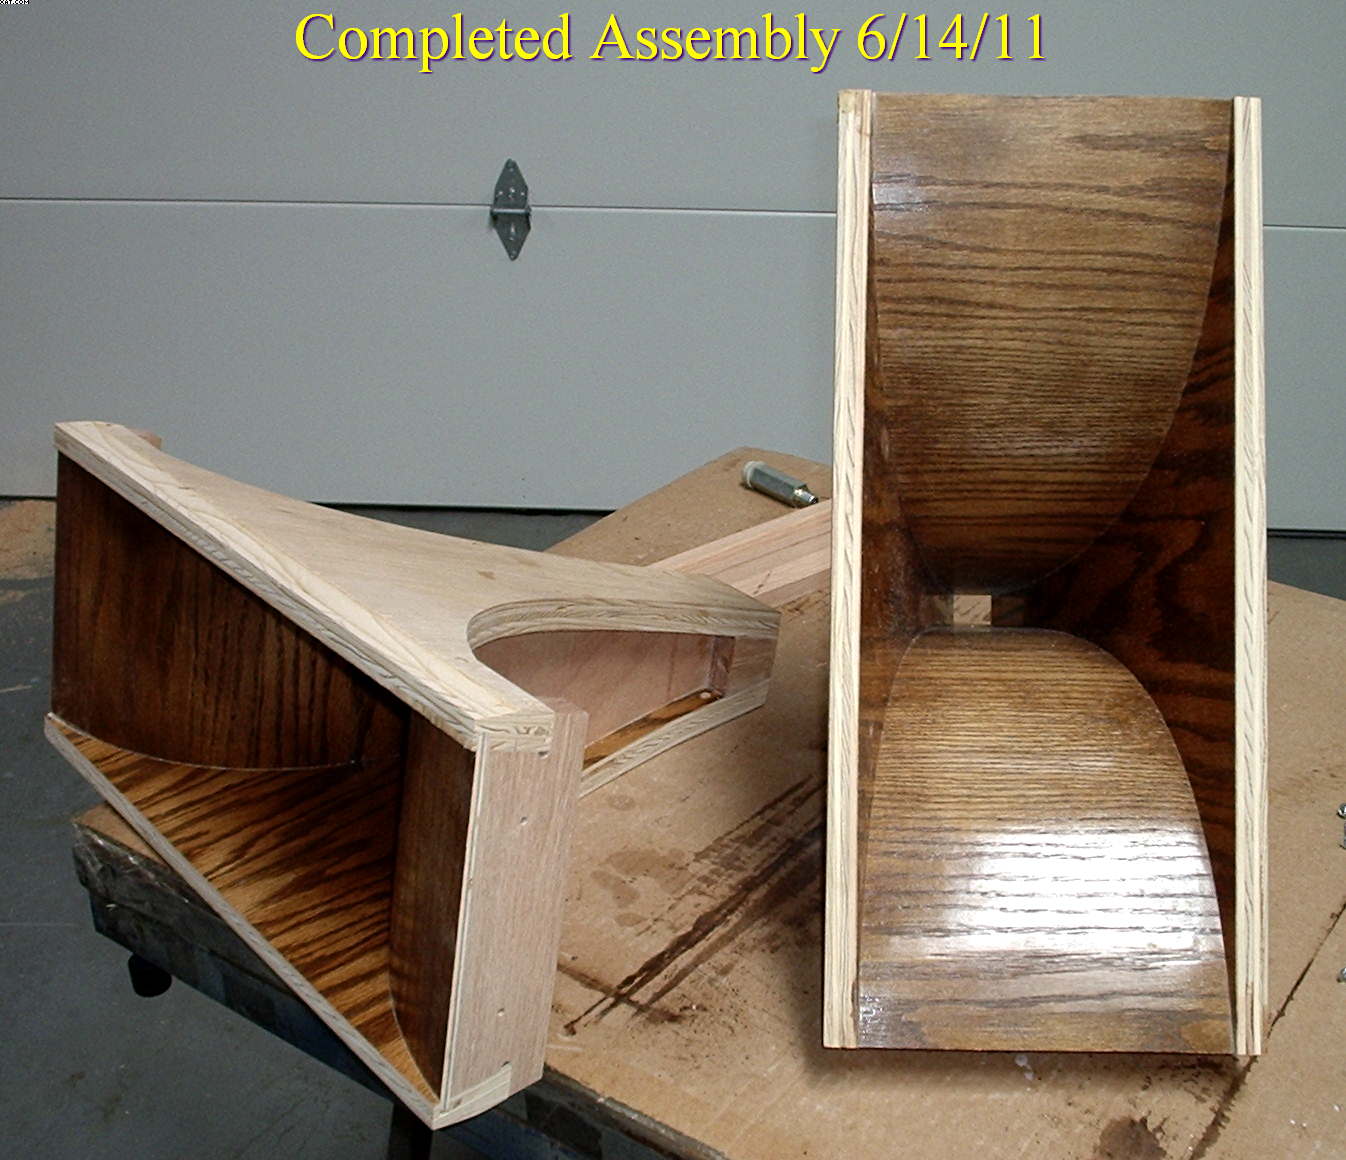
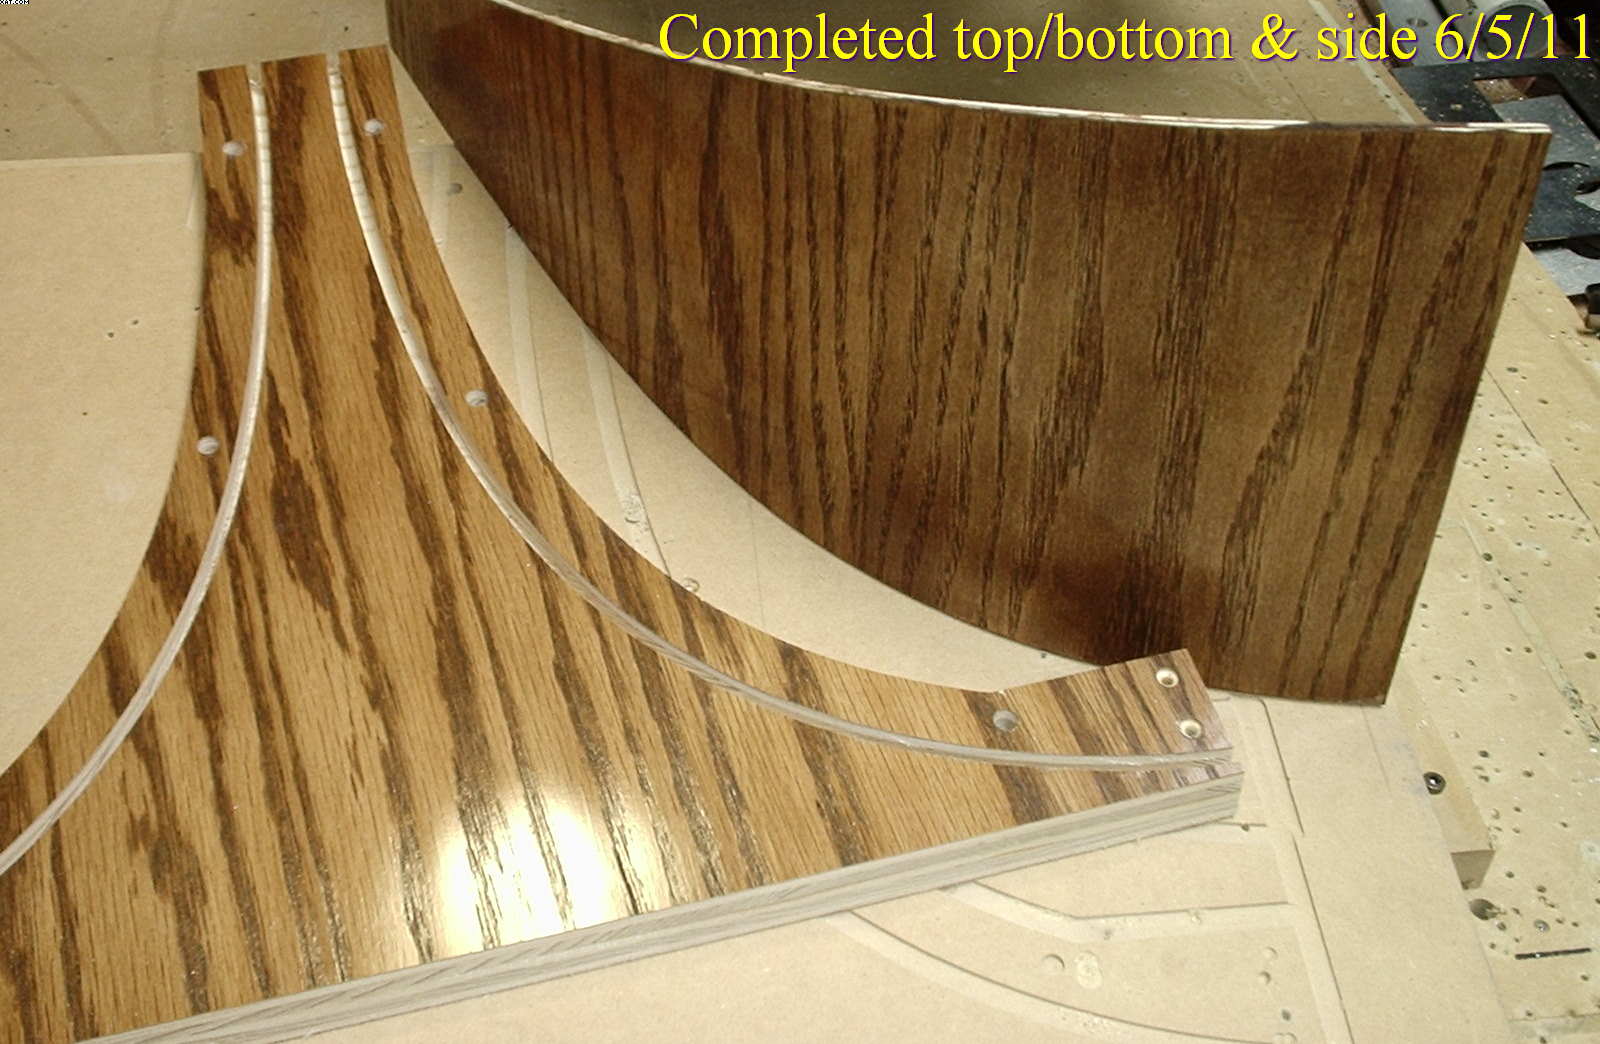
Completed assembly with rear braces (Complete, less front mounting flange that is).The rear braces serve to fix the 1" x 1" opening of the top/bottom in the vertical direction. The dado fixes the sides in the horizontal direction. The rear brace with it 3/8" hole will attach the horn lens to the round to square transition piece via a 1/4-20 bolt.
-
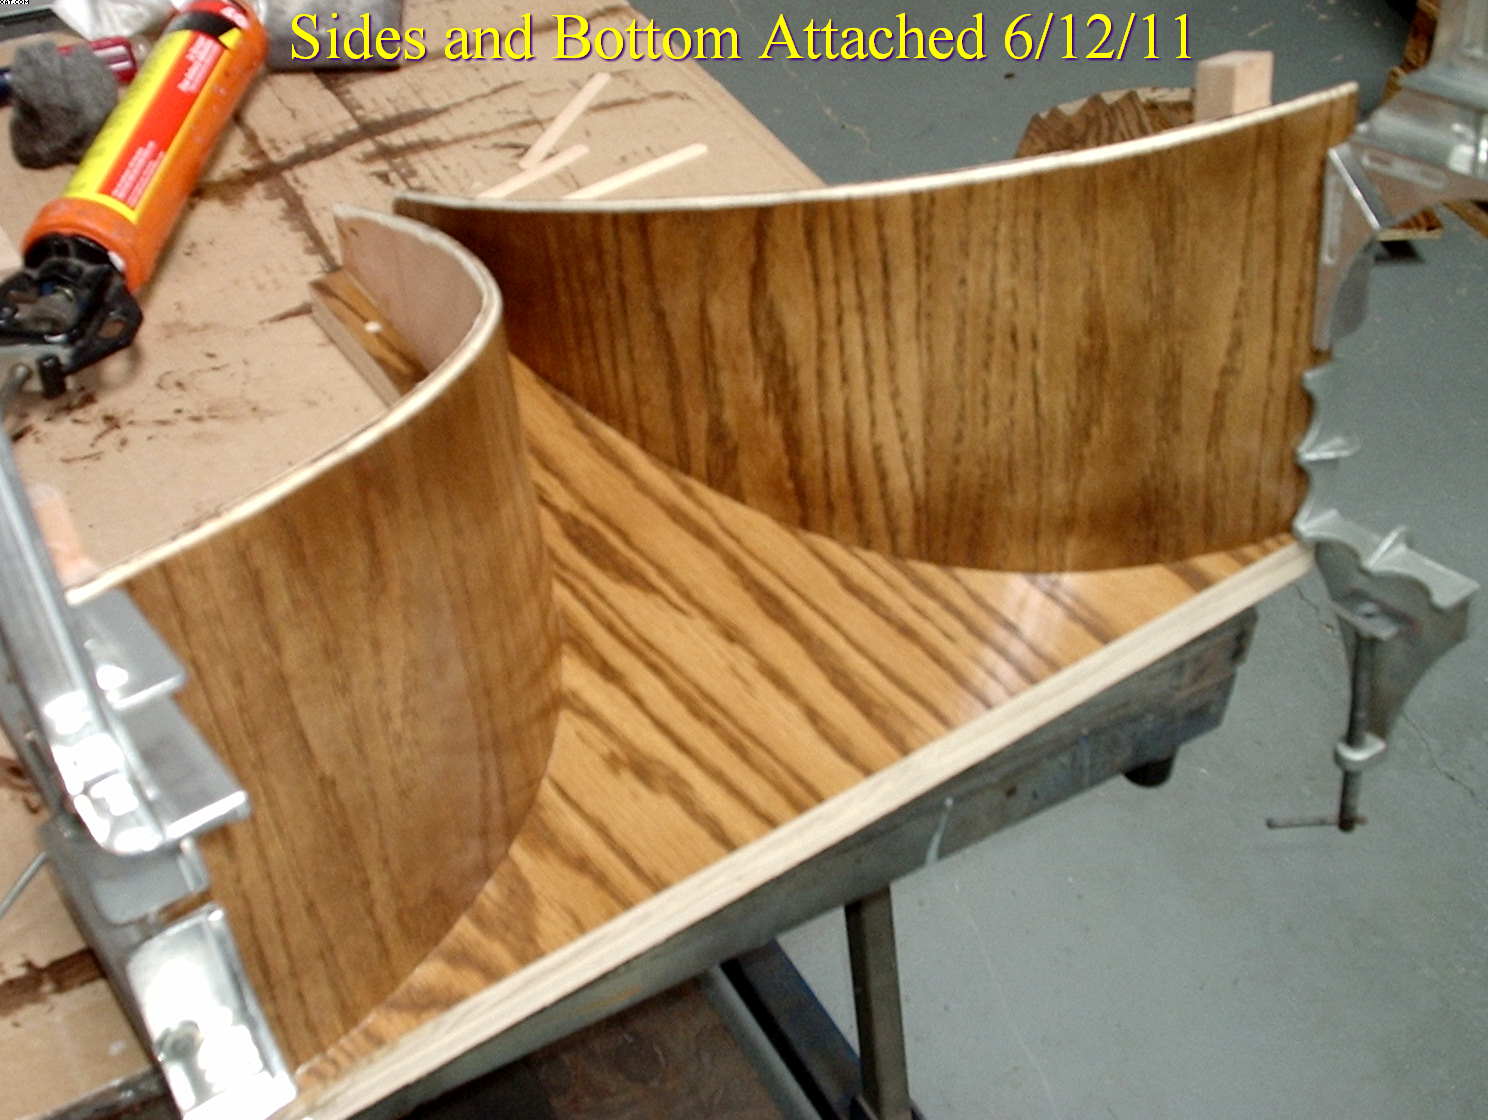
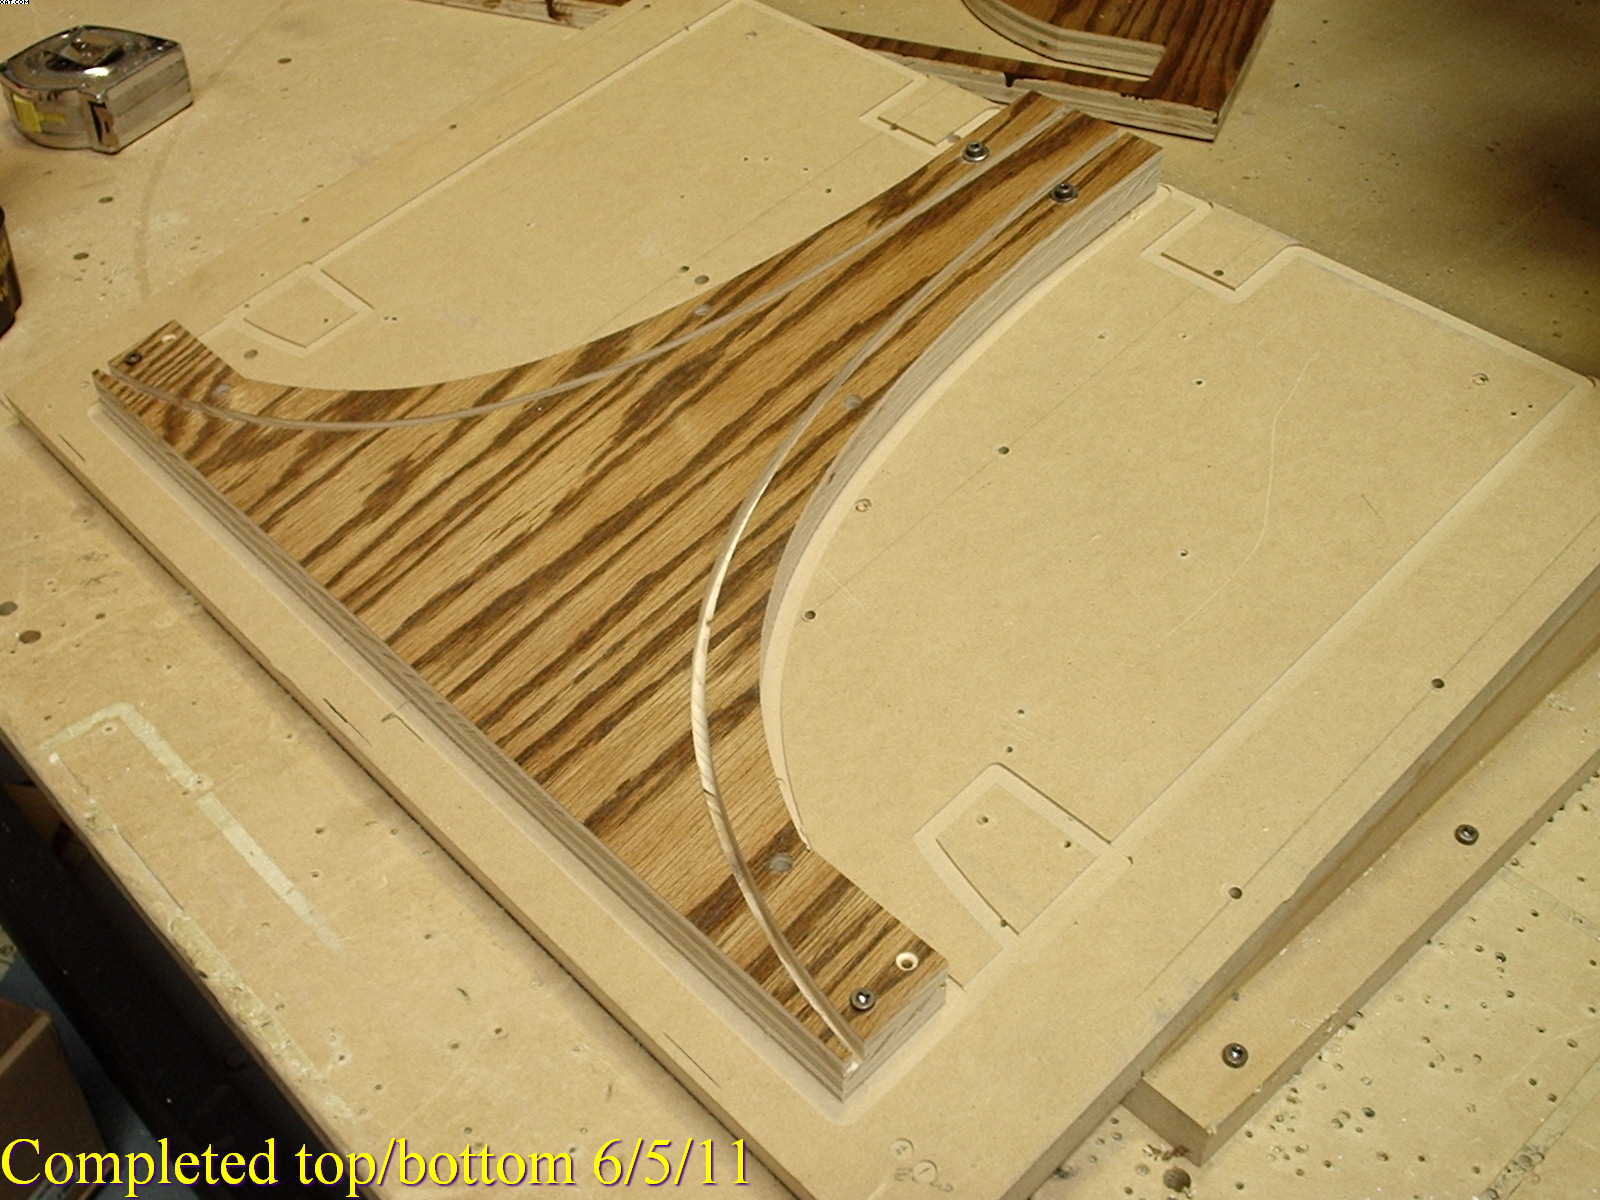
Sides attached to the bottom/top.
-
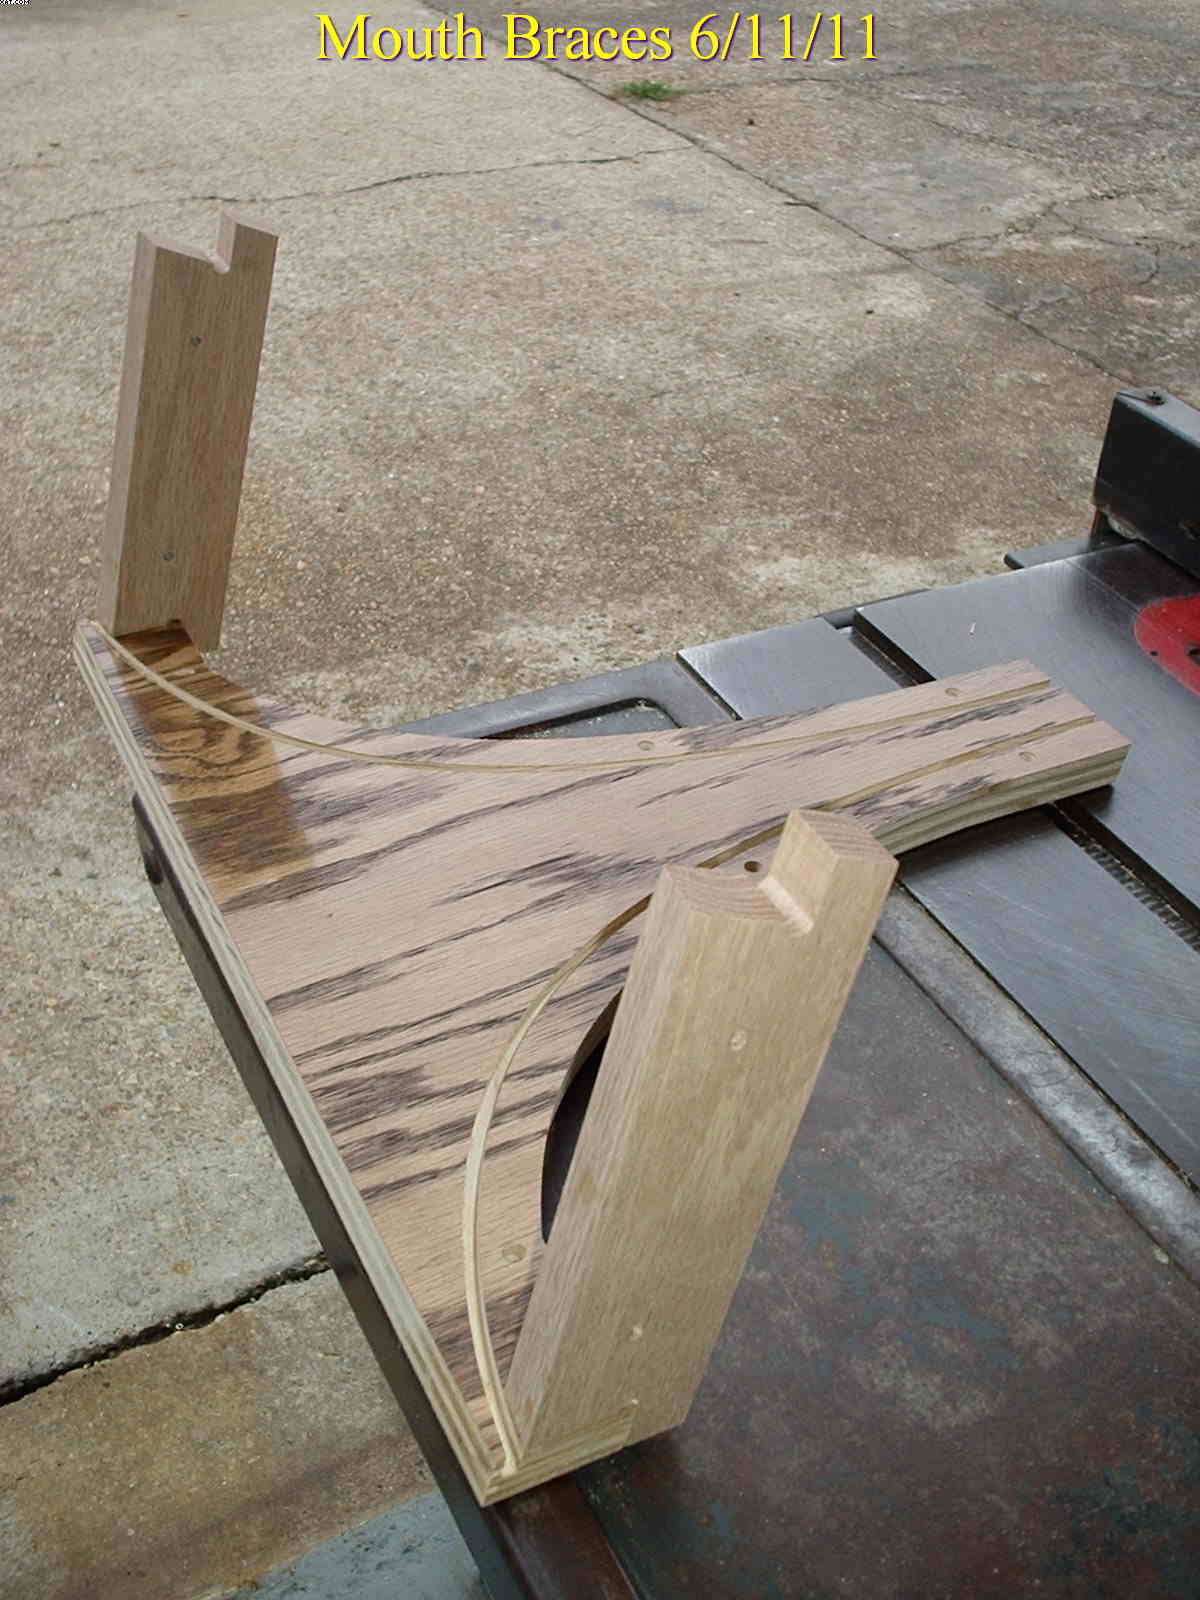
The first step of the assembly is to attach the mouth braces after beveling the edge to match the final curve of the side.
-
Here are the major components of the horn.
-
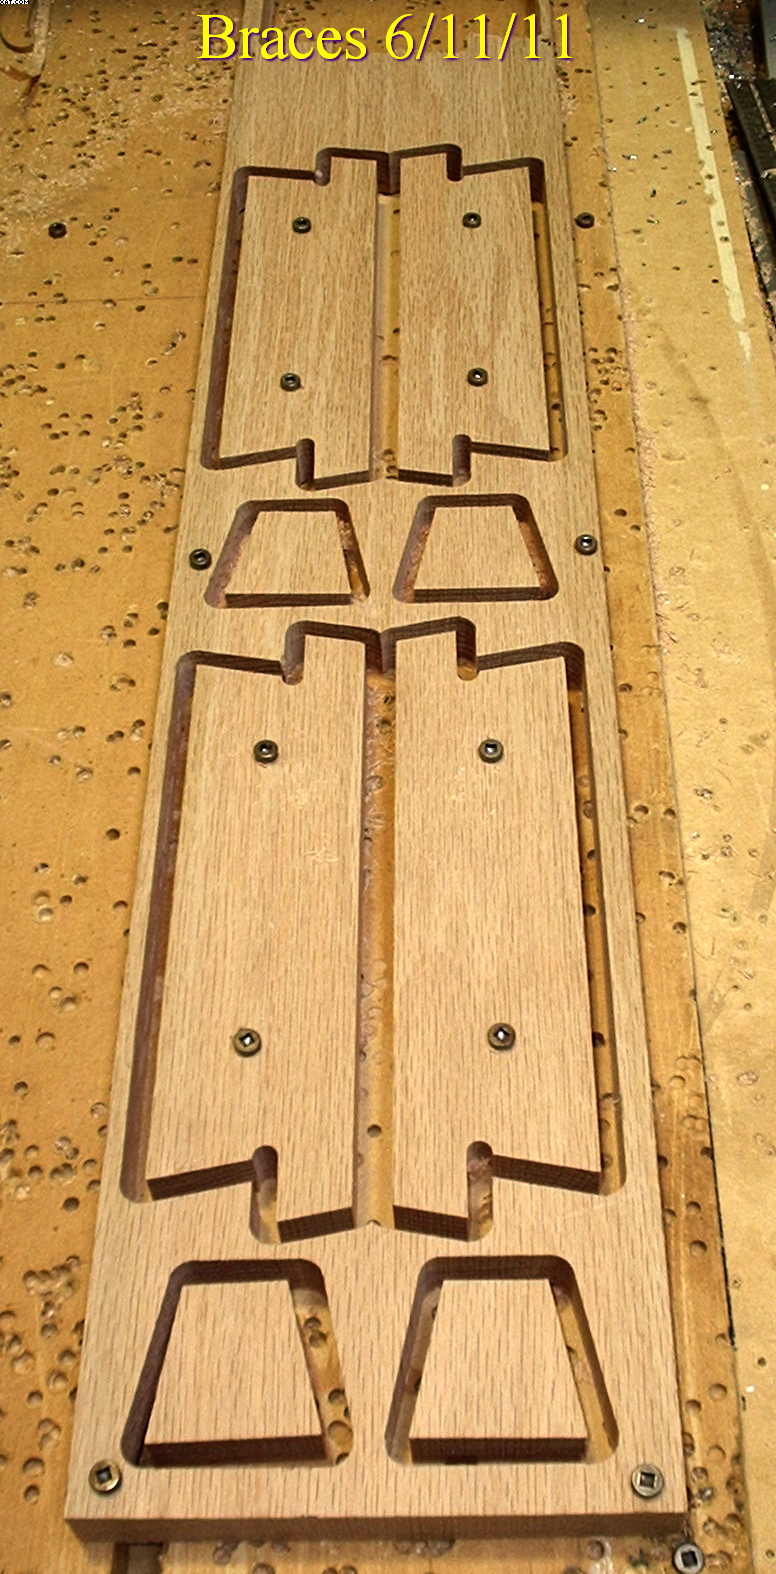
I got the front and rear braces cut today.
-
The sides were previously cut, steamed and formed. They are prefinished and will be placed in the dados in the top and bottom. A couple of braces need to be cut before I can assemble them.
-
Some alignment holes are cut and the center piece is secured before the outside cut.