


longdrive03
-
Posts
816 -
Joined
-
Last visited
Content Type
Forums
Events
Gallery
Posts posted by longdrive03
-
-
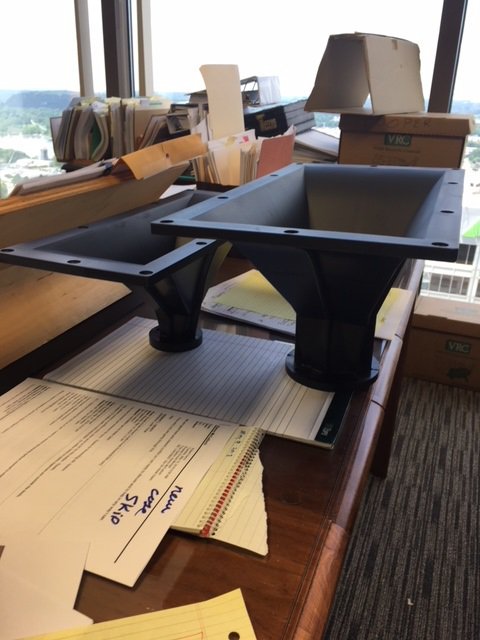
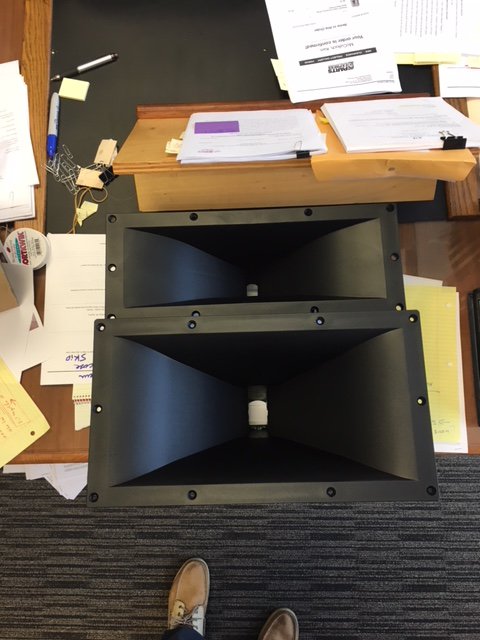
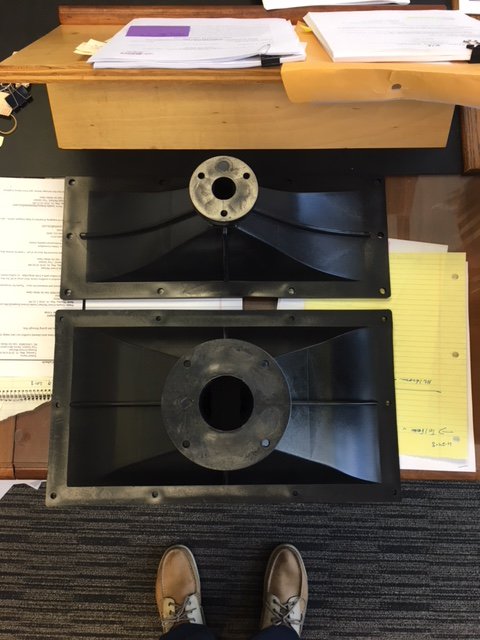
PE did a buyout of several mid and tweeter horn drivers from B-52. 299-2305 is a 2" opening horn 9.75" x 17.75" useable to 400HZ per PE"s listing. 299-2304 is a 1" opening 7" x 17.75" useable to 400HZ." I ordered four of each to inspect. They are very sturdy thick plastic and are well made. Prices are $15.88 per horn with quantity discounts. Anyone use or test these yet? I ordered some of the 1" to 2" opening adapters from PE and they fit the 2" horn opening, Here are some pics

-
Do you know what brand (and size - assuming they are 15") and what impedance on the woofers? I think the Type A network uses a 2.5mh coil on the 4 ohm K-33 woofer. If you have the wrong woofers in these and no mid and tweeters I'm sure they don't sound very impressive. Can you remove the bottom cover and see the woofer and any numbers on it and is it an accordion edge surround.
-
That is 2 xl!
-
Christy put me down for 2 CL in white. Will pay on PayPal now.
Thanks for your effort in handling this!!!
longdrive03
Ken
-
Took a short break from this project for other stuff. Nearly finished just need to rub down poly and wax, stretch grill cloth and install sealer foam and speakers. Should have ready within a week.
-
Excellent skills young man!! Great job. Someone is going to get lucky!
BTW what is the woofer number?
-
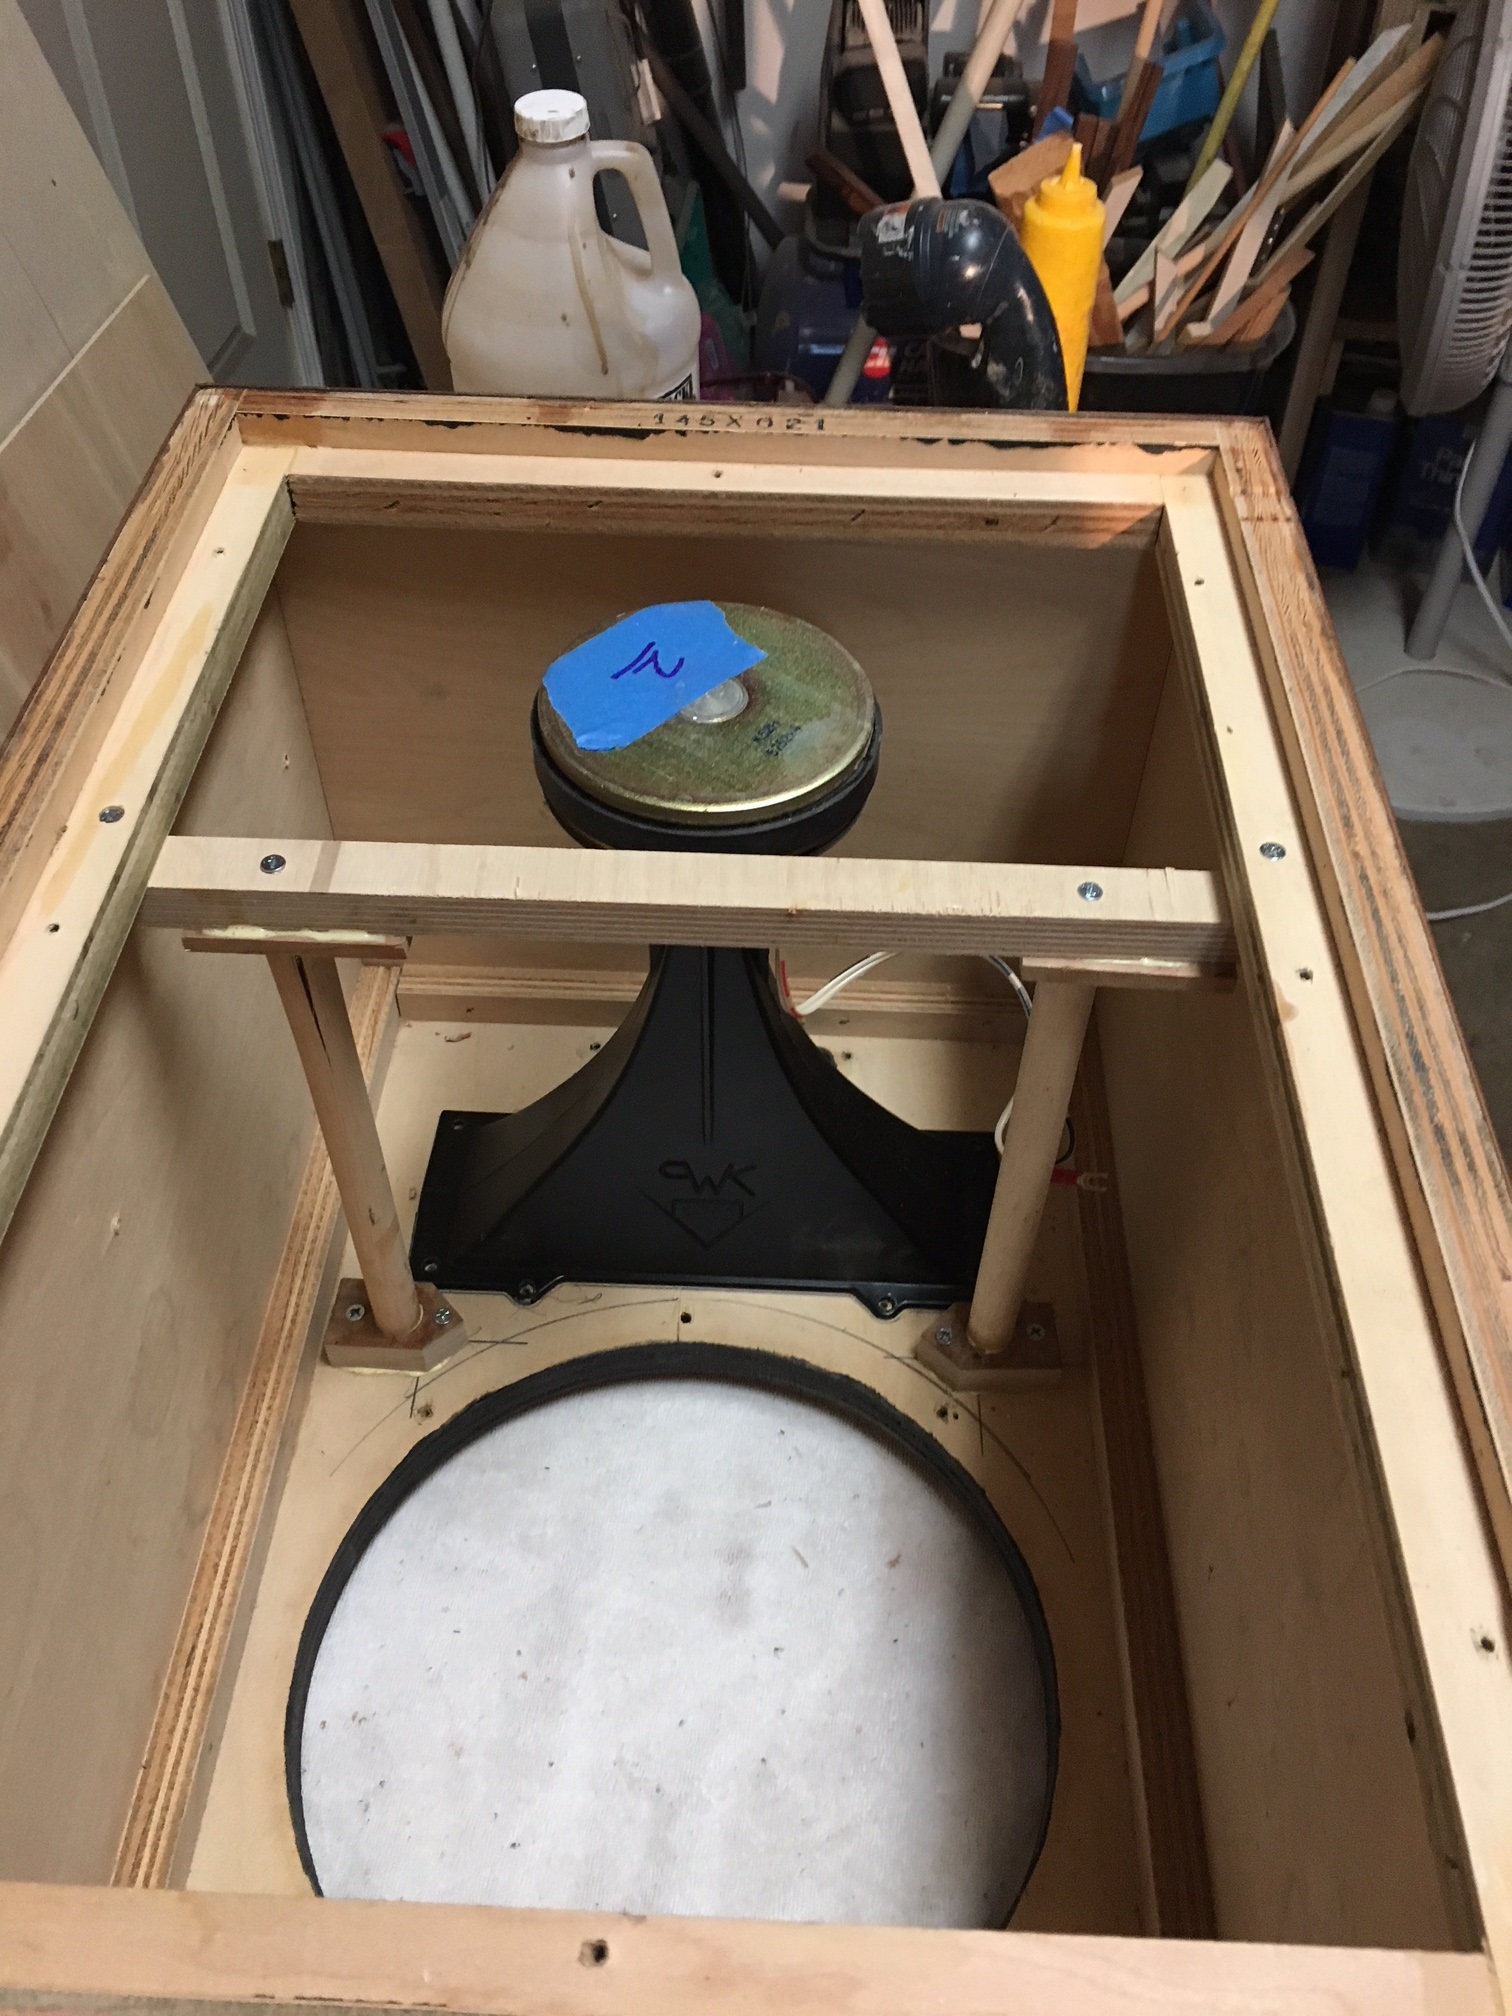
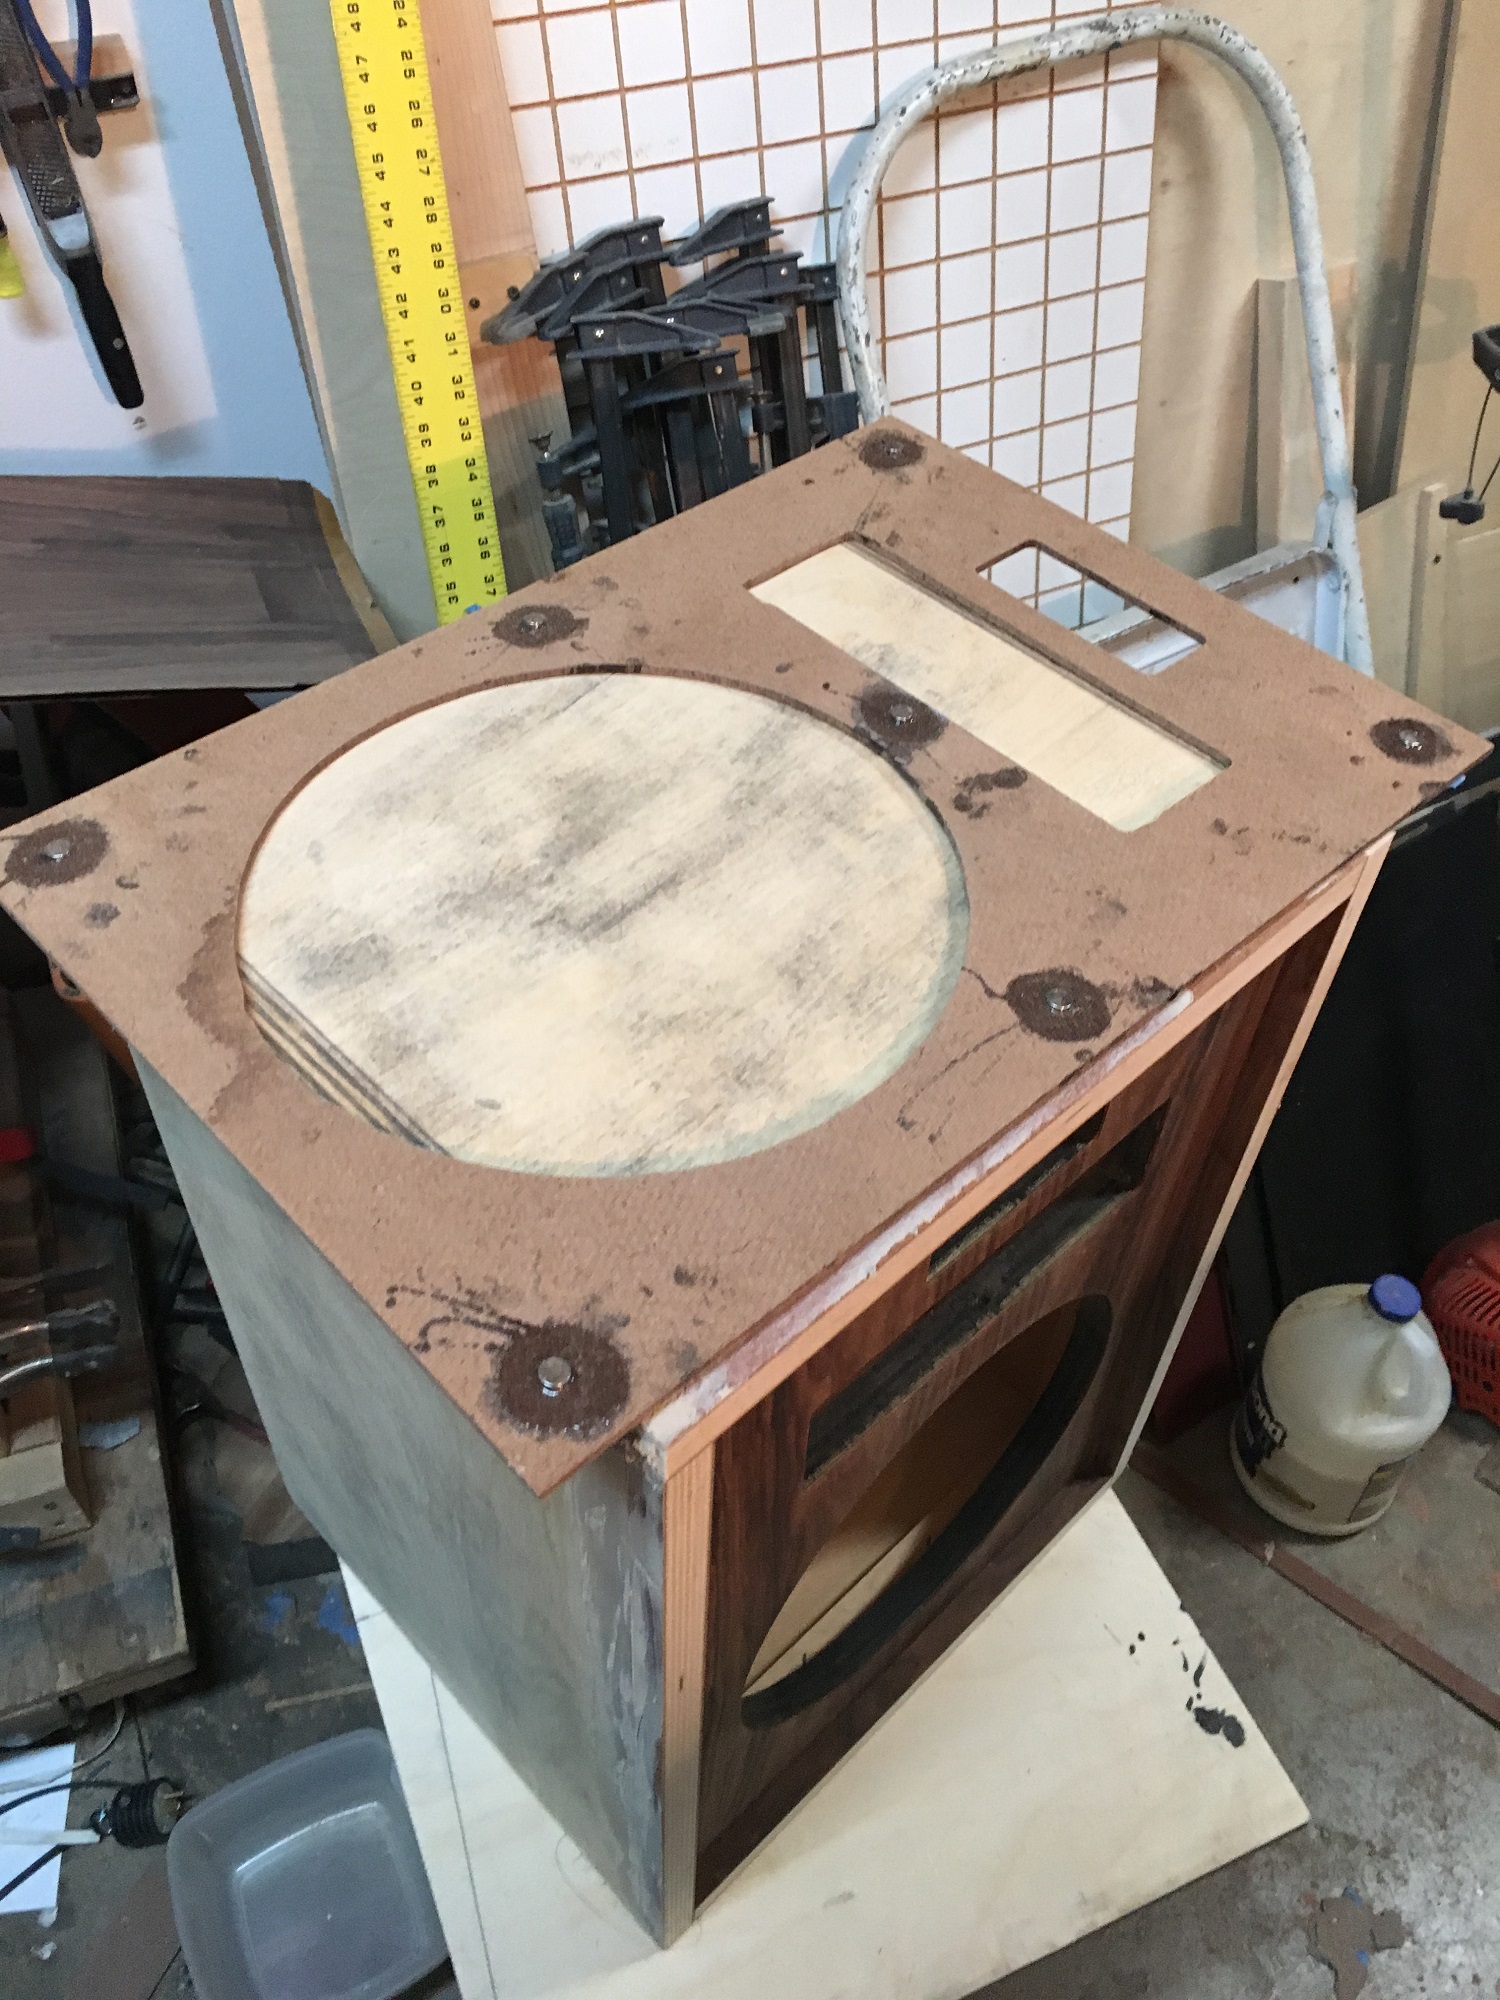
Looks good. I'm going to put a horizontal side to side cross brace and bolt to the round front to back dowels to add some stiffness. Thanks for the suggestion.
-
Thanks Emile I appreciate the compliment. Veneering can be hard but I enjoy it.
-
CEC, I think I missed the point of your question and now I think I get it!! DUH ME!!
Upon further consideration I am considering applying a horizontal brace across the two round vertical braces and glue/screw to the round verticals and pocket screw glue to the sides. That should provide some rigidity to the sides without taking up much cabinet space. Good suggestion.
-
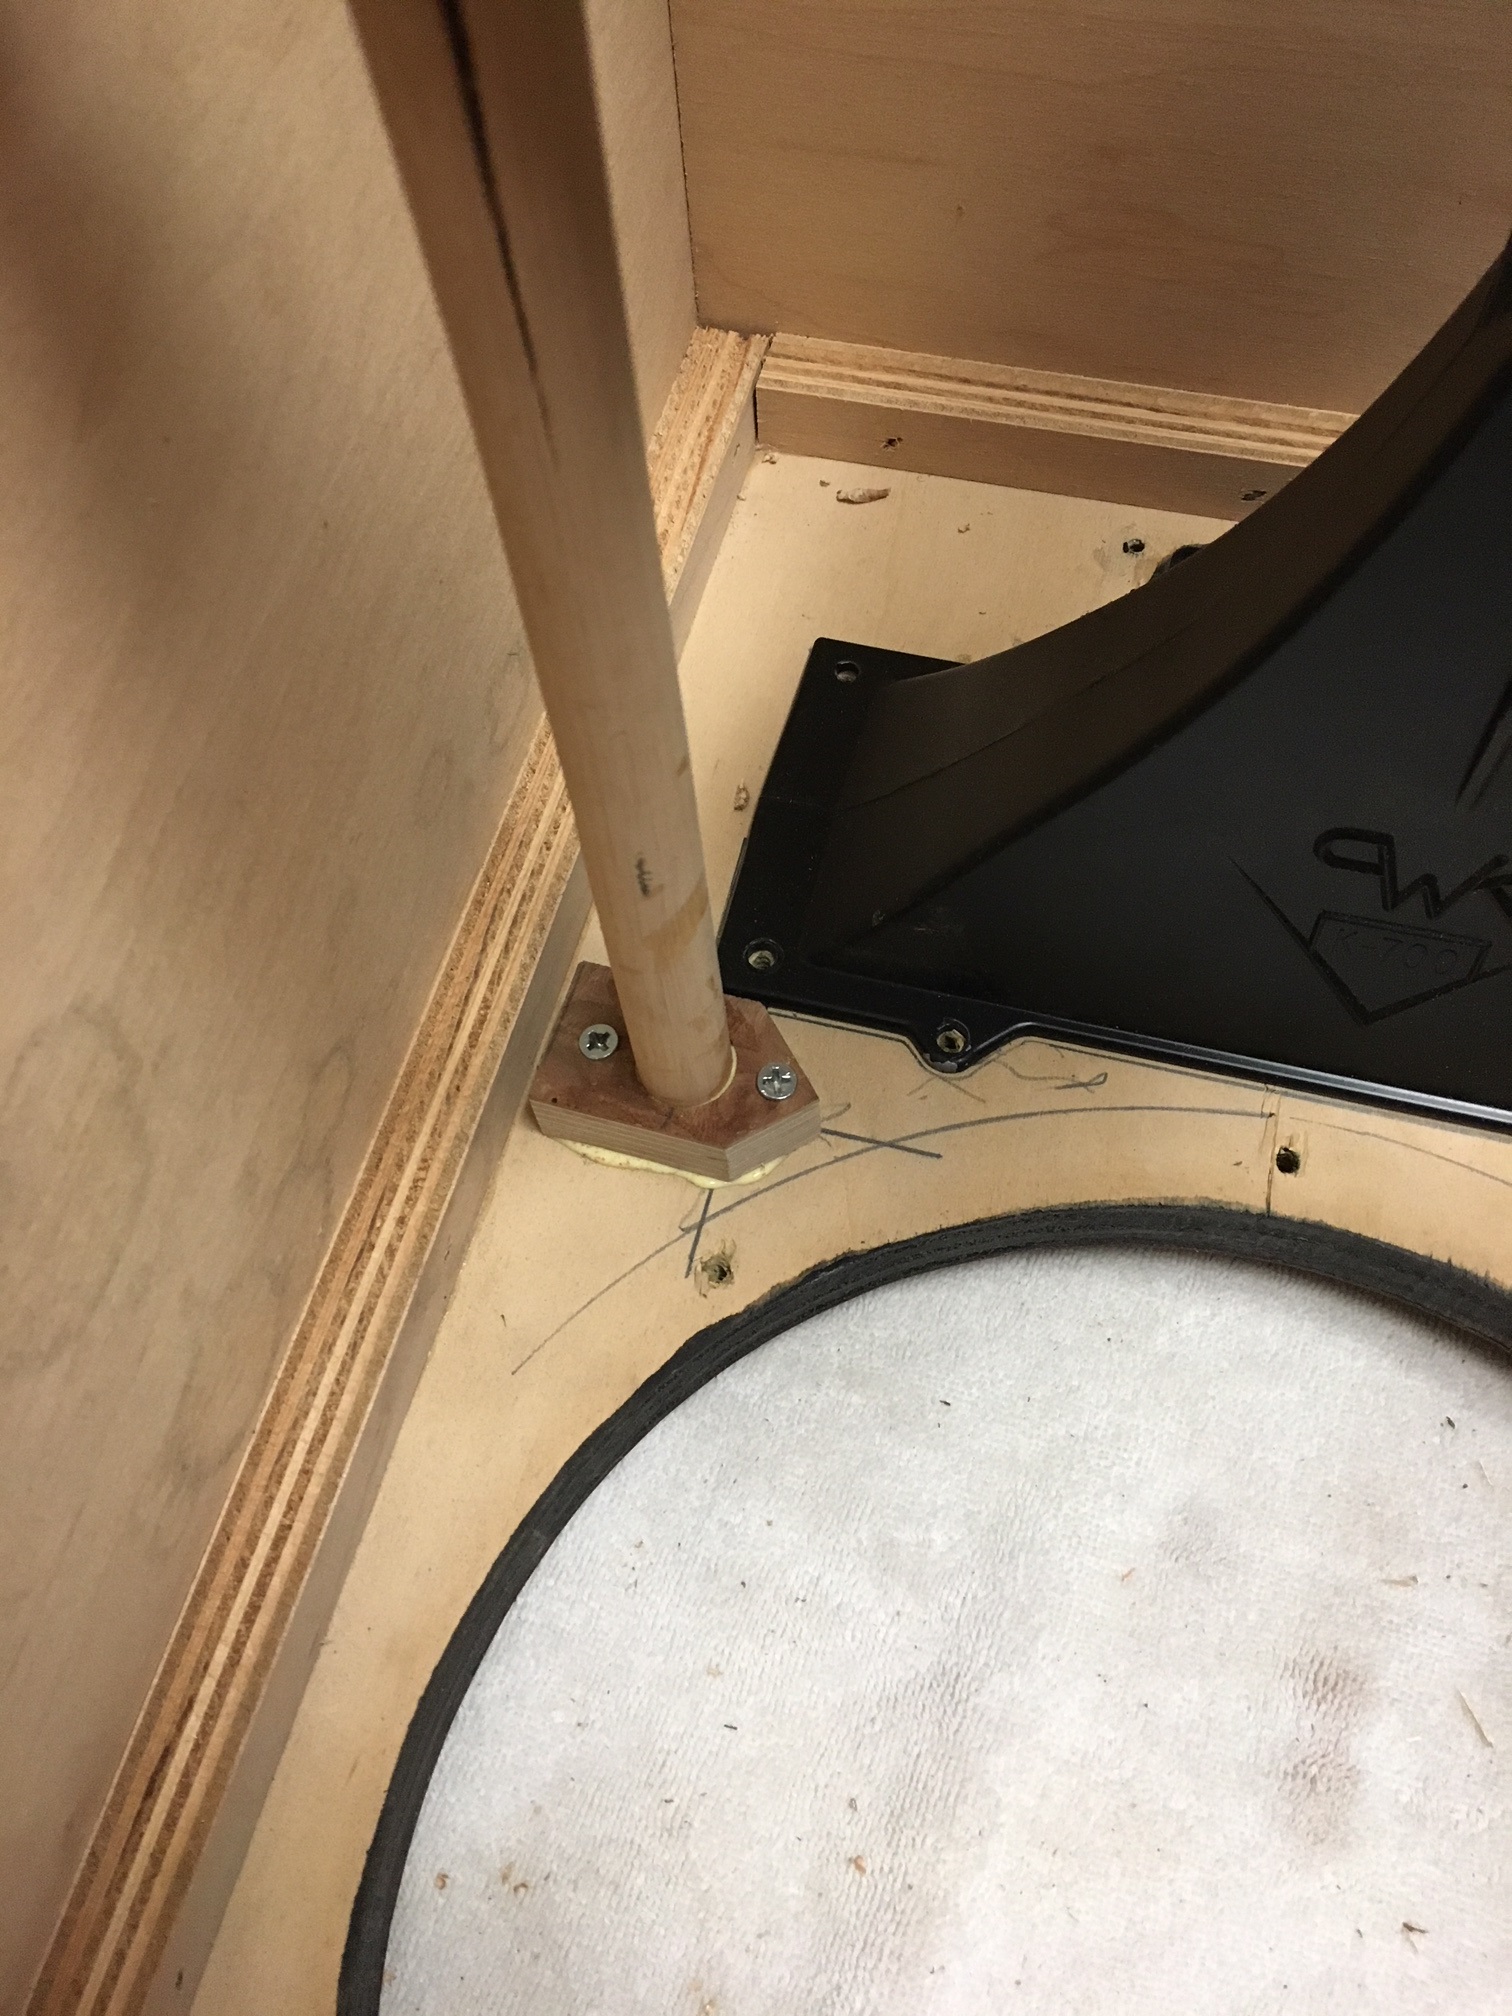
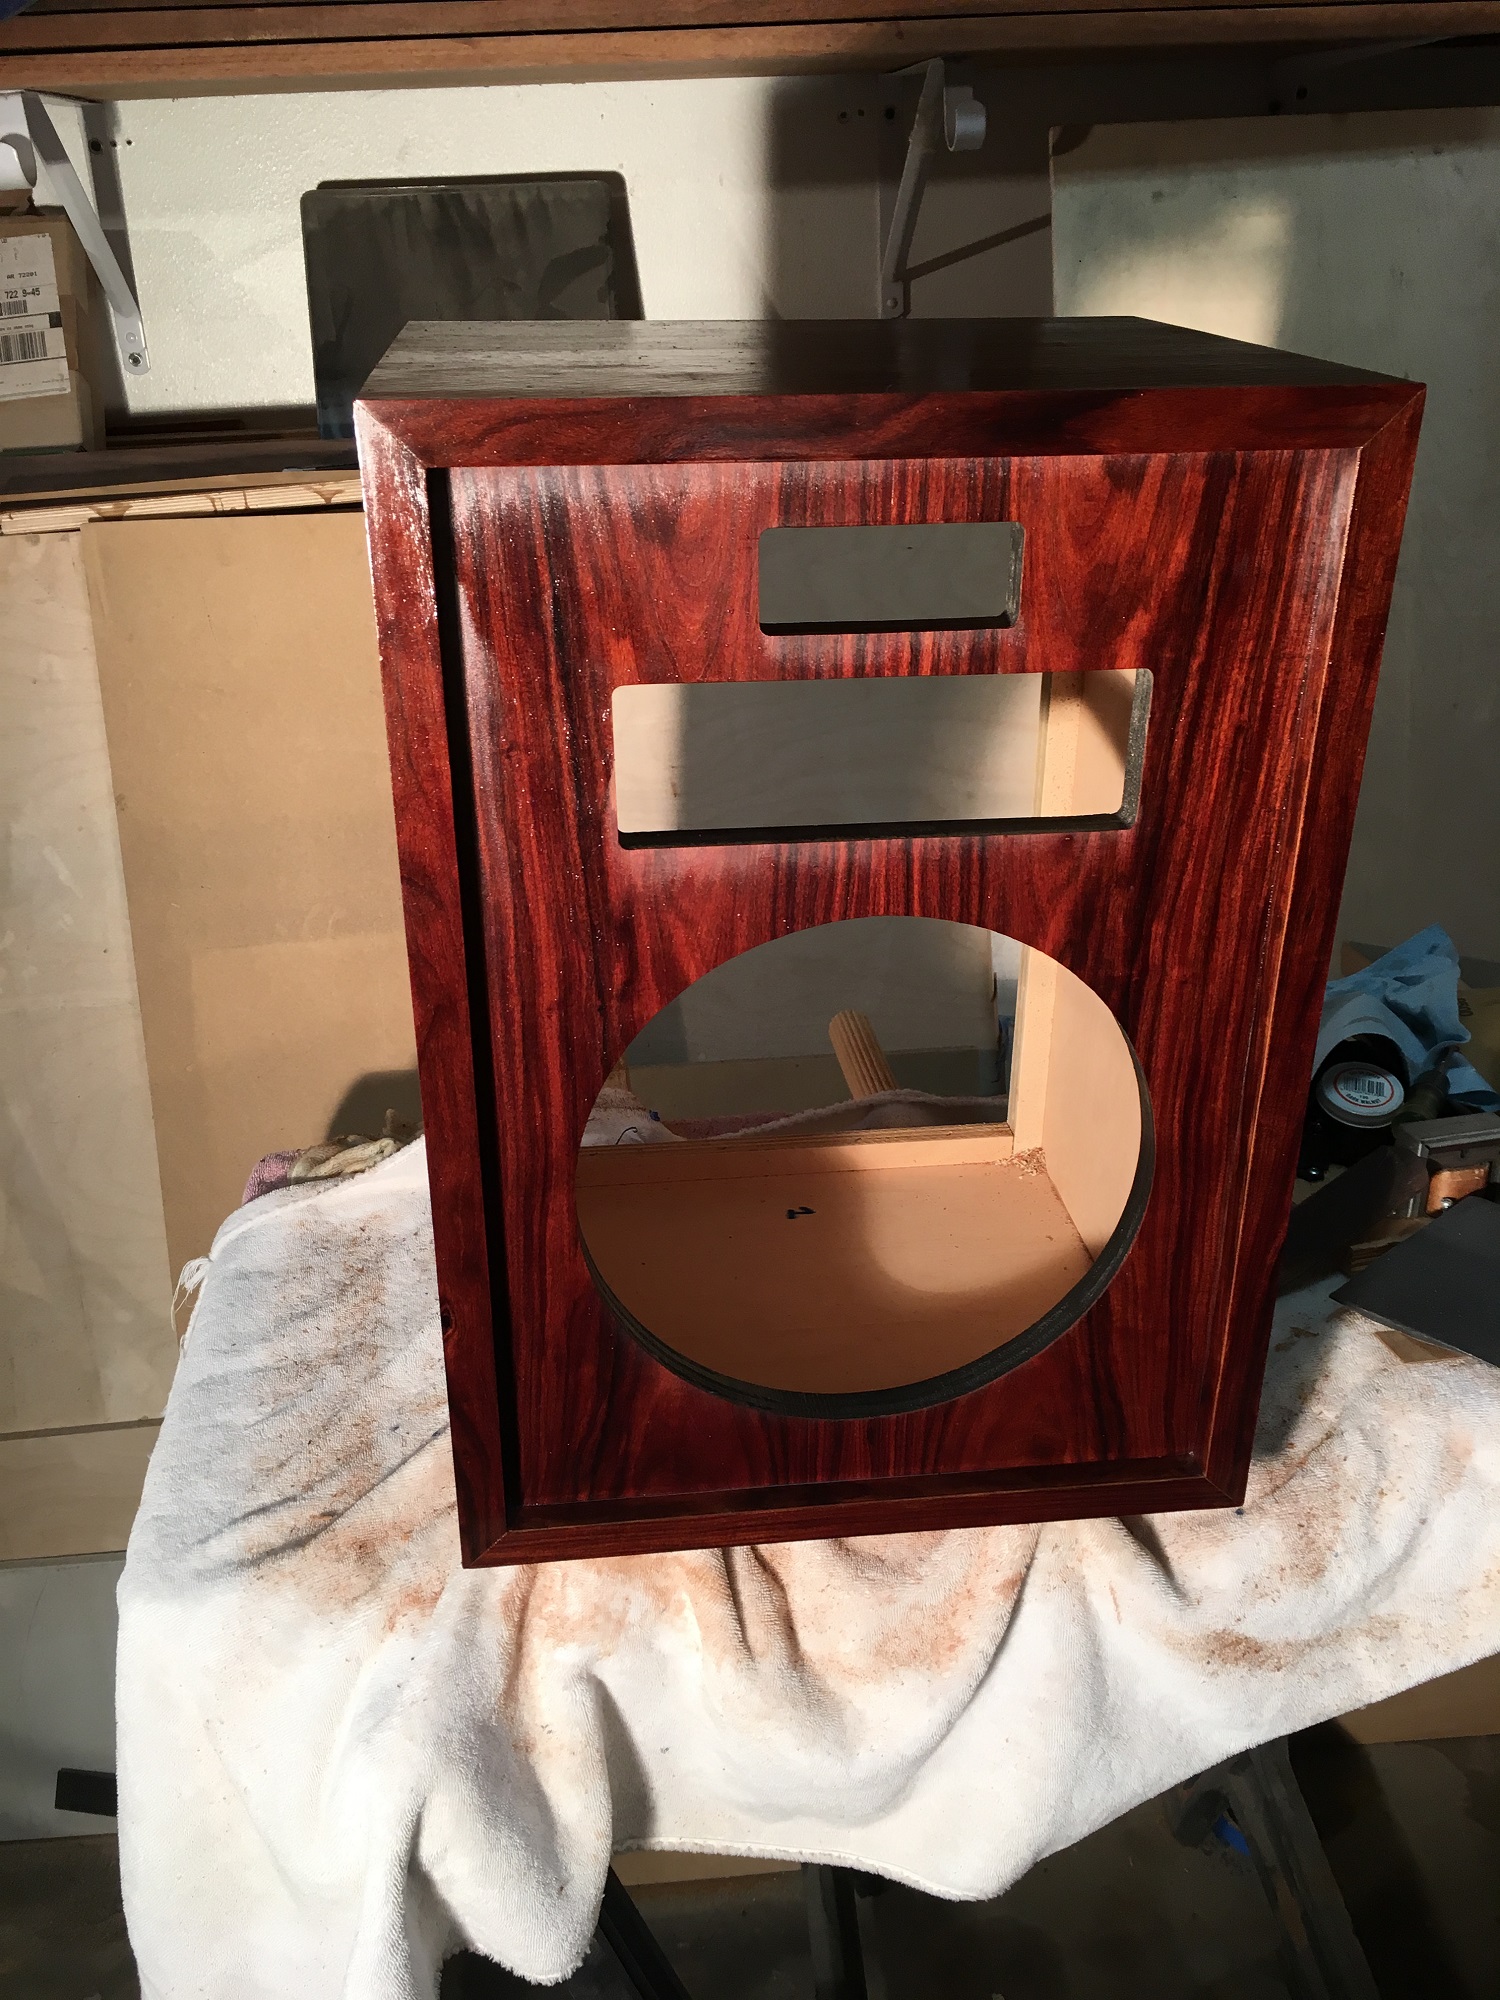
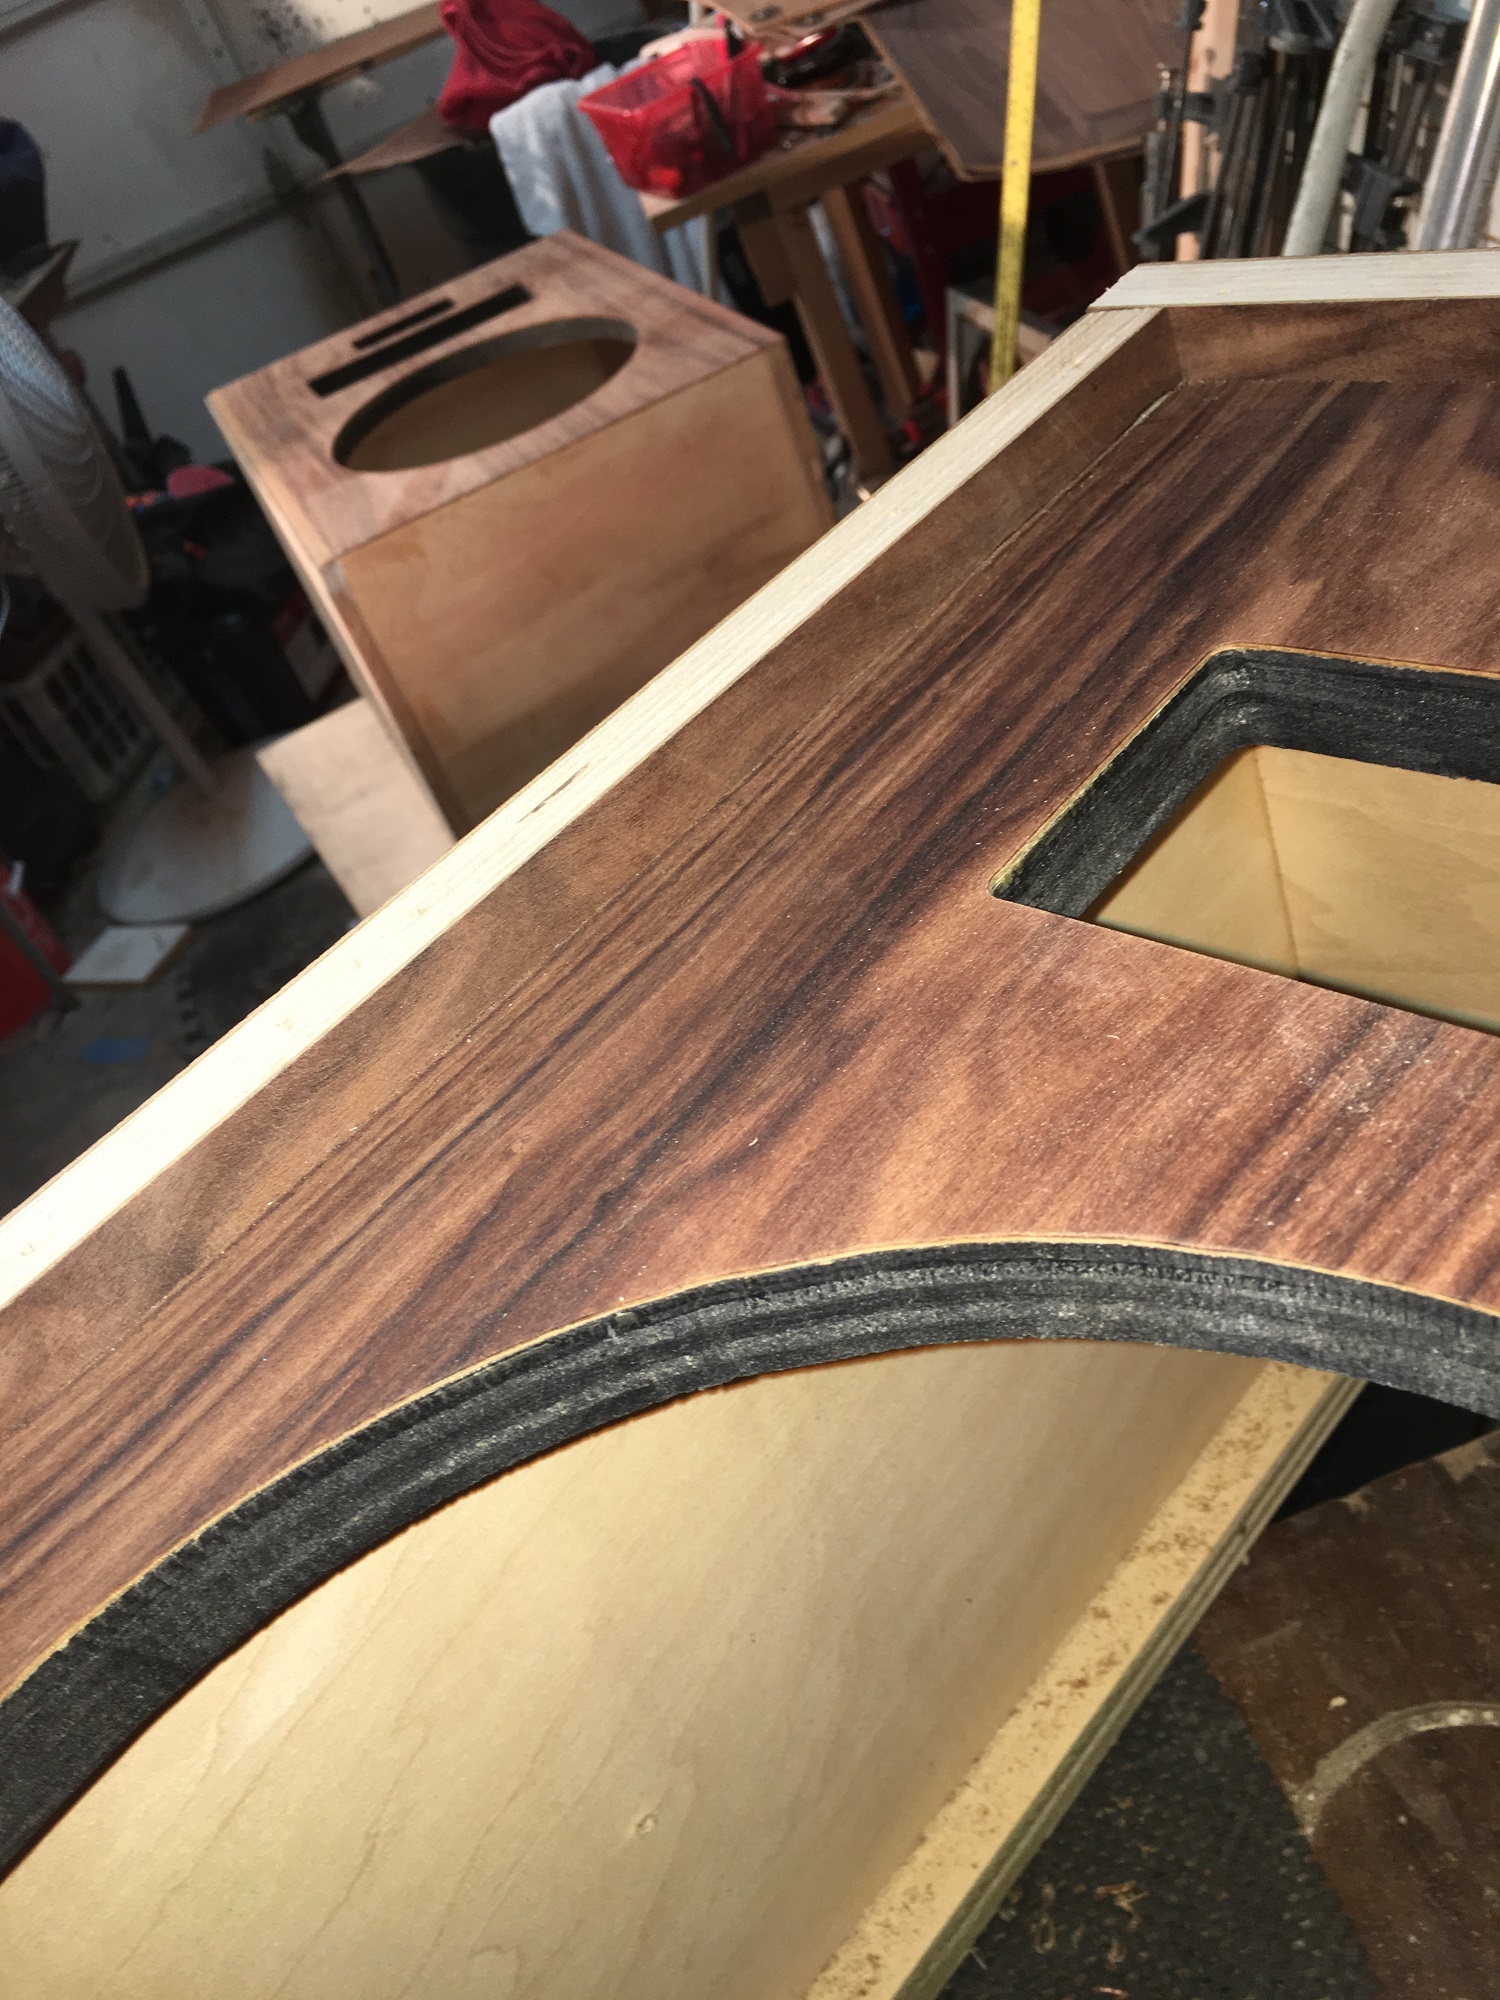
CEC and Don thanks for the compliments. The back is removable and I will have two additional screws though the back into the horizontal brace. Didn't consider the window pane brace because there is very little connection room on the front inside baffle because of the closeness of the woofer and mid horn. Also the mid driver is in the way. You can see the woofer pencil line and the mid horn are very close in the middle horizontally. Lot easier to do on a Cornwall. I'm sure that there is a better way but I wanted to make sure I could remove/install woofer. Should add some good stability front to back. The back is so thin that it vibrates a lot. Thanks for the inquiry. Here is the latest pic after applying one coat shellac and one coat gloss wipe on poly yesterday.
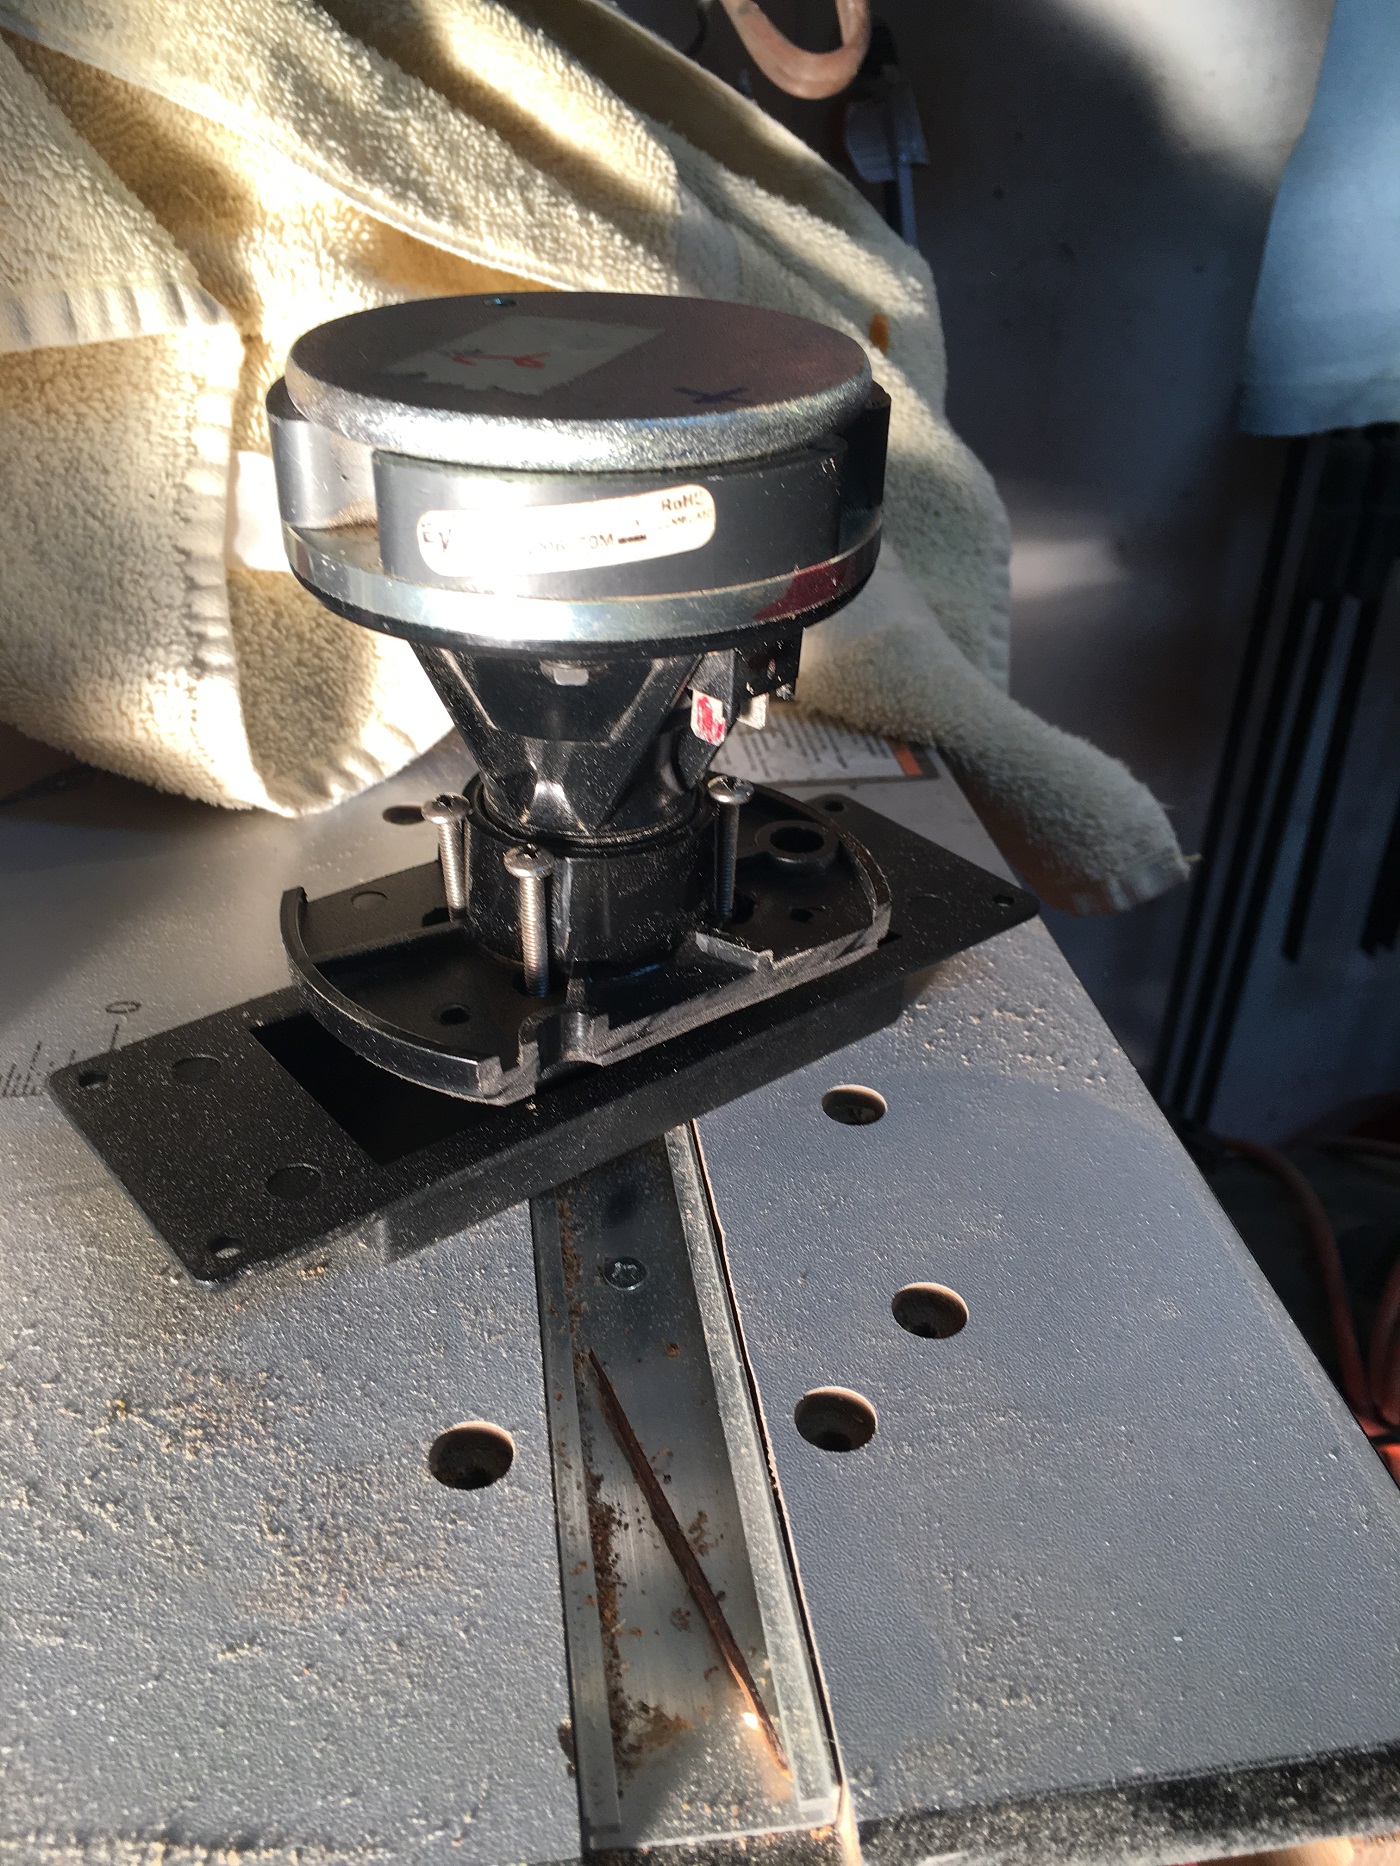
I'm tinkering with an idea using a K-77D horn front with an bolt to screw on adapter connected to an EV 2005 screw on tweeter driver. It will fit in a Heresy if the tweeter hole is widened by 3/16" each way. Inserts from the back side. Driver is sweet sounding. May not use on this set for could in the future.
-
CEC and Don thanks for the compliments. The back is removable and I will have two additional screws though the back into the horizontal brace. Didn't consider the window pane brace because there is very little connection room on the front inside baffle because of the closeness of the woofer and mid horn. Also the mid driver is in the way. You can see the woofer pencil line and the mid horn are very close in the middle horizontally. Lot easier to do on a Cornwall. I'm sure that there is a better way but I wanted to make sure I could remove/install woofer. Should add some good stability front to back. The back is so thin that it vibrates a lot. Thanks for the inquiry. Here is the latest pic after applying one coat shellac and one coat gloss wipe on poly yesterday.
I'm tinkering with an idea using a K-77D horn front with an bolt to screw on adapter connected to an EV 2005 screw on tweeter driver. It will fit in a Heresy if the tweeter hole is widened by 3/16" each way. Inserts from the back side. Driver is sweet sounding. May not use on this set for could in the future.
-
 1
1
-
-
Thanks Hugot. If you're up this way give me a shout. Lots of forum members in Little Rock.
-
Thanks for the compliments guys.
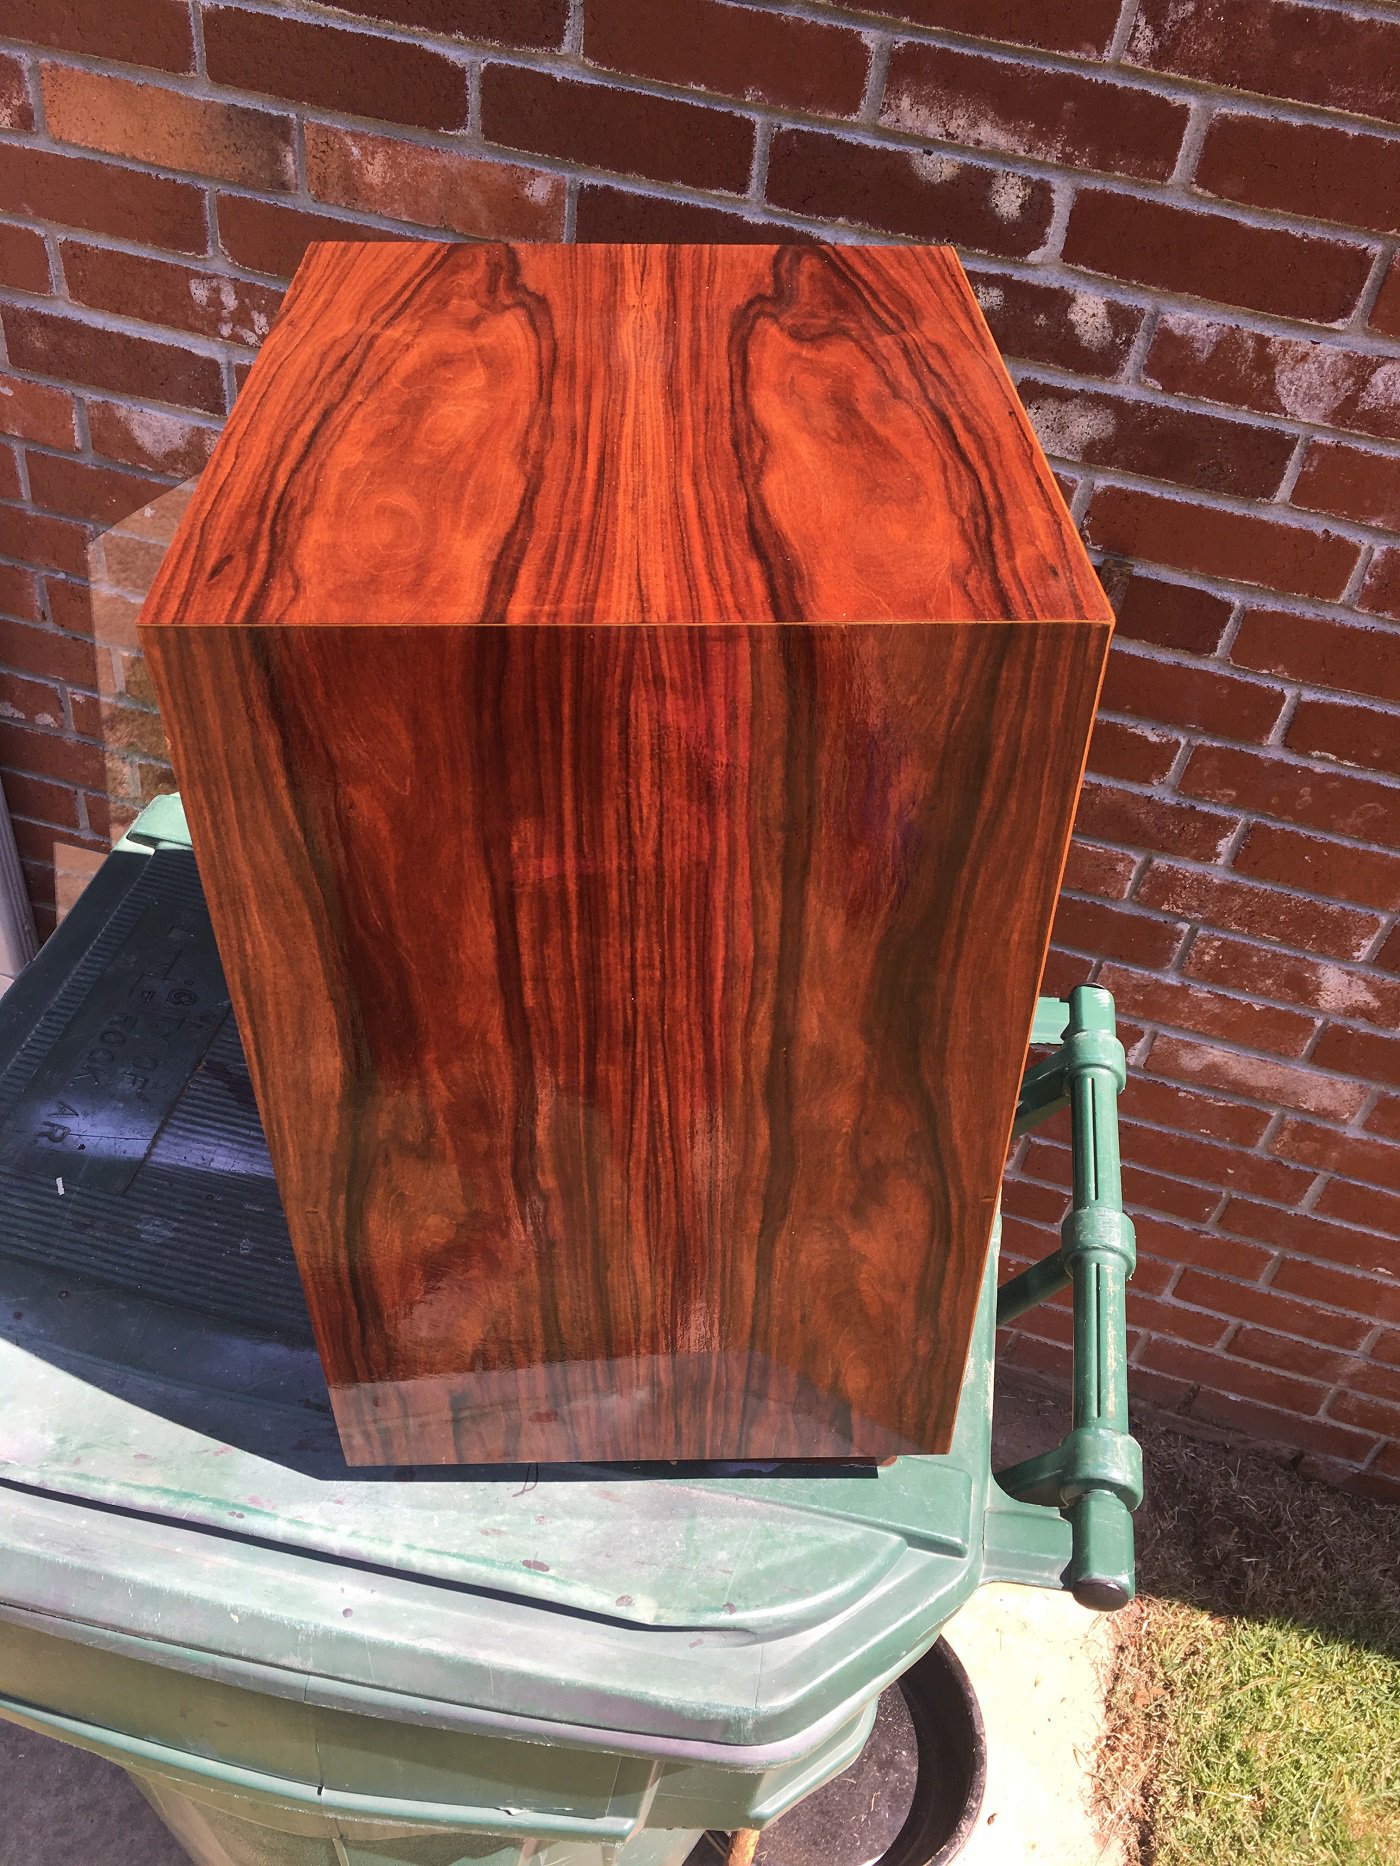
Update, all veneer work is done and I'm recapping the crossover with Sonicap caps and installing front to rear bracing. Finished building the slanted risers yesterday. Waiting for shipment of dewaxed shellac to use as sealing coat on this oily Rosewood.
-
Thanks for the compliments guys.
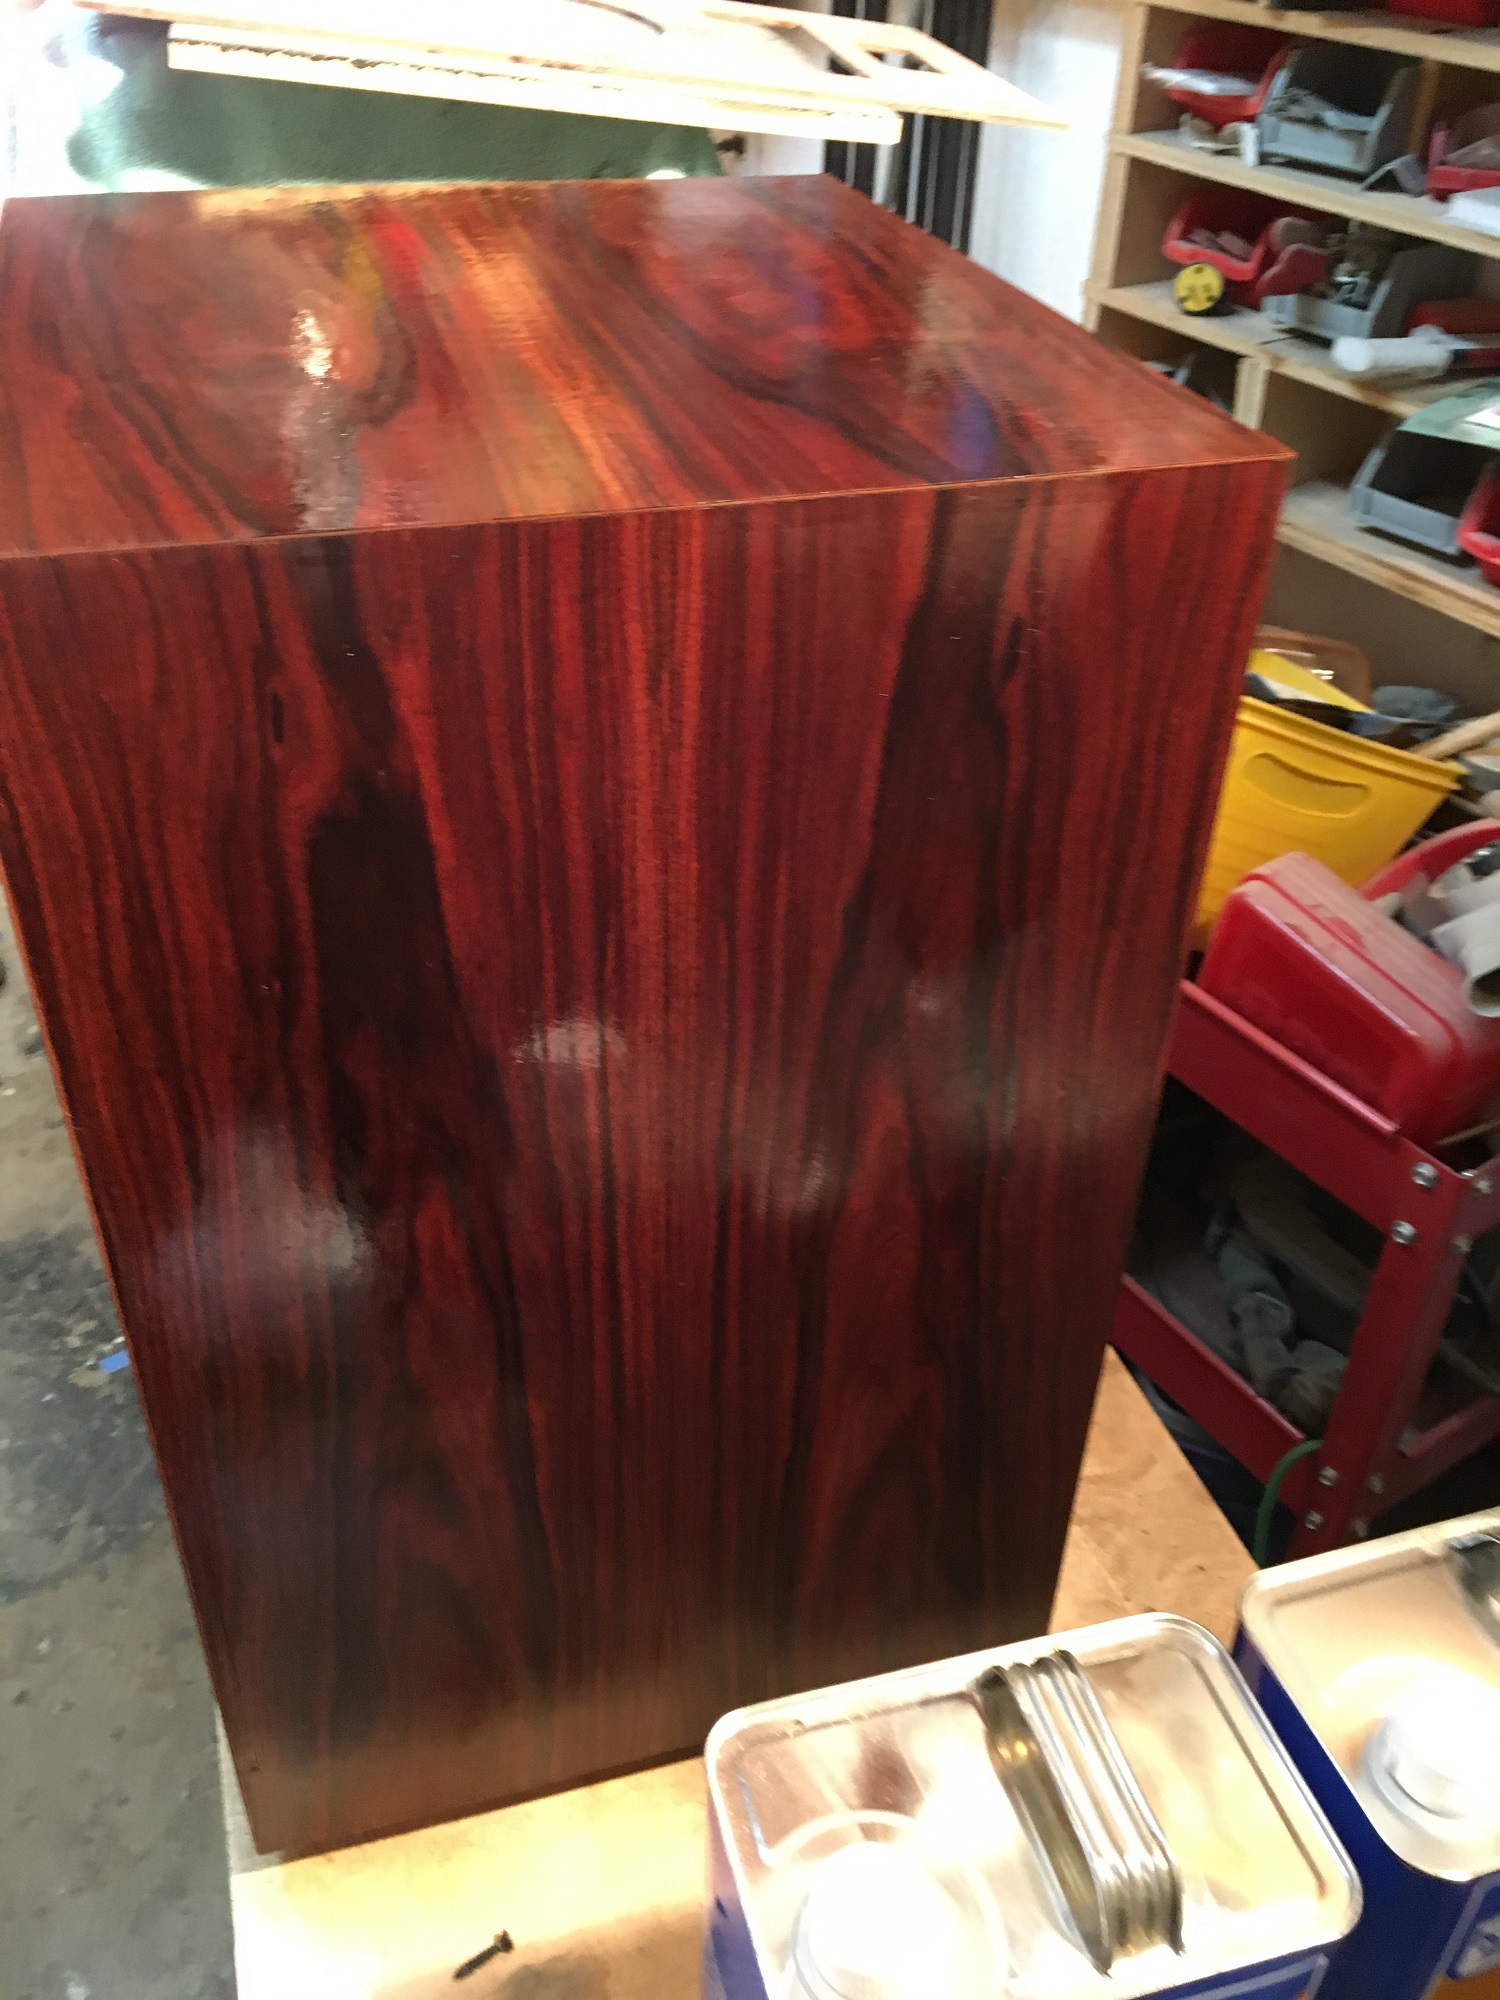
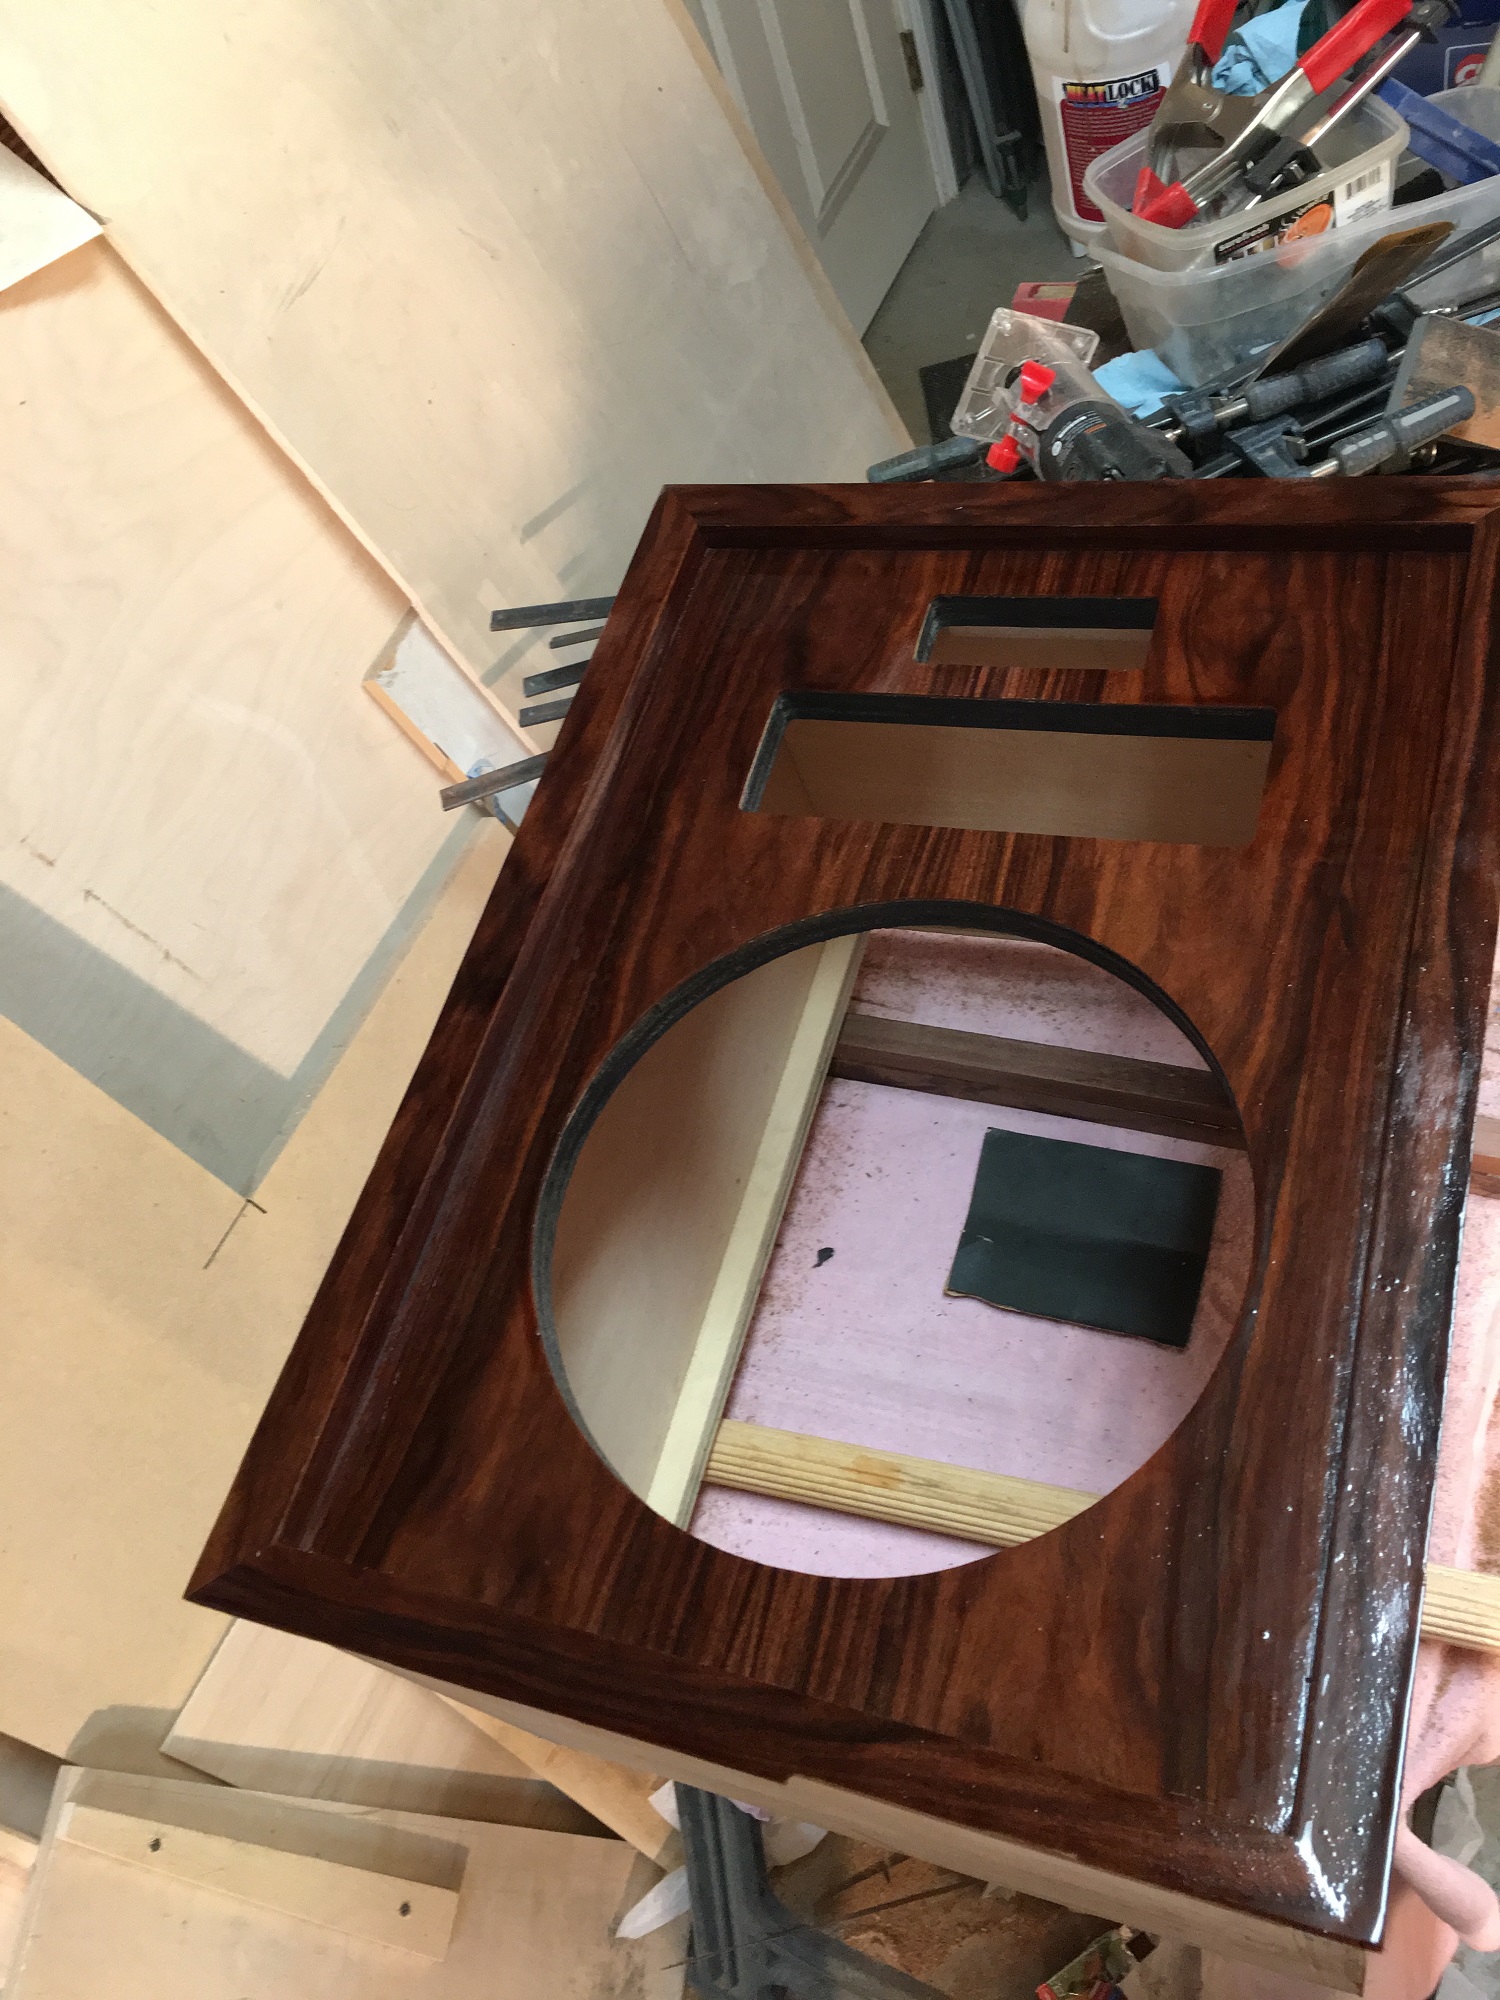
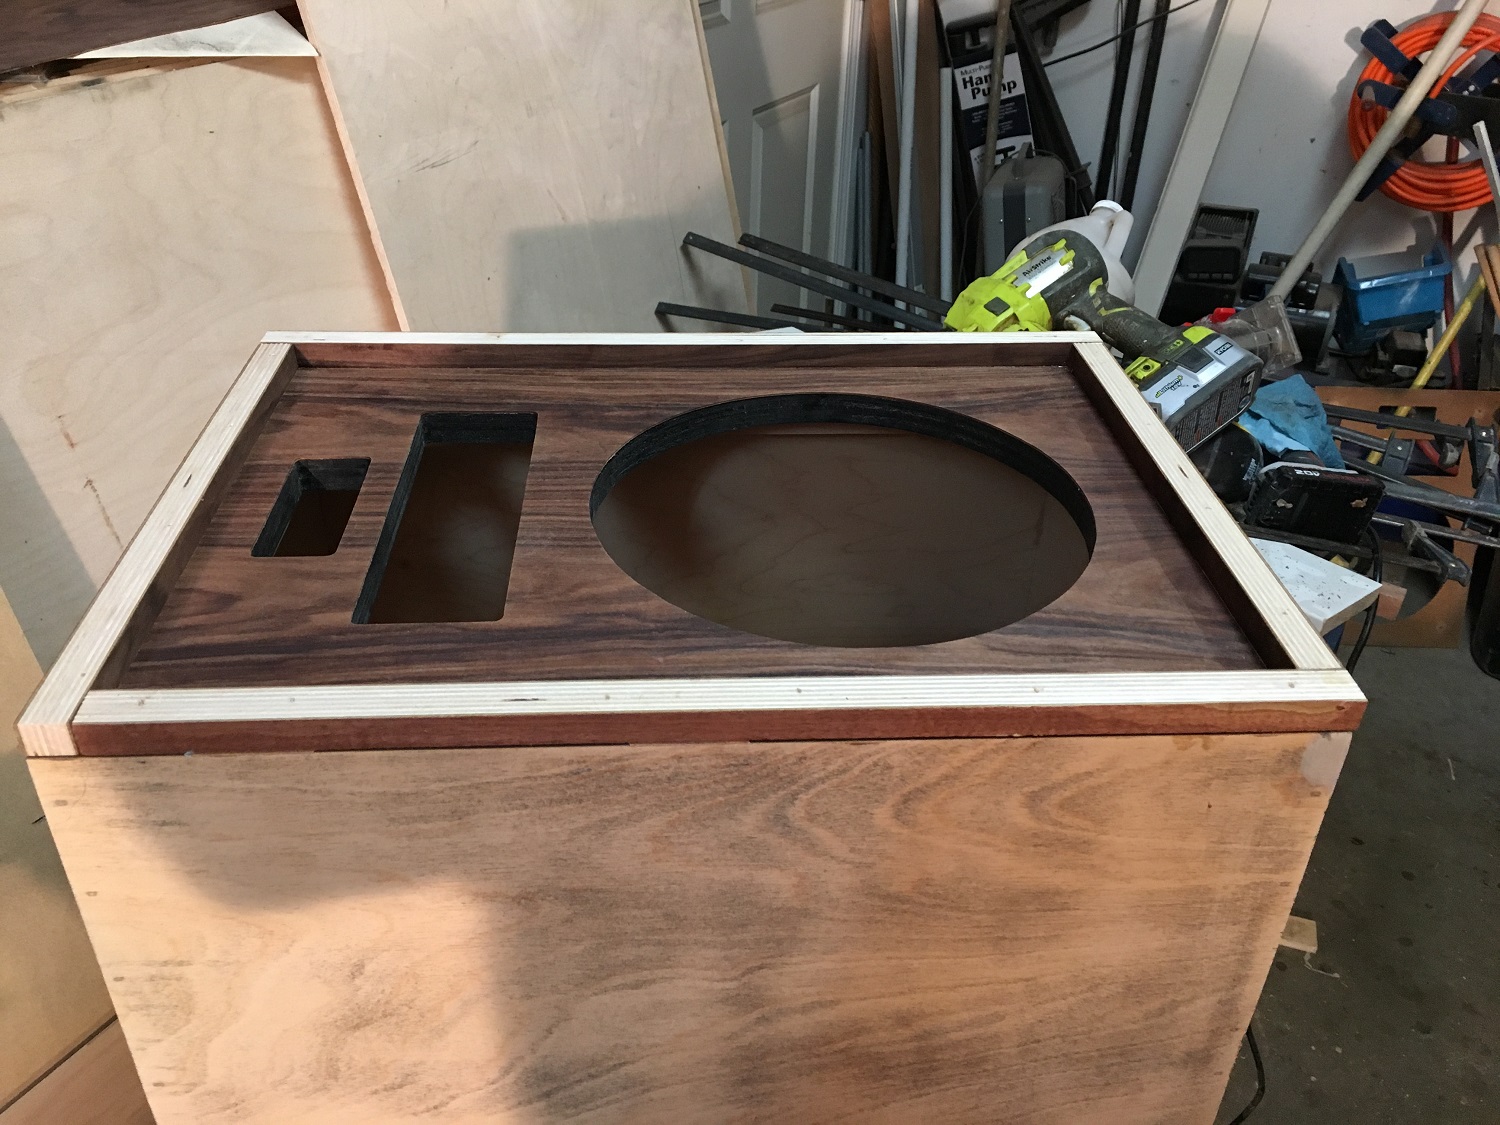
Update, all veneer work is done and apply poly now. Here are pics with one coat of poly on (still wet).
-
4
-
-
Update, got the front extended trim veneer but haven't flush trimmed them yet. Will do tonight and then apply veneer to second speaker. Won't be long before the ole finish goes on.
-
4
-
-
Thanks for the compliments guys. Twk123 I think the panels are thick enough that balance veneer isn't necessary. There already is birch veneer on the interior portions of the panels. There should not be any creeping of the veneer because the HeatLock glue dries hard unlike Titebond 2 that remains flexible. I've never had any problem with this method. Thanks.
-
1
-
-
Excellent job!! Love the light clean finish. Very elegant!!
-
 1
1
-
-
Achy - Richieb is right!! Grown here in Arkansas at secret location. NSA type location. I’ll check with my veneer consultant. Not really sure
-
-
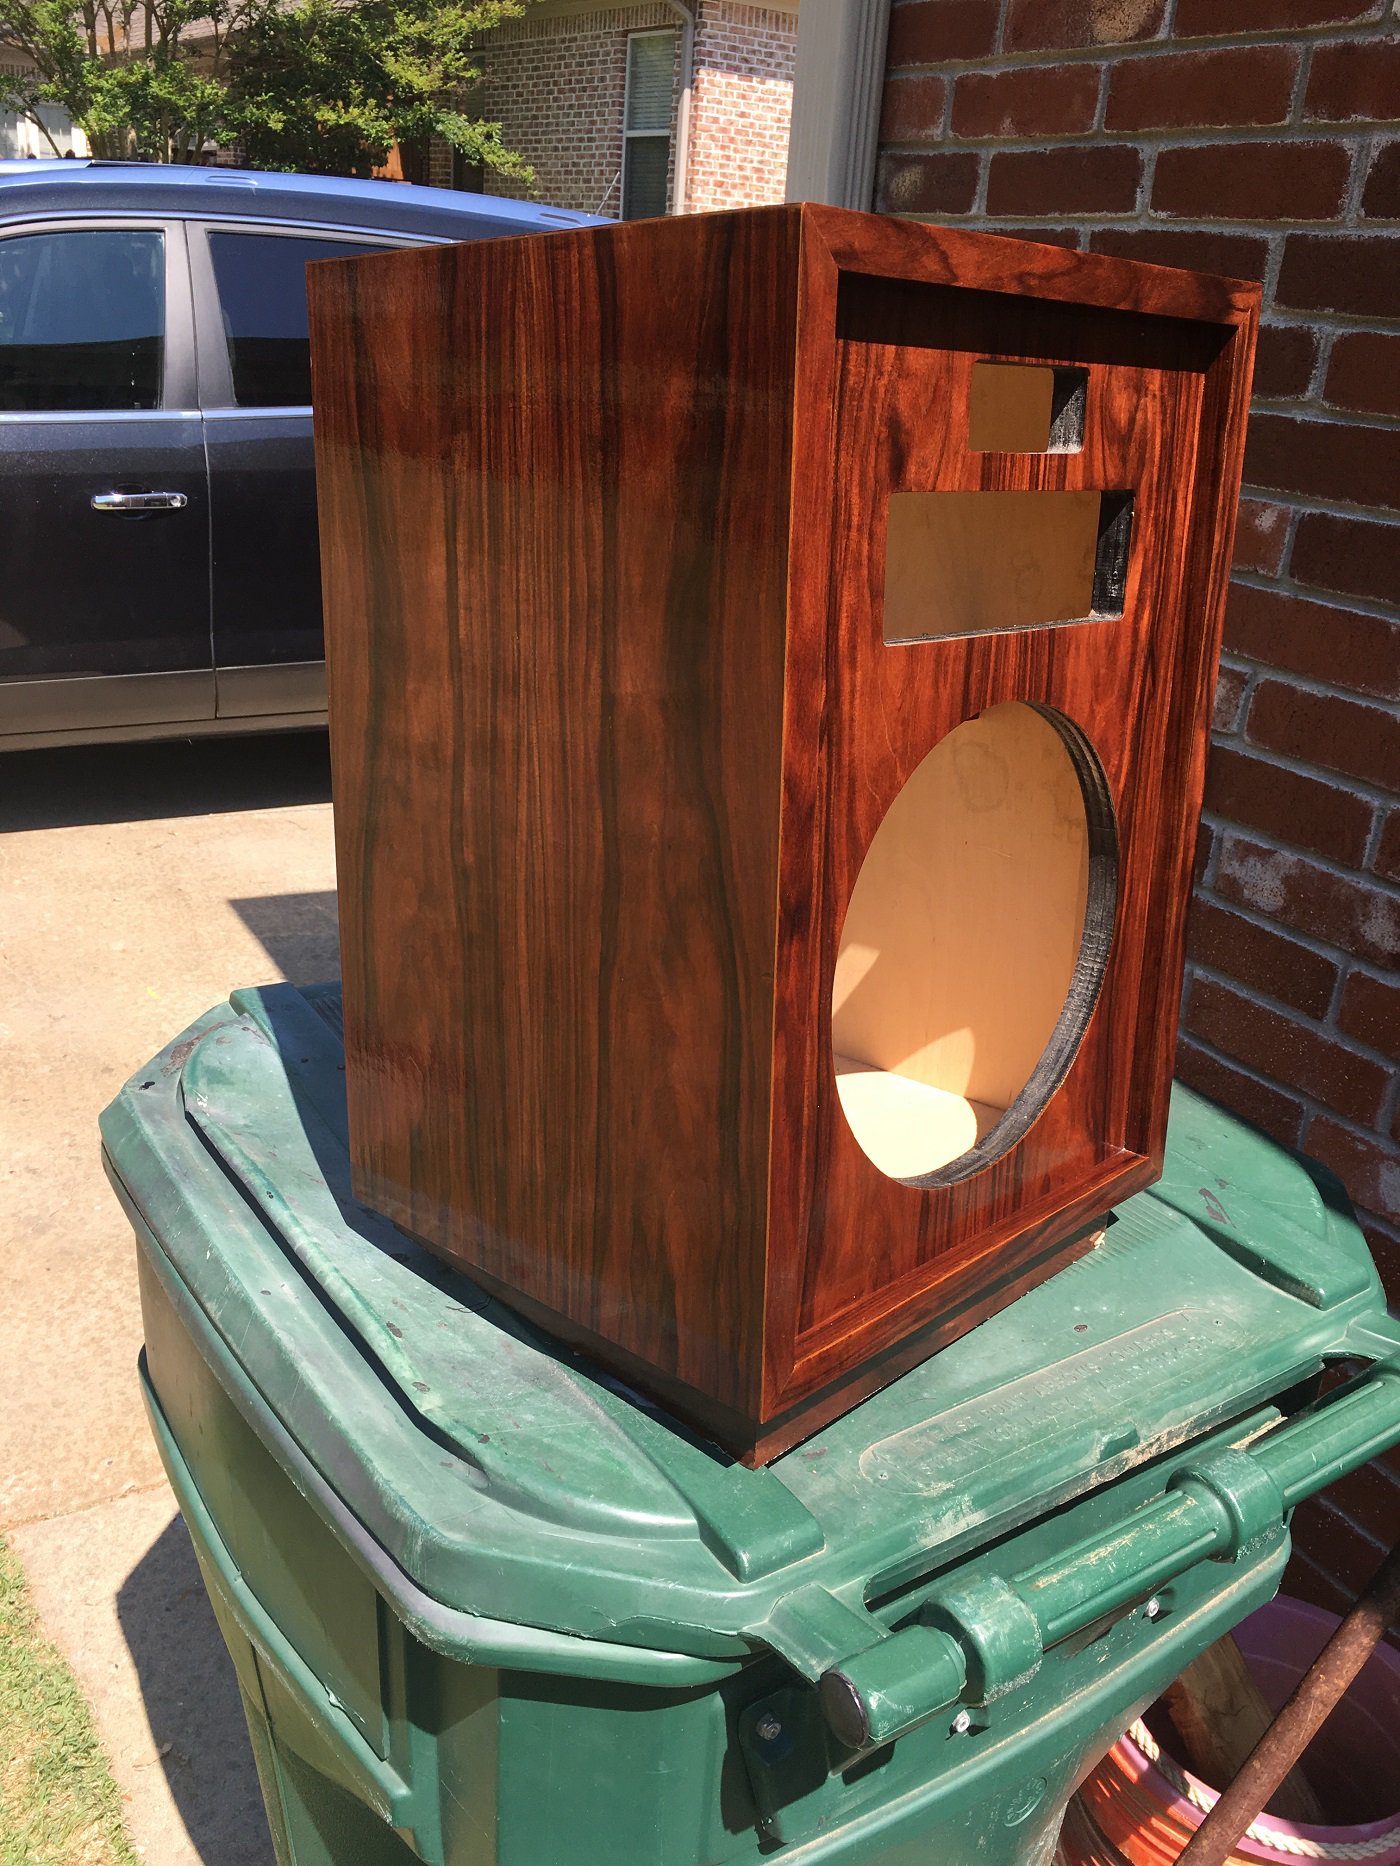
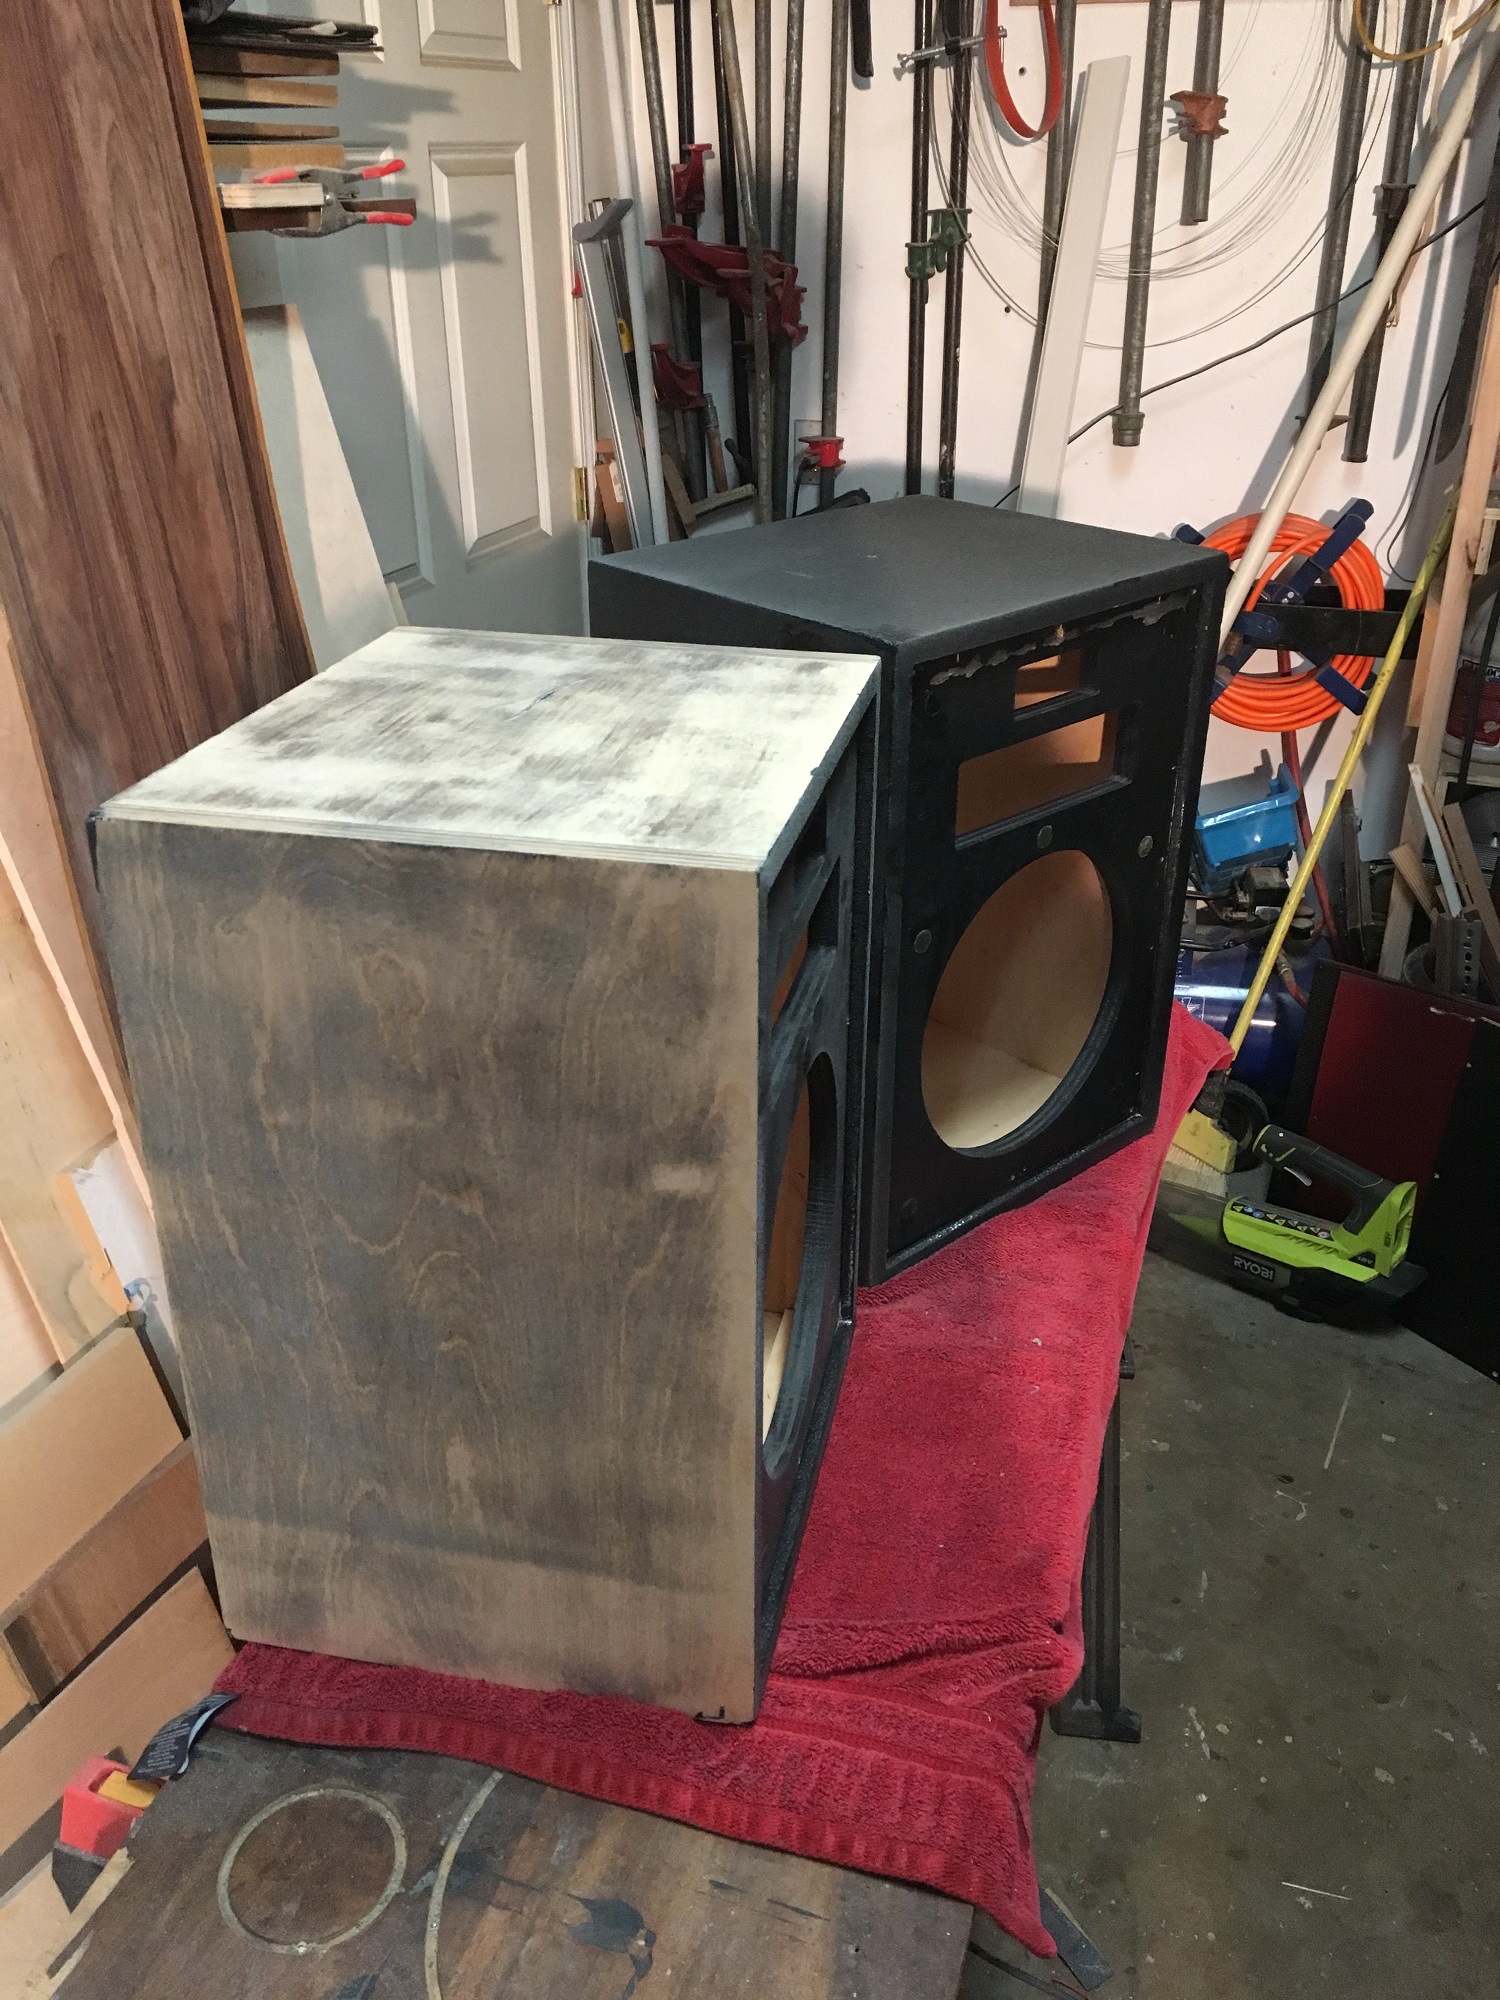
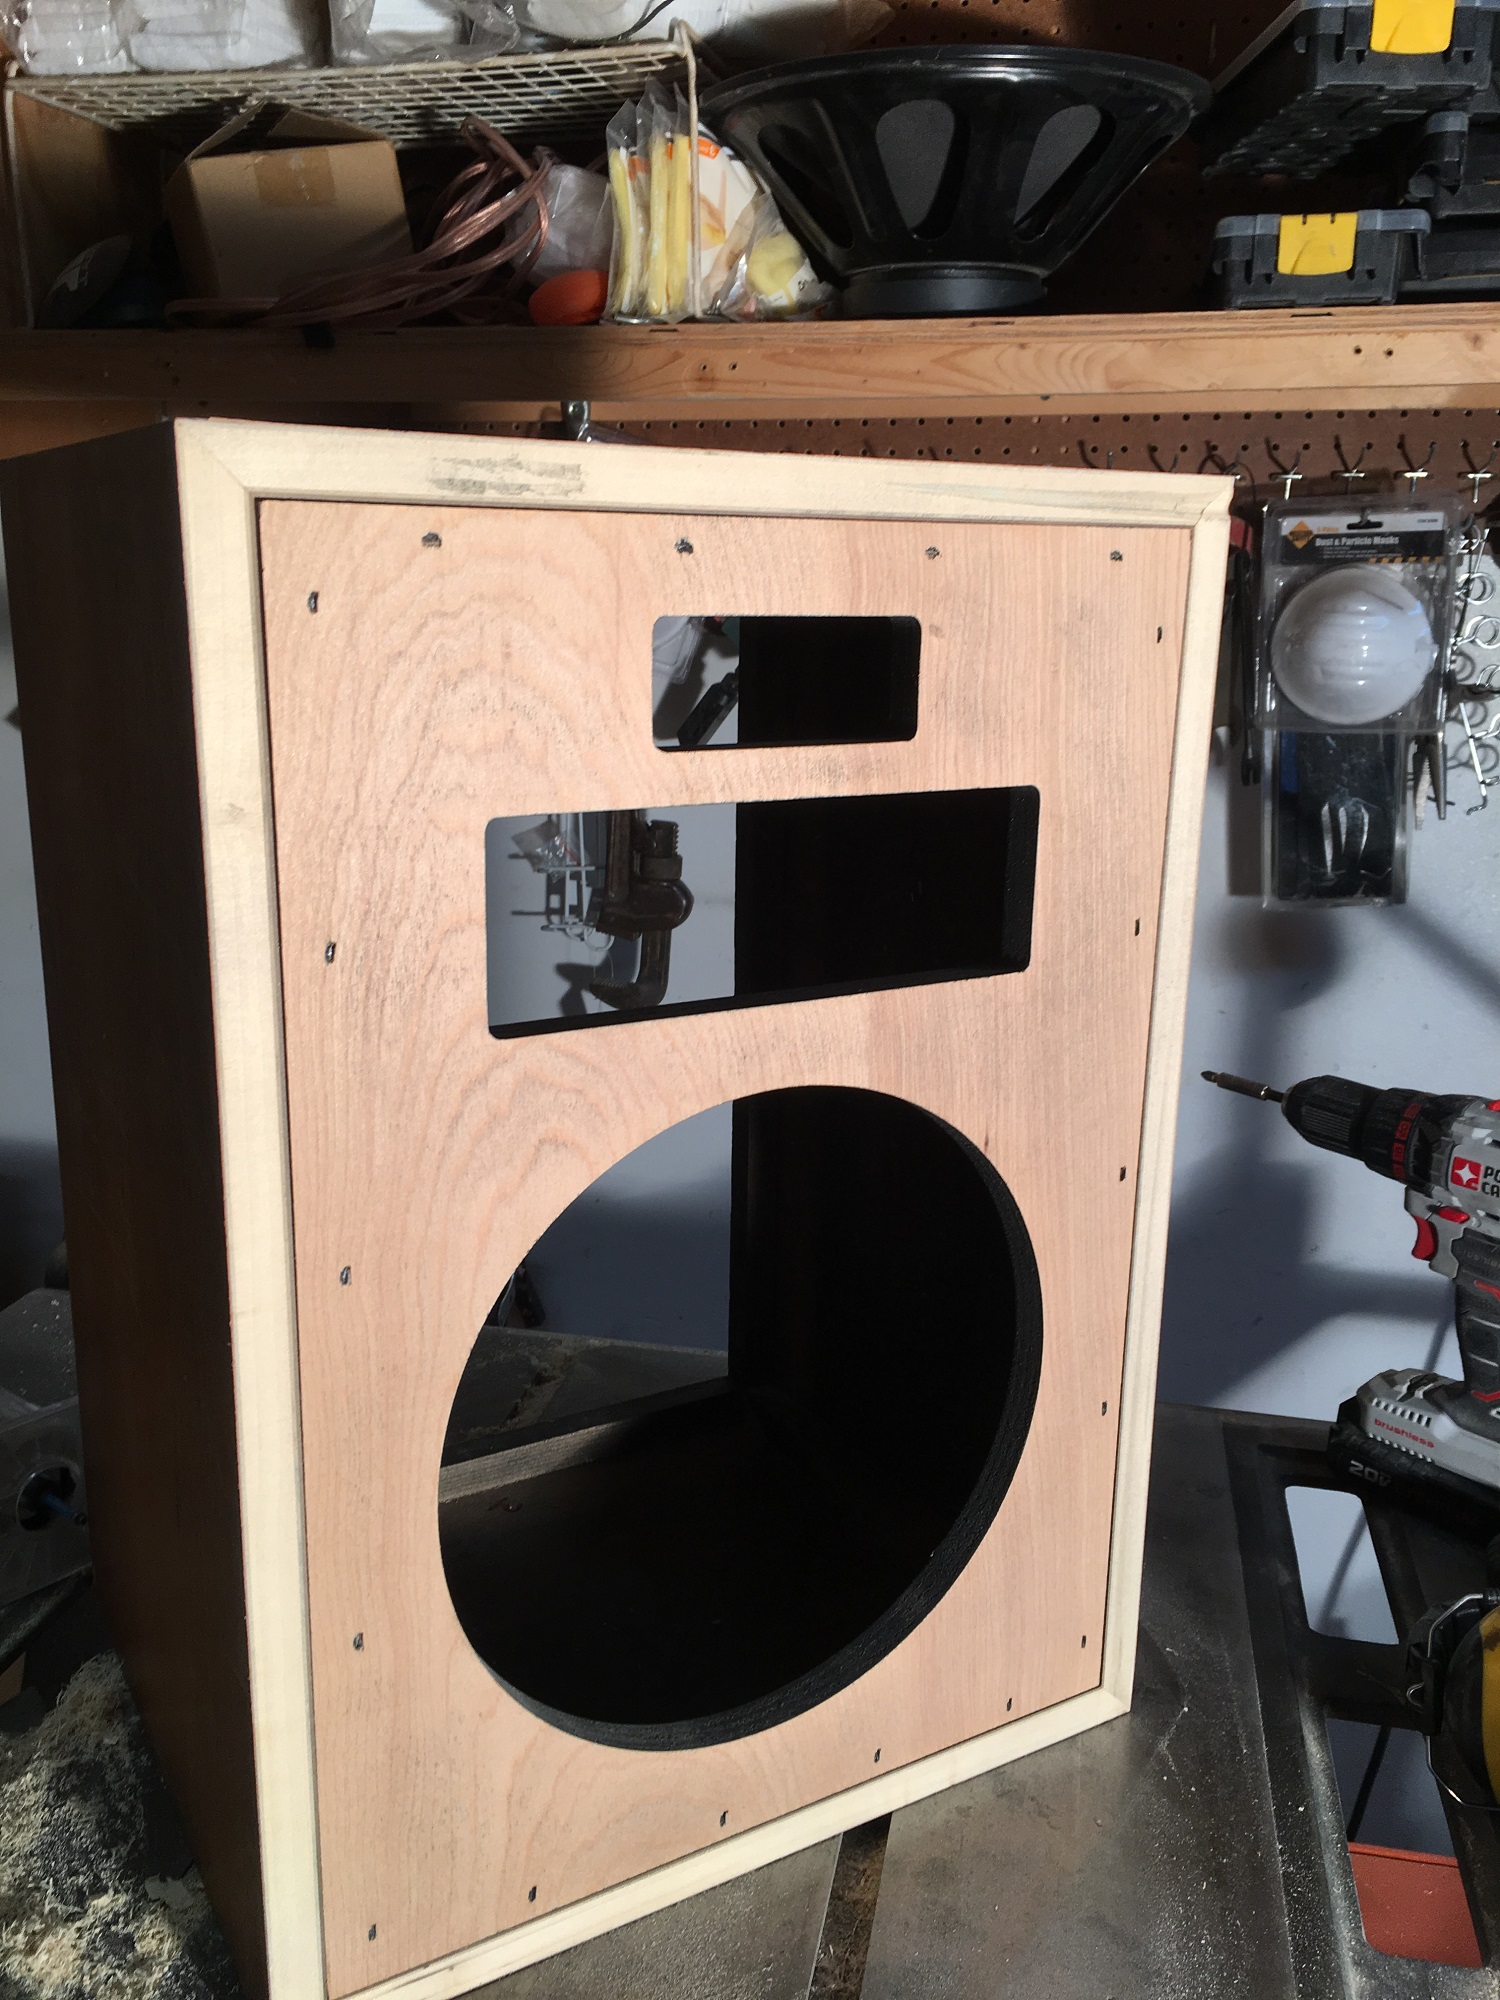
Redoing some 1982 model Heresy speakers I got from Rockhound. Sanded off the Duratex paint using 60 grit ROS. Trimmed off the front extended trim, install neo magnets in motorboard and veneered the front and attached new trim with rosewood veneer on the inside edges to match the motorboard. About to start veneering all sides then top then applying veneer to the front extended trim. Installing new Crites Sonicap caps, made new 1/4" masonite grill frames with neo magnets and will use brown woven grills like I did on the last Heresy redo using carpathian elm burl. May add some front to back bracing and will probably add 1/4" ply or mdf to back 1/2" panel to reduce resonance (cutting our a hole for the K52H driver space.
Will post as I progress.
-
Thanks Rockhound. Already have them sanded clean, front trim cut off, magnets installed in motorboard and new grill frames (with magnets) ready. Going to veneer with rosewood including the fronts. Should look nice. I'll post redo progress on new thread.
Ken
-
3
-
-
Rockhound sent PM buying them!
-
2
-
-
Thanks SiliconTI! I'm going to recap the balancing networks with Sonicap caps. Friend is picking them up next week.
-
Thanks for the compliments guys.
Capo, here is the order of my madness in veneering. I trimmed off the front 5/8" overhang flush with the motorboard to allow the entire front of the speaker to be covered with veneer to eliminate the possibility that the veneer could pull away from the motorboard and also because I veneered the inside edges of the new 5/8" trim pieces (before gluing and nailing to the motorboard) instead of painting them black. I wanted a full view of just veneer if the grill frames are removed. As you note it is also harder to veneer inside the front edges.
So before I veneer the front I glued in the grill magnets with epoxy, then apply the veneer on motorboard, flush trim the speaker cutouts then apply the 3/4"thick trim on the front of the speakers with glue, clamping and finish nails. I flush trim the outside edges of the new front trim flush with the top, bottom, and sides. Then I veneer the sides and then the top which overhangs the sides and flush trim on back, front and sides. Then I add the veneer to the face of the front trim and flush trim inside and out using my trusty handheld Harbor Freight router with 1/4" flush trim bit.
Takes quit a while to go through these steps but it's worth it I think. Here's a pic after I cut off and sanded the front trim.
-
1
-
PARTS EXPRESS B-52 MID HORNS BUYOUT
in Technical/Restorations
Posted
PE did a buyout of several mid and tweeter horn drivers from B-52. 299-2305 is a 2" opening horn 9.75" x 17.75" useable to 400HZ per PE"s listing. 299-2304 is a 1" opening 7" x 17.75" useable to 400HZ." I ordered four of each to inspect. They are very sturdy thick plastic and are well made. Prices are $15.88 per horn with quantity discounts. Anyone use or test these yet? I ordered some of the 1" to 2" opening adapters from PE and they fit the 2" horn opening, Here are some pics.
Any thoughts/comments on these?