Arash
-
Posts
822 -
Joined
-
Last visited
Content Type
Forums
Events
Gallery
Everything posted by Arash
-

RF7ii components in custom built curved sides cabinet.
Arash replied to longdrive03's topic in Technical/Restorations
wow that cabinetry deserves some expensive Scanspeak/Audio Technology drivers to turn into something diabolical good job! -
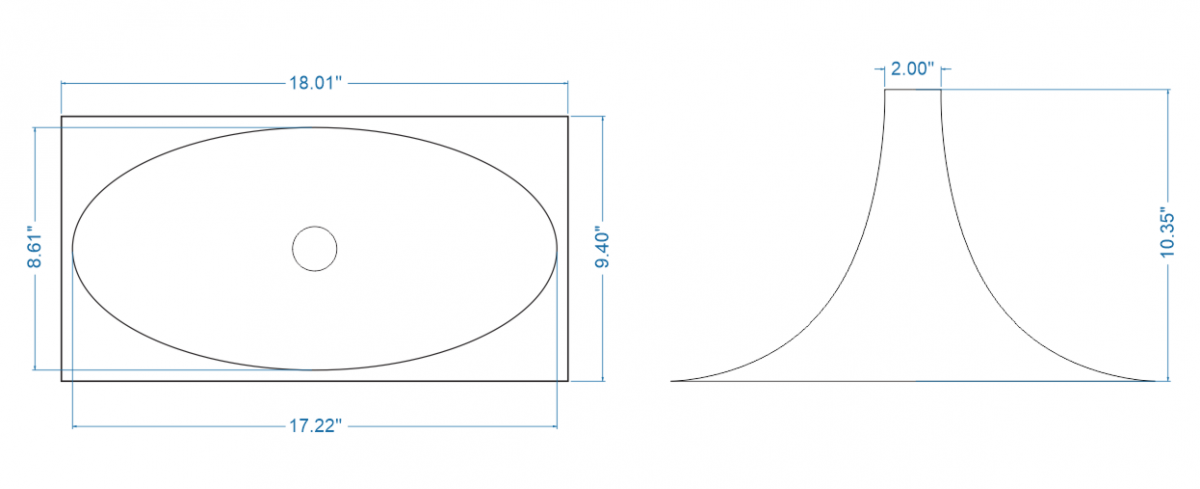
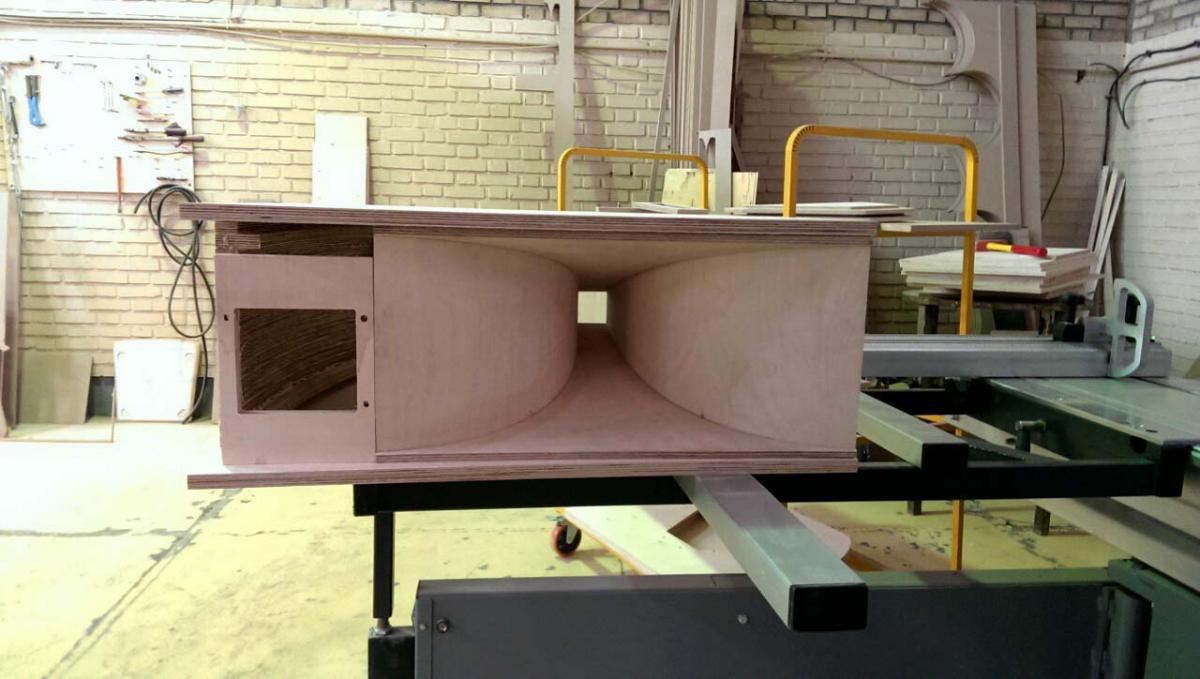
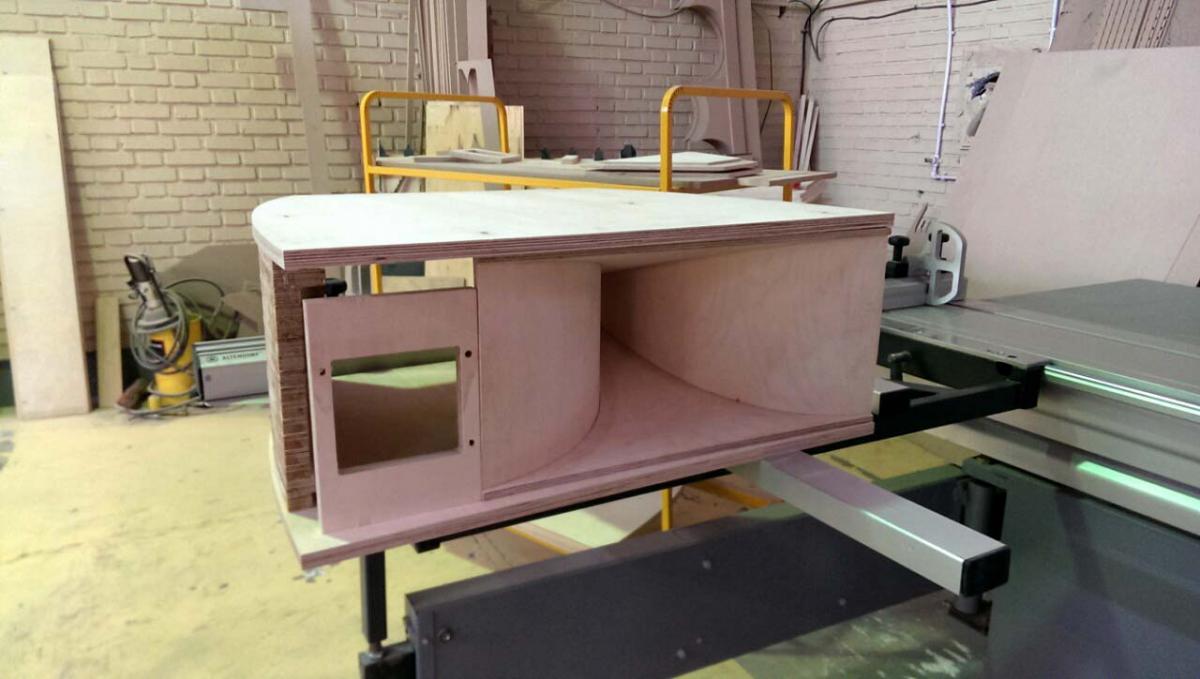
this is what I ended up tomorrow: profile: pure Tractrix cutoff frequency: 310hz

-
is there anywhere in the forum any information about elliptical horn with a conical start and a tractrix ending? that would be very hard in calculation point of view. any calculator? Dave's Eliptrac works near perfect as a two way so that should be also a horn with conical throat?
-
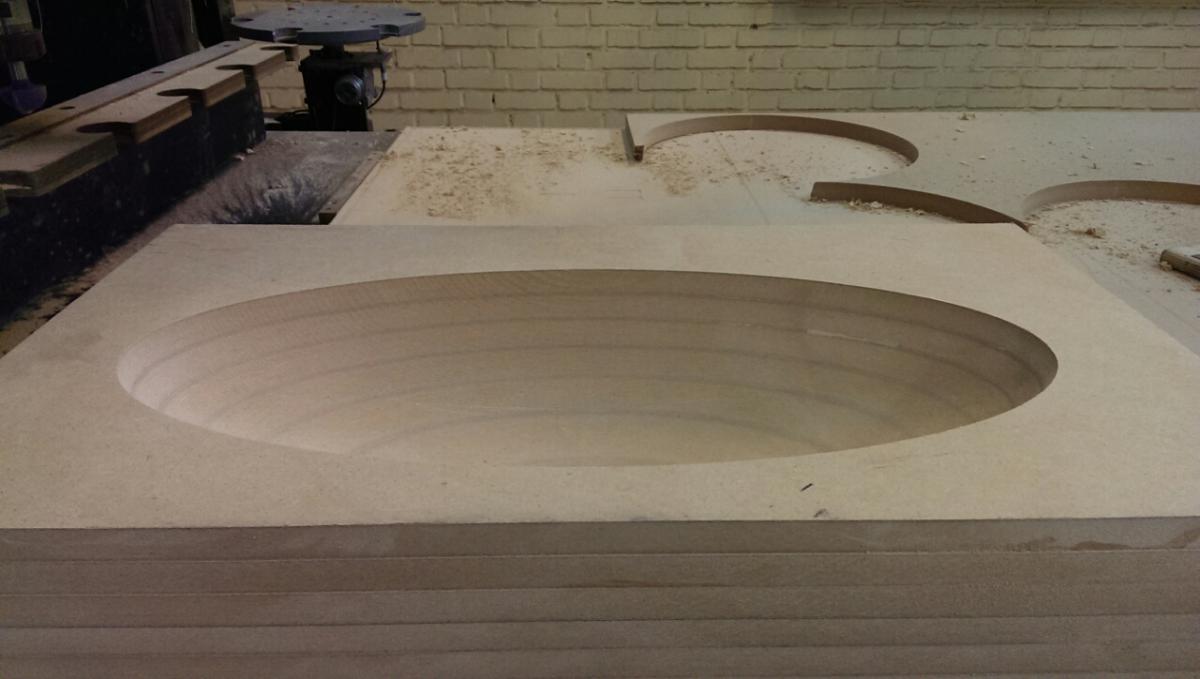
the other week I tried to engrave a horn into MDF and the result was stunning. sanding was needless! the surface was absolutely smooth and one with eyes shut couldn't tell if it's a molded shape or consist of layers. but this was not a horn. it's was a preset template of Artcam. NowI want to do this with a real horn shape. the Z axis of our machine can move ~160mm if the dust cap is removed so a horn with 12" length could be built in two different parts and there will be a little bit of sanding just between them. I can also do this process on two pieces of hard wood. it's cheap here. just imagine how beautiful it will be the result of such method would be a very precise geometric shape. I think for making a Elliptical 3D horn I should draw a front view of the horn which is an ellipse. the width of this ellipse should be the "intact" calculated Tractrix flare. then I should condense the same flare for other parts of the ellipse. am I thinking correct? is there any information how to do this? any help is appreciated
-
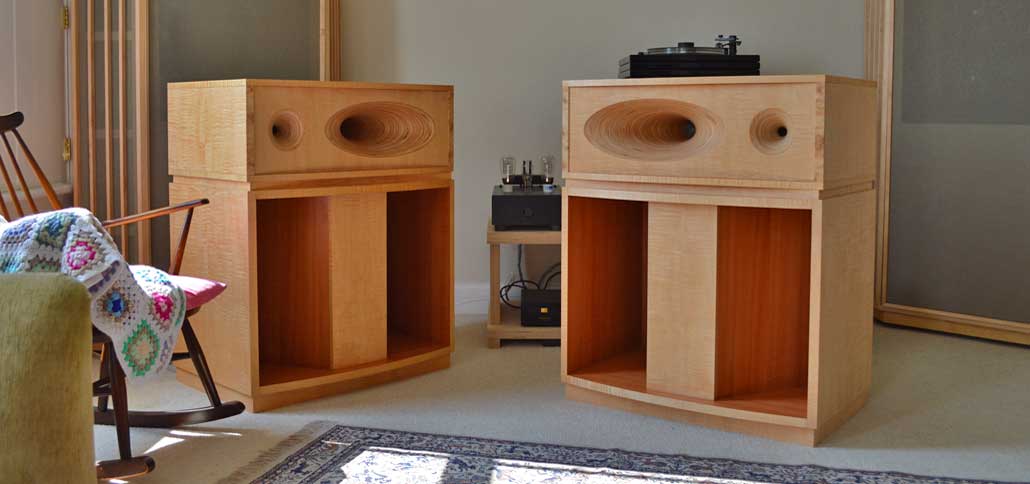
Hi there actually I'm on vacation for some days now. I'll be back to the work next week. the whole outer walls are done and I'll get down to dog-house. I'll keep you updated about the progress. for now it's the last picture I took with all the parts except grill and dog-house and top section back door: has anybody seen this British builder who builds a Belle-like speaker with Eliptical mid-horn with a B&C 2" driver and a 10500 pounds price tag. more info here I bet there is a CW1526 woof in there and an ALK network. seems he veneers everything before assembly!
-
How far from a Klipsch type horn can I possibly get?
Arash replied to Rudy81's topic in Technical/Restorations
Oris 150 is a fc150 horn. I think crossing it around 200-220hz is a smart thing to do. very nice job Ruddy, I'm waiting for three pairs of Oris 150 to arrive here to put some 1772 and Fostex 206 behind them. well done -
assuming the lower compression ratio in a horn transducer will result in a better sound, why don't we just use an 8" fullrange in a big horn with a big throat? (something like Oris 150 with a good 8 incher) in that case there will be no compression at all, the horn will only take care of the dispersion pattern and directivity. just amazing: link
-
I know what are you talking about. this glue is so nasty. it's been my hands companion during past 10 days! I hope it will vanish soon as I say prayers night after night. yes using PVA glue is much easier and leaves no trace. it's easy to sand (urethane is also good in sanding) but I wanted the best option. urethane is water resistance and this makes me feel good while listening to speaker even though I'm sitting in Sahara after all all parts will be sanded and veneered and the internal parts will be painted stained black. who care about traces? if it's well-sanded, there will be no trace at all. look at this cabinet we built today. it's also urethane glue and it looks really nice:
-
who knows maybe I can offer it for sale for a reasonable price and everybody can have a pair. I'm not saying I'll certainly offer it for sale for I may consider it. you know it's hard to build specially with slice method we use which will result in a very precise and accurate geometric shape but if we go the laminating way, it would be also cheaper
-
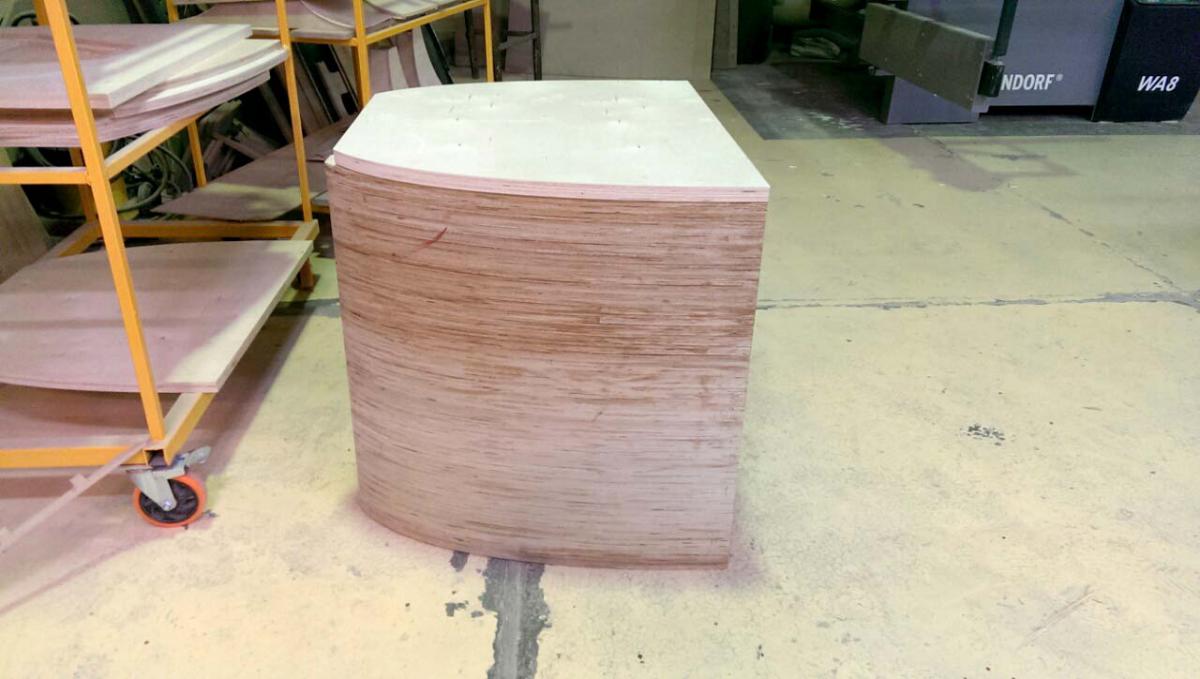
putting part together to check if they fit easily: check ✓ thanks for watching
-
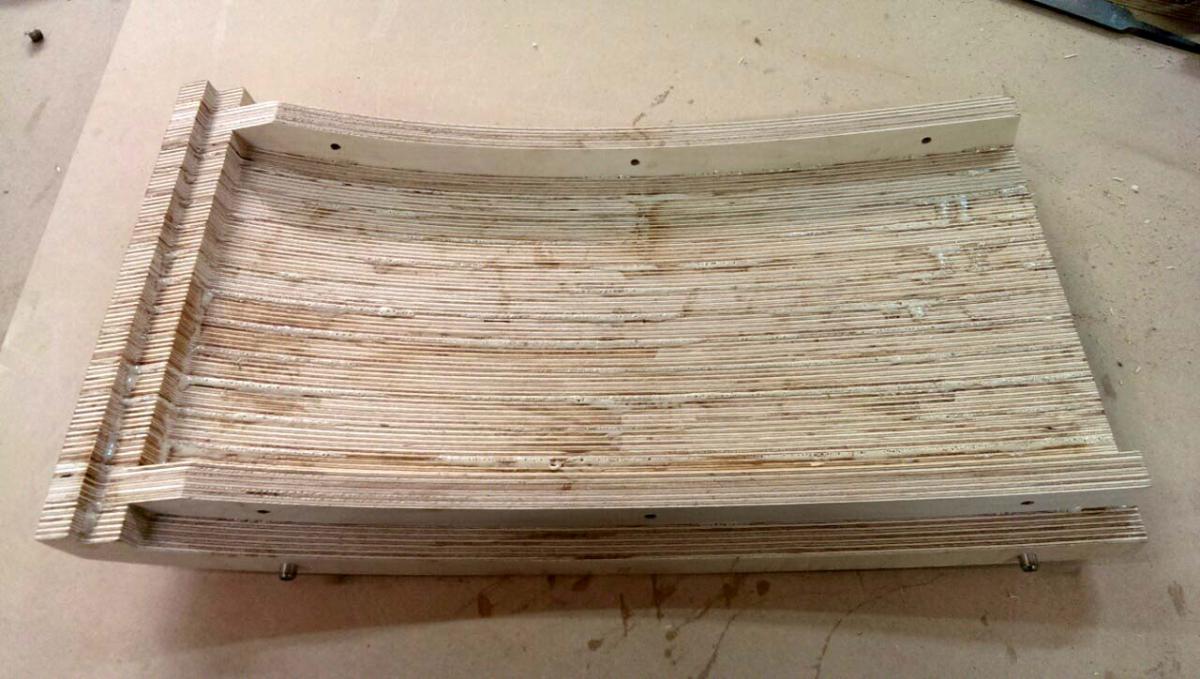
top hat side walls assembly: there is a bigger slice in the chain that I will sit on another slice stock on the top and floor plates with t-nuts: there are also 10mm longer pins on the side wall that will assure they will sit just in place on the floor plate. needless to say there are holes on the plates as well:
-
+1 on the idea of going without veneer and just staining and finishing the sides. IMHO, it makes for a very nice 'finish'. Found this picture on a Google search. Oh yeah! That's what I'm talking about! Look at that... not a bit of wave in that finish! yeah that thing looks gorgeous I hope you modeled it in Hornresp before this serious "bleeding edge" commitment on your part. wow. I haven't. a friend of mine did. the whole plan was also seen by a nice guy from Canada (who designed Vittora bassbin) he stated "you are pretty close". after that we tweaked with hornresp and we think this will work. Hornresp? I'm working on it.
-
thanks man thank you as well. I'm happy you people like the idea of building such a speaker thanks thanks, I considered that too but you know what, urethane glue leaves a dirty trace on the baltic birch. actually they couldn't be sanded to wipe out. after all there is no problem. the final option for veneering is buying some polyurethane bag from US and make another vacuum bag press, then I'll practice some times on other parts and when I feel I can go ahead, I'll apply veneers. Rudy. your project was very interesting but maybe that horn profile won't work in that shape. you could try a spherical version. I'll do more work on that kind of horn with some ballnose on CNC in near future thanks for promoting me +1 on the idea of going without veneer and just staining and finishing the sides. IMHO, it makes for a very nice 'finish'. Found this picture on a Google search. you know BB is beautifull but we have a lot of far more beautiful veneers I can't sleep nights when I imagine "Anahita" is wearing them! I have a laser router I may use it for cutting veneers for inside of dog-house. the outer side of the speaker is easy to apply veneer. thanks for the idea. I'll take a look
-
thanks for all the ideas. really informative and helpful. I'll build a separate little box for tweeter to put on top of speaker. there will also be a place beside midrange horn so I one can opt to use internal or external tweeter.
-
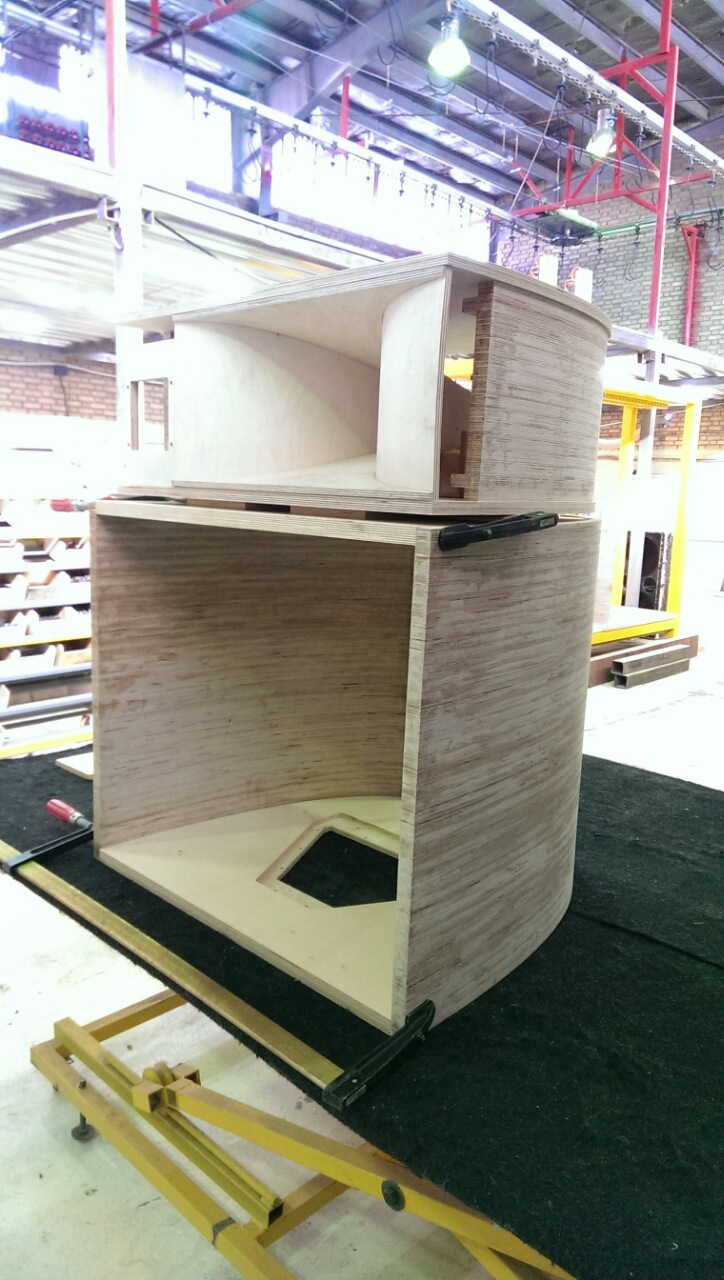
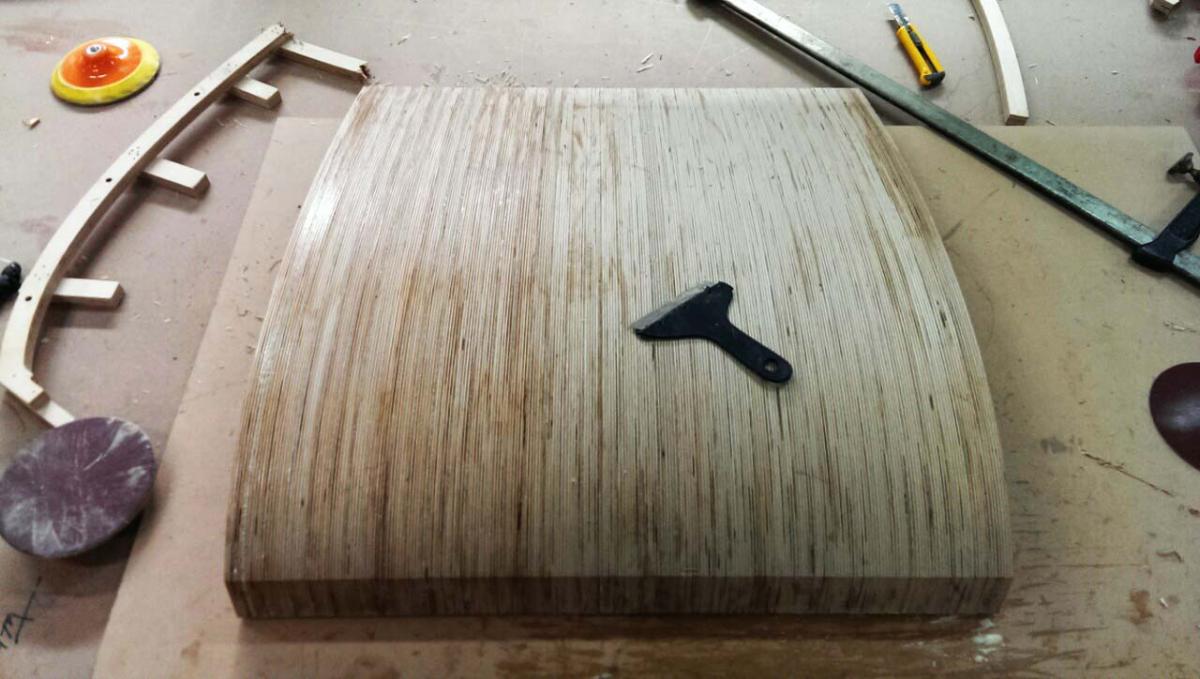
just playing Lego to see how it looks like, nothing is glued yet:
-
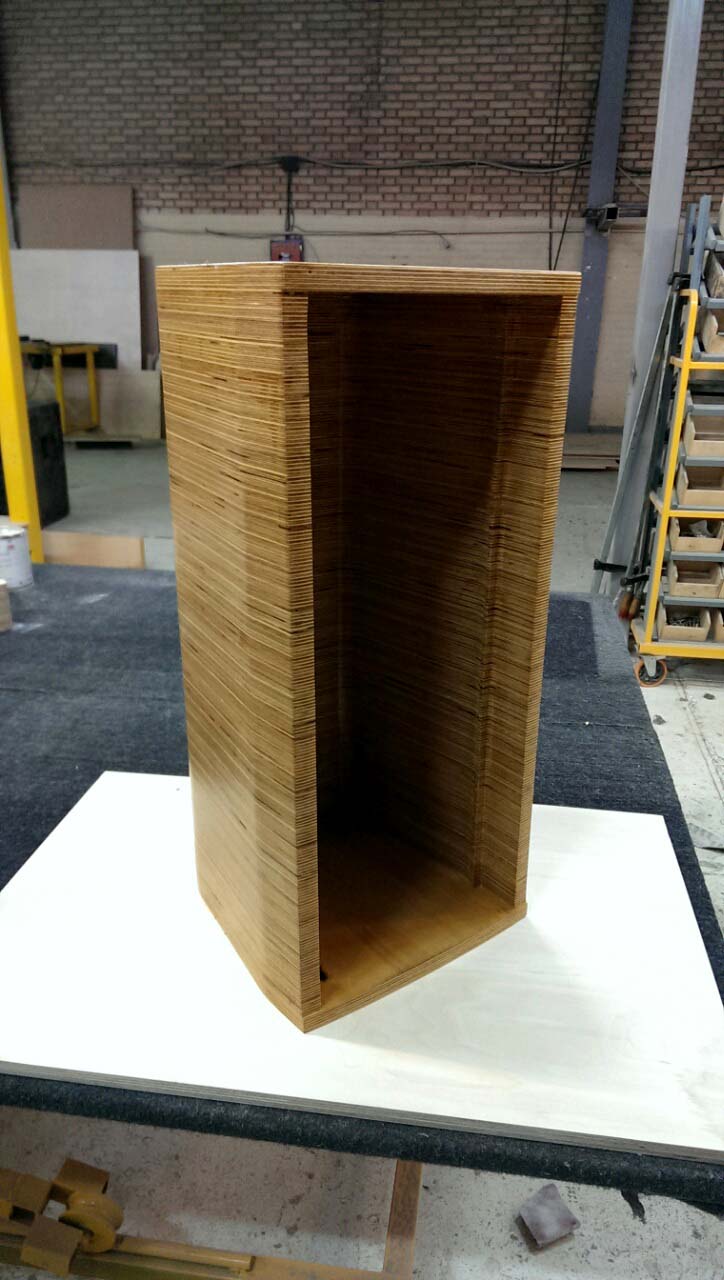
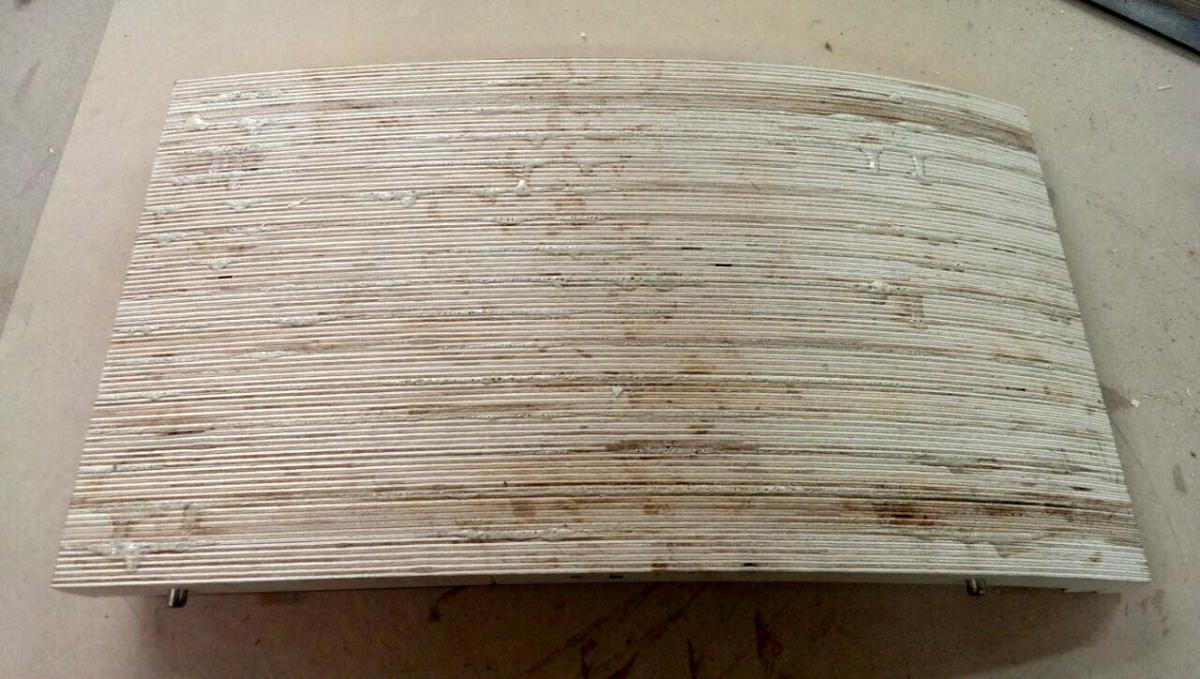
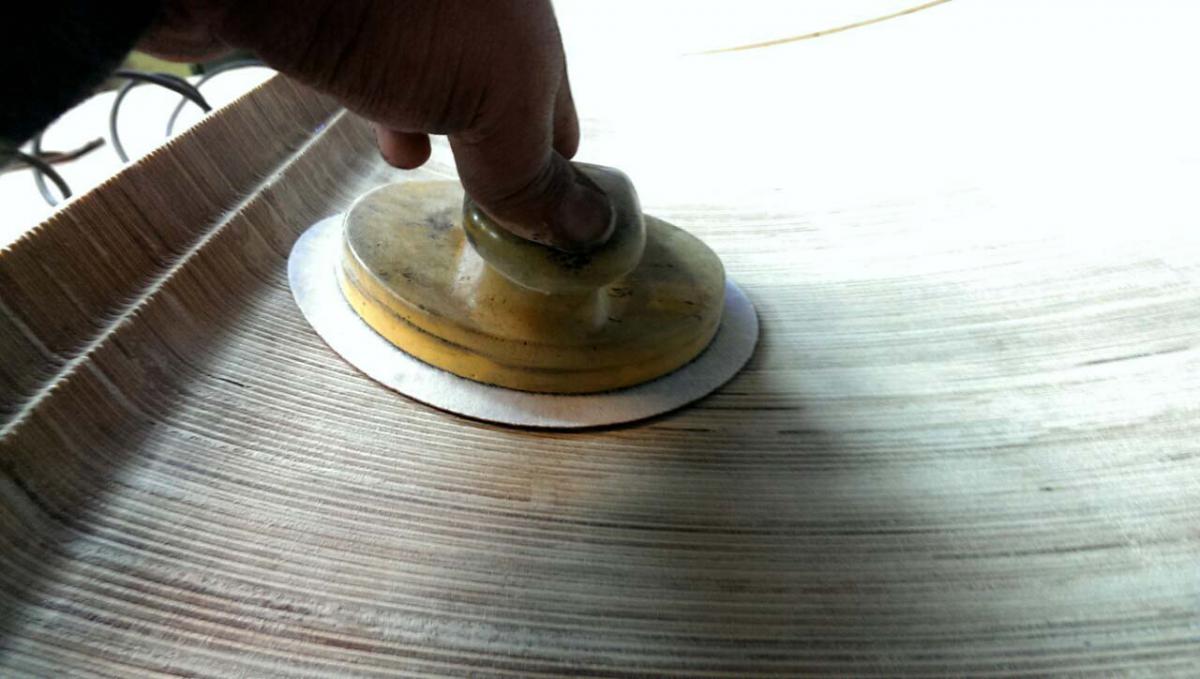
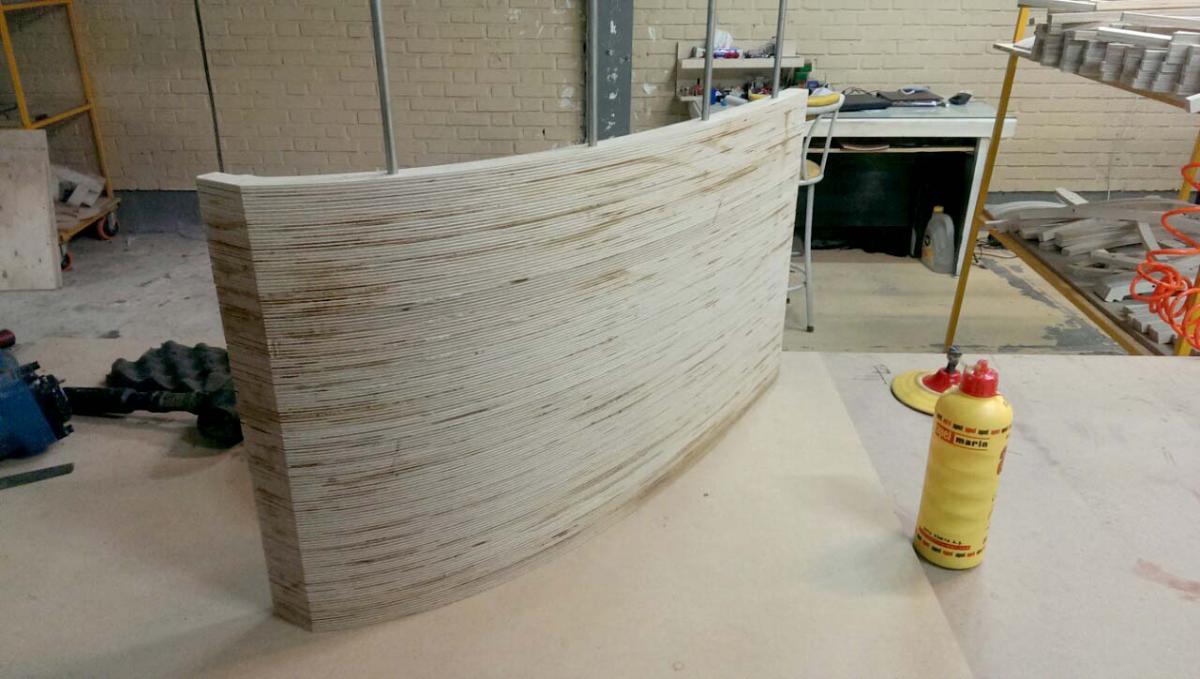
time to sand the walls. due to the curve shape of it, vibrating or rotating sanding machine won't work here. they will probably ruin the part. I have to sand it by hand. I used some kind of spongy sander that adopts it's shape to the part. on the flatter part it stays flat: on the curved surface it sit also well: I used 80, 100, 120, 150 and 200 grit paper and the final result is very promising. I couldn't be happier:
-
pressing two layer of 1/2" plywood under press to get a 1" to be used as bass-bin top and floor parts:
-
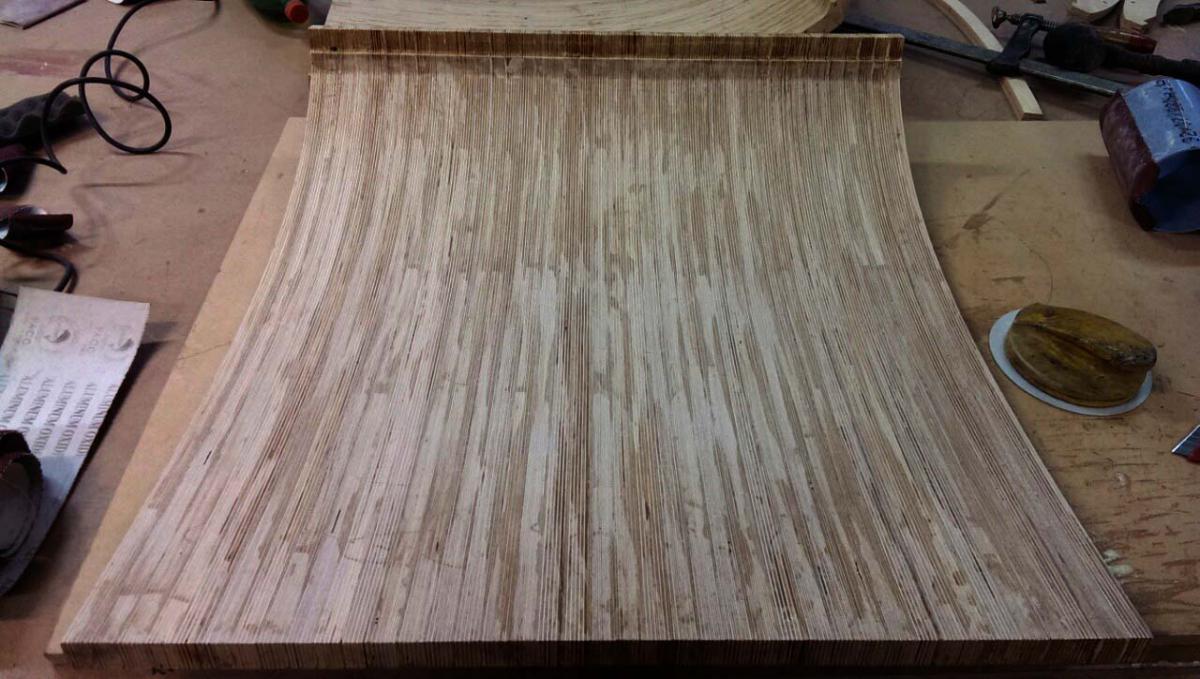
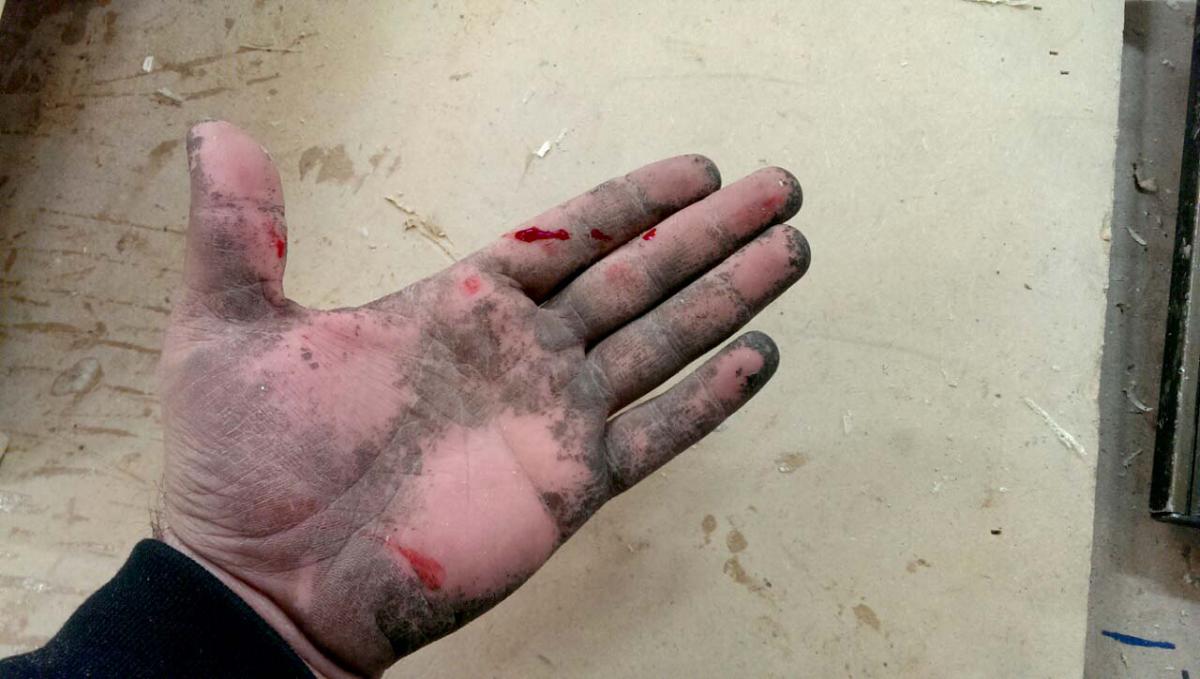
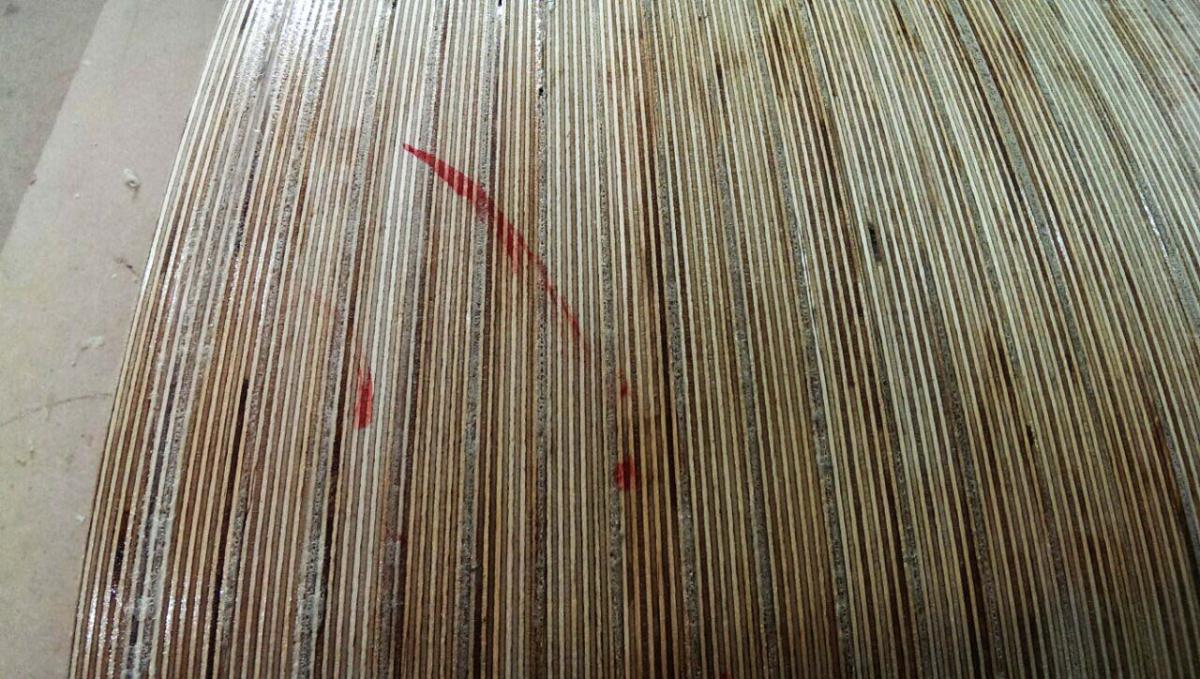
a complete side wall. I put it ~20 hours to dry now it's time to clean the glue puff: and I cut myself! leaving my DNA sample on the speaker! maybe someone can manage an embryonic cloning so hopfully there will be more audio-crazy guys like me to build similar speaker!
-
I use polyurethane glue between layers: I use nine nails at each slice. I clamp each section so the glue extrudes out and then I nail them. they will stay under pressure to dry out. every side wall consists 41 slices so whole the wall will have 369 nails and I have to change the clamp position five time per slice so a total clamping of about 200 times! Oh my! I hope I can hold spoon for dinner:
-
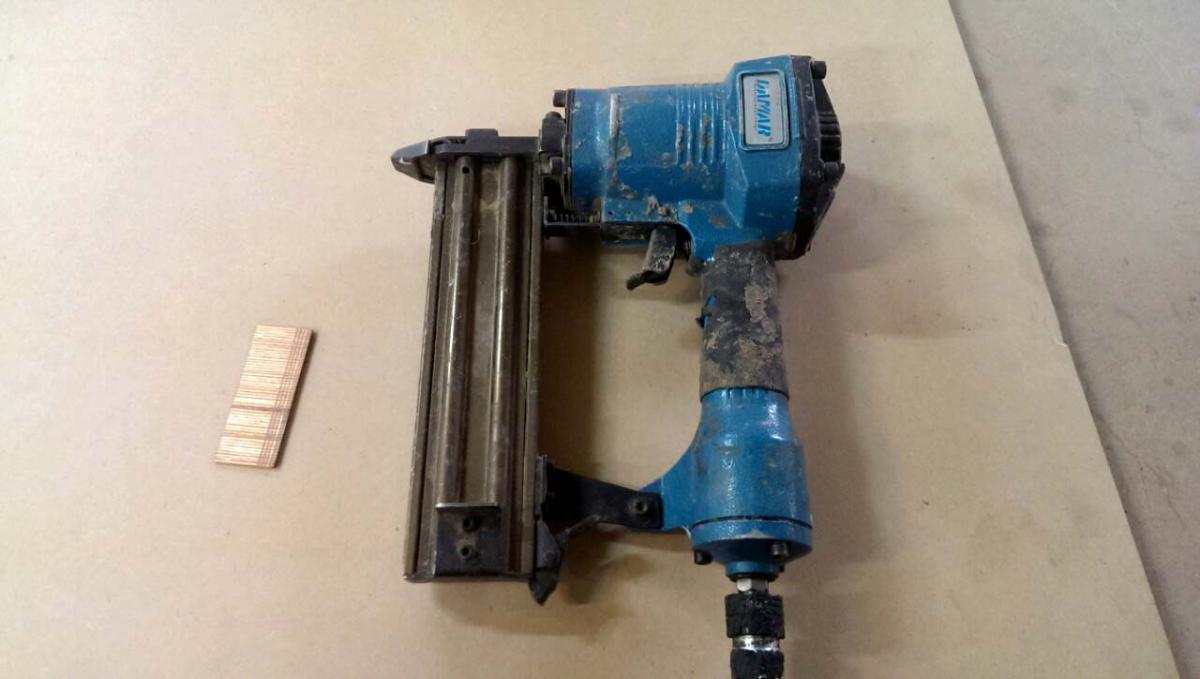
time to glue slices to each other: we have 7-8 different types of nail and stapler guns but for this part of the job I used the biggest nail gun. this thing is very heavy and the nails are very heavy duty: there is a thin layer of urethane on the nails that will melt down due to the heat produced while impact. it's literally impossible to take this kind of nail out of wood after pulling trigger so I have to be extra careful:
-
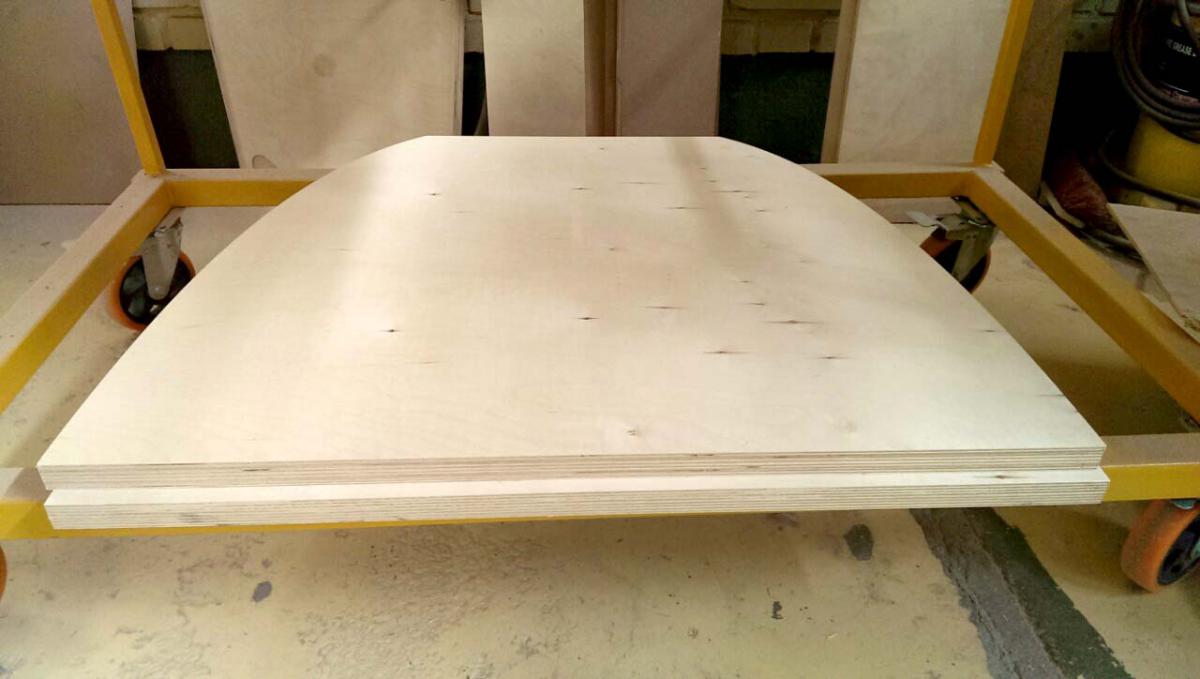
Top section parts that are 3/4" thick, two layers of veneers will add some thickness latter: I put them on a cart to use in due time:
-
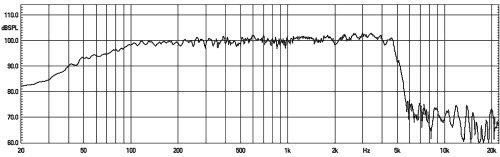
the bassbin uses a very high quality (expensive!) 15" woofer with cast frame and ND magnet with very flat frequency response. this is the measurement on a 47" x 47" open baffle. I have also CW1526C, Beyma 15LX60V2, Beyma SM-115K and some other woofers from B&C and BMS, I'll check them all in the bassbin and take a measurement and report back in case any case anybody is interested in seeing how other woofers perform in there. I think it's interesting to see how CW1526C will do here.
-
for now my biggest concern is about veneering the speaker at last. I never veneered a curved shaped part and we don't have a "polyurethane" vacuum bag which is capable of stretching 6x of it's original size. unfortunately we don't have the polyurethane bags here, I think I should buy some from US and make a new vacuum table for it. our veneer supply :
-
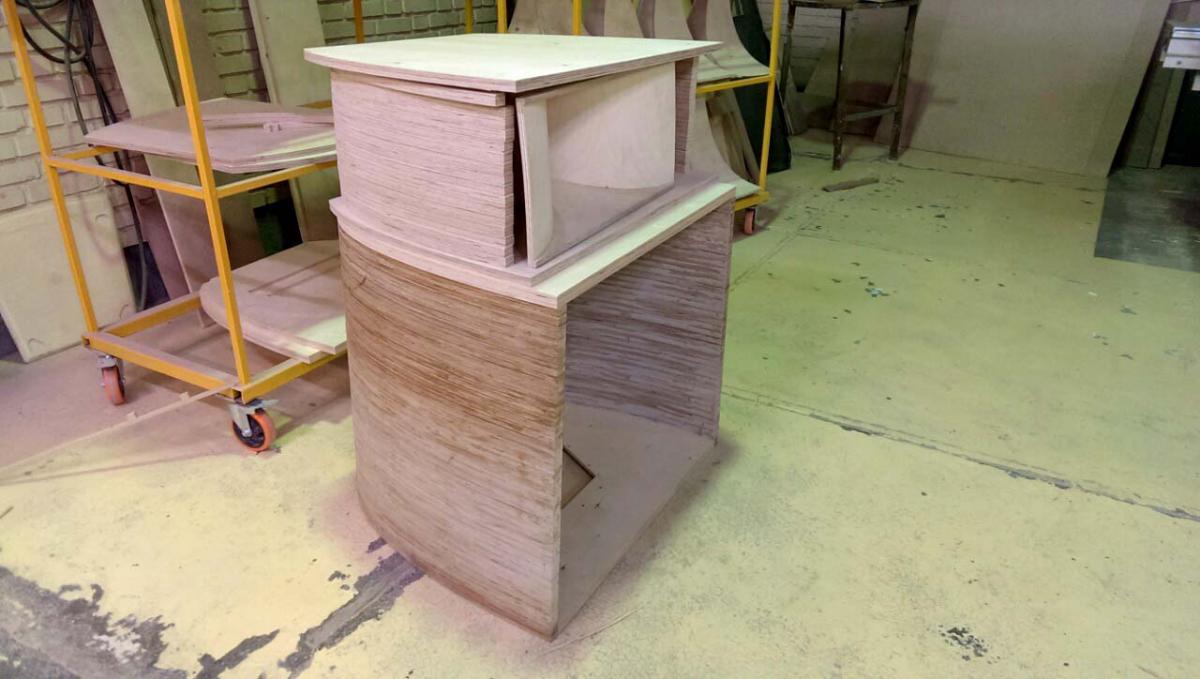
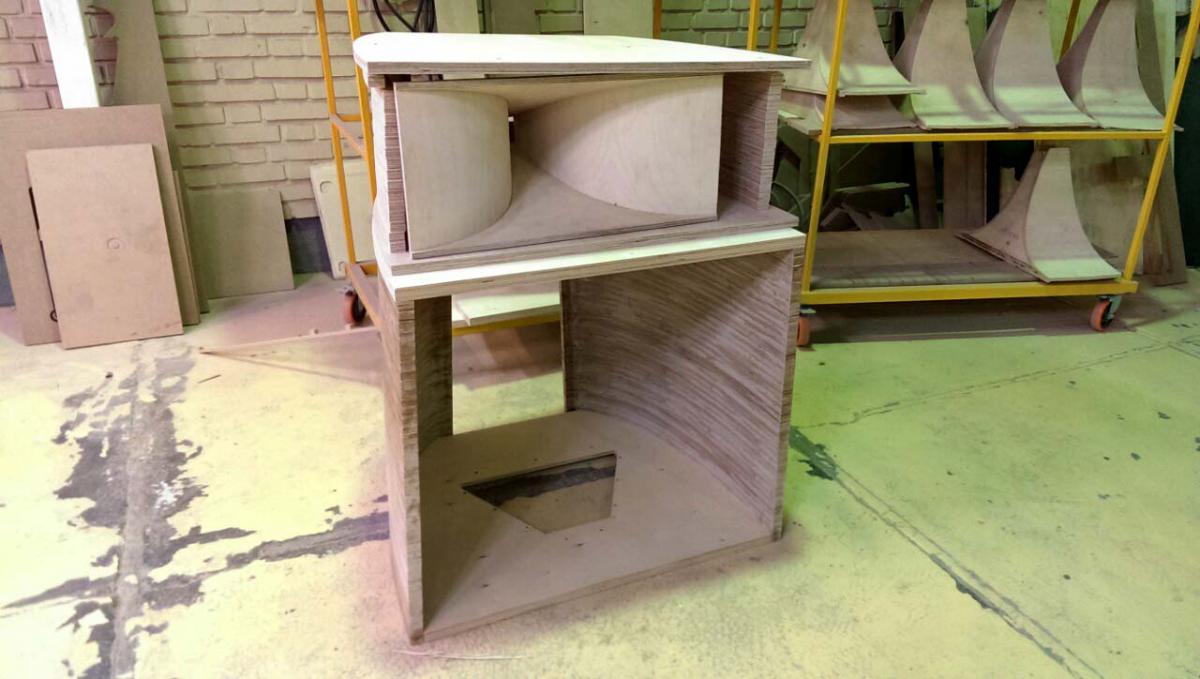
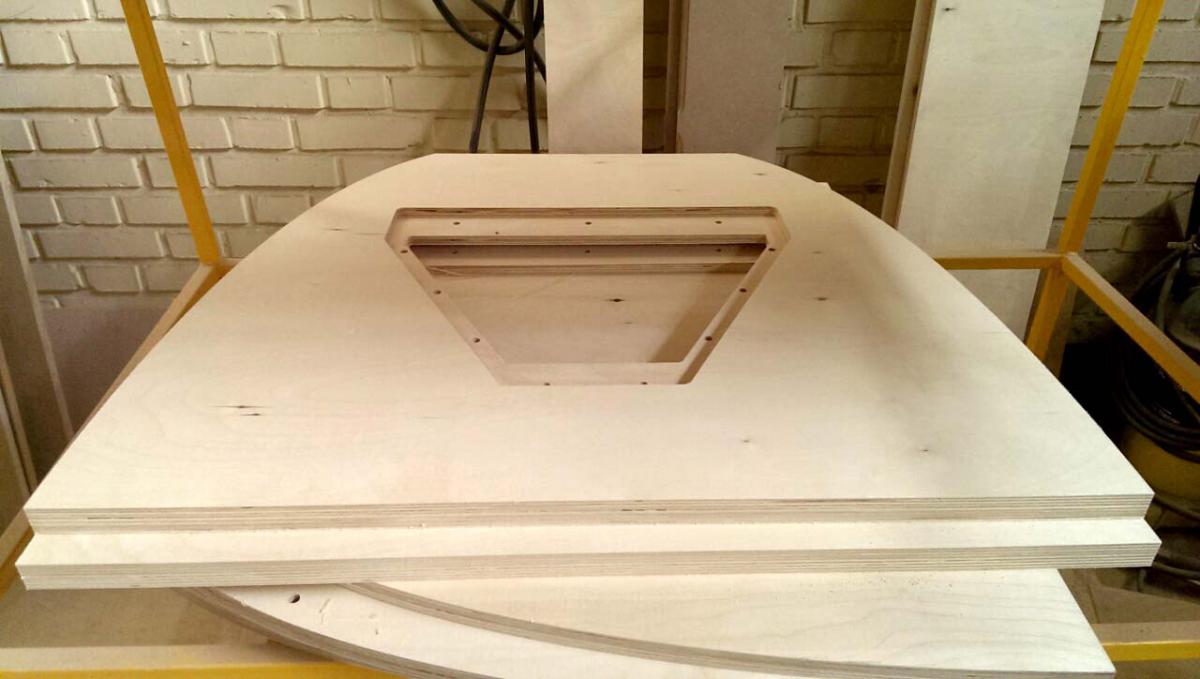
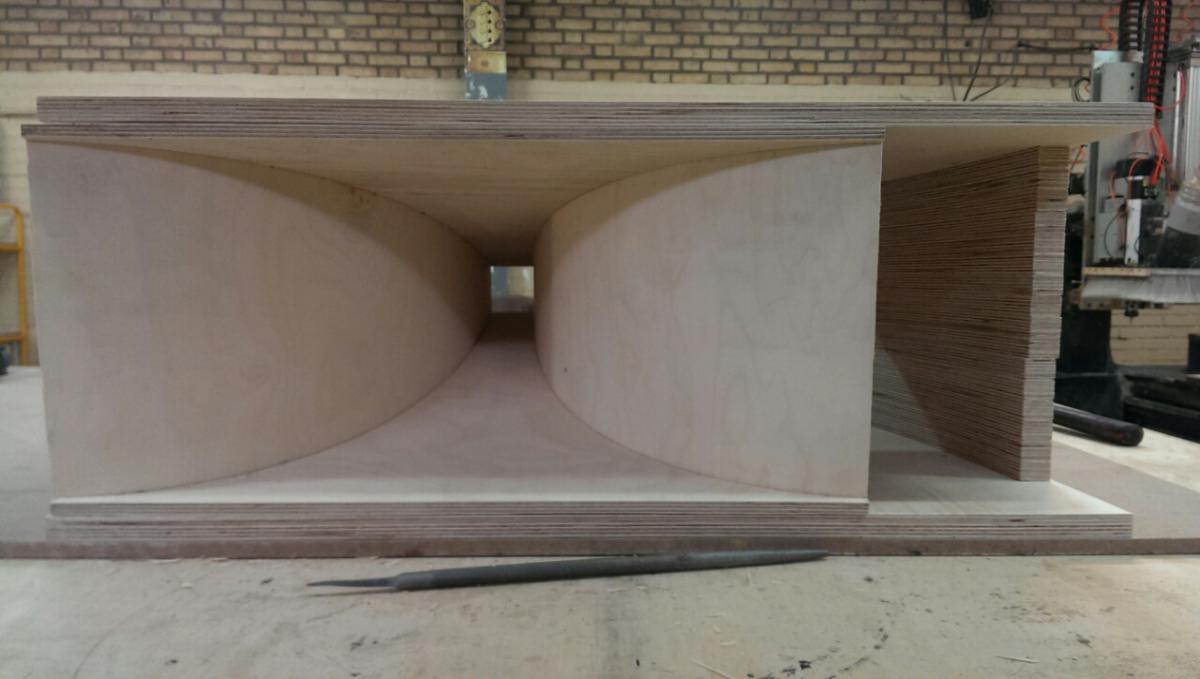
it's like a broken mirror jig-saw puzzle. as you put it together you'll find yourself shifting with it! top section preview (no glue yet): checking if the horn will fit in there. there is only room for two layers of grill fabric:
-
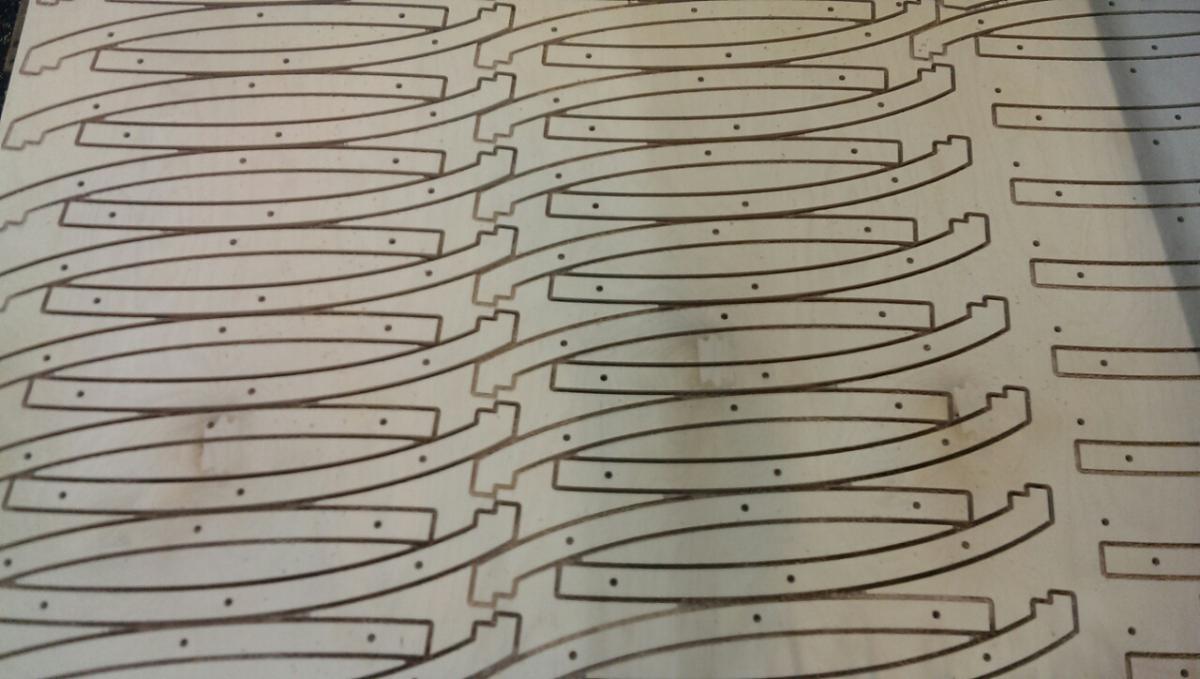
after countless of hours drawing and CNC working, the slices are ready to go to next level: