WakeJunkie
-
Posts
423 -
Joined
-
Last visited
Content Type
Forums
Events
Gallery
Everything posted by WakeJunkie
-
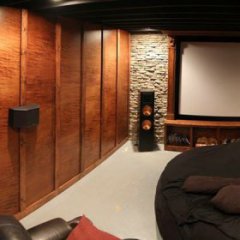
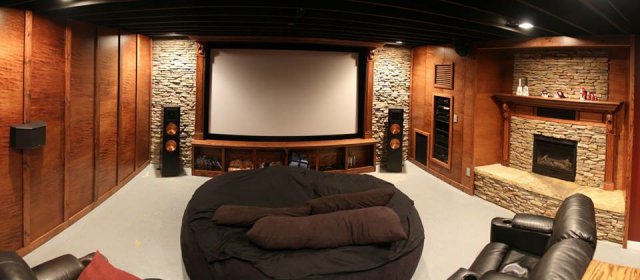
The two rooms are not separated yet. You can still see the back of the subs from inside the room. That being said it was still pretty impressive. The column is not in to fill the back of the box and seal to rear holes, before I covered them it was quite underwhelming. Once the holes were covered it was impressive. To early to make any real judgments, but I couldn't wait any longer I had to hear it bump...
-
Agreed. I will run some more test, but last night without the converter I got nothing at all.
-
From the EPX4000 manual
-
These are the only switches on the amp. Tried both limiter positions just to be sure.
-
Hooked up everything last night for a test run and found that without a level converter I could get nothing out of the EPX4000. Home Audio to ProAudio - Unbalanced to Balanced converter with +14dB boost turned all the way up got things working. With RCA inputs I did not expect to need this. I had it for my Pro-Audio Mackie sub and will need it or another converter upstairs when I move it. Also found that the Subs from FI that were supposed to be 4Ohm measure out to be 2.7 Ohms. I emailed them, but have not heard back yet.
-
The Subs shipped!
-
Gotcha. I just didn't follow at first. I have rigid fiberglass acoustic panels to do that with already. I wanted to get the new sub in before determining the placement for panels. The room is not bad in the front already. 8ft diameter beanbag that is 3ft thick of shredded foam and baffled ceiling do a pretty good job already. Leaning panels at the first reflection point don't seem to make any difference. The back of the room by the pool table and the corner by the foosball will definitely get treatments. Bass trap in the corner for sure. Since the audio in the room is changing I will finish that before any panels are placed.
-
Guess it would have been easier to just put a grill on it, but what's the fun in that? ;-)
-
Guess I am not following you on this one.
-
The wood column needs an oak trim column base and cap. I thought I would try my hand at curved molding. Each circle is made from 8 pieces of oak 6" on short side of 22.5 degree cuts to make my octagon. I have a fixed and plunge version of the same router and each came with an edge guide. I took one of them apart and made a circle jig out of a scrap of oak. The block is labeled "top" since the holes put in with the drill press are exactly the same offset as the router base so it holds it level. The block in the middle is attached to the plywood base of the jig with 1/4" hole in the center as the pivot point. The router is using a 1/2" spiral bit. The bulk of the outside was taken off with the band saw before going into the jig. Finished circles. Next will be to take them to the router table to turn them into curved molding.
-
Forgot to mention I found matching fan connectors from an old fridgidare mini fridge. Wine cooler style with no compressor. Soldered the new connectors on leaving the factory fans intact.
-
Behringer EPX4000 Fan Mod is pretty easy if you have the right tools. Ordered two of these fans to replace the two factory fans. NMB Technologies 3110SB-05W-B40-E00 36 CFM 26 db The one on the right in the pic below is easy. The fan on the left is a little more difficult due to space. The nuts on the fan are 7mm, not a standard size for most open end wrench sets, but would make this job easier. I had no problem doing the job with pliers. These are the tools I used. I forgot to include the hot glue gun. The very thin long nose pliers shown are necessary. Standard needle nose pliers will not reach. The razor knife is needed to cut the glue used to hold the fan connectors to the board. Use the hot glue gun to glue the nuts and washers to the back of the fan. It will be nearly impossible to get them on without attaching them. Use the butter knife to hold the back of the nut when starting the screw. Use the pliers to hold the nut to tighten. Don't over tighten or you will break the plastic fan housing. Result is a significantly quieter amp. I could have gotten quieter fans, but went with these for airflow. The airflow seems more than sufficient. SPL meter read 56bB with the factory fans. It was to quiet to get a reading now. 50dB is the limit so I am not surprised. To me it sounds less than half of original and is undetectable from 8ft where I sit. You can hear it if right next to it, but it is about the same sound level as my Dell laptop.
-
-
Love that Memorial Shot Youth. The close up of the Eagle is fantastic Oldenough. Here is one from my trip to Denali last year.
-
Don't think to hard. I want this thing to look as good as it sounds. Low frequency wavelengths are so long there is little if any difference to be made in the 2.25" of free space surrounding the column.
-
I decided that a square box just wouldn't cut it... This is the idea. Back two holes will be filled with a wood column that goes top to bottom of the manifold. I will route out oak column top and bottom trim rings for the column. LED lighting from the back of the column will light the enclosure. This is just a clamp up to hold the shape. I used a dado blade to cut grooves in the back of 1/4" ply then lay soaking wet hot towels on the wood for about 20 minutes to soften it up so I could form it into the circle. I will build the interior structure so it will have no flex. I thought about filling the gaps inside the column with rigid spray foam once complete. If I ever decide to add additional subs the column can be removed. And of course it will be sealed so no air from the outside gets in. Back View:
-
All 4 accessible from inside and out. I will probably need to remove the lower front to add rear subs. Even if I can do it without. I will probably remove it just to be safe. Guess it depends on how long my Gorilla's arms are, but I will cross that bridge at a later date.
-
I will be mounting the drivers inside.Don't forget the inside of this manifold will be visible from inside the room. Definitely not you typical design.
-
Correct. I will block off the back half of the manifold for now. I may never install 4, but it is alot easier to build for 4 now than to start over if I decide to add more. I was able to find the 4k watt amp for the same price as the 2K so I figured why not...
-
This bad boy is HEAVY. With the back it will be right at 180LB! That is just the box. Dry fit went perfectly tonight. Favorite tool of the day: Biscuit Jointer. Made it very easy to align and test fit everything.
-
No ETA....I am so NOT patiently waiting.
-
Depends on which one you get. You should mount it on the utility room end of the line so it sucks air from the far end. Flex tubing will transfer less sound than hard wall. You can slow it down with a resistor or a dimmer switch permanently set. They have way more CFM than most fart fans.
-
Air duct may work fine in the summer, but blow heat in the winter. Vents top and bottom of the closet will do a lot of good. It doesn't take much of a fan to keep the air circulating unless the space is super tight. An A/C booster fan would work well. You can get 4", 5", 6" etc. They are 120V and connect directly into ductwork. You could trigger it when you turn on the amp or put a thermal sensor in the closet. They are not to loud, but if you are sitting near the closet I wouldn't want to run it full speed. I have had good luck running them through dimmer switches so they run at half speed. I like the booster fans because you can just connect it directly to the boot to fit the air grate size you choose and you are done.
-
That was my reply. I had just posted on their first. They said they emailed me Monday and I didn't get it for some reason. They responded to FB within minutes. Had I noticed the big blue "F" logo on their site first I probably would not have had an issue. Very responsive, my work might have blocked the email or something. No worries, and Thank you.
-
I posted on that forum. First number is to a cycle shop. Second was to an individual persons voicemail. No company name given. I will check Facebook. Thanks for the help.