quinlanmw
-
Posts
56 -
Joined
-
Last visited
-
Days Won
1
quinlanmw's Achievements
Advanced Member (3/9)
22
Reputation
-
Beautiful, as always...
-
Greg, I hadn't visited your website since restoring my own KCBRs last fall. Your choice of the koa and cane grills on your own Khorns is stunning. Beautiful, beautiful work. And the La Scala...if it were me I'd have to move to find a room to accommodate all three. Mike
-
Gentlemen, For what it's worth, my dealer loaned me a set of the Audioquest DBS, along with some other cables, when I was looking for some balanced cables for my system. The technology sounded gimmicky to me and I was skeptical but thought, sure I'll try them out. They sounded worse than the cheap RCAs I had been using. Thanks, Mike
-
Wow, I found this thread while wandering around looking for Heresy restoration tips..fantastic work, and thanks for the detailed tutorial! Wish I had read this before restoring my Khorns. It would have helped tremendously. Mike Quinlan
-
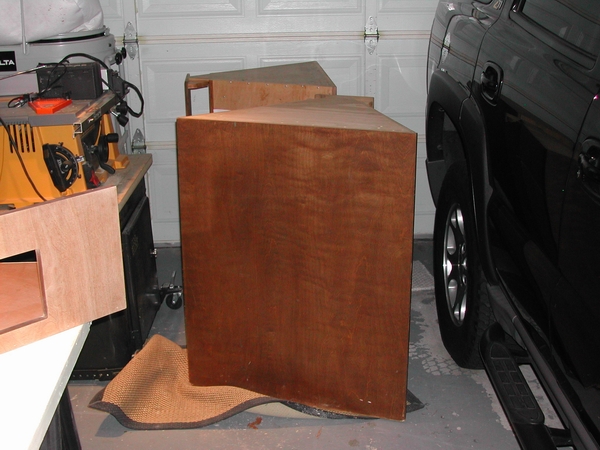
I would be remiss if I didn't take this opportunity to give another shout out to Greg Roberts. Not having seen a completed "B" model in 26 years, there is no way I could have pulled this off without the detailed information Greg provided on his website, on this forum, and in replies to some of the ridiculous questions I asked him in emails. I'll say again, if you are of a mind to convert your decorator models, or just restore your Khorns that have seen better days, and you can afford it, I'm confident you couldn't go wrong having Greg do the work. If you haven't visited his web page then go there and you'll see what I mean (dcchomes.com/Mkhorn.html)--you're in for a treat. Not only does Greg do incredible work, but he obviously approaches it with a deep affection for these fantastic speakers, and exercises a level of attention to detail that distinguishes him as a true craftsman. I'm still astounded by Greg's generosity in sharing his tips and tricks of the trade, especially since he restores these professionally. Thanks again, Greg..you ARE the man. And you even use a manual stapler! A few more thoughts for amateurs like me who are considering embarking upon this project...I was reviewing some records and realized this job took nearly three months. I worked on them, for varying periods, I think every day except for 5 days off when we went out of town. It requires a tremendous investment of time. As for tools, the jointer, table saw, router, and air stapler came in handy. But the work can definitely be done with hand planes, circular saw, jig saw and hand tools. Having said that, it was a lot of fun and tremendously satisfying. This project was so much fun I am even considering picking up some vintage Heresy's in need of some love and restoring them. Anyone have an idea what I should expect to pay for Heresy's in good working order but poor cosmetic condition? Thanks to the members of this forum. I lurked around for months before posting...you've really shown me what a great community of Klipsch lovers this is. And thanks to those of you who have posted responses to my postings here. Mike Quinlan P.S.--Here's another shot of the hideous monstrosities I started with..

-
And another of ser# 19X722. I guess these aren't KDBRs anymore, so maybe losing the original labels isn't such a bad thing.. More later...
-
Another shot of Klipschorn ser # 19X721, just to prove I didn't forget the insignia badge...
-
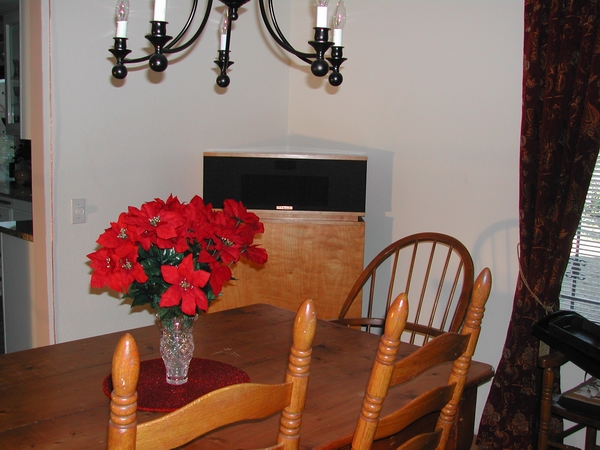
As I moved on to complete the second speaker I regretted a little my earlier decision to push through on the first..it took more brain cells than it should have to duplicate the steps and lessons I had learned with the first. But I managed not to screw it up and finished it, moving it in about four days later. Here's the second "new" Klipschorn moved into its "new" home..it used to be in the opposite corner. I managed to win that battle with the interior decorator...don't ask what it cost me. You may notice in the left of the picture the passage to the kitchen appears to have wire tacked around it...yep, that's 14 gauge speaker wire. Interestingly, I moved that speaker in and connected it on Thanksgiving day, with dinner guests on the way. I'm still surprised my wife let me get away with that one, but she had seen how hard and for how long I had worked on these. Maybe it was her way of telling me they looked good and she was happy to no longer have to live with those "hideous monstrosities", as she used to call them. By the way, that wire will be concealed by molding.
-
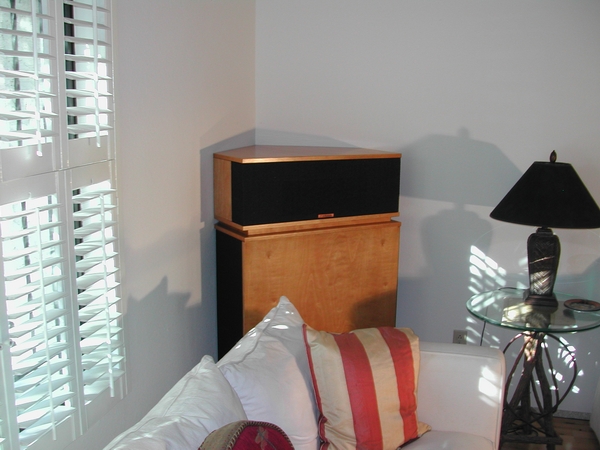
I explained earlier that once I had the top section of the first speaker finished I just continued until it was complete...part of the reason was the new amp I bought to drive the "new" Klipschorns. I ordered it hoping the delivery would coincide with completion of the speaker project, but the project ran long of my estimates and the amp had been connected to some bookshelf speakers while I worked on the Khorns. As soon as the first speaker was finished I moved it in and hooked it up, in spite of the fact I would only be hearing one channel for a while. Here's the first "new" Klipschorn, back in its original home...
-
And a shot from the left side. More later.
-
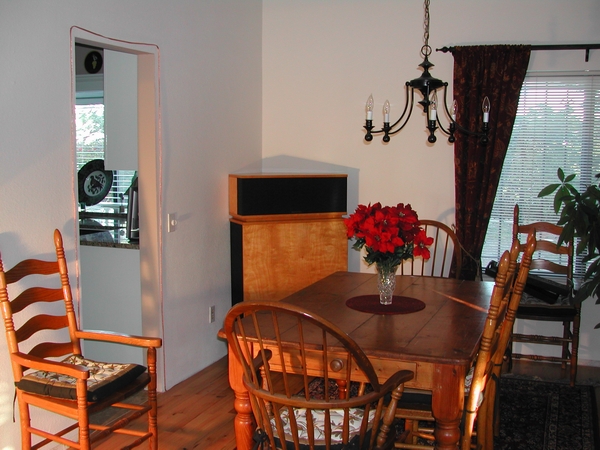
From the right side... By the way, I followed religiously the measurements and dimensions provided by Greg Roberts in his response to another forum member's questions in a thread a couple of months ago. That thread was entitled similarly to this one..a search should bring it up. My photos verify those measurements (not that you should doubt them..sorry, Greg)..they are spot on.
-
Here's a full view from the back.
-
Here's a full view of the front. Full disclosure again...remember I mentioned the glue squeeze out around the bottom trim would cause me headaches? After it dried, I had to get it off because I knew it wouldn't take the stain and would look unsightly. I carefully scraped with a razor blade, which actually worked fine. The only problem is that I scraped too deeply in one area and peeled off some of the outer laminate which I had been so careful not to sand through at the beginning of this project. How could I have been so stupid? Strangely, when I started peeling off thin strips of the lamination the peelings had exactly the same appearance as the glue peelings. I only realized it when I wiped the waste aside and then it was obvious. I was sick. All I could do was fill and hope for the best. At the top edge of the bottom trim, to the right of center, you can see the results of this mishap. I'm not sure why it stained so darkly here...I had filled a couple of other spots with far better results, but it is what it is. I've tried to be forthcoming with all my mistakes, in the hopes that it may help someone else from making the same ones. Sorry, though, no closeup of this one. I told you I was sick about it. I still am.
-
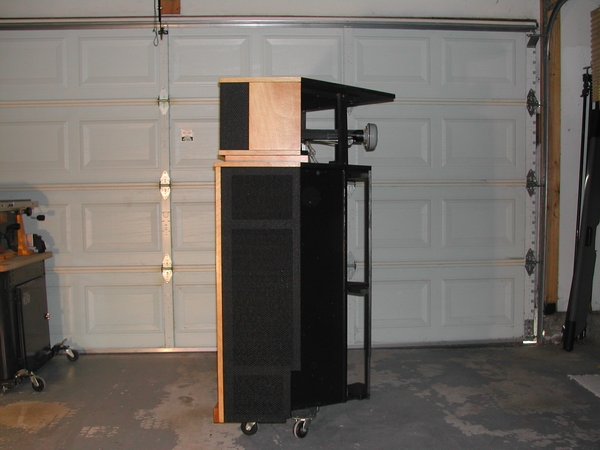
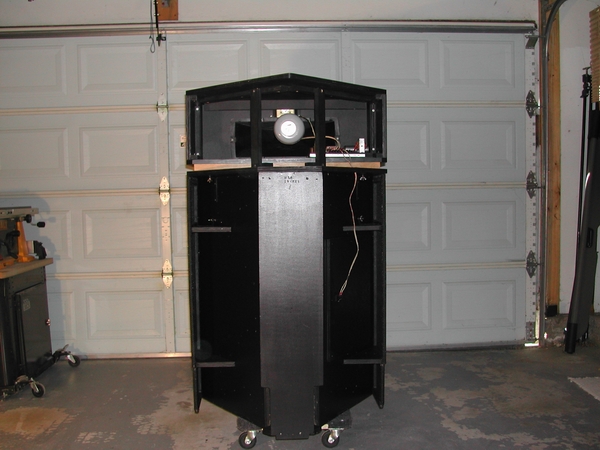
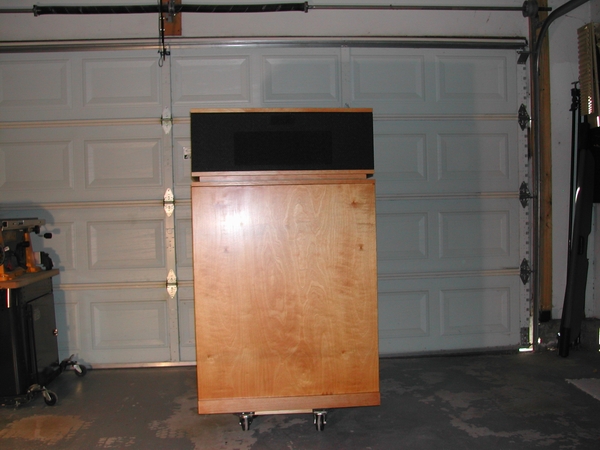
Continued... There's a reason I haven't posted a picture that shows both speakers for a while. Once I had the top assembly completed on the first one, I couldn't stop myself. I continued on it until complete. Here's a front view of the top half.
-
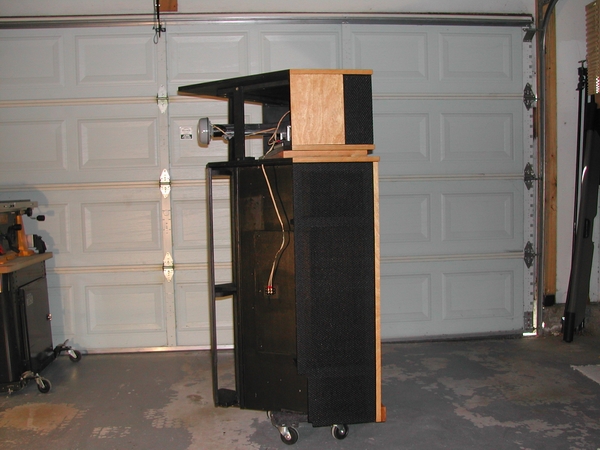
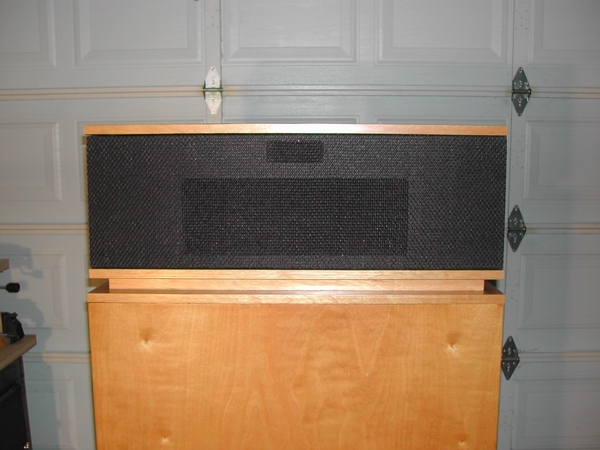
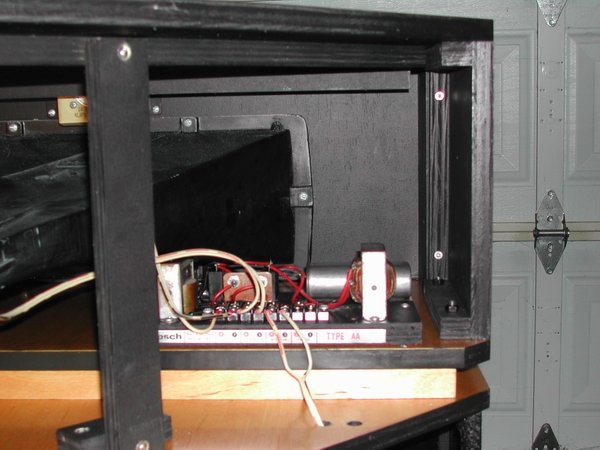
Horns and crossover installed. The crossover cleaned up pretty nicely with DeOxit and a lot of Q Tips. More later.