


LTusler
-
Posts
239 -
Joined
-
Last visited
Content Type
Forums
Events
Gallery
Posts posted by LTusler
-
-
-
Why don't they add a tracking camera trained on your ears and then slave the drivers to it, then where ever you go the sound stays with you.
-
I built this amp Kit from Bob Latino last weekend. So far is sounds great! For break in I am using:
Turntable/CD Changer>Shitt SYS>VTA ST-70> Hersey 1's with Crites Mods.

-
 6
6
-
 1
1
-
-
Go check out the https://www.minidsp.com/products/dirac-series/ddrc-88a its a very flexible DSP, room correction, active cross over, bass management system. I have it running room correction for 3 separate systems at the same time. One of the rooms is a pair of Heresy's.
-
Why not rig up a pair and just see how they sound?
-
I just had Frank at carversunfire@gmail.com do a rebuild on my Sunfire MKII sub. Just got it back and it sounds fantastic! I have it paired with a pair of Klipsch Heresy 1's I recapped and installed new tweeters from www.ctitesspeakers.com. All in for less than a grand.
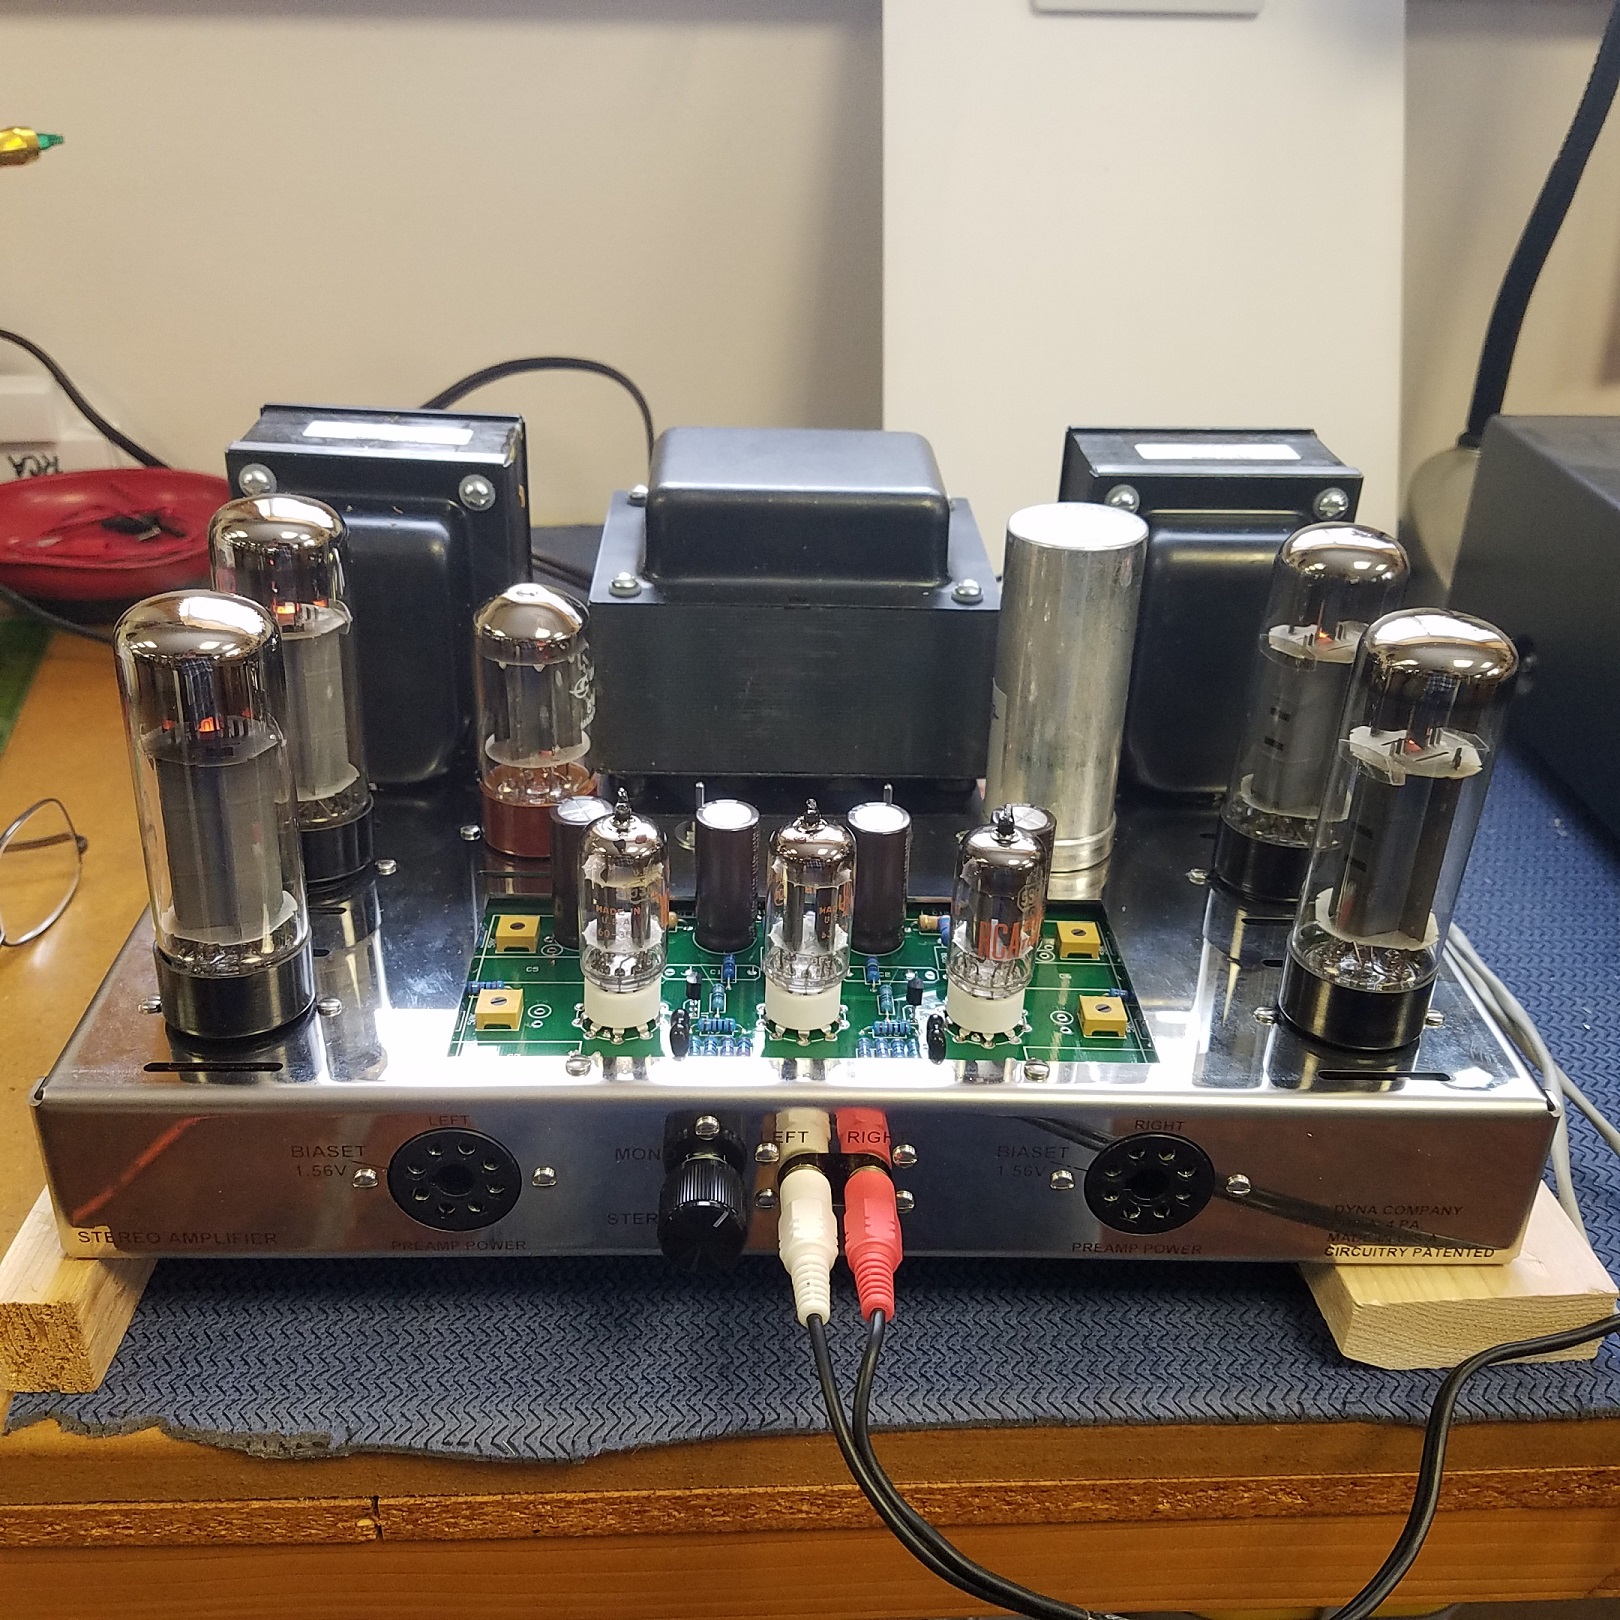
New VTA ST-70
in Talkin' Tubes
Posted
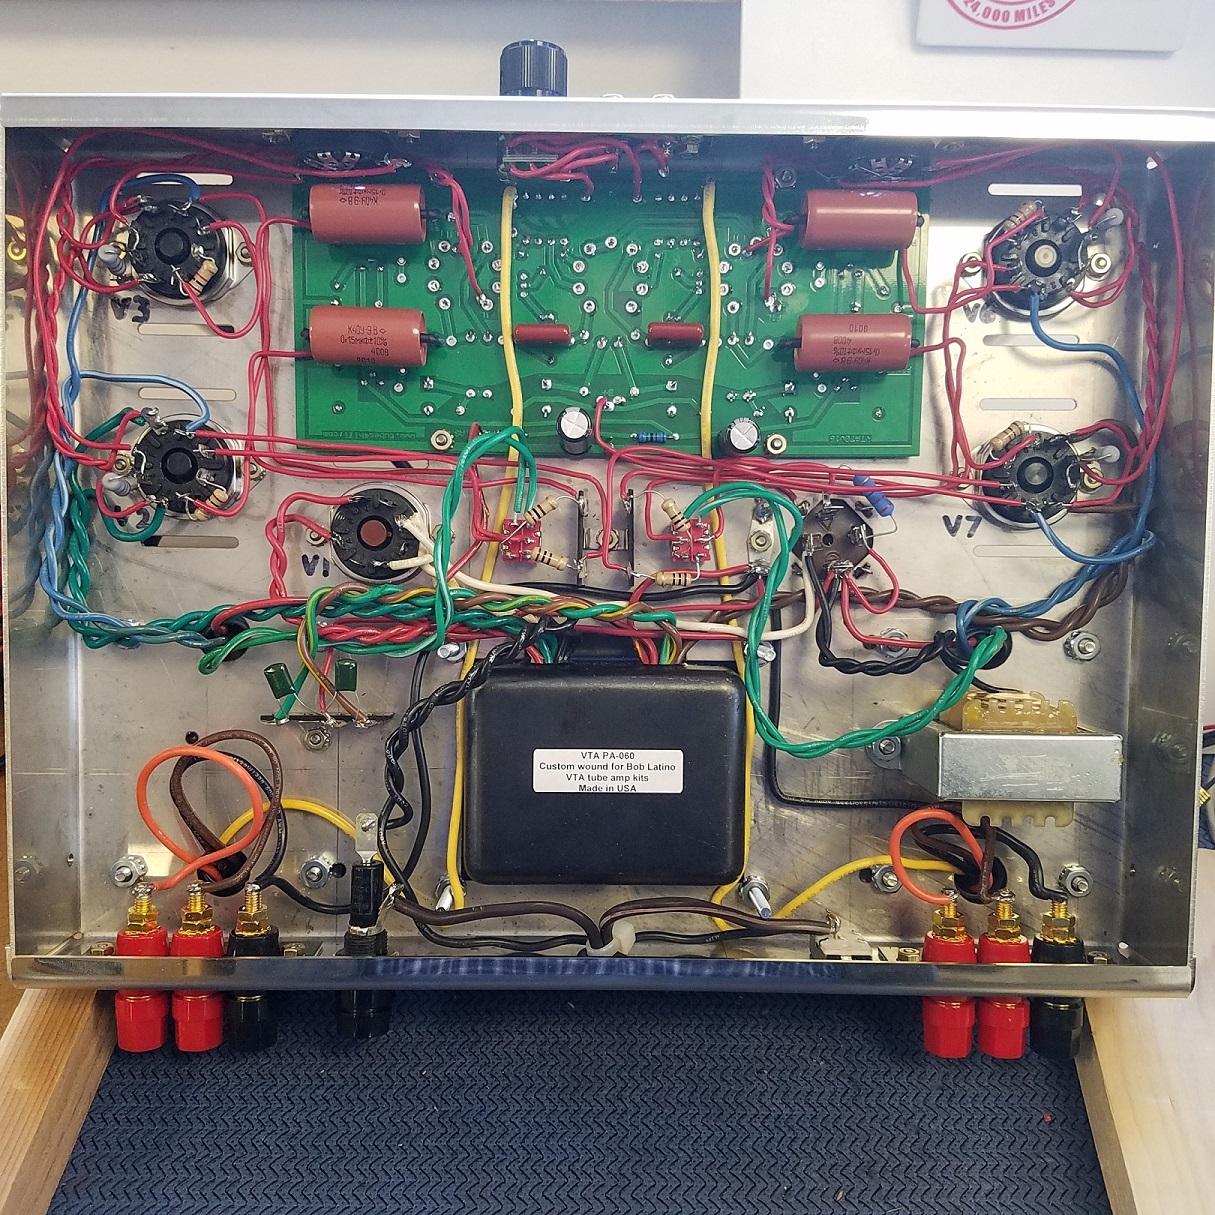
Here is a review of my process:
The kit,
I came very well packaged in one box. Very quick shipping
Everything was well labeled and all of the electric components were in separate zip lock bags.
The instructions were about 10 pages plus a couple pages depending on the options you choose.
A high resolution color photo and color diagram of the point to point wiring are included.
Mechanical assembly,
Pretty straight forward.
Have good lighting and a clean counter space about 3' wide and 2' deep.
A lazy Susan would be helpful.
If you're right handed place the soldering station on your right and the solder on the left.
Do not attempt to out think the directions! Follow them to the letter and in order, it will all make sense in the end.
There are many short small screws and nuts.
Pick a direction to face all of the screw slots.
Some pre-soldering is done to make things easier in later steps.
Chuck wire pairs in a variable speed drill to twist, go slow and keep some backward tension as it twists.
Electrical assembly,
Wide tip soldering iron for most of the point to point wiring works well, a small pencil tip for the circuit board is required.
Load the resistors and caps by the instructions and bag, DOUBLE check your part orientation and part location and the solder and flush cut excess.
When using an auto stripper on the supplied 20 ga. wire, bend the pieces in half to avoid pulling the wire sheath as it strips.
Route and bend the point to point wiring so that it lays in place before soldering.
Don't know if it matters, but I wore a cotton glove when inserting the tubes.
Start up,
Again follow the instructions.
I did have 2 wiring errors and 1 missed solder connection.
I ordered the attenuator kit, so for start up I just plugged in a CD player and a pair of speakers then started playing music.
I've been running it for a couple hours each day and cooling it down to heat cycle it before putting the bottom on just to make sure everything stays in place, I will recheck the screws and then button it up and insert into my main system.
The bias lowers as the amp heats up, so I adjust it after 5 min of power up, then just before power down, the variance gets smaller each time.
Conclusion,
Its my first tube amp, I am in love.
Main system,
NAS all FLAC, AT LP120 Modded Ortofon Blue, Sirius Internet> Sonos Connect> Cambridge DAC Magic Plus> MiniDSP DDRC88BM> VTA ST70> Cornscalla Type D