HPower
-
Posts
847 -
Joined
-
Last visited
-
Days Won
1
Content Type
Forums
Events
Gallery
Everything posted by HPower
-
I just sold my Welborne DRD45s so I have some tubes to offer up. 3 Vintage RCA 45s. I am not sure of the total hours on them, but they sounded great in my DRDs. Asking $65 each, or $150 for all 3... all 3 SOLD I also have two new Philips 5R4GYS Made in Holland rectifiers… Retail : $99/each (Cryogenically Treated @ $8 per tube by Upscale Audio (These replace GZ34/5AR4)) I purchase these from Upscale this past January and would guess they have about 150 hours on them. http://www.upscaleaudio.com/philips-5r4gys-made-in-holland/ Asking $60 each, or $100 for the pair... Rectifier Tubes SOLD
-
+1 G.E.M. Normally Jeff, I would be with you on that one... But after seeing J timberbake at the Sars thing here it TO (which he was a big part in organizing, he really can be a very giving person!) I will give him at least a little credit. Not saying he is Pavarotti, but much better than Tinny Tim... I think I may have dated myself there.
-
PM sent...
-
DIY Subwoofer - lilmike's Cinema F-20 vs lilwrecker
HPower replied to Beechnut's topic in Subwoofers
Did you run a round over bit along the edges? It's hard to tell from the pictures. Carl, I was thinking about doing a round over with the router, but I opted to just "ease" all the edges with a little sanding. Just enough to take the sharp edge off. -
DIY Subwoofer - lilmike's Cinema F-20 vs lilwrecker
HPower replied to Beechnut's topic in Subwoofers
I like using the pocket screws, I am not sure it saves a ton of time, but you will find that there is a lot less clamping required. I usually dry fit everything first with just the pocket screws, then if I am happy with how things look I take it all apart and then do final assembly with the PL. This give a chance to make any required "tweeks" before hand, vs. trying to do them while you have the glue already down. -
DIY Subwoofer - lilmike's Cinema F-20 vs lilwrecker
HPower replied to Beechnut's topic in Subwoofers
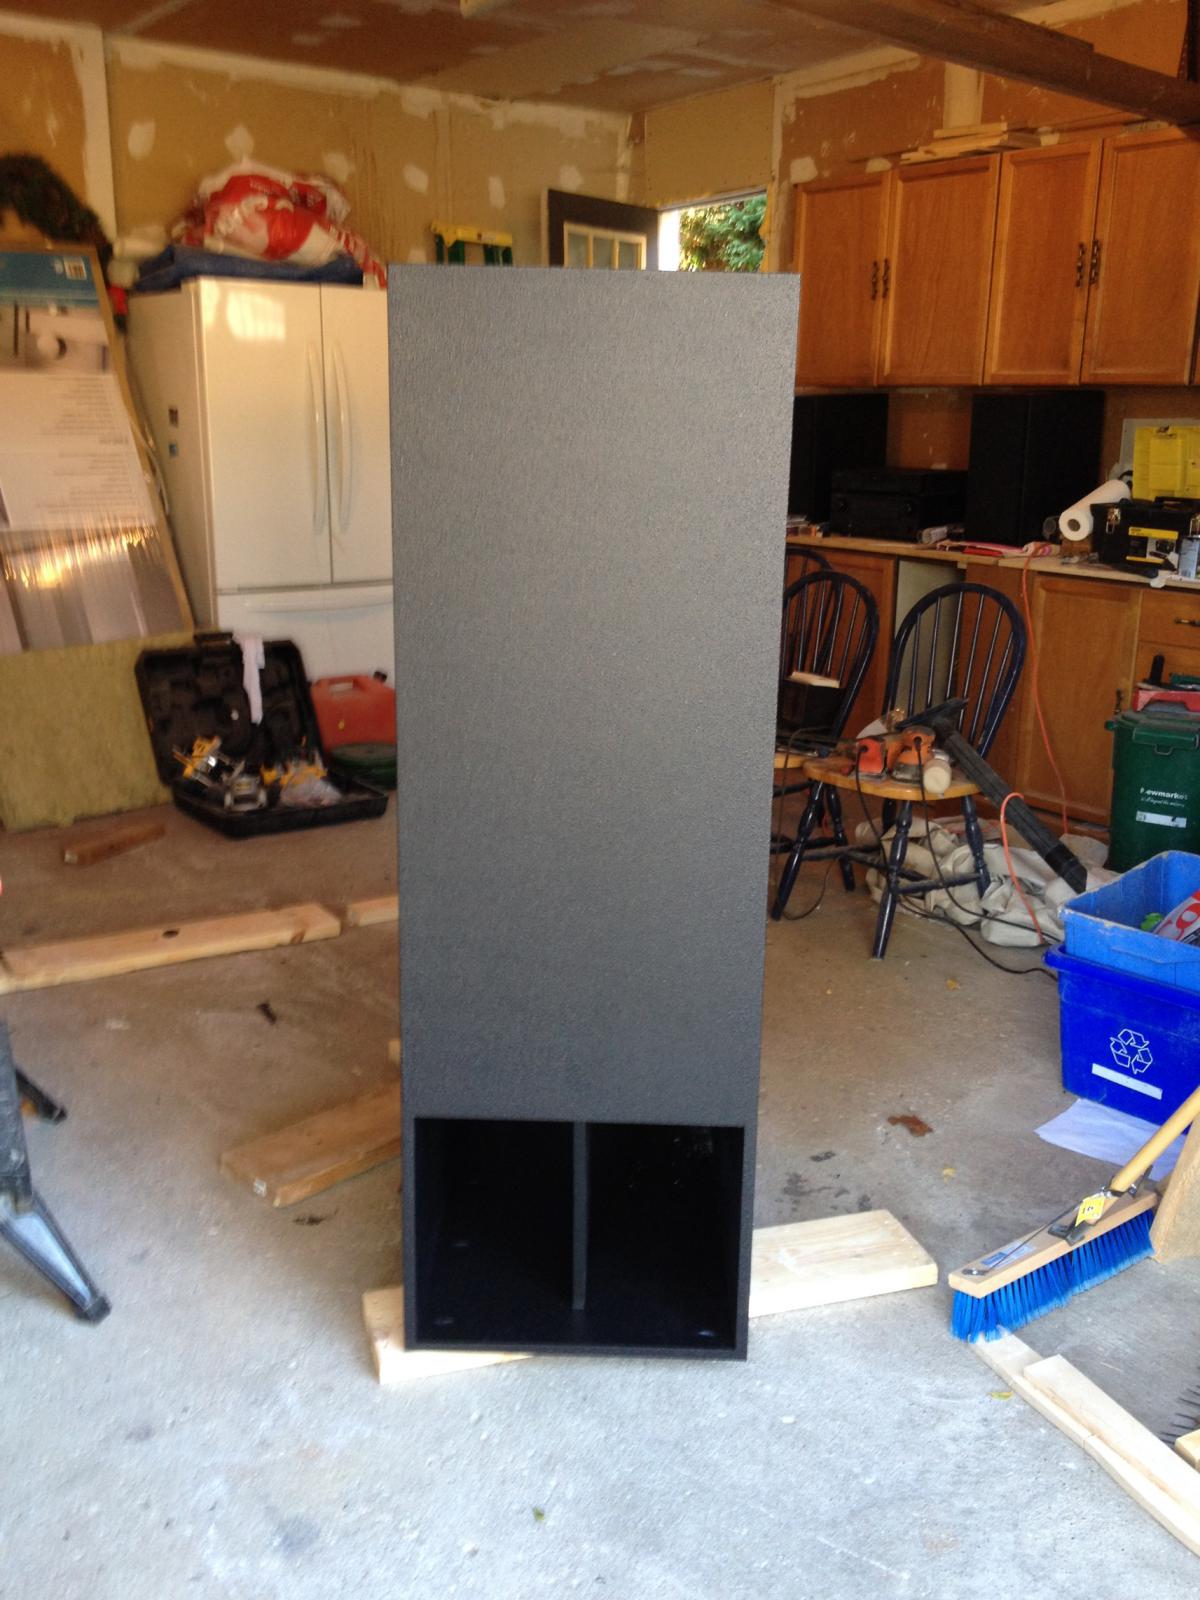
Thanks, I am happy with the way it turned out. Although, after looking again at the 2 previous pics, I think I will go in and fill the pocket screw holes in the mouth and repaint. This will be the first time I have used any Speakon connections. I figured since I am going to power it with a pro amp (Crown XLS 1500), I might as well use pro connections. With Speakons usually used on most road cases... if they work for touring bands, surely they will work in my basement. -
DIY Subwoofer - lilmike's Cinema F-20 vs lilwrecker
HPower replied to Beechnut's topic in Subwoofers
He it is with just one coat of Duratex, still waiting for Thursday's Speakon order to arrive.
-
Hey Jeff, PM Sent.
-
SOLD... Unfortunately I need to downsize my HiFi collections, so up for offer is my outstanding pair of DRD45s. I have owned these for about 1 year and they were used very minimal by the previous owner, and it shows. These were Factory built units and they work perfectly and sound as fantastic as they should! I am asking $1500 shipped, with the tubes I bought them with... Three RCA 45 tubes (1 spare). Two Sovteks 5AR4 rectifiers. Two Russian 6N1P input tubes. I decided to up the ante after a few months with the DRDs and purchased... Two new Emission Labs 45 Mesh tubes… Retail : $629/pair and Two new Philips 5R4GYS Made in Holland rectifiers… Retail : $99/each (Cryogenically Treated @ $8 per tube by Upscale Audio) So, for those that would prefer the "Full Monty", I am asking $2100 shipped with both sets of tubes. I will upload some pics this evening. Thanks for looking.
-
DIY Subwoofer - lilmike's Cinema F-20 vs lilwrecker
HPower replied to Beechnut's topic in Subwoofers
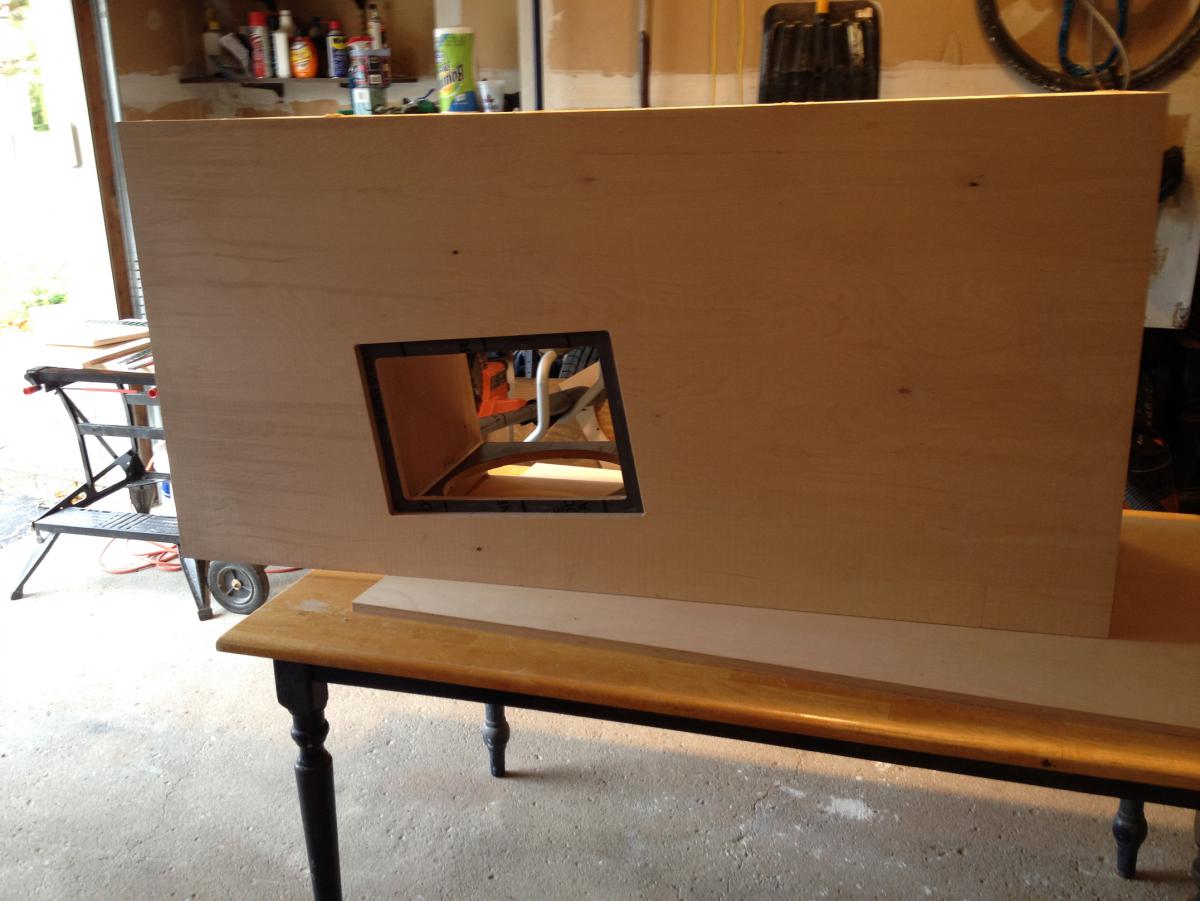
That is a 3M glued layer of Shower Pan Liner to the baffle to act like a gasket to ensure a better seal for the woofer. Not sure if it was necessary but I had a bunch of it from previous speaker builds. I also used it to form the gasket for the trapdoor. -
DIY Subwoofer - lilmike's Cinema F-20 vs lilwrecker
HPower replied to Beechnut's topic in Subwoofers
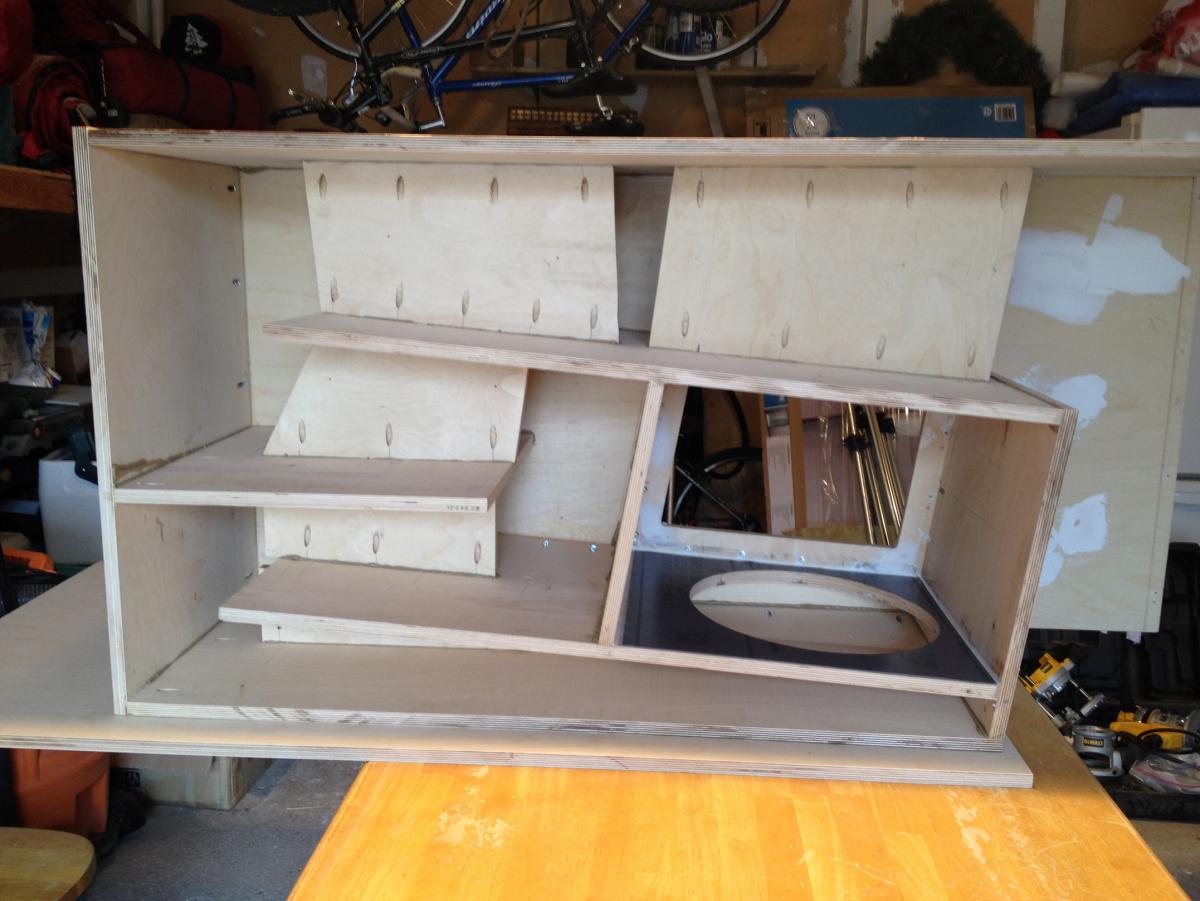
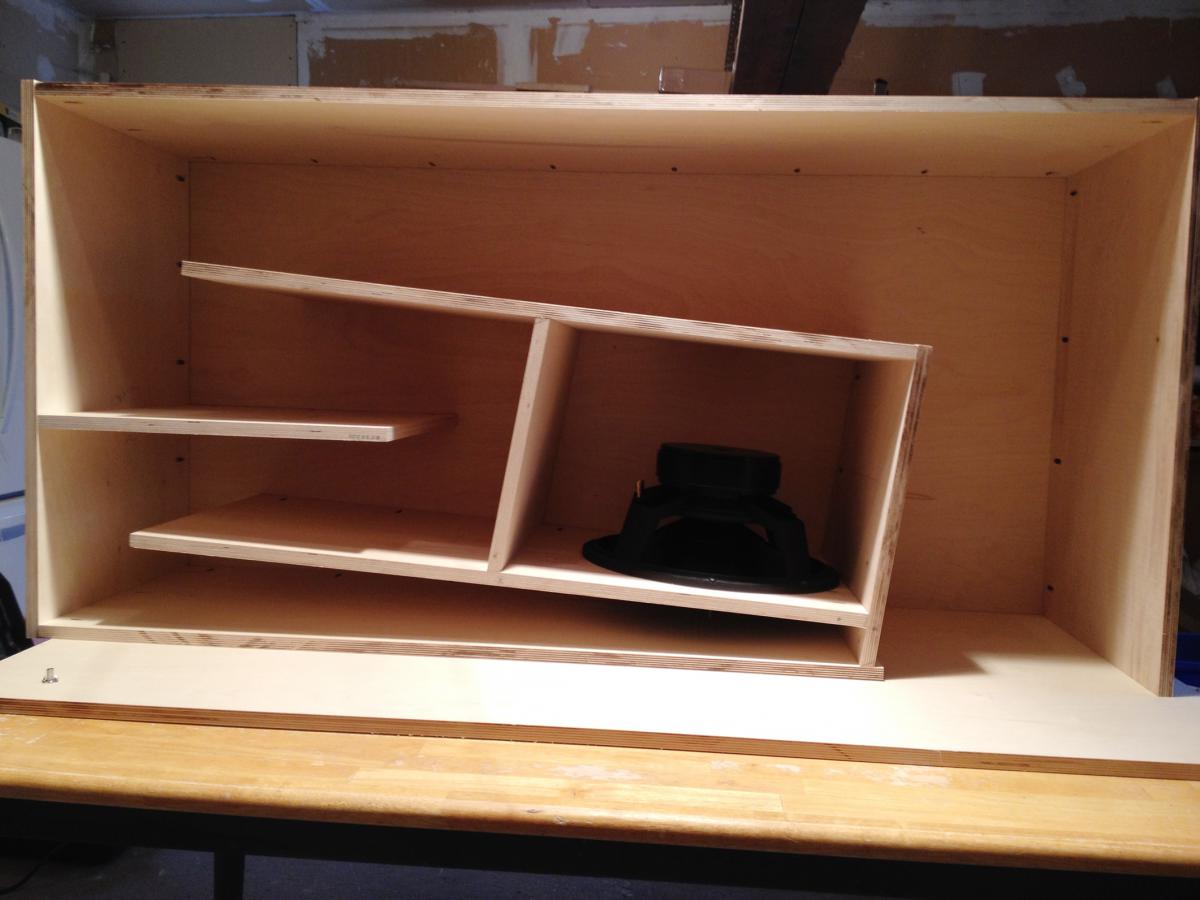
I have been dragging my A$$ the last couple days but yesterday I did get all the bracing put in. Carl, I followed your technique for cutting and installing the braces, worked out great. I forgot to take a pic with the mouth brace in and all painted black. Hopefully after work tonight I can get the last side glued on.
-
DIY Subwoofer - lilmike's Cinema F-20 vs lilwrecker
HPower replied to Beechnut's topic in Subwoofers
Not confusing, Without me giving a lot of thought initially, that is how I was planning to go about it. But when I was thinking about the other approach, I am thought it would help with positioning the panels. I am guessing I would hardly need to clamp while dry fitting with the pocket screws. When I do my final assembly with the PL, I will take a few picks to simulate my idea. If it looks like it will be a good technique, I will keep in in mind for future builds. -
DIY Subwoofer - lilmike's Cinema F-20 vs lilwrecker
HPower replied to Beechnut's topic in Subwoofers
Thanks Carl After I was about half way through my dry fit yesterday it dawned on me that I could have cut all my braces to my layout before doing any assembly. I figured I could have positioned the braces on the inside of the 1st side (tacked in position with a couple of screws) and then used them as stops to position the panels as I went along. When screwing the panels down from the opposite side of the brace, the pocket screws would push the panels against the brace. Then, once everything has been dry fitted (basically where I am now) I would un-tack the braces from the side panel and move them up 1/2 way and they should be a perfect fit. This would also ensure all the panels are square and perpendicular to the side panel. If I build a 2nd one, I will try this approach, as per this layout. -
DIY Subwoofer - lilmike's Cinema F-20 vs lilwrecker
HPower replied to Beechnut's topic in Subwoofers
Hey Beechnut, Have you decided on which model that you are going to build? I went with the Cinema F-20, mainly because of the lower cost and ease of build. This weekend I was able to get a start and have all the panels dry fitting with pocket screws. Next I will cut and fit the braces, then take it all apart and reassemble with the PL.
-
You are welcome Chuck. Nice B3! My buddy has a nice C3, he can't play but when he came across it for sale he could not pass it up. He has a couple buddies that play in bands and it is cool to hear them play when they are over.
-
In my mind, I think using contact cement like Ryan did will give you a fantastic job and perhaps making a better bond to the speaker. I just found that method harder for me to get done correctly. With the Heat-Lock method I used, you can position the veneer and move it around until you are happy with the spot. This is a little more difficult with contact cement, once it the veneer is down... it is down. When I veneered my Frugalhorns, they are a very irregular shape as you can see from the pics, so positioning the veneer required a bit of finesse. With the iron on method I was able to get a pretty good grain alignment from side to top, to side. Because the front baffle is sloped, the top panel to side is not really a true 90 degrees so the grain did not match perfect all the way across, but not too bad. Keeping the rebate to a minimum on a "squarer" cabinet like your Fortes you should be able to get a real nice grain match as you wrap from panel to panel.
-
Hey Jim, I am by no means an expert but I ended up doing the "Iron On" method for my couple of veneer jobs. http://www.veneersupplies.com/products/Better-Bond-Heat-Lock-Veneer-Glue.html http://www.veneersupplies.com/products/Veneer-Glue-Roller.html I purchased those 2 products and then followed, more or less this method: I tried the contact cement method and I had a real tough time keeping bubbles out and it also made it very difficult to position the veneer exactly where you wanted it on the cabinet. With the iron and Heat-Lock, it was simple to get the veneer in the right spot. This makes it super easy when trying to line the grain up when wrapping from one panel to the next. I tried Iron on with just brushing regular Titebound glue but it did not work as well as the Heat-Lock. I think this was more due to the brushing of the glue vs. the roller that I used with the Heat-Lock... use the Heat-Lock roller for applying the glue!!! 2 coats to both the veneer and cabinet. Much easier to work with and clean up is a breeze, wash roller with warm water and it is ready for the next project.
-
Forget the boxes, I wanta see pics of his new tools!... That didn't sound right. :o
-
Location and willingness to ship would help your sale.
-
DIY Subwoofer - lilmike's Cinema F-20 vs lilwrecker
HPower replied to Beechnut's topic in Subwoofers
Well, I have done a little Duratex practicing on my little speaker project and I really like this stuff! It goes on easy and you can manipulate the texture with how much you apply with the 2nd coat. I went with the conventional "stipple" finish but did try the "leatherette" look on some scrap and my go that route when I do the F-20.
-
DIY Subwoofer - lilmike's Cinema F-20 vs lilwrecker
HPower replied to Beechnut's topic in Subwoofers
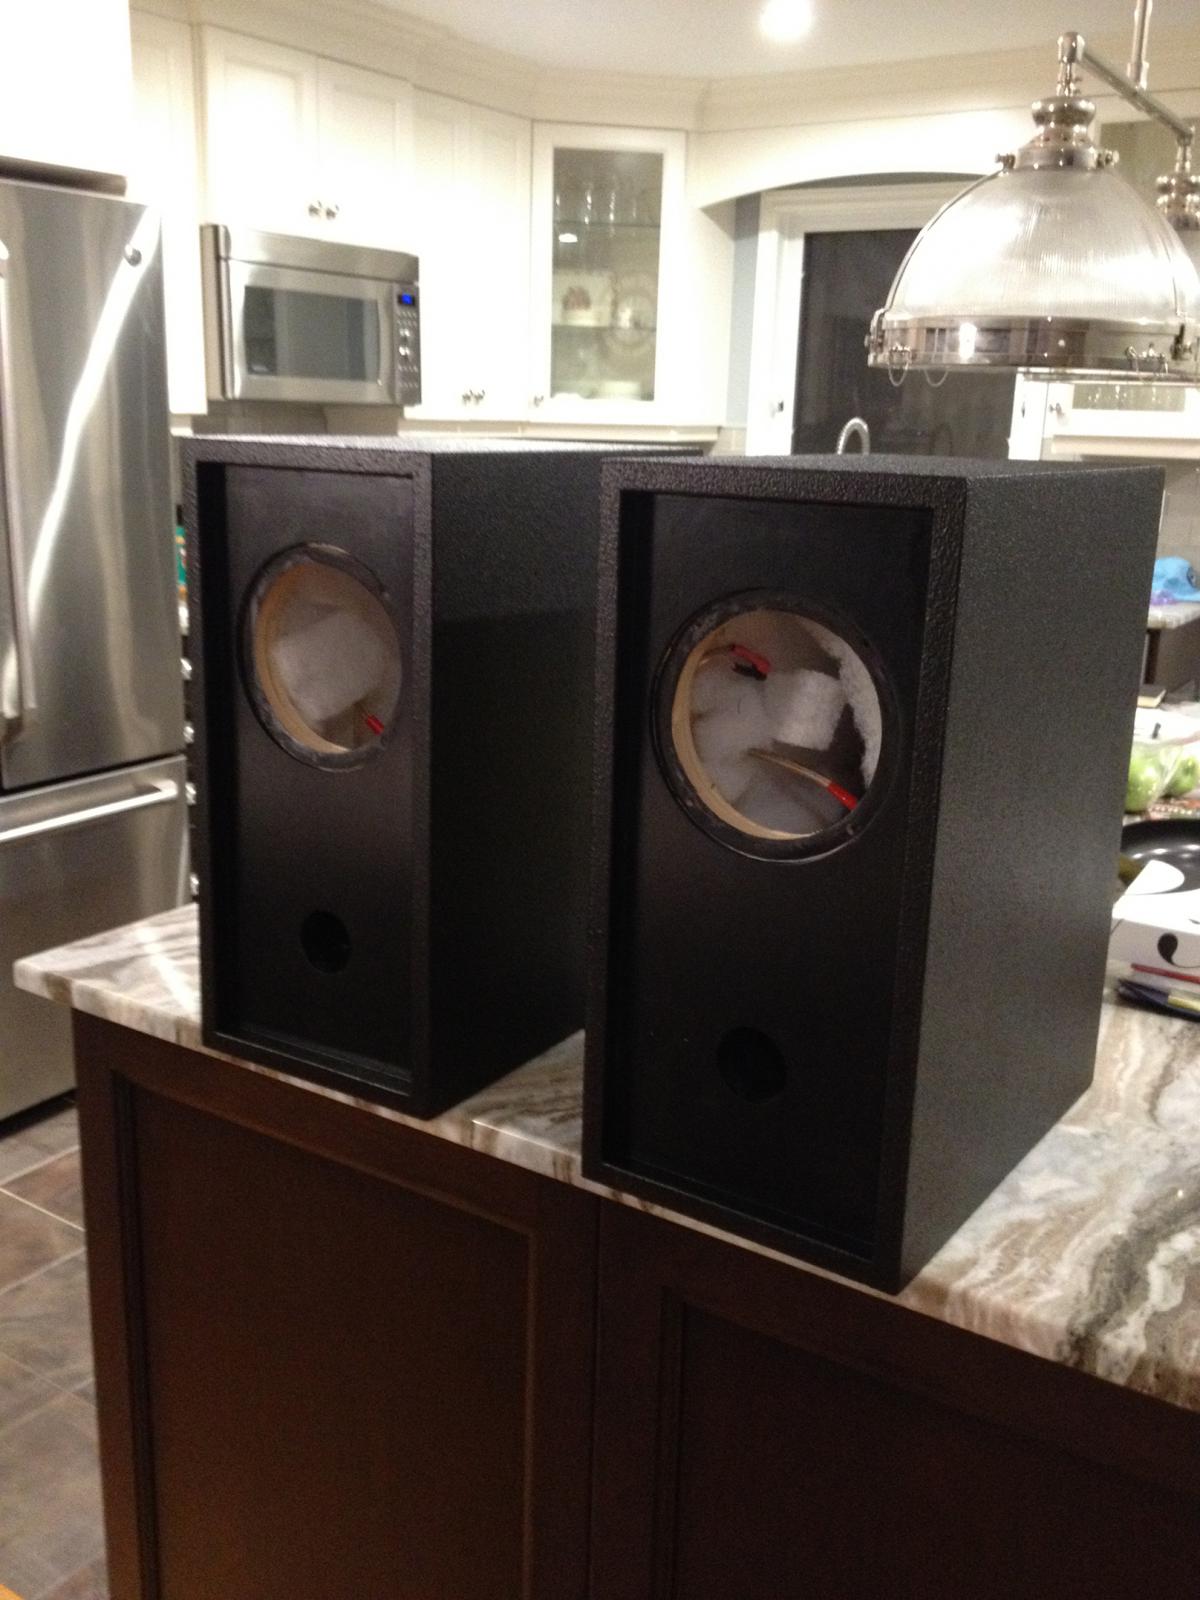
I will probably practice on these first... -
DIY Subwoofer - lilmike's Cinema F-20 vs lilwrecker
HPower replied to Beechnut's topic in Subwoofers
Ya, I have a couple other projects that need finishing and figured I would use the Duratex... I am just finishing up a pair of small speakers that I used a pair of CDT 6.5 Braxial drivers and Xovers that I reclaimed out of my old car. They are done, other than the grill cloth and giving them a coat of Duratex. Later this fall I still want to get to my Four Pi speaker build, I have had the Horns, Drivers, and Woofers sitting on my bench for well over a year. http://www.pispeakers.com/catalog/product_info.php/products_id/105 Still deciding if I will Duratex my 2 25hz Tapped Horns or I may veneer them in Cherry to match the FHorns. What is the shelf life like on the Duratex once it is opened? -
DIY Subwoofer - lilmike's Cinema F-20 vs lilwrecker
HPower replied to Beechnut's topic in Subwoofers
I was wondering the same Carl, the black cabinet between the F-20 and right KHorn? -
DIY Subwoofer - lilmike's Cinema F-20 vs lilwrecker
HPower replied to Beechnut's topic in Subwoofers
Just placed an order at Parts Express today for 1 Dayton Audio RSS390HF and a gallon of Acry-Tech DuraTex Black. My wife has a 10 day trip starting on the 14th so I will probably wait until then to start the F-20. -
DIY Subwoofer - lilmike's Cinema F-20 vs lilwrecker
HPower replied to Beechnut's topic in Subwoofers
Thanks Carl, Makes sense to stick with a proven commodity. It's a little slow at work today so I drew up a F-20 layout in Illustrator and output a couple size as HPs (one on paper and 1 on acetate). As I did with my Frugalhorn and 25hz Tapped Horn builds, I will transfer the layout to the BB.