Mike Dubay
-
Posts
257 -
Joined
-
Last visited
Content Type
Forums
Events
Gallery
Everything posted by Mike Dubay
-
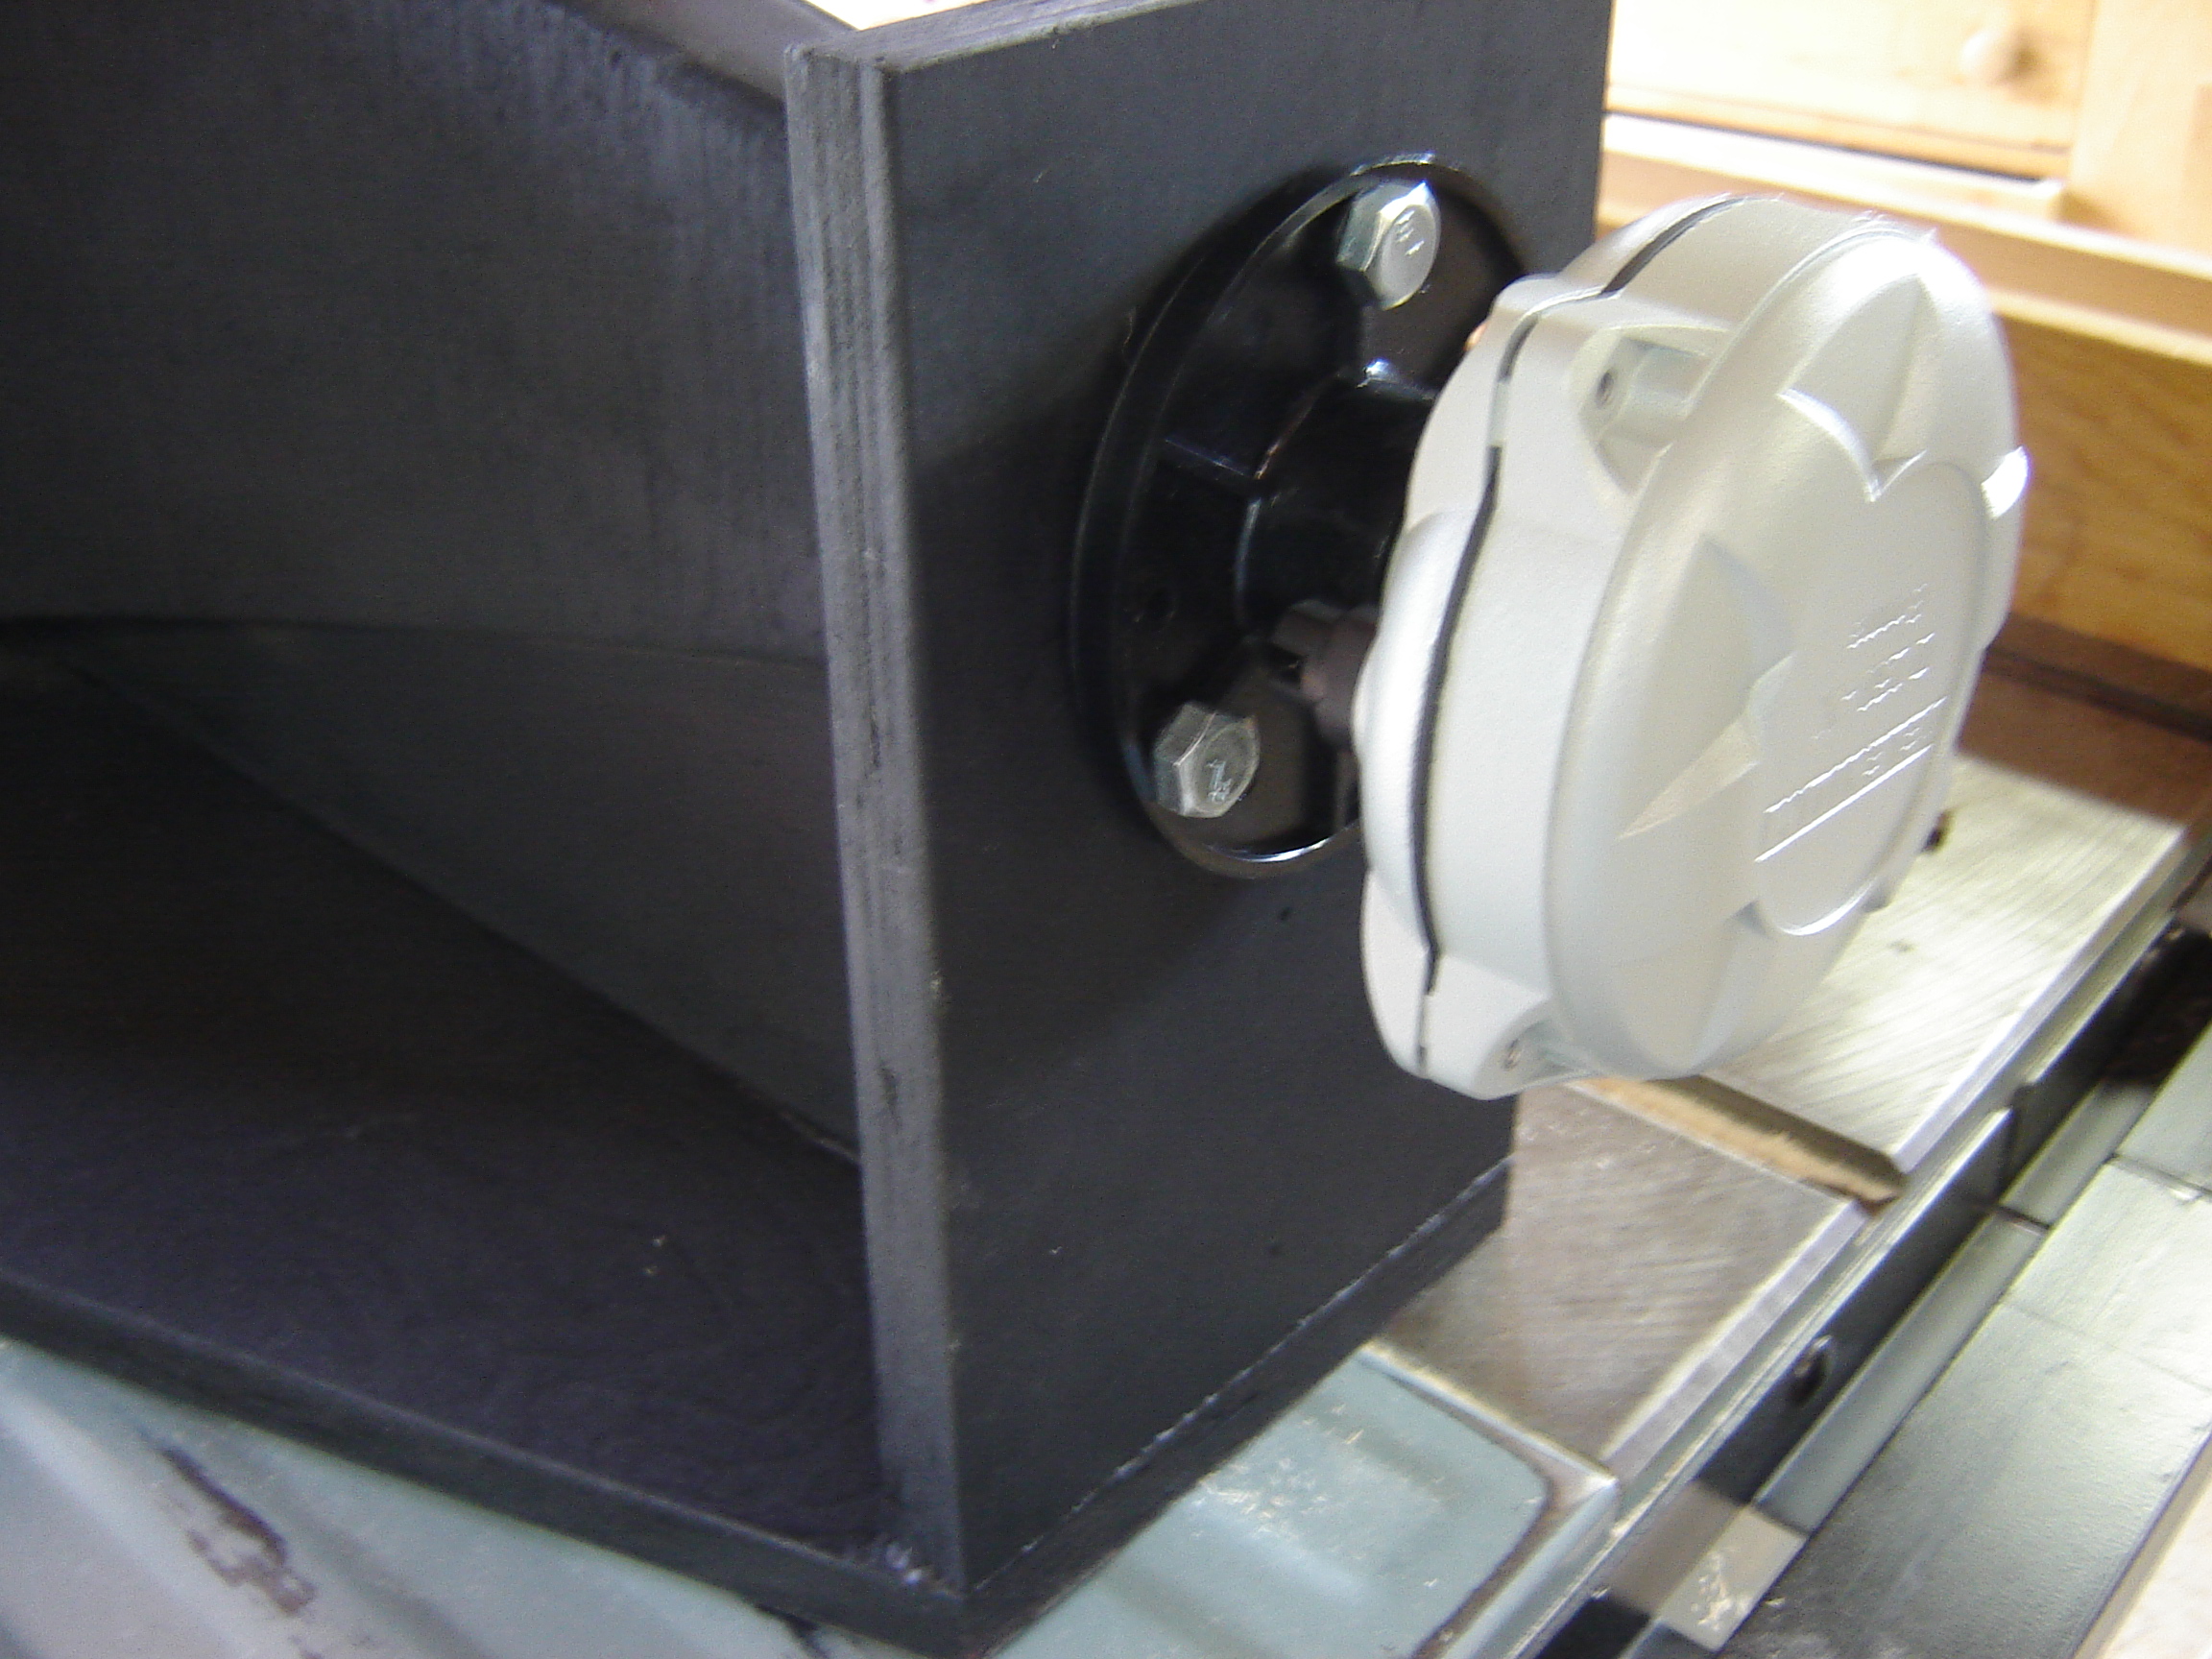
Close up of the driver and adapter. To align the adapter I placed a 1" cylinder in the hole in the horn through the adapter, then marked the holes which gave good alignment.

-
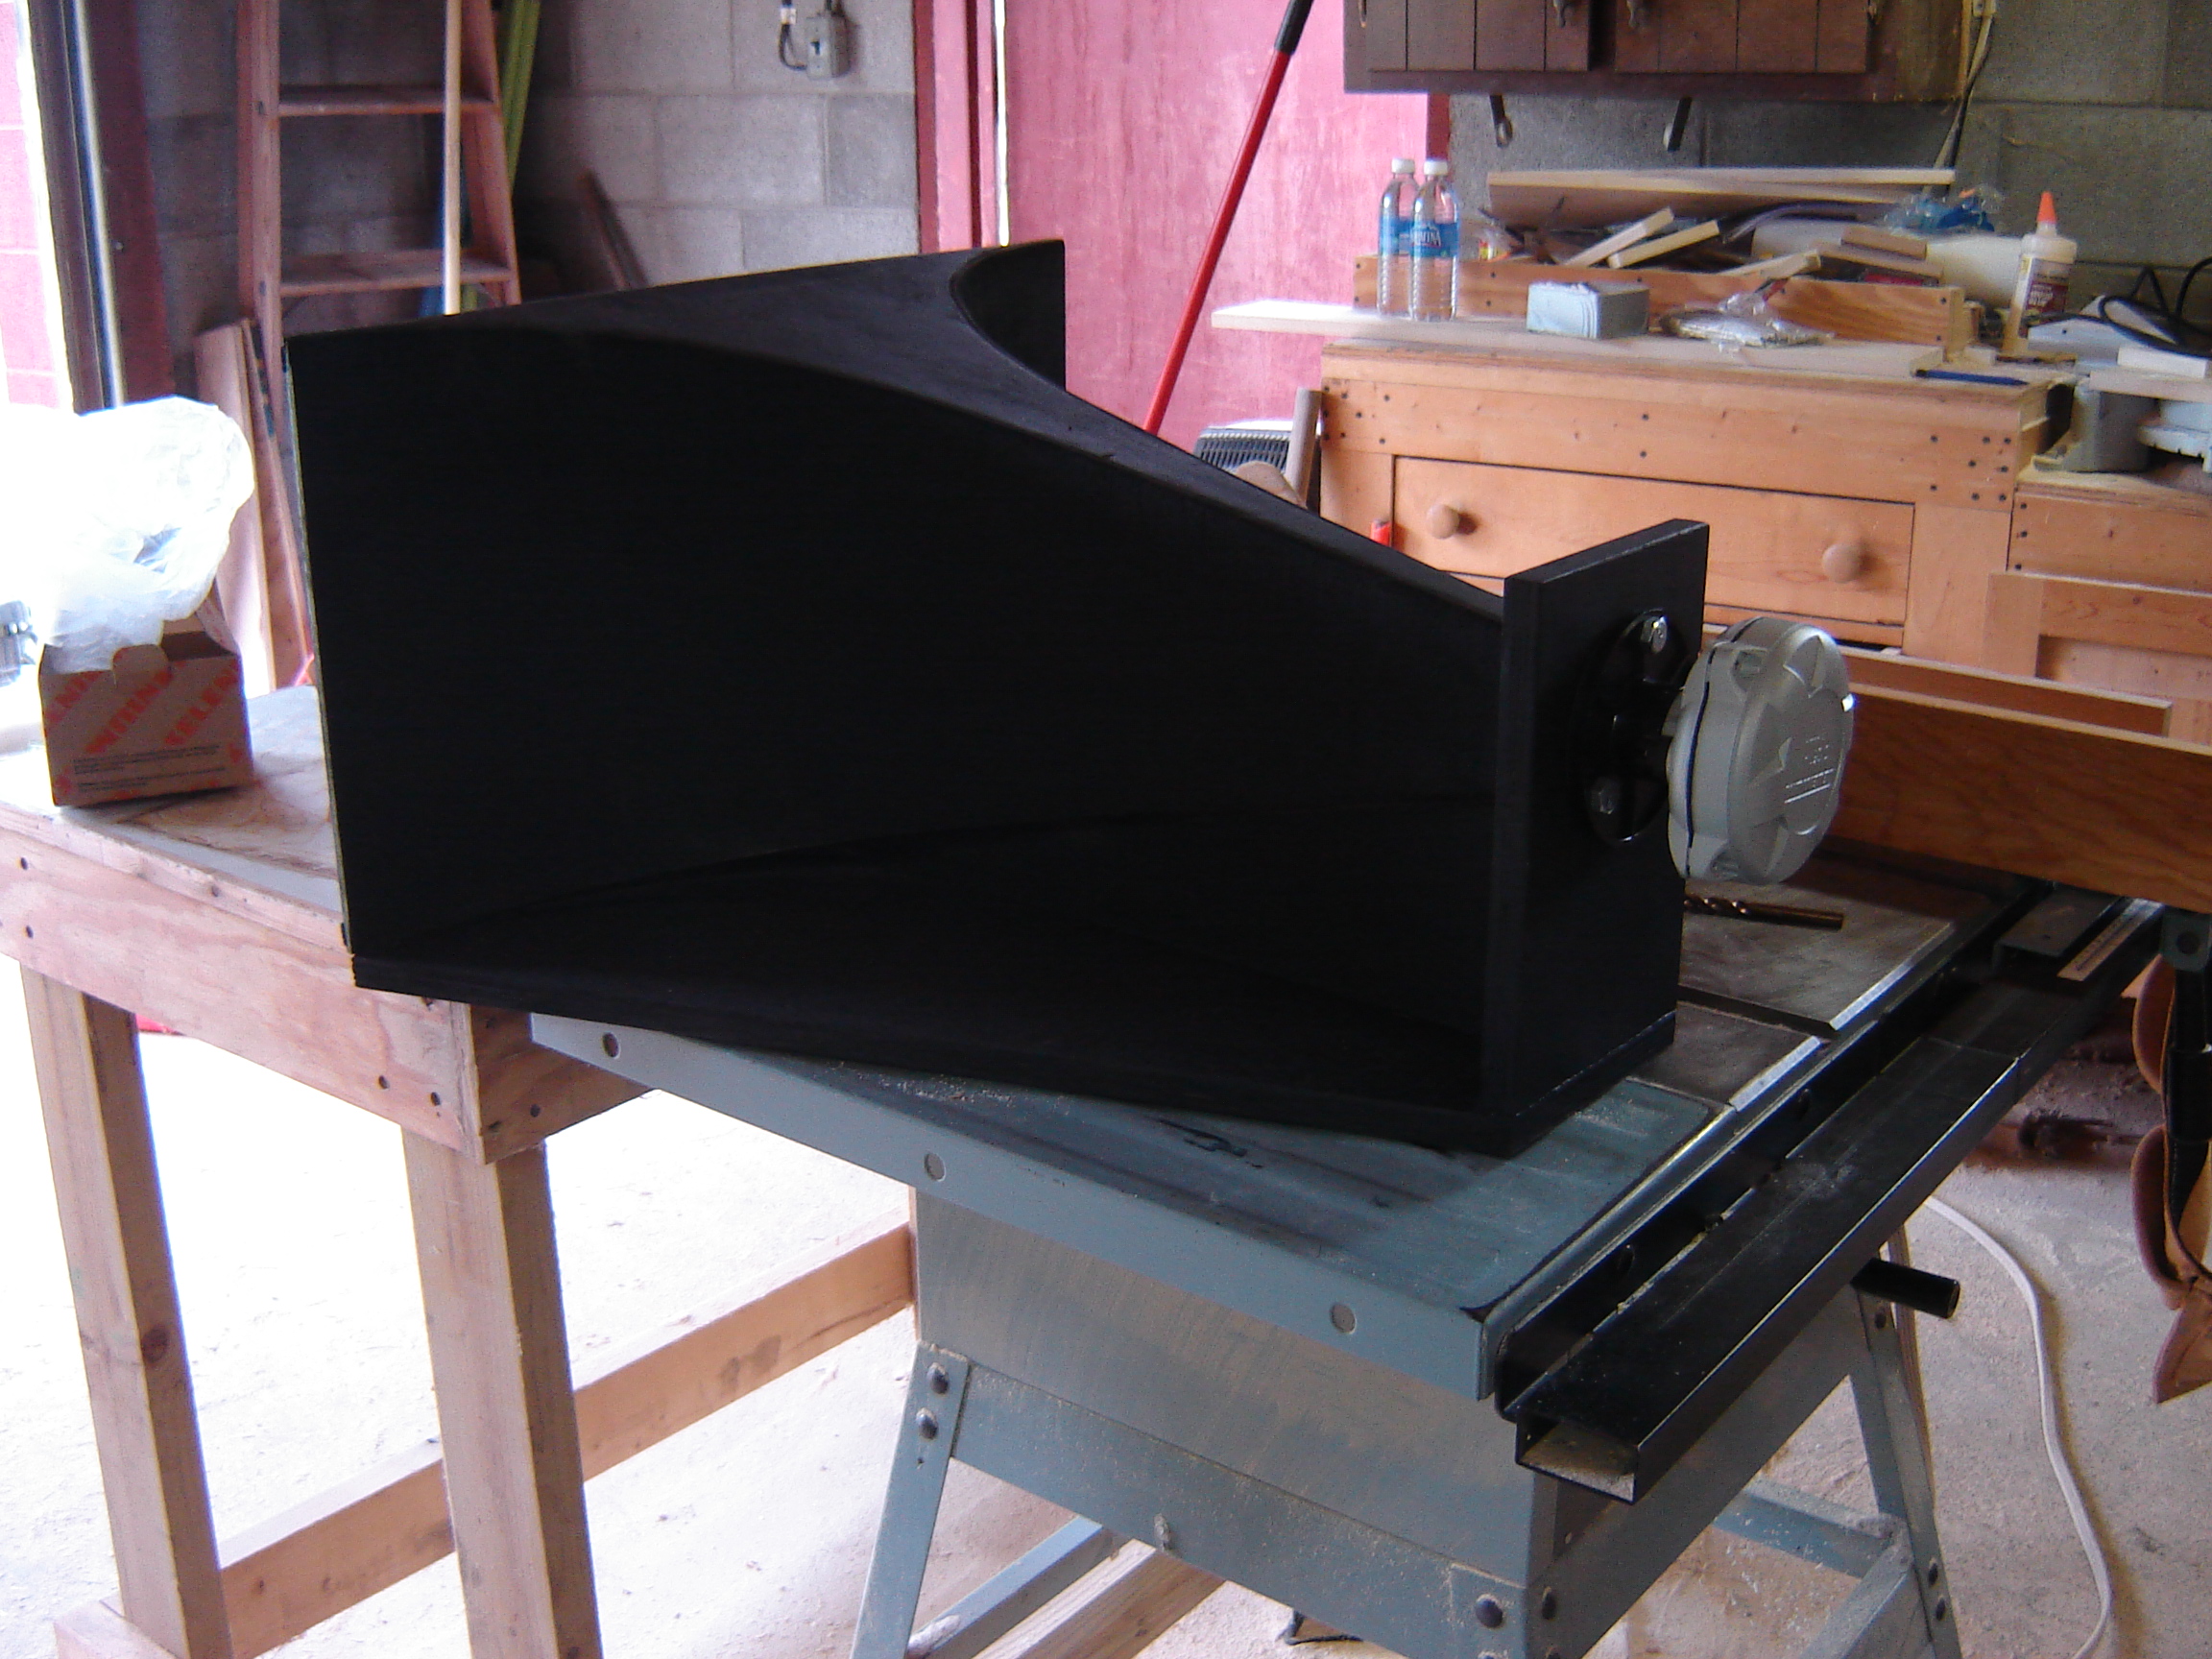
Almost a shame to black them out. Look sinister in black with the driver mounted. Next time I would like to have the horns stay a natural wood color. Maybe have a layer of oak veneer on top of the flexible plywood. Or mahogany lamiate as Kevin suggested. Why go to the time of building wood horns and then cover them in black to hide them.
-
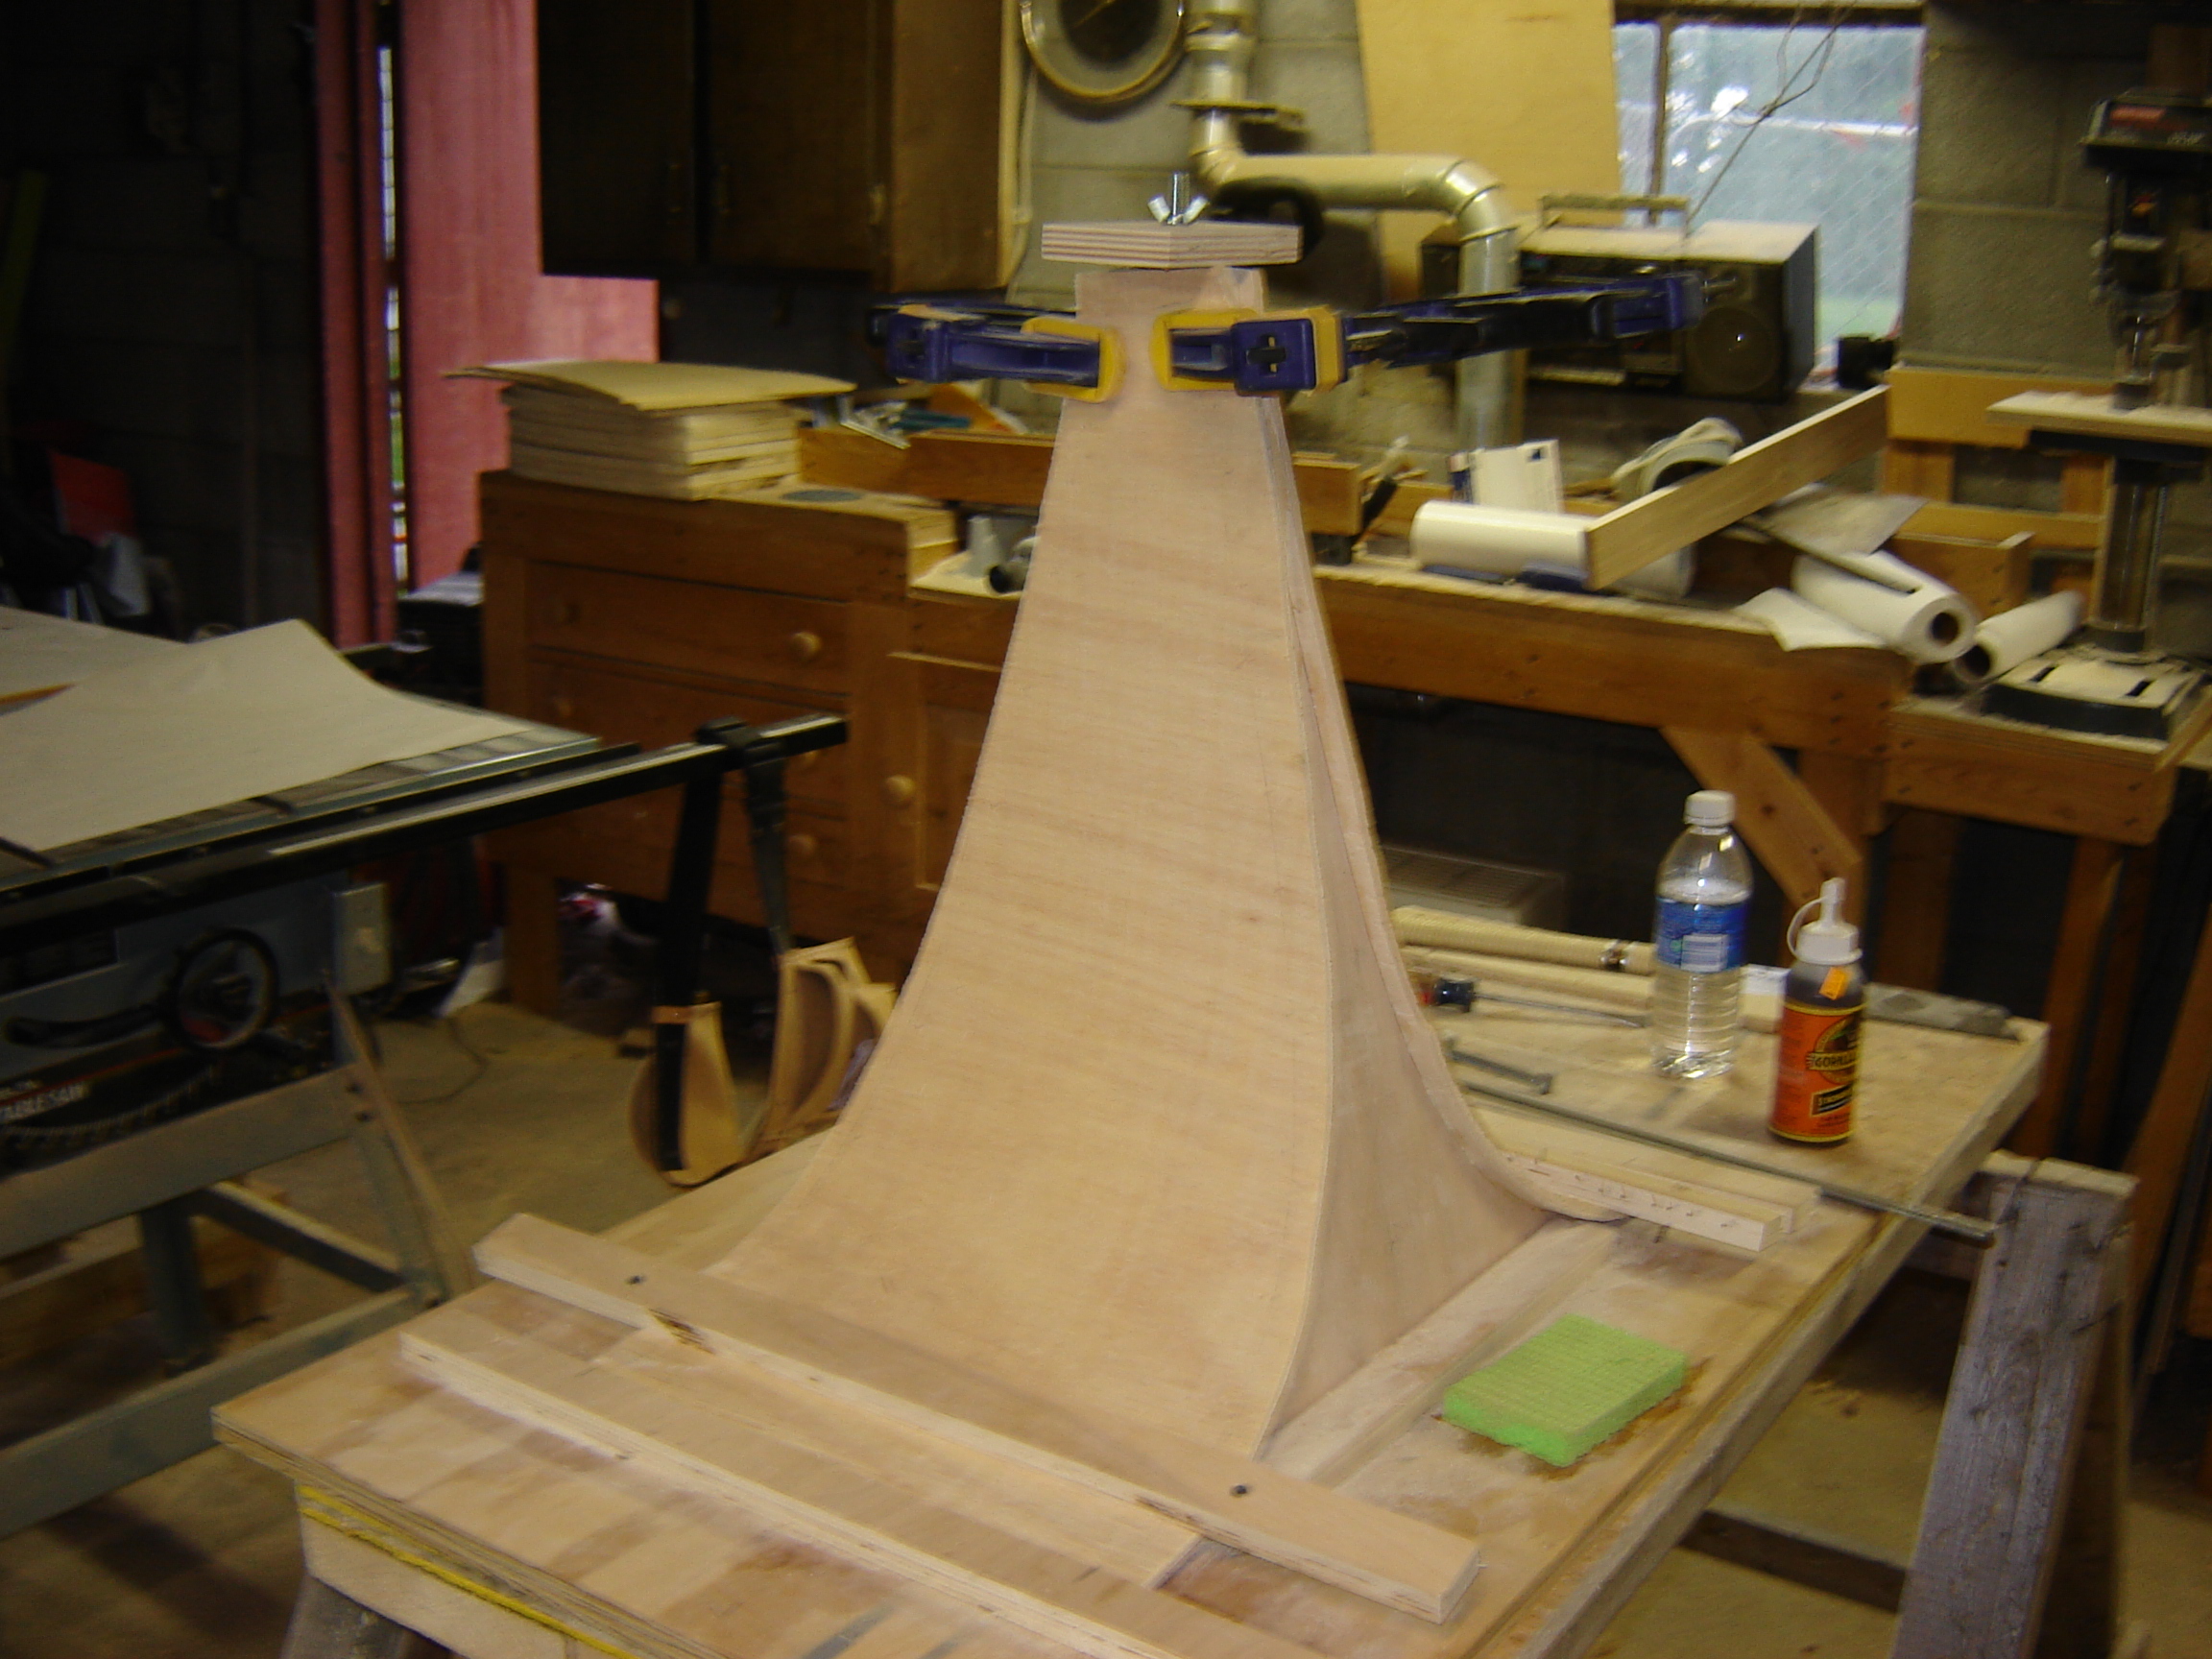
Attaching the horns to the base. Boy are these things getting heavy, and feel very solid.
-
Why just build a base for the horn, when you can instead over build the base for the horns.
-
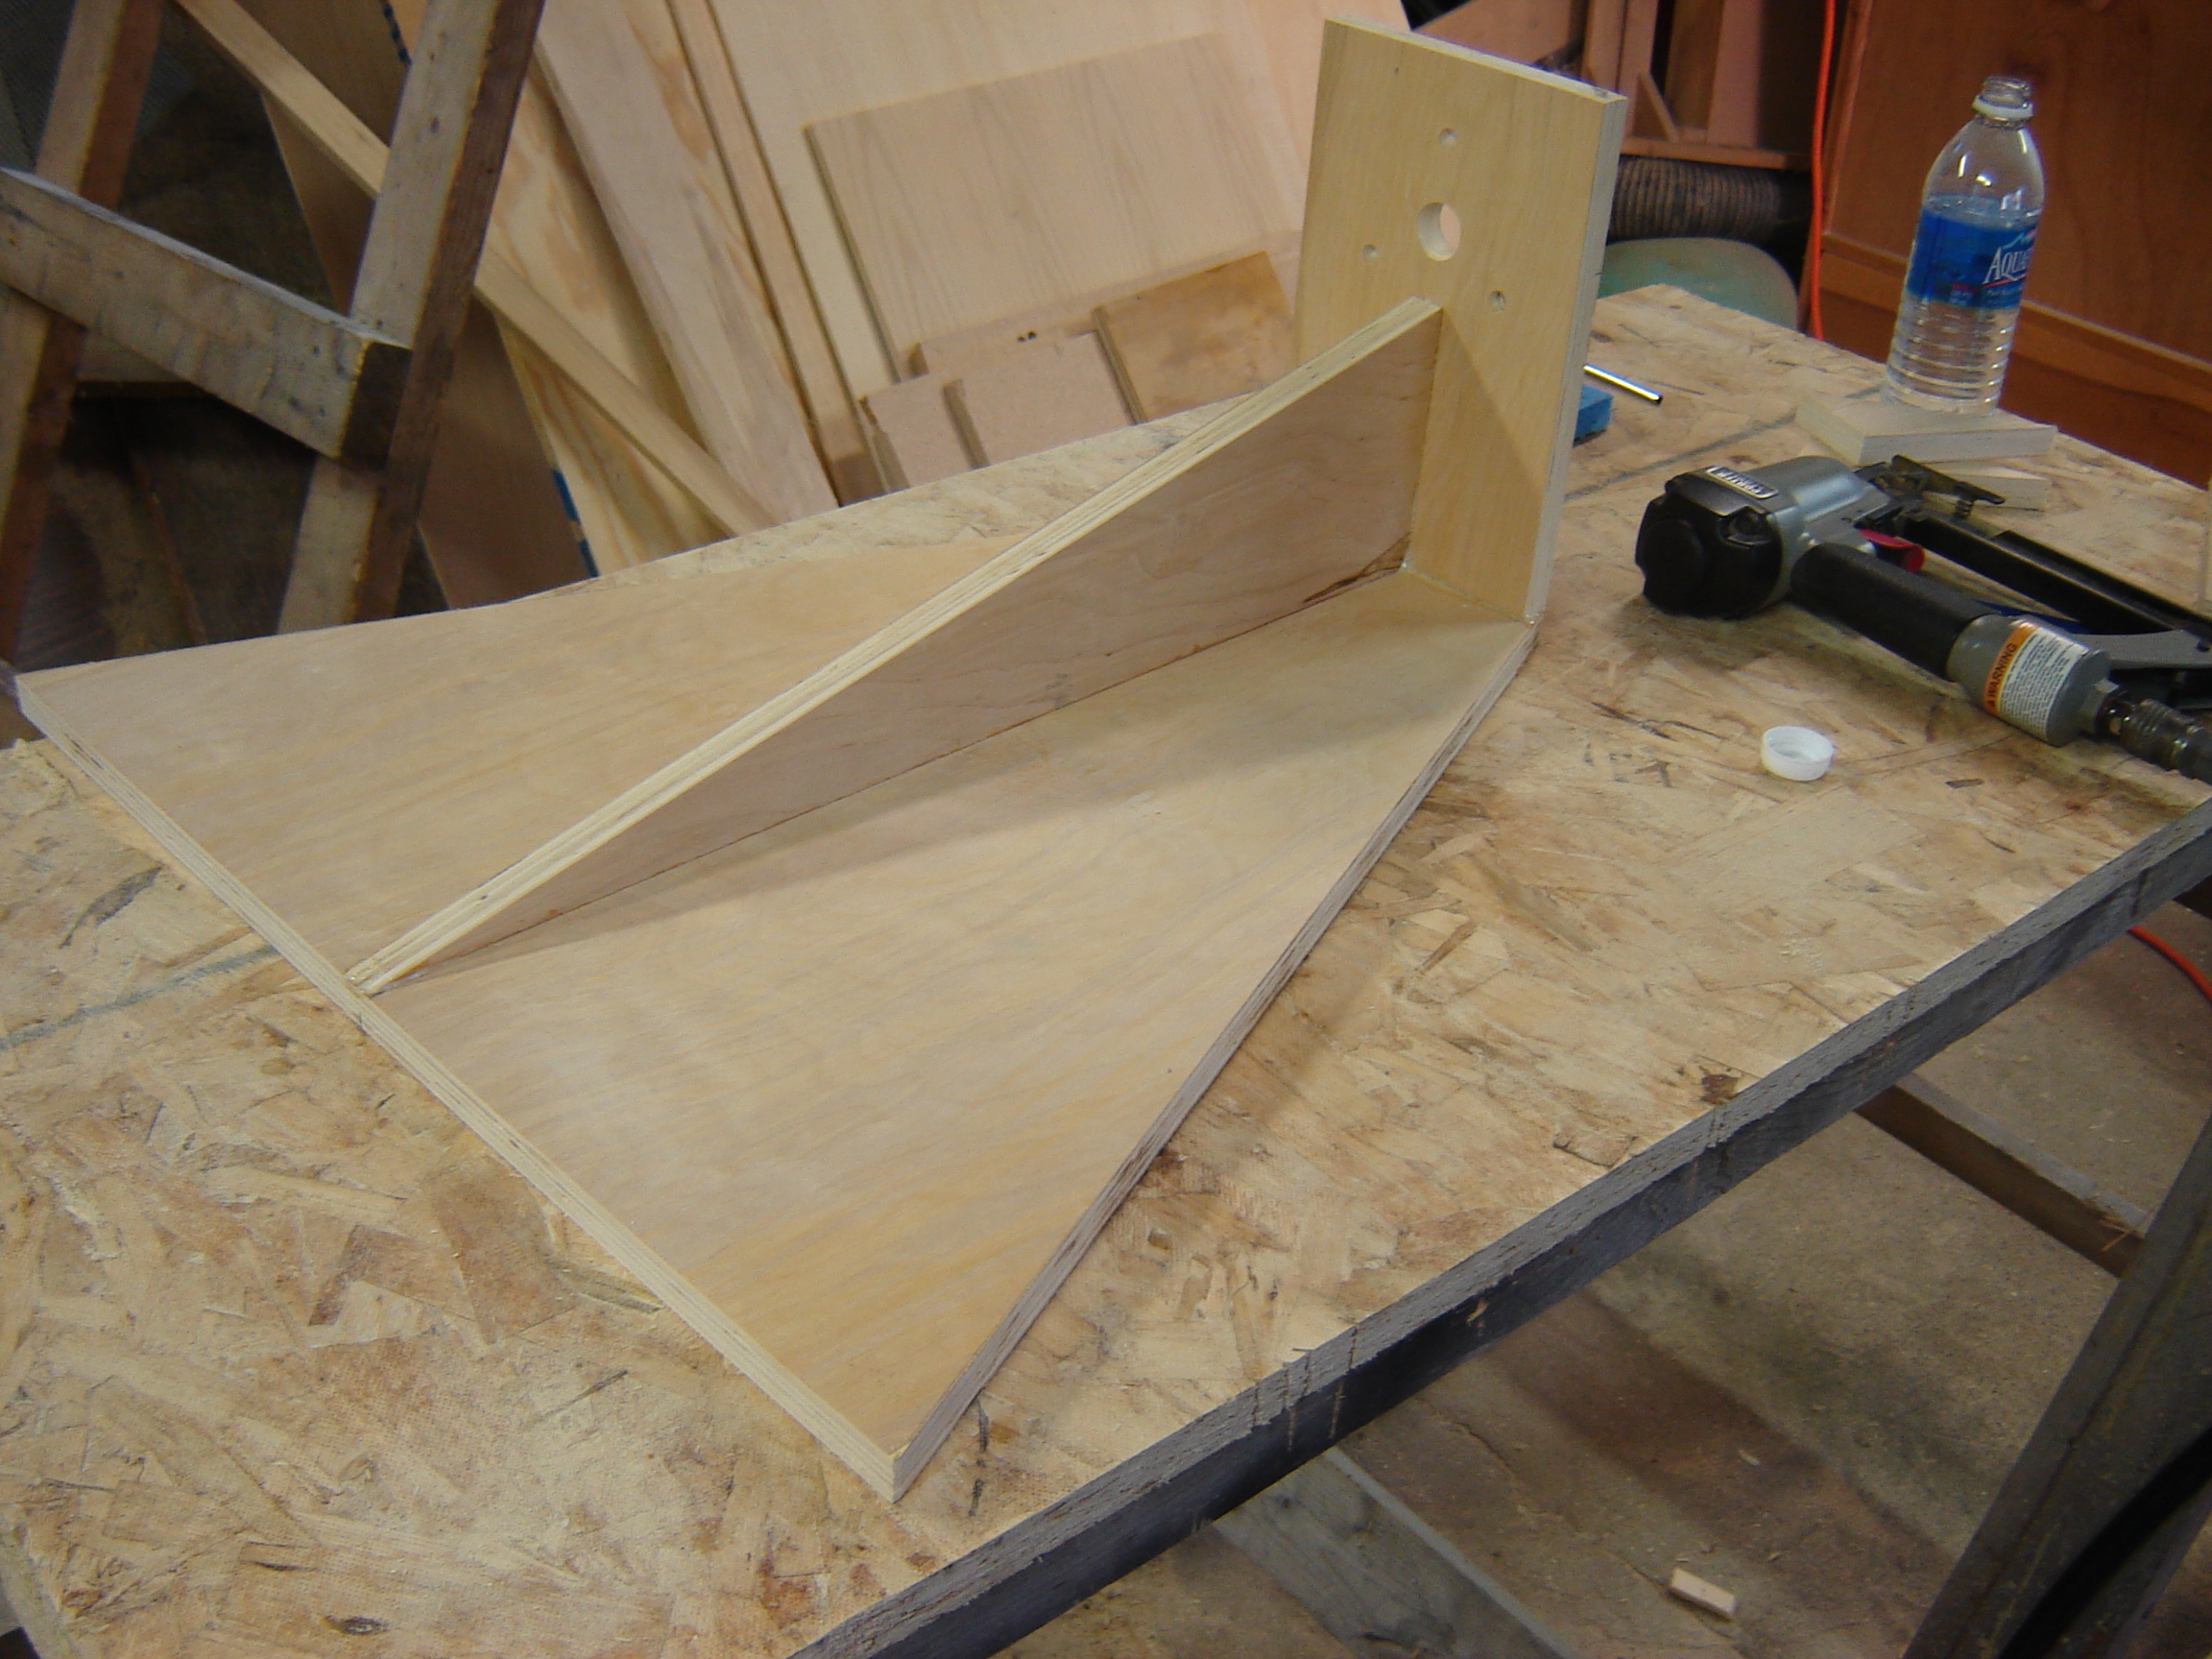
The base for the horns consists of a trapizoid of 3/4 inch birch plywood, a triangle down the middle, and a rectangle to mount the driver to the squawker.
-
Side view.
-
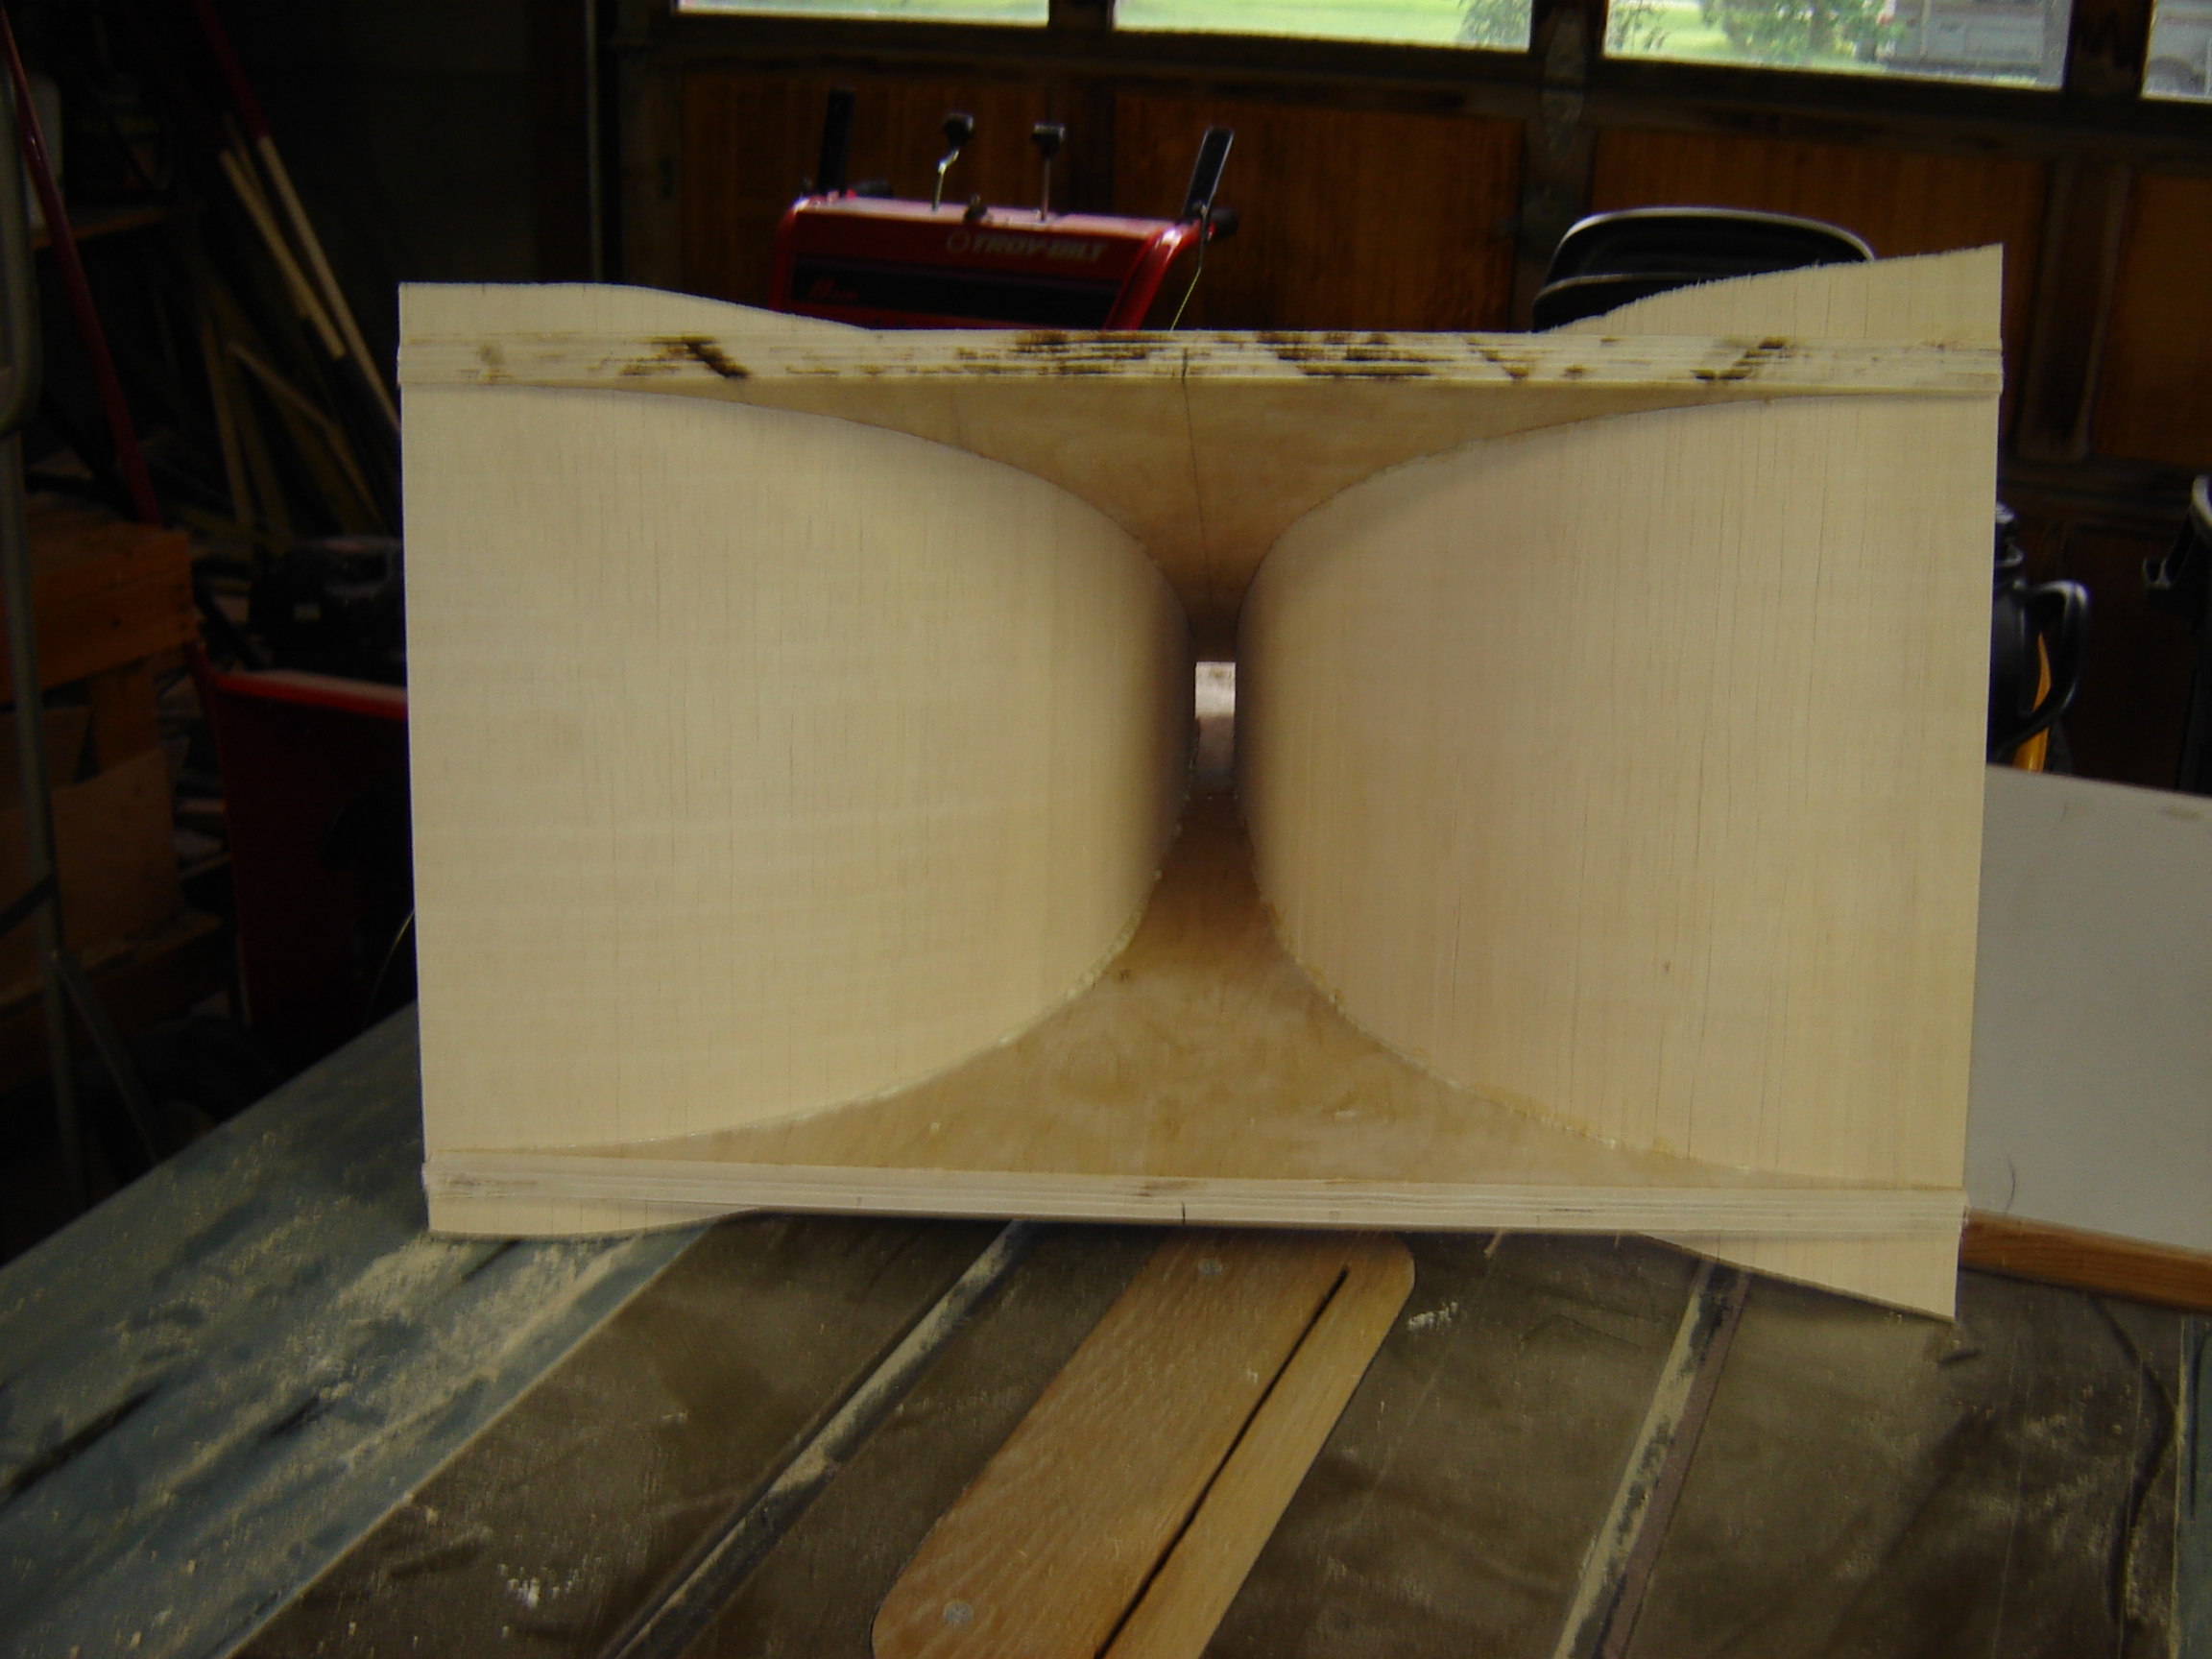
Here is my first horn out of the jig.
-
. Sure thing Kevin, That is one sweet looking turn table in your avitar. Who makes it?
-
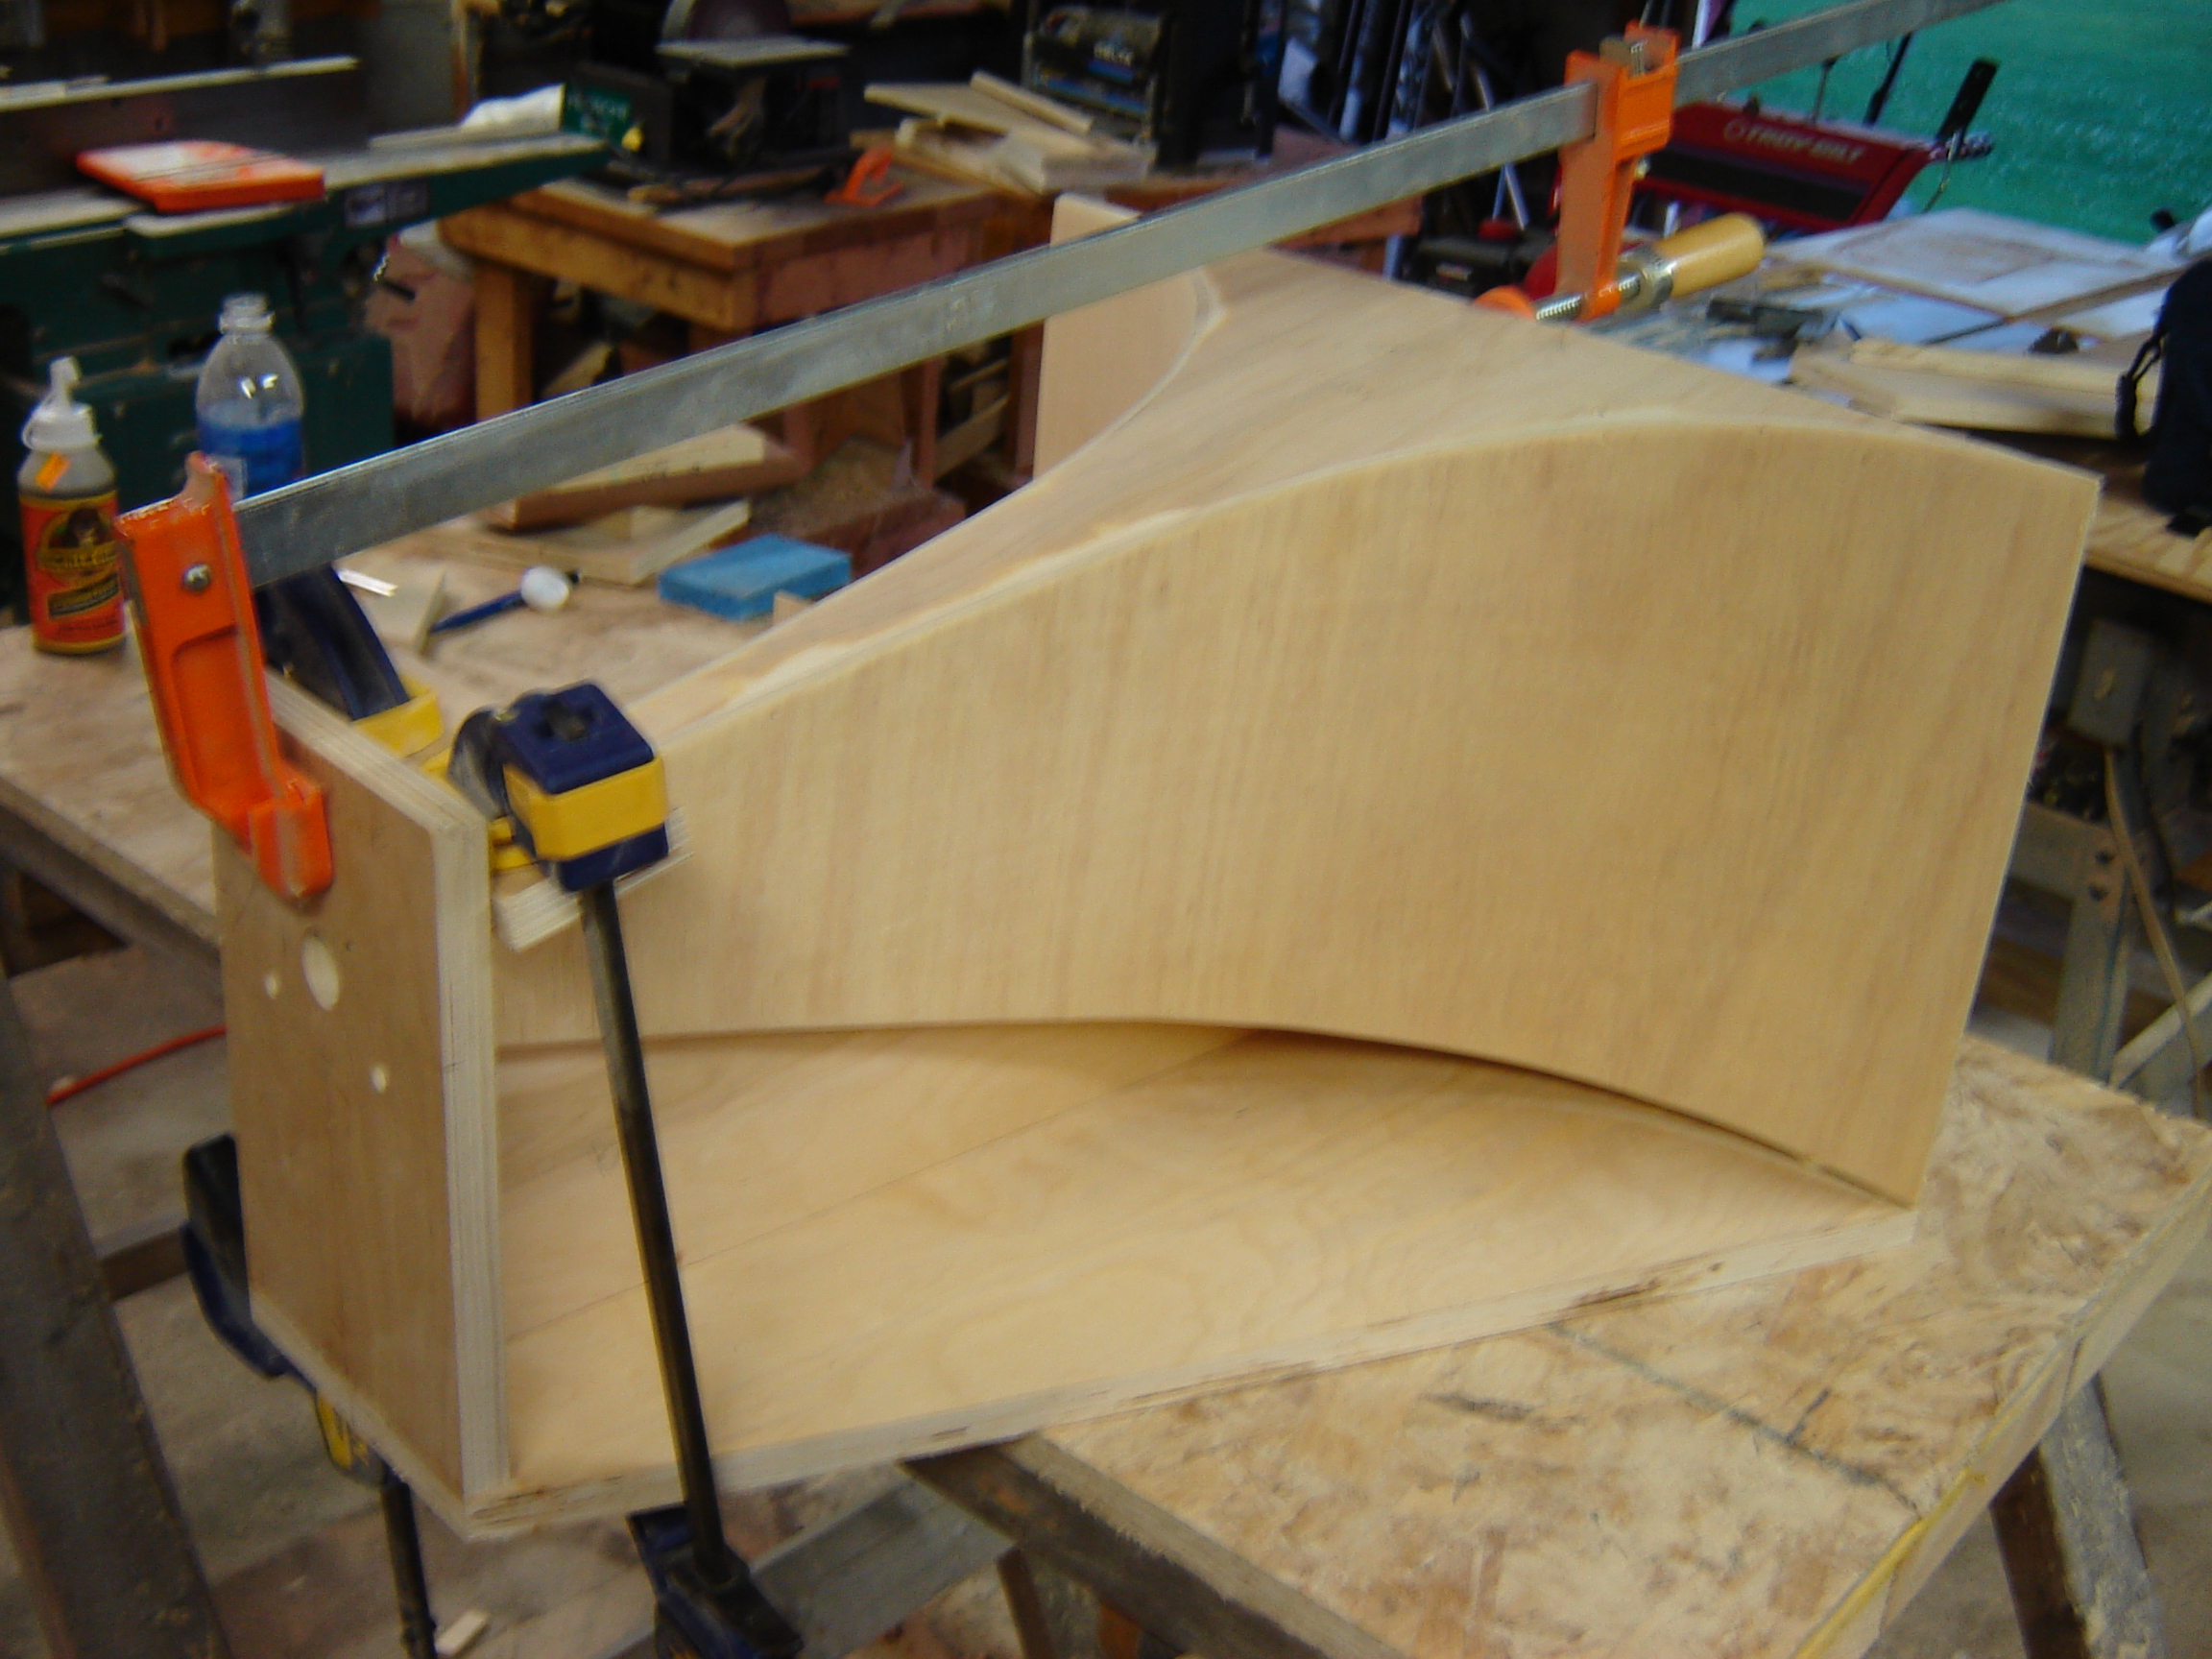
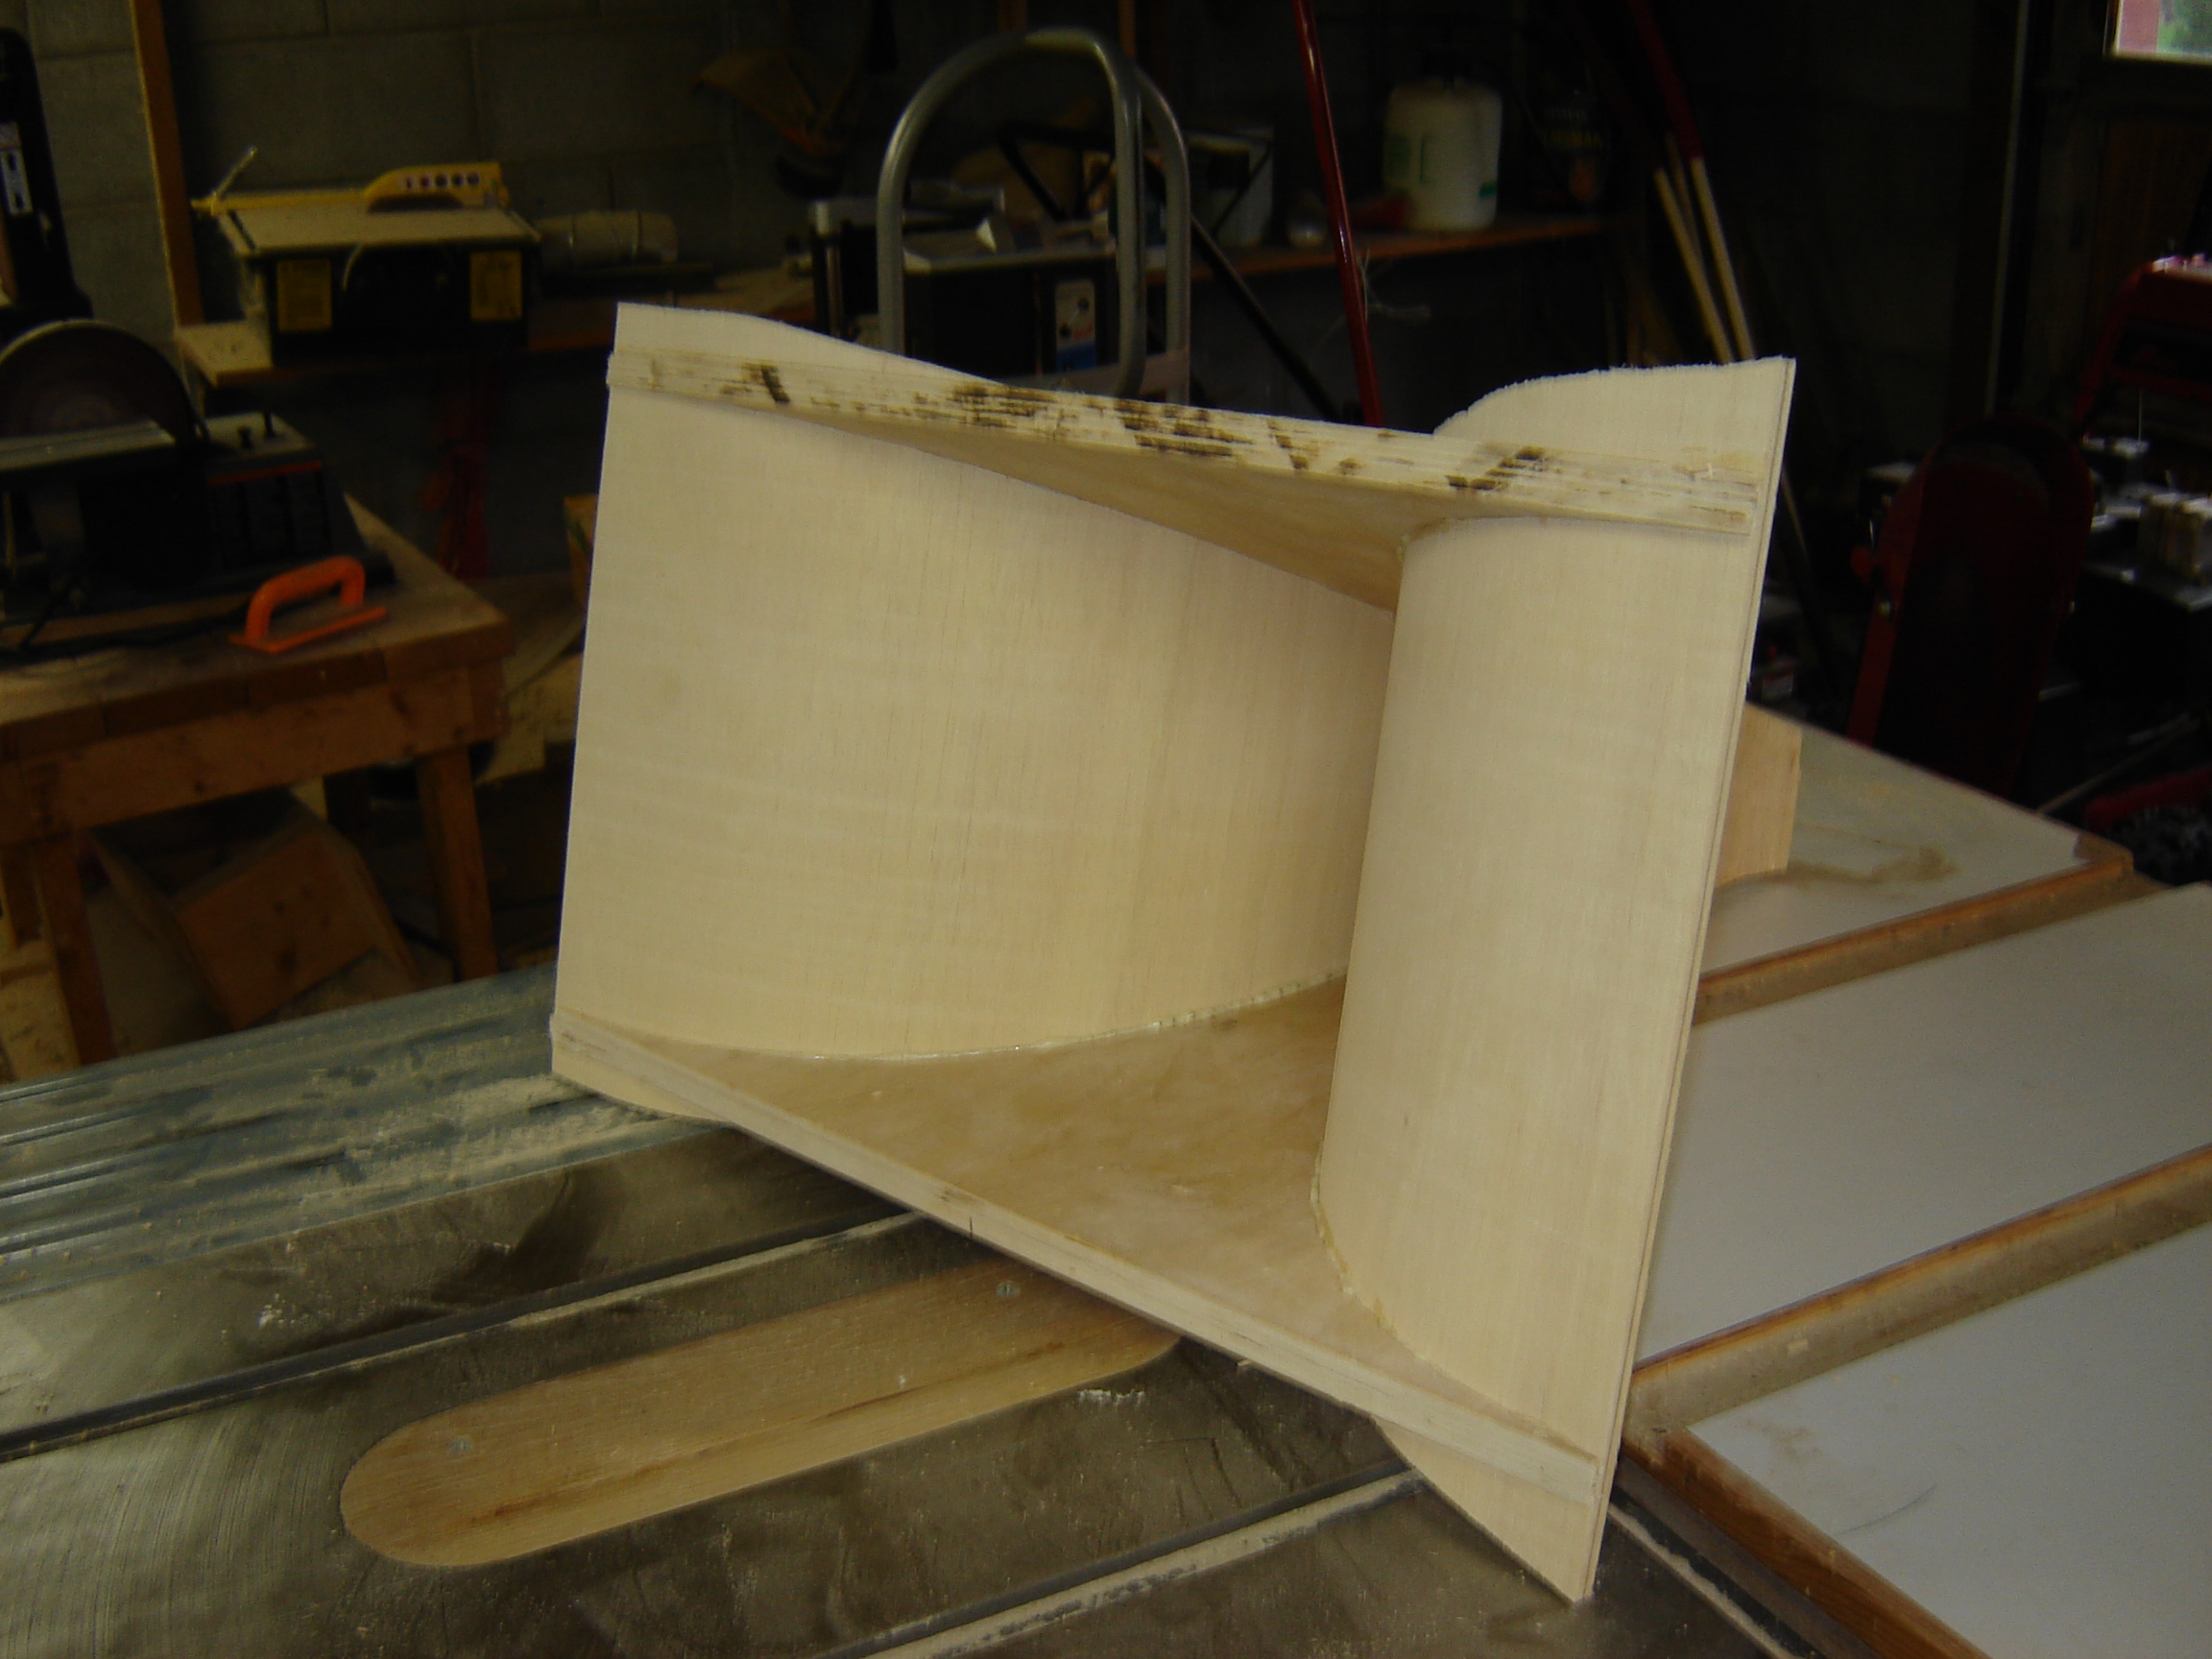
I then glued two slightly over sized pieces of flexible plywood to the existing horn walls. The only thing I did not love about the flexible plywood is that the grain opens up when bent to a tight radius. Just some extra filling and sanding. Next time I will place a piece of birch veneer on the flexible plywood to provide a smooth finish.
-
Now for the jig for making the horn. I made a trapezoid 11 inches at the base, 1 inch at the top, and 21 7/16 long. I inserted a screw at the top, and mounted the trapezoid vertically on a piece of scrap wood. Two of the horn walls are now set on the long side of the trapezoid and various braces and stops are attached. The side of the horn walls must be sanded even to the interior width so the next two faces will lie flat against the faces. I used 50 grit sand paper on a 3 inch pipe to sand the edges even.
-
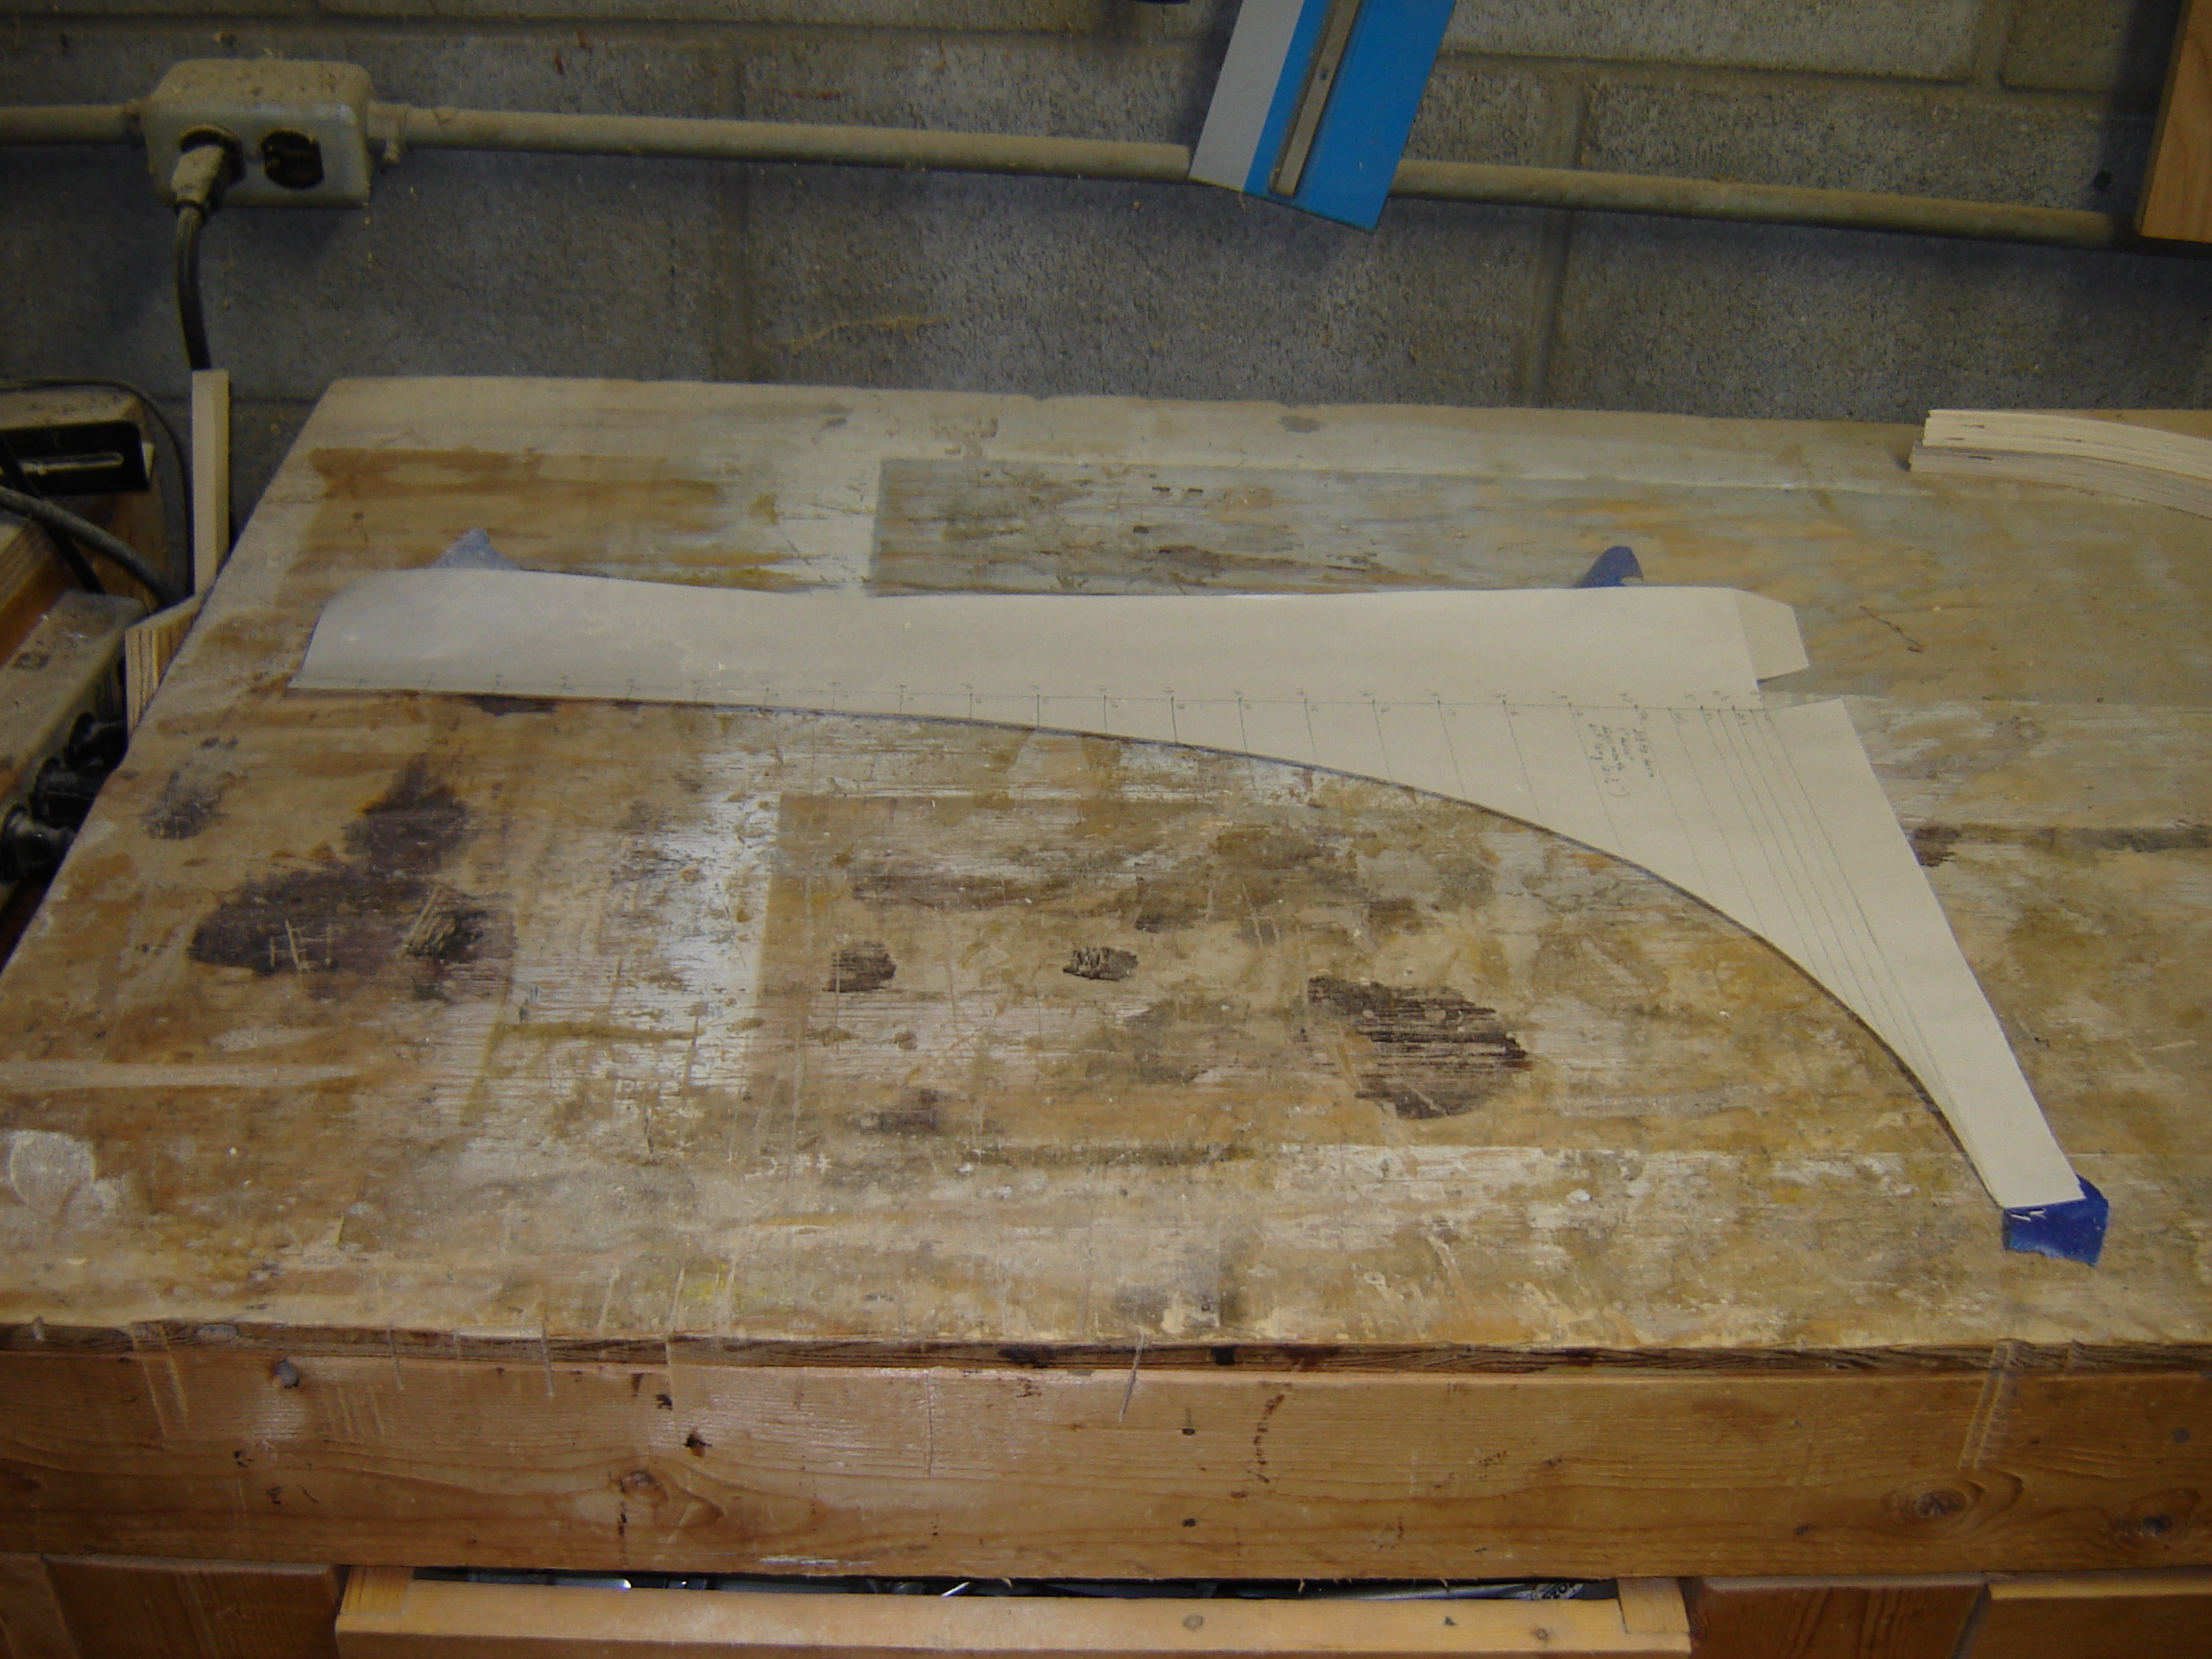
I traced the half template on ¾ inch birch plywood, flipped the template over, and traced the other side. I rough cut the template and refined it to the traced line with a drum sander and hand sanders. With a full sized template, using the router table I make three other horn walls using the first as a template.
-
Now for the midrange horn design. The plan is to have the bass cabs of a similar width as the design by Cullison. http://forums.klipsch.com/forums/storage/4/1071530/cs4.pdf). The horn will be inside a cabinet with the same width as the bass cab, so the horn will need to sit inside a 25 ¼ inch wide cabinet. The driver can stick out the back of the cabinet, so there is no depth constraint. For purely aesthetic reasons I will set the aspect ratio to be 2:1, Width to Height. Given these parameters, design a horn with the lowest frequency that will fit the above. I went to the Volvotreter web page and down loaded the Tractrix Horn Calculator. I did several examples in which I reversed engineered several designs on the Klipsch forms so I understood the spread sheet. http://www.volvotreter.de/dl-section.htm I can up with the following: Fcut off 243 Hz Horn W:H 2.0 W/H Throat dimension 1 inch Horn length 21.3 inch Width of Horn 11 inch Height of Horn 22 inch One of the things you need for a template for the horn is the length of the two flat horn walls. I drew a trapezoid with a 1 inch throat, and an eleven inch mouth, and a total length 21.3. This represents the inside of the horn in the vertical plane. The long side of the trapezoid was measured to be 22 inches long. For each of the distances from the horn throat, you multiply by 22/21.2 to get a ‘stretched’ length. This is a representation of the distances at the center line of the horn as it is expressed in the plane of the upper and lower walls of the horn. I then tabulated ½ widths at the various distances from the throat. I added finer lengths when near the mouth of the horn, when the widths are changing quickly. Template Template [in] [in] [in] [in] fractional inches stretch half half length height width width width 0.00 1.00 1.00 0.50 8/16 0.93 1.42 0.86 0.43 7/16 2.05 1.92 0.81 0.41 6/16 3.03 2.37 0.82 0.41 7/16 3.92 2.78 0.86 0.43 7/16 4.92 3.23 0.92 0.46 7/16 5.99 3.72 1.01 0.51 8/16 6.94 4.15 1.12 0.56 9/16 7.93 4.60 1.27 0.63 10/16 8.94 5.06 1.45 0.72 12/16 9.06 5.11 1.47 0.74 12/16 9.96 5.52 1.67 0.83 13/16 11.05 6.01 1.96 0.98 1 12.01 6.45 2.28 1.14 1 2/16 13.03 6.91 2.68 1.34 1 5/16 13.99 7.35 3.15 1.58 1 9/16 15.02 7.82 3.78 1.89 1 14/16 16.02 8.27 4.53 2.27 2 4/16 17.02 8.73 5.49 2.75 2 12/16 18.00 9.17 6.69 3.34 3 6/16 18.99 9.62 8.27 4.14 4 2/16 20.01 10.08 10.53 5.26 5 4/16 20.50 10.30 11.96 5.98 6 21.01 10.54 13.86 6.93 6 15/16 21.25 10.65 14.99 7.50 3 12/16 21.50 10.76 16.40 8.20 8 3/16 21.75 10.65 14.99 7.50 3 12/16 22.01 10.99 21.98 10.99 11 Then draw a full sized template, stretch length against half width.
-
Yes, went with the cast frame woofers from Bob crites. Singles for now.
-
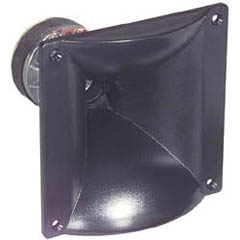
Tweeter: The APT line of drivers seem popular here on the forums, so going with the ATP-200, with the cool looking ‘cheeks’ horn lens.
-
So first order of business: Selecting the drivers. Decided to go with new hardware, no surprises out of the box. Woofers: A pretty clear winner here, based on reported superior performance and at a great price to boot, you can’t go wrong with the Crites CW1526C driver with cast frame. Midrange: Here I’m going to depart from the usual Atlas PD-5VH. There was some positive discussions awhile back about the Selenium D250-X Phenolic Driver. I read some positive comments by a person who replaced a pair of blown Atlas drivers on his Klipschorns with these. They come in at a great cost savings compared to the Atlas drivers, so I decided to give them a try. If they don’t work out, they can be replaced with the Atlas drivers in the future. At only 35$ each, they are worth a try. They are 8 ohm instead of 16, SPL of 107 dB 1W/1M. With a reported frequency response of 400 to 9000Hz.
-
There has been a lot of interest in Cornscalas lately. Here is my build of a pair from here in the northern Midwest, thus the Great White North (GWN) Cornscalas. So for any big project I write down what my end goals are: I want improved bass response from my basement listening system and the classic large format horn sound that defines Heritage Klipsch. Want good sensitivity, in the 100 db or higher range. Cornscalas appear to fit the bill. Project definition: Want this to be a DIY project. I enjoy building speakers, and find the building process is a great learning tool to understanding what you are working on. Size and SAF is really not a concern. This is for the man cave; they can take as much space as available. I have 17 feet of wall space. I plan on building a split Cornscala, separate horns and woofer cabinets. This will allow flexibility in the future to move to MWM bass bins in the future. I’m will be willing to try new things, but will be sticking close to the spirit of designs previous. This is not going to be an “at all costs” project, there are always tradeoffs in a design, both cost and performance. But I expect that classic Klipsch sound when I’m done. I plan on building my own mid range horns. There have been several detailed posts on this, and I’m ready to tackle this. This will also reduce costs, as large format high quality horns can be pricey. I will be including pictures on the way which always seem to increase interest in the forums. This will also not be in “real time”, but more retrospective as I’m far long in the project at this moment. So here we go…
-
Is a Sylvania (tube) console from 1965 worth restoring?
Mike Dubay replied to Richard Guba's topic in 2-Channel Home Audio
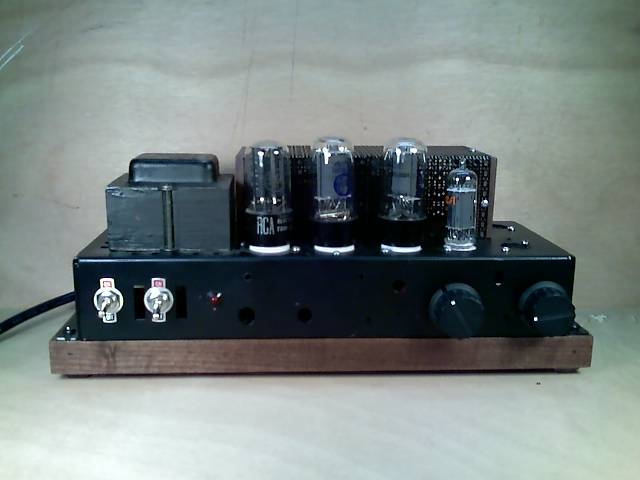
Thanks Pat, This was going to go into my brothers home office, so I ended up working on the asthetics. He has kids in the house so had to fabricate a cover with some perforated metal and some walnut ends, to keep prying fingers away from the B+ voltages that are exponsed on the output transformers. He ended up not getting enough bass response, so it's back into my shop. Pretty plain jane on the inside. Most switches and stuff are via Radio Shaft, and I used orange drop caps. I want to work on it this winter, replace the caps, maybe put in a stepped attenuator. I plan on mating it with a tuner and an MP3 player and using it in my garage or wood shop. I have a cornscala project I'm in the midst of, so my time has been at a premium. -
Is a Sylvania (tube) console from 1965 worth restoring?
Mike Dubay replied to Richard Guba's topic in 2-Channel Home Audio
Here is what my Magnavox ended up looking like.
-
Is a Sylvania (tube) console from 1965 worth restoring?
Mike Dubay replied to Richard Guba's topic in 2-Channel Home Audio
I can into possession of Magnavox console from the mid 50's last fall. I tore out the amplifier and rebuilt it with out the phono section and ended up with a nice 6V6 based single ended amplifier. Was a fun winter project, but certainly a labor of love. Much more time and money spent on it than what it is worth selling it. It floats around my shop and is a back up if an amplifier is taken out of any system. -
Most likely the light ouput of the laser has dropped off over the years, not much you can do about that. I have a 20 year old Sony CD player, sounds great, but is also prone to vibrations. It is now in my basement system and seems happy there with the concrete floor. I put isolation feet on the Sony with good luck, gave me an extra 2 years of use before it was religated to the work shop system. I fabricated four small blocks of plywood with 3/4 inch foam attached to the bottom.
-
Question: What do you feed a hungry rat?
Mike Dubay replied to Al Klappenberger's topic in Technical/Restorations
My universal solution for rodents are 3 snarly feral cats that sleep under my deck. No bunnies, no mice, no moles. The big one evern tangled with a possum, once... Now has mono hearing with one good ear. -
have you found your taste in music changing ?????????
Mike Dubay replied to joessportster's topic in 2-Channel Home Audio
My older stuff is about half and half, half sits (Dio, Def Leppard), and half gets played often (Led Zepplin, Areosmith, Clampton, The Who, Hendrix). On the road and while working out I listen to the seattle grunge era bands (Alice in Chains, Stone Temple Pilots, Nirvana,) keeps me awake on those early morning drives back home after an evenings spinner fall. I have grown to have about half of my collection is now Jazz and gets the bulk of the play at home. Jazz is more often now to relax after work or before bed. My tastes now widen to include some R&B. -
KG5.5's w/ Bob's Crossovers, and Ti tweeter mods (Success!)
Mike Dubay replied to chacodude's topic in Technical/Restorations
Well chacodude I guess you are going to get me off my duff and get me moving. I have been living with a pair of KG5.5s bought new as my two channel speakers since the early 90's. I have enjoyed the sound of these speakers over the years and they will continue to be my main upstairs speakers. They are now driven by a pair of MK IIIs from Kevin at Dynakit and provide me much joy. I have been considering these upgrades for some time, but this summer I'm going to pull the trigger on Ti diaphrams and crossovers. I have built several cross overs and would like to do the cross overs myself. I would consider two ways to address the cross overs: buy a rebuild kit and replace the components on the existing cross over, or buy the components and make new cross overs. Which would you suggest? Bob C any suggestions? Only problem is I just started on a Cornscala project for the basement system yesterday, made the template for the DIY wood horn I will be building. The Cornscala's still need Crites woofers (cast), and cross overs. The plan is to do the wood horns this summer, then complete the cabinets this fall. So I guess the diaphrams and cross overs can be a mid summer project. I'm envious of a spouse that appreciates HF audio, my wife does not understand my passion. -
Greatest revelations and misconceptions in Audio
Mike Dubay replied to Audio Flynn's topic in 2-Channel Home Audio
Revelations - DIY audio is alive and well. No better way to appreciate how something works than by building it. - The quest for audio nervana is attained through the quest it's self, not the journey's end. - I'm drawn to the utter simplicity of valve audio, a more direct link between me and the musical artist. Misconceptions - All solid state amplifiers sound the same. -
I have a pair of EH 12AX7 in my TT preamplifier. They have made a similar noise since day one, but more of a koinnnnng. But of a similar type of decay, just a lower frequency. It is only noticeable on quite passages and high gain settings. Besides that problem, they sound nice to my ear, so I have not had the impulse to change them out. I would say if the noise is not objectionable, don't change them. The Tube Depot will check for "microphonics and low noise" on replacement tubes for a $4 charge. I have not used this option, so I can not vouch for the effectiveness of this check. That brings the total to only $20 a tube, might be worth the experiment.