Q-Man Posted February 21, 2004 Author Share Posted February 21, 2004 While the glue sets up on the cabinet, it back to working on the Klipschorn. I'm using a router to cut the top and bottom pieces of the bass horn. Quote Link to comment Share on other sites More sharing options...
Q-Man Posted February 21, 2004 Author Share Posted February 21, 2004 This is what the Klipschorn would look like if it had a full top. I am going to clip them. Quote Link to comment Share on other sites More sharing options...
Q-Man Posted February 21, 2004 Author Share Posted February 21, 2004 Clipping the corner off of the full tops. Quote Link to comment Share on other sites More sharing options...
Q-Man Posted February 21, 2004 Author Share Posted February 21, 2004 The top and bottom are cut and ready to screw onto the Klipschorn. The shape of these are the way the first klipschorns were built. Instead of going back at a 90 degree angle from the front of the bass horn they go back to the wall at a 45 degree angle. This gives you a little larger horn. Well, I'll go try to get a little more done before my wife makes me fire up the BBQ. Fini, I'm sitting on top of the RPTV in that one picture. Quote Link to comment Share on other sites More sharing options...
Q-Man Posted February 21, 2004 Author Share Posted February 21, 2004 Picture won't open, move on down to the next one. Quote Link to comment Share on other sites More sharing options...
Q-Man Posted February 21, 2004 Author Share Posted February 21, 2004 Sorry, I guess it didn't like my file name. This should show the top and bottom pieces. Quote Link to comment Share on other sites More sharing options...
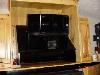
Q-Man Posted February 21, 2004 Author Share Posted February 21, 2004 Done with the assembly, now to add the finishing touches to make it look good. Quote Link to comment Share on other sites More sharing options...
Q-Man Posted February 21, 2004 Author Share Posted February 21, 2004 I set the top of the Klipschorn in so you can see how the bass horn will sit in this cabinet. That's it for today. Quote Link to comment Share on other sites More sharing options...
formica Posted February 22, 2004 Share Posted February 22, 2004 ---------------- On 2/21/2004 9:42:30 AM Q-Man wrote: I see that some of you are interested and not everyone thinks I'm nuts... ---------------- I have to admit that I couldn't believe you were cutting up your main Khorns when you did your Altec/JBL mod... but your end result looks good and undoubtedly sounds much better than the stock Atlas/EV, given the quality of the replacements and the custom x-overs. I've come to respect your mods... and look forward to seeing this custom center come together. Rob Quote Link to comment Share on other sites More sharing options...
Q-Man Posted February 22, 2004 Author Share Posted February 22, 2004 I forgot to take a picture of how to join boards and parts of a cabinet together so you won't have any visable brads, screws, nails etc. showing. This Plate Jointer makes it easy. If you want your work to look like it was done by a cabinet maker, buy one. If you don't care about using putty and wood plugs to try to hide fasteners the way trim carpenders do their work, then don't bother. Quote Link to comment Share on other sites More sharing options...
Q-Man Posted February 22, 2004 Author Share Posted February 22, 2004 After assembly is complete I first use a 4" wide belt sander to flush up all the joints, and clean up the plywood. I also use a small belt sander that I can control with one hand, but don't use the small one on a large flat surface. Then it is on to finish sanding. Quote Link to comment Share on other sites More sharing options...
Q-Man Posted February 22, 2004 Author Share Posted February 22, 2004 I like using a palm sander for all my finish sanding. Also cut a board to fit tight into a belt sander belt. These make hand sanding a lot easier. Quote Link to comment Share on other sites More sharing options...
Q-Man Posted February 22, 2004 Author Share Posted February 22, 2004 Use a small hand held trim router for routing edge profiles and decorative stuff. It's a lot easier then using a big one. I don't know it you can see the edge profile or not? I don't like leaving square edges. Quote Link to comment Share on other sites More sharing options...
Q-Man Posted February 22, 2004 Author Share Posted February 22, 2004 I keep a lot of trim routers already set up with bits that I offen use. It makes the job go faster. I have two or more of every tool that I have. It sure saves time, and sometimes you don't want to change a set-up, so you use your other like tool. When you buy a new tool, don't get rid of your old one untill you have at least three of them. I just sold a table saw, because I had three,and I needed the room, or I would have kept it. Quote Link to comment Share on other sites More sharing options...
Q-Man Posted February 22, 2004 Author Share Posted February 22, 2004 Another must is having a compond miter saw, if you think you will cut large pieces get a sliding compond miter with a 12" blade. I'm using this to cut the crown molding for the top of the cabinet. This saw came in handy when cutting the compond angled pieces that made up the University Classic horn. Quote Link to comment Share on other sites More sharing options...
John Warren Posted February 22, 2004 Share Posted February 22, 2004 These are the networks that Q is using for the Klipschorn-Altec-JBL setup. The 311-290 and JBL 2404H tweeter is a very good combination for the Klipsch bass unit. Quote Link to comment Share on other sites More sharing options...
Q-Man Posted February 22, 2004 Author Share Posted February 22, 2004 See what I mean about square edges? After cutting those maple blocks I just reached in the drawer and grabbed a trim router with a round over bit already in it to ease the edges. Then I sent the blocks off to John and Barbie to let them finish them up. One of these networks is going in this center channel speaker. Quote Link to comment Share on other sites More sharing options...
Q-Man Posted February 28, 2004 Author Share Posted February 28, 2004 I had some time today to put the crown on, sand it, and give it the first coat of stain. You don't have to stain knotty pine, but I like to give it that aged look right away. Tomorrow I'll show you a trick on how to accent the knotts and add more dark grain in the wood. My wife came out when I was staining it and asked if I was building someone a doll house. I can't win. Maybe I should give it to John Warren to use with his Barbies. Quote Link to comment Share on other sites More sharing options...
LOADEDTUNES Posted February 29, 2004 Share Posted February 29, 2004 Want to try something real cool and trick looking with pine ? Ammonia distressing looks unreal on pine , but it's a bit dangerous for beginers to play with. Basicly you build a containment box ( air tight )to hold what your distressing , put in an open container of pure ammonia and close the container for about 24hrs. after removing the wood from the containment it must be allowed to gas off for a few days before the application of any top coats. The finish is a greyish wheathered look that can be topcoated or spraystained with a alcohol base spray stain. This is all the rage in the expensive cabinet market right now . Quote Link to comment Share on other sites More sharing options...
Q-Man Posted February 29, 2004 Author Share Posted February 29, 2004 This is a before picture with just the tan stain on the pine. One piece of crown is lighter then the other and the pine doesn't have enought character. I'm going to add some brown stain to fix this. Quote Link to comment Share on other sites More sharing options...

Recommended Posts
Join the conversation
You can post now and register later. If you have an account, sign in now to post with your account.
Note: Your post will require moderator approval before it will be visible.