rcarlton
-
Posts
1246 -
Joined
-
Last visited
Content Type
Forums
Events
Gallery
Everything posted by rcarlton
-
Turns out the Mitsubishi DLP TV's have several boards with bad capacitors...large and surface mount.To repair the boards would require swapping out hundreds of capacitors. Mitsubishi sells refurbished boards that so far have temporarily fixed the problems. The worst problem is the blinking green light of death (BGLOD). Looks like eventually all of these boards will fail. I bought a new TV and gave away a nice Mitsubishi WD-62725. To repair the problem would cost me $1220+ (cost of refurbish chassis, don't believe this covers labor costs). New TV's cost nearly as much as the repair.
-
Blues/Dallas/Friday/Noon/Meyerson/25bucks/BeThere
rcarlton replied to Lonelobo's topic in 2-Channel Home Audio
Wish I didn't have to work. -
I have a Richard Gray 400 pro. Works as advertised. Plus Mr. Gray is a true gentleman.
-
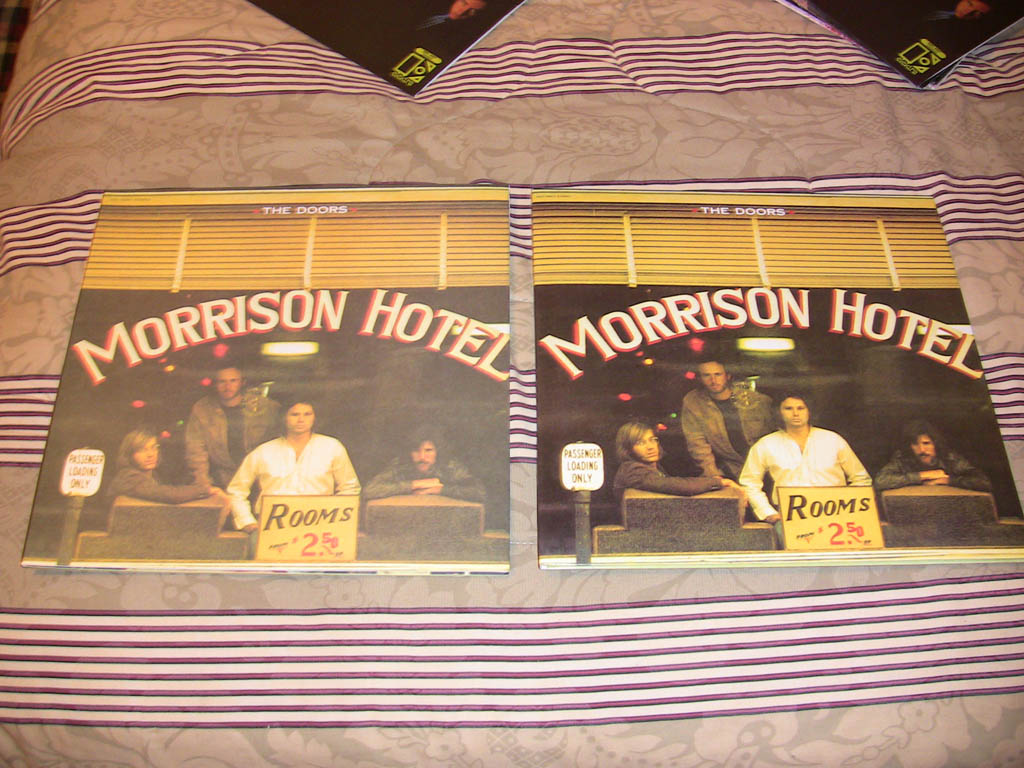
Morrison Hotel Changed the cover to a mat finish like original. The rest of the covers were hard to tell from the originals. Over all Rhino did a pretty good job. Expect the replacement records by mid-November plus Light My Fire 7-inch single.

-
Waiting for the Sun Corrected color of photo. Also made the cover a gate fold like original. Original at top, new cover on left.
-
Received a complete set of covers. Look good. Corrected serial numbers on the first Doors album. New cover on left.
-
Greg, I sanded completely through the old veneer to the glue line. I did this because sanding the old veneer with 80 grit paper and putting glue on it caused the old veneer to form lots of bubbles. Probably thinned the veneer enough for the glue to soak through. Needed a solid substrate, which left me no choice, but to sand through to the glue line. All sanded with 320 paper, waiting on daylight to put sanding sealer on. My garage at night with a light bulb on tends to draw insects. Not good for finish work. I agree...pie slice logo looks to be the way to go. The speakers are all lacquered. Waiting a month before I rub them out and have them complete. They are safely locked in a spare bedroom.
-
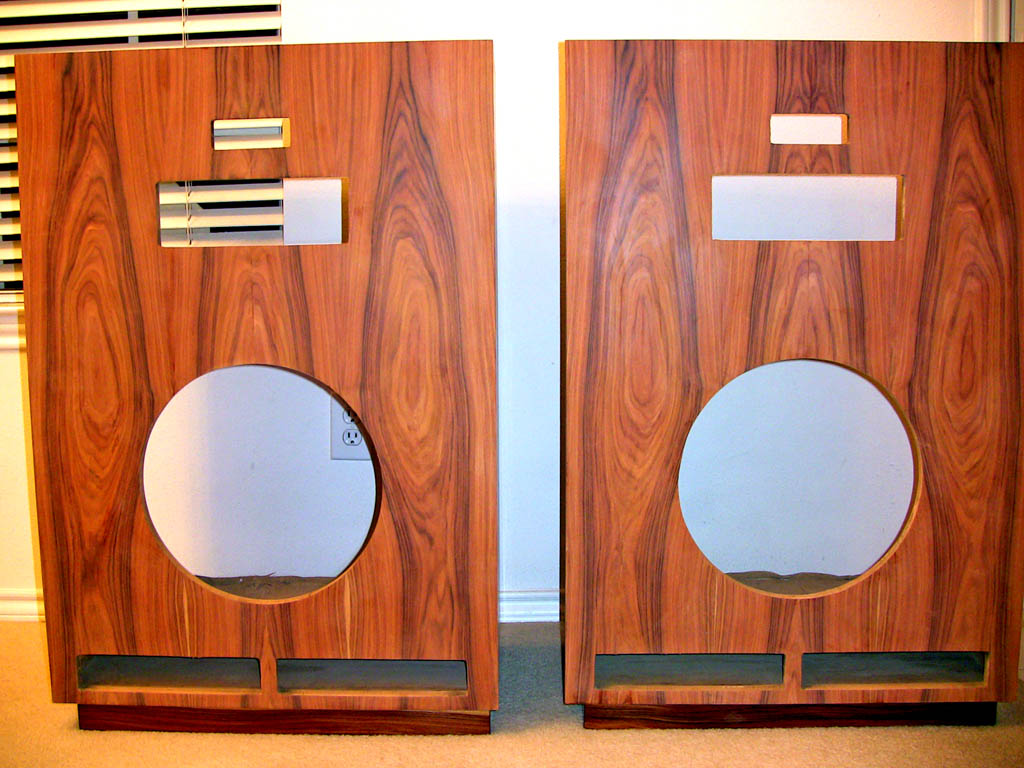
View from above. I'm leaning toward the pie slice logo. Naturally that is a logo I don't have...have the brass retangular plate.[] You might notice the tops look a little different than in the earlier picture. One top and side had too many checks in the veneer...it wasn't acceptable so I simply sanded it down and started over. No big deal. [:@]
-
On the home stretch. Speakers have been sanded with 220 sandpaper, imperfections are all filled, and in some cases painted. Waiting on paint to dry, light 320 sanding by hand and sanding sealer next. Bases are lacquered, sanded with 320, 400, 600, 2000 self lubricating paper (used soapy water), rubbed with pumice (FF) and paraffin oil using a cork sanding block and cotton cloth, and finally rubbed with paraffin oil and Rotten stone using a felt sanding block. [O][&]
-
Patricia Barber Café Blue Nardis will give your system a workout. Muddy Waters Folk Singer Side 1 to 2, all good. Creedence Clearwater Revival Remastered box set. Wonderfully remastered by Steve Hoffman. The "breath of life".
-
Ok, I'm paranoid about checking. How about this for tape? No checks (yet)!
-
The speakers deserv more than restaining. They need a nice exotic veneer!
-
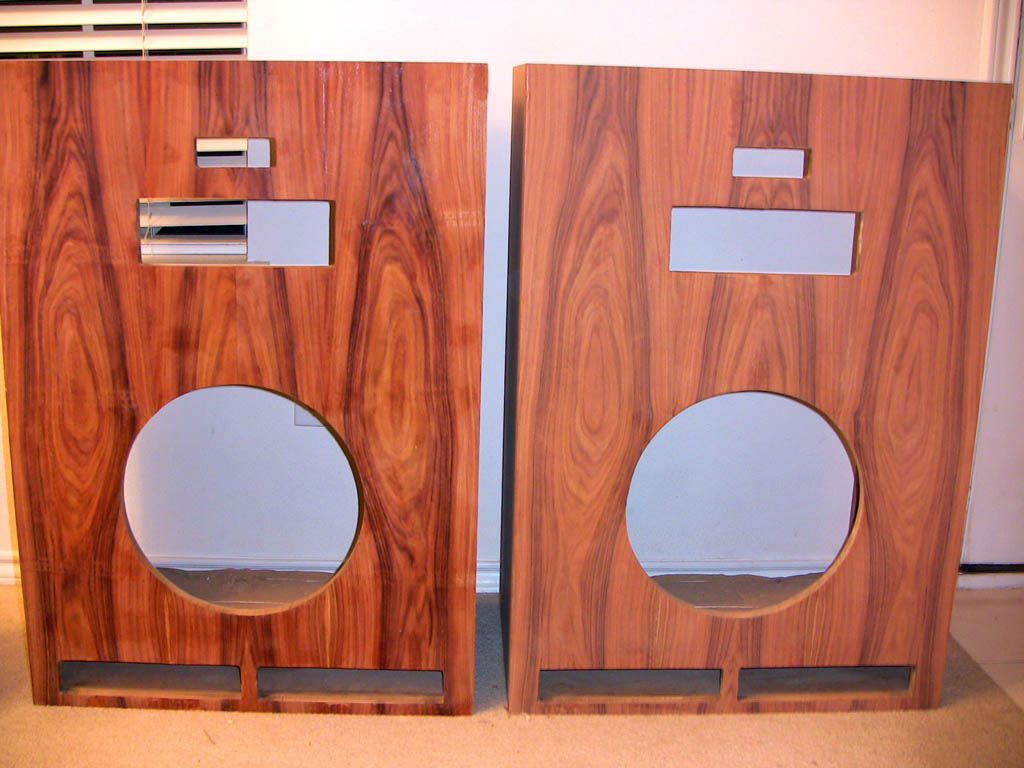
I'm planning on using black for the driver openings. Of course I'm open to other ideas. Starting final sanding and touchup this weekend. Materials for filling cracks: Super glue Epoxy Sawdust Artist paints.
-
I remember those wood burning sets. Managed to burn myfingures quite a few times.
-
Left side.
-
Right side.
-
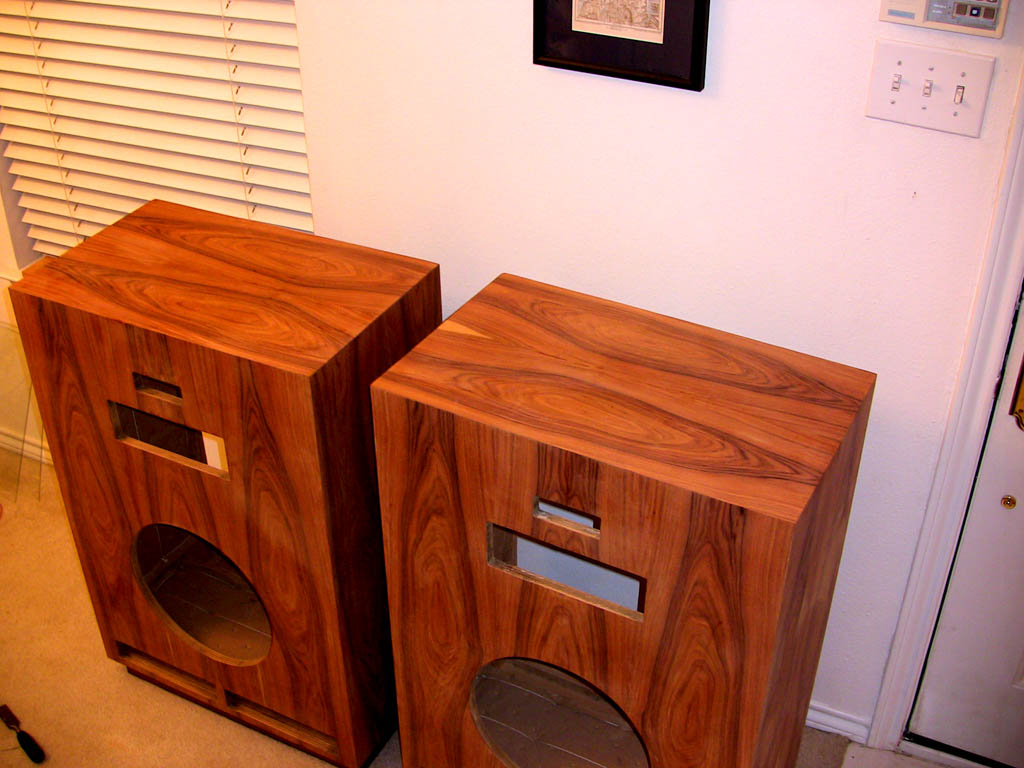
Both speakers are completed. All that is left is fixing blemishes,sanding and finishing. Speaker on the right has had a light sanding (150 grit).
-
Left side of speaker.
-
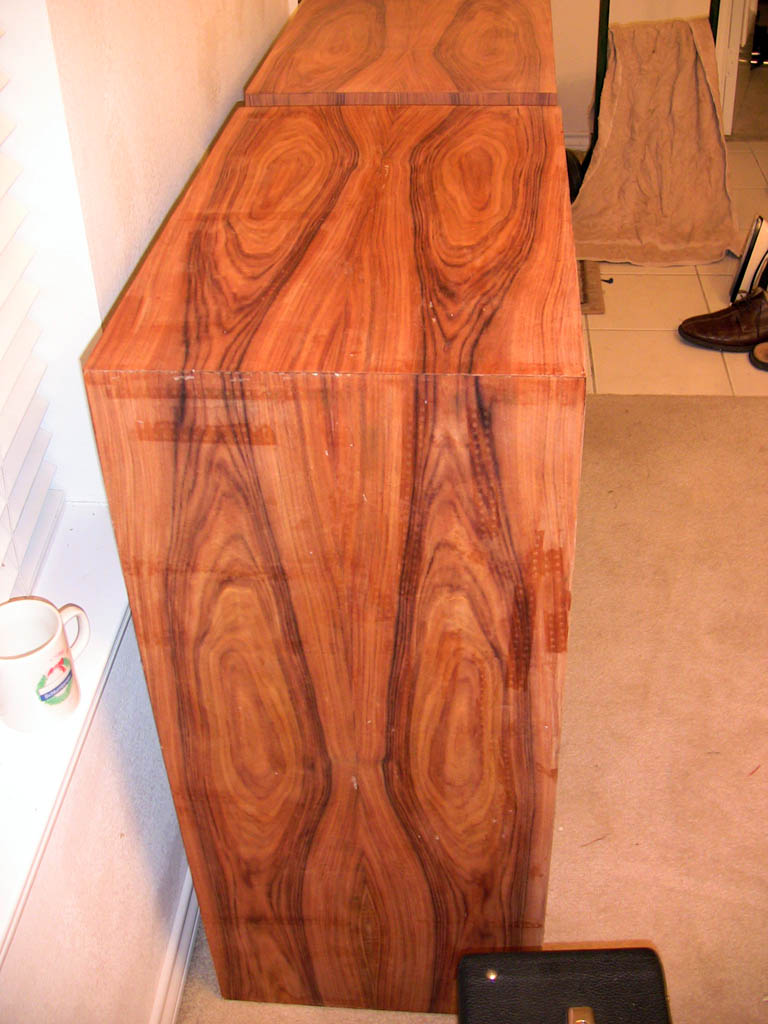
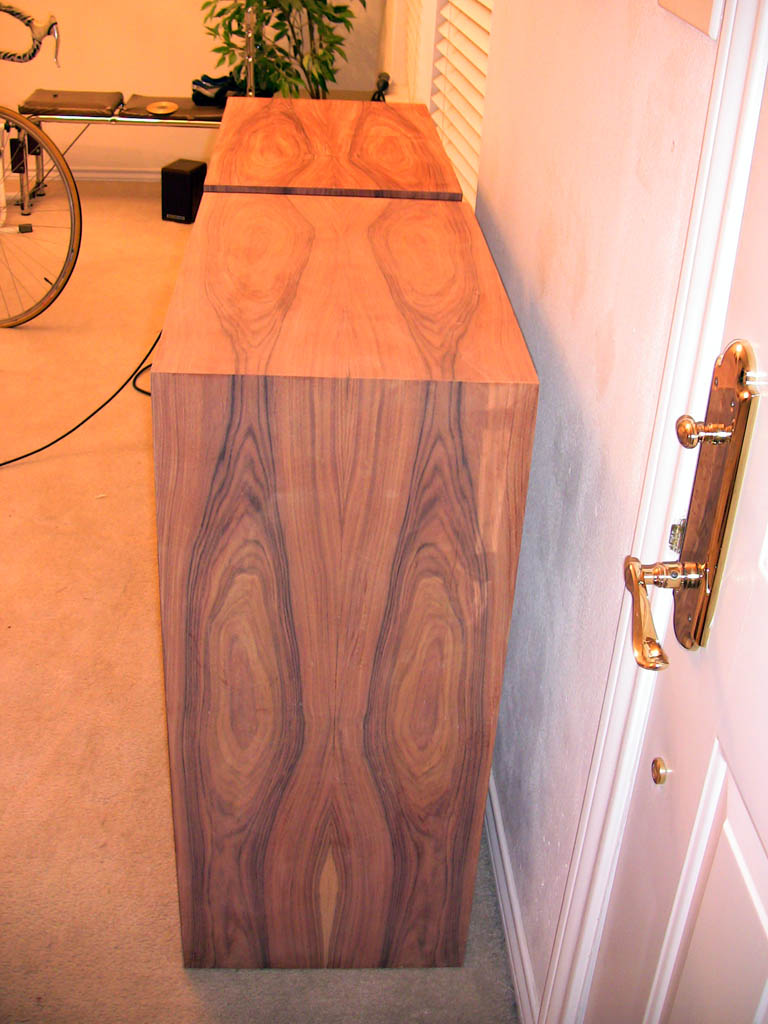
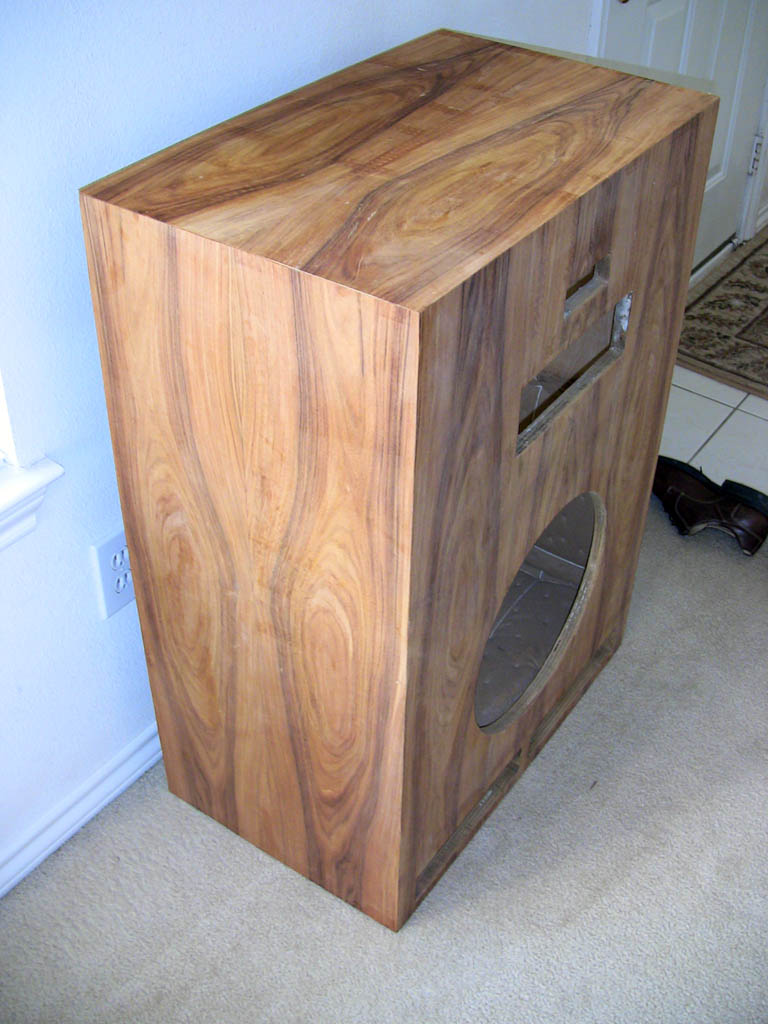
Edge shot of completed speaker. Note how the grain wraps around both sides and the top.
-
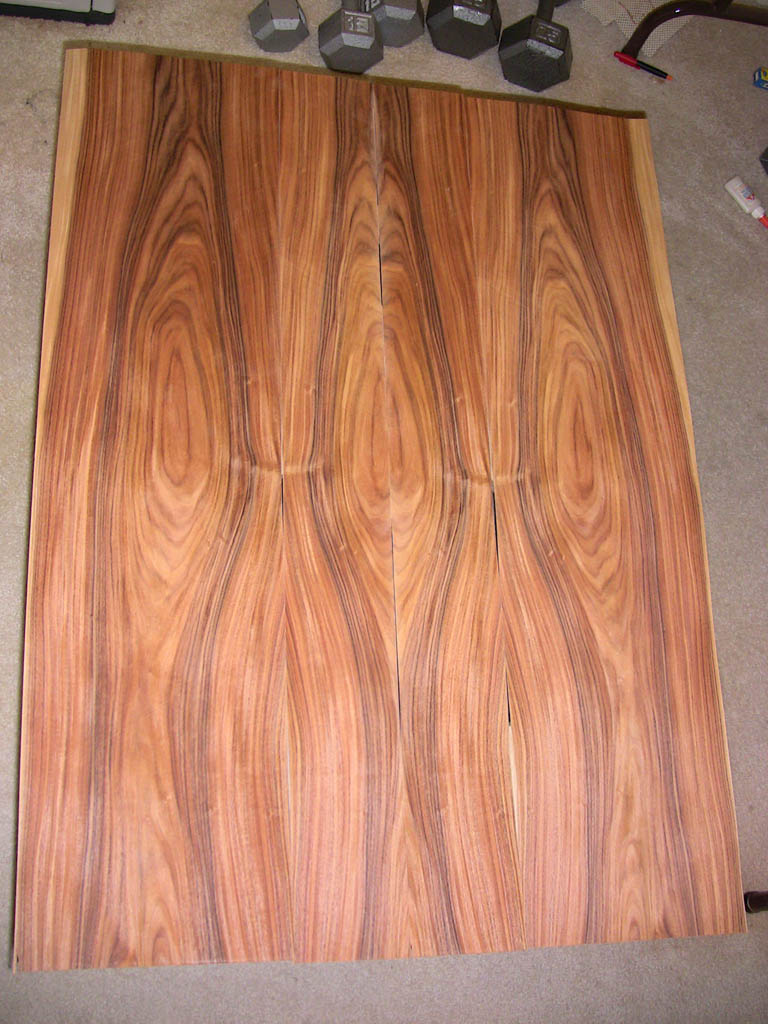
Here is the second face cut and laid out.
-
Here is the first speaker with new skin. I'm beginning to wonder if the glue is the problem. Last year I had a problem with a water based contact cement and Bubinga. It was an oily wood and checked like crazy. Went with the flammable contact cement and no checking. Here is a glue that might work. $102 a quart.
-
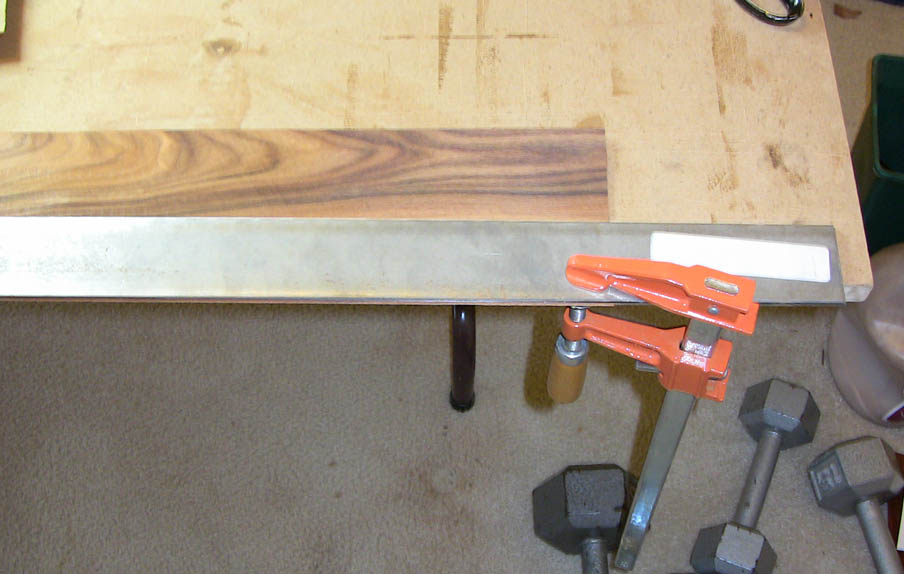
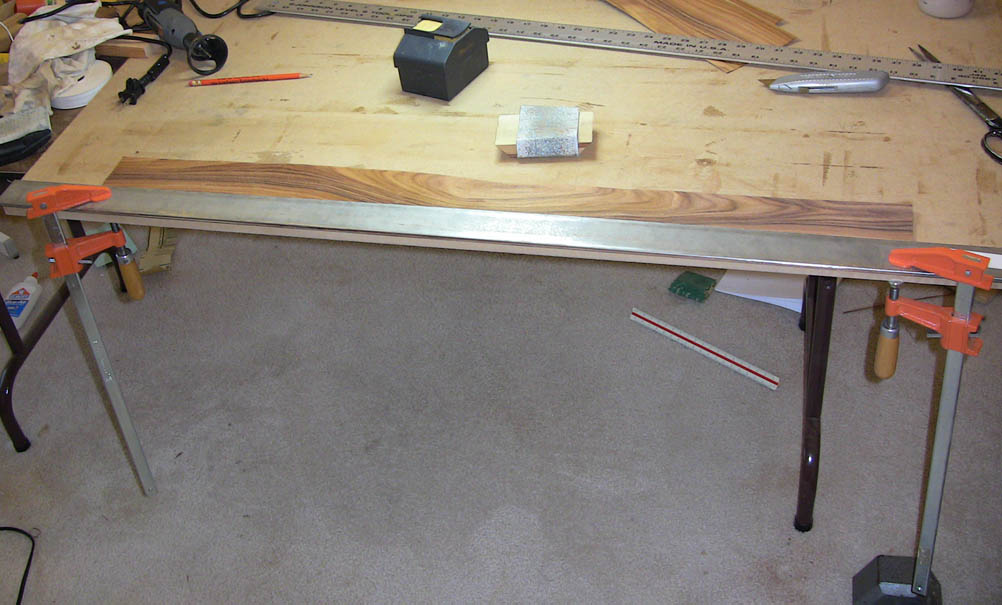
Closeup of the shooting jig.
-
No sooner than I wrote that checking was under control...it's back...with a vengeance. I should be able to fix most of the problems with wood filler and pigment shellac and a pointed touchup brush. Some might be fixed with thin glue and sawdust. It will add a couple of hours to the prep time. When making a joint with two pieces of veneer coming together I 'shoot' the deges. I use 80 grit sandpaper and two flat pieces of steel held down with clamps. The ends can be tricky with the clamps in the way.
-
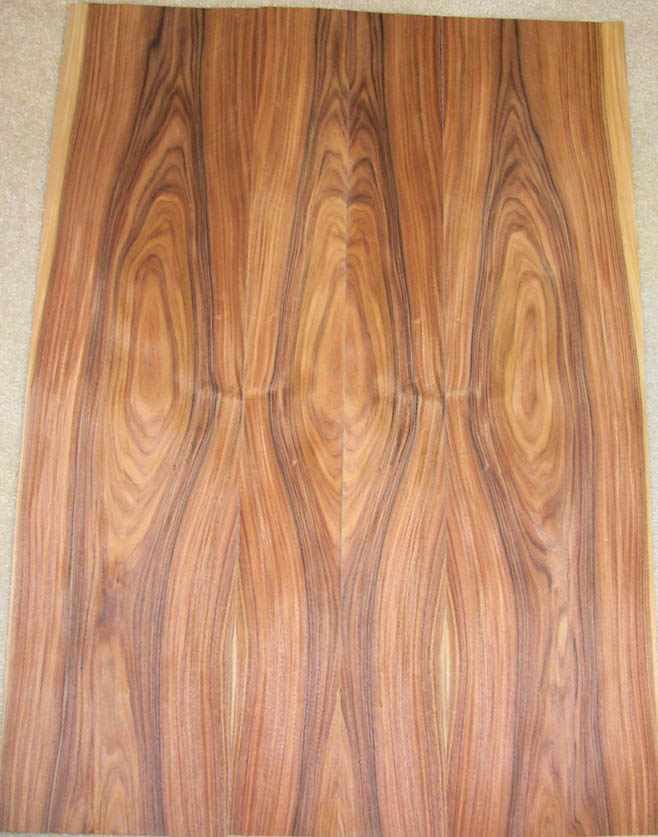
Time to turn my attention to the front of the speakers. Need four sheets of veneer. Take the two center pieces and cut them in two length wise, book match them, and have the two edges of the outside pieces book match the outside edges of the two center pieces. Now I have 3 joints to work with.
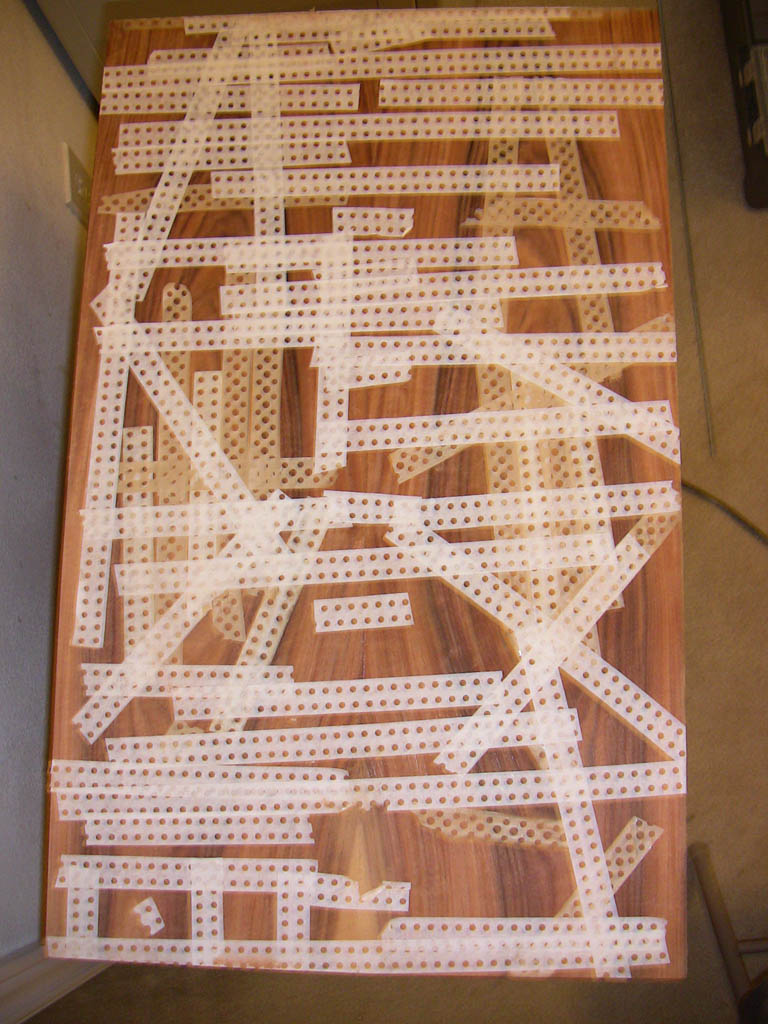
-
Finished the sides and tops. Looks as if the veneer softener worked. Checks are under control, center joint looks to be tight. Sure looks messy with all the tape. That's the poor man's version of paper backed veneer. I had to peal back some tape to line up my joints. The technique I used is called quad matching. Did something very similar on the other edge. BTW the checks and less than perfect center joints are all on the bottom of the speakers.