kapsnb01
-
Posts
541 -
Joined
-
Last visited
Content Type
Forums
Events
Gallery
Everything posted by kapsnb01
-
HDMI board failed 3 weeks in. I think fish is right though, sounds like the newer 809 boards are much better. Guess I got an old one. Lol
-
Best wishes on your sale Josh! I hear the 818 is a great AVR...I really liked the 809 (when it worked), but seems the problems with the 809 were mostly worked out with the 818.
-
Appears someone is parting out a CF3 (no word on which version, or a serial number), as the bay has a pair of woofers, a tweeter, and crossover on it. Just an FYI for anyone that may be looking for parts. Who knows if the seller has a clue as to the version though. Bracing is done on my cabinets and I've got some temporary damping in right now. Plan to start testing to determine the permanent damping here this weekend. Very pleased with the results so far. Put everything back together and have been listening for the past few days and couldn't be happier. Noticeable difference in tightness of sound and clarity. Crossover refresh also was substantial improvement. All in all, couldn't be happier with the results on my CF3s!
-
First of all, welcome to the forum! Your best bet will likely be to match your front stage. Since you've already got the RF35 fronts, your best bet will likely be to find the matching RC35 center. Depending on your location, they do pop up now and again on Craigslist and Ebay, plus occasionally on the Garage Sale section of the forum. I have not heard the Pioneers, but from all accounts, I think you're going to find a lot of folks will recommend them. I have a Yamaha RX-V667 which is the same the 2 year old model. I like it, but if given the choice, I'd definitely have one of the 2 Pioneers that you listed over it. As for surrounds, they aren't as important to match to your mains, but you might be able to find the matching surrounds also... Good luck in your search and I'm sure others will chime in with opinions as well.
-
Highly recommend looking at the threads. The Quartet was the basis for everything that I did and it is 100% worth the effort. Definitely more work and not always easy, but well worth it in the end.
-
Great point. All braces should fit in easily with enough of a gap for the adhesive. My point was only that if you're going to miscut a brace, better to do it on the long side, as that can be fixed versus the short side which really can't.
-
The first couple posts in the thread have the before. I had already taken out the factory damping material, so it was just the empty cabinets. Not the best pictures, but those are what I have for 'before' type pics. Side to side measurement was 15 1/8", Front to back was 15 1/8" and the top to bottom was just a shade over 39"...I think it was 39 1/16". Best advice, it's always better to have it be a little long than too short. If it's too long, you can always shave it dwn a bit to fit right. I always cut one 'test' board first and fit it into place just to make sure the measurements were right. Spent a lot of time today with the Eagles Farewell Blu Ray. All the work paid off in spades. I couldn't be happier, just a nice tight and very detailed sound. Just awesome in my opinion and well worth the time and effort! [H]
-
10 out of 10, in all aspects...

-
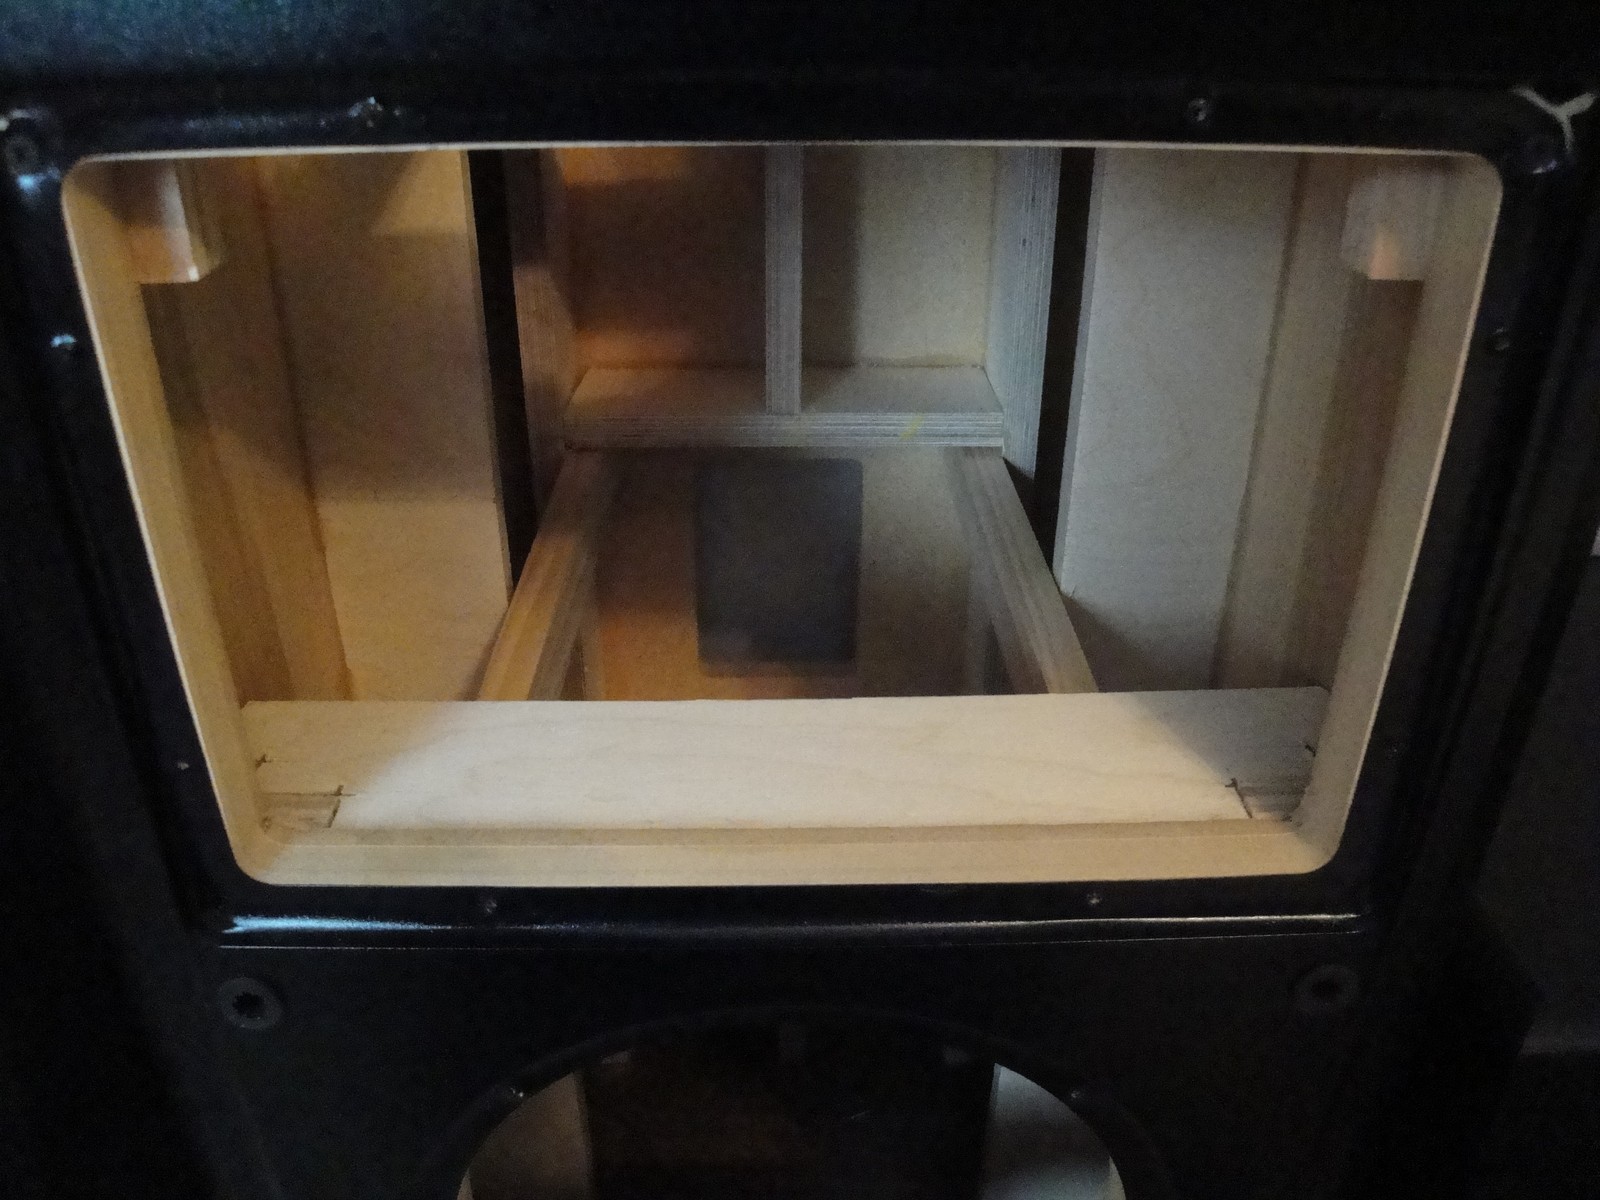
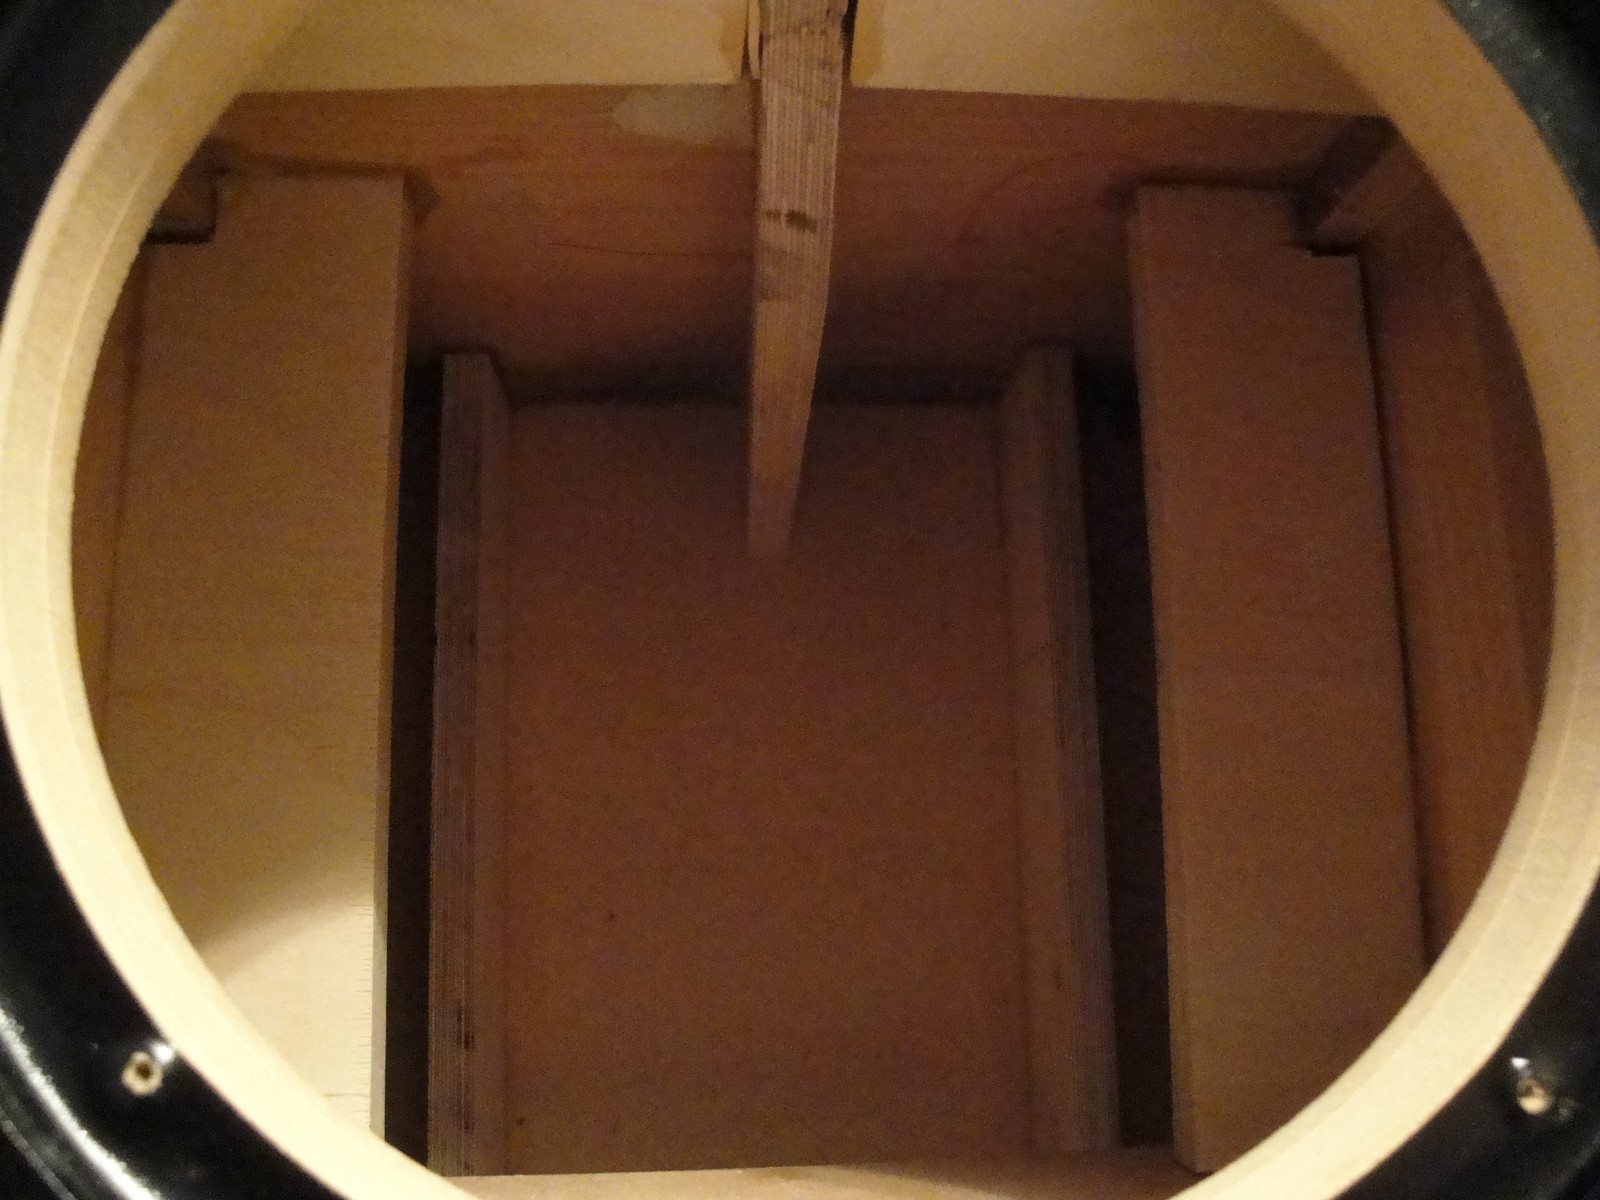
Down through the upper woofer
-
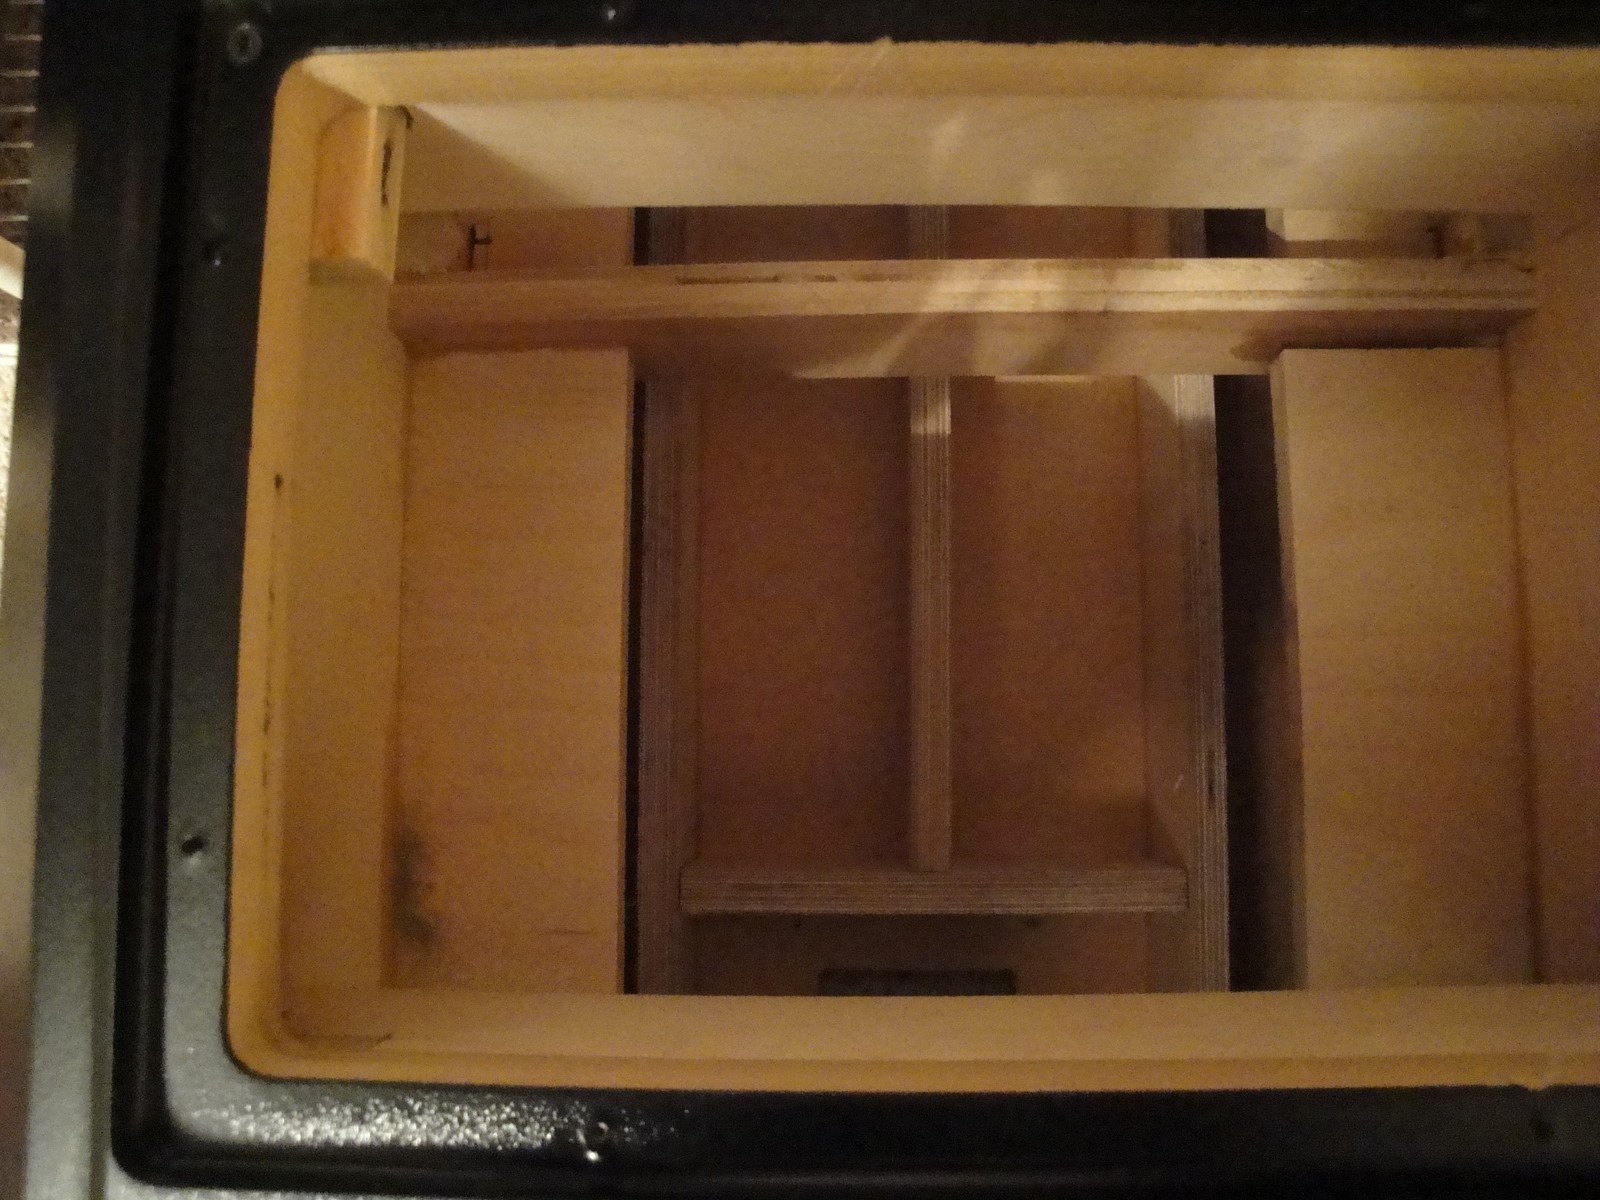
Upper woofer opening
-
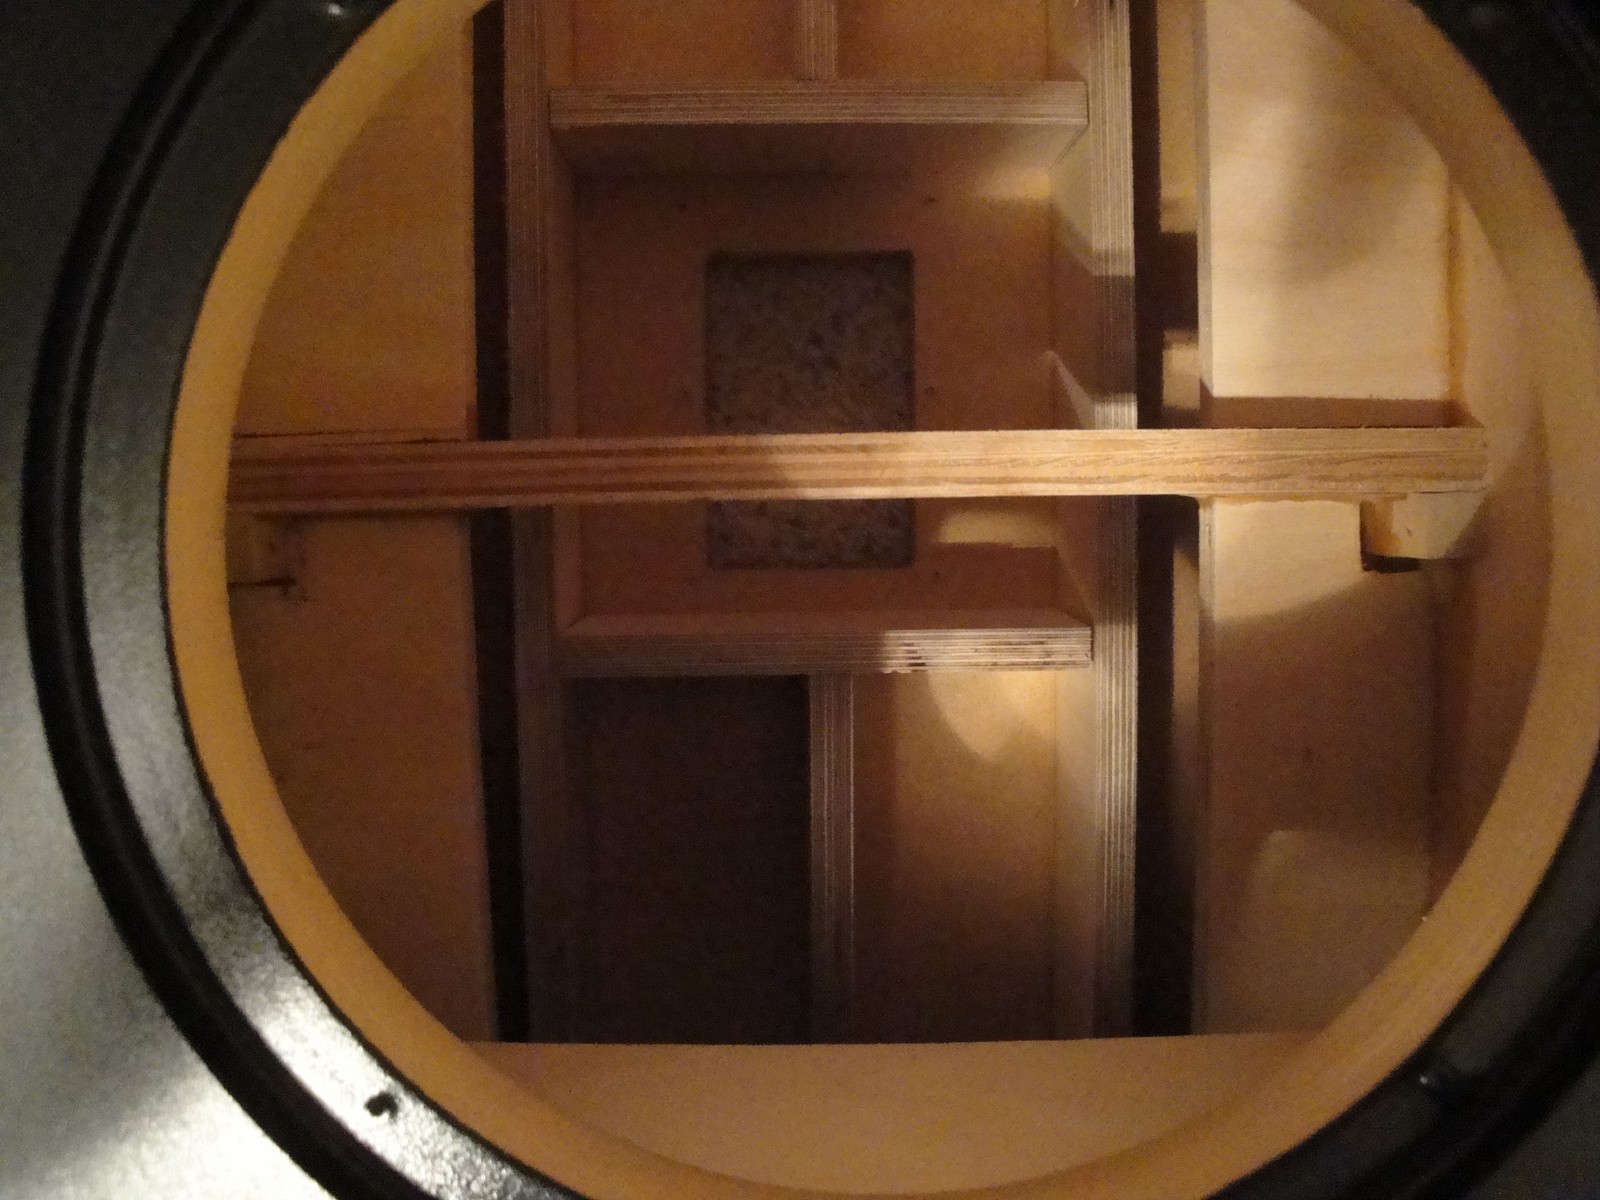
Through tweeter opening
-
Well the bracing is complete. Ran a couple more side to side stringers and also a couple down from the top to the factory installed brace. Looking forward to putting them back together tomorrow for a listen. Thanks to Moray James for the road map and advice on how to do this project!
-
Yeah...hard to stay inside on a day like today, huh? [um]
-
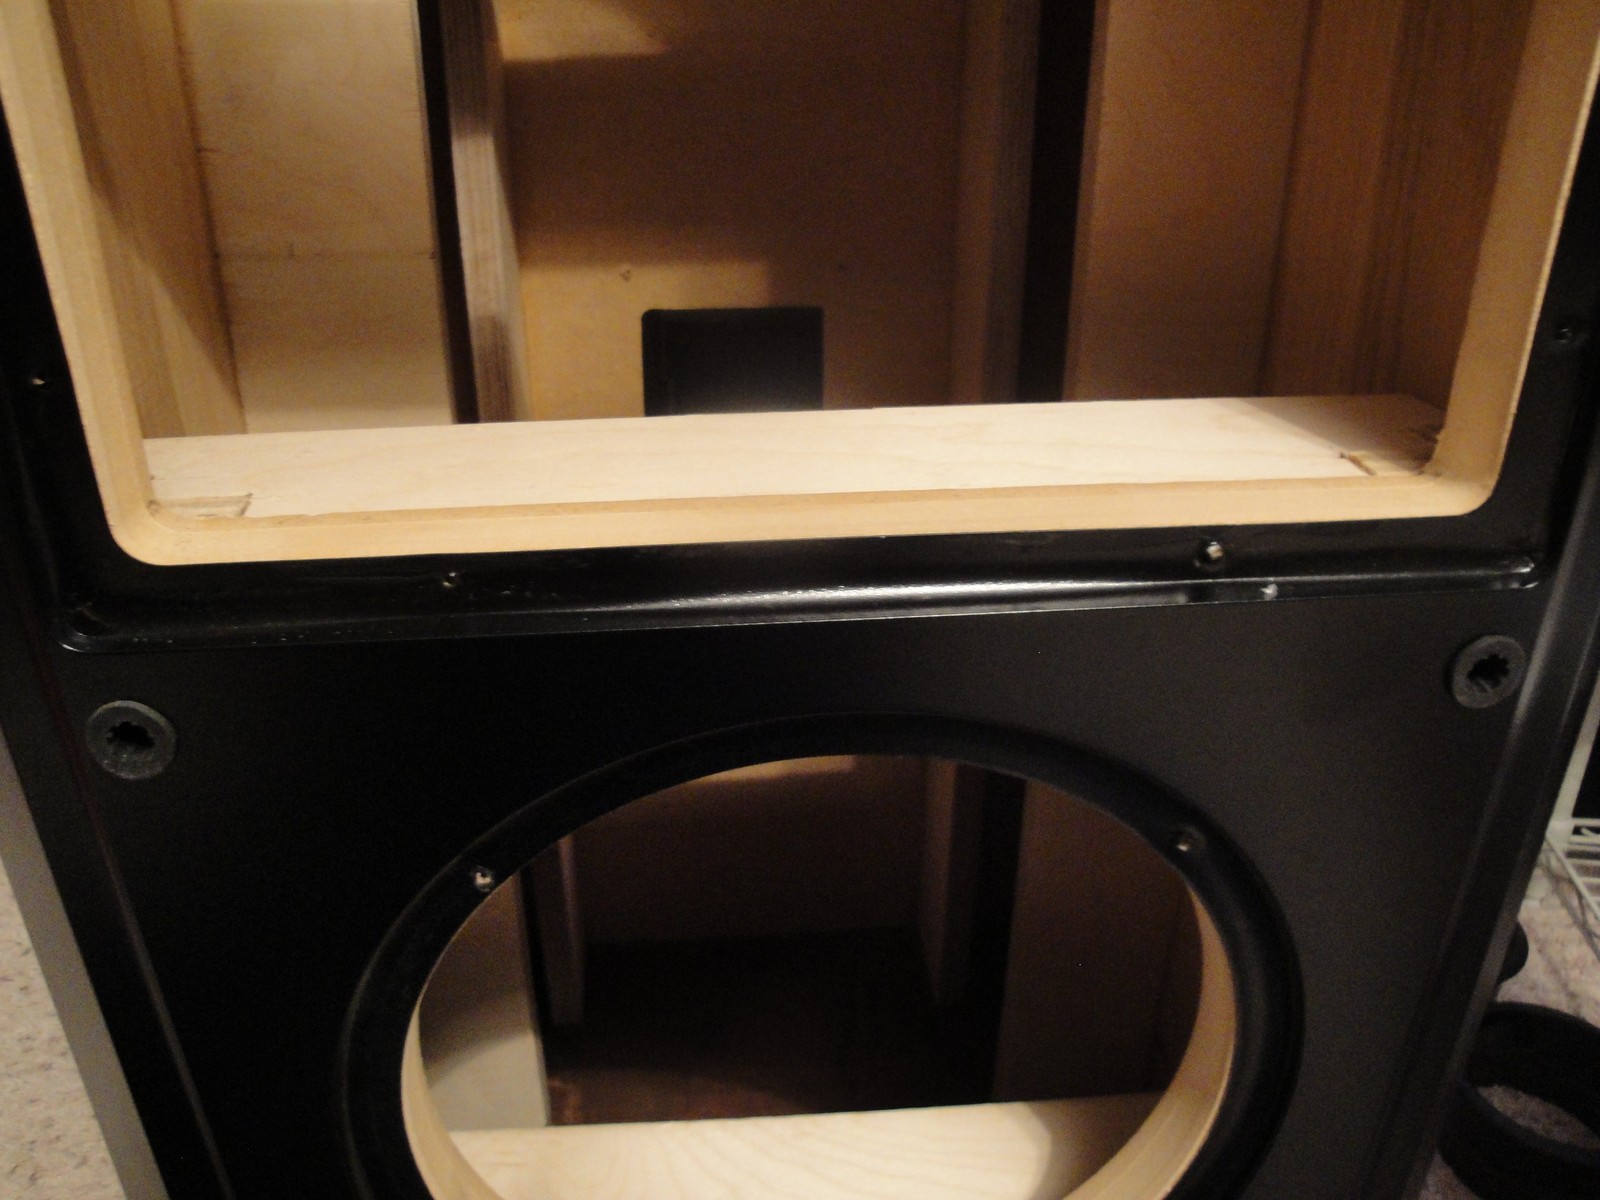
More stringer bracing
-
Added a few stringer braces to connect things together. Will let everything set and dry for the next 24 hours and then put the drivers and networks back in tomorrow.
-
The cat sure likes to sit on 'em...
-
I'll give you my $0.02, for what it's worth. I can say that I am pretty green as well when it comes to woodworking, and it is a fair amount of work. That said, I asked a ton of questions before I cut a single board and actually drew out a plan for what I was going to do. I also taped inside the cabinet where I wanted to put the braces so that I could visually see what I was going to do. As far as cutting, I only used a circular saw, architectural square, and a guide that I built for the saw to run on. The guide is a simple 1x4 mounted on a sheet of plywood (can easily google "straight cutting with circular saw" to find). I clamped the guide where I drew my cut lines and easily ran the saw right down it to make straight cuts. All of the braces were put into the cabinet through the woofer/tweeter holes, so it is possible to get them in there. You will need to temporarily remove the upper factory brace though to get the back braces in. I was certainly intimidated at the start, but you learn along the way and if you take it slow and easy, it does come together. Hope this helps!
-
#4
-
#3
-
#2
-
Well, I got some time the last couple days to work on things and was able to brace the top and front baffle. Also added some additional bracing to stiffen up the back baffle, as my originals were too wide (ideally should've hugged the terminal cup). Here are a few more pictures:
-
One other thing on the back bracing, mine are too wide from the terminal cutout. You'd want those to be on either side of the cutout. I'm going to be adding some additional bracework to the back that you wouldn't need to add if you were to run the vertical braces tighter to the cutout than I did.
-
I've received a ton of advice and tips from Moray, so hopefully he can weigh in to help also. But, I would say that in a nutshell, he's laid out most of what I'm going to be doing on page 14 of the other CF3 thread in 2-channel. At the very top he talks about bracing. As for the actual project, so far I've put in the back and side bracing. The back was a bit challenging, as you mentioned, due to the length of those braces and the internal bracing that is already in the cabinet. I actually removed the upper most factory brace in order to get the back braces into the cabinet. Once I had these in, then I put the factory brace back in it's original spot. All of my bracing is held in place with carpenter's wood glue. It sets relatively quickly and dries incredibly firm. From a foam perspective, I took out all of the factory foam and I'm going to dampen with F11 acoustic felt and Dynamat. I'll be sure to post more and better pictures here as I go also. Hope this is helpful...
-
I would say that from what Klipsch sent to me, you have the version 1s. The clear heavy gauge internal wiring and the 5" ports were the main characteristics of the 1s. At worst, they are version 2s that a previous owner added the 5" ports to. Version 1s were in production until fall of 1994, so being yours were made on the 253rd day of 1994...they're real close either way... Either way, you have the more desirable heavy drivers.
-
Thanks Mark! Been a fun project so far and really looking forward to putting everything back together and giving it a listen. Can certainly tell that the cabinets are both stiffer and heavier already. I think it'll be a worthwhile project for your Chorus'. Let me know if you want any help when you do it!