thefluffy Posted August 12, 2008 Share Posted August 12, 2008 Hey Guys! I'm fairly new to the forum minus doing some research with the search function ;-). So, I thought I'd just jump right in. I just recently purchased a matching set of '72 Vertical Cornwalls for $450 locally. I am thrilled with the way they sound. Makes me think about the days of listening to my dad's 75?(I think) Cornwalls when I still lived with my parents. I'll post some pictures of them as soon as I get a chance. I'm going to document my restoration process for those interested. Unfortunately, the Veneer is heavily cracked and chipped in several locations. I decided I am going to just strip the veneer which is a rather lengthy and painful process but the progress so far shows that it will pay in full when it is done. I do have a quick question the finish is listed as C-DR. Can anyone tell me what the DR stands for? I'm just trying to figure out if this Veneer is original and what style it is. Thanks in advance and I hope you guys enjoy seeing the restoration process. Daniel Quote Link to comment Share on other sites More sharing options...
colterphoto1 Posted August 12, 2008 Share Posted August 12, 2008 decorator, raw The decorator style has the panel cuts made in a different style so that the front motorboard is generally flush to the sides and top and extends the entire cabinet height. Is this the case with yours? Quote Link to comment Share on other sites More sharing options...
thefluffy Posted August 12, 2008 Author Share Posted August 12, 2008 Well, I'm not 100% sure what you mean. The top and the sides are flushwith the motorboard. But, there is a trim that runs along the permiterof the motorboard on the front holding the grill down. If I understandwhat you are saying correctly, then I do believe these are as youdescribed them. Here is a picture, I'm not sure if it will help. Quote Link to comment Share on other sites More sharing options...
colterphoto1 Posted August 12, 2008 Share Posted August 12, 2008 If you view from the top, near the front trim piece, can you see the edge of the 7-ply plywood? If so, it's a decorator model with trim and grille added. If you can imagine it without the grille package, all panel edges are flush to the front and the front piece extends top to bottom. It's a different cut list than the standard mitre-cut CW box. Some prefer the more retro look without the grille. Quote Link to comment Share on other sites More sharing options...
thefluffy Posted August 12, 2008 Author Share Posted August 12, 2008 Unfortunately the veneer covers the top completely. So, I cannot see the top--until I remove the top veneer either this weekend or the next. But I layed the speaker on its side and looked at the bottom of the speaker. I can see the edge of the front piece of plywood from the bottom. Also, it would appear that all the panels are flush to the front. They are just covered by the trim on the front. I planned to replace the grills on them, but if they are decorators--I must just remove the grills all together. Thats a tough decision for me. They'd look beautiful either way. Quote Link to comment Share on other sites More sharing options...
garymd Posted August 12, 2008 Share Posted August 12, 2008 Decorators are rare and Vertical Decorators even more so. The advantage you have is that after removing the added molding and grill, you can refinish or veneer the front to match the sides and end up with a spectacular and unique looking pair of Cornwalls. I'll be following your progress closely. Have you thought about a finish? Something to match your home's decor? Also, you might want to build a pair of matching risers. They're nice to have. BTW - Welcome to the forum! Quote Link to comment Share on other sites More sharing options...
thefluffy Posted August 12, 2008 Author Share Posted August 12, 2008 Does anyone have a picture of a decorator model? I would like to be certain that they are. I just need to see exactly how the boards line up on the front to be sure. I didn't realize the vertical decorators were so rare. I purchased the xover rebuild kit from Bob Crites--payment should clear today. Hopefully, I will be soldering those caps in Saturday if I'm lucky. I've got a couple of pics to upload. This picture shows the condition of the veneer that I am stripping. There are also several chips of he veneer near the base. Though, I have no pics of chips. Quote Link to comment Share on other sites More sharing options...
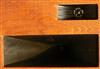
thefluffy Posted August 12, 2008 Author Share Posted August 12, 2008 This shows the one side I started. This was after the veneer was removed with an iron and putty knife. I had also sanded about half of the side. Quote Link to comment Share on other sites More sharing options...
thefluffy Posted August 12, 2008 Author Share Posted August 12, 2008 Here is one more pic for now. This shows that side after I completed the stripping/sanding. It took about 4 to 5 hours of work total on just this side. Even after that much time, I'm not calling it finished. I will need to go back over it with a finer sand paper before I put a finish on it. As much work as it is, seeing that one side after I stripped/sanded it gave me all the motivation I needed to finish the job. I know these will look beautiful when I am done. I think I'm going to just stain them and then oil them up with Tung or Linseed oil. Any input would be appreciated. The only thing I refuse to do is veneer them--because I now see the damage that veneer can do to a speaker box. But mostly, how much work it is to repair that damage. P.S. Did i mention that I paid $450 for these? Quote Link to comment Share on other sites More sharing options...
bluesboy Posted August 12, 2008 Share Posted August 12, 2008 Please elaborate on what you mean by the damage that veneer can do to a speaker box. Quote Link to comment Share on other sites More sharing options...
thefluffy Posted August 12, 2008 Author Share Posted August 12, 2008 I'm referring to the damage the glue causes. It is reversible. It just requires a considerable amount of labor. If u ever want to remove the veneer, you will have to deal with it. In this case, the veneer cracked severely over the whole speaker box. The veneer was chipped in a places along the corners. Removing the veneer itself was easy. However, as I just stated--the glue is not so easy to remove. Just my two cents. Quote Link to comment Share on other sites More sharing options...
colterphoto1 Posted August 12, 2008 Share Posted August 12, 2008 when you finish them, they could end up looking like these Heresies. See how the veneer is wrapped all the way around so you don't see any edge banding? The fronts are left nekkid and beautiful. I painted the cutout edges black for a finishing touch. Quote Link to comment Share on other sites More sharing options...
thefluffy Posted August 12, 2008 Author Share Posted August 12, 2008 I must say, those Heresies are beautiful!! I would go with a veneer. I'm just nervous after seeing the condition of the veneer on these cornwalls. They would look absolutely beautiful with a veneer job like that! What do you think about my ideas for finishing? Do you think a stain + oil would do them justice? Quote Link to comment Share on other sites More sharing options...
greg928gts Posted August 12, 2008 Share Posted August 12, 2008 My guess is someone installed veneer over the fir plywood that the speakers were originally built with. Just a guess. It looks like the boxes are made with fir plywood. If that's so, lots of sanding will result in a very pronounced raised grain that is actually pretty neat in and of itself. But if you try to veneer over it, be prepared for the raised grain to transfer through the new veneer. It is possible to do a very nice veneer job that will not crack like the old veneer that you took off. I recommend 10-mil paper-backed veneer from www.oakwoodveneer.com and Heatlock glue from www.joewoodworker.com and the iron-on method of veneering with a common household iron. I like contact cement too, but it's not recommended with paper-backed veneer, which means you have to use NBL backed veneer (with the thick edges showing everywhere), or raw wood veneer and deal with cracking and bubbling issues. I think contact cement would work fine with paper-backed veneer, but like I said, it's not recommended. But I think it would be fine. I've had very good luck with the Heatlock glue and the iron-on method, so I'm "sticking" with that. [] Greg Quote Link to comment Share on other sites More sharing options...
thefluffy Posted August 15, 2008 Author Share Posted August 15, 2008 I got a set of replacement caps from Bob Crites today. It was pretty easy to get them installed. Right now, I am comparing one speaker to the other. One with the replacement and one without. So far, I am not noticing a huge difference. I have noticed that the extreme highs on the new caps do sound a little more pronounced and crisp. I'll give some more input as I listen to them more and get the 2nd speaker freshened up with the caps. Quote Link to comment Share on other sites More sharing options...
thefluffy Posted August 16, 2008 Author Share Posted August 16, 2008 I got the caps swapped out on the other speaker. I must say after a nice long session of listening, there is defintitely a noticeable difference. Interestingly, the largest difference is that before the new caps it sounded as though one speaker was marginally louder than the other. After the swap, the two are levelled out nicely. I guess the one speakers caps had become more resistive than the other. Additionally, the highs have a better presence over all. They are more crisp and pronounced. Now, its back to working on the cabinets. Quote Link to comment Share on other sites More sharing options...
thefluffy Posted August 22, 2008 Author Share Posted August 22, 2008 Last weekend, i finished up removing the veneer on one speaker. Here is a pic of the speaker. Additionally, I think I proved that these speakers are in fact decorators and originally came with no grill. The front is stained identically to the back of the speaker. I believe that they were indeed purchased in raw. They were then stained by the first owner. The second owner then veneers the sides and top and put a grill on them. I can't wait to start on speaker number 2 this weekend. Daniel Quote Link to comment Share on other sites More sharing options...
longdrive03 Posted August 24, 2008 Share Posted August 24, 2008 You will enjoy the fruits of your labor! I agree on the post about veneering using the iron/glue method. I used Titebond II glue and an $8 Wal-Mart iron and wood backed veneer which is about 1/16" thick. I just bought a load of different veneers from a furniture plant and it's fun to experiment. If you like cherry it's great to work with and finish. Birdseye maple ain't so bad either. Quote Link to comment Share on other sites More sharing options...
colterphoto1 Posted August 24, 2008 Share Posted August 24, 2008 Yes Daniel-son, speakers most definitely Decorators- the defining bit of cabinetry is that the front board is not an inset baffle board, but integral part of the cabinet box itself- running full height top to bottom. Excellent sleuthing work and good job on stripping them down. You've got a great start on your restoration project. Now go read every thread posted by Greg928S about how to tool up veneer properly.. (jk, kinda) Practice on scrap block is a good idea. Michael Quote Link to comment Share on other sites More sharing options...
thefluffy Posted November 9, 2008 Author Share Posted November 9, 2008 I just stripped the veneer off the second speaker. Now I have some more sanding and prep work then its time to veneer. I have a quick question. Does anyone know what the exotic veneers were used around 1972? I'm thinking that I would like to use one of them for the sake of some legitimacy. Thanks in advance. Daniel Quote Link to comment Share on other sites More sharing options...

Recommended Posts
Join the conversation
You can post now and register later. If you have an account, sign in now to post with your account.
Note: Your post will require moderator approval before it will be visible.