muel
-
Posts
3070 -
Joined
-
Last visited
Content Type
Forums
Events
Gallery
Everything posted by muel
-
Nope. You could do it with a Niles amplifier switch though: http://www.nilesaudio.com/images/PDF/SPK-1_Cutsheet.pdf You would need to add a 12 volt source that will switch to the other amplifier when the 12 volts are applied. You should still be very careful! I am always sure any amp I have on is connected to speakers. I don't use it for quick switching but to keep from having to swap speaker connections back and forth.
-
I was thinking the same thing!
-

Tube amps popping on shut down...Arrggg!
muel replied to challenger1's topic in Technical/Restorations
At the risk of starting a power cord conversation I will tell you that I use a power strip to turn off and on vintage amps. This eliminates wear and tear on those irreplaceable on/off volume controls as well as making mono blocks a one switch operation. Also, when starting up turn the amp on last and when shutting down turn the amp off first. -
Using Heresy's on a Screened In Porch Outside
muel replied to Twenty Watt's topic in 2-Channel Home Audio
You can get some condensation inside the garbage bags depending on the weather. You would be surprised how good they still sound with garbage bags over them! I've used some in the shop for a couple of years and I've only taken the bags off to verify that I'm not hurting the finish. -
Lascala base cabs using 1" material - plans attached
muel replied to mustang guy's topic in Technical/Restorations
I've been planning a similar project to build some La Scala II looking clones based off old La Scala plans found here on the forum. I have the outer walls at 1 inch but I am keeping the rest at 3/4 to keep the geometry correct. I don't want to change anything not knowing how it will affect sound. I'll be making the 1 inch panels out of 2 layers of 1/2 inch cabinet grade plywood glued and vacuum pressed. The 3/4" panels will be baltic birch. I haven't played with SketchUp much. How do you see the dimensions without using the tape measure tool? You did a nice job with these plans! As far as material to use I am fearful of MDF on anything I might have where it might get wet (like a basement). I'm not too interested in the extra weight but who are we kidding... these are already pretty heavy! -
Mod Squad

-
Replacing capacitors from BEC is money well spent! Crossovers from ALK is money well spent too! If you get La Scalas with old caps then I'd replace them with the kit from BEC. Once you have listened to those for a few months then place your order with ALK one of his networks. You can attenuate the mids and highs with ALKs which will come in handy when you decide to replace your mid horn with one of the available drop in wood horns from gothover or Volti audio. You will still have all your parts so you could put things back to original if you like. That is the route I would be considering anyway.
-
I used a passive pre with VRDs more than anything else. You don't have to have a preamp unless you just can't plug your source in any other way! I am currently using my DAC as a pre. If you have telefunkens in your pre they might seem a little bright with the VRDs. I prefered mullards when I had a tube pre with VRDs.
-
This is what I use: http://discdoc.com/ Follow the directions carefully. I understand that alcohol can destroy some types of 78s!
-
No group pics yet... I'm embarrassed to say that the TT is sitting on my desk and the VRDs aren't even close as they are sitting on a desk made out of a formica bar top sitting on top of some file cabinets. Honestly, I haven't really even thought much about getting a nice cabinet yet. I guess that tells you something about my priorities. [:$]
-
VRDs look good at night too!
-
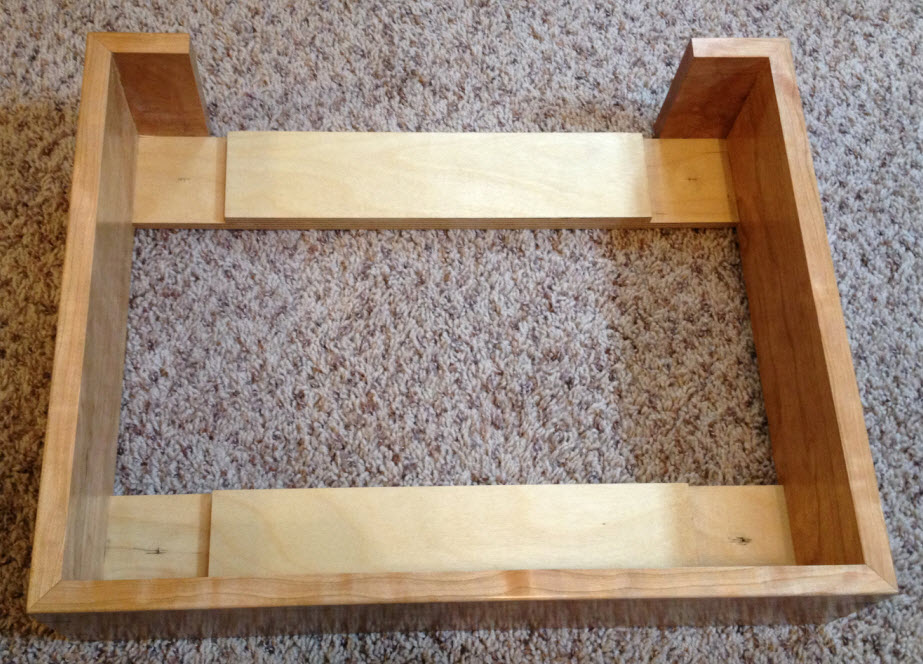
Actually, I emailed Kevin at KAB but he wasn't interested in changing anything on his cabinets and didn't offer any customization. He has always been great to deal with and very helpful to me on multiple occasions. I understand it just wasn't worth the trouble to him and I don't fault him at all! He suggested and I considered sanding the finish off one of his but later decided it would be much better to make one to match the VRDs. Mine have a shellack finish and no stain as I much prefer a clear finish for cherry! The sides of the cabinet are taller to accommodate the taller Isonoe footers. As far as measurements I used a good carpenters tape and I must have measured and remeasured that Technics 20 times! I also checked it for square in case there was a bit of a curve (it was perfect). I found the specs online and found that they were exactly what I measured. Find them here: http://www.panasonic.com/consumer_electronics/technics_dj/prod_specs_sl1200mk2.asp The back is only enclosed 2-1/16" from the inside edge to not get in the way of the hinges. For the height just measure from the bottom of the feet to the top of the deck and add enough for bottom frame where the feet will set. Obviously the most important measurements are the INSIDE dimensions of your cabinet... I would suggest you double check your own TT to be sure it isn't a little different. There is no way I would have tried to build this with the tight tolerances that Tom used! That required that it come out perfectly square and straight which it did. I imagine Tom wouldn't mind building another one of these since he has worked it out. Dovetail corners would look awesome but I was looking for a more simple look.
-
I would like to add how great Tom is to work with! We must have exchanged 90 plus emails and a couple of phone calls while discussing this and the VRD cabinets. He was kind enough to take some pictures of wood samples, the build process, and discuss things at length so I could get even more than I hoped for in the end.
-
Last one... time to start spinning I think!
-
Left view... sorry the pictures aren't better. They make it look a little yellow.
-
Looks like it was made for it!
-
View of back...
-
Installed. This top view you can see that it is a perfect fit. This took a lot of discussion and remeasuring to be sure we got this right. Tom didn't have a 1200 to measure so he was relying on me to get this right. You can just fit an index card between the TT and the sides.
-
Bottom. Tom added a thin layer of cherry to give enough depth to install footers.
-
Top view of inside
-
finished and home at last.
-
Brass spike footers added. It was better for Tom to install these before finishing.
-
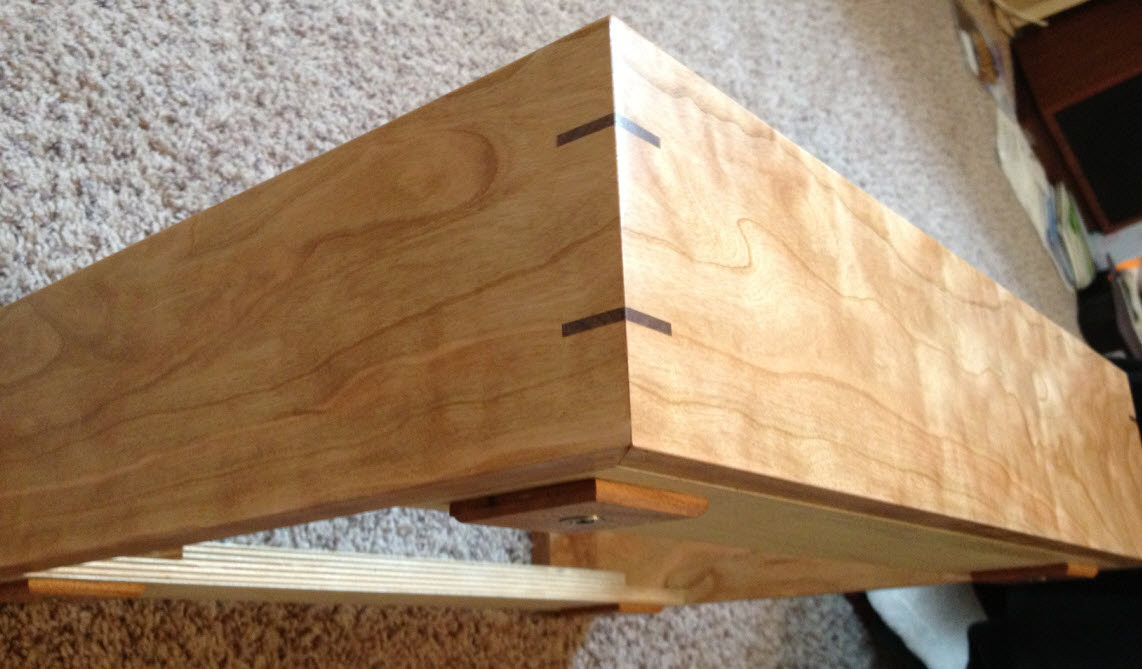
Splines added at corners
-
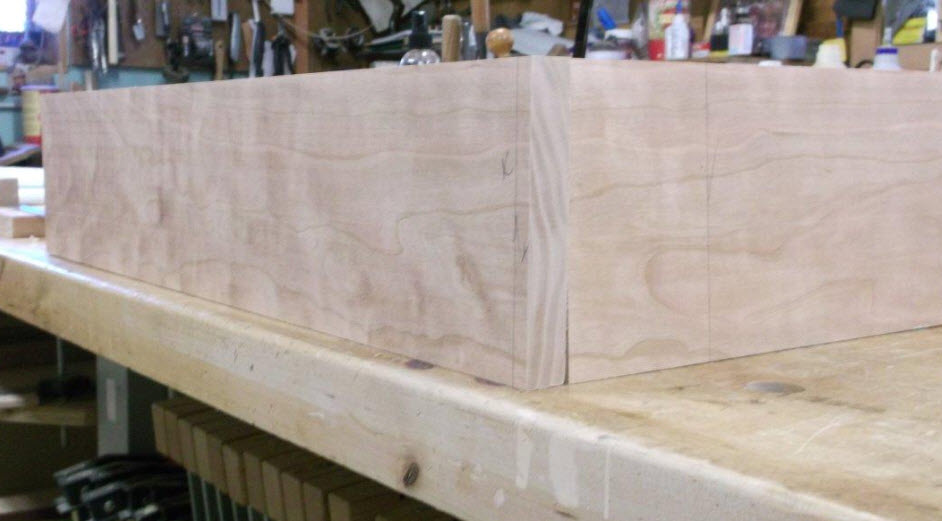
Glue up
-
A few weeks ago I posted pictures taken as my VRDs were being built. Tom (tk49 here on the forum) built the cabinets and Craig (NOSValves) did everything else. I really liked our custom design of the cabinet... solid cherry with walnut splines at the corners. It looked stunning to me and I decided to have Tom build a cabinet for my Technics 1200. Check out my next posts if you would like to see the great results I got from Tom. Tom got some beautiful cherry! These pictures don't capture the near luminescence of this wood!