nyt Posted September 27, 2010 Share Posted September 27, 2010 The plans say you can have one access hole,or one on each side to make woofer installation easier. I'll stick with one then. Did you use any nails on the second side? It looks very smooth on the pictures. Yep, I just filled that side better. I didn't feel like messing with filler and sanding and stuff around the gap for the panel and all the screws, so the side by the panel is a little ugly. It's hidden so I was like screw it =] I used a bunch of filler on the rest of it and sanded it smooth before painting. This is after the first coat, pre sanding. Quote Link to comment Share on other sites More sharing options...
psg Posted September 27, 2010 Author Share Posted September 27, 2010 You put a lot of finish work on that sub! I received my driver, connector cap, t-nuts and bolts from Solen today; I ordered Wednesday and got it on Monday so that was quick. C$238 after shipping and taxes. The driver looks really impressive! I'm buying 4 5x5 baltic birch sheets tomorrow and start building Wenesday evening. I'm going to take this real slow. Pics to start soon! Quote Link to comment Share on other sites More sharing options...
CECAA850 Posted September 28, 2010 Share Posted September 28, 2010 You put a lot of finish work on that sub! I received my driver, connector cap, t-nuts and bolts from Solen today; I ordered Wednesday and got it on Monday so that was quick. C$238 after shipping and taxes. The driver looks really impressive! I'm buying 4 5x5 baltic birch sheets tomorrow and start building Wenesday evening. I'm going to take this real slow. Pics to start soon! I don't have much free time to work on mine, but I did get my first panel glued yesterday. Quote Link to comment Share on other sites More sharing options...
CECAA850 Posted September 28, 2010 Share Posted September 28, 2010 nyt, what type of filler did you use? Would drywall mud work? Quote Link to comment Share on other sites More sharing options...
psg Posted September 28, 2010 Author Share Posted September 28, 2010 I don't have much free time to work on mine, but I did get my first panel glued yesterday. Sweet! What width are you building? Either post pics here (I don't mind; we could compare and share thoughts) or start another thread! EDIT: Oh right, you are not building a Tuba HT but rather a Tuba 18... Still, post pics! Quote Link to comment Share on other sites More sharing options...
nyt Posted September 28, 2010 Share Posted September 28, 2010 nyt, what type of filler did you use? Would drywall mud work? it will shrink, best to use bondo. or even wood filler =] Quote Link to comment Share on other sites More sharing options...
psg Posted September 28, 2010 Author Share Posted September 28, 2010 Got my four sheets of baltic birch today. I had them cut into two pieces to fit in my minivan, two of them in half and two of them at 36.75" on one side, to fit my cut sheet. It turns out that a 30" Tube HT, with all it's 29" wide pieces, is a very efficient size for 60x60" sheets! I should be able to get all my ain panels cut tomorrow evening during my 3-hour class, and perhaps a bit more. Quote Link to comment Share on other sites More sharing options...
CECAA850 Posted September 28, 2010 Share Posted September 28, 2010 Sweet! What width are you building? Either post pics here (I don't mind; we could compare and share thoughts) or start another thread! EDIT: Oh right, you are not building a Tuba HT but rather a Tuba 18... Still, post pics! Not much to look at yet, but here's where I'm at. Quote Link to comment Share on other sites More sharing options...
CECAA850 Posted September 28, 2010 Share Posted September 28, 2010 I only have a short time at night to work. Tomorrow night I need to rout a groove in my next panel to allow for driver clearance. There was supposed to be a note in the plans to make the driver chamber larger if you use this particular driver, but it was left off my plans. Now I have to compensate, as I've already cut my panels. I just need to make it all fit at this point. Quote Link to comment Share on other sites More sharing options...
jason str Posted September 29, 2010 Share Posted September 29, 2010 The problem with pre-cutting your panels is that the stock is never the same thickness between brands and such. This means being just 1/16" off in stock thickness equates to 3/16" by the time you are installing your 3rd round of panels so be cautious on your pre-drilling & pre-cutting ideas, you may be shooting yourself in the foot. Quote Link to comment Share on other sites More sharing options...
CECAA850 Posted September 29, 2010 Share Posted September 29, 2010 The problem with pre-cutting your panels is that the stock is never the same thickness between brands and such. This means being just 1/16" off in stock thickness equates to 3/16" by the time you are installing your 3rd round of panels so be cautious on your pre-drilling & pre-cutting ideas, you may be shooting yourself in the foot. I checked all the Baltic Birch and it's all exactly 1/2". As far as shooting myself in the foot is concerned, the gun's already discharged. Other than the issue with the driver heigth (easy fix), everything SEEMS like it will be OK. I stood all my panels up on the template and they appear to be butting up properly. Quote Link to comment Share on other sites More sharing options...
psg Posted September 29, 2010 Author Share Posted September 29, 2010 I didn't get very far this evening. I cut all the main panels according to the sizes requested in the plan. I know some cuts will require downsizing a bit with angle cuts. I drew out the layout on the first side panel. That's it for 2.5 hours. All pieces are perfectly square. It was nice at the end to stack up all the 29" pieces and have them line up like they were one very thick piece of plywood! The precision of the cuts will surely make the build easier. I cut the access hole and start gluing next week! Quote Link to comment Share on other sites More sharing options...
psg Posted September 30, 2010 Author Share Posted September 30, 2010 I measured the Dayton RSS390 HF-4 woofer to see how big the hole should be. The directive for an 1/8" smaller than the inner diameter of the frame gasketpuzzled me a bit, not knowing exactly where to measure. But I figuredthat clearing the foam surround would be okay so measured to the outeredges of that.I was surprised to measure 13 7/8". I had alwaysassumed that a 15" driver meant a 15" diameter displacement of air andnot a 15-inch outer frame diameter!I have seen pictures fromothers who have cut this circle straight rather than with the anglesuggested in the plans, so I will do the same (my T-nuts are on thesmall size, #10-24). I don't have a router attachment to cut a circle,so I plan to rough-cut to 1/8" of the line with a jigsaw and even outwith a sander (thus the straight cut). Quote Link to comment Share on other sites More sharing options...
CECAA850 Posted September 30, 2010 Share Posted September 30, 2010 I believe I'm using the same size T-nuts as you. With the 8" driver, there's not much wood between the driver hole and the T-nut hole. I ended up grinding one side of the T-nuts down so the flange wouldn't hang over into the driver hole. If you click on my pic, you can enlarge it and see what I mean. Quote Link to comment Share on other sites More sharing options...
psg Posted September 30, 2010 Author Share Posted September 30, 2010 Thanks for that! I guess I should take careful measurements to see what happens with the 15-inch driver. But if it is suggested to angle cut the hole and that doesn't get in the way of the driver, then surely such an overhanging T-nut would never get in the way of the driver either. EDIT: BTW, That is 1/2"? It looks thicker from the number of plies in it! Quote Link to comment Share on other sites More sharing options...
CECAA850 Posted September 30, 2010 Share Posted September 30, 2010 Angle cutting seemed like a PITA to me, especially when a router with a jasper-jig is so fast. I spent about 15 seconds per T-nut on the bench grinder and all was good. Yes, 1/2" Baltic Birch is 11 ply. Quote Link to comment Share on other sites More sharing options...
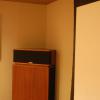
CECAA850 Posted October 2, 2010 Share Posted October 2, 2010 Some more pics from the crapola camera. Quote Link to comment Share on other sites More sharing options...
CECAA850 Posted October 2, 2010 Share Posted October 2, 2010 Same pic, no flash. Quote Link to comment Share on other sites More sharing options...
CECAA850 Posted October 2, 2010 Share Posted October 2, 2010 Next panel. Quote Link to comment Share on other sites More sharing options...
CECAA850 Posted October 2, 2010 Share Posted October 2, 2010 You can finally see the horn starting to take shape. Quote Link to comment Share on other sites More sharing options...

Recommended Posts
Join the conversation
You can post now and register later. If you have an account, sign in now to post with your account.
Note: Your post will require moderator approval before it will be visible.