wvu80
-
Posts
12379 -
Joined
-
Last visited
-
Days Won
6
Content Type
Forums
Events
Gallery
Everything posted by wvu80
-
He shoots; HE SCORES!!! +++ Nice find regardless of the price, even better due to price! I bought my CF-4's a week ago, and yours are ten times in better shape than mine. What are you going to do with them in terms of where they fit into your system? You would not put them in a bedroom, at 108 pounds each, they are large BEASTS!
-
I'm still working on the refinish, but I'm spending a lot of time researching Youtube videos on applying poly. Apparently, the only thing every Youtube video agrees on is all the other ones are wrong! Some say apply with a rattle can, some say use a fine brush, some say use the cheap foam brushes. I bought foam brushes, but now I'm thinking soft brush, so I can work the poly into the deep part of the grain for the first (thin) coat. I would think the Minwax guys should know what they are doing: And then after buying the satin poly, I'm second guessing myself, having seen some really nice looking high gloss finishes. It looks like the satin looks closest to the stock finish, but I'm not sure. And if you're not sure, shouldn't you hedge your bet and buy semi-gloss? I have no clue. This is your last chance to weigh in with a suggestion for poly! I'm thinking two coats, and probably three. I spend so much time analyzing, I bet it is TEN TIMES easier for you guys to make that decision than me!
-
That link is GONE already! Listing removed by author. You snooze, you lose.
-
I have found the guys over at the AVS Forum, sub forum DIY Speakers and Subs to be incredibly knowlegable and helpful when it comes to projects exactly like you want to do. They can help you with measurements, plans, drivers, enclosure material, bracing, budget, amp options, etc etc. No need to re-invent the wheel. Edit: I saw the reference to the Table Tuba, in Post #6. That is offered by Bill Fitzmaurice, and he posts frequently on the AVS DIY Speakers and Subs forum. You could ask questions directly to him if you wanted, and he will give you good advice, even if that advice points you to a different product or solution than what he offers.
-
Megarock, thanks for the tip on the Ebay seller and the older forums . I am only a week old on these forums, but maybe there are some read-only archives available. I'll take a look and report back if I find them. +++ Regarding the L-pad: My old receiver has a 5-band equalizer. What is the difference between simply using the EQ to tame the highs versus using the L-pad? I tried using the EQ and didn't hear much improvement, but since the speakers are being refinished, they are on their side, have plastic bags over the drivers for dust protection, and they just are not in dial-in mode. I feel like I can't properly evaluate if the EQ might be an adequate fix vis-a-vis the L-pad.
-
I've never heard this "mineral spirit" tip.
-
Music to refinish speakers by, the Russian Easter Overture, by Rimsky-Korsakov. The whole piece is good, but tune in about 13:15 for a two minute sampler that absolutley cooks to the end.
-
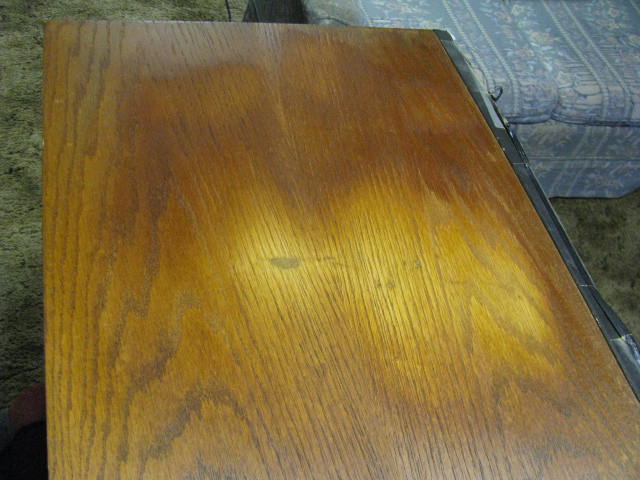
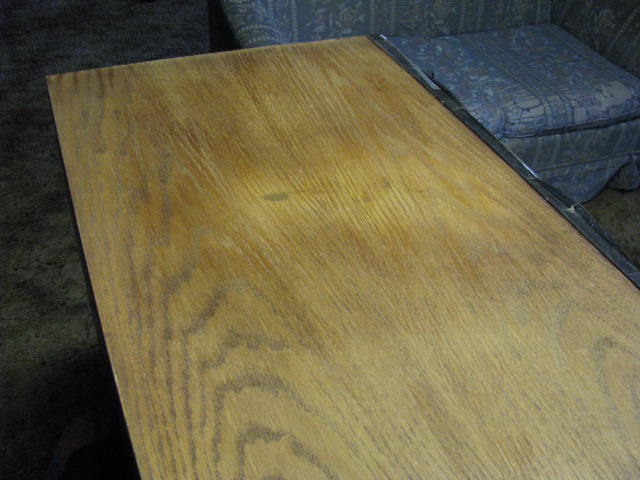
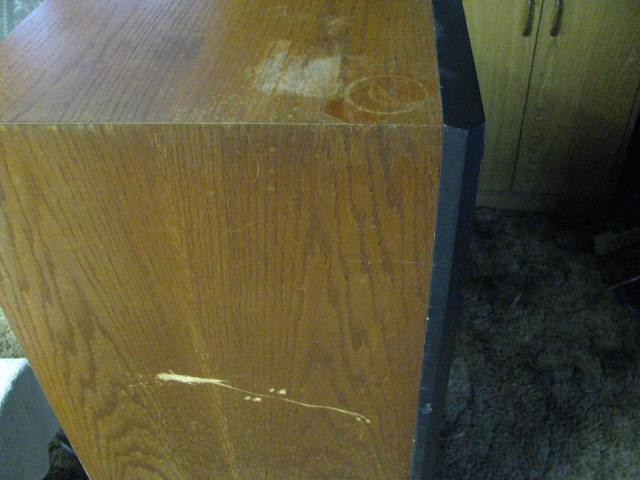
Thanks for the compliment! About that stink: Well, I didn't exactly tell my wife what I was doing the basement and she rarely goes down there, so yes, I did stain inside, with all windows and door open, of course. She came into my upstairs Mancove (it's not quite big enough to be a ManCAVE ) and asked me "what stunk so bad." I told her it might have been my bare feet in my old smelly tennis shoes, and she seemed to think that made a lot of sense, so I didn't elaborate on the staining going on in her basement. As I have gotten into the sanding, I now see every flaw, and the good parts as well. These speakers have consecutive serial numbers, but I swear it looks like one was kept in a nice listening room, and the other one kept outdoors in the sun, by a creek! Both speakers had water stain damage on the tops, but just the one had the gouge and did not clean up perfectly, but the other undamaged surfaces did. I just finished the staining, one coat. The Minwax can says not to sand in between coats, but I was only planning one coat at this time. Before I did the overall staining (and before I read the directions) I did put a small amount of stain on the repaired area, which was almost white due to sanding. Then I sanded lightly later. The sandpaper almost immediately clogged with the stain. Despite that, I would not be against trying another light sanding, if I can get those light areas less noticable. I'll let you all comment on the difference in the damaged speaker: Before: After: (the lighting is inconsistent with a florescent overhead to the left, but the color is fairly true, and the highlights on the top are not as pronouced as they look.

-
Now I look in the mirror, and it is my dad staring back.
-
I am new to the refinish game as well, and after my staining which I am doing today, I will be applying poly as well. I was told that the poly needs to be stirred, not shaken due to bubbles. And my question is, you used a "quick dry" poly. Would the poly with the standard drying time make any difference? I don't know that answer, that is just me thinking out loud. My last question, how many coats of poly are you going to use? +++ In any case, please check back in here with your solution so I can follow what you did that worked. I'm not making a move until I see how your bubble issue gets resolved. You can believe me when I say, good luck!
-
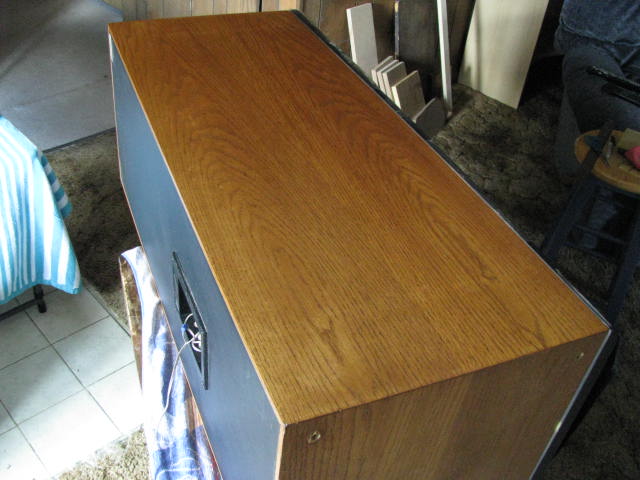
OK, no stripper. I had sanded pretty well before, and Mr. Reference's advice to NOT over-sand sounded about right, so I cleaned up the surface one last time with a dry rag, and stained. Before: And after, with stain: (the lighting is slightly different, so the lighter places near the bottom of the pic are not really lighter than the darker top, which is in a slight shadow) I am doing the work in our finished basement, so there is an old 36" tube TV in there. I had to move the speakers, because when they were within 5 feet of the TV, the magnetic field from the two 12" woofers caused the colors to distort on both sides!
-
Thanks for the comments, Ryan. I agree with you, my first committment to these speakers has to be "do no harm." And "yes" I'd like to stay with the lighter/ stock color, meaning the Golden Oak. I'm not sure why, it just seems like the right thing to do. If a couple of coats would darken it just a bit more than stock and look good, I would certainly go with that. Because of the uneveness after I have sanded, and my reluctance to dig deeper into the finish with sandpaper, I'm guessing one coat of stain, some more 220 sanding, then the second coat might be the way to go. When I am removing sawdust with a damp rag, that finish absolutly pops; it's just beautiful, and the blemishes disapear. I'm just looking for a guarantee that when I am done, it will really look that good. Keep those suggestions coming; we are getting closer to the finish line. +++ Edit: I just found a pic that wasn't too large for an avatar, with me in it. This is my wife, and my son who in in Germany with the USAF. It is likely that when he finishes his service, he will get the Klipsch's.
-
I picked up some CF4's last Friday and I am refinishing them right now. Can you be specific about WHICH L-pad to use, or maybe post a link? Also, where did you mount them? +++ I just got both mine hooked up temporarily with an old 100 wpc receiver, and all I've listened to so far is FM radio, some rock and a little classical. I am withholding judgement on the sound because they are not set up properly, inferior receiver, poor source material, etc. My preliminary judgement is that they can play LOUD, and the horn really beams. They seem to image super well. They seem to be like a jet airliner on a runway; you get cruise around on half power, but it's not very exciting and you can't get in the air. But hit full throttle in the jet and it pins you to your seat. These CF4's are a LOT like that! I'm not certain what I'm hearing, but the horn seems to overpower the two 12" woofs at LOW/MED volume. Crank things up and the horn gets a little louder, but those woofs REALLY get into Beast Mode as they get louder and catch up to the horn's SPL, balancing out the sound. This is also new to me, but those cabinets vibrate like crazy! There is sound from the front (duh) but there is also an "aura" of sound which eminates from the top, sides and back within about 2 feet, which have their own sound! It's not unpleasant, I'm just not sure what to make of it. +++ Megarock do you have any advice for me, or comments on your experience with them? FYI my musical tastes are for jazz horn like Maynard Ferguson, and classical, like Copeland and Berstein. La Fiesta:
-
I have a set of 301 Model 2's I USED to like before I heard good stuff, but I'm afraid I have become a tad jaded on the old 301's. I currently use mine for surround duty and I like the way the fit into the decor due to the low height, so they're not unusable. That's an 8" woofer in there (outside edge-to-edge). And there has GOT to be a better option than those cheap computer speaker style $1.00 tweeters. What are you doing to mod your 301's?
-
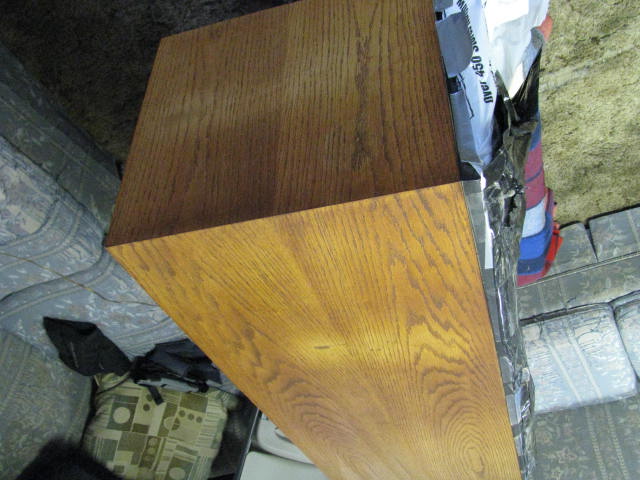
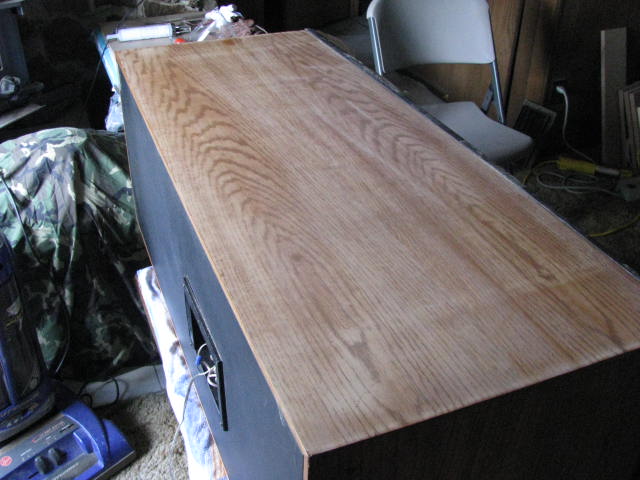
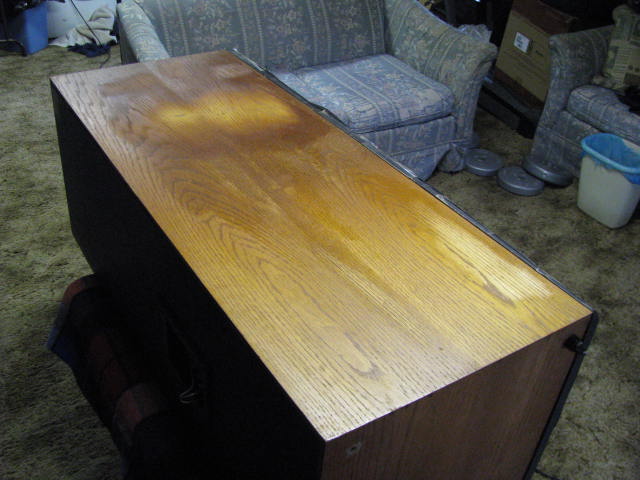
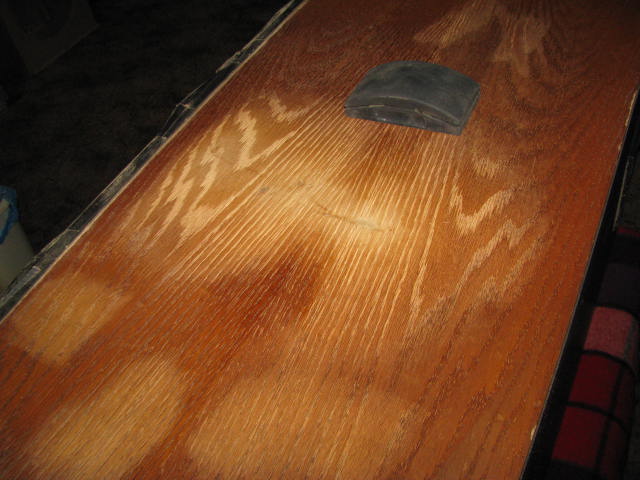
++++++++++++++++++++++++++++++++++++++++++++++++++ Edited. re: USING A STRIPPER??? I was doing some more sanding, and remember, I am still learning. I did NOT use a stripper due to my ignorence in refinishing, but now I think I probably need to do that before I finish sanding and apply a finish. The laminate (at least this laminate in bad shape) looks like kind of a sawtooth pattern (bottom to top) ^v^v^v^v^v^v^v^v^v^v^v^v^v^v^v^v^v^v^v^v^v^v^v^v^v And after I sanded, the surface is smoother on top, and looks more like this. very smooth to the touch: V V VV V V V V V V V V V V V V V V The point is, after sanding a NEW pattern shows up, and I'm guessing the old stain and acrylic is down INSIDE the grooves, which I can't now get out without sanding/destroying the laminate. You can see the horizontal pattern about 3/4 to the bottom of this pic. The bottom of the speaker looked pretty good and the finish was consisent looking, until I sanded it. I used a single stroke with the sanding block from the top to the bottom, I did not stop in the middle. My question is, SHOULD I be using a stripper? I'm putting things on hold until I hear back from you guys. (including stripper jokes) ++++++++++++++++++++++++++++++++++++++++++++++++++++++++ I am taking a brief break to think about my next steps. I have done a lot of work, but there is some more work to do it right. I was so excited to get the speakers off Craigslist, and then so freaked out they looked so bad I kind of jumped in to refinish without really knowing what I was doing. Did you know they now have Youtube vids that tell you how to refinish furniture? Who knew? +++ I do have a 7" orbital sander. I am hesitant to use it, or even get the 5" model you suggest, because I don't know how to use it properly and I don't want to ruin the finish. I have since watched a couple of Youtube videos, but they are simplistic and don't come close to demonstrate how to RE-finish veneer that has been neglected and damaged for 20 years. You can see by my picture that the finish/sanding is not yet flawless, and even. I am guessing some of the rough spots will even out by applying stain and some more light sanding, but the point is, I am guessing; I don't know that. Here is the right side of the undamaged speaker I finished by hand. It looks pretty good, this is natural lighting by a window, no direct sunlight and no internal lighting. And you are right Mr. Reference Head, that unfinished surface does look much lighter, and looks good in its unfinished glory. I am probably still going to go ahead with the Golden Oak to return the speaker to close to original condition, and hopefully the finish will hide some blemishes. I think the key is that I have to get it to look good BEFORE applying the stain.
-
I have Firefox, latest version 28.0, Win 7. No problems like you describe.
-
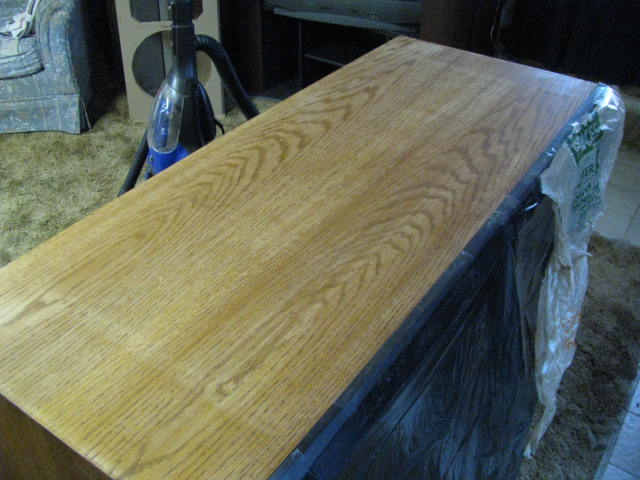
(from Mr. CR4:) yeah that didnt blend too well. sorry i should have clarified, You are still good with your advice, the blending is yet to come with more sanding, but I knew that. I just didn't expect the extreme high and low spots, and that's what I took the pics of. After sanding the rest of the speaker, it will be fine. This is my first ever re-finish project, and I am still in learning mode. you cant just sand one or 2 spots & stain just them, after sanding the stains & scratches etc, you need to sand the entire surface to get it to look as light as the spots you concentrated on. its almost impossible to match a spot in the middle of the surface. maybe if you did the entire top it could match an untouched side, but not just a spot in the middle. We are still good here. I know the speaker looks awful in those pics, but I am probably posting in between mid-steps. I fully expected to sand the entire speaker, and I expect it to clean up. if the stain isnt penetrating it needs to sit longer, the suggested 2-5 minutes was just a starting point so it didnt get too dark the first time around. The stain dried almost instantly in the sanded portions, there was no excess stain to wipe up, though I tried. Remember I did NOT sand the entire speaker at this point. It's possible I didn't use enough stain, but I was deliberately going "light" using a rag, to see what would happen. also since they are laquered, the stain wont absorb evenly if you have random spots heavily sanded. are we sure they are laquered? is there an "O" in the oak letters on the tag? There was no "O" so these are certainly lacquered. What I didn't explain very well because I didn't know what I was looking at, is that the wood surface is 18 years old and has had not been taken care of, so it is in lots worse shape than I initially described. That's why the light and dark spots, the surface has not yet been prepared properly, yet. my apologies again for not completely explaining every aspect of this, i assumed some of it was self explanitory. try to resand the entre surface to match the spots you sanded, then do another coat of stain & let it sit for 10-15 minutes, apply a little heavier on the heavy sanded spots & even let sit a little longer in those areas if needed. I'm on it! I initially decided NOT to use a second coat, but now I see I may have to so the surface can be evened out. I don't mind doing it either way, I just thought one coat would be the best way because there is already a coating on there. I now have the opinion that the entire old surface needs to be removed, and I will stain and then re-stain as needed. One reason I am figuring things out is because I moved from the gouged speaker, which had some dry rot and fading from sun, to working on the other speaker which is cleaning up MUCH easier, because it is in so much better shape. In the end, I will use the same refinish technique (two coats of stain, etc) on both speakers. do you have an electric sander? that might make sanding the large areas a little easier, you can get one from harbor freight for very cheap, $15-$20. No, I don't have a belt sander, but I have an oribital sander. I'm guessing the orbital is not the right tool for this job, as I bought it to buff out the finish on the car. Looking back on how much material I had to sand off the speakers, the belt sander might have been a better idea, but then again, putting a power tool in the hands of a total novice can screw things up MUCH faster than working by hand. I could have ruined those speakers, so working by hand is tedious, but probably a better method for me right now. Edit: A 5" orbital sander is the tool to get. The one thing I am now doing different is I'm using 120 grit to remove the old finish, then doing a final finish with 220, the 220 being the recommendation on the Minwax can. The 220 just didn't take the old finish off very well. Now that I have done some sanding, I can feel how smooth the finish is compared with how I started. I thought maybe the textured wood was characteristic of the Klipsch veneer. I can tell now that the wood was just in bad shape, and it is going to clean up very nicely. That Golden Oak stain is a VERY close match for the stock finish, and looks really nice, judging from the bottom of the one speaker I experimented on, and is now finished except for poly. I don't mind taking longer than expected, and I don't mind the extra elbow grease. It will give those speakers character. +++ This should make you feel better, BEFORE whole speaker sanding: And, AFTER some preliminary whole speaker sanding (more with some more sanding to do). That gouge spot is MUCH less conspicuous, and it actually looks better in person than in these pics.
-
I do more music listening than my wife does, as she does 99% TV and she likes it soft. I have a year-old Onk 717 AVR with about 110 wpc and all the newer codecs and bells and whistles ready for the CL4's. I knew the 110 wpc would not be enough for more demanding mains, so I got an AVR with pre-outs if/when I needed an upgrade in power. I prefer the one-stop shops of the modern AVR's even with their shortcomings, even though BITD I had pre-amp, EQ's, and Magnapan MG1's for my 2-channel listening (known back then as "listening" ). I upgraded to 5.1 in the last year so all my stuff is up-to-date, and I'm trying to resist upgrade-itis! I would say with the purchase of the CF4's, I've already failed at that. But I got a "deal" on them. What real man could resist that? +++ The general sanding with 220 is going very well since I don't have to take care of major scrapes now. In fact, just the light sanding cleaned up the appearance a lot. The staining did NOT go well on that heavily damaged panel, as the stain was aborbed unevenly. I am thinking I can clean that up now with some light sanding to even out the appearance of the grain. The grain looks real nice, if I can get my act together with the staining. This is the gouged speaker, with heavy sanding in the damaged area, no light sanding anywhere else. Then stain was put on in the heavily sanded areas only, hoping to get the finish to blend before light sanding. The stain did not aborb into the sanded area, and the little feathering of stain around it turned those areas very dark. Here is the other speaker, light sanded only, no stain yet. The light sanding really brought that grain out, and the sanding was easy, if that makes any sense.
-
Has anybody tried Silicon Seal (not latex)? It seems like a quick and easy solution to damping the plastic ringing.
-
I'm pretty anxious to get some listening, but when I saw how badly this beauty was treated, I really wanted to restore her as best I could to her full glory! +++ And what do you suggest for jumpers? I pieced some old speaker wire together just to get the one speaker to play. +++ How did you have your CF4's set up in terms of equipment and power? And how were the CF4's for non-critical listening, ie, TV, low power or low volume listening? I managed to get one speaker hooked up with a 20 year-old cheap 100 wpc receiver, and the louder it got, the better the speaker sounded. The sound was pretty subdued until the power got turned up.
-
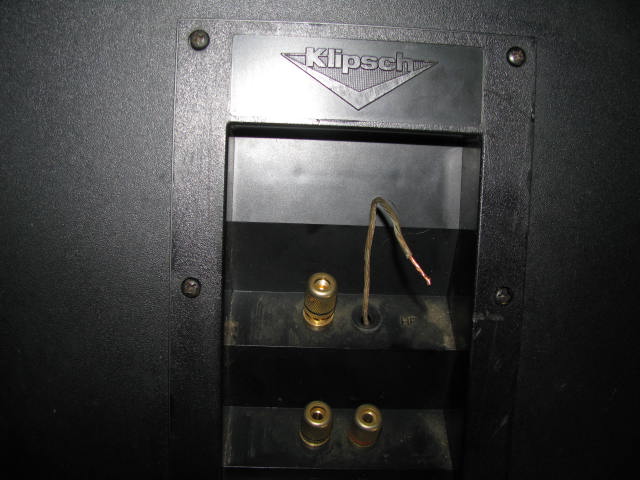
LOL! I "+1'd" you right back, buddy! In your honor: Edited: Be sure to go back upstream and check the pic I added of my binding post problem.
-
I like PE as well. I buy my DIY speaker stuff from there. They have good posts, but they don't have a good match for what I have. Believe it or not, Ebay has something similiar to the stock posts, for about $6. I don't mind paying a little more, but I really want one replacement that will match, I don't want to replace all the stock parts. The binding posts I have have a nice pitina to them, so I doubt I'll be able to exactly match them. I think I'll get something for now, then upgrade in the future if I want. +++ Edited: Here are the binding posts, including my amazing re-engineering of Klipsh's original equipment:
-
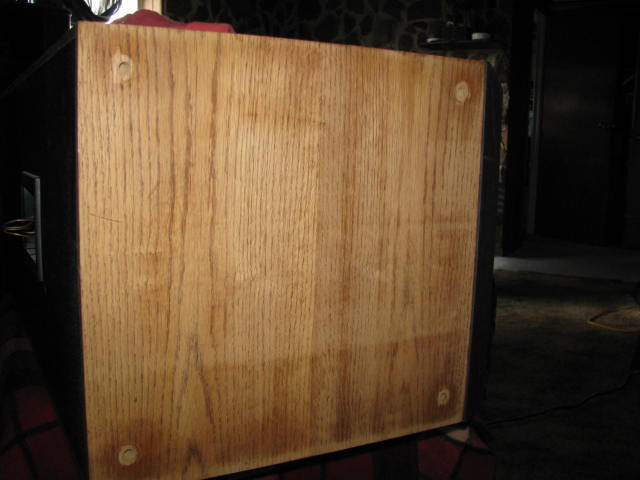
The original gouge looked horrible and I just figured it was not going to go away. It is gouged all the way to the substrate, but only in a couple of places, so the veneer grain will not be contiguous. What I didn't know is that all the sanding I did close to the bad part really helped to minimize the size of the scratch. Those water marks (top) are now totally gone. I've only worked on the worst spot of the worst speaker, knowing I couldn't make it any worse. The other finishing will be MUCH easier. For reference, the 5" wide sanding block is above the gouge spot. The other light spots is where I sanded to take out smaller scratches. My next step will be using the recommended 220 sandpaper all over, then I can stain. (this picture is upside down and backwards to the other pic, so the drivers on are the left of the pic, and the speaker top, is bottom of the pic.) I'm not going to try filling in the spots with wood putty, because I think simply staining the cab might hide much of what is very visible right now. I'll have to try it and see. +++ Ryan, I did pick up a rubber sanding block. That cheap rubber made in China was still curing, and stinks. +++ I've got a binding post stud on missing, so there is nothing for the knurled knob to screw in to. I was told both speakers worked, but there is NO WAY this speaker worked. The outside knob was shoved in the hole and it didn't attach to anything, but I didn't know that until I looked at closely and saw that it was missing. Does anybody have a recommendation for a replacement? The stock parts have a nice gold knurled knob and have a nice heft to them, although they are probably smaller than some others I've seen. No $75 binding posts, please.
-
OK, which one of you guys forgot to tell me this was going to be a lot of work! My attitude was pretty much "OK, I'll start at noon and sand, stain and apply the poly. Then by about 1:00 I'll have the rest of the day to rest." I've been wrestling with sanding just the TOP of ONE speaker for about two hours! That's because I am being very deliberate, and I am trying to cleanly sand out a gouge with 220 sandpaper and I am trying hard not to take too much off. (Dave pauses for hysterical laughter) On the positive side, I am figuring out how to sand, and how to get cramps out of my forearms. I have taken out some deep scratches on the worst top which I think might look pretty decent when I'm done. I'm hoping now to get done by the end of the week... In my own defense, I did practice first by sanding and staining on one of my wife's end tables which had a couple of nicks on top. She'll never notice.
-
What a ton of good advice, thanks! Ryan: I think I might have done the Watco if my finish wasn't so bad. +++ One question; do I sand the entire speaker, or just where the stains are? My instincts say lightly sand the bad spots and try to feather into the rest of the finish. Here's the plan, probably for tomorrow: Minwax Golden Oak stain it is, one coat. I don't want the finish darker, but as close to factory as possible. Just the opposite of a James Bond 007 martini, the stain will be stirred, not shaken Light sand with 220 Apply stain with rag, wait 2-3 minutes, wipe excess with a clean dry rag Practice on bottoms first. (I really like that idea) After it dries, no more sanding Wait 24 hours, although I think 4-6 hours is the minium for the stain to dry before applying a second coat. I'm not in any hurry. Minwax (or whatever brand) Satin poly, apply with foam brush. Does that sound like a plan? Any other suggestions or comments? This is great stuff. Thanks. +++ I did get one speaker hooked up. It sounds pretty good, but now I know what "beaming" is coming from that horn! That speaker really has a distinctive, characteristic sound. I ran into a small, fixable problem with the other speaker, but I'll address that later.