Mike Lindsey Posted August 30, 2007 Share Posted August 30, 2007 I know there are a few of you who have had your Heresy's reveneered. I'm just wondering what a fair price for the labor might be, as well as the cost of the veneer. I would imagine the veneer would depend on the wood grain I decide to go with, but I would still like to have some ideas. I ask because I'm taking a pair by a local cabinet maker today to see what he charges. Thanks, Mike Quote Link to comment Share on other sites More sharing options...
colterphoto1 Posted August 30, 2007 Share Posted August 30, 2007 whatever happened to DIY Mike? Quote Link to comment Share on other sites More sharing options...
Mike Lindsey Posted August 30, 2007 Author Share Posted August 30, 2007 I have sanded them pretty smooth, but there are a couple of places where they need to be filled in, veneer missing in some corners, etc, and do not know anything about veneering, and would prefer to get them professionally done if the price is right. If not, I'll probably just stain them and be done with it. Mike Quote Link to comment Share on other sites More sharing options...
Mike Lindsey Posted August 30, 2007 Author Share Posted August 30, 2007 OK... he said the existing cabs could not be saved for stain, and he would have to reveneer them if I wanted to go that route. He also told me he could build me new cabinets for less using high grade maple wood. He would use the motor boards from the beat up 76 cabinets that I have, and if I choose to veneer the 80 cabinets then I can still do that. Has anyone built these cabinets using real wood (maple)? Are there any differences sonically? Mike Quote Link to comment Share on other sites More sharing options...
HDBRbuilder Posted August 30, 2007 Share Posted August 30, 2007 Never use solid wood for speaker cabinets. Use either veneered lumber-core plywood panels, or veneered plywood panels (my two choices in that order), OR you can go the veneered MDF route. Granted, high-grade maple is a fine furniture medium, but it will eventually give problems for a speakercabinet unless it is laminated maple strips, which will look more like a butcher block than a piece of furniture. Heresy cabinets are pretty simple boxes, and don't require extreme master craftsmanship to come out nice. Basically they are four mitered panels, glued up and secured with glue-blocks and staples from the inside. The front motor board panel is dropped into the front where it is glued and stapled to four glue blocks which have been glued and stapled inside the cabinet front edges at a depth of about 1-1/32" (if I remember correctly), which allows for the motor board thickness (nominally 3/4"), plus another 1/4+" for grill cloth panel thickness, and so that there will remainjust under 1/8" or so between front of the grill cloth panel and front edge of the cabinet. The back glue-blocks are installed the same manner as the front blocks, except at about 1/2" depth. Be sure that the new cabinet follows the design of the original mitered cabinet exactly! Interior volume dimensions need to remain identical. Also, be sure to caulk up the junctions of the glue blocks as it was done on the original cabinet, to ensure air-tightness of the box. This is a functional requirement which also eliminates "air squeaks" from woofer cone excursion. If your original Heresys are decorator style models, then there are major differences in the way the mitered cabinet design is built. If you don't have an original mitered corner heresy cabinet to copy dimensions from, then just ask and someone here should be able to give you the dimensions. My stuff is in storage now, so I can't help you in that department, myself. Quote Link to comment Share on other sites More sharing options...
Klipschfoot Posted August 30, 2007 Share Posted August 30, 2007 It's obvious when an expert answers a question. How many audio forums have original master craftsmen carefully setting straight the young and careless? Anyone have a signature HDBRbuilder edition? Thanks for being here. (How about a post-your-pic thread of HDBR labels?) Your posts are always thorough yet concise. Much appreciated. Quote Link to comment Share on other sites More sharing options...
Mike Lindsey Posted August 30, 2007 Author Share Posted August 30, 2007 Thanks, Andy! That's what I wanted to hear! I'll show this to the cabinet guy and see what he says in response. He's an older fellow and seems nice enough. Not only that but he said he would build both cabinets for $110. That's for the pair. [] Mike Quote Link to comment Share on other sites More sharing options...
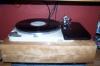
thebes Posted August 30, 2007 Share Posted August 30, 2007 Mike maybe our favorite resident, and lately happily returned to us, Builder can add something to this. I have a pair of Hersey 1's that have the drivers mounted on the back of the mortar (KABOOM!) board. Now I'm not sure it's original because I can see nail holes around the edge of the board so someone may have done this to them at one point. Doesn't matter however, because I also had a pair of Heresy 2's in here and IMO these spanked them badly in in extended A/B listening. So if you are going to be rebuilding yours anyway, I would suggest dropping the drivers inback and see how they sound. Easily reversible if you don't like it. Oh ignore the bottom driver. It's a Altec I'm playing around with. Quote Link to comment Share on other sites More sharing options...
HDBRbuilder Posted August 30, 2007 Share Posted August 30, 2007 Mike, What model are the Heresys with the cabinets you want rebuilt? Just tell me if they are Heresy II or original Heresys, and whether they are like the ones that are in the pic Thebes posted, or if they are HBR/L or HDBR/L models. Actually, a pic of one of them would tell me all I need to know, if you can post one. Then I can give you more information about what the cabinet guy needs to know. Quote Link to comment Share on other sites More sharing options...
Mike Lindsey Posted August 30, 2007 Author Share Posted August 30, 2007 Hi Andy, I have a pair of '80 HBR's and a pair of '76's that look like they could be Decorators. The reason I say this is because the tag on the back is unrecognizable (stained on) and the motor board looks to be flush with the plywood up front if it were not for some quarter round that had the mitered corners that stuck it out enough to allow for the grill cloths. I was going to have him duplicate the 80's, but take the motor boards from the 76's, which do not have the reinforcing braces like the 80's do. Let me know your thoughts. Mike Quote Link to comment Share on other sites More sharing options...
thebes Posted August 30, 2007 Share Posted August 30, 2007 So Andy are these things originally built this way or do you think they were modded? Sound sweet whatever they are. Quote Link to comment Share on other sites More sharing options...
HDBRbuilder Posted August 30, 2007 Share Posted August 30, 2007 OK, Mike, that's what I needed to know. I probably bult your 1980 Heresys, but it depends on when in 1976 your other ones were built because I didn't start building Heresys until very late in 1976. Here is how you get what your cabinet guy needs to know: Heresy Building 101: 1. Take the outside dimensions of your 1980 Heresys, depth, height, width. That will be the final outside dimensions of the new mitered cabinet. Write them down 2. Then measure the inside dimensions of the front of your 1980 Heresys right over the motorboard, and subtract 1/16" from the length and 1/8" from the width you end up with. This will be the final dimensions to which he will have to cut down the 1976 motorboard. (If you look at the motorboard on your 1980 Heresy, you will see that there is a bit of space along the sides and at the bottom of the motorboard there, so that it is not an exact fit, this is for expansion/contraction of the wooden box due to temperature and humidity changes). NOTE: He will basically be removing about 13/16" from the1976 motorboard top edges, 13/16' from the bottom edges, and about 1/16" to 3/32" from each side of the motorboards. This will allow for a nice slightly loose fit to the new cabinets. 3. About the new motorboard dimensions: they need to be exact, but the driver holes in the motorboard still need to remain centered along the vertical axis of the motorboard. ALSO: the distance from the top of the motorboard above the tweeter hole to the top of the tweeter hole itself needs to be identical to the same dimensions on your 1980 motorboard. THIS IS IMPORTANT! Hard to center the tweeter to the hole if the horn flange is against a glue block, hint, hint! 4. Now, go back to your 1980 Heresy, and measure the distance from the front of the motorboard to the front edge of the cabinet body. Take that measurement and add 3/4" to it and you have the distance from the front of the cabinet to the front of the glue blocks the motorboard is mounted to. Write it down. 5. Now, go to the back of the 1980 Heresy, take the back panel off, measure from the cabinet edge to the glue blocks the back was screwed to. Write that down. 6. Now, take the depth (front to rear of outside of cabinet) measurement you got from your 1980 Heresy cabinet in step 1 above, and subtract both of the measurements you got in steps 4 & 5 above. The result is the INSIDE depth dimension of area inside the speaker, and is ALSO the LENGTH of the four glue blocks he will have to use to reinforce the inside of the miters on each of the new mitered cabinets. 7. Look again at the glue blocks around the inside of the back of your 1980 Heresy. Notice that they don't quite touch each other? Notice that they have white LATEX caulk filling the gaps? If those blocks were a too snug fit to each other they would not allow for the caulk to squeeze into the gap, and that would allow for air leaks PLUS it would not allow for wood expansion/contraction of the side and top panels, understand? So he needs to see this to understand why the glue block fit is not EXACT, so that he will not try to make it exact, OK? And LATEX caulk is what is used here for the airtight seal where those glue blocks meet on both the back AND front of the speaker. 8. Now, when you look at those glue blocks on the back of the 1980 Heresy, the ones running along the sides are 1-1/2" LONGER than the ones that wil be used for the new mitered cabinets. That is because the glue blocks which reinforce the inside of the miter joints will extend out to the front and rear of the miter joints and the butt ends of those glue blocks will be even with outside edges of the other glue blocks, understand? This allows for more reinforcement of the inside of the miter joints to the front and rear. 9. ALL of the glue blocks used in construction will be 3/4" X 3/4", and can be made from 3/4" plywood scrap OR from knot-free pine or fir. 10. The fasteners originally used in mitered Heresys to secure the glue blocks AND to secure the motorboard were 1-1/8" long X 1/8" wide Duofast coated staples. They were driven with 120 psi nominally. 11. Look at the staple pattern on your motorboard of your 1980 Heresy. The front glue blocks had a bead of glue run all around them after the corners were caulked up, then the motorboard was dropped into the front of the box. Here is how the box was squared-up using the motorboard: Box is on its back with front edges facing up, front motorboard is dropped in, then builder faces speaker top panel and puts all fingers but thumb into tweeter hole, puts thumb on cabinet top panel, pulls motorboard tight to top panel, "eyeballs" the side edges of motorboard to divide distance between motorboard edges and side panels equally and shoots four equally spaced staples through motorboard top into glue blocks underneath. Then builder slides box around until facing box bottom panel and places fingers thru woofer hole while using thumb against outside of bottom panel to move motorboard left or right to center it up in the box,then shoots four more equally-spaced staples along bottom edge of motorboard into glue block underneath. Then builder shoots five staples equally spaced up each side of motorboard into glue blocks beneath. Takes about 4-8 seconds to do this with a good builder.LOL! NOTE: NO STAPLES CLOSER THAN ONE INCH TO ANY CORNER,so as not to split glue blocks or hit fasteners already in glue blocks. If you look closely at the glue blocks inside of the front of your 1980 Heresy, you wil note that there SHOULD be just three staples holding the short glue blocks to the bottom/top panels, while there are four staples securing the long blocks to the side panels. Remember the number of staples used to secure the top/bottom, and sides of the motorboard were four and five? This ensures fasteners don't hit previously used fasteners, thereby splitting glue blocks or turning staples through the outer panels. Cool huh? If somebody could post a pic of the rear glue blocks of a mitered screw-on back Heresy, you can get a better idea of how the miter-reinforcing blocks' butt ends are flush with the blocks the rear panel is secured to. Neither of your current Heresys will show you that. But your cabinet guy needs to know this. The front glue blocks will have the same configuration. The veneered panels for your new Heresys need to be 3/4" thick, or else the interior dimensions will be wrong. Any questions? Quote Link to comment Share on other sites More sharing options...
HDBRbuilder Posted August 30, 2007 Share Posted August 30, 2007 Thebes, That's how they were originally built. Motorboards were cut, then went to table router, for speaker holes to be cut out, drilled for driver mounting, then were lightly sanded around holes, and any gaps in plys of holes were filled and sanded smooth, then they were shot with black paint, then they went to the builder who installed them as he built his boxes. Should be four staples along top and bottom edges, and five along sides, securing motorboard to the glue blocks beneath. Also top edge of motorboard should be relatively tight against top panel, with spaces between motorboard sides and side panels being equally divided. On what we called "drop-in front" speakers, the motorboard installation was actually used to square-up the cabinet box. Therefore the motorboards had to be cut with squared corners so that the box would be square. An out of square parallelogran motorboard would cause the box to follow that same shape. Quote Link to comment Share on other sites More sharing options...
Mike Lindsey Posted August 31, 2007 Author Share Posted August 31, 2007 Andy, Thanks so much for taking the time to do that. Not sure if you understood, but we wanted to actually use the motorboards from the 76 Heresy's. These are in very rough shape, but the motor boards are fine. How difficult is it to remove these if they don't have the glue blocks attached? What changes would need to be made to your plans if we are able to use them? I also want to say that only the 76's might be decorators, but I still don't think so... the 80's definitely are not. The 80's motor board appears to set back inside the cabinet about 3/8" and has the glue blocks butting up against the motor board on all 4 sides. The 76's do not have the glue blocks behind the motor board, and the motor board itself is not recessed inside the cabinet like the 80's. It is instead flush with the plywood front face. What allows for the front grill cloth is some mitered quarter round that sticks out about 3/8" that is glued/nailed to the front facing plys. I'm sure you understood that, but just wanted to make sure. Thanks again for taking the time to do this. And thank you for your service to our country. Mike Quote Link to comment Share on other sites More sharing options...
Groomlakearea51 Posted August 31, 2007 Share Posted August 31, 2007 Absolutely outstanding thread!! I rebuild/ restore H-I's (H-II's are a still beyond my "skill & comfort level" with a router...), and in reading Andy's detailed postings, I can only wish I could begin to explain the cabinet building process and bracing as well as he has done. Of extreme importance, especially for us folks in humid Florida..., is Andy's explanation about the gaps and the caulking. Those gaps, while necessary for expansion contraction/ humidty, etc, still have to be filled as he noted. Some use silicone or latex caulk, others have used woodworkers glue (still somewhat flexible when it dries). On my first H-I cabinet rebuild, I had to re-do the bracing because after cutting the braces, they "shrunk" ever so slightly as they dried out from the exposed laminations on the sides, thus the "gap" was slightly too large. Now when I cut the braces (and the panels), I usually cut them about 1/16" too long, and let everything "sit and breathe" for at least a couple days, if not a week (it's Florida...). Then I re-measure the braces, and sand the ends to the final length. After that I pull out the 2x4 forms, clamps, glue, staples, compressor and the finishing gun..... and the fun (and "cussin") begins!! Again, Andy (HDBRbuilder), very, very much respect!!! Quote Link to comment Share on other sites More sharing options...
HDBRbuilder Posted August 31, 2007 Share Posted August 31, 2007 Mike, Yes I was fully aware that you plan to use the motorboards from the 1976 Heresys. Re-read #2 in my last post about the motorboards. Be advised that by using the motorboards from the 1976 boxes, that those will be destroyed with no turning back. The 1976 boxes are incredibly strong, MUCH stronger than your 1980 boxes! This was proven by testing of the box corner strength by dropping the earlier type box from a height to land on its corner. It can take a helluva beating ans still survive! KEEP THIS IN MIND!!: Wood glue is stronger than the wood itself, so it is best to remove uwanted wood instead of trying to pry apart panels that are glued together. If you try to pry apart panels, then you will likely have some of the wood from what you are trying to salvage get lost in the process!!! Now, let's see the best way to remove the 1976 motorboards for re-use, without destroying them. Using a sawzall is likely the best route to take. A sawzall is a reciprocating saw like used in construction and remodeling. The best way to do this is NOT to saw the front panel itself, but to saw it away from the cabinet, IOW, as follows: 1. Remove the 1/4 round moulding from the front of the 1976 cabinets, carefully so as not to do any damage to the motorboards. Also, carefully remove the fasterners used to secure the moulding to the motorboard front. If any glue was used to secure the moulding, just sand the glue residue off the motorboard. 2. Then take the sawzall and saw around the perimeter of the motorboard about 2" back into the cabinet body. This will get the front panel with residue from the sides, top, and bottom panels removed from the cabinet. The remainder of the 1976 cabinet is now useless, except for the original backs to the 1976 speakers, which you can re-use on your new cabinets. 3. Now you have a motorboard which has about 1-1/4" of the cabinet top and bottom panels still attached to it. It also has about 2" of the side panels still attached to it. Lay the motorboard face down on a smooth clean surface. Now you get into the "elbow grease" portion of this project. You will need a good hammer, a good sharp 3/4" wide wood chisel, and a pair of nail cutters/pullers, or "dykes" as they are known in the trade. 4. Take the wood chisel and use it and the hammer to carefully split apart the plys of the remainder of the top and bottom panels still attached to the motorboard. DO NOT try to pry these parts away fro the motorboard, just split the plys and remove a bit at a time, until you have all of the wood of the top and bottom panel residue removed. Don't worry about the glue residue at this time. 5. Now, after removing all the wood residue of the top and bottom panels from the motorboard, there should be the points of 1-1/2" finishing nails sticking out. CAREFULLY pull these out through the BACK SIDE of the panel using the dykes. You will basically be pulling the heads of the nails THROUGH the motorboard, so be careful not to separate the plys of the motorboard panel while doing this. Once you get those nails removed it is time to begin work on removing the side panel residue from the motorboard panel. 6. Using the chisel and hammer again, separate the plys of the side panel residue, removing a little at a time from the motorboard, Once all of the side panel residue is removed there will be remainig the heads of the finishing nails used to originally assemble the cabinet side to the motorboard. Pull those nails out by the head of the nails. Now, your cabinet guy can just use his table saw to remove about 1/16" of the motorboard sides, and about 3/4" from the motorboard top edge, and about 7/8" from the motorboard bottom edge. Once this is done, you can go ahead and spray paint the motorboards' front sides black and leave them to dry while building the new cabinets. Simple, huh? Quote Link to comment Share on other sites More sharing options...
Mike Lindsey Posted August 31, 2007 Author Share Posted August 31, 2007 Andy, thanks again for the detailed response. I do have a Sawzall, and might attempt this myself. Before I have this guy build the boxes I will continue to work on the 80's and see if I can remove all the stain (100 grit) without going thru the veneer. I may also attempt to remove the stain and lacquer from the 76 boxes as well, and see about having them veneered when I'm done. Thanks again for taking the time to answer, Mike Quote Link to comment Share on other sites More sharing options...
arfz28 Posted August 31, 2007 Share Posted August 31, 2007 Mike if I were you why not just reveneer the heresys, sounds like you already have them almost sanded down. A few hours of prep work and you should have the cabinets straight enough for the new veneer. I am reveneering a set of heresys right now in ribbon striped sapele and it is a lot of time consuming work but when completed the heresys should look great. If you build new heresy cabinets you will need a good looking type of veneered plywood or else you will end up building cabinets and then putting veneer on them anyway, why not keep going on the cabinets you got and reveneer them? Quote Link to comment Share on other sites More sharing options...
Mike Lindsey Posted August 31, 2007 Author Share Posted August 31, 2007 Hey arf, That's what I'm gonna attempt to do with both sets of cabinets. The 80's will just require 3 - 6 more hours of work on my part, and I will also try to get the corners square where there is some missing veneer. Still not sure if I will attempt to veneer them myself or source it out. Mike Quote Link to comment Share on other sites More sharing options...

Recommended Posts
Join the conversation
You can post now and register later. If you have an account, sign in now to post with your account.
Note: Your post will require moderator approval before it will be visible.