Rudy81 Posted December 13, 2010 Author Share Posted December 13, 2010 Please upload the latest design of subwoofer. I don't have any design other than what can be found on the with a search online. Some of what I plan to build will be result of what I have seen in pictures of the Super SPUD kit build or what others have done. Quote Link to comment Share on other sites More sharing options...
Rudy81 Posted December 13, 2010 Author Share Posted December 13, 2010 Sweet room! It will rock for sure. Is that a rather large monitor over your system to control the system and select ripped music or movies? That monitor realy is not as large as it looks in the picture. I use it when listening to music to select my bit perfect ripped audio, to use REW to take room measurements, to tweak my active crossovers or to do firmware updates. Quote Link to comment Share on other sites More sharing options...
Rudy81 Posted December 13, 2010 Author Share Posted December 13, 2010 I think its back to the drawing board on this project before I cut up some BB. I started thinking last night about the signal path length of that type of horn and realized this may not work so well in my room. Right now all my signals are time aligned either by speaker, like my mains and center, or in all the speakers in the 7.1 layout with Audyssey. I don't know how long the path is on the TH, but it is way longer than any speaker I have. That could throw a wrench in my setup timing. I may have to re-evaluate and go back to looking at a ported enclosure to better match my mains. Arghhhh! Quote Link to comment Share on other sites More sharing options...
Chris A Posted December 13, 2010 Share Posted December 13, 2010 I don't know how long the path is on the TH, but it is way longer than any speaker I have. It's 19 feet in length at the centerline, approximately. Quote Link to comment Share on other sites More sharing options...
Rudy81 Posted December 13, 2010 Author Share Posted December 13, 2010 Interesting. I got around 21' using the template I made. That's a long signal path! Quote Link to comment Share on other sites More sharing options...
Chris A Posted December 13, 2010 Share Posted December 13, 2010 Oops, you're right - I looked at my numbers after I got home. My initial guess on path length was 19' but I missed th short lengths on the "switchbacks". Chris Quote Link to comment Share on other sites More sharing options...
Rudy81 Posted December 13, 2010 Author Share Posted December 13, 2010 Ok, good. For a minute there I guessed I had made some major mistake in interpreting things. Quote Link to comment Share on other sites More sharing options...
CECAA850 Posted December 14, 2010 Share Posted December 14, 2010 I think its back to the drawing board on this project before I cut up some BB. I started thinking last night about the signal path length of that type of horn and realized this may not work so well in my room. Right now all my signals are time aligned either by speaker, like my mains and center, or in all the speakers in the 7.1 layout with Audyssey. I don't know how long the path is on the TH, but it is way longer than any speaker I have. That could throw a wrench in my setup timing. I may have to re-evaluate and go back to looking at a ported enclosure to better match my mains. Arghhhh! I would think that you could use your receivers distance settings to compensate. Worst case scenario, you could use a subwoofer plate amp with phase adjustment. Quote Link to comment Share on other sites More sharing options...
Rudy81 Posted December 14, 2010 Author Share Posted December 14, 2010 Should I go this route, I will have full phase control with my DCX2496. Quote Link to comment Share on other sites More sharing options...
CECAA850 Posted December 14, 2010 Share Posted December 14, 2010 Couldn't you compensate for the horn path with the distance settings then? Quote Link to comment Share on other sites More sharing options...
Rudy81 Posted December 14, 2010 Author Share Posted December 14, 2010 Yes, I certainly could. What I need to look into is how the long delay will affect everything else, particularly my mains and center channel lipsync. Maybe not a big deal, but better to check it out beforehand. Quote Link to comment Share on other sites More sharing options...
Rudy81 Posted December 26, 2010 Author Share Posted December 26, 2010 After much thought and some research I decided this project was worthwhile. Worst case I lose some time and 5 sheets of BB. It turns out the template for making interior dadoes (sp?) was a life saver. It made the project go much faster and made a huge difference when putting things together. This would definitely have been a major pain without exactly matching the top and bottom large pieces. Here is a picture showing the dadoes cut into one of the panels. Prior to starting with the router, I designated a 'master corner' on each panel so that they would match exactly at the time of construction. Quote Link to comment Share on other sites More sharing options...
Rudy81 Posted December 26, 2010 Author Share Posted December 26, 2010 Use of the router was rather experimental for me, so I went all out. I also cut rabbets along the edges in hopes of getting a perfect fit on the side panels. The router bits are rather expensive, but I figured I'd have some good tools when I was done. Quote Link to comment Share on other sites More sharing options...
Rudy81 Posted December 26, 2010 Author Share Posted December 26, 2010 Based on pictures of other builds, I wanted a convenient access panel to the woofers in case of problems, or if I ever needed to replace a driver. I created another template so I could match both subs and also ensure the access panel location would work. Quote Link to comment Share on other sites More sharing options...
Rudy81 Posted December 26, 2010 Author Share Posted December 26, 2010 Here is the complete access panel. I then cut a matching piece of BB to create a panel that fit in the slot. Quote Link to comment Share on other sites More sharing options...
Rudy81 Posted December 26, 2010 Author Share Posted December 26, 2010 Interior almost complete on both units. Still need a little more polyfill near the horn exit. Then I chose to mount the drivers before I permanently mounted the last piece. It just made it easier to mount drivers, wire and check continuity. Wired in series I got 6.6 Ohms, which should be correct. Quote Link to comment Share on other sites More sharing options...
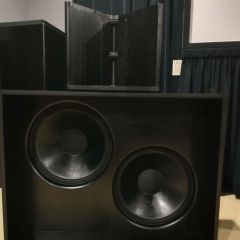
Rudy81 Posted December 26, 2010 Author Share Posted December 26, 2010 Units finally complete and sanded, waiting for paint. Prior to sanding and working on the exterior I took one of the subs outside and ran some frequency sweeps through the sub.....plot to follow. As you can see, the sweeps were satisfactory and prepped for paint. Quote Link to comment Share on other sites More sharing options...
Rudy81 Posted December 26, 2010 Author Share Posted December 26, 2010 The first day I ran REW it was raining, so I ran the plot with the sub inside the shop with the mouth of the horn aimed outside. Amazingly, I got a very similar response as I did in this run. The run below was done outside with the sub flat on the ground. Horn mouth pointing up. I used my shop receiver to run the sweep, so nothing with real power. I think it has 70 wpc. I am pleased with the performance, but can't figure out the dip near 120Hz. I beleive the sub will work well for my LFE channel, from 15Hz to 125Hz. The system delay measured by REW was right at 6 ms. BTW, this is a totally uncorrected plot. I have already started painting and will have more shots later. Quote Link to comment Share on other sites More sharing options...
Rudy81 Posted December 26, 2010 Author Share Posted December 26, 2010 While I'm thinking about this, I'll add some comments on the build. Although it was not complicated, it took much longer than I expected. Partly because I was building two units, and partly due to my lack of skill with woodworking. I certainly learned quite a bit. I used the PL construction adhesive since I needed a glue that would 'fill' voids well. In retrospect, I would still use it, but only for the interior parts. It is very messy and not easy to remove excess. For the outside seams I should have used carpenters glue since the sides did not need voids filled. The excess I got on the sides needed to be sanded, which was a pain. I figured paint wouldn't stick too well to that product. The rabbet and dado idea worked very well for the cabinet and the access panel. I also spent quite a bit of time dry fitting things since I did not trust my skill to be right on every time. Another issue was taking guesses at the length of the interior panels. I was glad I dry fit everything first since I had misjudged the length of one panel, making one of the turns narrower than the horn width before and after the turn. I figured that wouldn't work, so had to shorten the panel in question. I chose to ensure the speakon connector and access panel were on the low pressure side of the enclosure to preclude any chance of leaks in the high pressure section. The biggest problem I had ocurred when I went to put the last large piece on one of the units. I had cut a dado on an end piece too deep ( where the angled driver baffle meets the end piece), so when I screwed the end piece in, it pulled the end in and bowed the BB. When I went to dry fit the large top section....it didn't fit! It took me about two hours to break that joint loose and pull the end piece away enough to allow the top to fit the rest of the enclosure. I could have saved myself a lot of time and stress if I had dry fit the top on WHILE I screwed the sides on. Live and learn. Quote Link to comment Share on other sites More sharing options...
CECAA850 Posted December 27, 2010 Share Posted December 27, 2010 Looks great Rudy, you should be proud. I'll bet they'll sound fantastic once installed. Question, did you have to wire the drivers out of phase with each other? Quote Link to comment Share on other sites More sharing options...

Recommended Posts
Join the conversation
You can post now and register later. If you have an account, sign in now to post with your account.
Note: Your post will require moderator approval before it will be visible.