Full Range Posted May 2, 2016 Share Posted May 2, 2016 (edited) Full Range, if your ever up to the task of building your own chassis. There is a heat sink company there in Australia, I bet shipping wouldn't be so bad. One of the forum members at diyaudio.com used them and had great results. http://www.conradheatsinks.com/welcome.htm Yes I know of Conrad Heatsinks and was going down that path with the double flanged units Then extra contracts at work and no free time available I decided to get the 5U Deluxe Still getting a great Aussie toroidal from Harbuch And due to that lack of time I'm getting a friend to build my M2 for me - but I know he solders way better than me in a good OCD kinda way Edited May 2, 2016 by Full Range 2 Quote Link to comment Share on other sites More sharing options...
Cantilope Posted May 6, 2016 Author Share Posted May 6, 2016 I got my Aleph J done and it has been put into service. What a great project, not as easy as the M2, but very close. I have not done a real side by side yet but soon and I really appreciate the suggestion to build it. It does some things better than the M2 and has a very quiet noise floor. I call it my Ford F150 of Amps as it sounds great on all of my speakers, a great all around amp. At the moment the Aleph J is running the Belles I am using for rears in my Jubilee HT system, with (3) M2s running the F, L, and C. I cannot begin to explain how good it sounds. I will say when I get shot at in Fallout 4, I duck in real life. No kidding it sounds that real. 2 Quote Link to comment Share on other sites More sharing options...
Fjd Posted May 14, 2016 Share Posted May 14, 2016 Now that you have built one First Watt clone (since we all like to spend other people's money on this forum), if, or should I say when, you are up for a "different" build, I would suggest the Aleph J in order to sample a First Watt single-ended class-A two stage design that will match up very nicely to a larger variety of speakers as opposed to one of the other more esoteric single-ended, single gain stage designs where it becomes very difficult, if not impossible, to source certain parts. . I got my Aleph J done and it has been put into service. What a great project, not as easy as the M2, but very close. I have not done a real side by side yet but soon and I really appreciate the suggestion to build it. It does some things better than the M2 and has a very quiet noise floor. I call it my Ford F150 of Amps as it sounds great on all of my speakers, a great all around amp. At the moment the Aleph J is running the Belles I am using for rears in my Jubilee HT system, with (3) M2s running the F, L, and C. I cannot begin to explain how good it sounds. I will say when I get shot at in Fallout 4, I duck in real life. No kidding it sounds that real. Work commitments have kept me away for a while, but wanted to congratulate you on another great amplifier build. The Aleph J is an incredible amplifier, works really well with horns, and a great introduction into the world of single-ended class-A solid state amplification. While the Aleph J is a fantastic amplifier, sometimes I find it hard to believe that the F3 has even less distortion and a much lower level of noise than the Aleph J. However, the F3 is more limited in speaker matchups where it seems to work best with the higher efficiency speakers and no easy way to obtain a F3 these days. When I replaced my F3 clone with a genuine demo F3, from what I understand, production of the F3 went well beyond the 100 originally planned, but I believe finally retired once the SIT amplifiers were introduced. 1 Quote Link to comment Share on other sites More sharing options...
Full Range Posted June 24, 2016 Share Posted June 24, 2016 My build is almost finished I had to order another Tiroidial from Germany due to delays of my other order Hope to have it running in about 2 weeks if postage is quick 2 Quote Link to comment Share on other sites More sharing options...
Full Range Posted June 24, 2016 Share Posted June 24, 2016 (edited) My amp builder is a little OCD and is treating this build as his own - I will pass on your comments Also note that all components are at a 1.5 mm clearance off the PCB One other thing that needs to be mentioned is that - I have made two alterations 1) Power On / OFF switch ( illuminated ) was installed in the front - it's just to hard to reach out the back 2) Speaker cable terminals on rear panel are now slightly further apart Edited June 24, 2016 by Full Range Quote Link to comment Share on other sites More sharing options...
DizRotus Posted June 24, 2016 Share Posted June 24, 2016 Very interesting and well done. Thank you for sharing this. Quote Link to comment Share on other sites More sharing options...
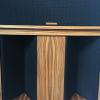
Full Range Posted June 24, 2016 Share Posted June 24, 2016 Some more build update photos of the M2 The transistor assistive heat sink style hold down bracket that Wdeco noted A nice touch Part of the cabinet internals ( power supply and toroidal waiting to be fitted ) The modification of the back panel speaker terminals A suitable plug will be sourced to fill the spare hole Before - After - New illuminated power switch on front panel 1 Quote Link to comment Share on other sites More sharing options...
Cantilope Posted June 24, 2016 Author Share Posted June 24, 2016 Very nice, I might go back in and add a few heatsinks. You're are right on with the speaker terminals and switch in the front. Nice! Joe 1 Quote Link to comment Share on other sites More sharing options...
Deang Posted June 27, 2016 Share Posted June 27, 2016 Feeling pretty envious right now - you techy guys make me sick. Quote Link to comment Share on other sites More sharing options...
Full Range Posted June 30, 2016 Share Posted June 30, 2016 Feeling pretty envious right now - you techy guys make me sick. You can do it Dean Quote Link to comment Share on other sites More sharing options...
Full Range Posted June 30, 2016 Share Posted June 30, 2016 OK a quick build update The toroidal transformer that was ordered from Germany just landed, and the build has restarted My amp builder said that it's very well built Also a quick look of the amp power supply mock-up Quote Link to comment Share on other sites More sharing options...
Zoef Posted June 30, 2016 Share Posted June 30, 2016 Good work!!! Got a mini-aleph ("half"a Aleph 3) i am working on. Wish i did it your way and used a ready made chassis...... still got 200+ holes to drill Quote Link to comment Share on other sites More sharing options...
Full Range Posted June 30, 2016 Share Posted June 30, 2016 Good work!!! Got a mini-aleph ("half"a Aleph 3) i am working on. Wish i did it your way and used a ready made chassis...... still got 200+ holes to drill For the extra $40 / $50 or so dollars to get the fully drilled and tapped chassis - it's worth every cent and that = equals money well spent Quote Link to comment Share on other sites More sharing options...
Zoef Posted June 30, 2016 Share Posted June 30, 2016 Good work!!! Got a mini-aleph ("half"a Aleph 3) i am working on. Wish i did it your way and used a ready made chassis...... still got 200+ holes to drill For the extra $40 / $50 or so dollars to get the fully drilled and tapped chassis - it's worth every cent and that = equals money well spent YES! 1 Quote Link to comment Share on other sites More sharing options...
CECAA850 Posted June 30, 2016 Share Posted June 30, 2016 Gorgeous. Quote Link to comment Share on other sites More sharing options...
Zoef Posted June 30, 2016 Share Posted June 30, 2016 (edited) Here's a link to some very useful information for everybody who wants to build a pass clone : http://www.facstaff.bucknell.edu/esantane/movies/aleph-x.html Edited June 30, 2016 by Zoef 2 Quote Link to comment Share on other sites More sharing options...
Full Range Posted July 5, 2016 Share Posted July 5, 2016 (edited) WARNING - Phonographic amp contentAmp is now complete and burning inTime of birth 10 am 5-7-2016.Actually It was fired up last night about 10pm, but first up was a slow variac rise for testing (no smoke )But it was necessary to swap out one resistor on both boards to 'center' the dc offset.Once that was done it was time to let it stabilize, offset is now under 3mv.Both channels are so close you'd think they were matched.So far the massive heatsinks are doing their job very nicely. Just over luke warm so far.Some Phonographic photos for you allAnd No, I won't have any impressions of what it sounds like. It's fresh and needs some serious break in. Edited July 5, 2016 by Full Range 1 Quote Link to comment Share on other sites More sharing options...
Zoef Posted July 5, 2016 Share Posted July 5, 2016 Great job! And very wise to let it break in over a long period. Like the way you mounted the fets! Did you use a "extra heatsink" ? Quote Link to comment Share on other sites More sharing options...
Full Range Posted July 5, 2016 Share Posted July 5, 2016 (edited) Great job! And very wise to let it break in over a long period. Like the way you mounted the fets! Did you use a "extra heatsink" ? The main transistors are mounted onto the heat sink and then we added a finned hold down washer And for the power supply diode boards we made some alloy heatsinks, they also bolt down better on the base-plate Edited July 8, 2016 by Full Range Quote Link to comment Share on other sites More sharing options...
Zoef Posted July 6, 2016 Share Posted July 6, 2016 Cool! Quote Link to comment Share on other sites More sharing options...

Recommended Posts
Join the conversation
You can post now and register later. If you have an account, sign in now to post with your account.
Note: Your post will require moderator approval before it will be visible.