WakeJunkie Posted March 3, 2014 Author Share Posted March 3, 2014 (edited) This bad boy is HEAVY. With the back it will be right at 180LB! That is just the box. Dry fit went perfectly tonight. Favorite tool of the day: Biscuit Jointer. Made it very easy to align and test fit everything. Edited August 4, 2014 by WakeJunkie Quote Link to comment Share on other sites More sharing options...
Moderators Youthman Posted March 3, 2014 Moderators Share Posted March 3, 2014 We are all waiting anxiously for your subs to arrive. Cmon already! Quote Link to comment Share on other sites More sharing options...
The Dude Posted March 3, 2014 Share Posted March 3, 2014 We are all waiting anxiously for your subs to arrive. Cmon already! Probably more then he is. I all most hit report instead of quote, good thing there is a cancel button after that. Quote Link to comment Share on other sites More sharing options...
Moderators Youthman Posted March 3, 2014 Moderators Share Posted March 3, 2014 I all most hit report instead of quote, good thing there is a cancel button after that. Ha! That's funny. Quote Link to comment Share on other sites More sharing options...
Scrappydue Posted March 3, 2014 Share Posted March 3, 2014 I'm confused. Looks like you cut holes for four subs. But thought you only ordered two? Quote Link to comment Share on other sites More sharing options...
WakeJunkie Posted March 3, 2014 Author Share Posted March 3, 2014 I'm confused. Looks like you cut holes for four subs. But thought you only ordered two?Correct. I will block off the back half of the manifold for now. I may never install 4, but it is alot easier to build for 4 now than to start over if I decide to add more. I was able to find the 4k watt amp for the same price as the 2K so I figured why not... Quote Link to comment Share on other sites More sharing options...
CECAA850 Posted March 3, 2014 Share Posted March 3, 2014 Looks great as expected! Love the pics. You'll need to rent a gorilla to mount that thing. Which side are you mounting the drivers, outside? Quote Link to comment Share on other sites More sharing options...
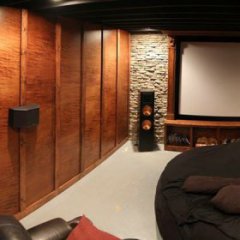
WakeJunkie Posted March 3, 2014 Author Share Posted March 3, 2014 Looks great as expected! Love the pics. You'll need to rent a gorilla to mount that thing. Which side are you mounting the drivers, outside?I will be mounting the drivers inside.Don't forget the inside of this manifold will be visible from inside the room. Definitely not you typical design. Quote Link to comment Share on other sites More sharing options...
Moderators Youthman Posted March 3, 2014 Moderators Share Posted March 3, 2014 You'll need to rent a gorilla to mount that thing. If I was there, he wouldn't have to rent a gorilla. Quote Link to comment Share on other sites More sharing options...
CECAA850 Posted March 3, 2014 Share Posted March 3, 2014 I will be mounting the drivers inside. Not accessible from the outside? You can fit your body in there to reach the rears? I guess you'll have to take the ft drivers back out to pull the divider when the time comes. Quote Link to comment Share on other sites More sharing options...
WakeJunkie Posted March 3, 2014 Author Share Posted March 3, 2014 All 4 accessible from inside and out. I will probably need to remove the lower front to add rear subs. Even if I can do it without. I will probably remove it just to be safe. Guess it depends on how long my Gorilla's arms are, but I will cross that bridge at a later date. Quote Link to comment Share on other sites More sharing options...
WakeJunkie Posted March 4, 2014 Author Share Posted March 4, 2014 (edited) I decided that a square box just wouldn't cut it... This is the idea. Back two holes will be filled with a wood column that goes top to bottom of the manifold. I will route out oak column top and bottom trim rings for the column. LED lighting from the back of the column will light the enclosure. This is just a clamp up to hold the shape. I used a dado blade to cut grooves in the back of 1/4" ply then lay soaking wet hot towels on the wood for about 20 minutes to soften it up so I could form it into the circle. I will build the interior structure so it will have no flex. I thought about filling the gaps inside the column with rigid spray foam once complete. If I ever decide to add additional subs the column can be removed. And of course it will be sealed so no air from the outside gets in. Back View: Edited August 4, 2014 by WakeJunkie 1 Quote Link to comment Share on other sites More sharing options...
CECAA850 Posted March 4, 2014 Share Posted March 4, 2014 Interesting. I'll have to think about this. Don't know how the waves in the enclosure will act with a column in there. Quote Link to comment Share on other sites More sharing options...
WakeJunkie Posted March 4, 2014 Author Share Posted March 4, 2014 Don't think to hard. I want this thing to look as good as it sounds. Low frequency wavelengths are so long there is little if any difference to be made in the 2.25" of free space surrounding the column. Quote Link to comment Share on other sites More sharing options...
Moderators Youthman Posted March 4, 2014 Moderators Share Posted March 4, 2014 Not much to think about. Shaun just invented a new enclosure! Get a patent on that bad boy ASAP before Velodyne or SVS does! Quote Link to comment Share on other sites More sharing options...
Moderators dtel Posted March 5, 2014 Moderators Share Posted March 5, 2014 That will look cool with the LED lights back there, the sound will just be more well rounded. Until you rip it out, which easy plans for that needs to be thought about now as to not have to completely take everything apart. 1 Quote Link to comment Share on other sites More sharing options...
akdave Posted March 5, 2014 Share Posted March 5, 2014 That will look cool with the LED lights back there, the sound will just be more well rounded. Until you rip it out, which easy plans for that needs to be thought about now as to not have to completely take everything apart. Thank you I just about choked on my lunch at work! Quote Link to comment Share on other sites More sharing options...
WakeJunkie Posted March 6, 2014 Author Share Posted March 6, 2014 (edited) Behringer EPX4000 Fan Mod is pretty easy if you have the right tools. Ordered two of these fans to replace the two factory fans. NMB Technologies 3110SB-05W-B40-E00 36 CFM 26 db The one on the right in the pic below is easy. The fan on the left is a little more difficult due to space. The nuts on the fan are 7mm, not a standard size for most open end wrench sets, but would make this job easier. I had no problem doing the job with pliers. These are the tools I used. I forgot to include the hot glue gun. The very thin long nose pliers shown are necessary. Standard needle nose pliers will not reach. The razor knife is needed to cut the glue used to hold the fan connectors to the board. Use the hot glue gun to glue the nuts and washers to the back of the fan. It will be nearly impossible to get them on without attaching them. Use the butter knife to hold the back of the nut when starting the screw. Use the pliers to hold the nut to tighten. Don't over tighten or you will break the plastic fan housing. Result is a significantly quieter amp. I could have gotten quieter fans, but went with these for airflow. The airflow seems more than sufficient. SPL meter read 56bB with the factory fans. It was to quiet to get a reading now. 50dB is the limit so I am not surprised. To me it sounds less than half of original and is undetectable from 8ft where I sit. You can hear it if right next to it, but it is about the same sound level as my Dell laptop. Edited August 4, 2014 by WakeJunkie 1 Quote Link to comment Share on other sites More sharing options...
Scrappydue Posted March 6, 2014 Share Posted March 6, 2014 I need to do my inukes bad. Especially the one upstairs. It creates like a honing sound in my entertainment center. Quote Link to comment Share on other sites More sharing options...
WakeJunkie Posted March 6, 2014 Author Share Posted March 6, 2014 Forgot to mention I found matching fan connectors from an old fridgidare mini fridge. Wine cooler style with no compressor. Soldered the new connectors on leaving the factory fans intact. Quote Link to comment Share on other sites More sharing options...

Recommended Posts
Join the conversation
You can post now and register later. If you have an account, sign in now to post with your account.
Note: Your post will require moderator approval before it will be visible.