Dave A Posted April 14, 2019 Author Share Posted April 14, 2019 OK pictures start tonight and will wrap up Monday. Never dreamed it would drag out so long but it was a want to not a have to and so things kept getting in the way. How ever let us begin. Today was screwing and gluing sub assemblies. Get the motorboards set up with T nuts and glued on back side guides making sure the speaker screws fit right. Next is setting up the inner and outer speaker plenum boards. You want the screws to bite into the bottom piece of plywood so I predrill holes through the corner brace so the screws will pull the glue joint tight. t Next up is putting corner braces on the two sets of inner and outer plenum boards. Decided to let these assemblies sit over night since there will be stress placed on them pulling the top and bottom flat. I will start with the speaker plenum in the canter and work out from there to the sides tomorrow. 1 Quote Link to comment Share on other sites More sharing options...
ClaudeJ1 Posted April 14, 2019 Share Posted April 14, 2019 Yay. PROGRESS! Quote Link to comment Share on other sites More sharing options...
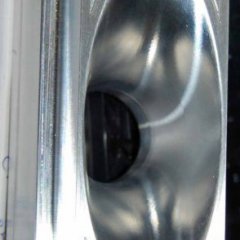
carlthess40 Posted April 14, 2019 Share Posted April 14, 2019 What determines the size of the hole in this piece for the driver that you’re usingDollar for dollar Klipsch has no equals Name one other speaker company that can build a speaker and keep working like new after 45 plus years of service. Answer NO ONE !!!!!! Quote Link to comment Share on other sites More sharing options...
rockhound Posted April 14, 2019 Share Posted April 14, 2019 I got my popcorn ready! 🍿 Quote Link to comment Share on other sites More sharing options...
Dave A Posted April 14, 2019 Author Share Posted April 14, 2019 1 hour ago, carlthess40 said: What determines the size of the hole in this piece for the driver that you’re using Dollar for dollar Klipsch has no equals Name one other speaker company that can build a speaker and keep working like new after 45 plus years of service. Answer NO ONE !!!!!! Motorboards from a set of single bin John Allen MWM clones. Since they are basically exact copies I salvaged a motorboard and adjusted accordingly to height. In passing I think there is a direct relationship based on the volume of expansion. The La Scala motorboard has a much smaller slot but also has much smaller volume of expansion. The MWM is far bigger in every regard and that motorboard cutout is much bigger. Quote Link to comment Share on other sites More sharing options...
glens Posted April 14, 2019 Share Posted April 14, 2019 So you're not going for specific "compression"? Or are you just saying it in a different way? Quote Link to comment Share on other sites More sharing options...
glens Posted April 14, 2019 Share Posted April 14, 2019 And I take it the "Zig-Zag" (cut corners) make the driver enclosure a bass reflex (also) into the horn? Interesting... Quote Link to comment Share on other sites More sharing options...
mikebse2a3 Posted April 14, 2019 Share Posted April 14, 2019 23 minutes ago, glens said: And I take it the "Zig-Zag" (cut corners) make the driver enclosure a bass reflex (also) into the horn? Interesting... No... adds volume to back chamber for driver. 1 Quote Link to comment Share on other sites More sharing options...
Dave A Posted April 14, 2019 Author Share Posted April 14, 2019 2 hours ago, glens said: So you're not going for specific "compression"? Or are you just saying it in a different way? I have a spiral compressor and now you know as much as I know about compression. This is based on proven good design by Klipsch and Gillam and extended far longer than they ever decided to do. I have never heard bass as dynamic and clear as the MWM bins so that was the goal. To go much deeper and keep the same qualities of output. 2 hours ago, mikebse2a3 said: No... adds volume to back chamber for driver. Correct that is the benefit of the coped corners on the motorboard. Quote Link to comment Share on other sites More sharing options...
ClaudeJ1 Posted April 14, 2019 Share Posted April 14, 2019 2 hours ago, mikebse2a3 said: No... adds volume to back chamber for driver. You beat me to it, Mike. Every square cubic inch of the original MWM, my Quarter Pie, and this latest collaboration between DaveA and I, follow the same concept. 1 Quote Link to comment Share on other sites More sharing options...
Dave A Posted April 15, 2019 Author Share Posted April 15, 2019 Plenums done and sitting overnight to make sure all glue joints are 100% strength. While I have a nailer I have found it does not draw things together like screws or clamps do for good bonds so it is mostly to tie things together until clamping or subsequent screwing. Everywhere the screws go there are predrilled holes either all the way or most of the way through so there is a good bite into the opposite side piece. My screw gun strips these out way to fast so I am running them in most of the way with it and then final tightening by hand. If I ever start building on a regular basis I will set up a perfectly flat table to work off of. It will probably be a 3/4" 4' x 8' aluminum plate as that is pretty flat from the mill whereas steel might be cheaper but is never flat. Since I am screwing it all together clamps are not needed on this one. I am going to cover it in brown Duratex later after Hope and seal that bad boy up with a couple of coats and that will be that. Don't have any science behind the shape but adding a splitter that is a 45 degree 4" x 4" leg angle made of 1" Baltic. I am going to fasten it all in place permanently as I have decided I want it done and I think I will leave the splitter tinkering to the next guy. 1 Quote Link to comment Share on other sites More sharing options...
Dave A Posted April 15, 2019 Author Share Posted April 15, 2019 Here is a set of drawings for the CAD challenged among us. If anyone finds discrepancies let me know and I will amend things but I believe they are pretty well dead on. 1 Quote Link to comment Share on other sites More sharing options...
glens Posted April 15, 2019 Share Posted April 15, 2019 Okay, I now understand the cut corners. Are you going to mask the attachment surfaces and paint up what you've got done so far? Quote Link to comment Share on other sites More sharing options...
Dave A Posted April 15, 2019 Author Share Posted April 15, 2019 1 hour ago, glens said: Okay, I now understand the cut corners. Are you going to mask the attachment surfaces and paint up what you've got done so far? Debating that. I will probably do everything but the tops tomorrow and I may paint all the inside at that point with the Duratex. The outside will come later after final sanding and corner rounding. Quote Link to comment Share on other sites More sharing options...
Marvel Posted April 15, 2019 Share Posted April 15, 2019 Dave, is there a reason you made the cabinet taller (19.5 in). Just my curiosity mostly. This makes the throat a little larger than the original. Or does this follow the John Allen bins in this regard? Bruce Quote Link to comment Share on other sites More sharing options...
Dave A Posted April 15, 2019 Author Share Posted April 15, 2019 Hi Bruce, The Allen bins are exact copies of the MWM. The woofers even appear to be the same Eminence construction as the K-43's so basically a true clone of the MWM I went with the taller height because it used up more of the material from the same sheet. Claude ran the numbers and they indicated not only did it use a higher percentage of the material bought it also would go a bit deeper which is the reason for this whole exercise anyway. 1 Quote Link to comment Share on other sites More sharing options...
Marvel Posted April 15, 2019 Share Posted April 15, 2019 41 minutes ago, Dave A said: it also would go a bit deeper which is the reason for this whole exercise anyway. That is a good reason, right there. They are looking good, too. Bruce Quote Link to comment Share on other sites More sharing options...
ClaudeJ1 Posted April 16, 2019 Share Posted April 16, 2019 8 hours ago, Dave A said: Hi Bruce, The Allen bins are exact copies of the MWM. The woofers even appear to be the same Eminence construction as the K-43's so basically a true clone of the MWM I went with the taller height because it used up more of the material from the same sheet. Claude ran the numbers and they indicated not only did it use a higher percentage of the material bought it also would go a bit deeper which is the reason for this whole exercise anyway. And it filled in a slight dip between 45 and 80 Hz. by about 1-1.5db. So, it was truly optimizing material use (reducing useless leftover scrap) with better performance as a bonus. This is similar to what Bill Fitzmaurice publishes about his Tuba HT sub woofer. The wider you make it (in this case, taller), the more output you get near the cutoff frequency. His standard is 24" but if you go 30 or 36" the performance improves with the same driver. Since Dave is only doing a single per channel (can you imagine 4 of these with twins on each side with a K-402 on top? WOW that's a visual). It's kind of what I did by adding a little bit more, lie 1/2" or so to my original Quarter Pie, so all the left over scrap lumber is only wide enough to make toothpicks!! Quote Link to comment Share on other sites More sharing options...
Dave A Posted April 16, 2019 Author Share Posted April 16, 2019 OK first one all done but the speaker chamber cover, sanding filling and painting. I had to try and figure out how to do this with one person and I ended up putting the corner braces on the top and bottom and then positioning the top over the bottom/plenum sub assembly. Then you slobber glue everywhere and get a couple of clamps out and get busy tying it all together before the glue sets up. Lowered the top until it fit up with the forklift and then raised it back up, slobbered glue and lowered it back down.Working around the outside as fast as you can with clamps pulling top and bottom snug I drilled holes and ran screws in from the top and bottom and sides. Some of the screws pulled in to far and it is not the best looking work with some epoxy filler in the future. However this thing is massive and should never suffer from resonance. I will be coating it all with Duratex inside where ever I can reach and outside I just might do in black for contrast and paint just the inside brown. I will for sure be firing these up this week. 3 Quote Link to comment Share on other sites More sharing options...
codewritinfool Posted April 16, 2019 Share Posted April 16, 2019 You can climb inside and paint them. So cool. Quote Link to comment Share on other sites More sharing options...

Recommended Posts
Join the conversation
You can post now and register later. If you have an account, sign in now to post with your account.
Note: Your post will require moderator approval before it will be visible.